Follow along with the video below to see how to install our site as a web app on your home screen.
Note: This feature currently requires accessing the site using the built-in Safari browser.
We noticed you are blocking ads. DO THE TON only works with community supporters. Most are active members of the site with small businesses. Please consider disabling your ad blocking tool and checking out the businesses that help keep our site up and free.
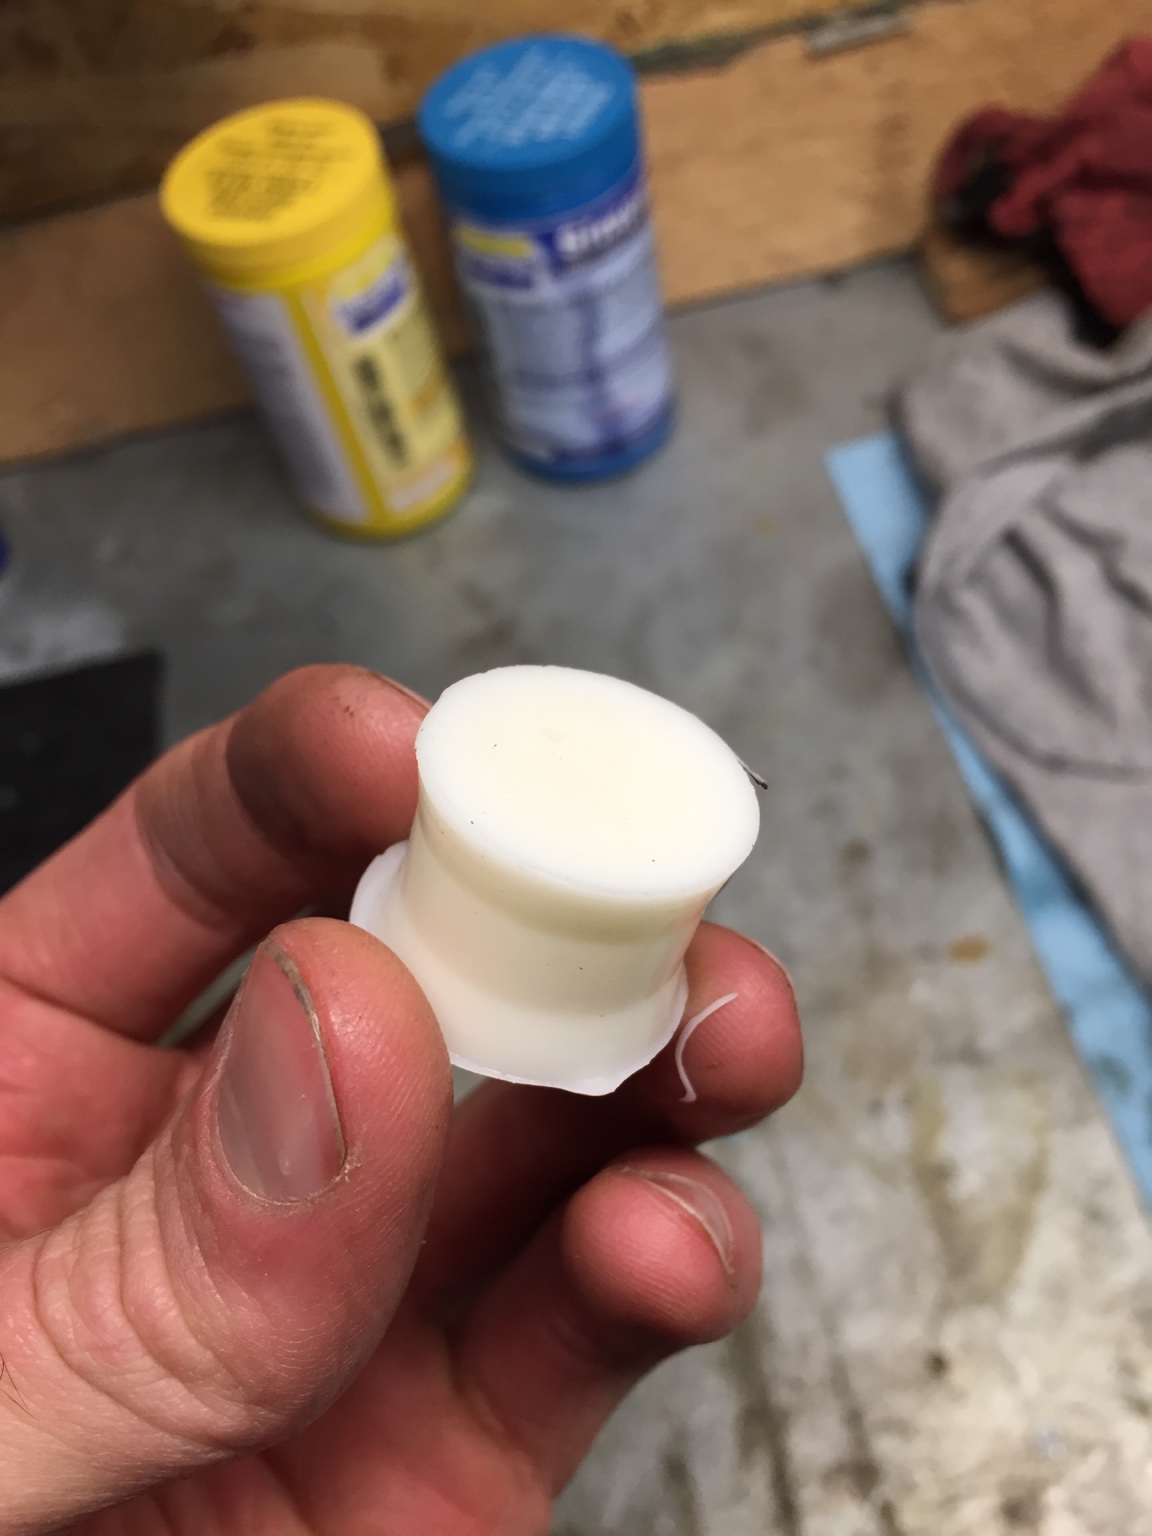
Bushings came out sweet. Popped right out thanks to the mold release. Going to let them fully cure (48 hours) then make some holes and then I should have some functioning suspension on this beast.
I don't understand why you didn't cast them with your shafts already in place. You can form oil clay around it, put a dowel of any material through and cast it in exactly the right shape. You can also make a mold, cast plaster positives, then make molds off the plaster positives. There's really lots of ways to do it.
The shocks on the XL have bolts for both top in bottom, I suppose I could have made a jig to hold them perpendicular and perfectly in the center. I have tons of the stuff left so if this method doesn't work I will retry it that way.
I plan to eventually 3D print a positive, cast a negative mold and then cast the poly in that, since I would like the bushings to protrude at least 1/8" on either side. But that's down the road, these will do for now.
Polytek is just another brand of urethanes. The number "85a" refers to the hardness of the material on a scale called "shore durometer" which signifies a class "a" plastic and a hardness rating of 1-100. So if you wanted a harder bushing, you could go with a higher numbered durometer mix.
The supply company I purchased the material from sent me about 10 samples from the A range, and I chose the 85a which was the second hardest mix because I wanted the bushings to be solid enough where they would not reform but still have a bit of give.
That said, I think much harder to 90% would get to the point of solid and not what we want in a shock bushing, I look forward to the results after some ride time. Deterioration is always a concern with this "stuff" lol.
That said, I think much harder to 90% would get to the point of solid and not what we want in a shock bushing, I look forward to the results after some ride time. Deterioration is always a concern with this "stuff" lol.
Yep it will be a good experiment. 85a is one of the harder urethanes used for skateboard/longboard wheels that are meant to hold up to sliding on pavement, so I think I will get some time out of them. I don't plan on being nice to this bike, either. ;D
Looks great. I'm curious how much better the harder bushing is. Most that come with shocks are around 65a. With skateboards, you can go from 65 to 91 on truck bushings.
That said, I think much harder to 90% would get to the point of solid and not what we want in a shock bushing, I look forward to the results after some ride time. Deterioration is always a concern with this "stuff" lol.
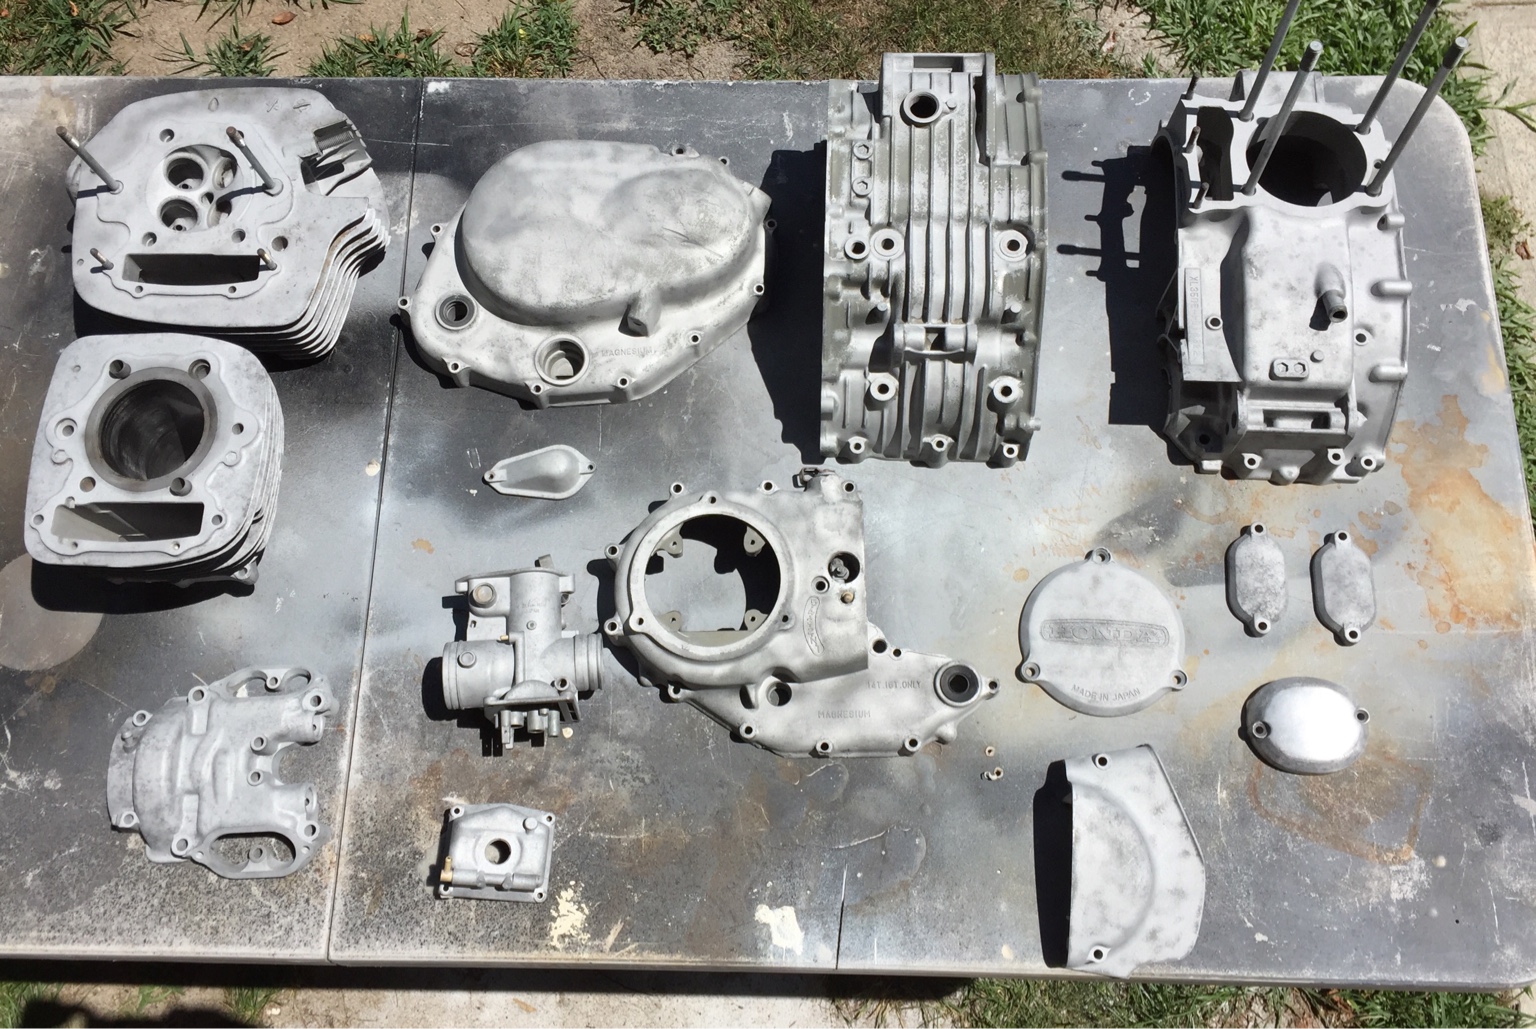
Lots of bead blasting. Didn't go crazy on the engine parts since everything is gonna get painted. Just got the grime and corrosion off.
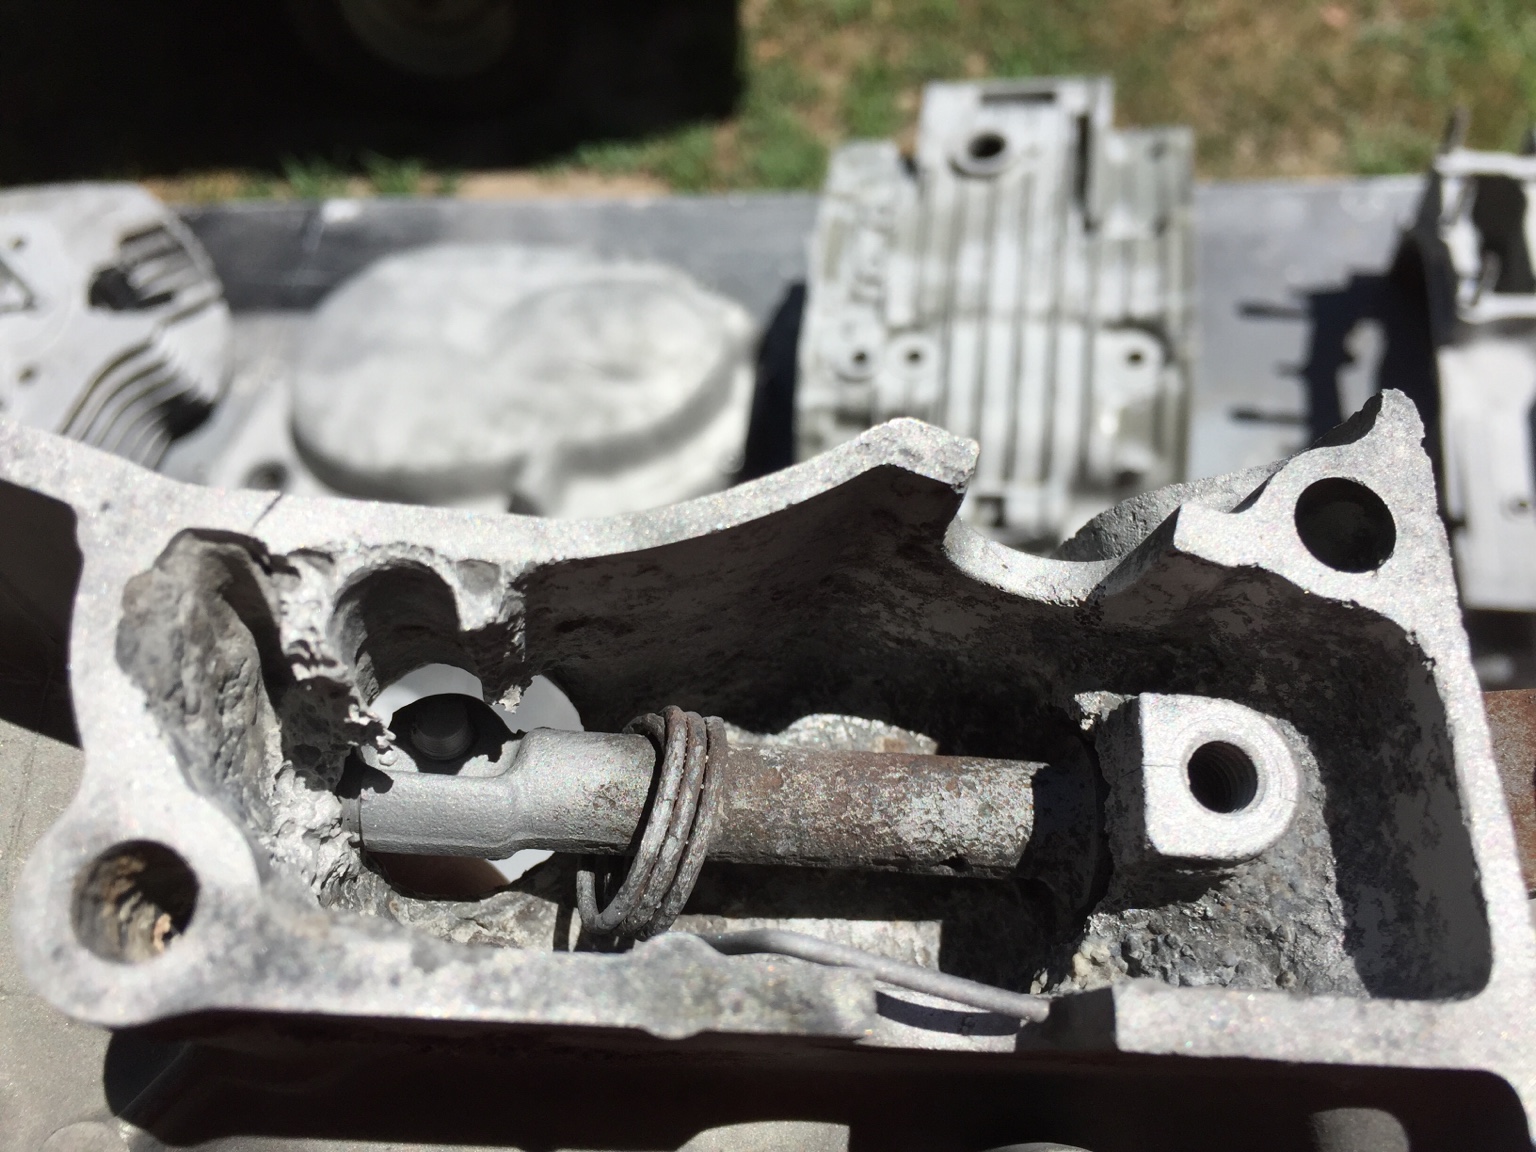
Clutch mechanism housing super corroded. Don't think the sliding surfaces are damaged though so should be good to go. Hoping I can save the needle bearing since they are no longer available.
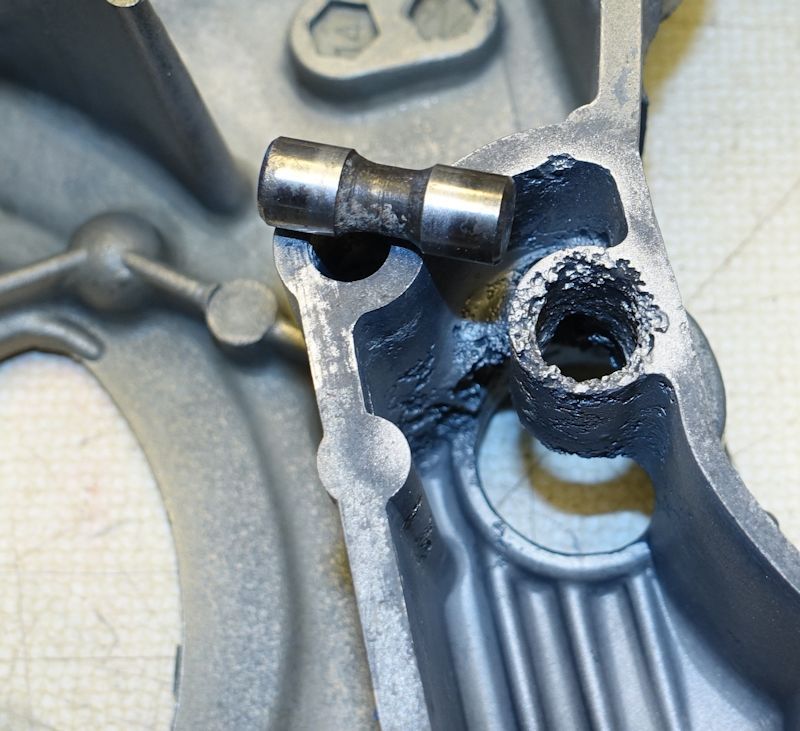
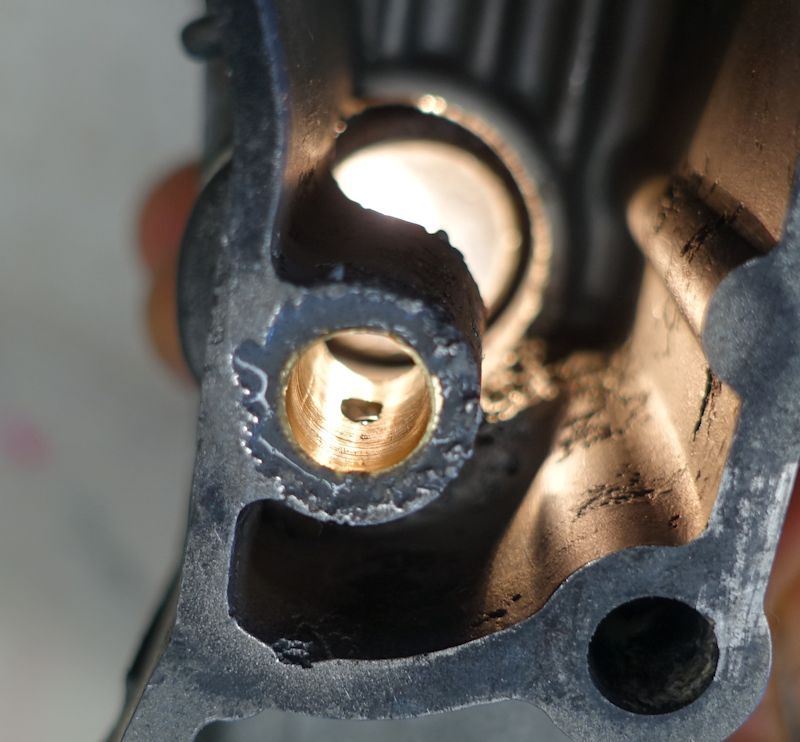
Hi there, it looks like the part of your left side case that holds the short lifter rod is toast, and probably the hole that holds the lower end of the actuating lever as well. That is common on these magnesium cases. Below is a shot of the hole on my case, which was not nearly as eroded as yours:
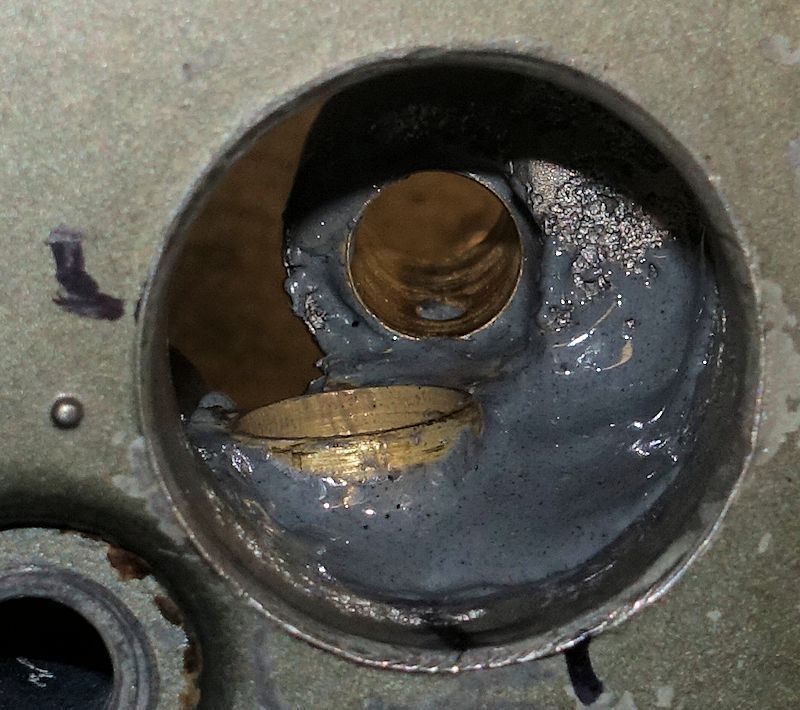
I did an epoxy and brass bushing repair on mine, pictured below. I believe Dave at XLint offers this service. I wrote up the full details on the first page of a post on another forum here: http://bayarearidersforum.com/forums/showthread.php?t=491468.
Anyway, here are a couple of photos of the repair:
Thanks Bill. Some great info on your build there. Nice looking bike! I have many of the same issues on this one so your techniques will be helpful.
Looks like you're right about the clutch mechanism housing. I spoke with Dave at XLint and got a quote to repair the surfaces in there but it's a bit out of the budget for this build at the moment.
I will look into your method and may try that route, provided I can find someone or somewhere to machine some bushings. I will see how bad the damage is to the lower seat when I manage to pull the actuator out.
Got a line on a LH case cover, I don't think mine is really worth the time and cost of rebuilding.
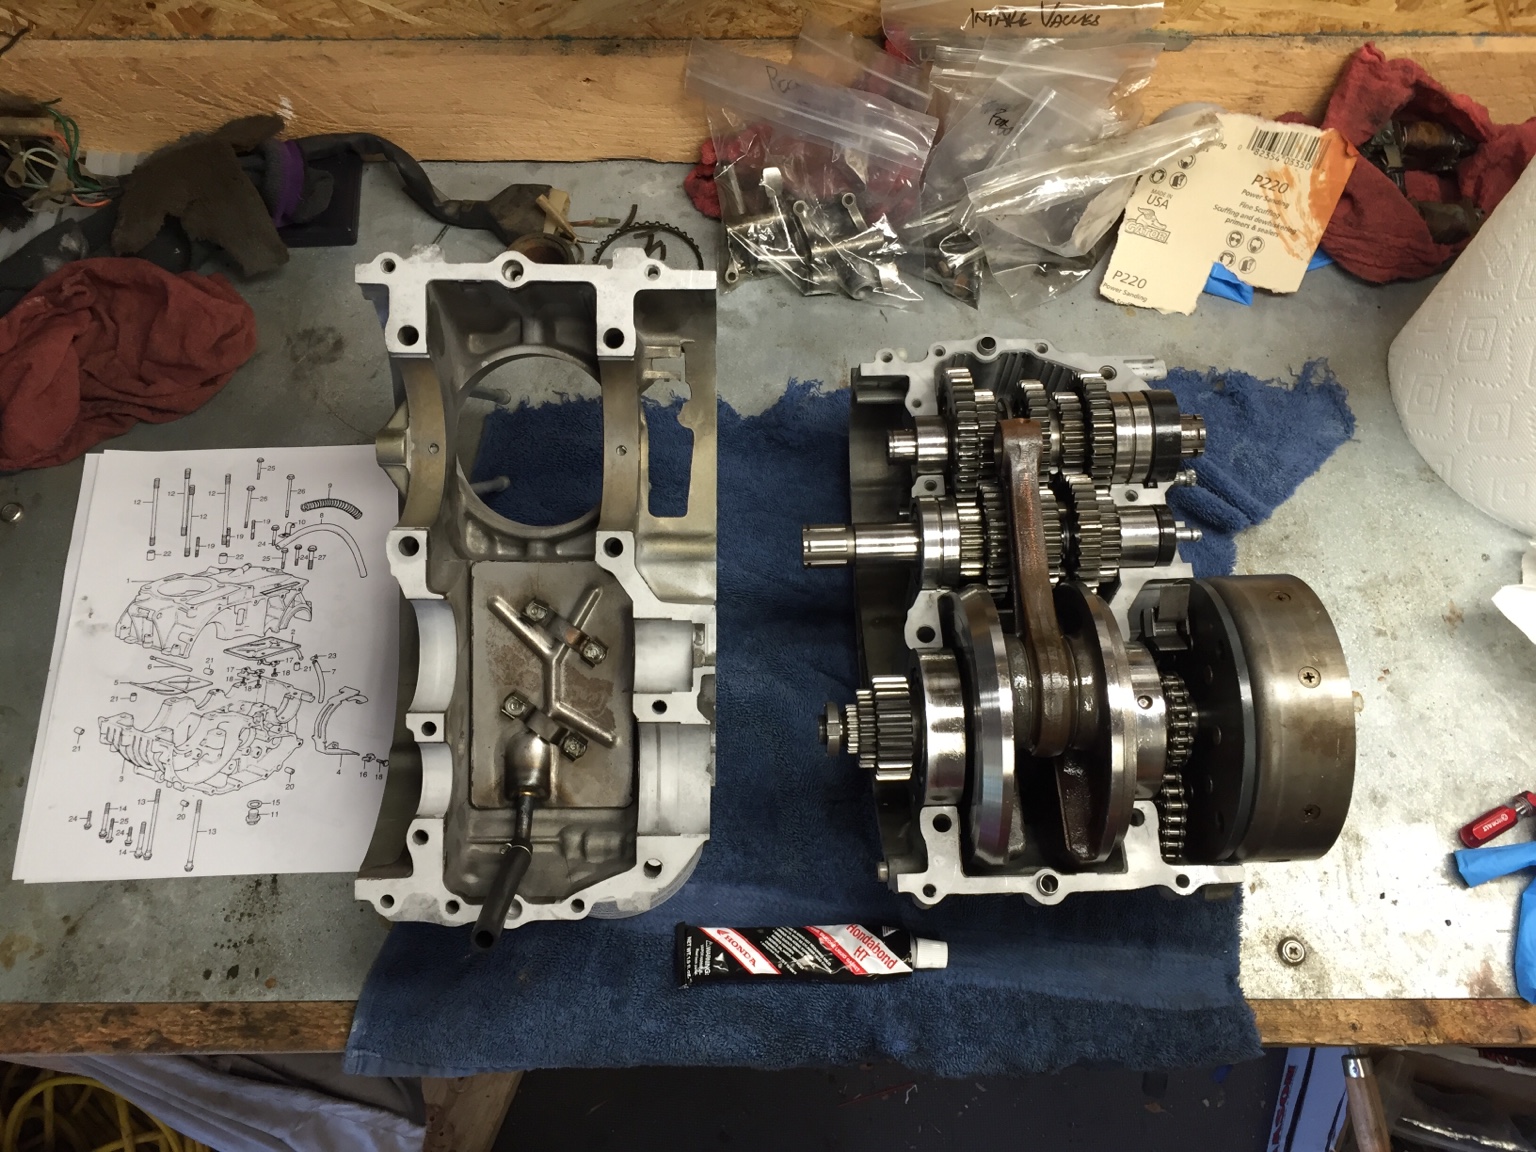
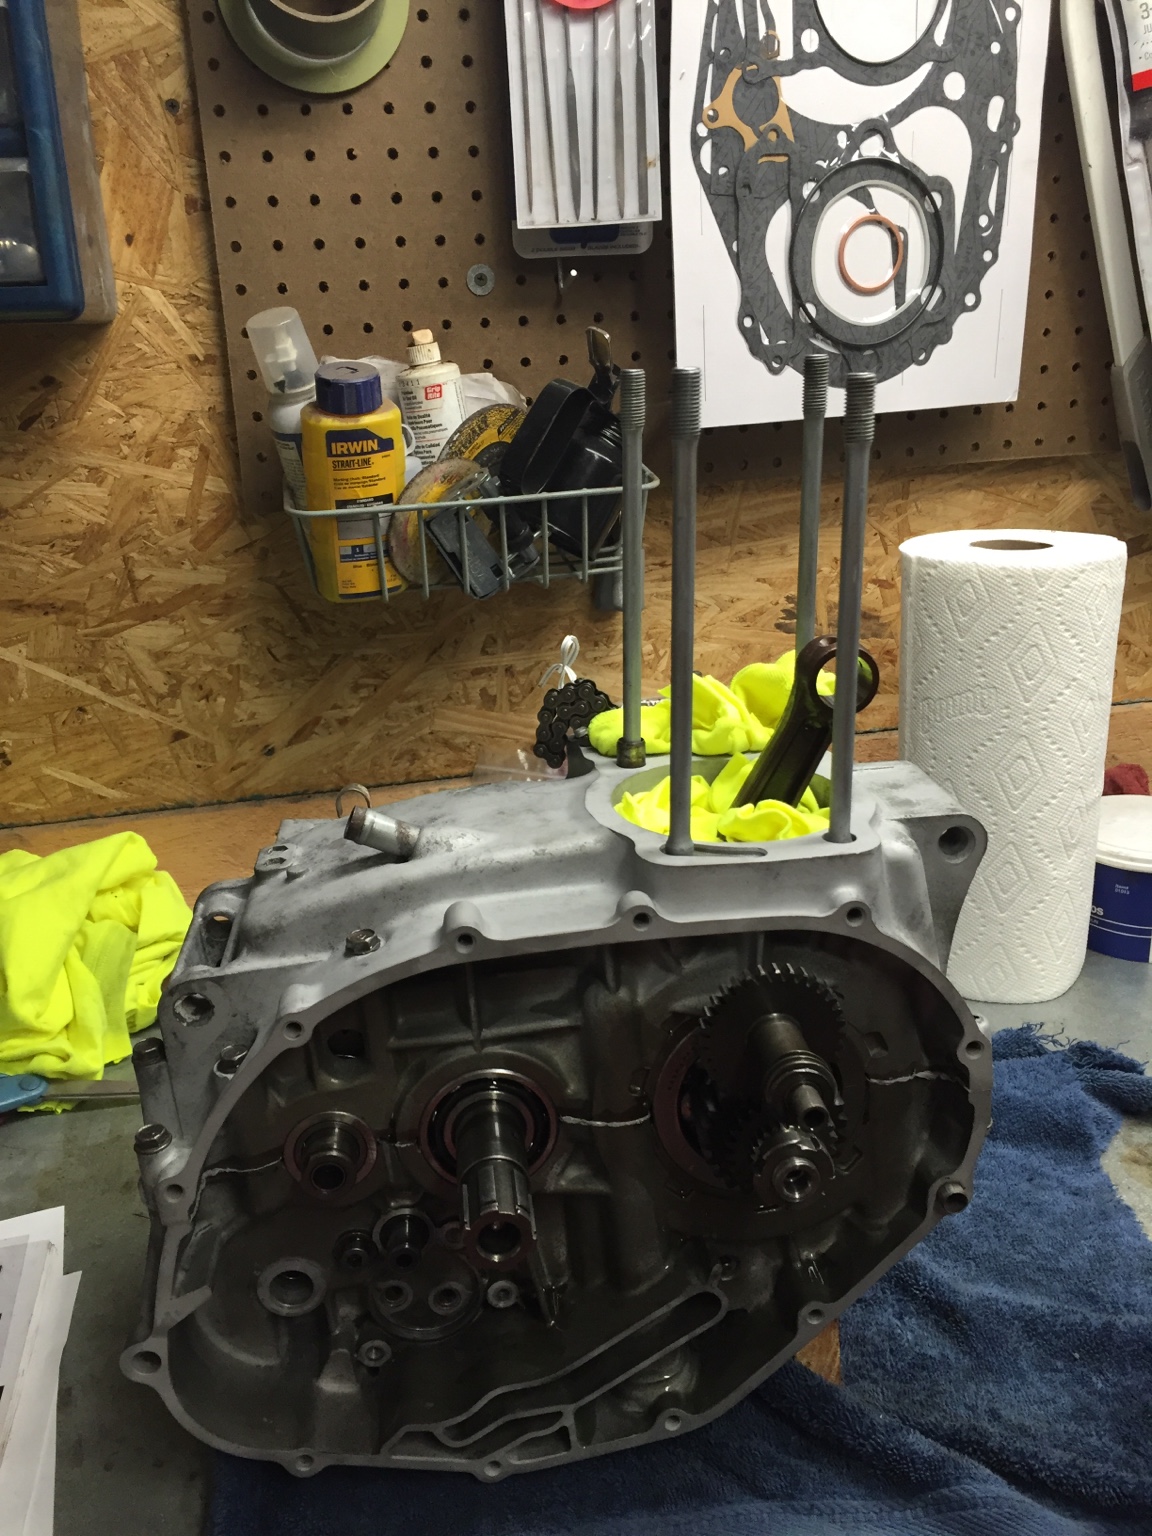
Transmission gears, gearshift mechanism and crank cleaned and reinstalled into the cases. New main shaft and countershaft seals. Closed 'em up.
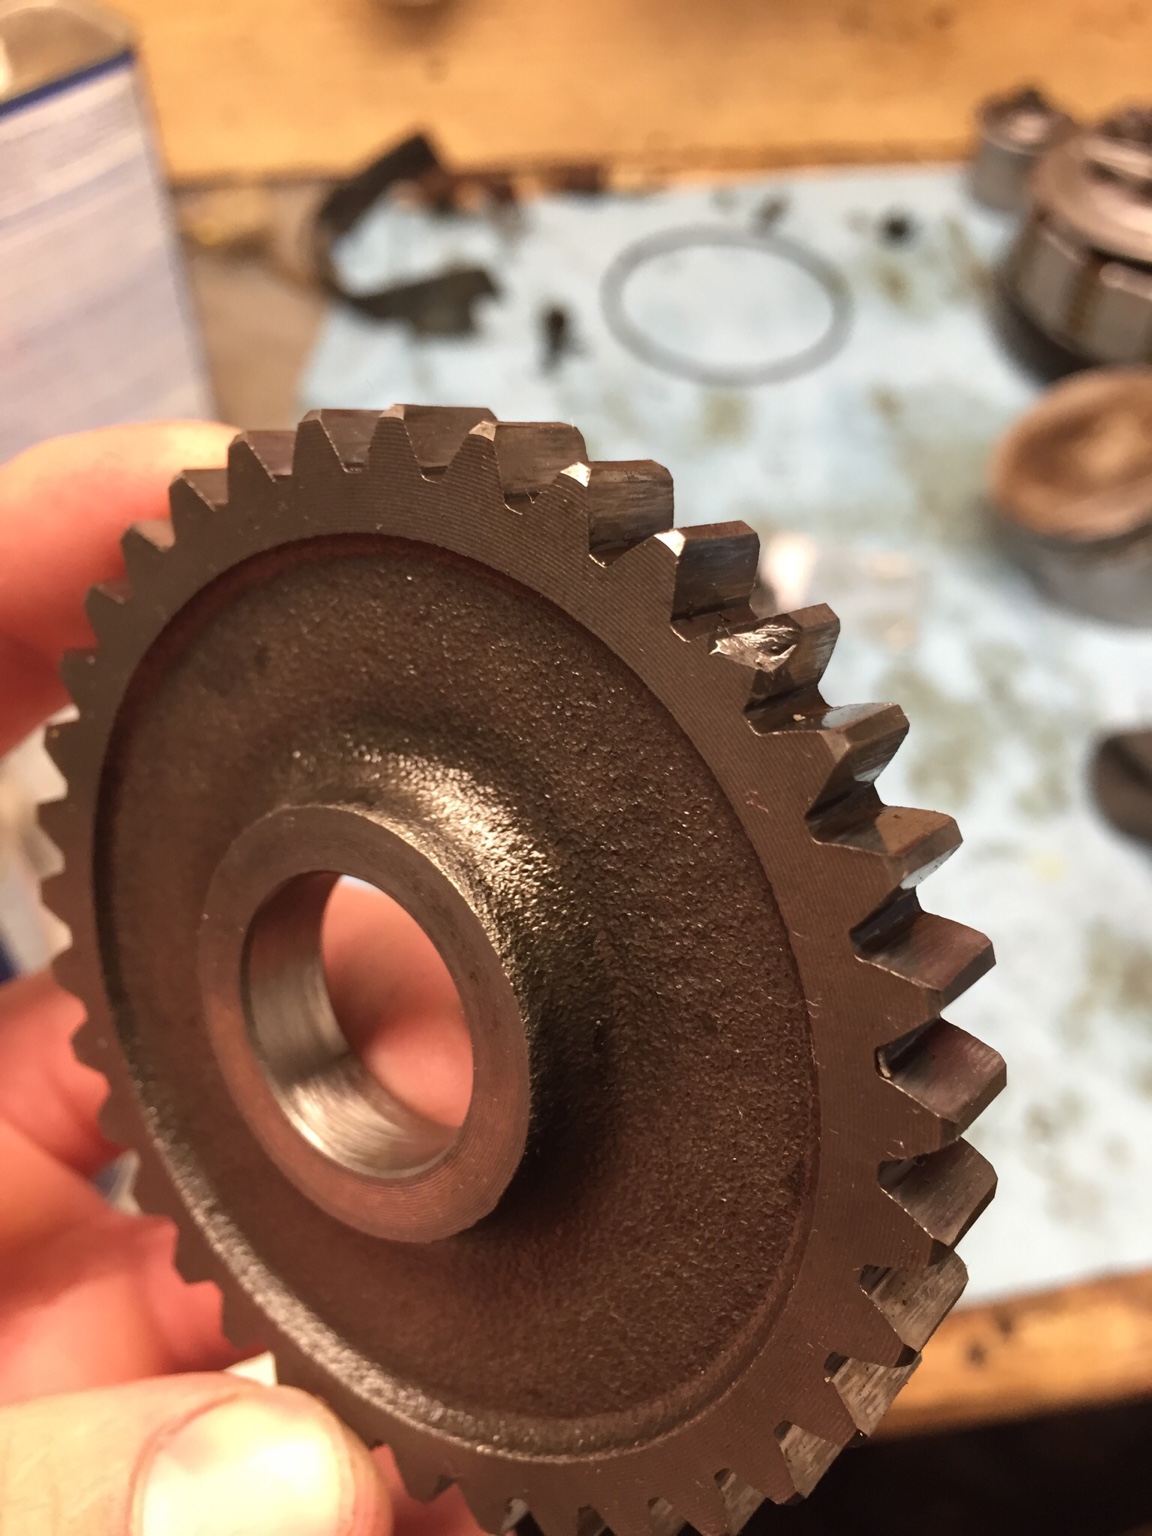
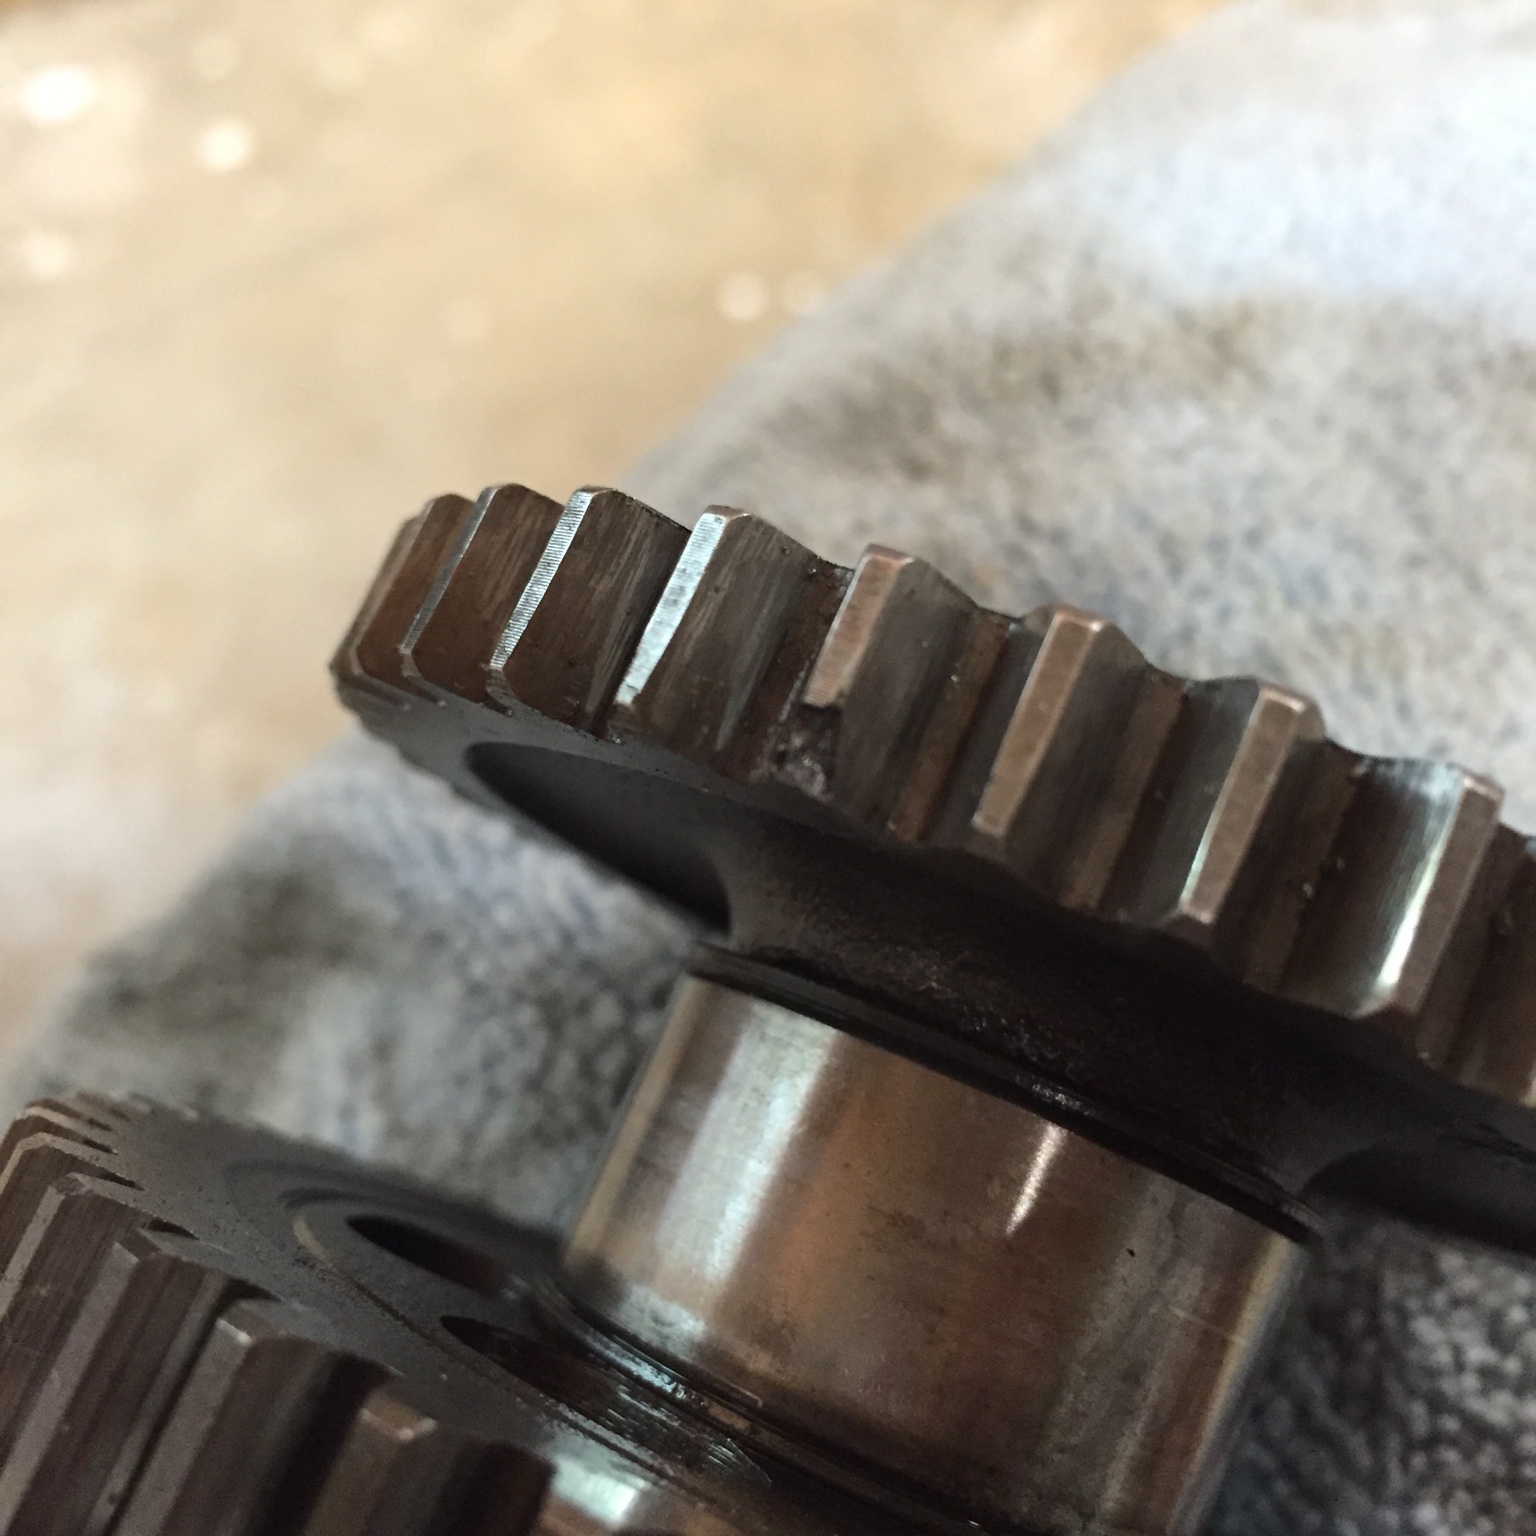
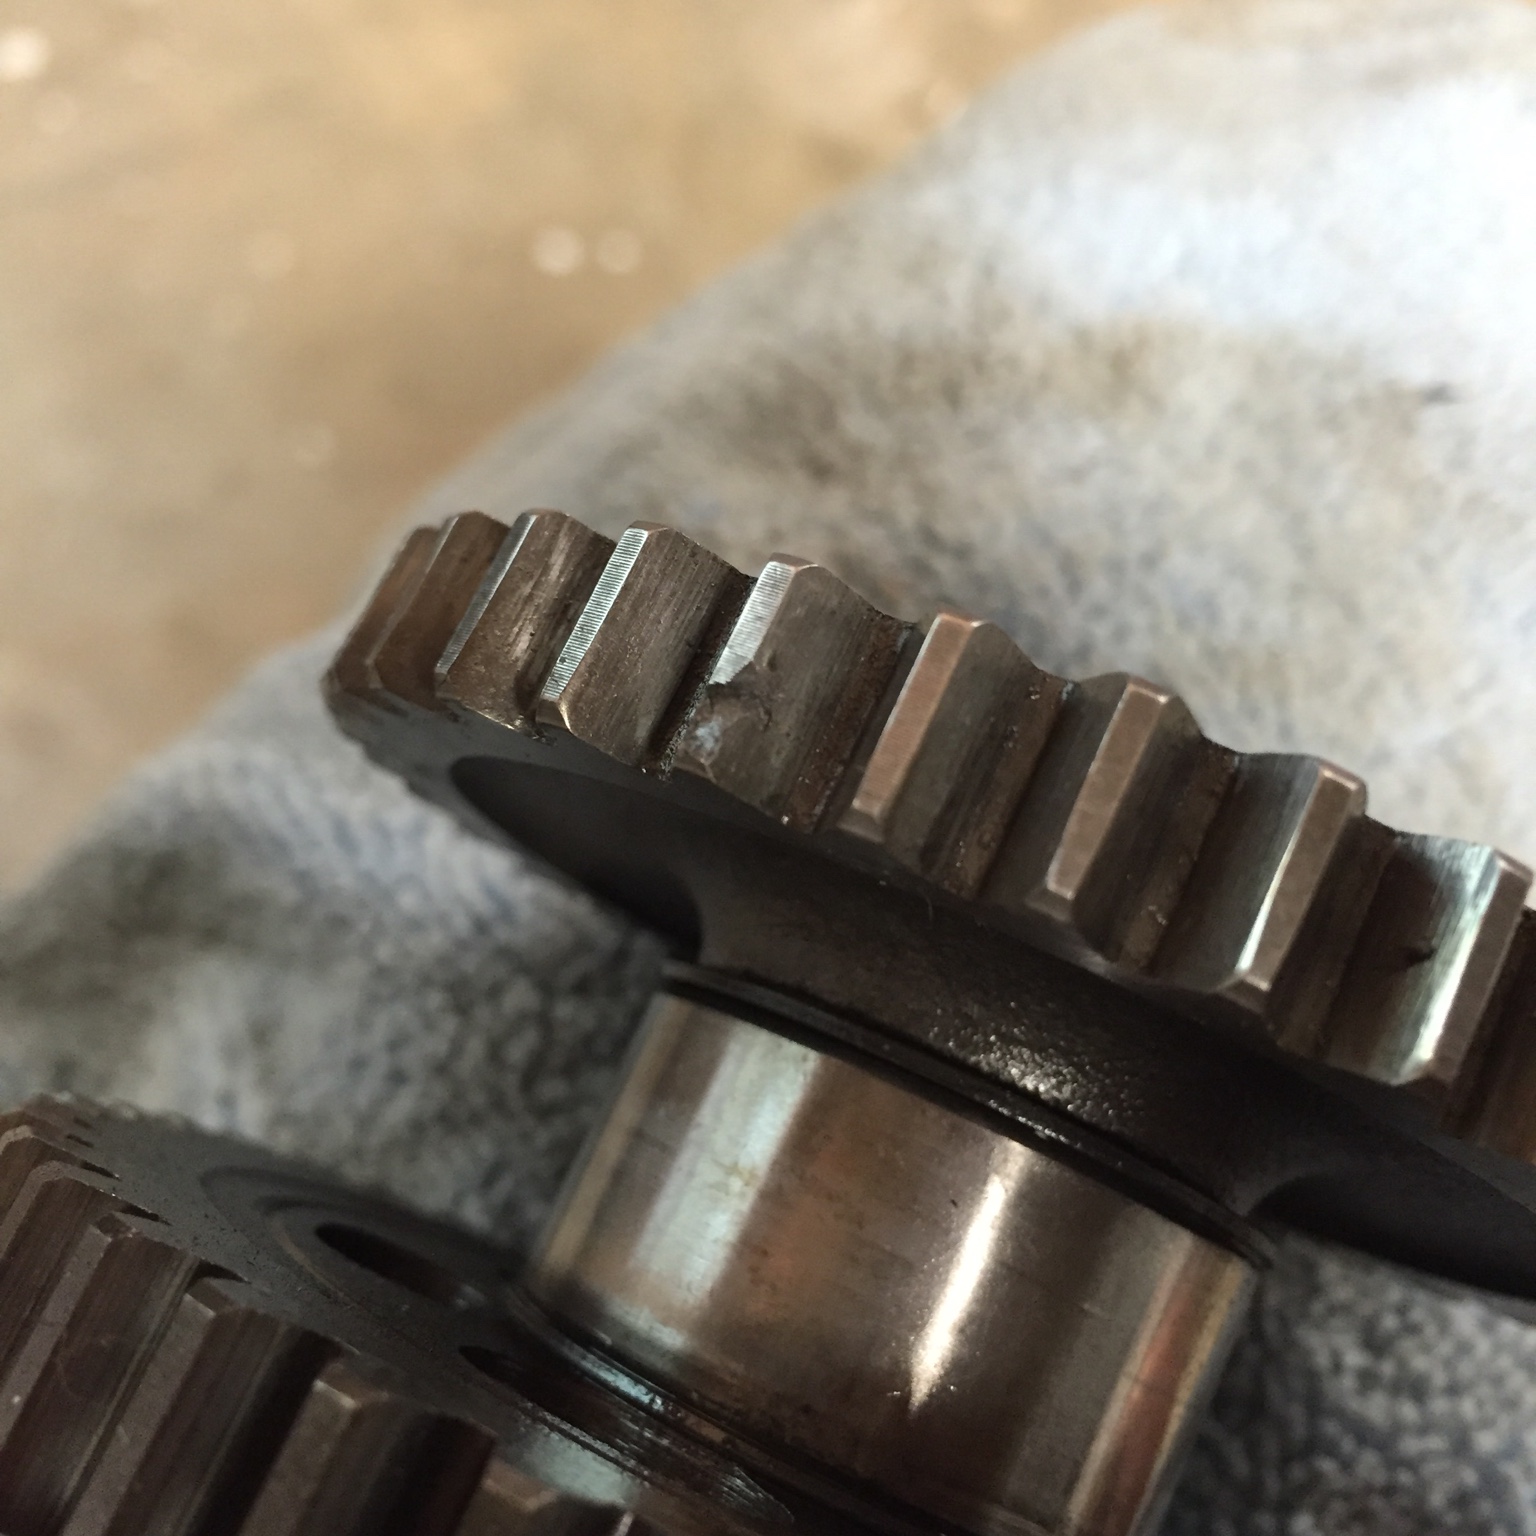
Found a chipped tooth on the idler gear which I'm not surprised about. Wondering if I should just clean it up and run it or try to find a good used one.
This is how it usually goes with these things. Magnesium sucks for durability. A spare motor is always a good idea, and a collection of spare covers is required. I have about 2.5 XL250 and 175 motors when it's all counted.
This is how it usually goes with these things. Magnesium sucks for durability. A spare motor is always a good idea, and a collection of spare covers is required. I have about 2.5 XL250 and 175 motors when it's all counted.
a lot of MX bikes used magnesium back then because of the weight (mostly cost) savings. longevity of the motors wasnt as much a concern as it was for heavier bikes that had a foreseeable future. MX bikes were basically expected to last a few years and a few rebuilds, and then go to scrap for a new one. I did have reasonable sucess TIG welding the magnesium covers on my elsinore, but it was doing much the same thing. And I'm also keeping an eye out for a spare motor at some point for mine for the same reasons. CB750 or XS650 cases on the other hand, practically last forever.
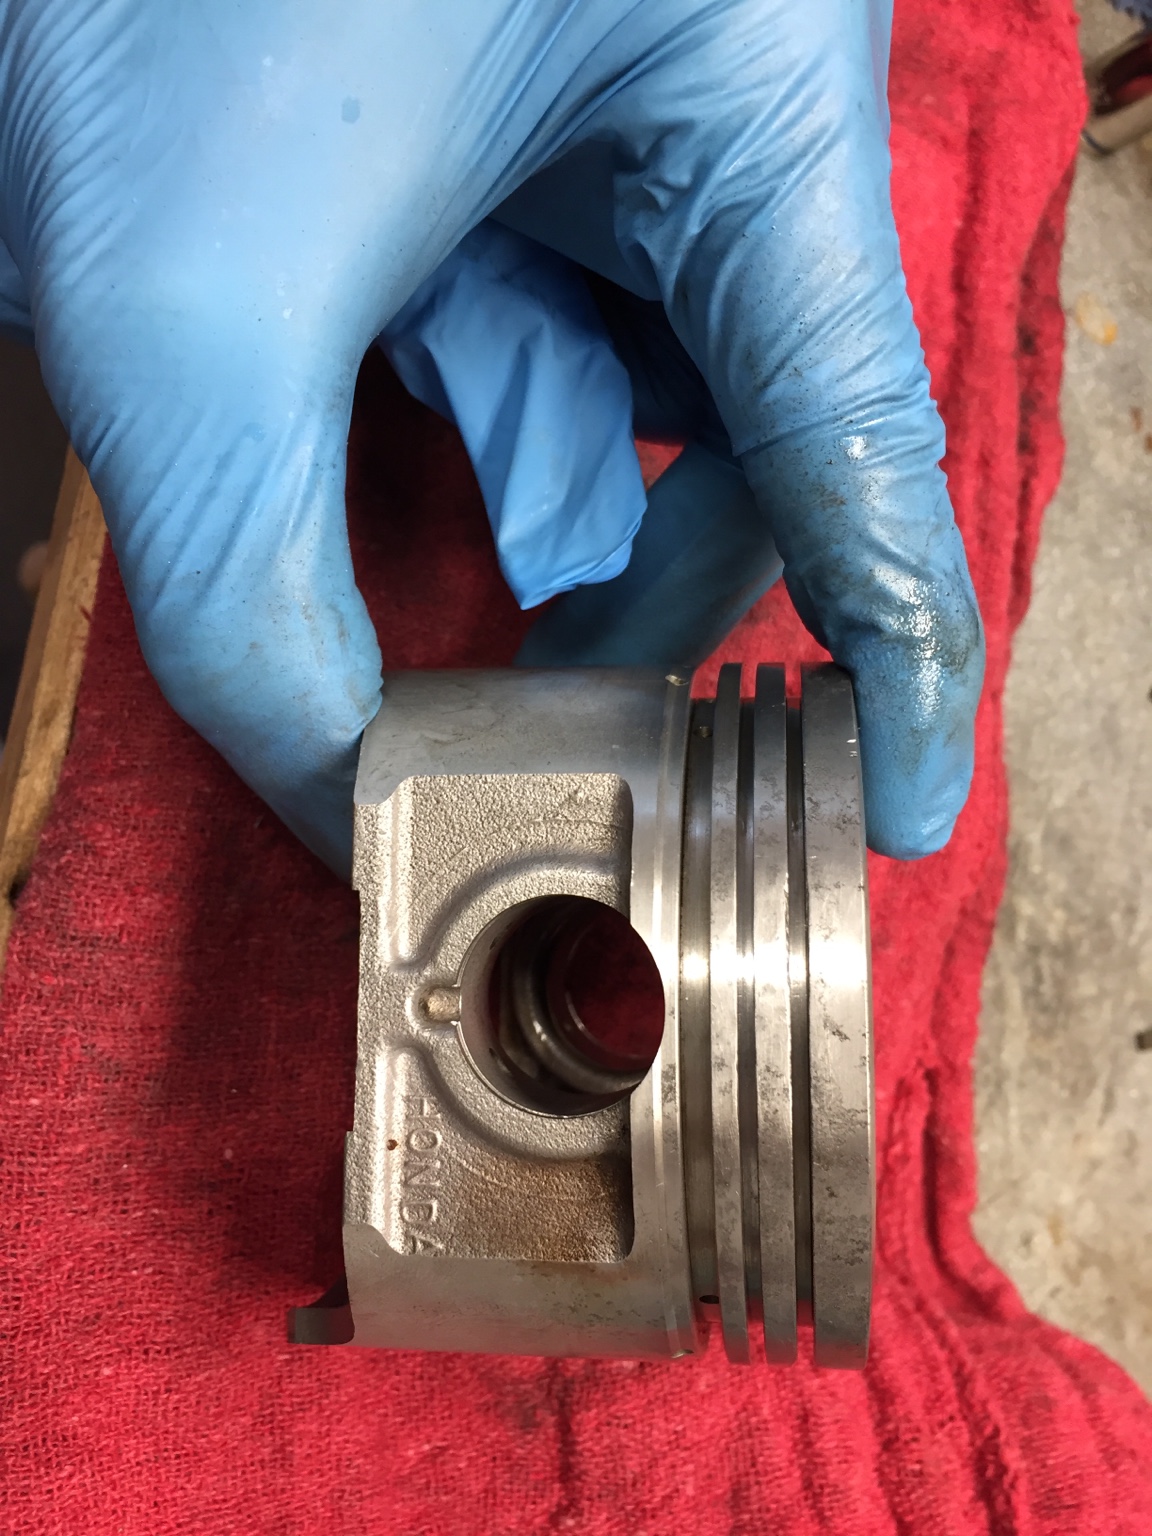
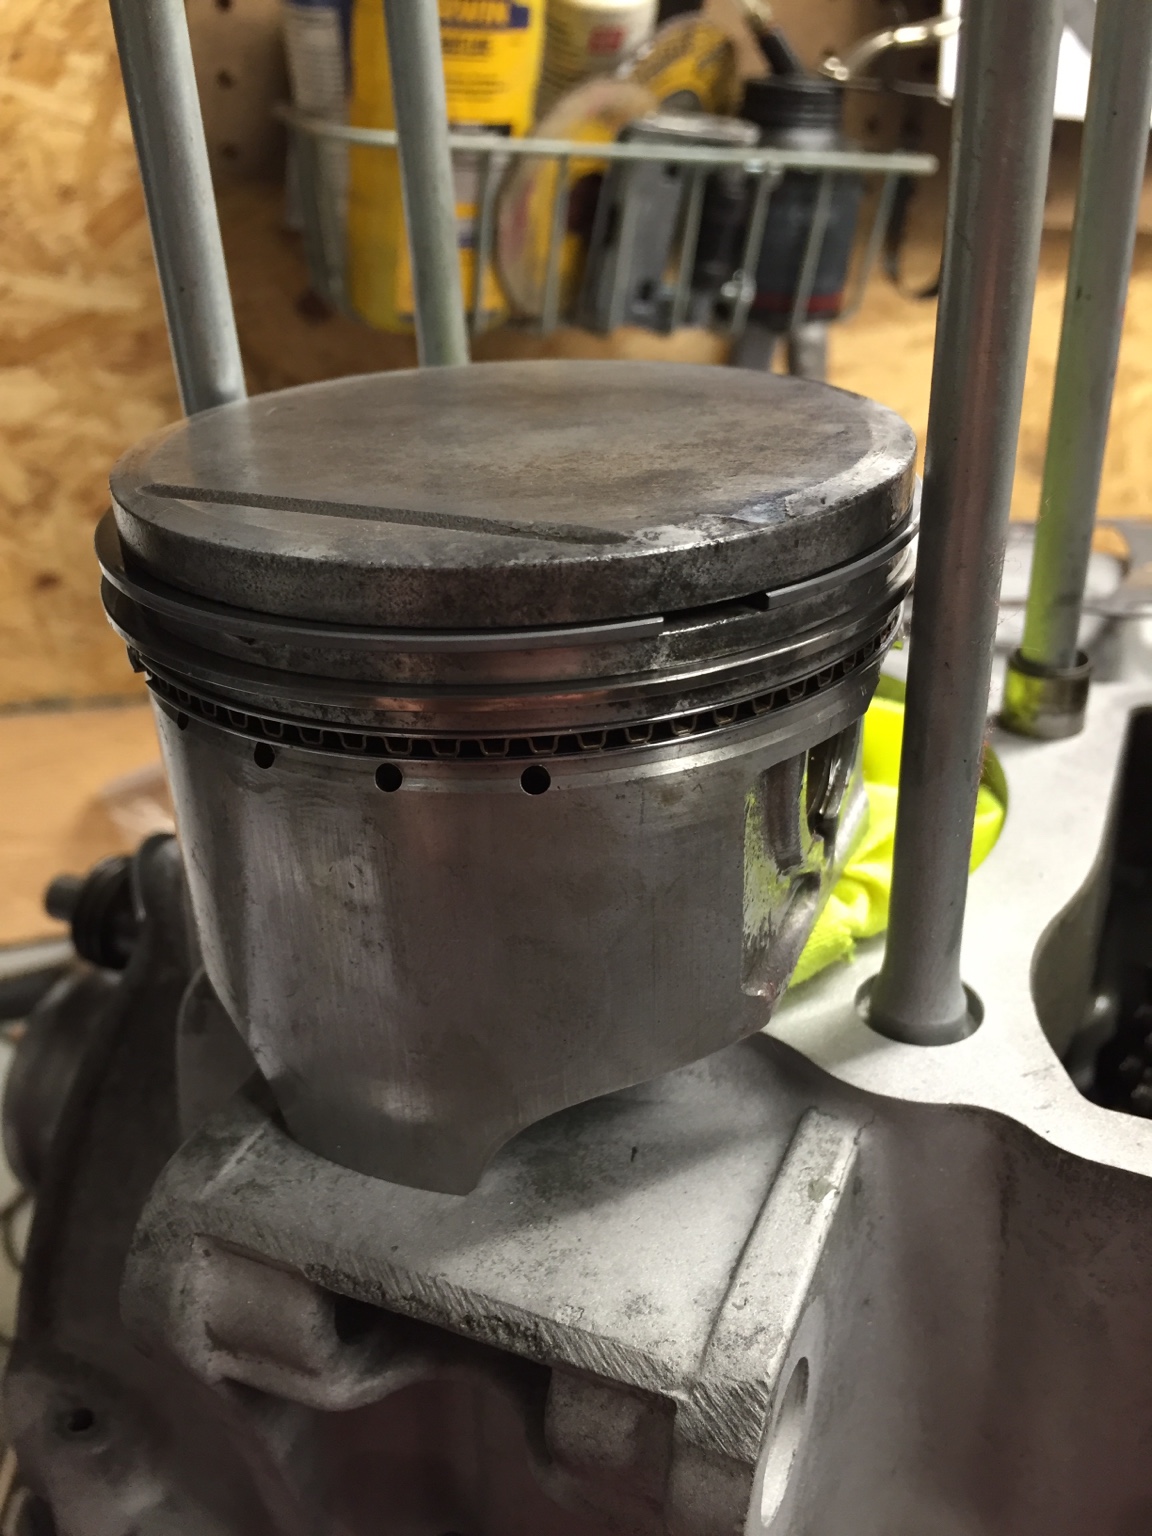
So what happened this weekend. Seized rings removed, grooves cleaned, new rings gapped and installed. Went to install the jug with a POS piston ring compressor and tore the gasket. Got to cut a new gasket now.
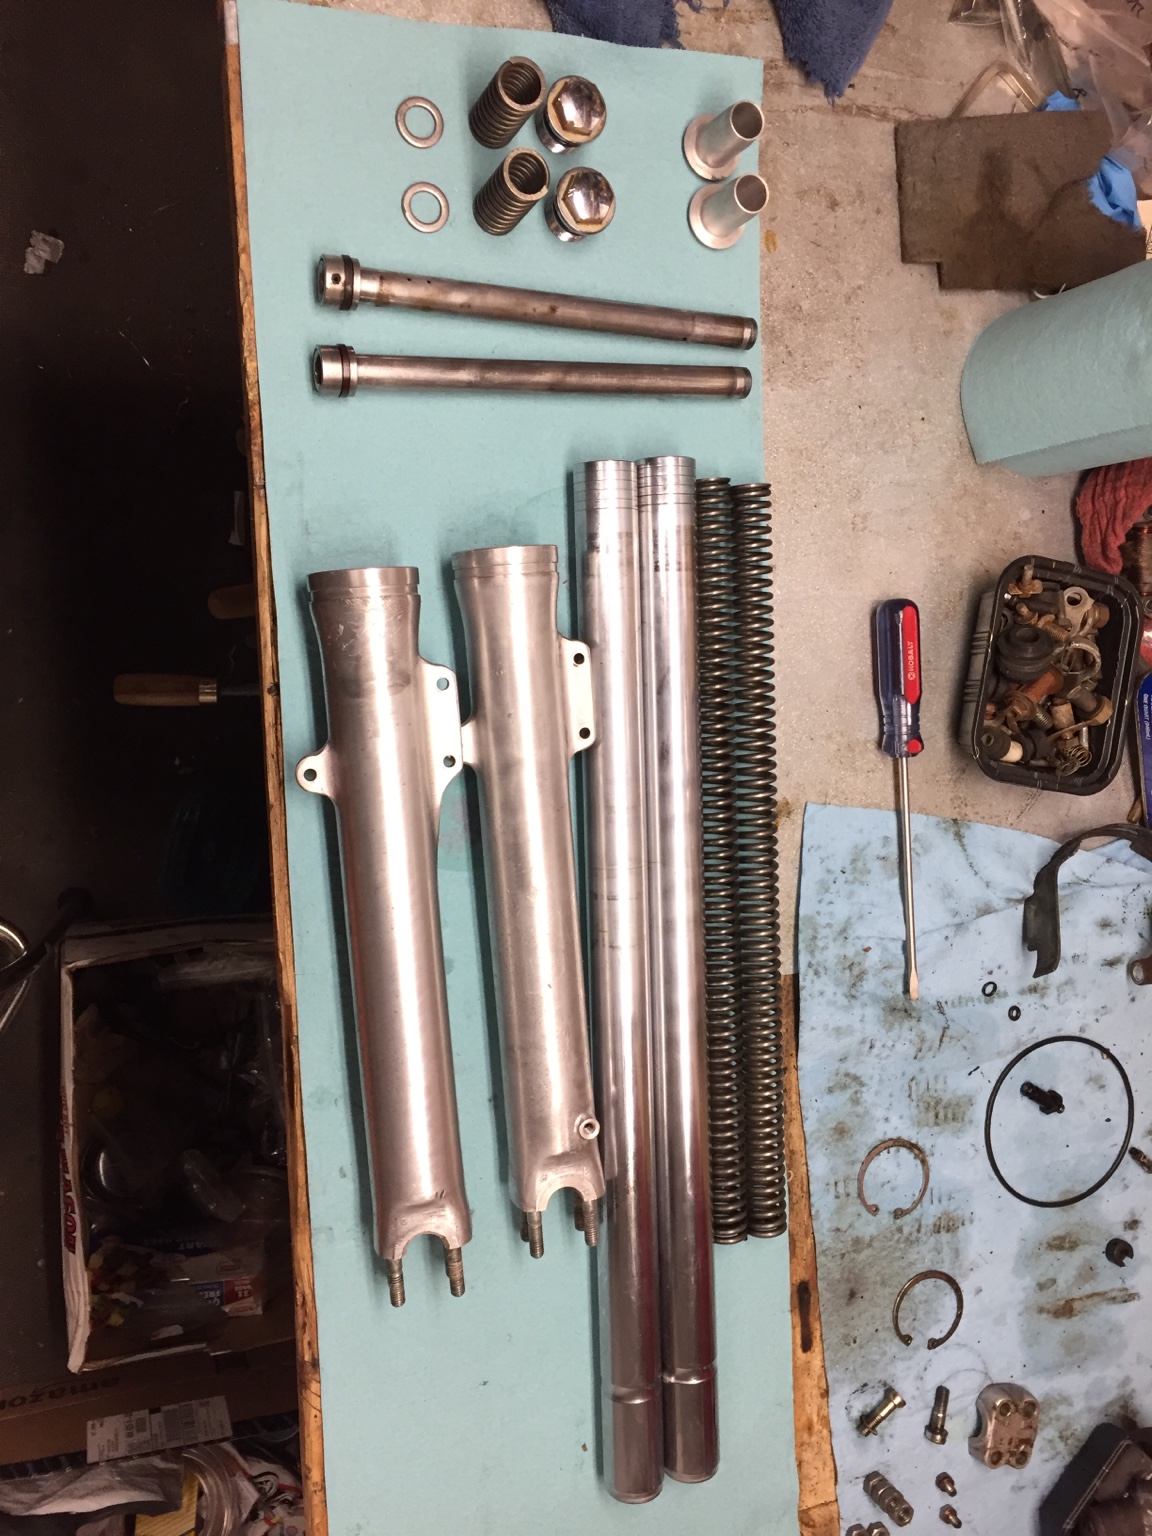
eBay forks cleaned and dismantled. One of the lower springs was a bit out of spec so I swapped it for a better one from the original forks. Polished up the lowers real quick, popped in new sealed and threw em in.
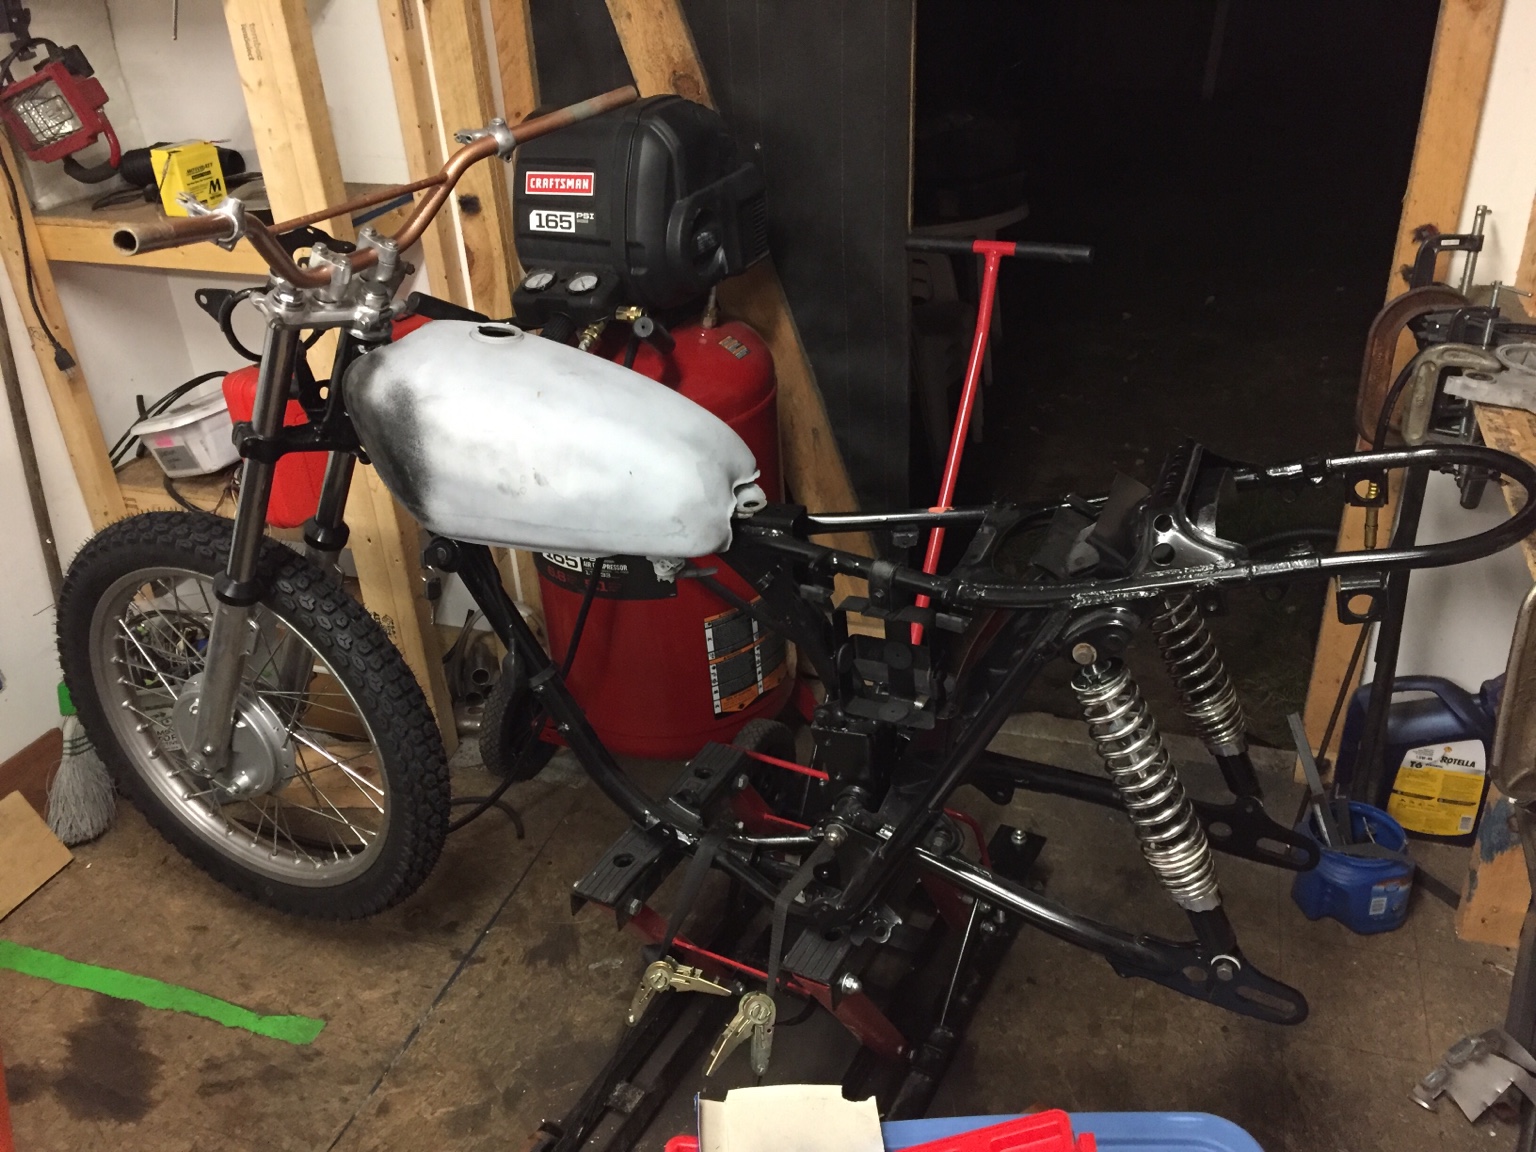
Front wheel laced up and trued, as good as I could get it for something that had been abused. Spokes fit like garbage. After getting a new set with the "right" length, I laced and replaced this thing about 5 times. The 2 part hub is a pain in the ass. The eBay spokes are hardly to spec, as the length from the bend to the flange is longer than stock. I think they are all seated, but we'll see what happens after a couple miles. Threw everything together real quick.
Rear wheel bearings been on back order for over a month now. Gotta find a new source and cancel that order. Holding me up from having a roller.
I like to look up the old honda numbers, then plug those into ebay. lots of time you will find someone else has already cross referenced bearings and gone straight to mfg like the NMD one there. NMD is one of several bearing makers that supplies "oem" bearings to companies. Plus, pretty sure my elsinore uses the same ones
This site uses cookies to help personalise content, tailor your experience and to keep you logged in if you register.
By continuing to use this site, you are consenting to our use of cookies.


")


