
We noticed you are blocking ads. DO THE TON only works with community supporters. Most are active members of the site with small businesses. Please consider disabling your ad blocking tool and checking out the businesses that help keep our site up and free.
You are using an out of date browser. It may not display this or other websites correctly.
You should upgrade or use an alternative browser.
You should upgrade or use an alternative browser.
The Van Van - '73 Suzuki RV125 "tracker"
- Thread starter adventurco
- Start date
crazypj
Split personality, I fake being smart
I don't remember them ever being Van-Van, isn't that a Yamaha 'thing'? ( just can't remember wat they were named in Britain)
Real good idea to make a case puller, case can and will distort if just pried apart. then becomes very difficult to stop air leaks
It's possible to take the early TS 125 motor to nearly identical spec RM but that would probably make bike unrideable with double the HP
Real good idea to make a case puller, case can and will distort if just pried apart. then becomes very difficult to stop air leaks
It's possible to take the early TS 125 motor to nearly identical spec RM but that would probably make bike unrideable with double the HP
Thanks guys, its really coming along so far.
@Trek - I used Duplicolor engine enamels on this one, bead blasted most of the engine parts except the cases which I just degreased and cleaned. Primer + Color, no clear as I wanted more of a factory look finish.
@PJ - These original RV125s were only referred to as Van Van in the Japanese market. When the new model was introduced in 2003 (I think), they used the Van Van name for all markets. The TS125 motor is identical to the RV125, as I swapped TS125 cases for the busted cases that came with this motor. The TS185 is also a bolt in upgrade that I'm keeping in mind.
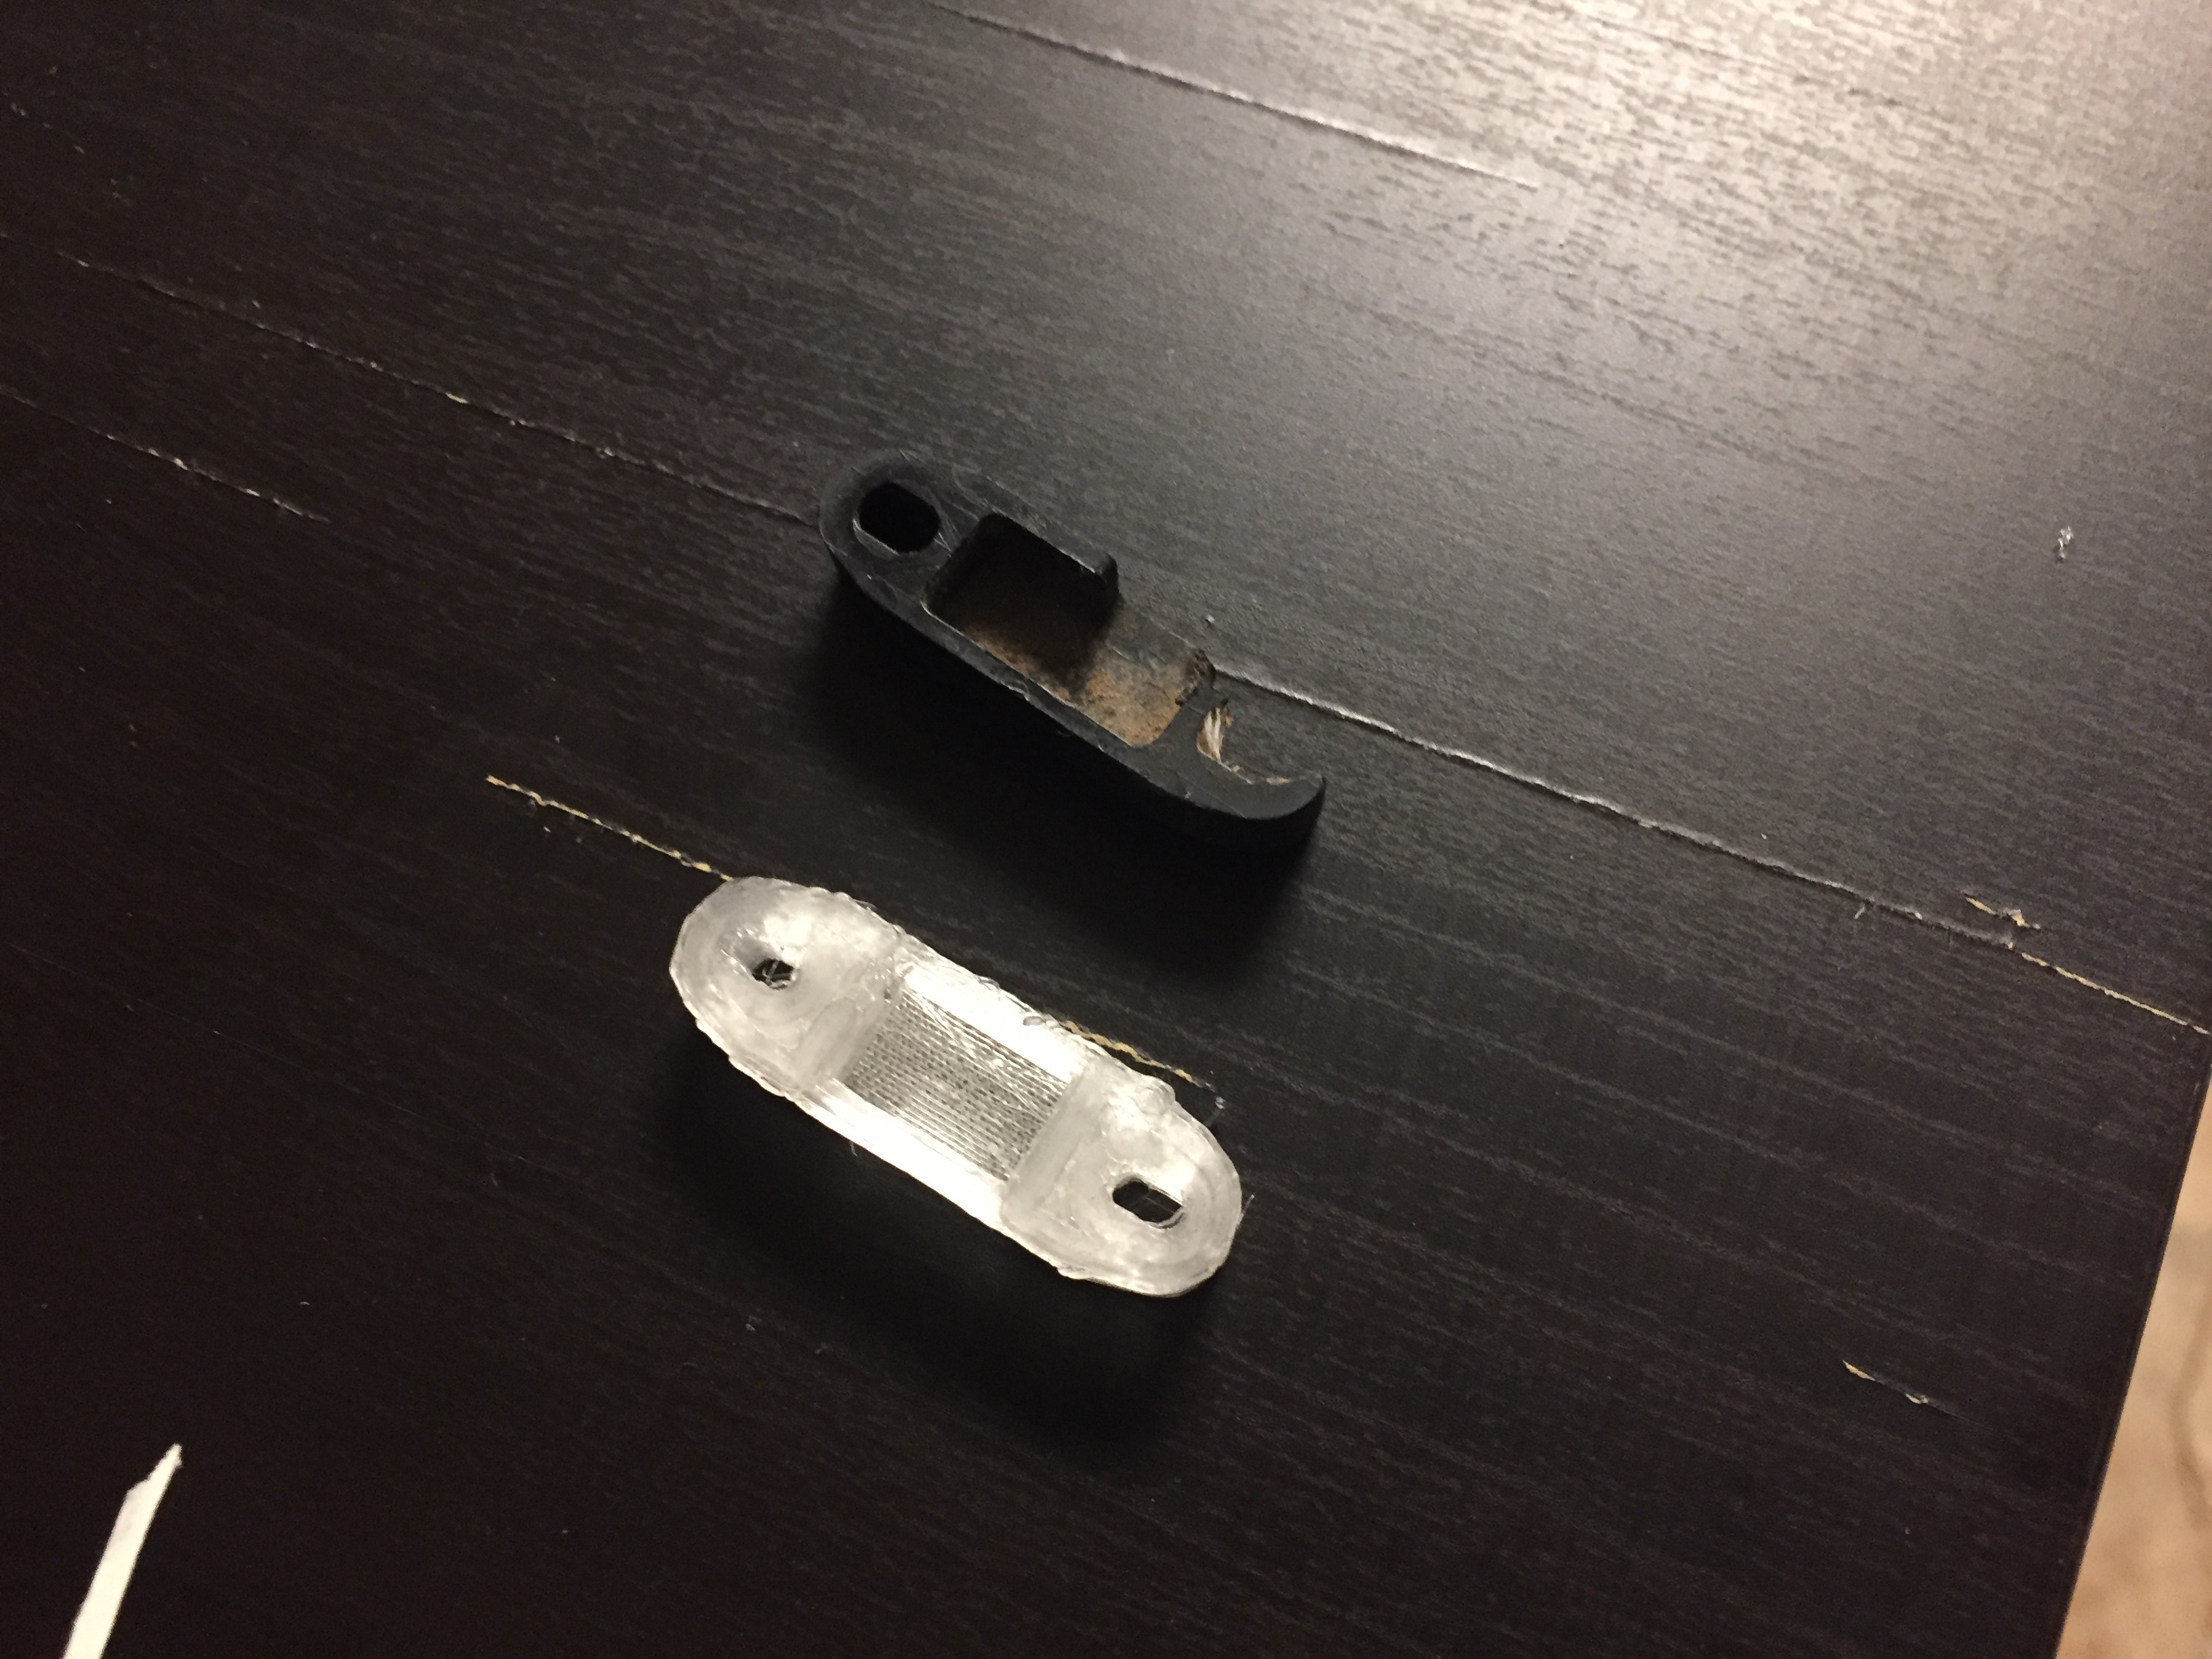
The plastic cover for the front brake switch was all busted up and is another one of the many unobtainable parts for this bike. I made a quick 3D model and sent it over to the printer. With a little filing and clean up, it went right into place.
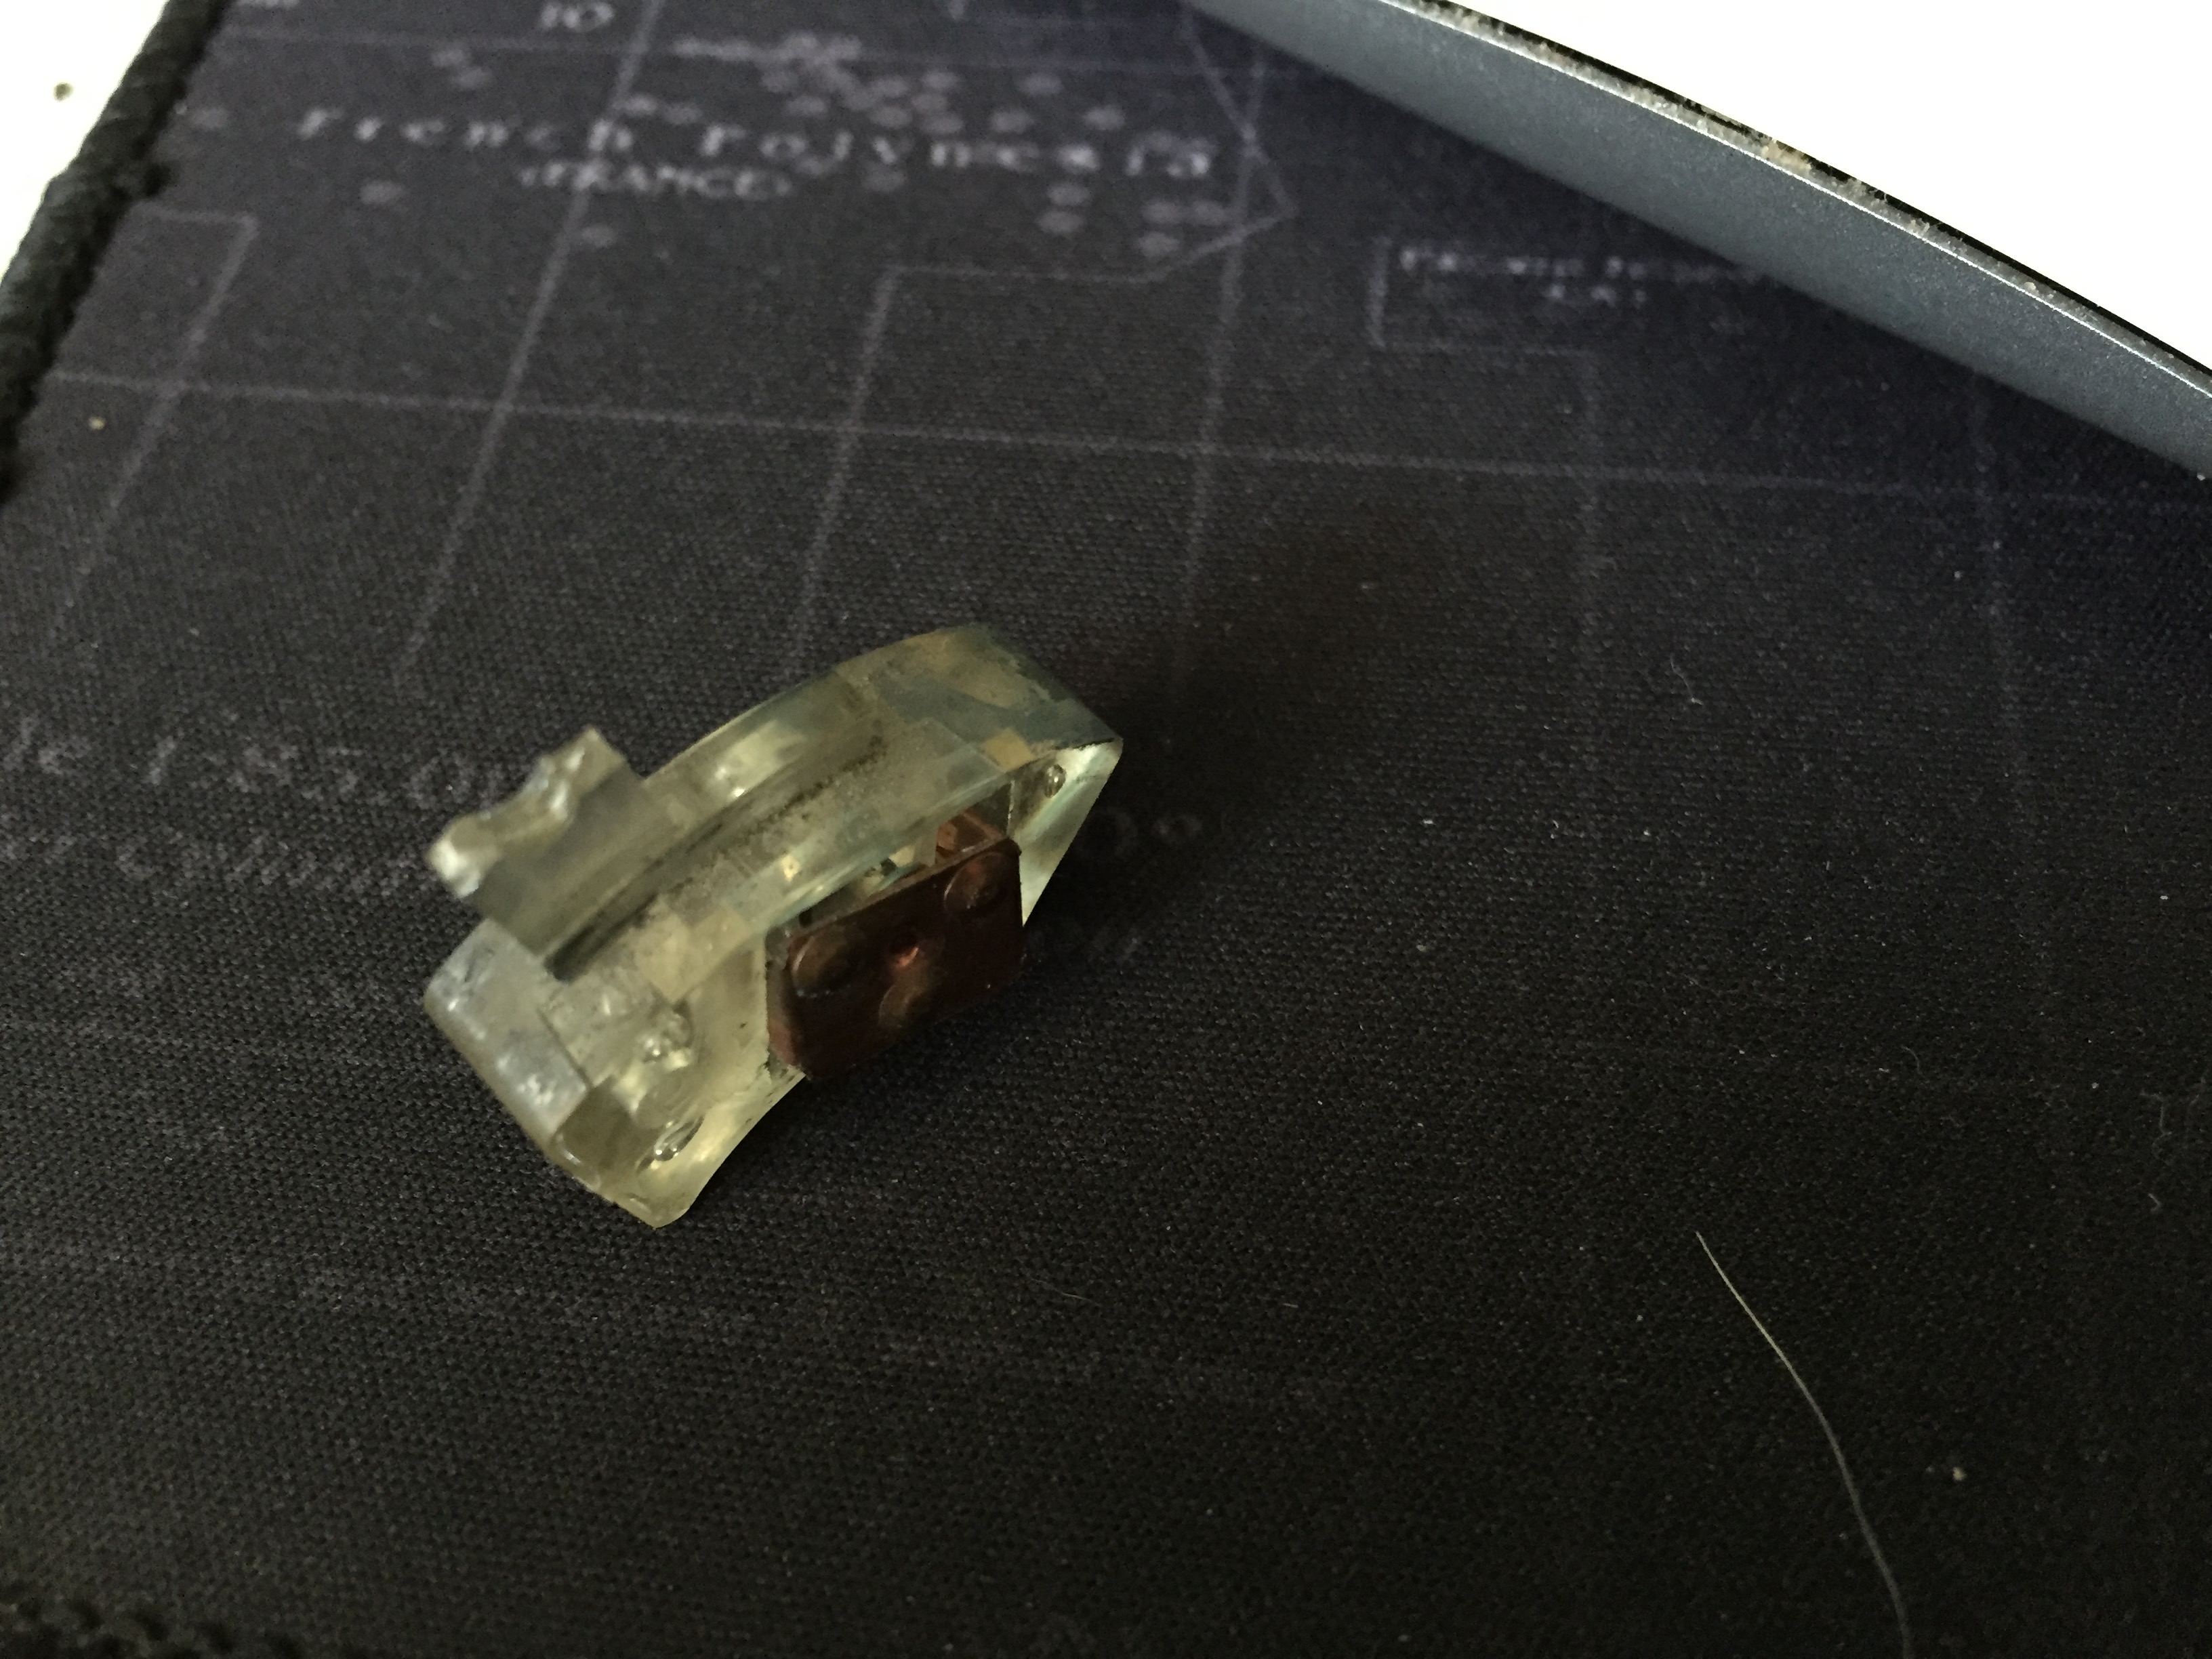
The G/Flex is really coming through on this project. Another part on the unobtainium list is the actuator for the dimmer switch on the hand control unit. Every single one is broken just as this one is. I was lucky enough that the thumb switch stayed on long enough for me to get it here through ebay. The first time I tried to test the switch, the thumb piece broke right off.
I used an old kneaded eraser, some tape and a toothpick to make a mold for the G/flex that would get me close enough to the correct shape. Not the best solution as the epoxy stuck to the eraser, but I was able to peel most of it off and then scrape the rest with an xacto.
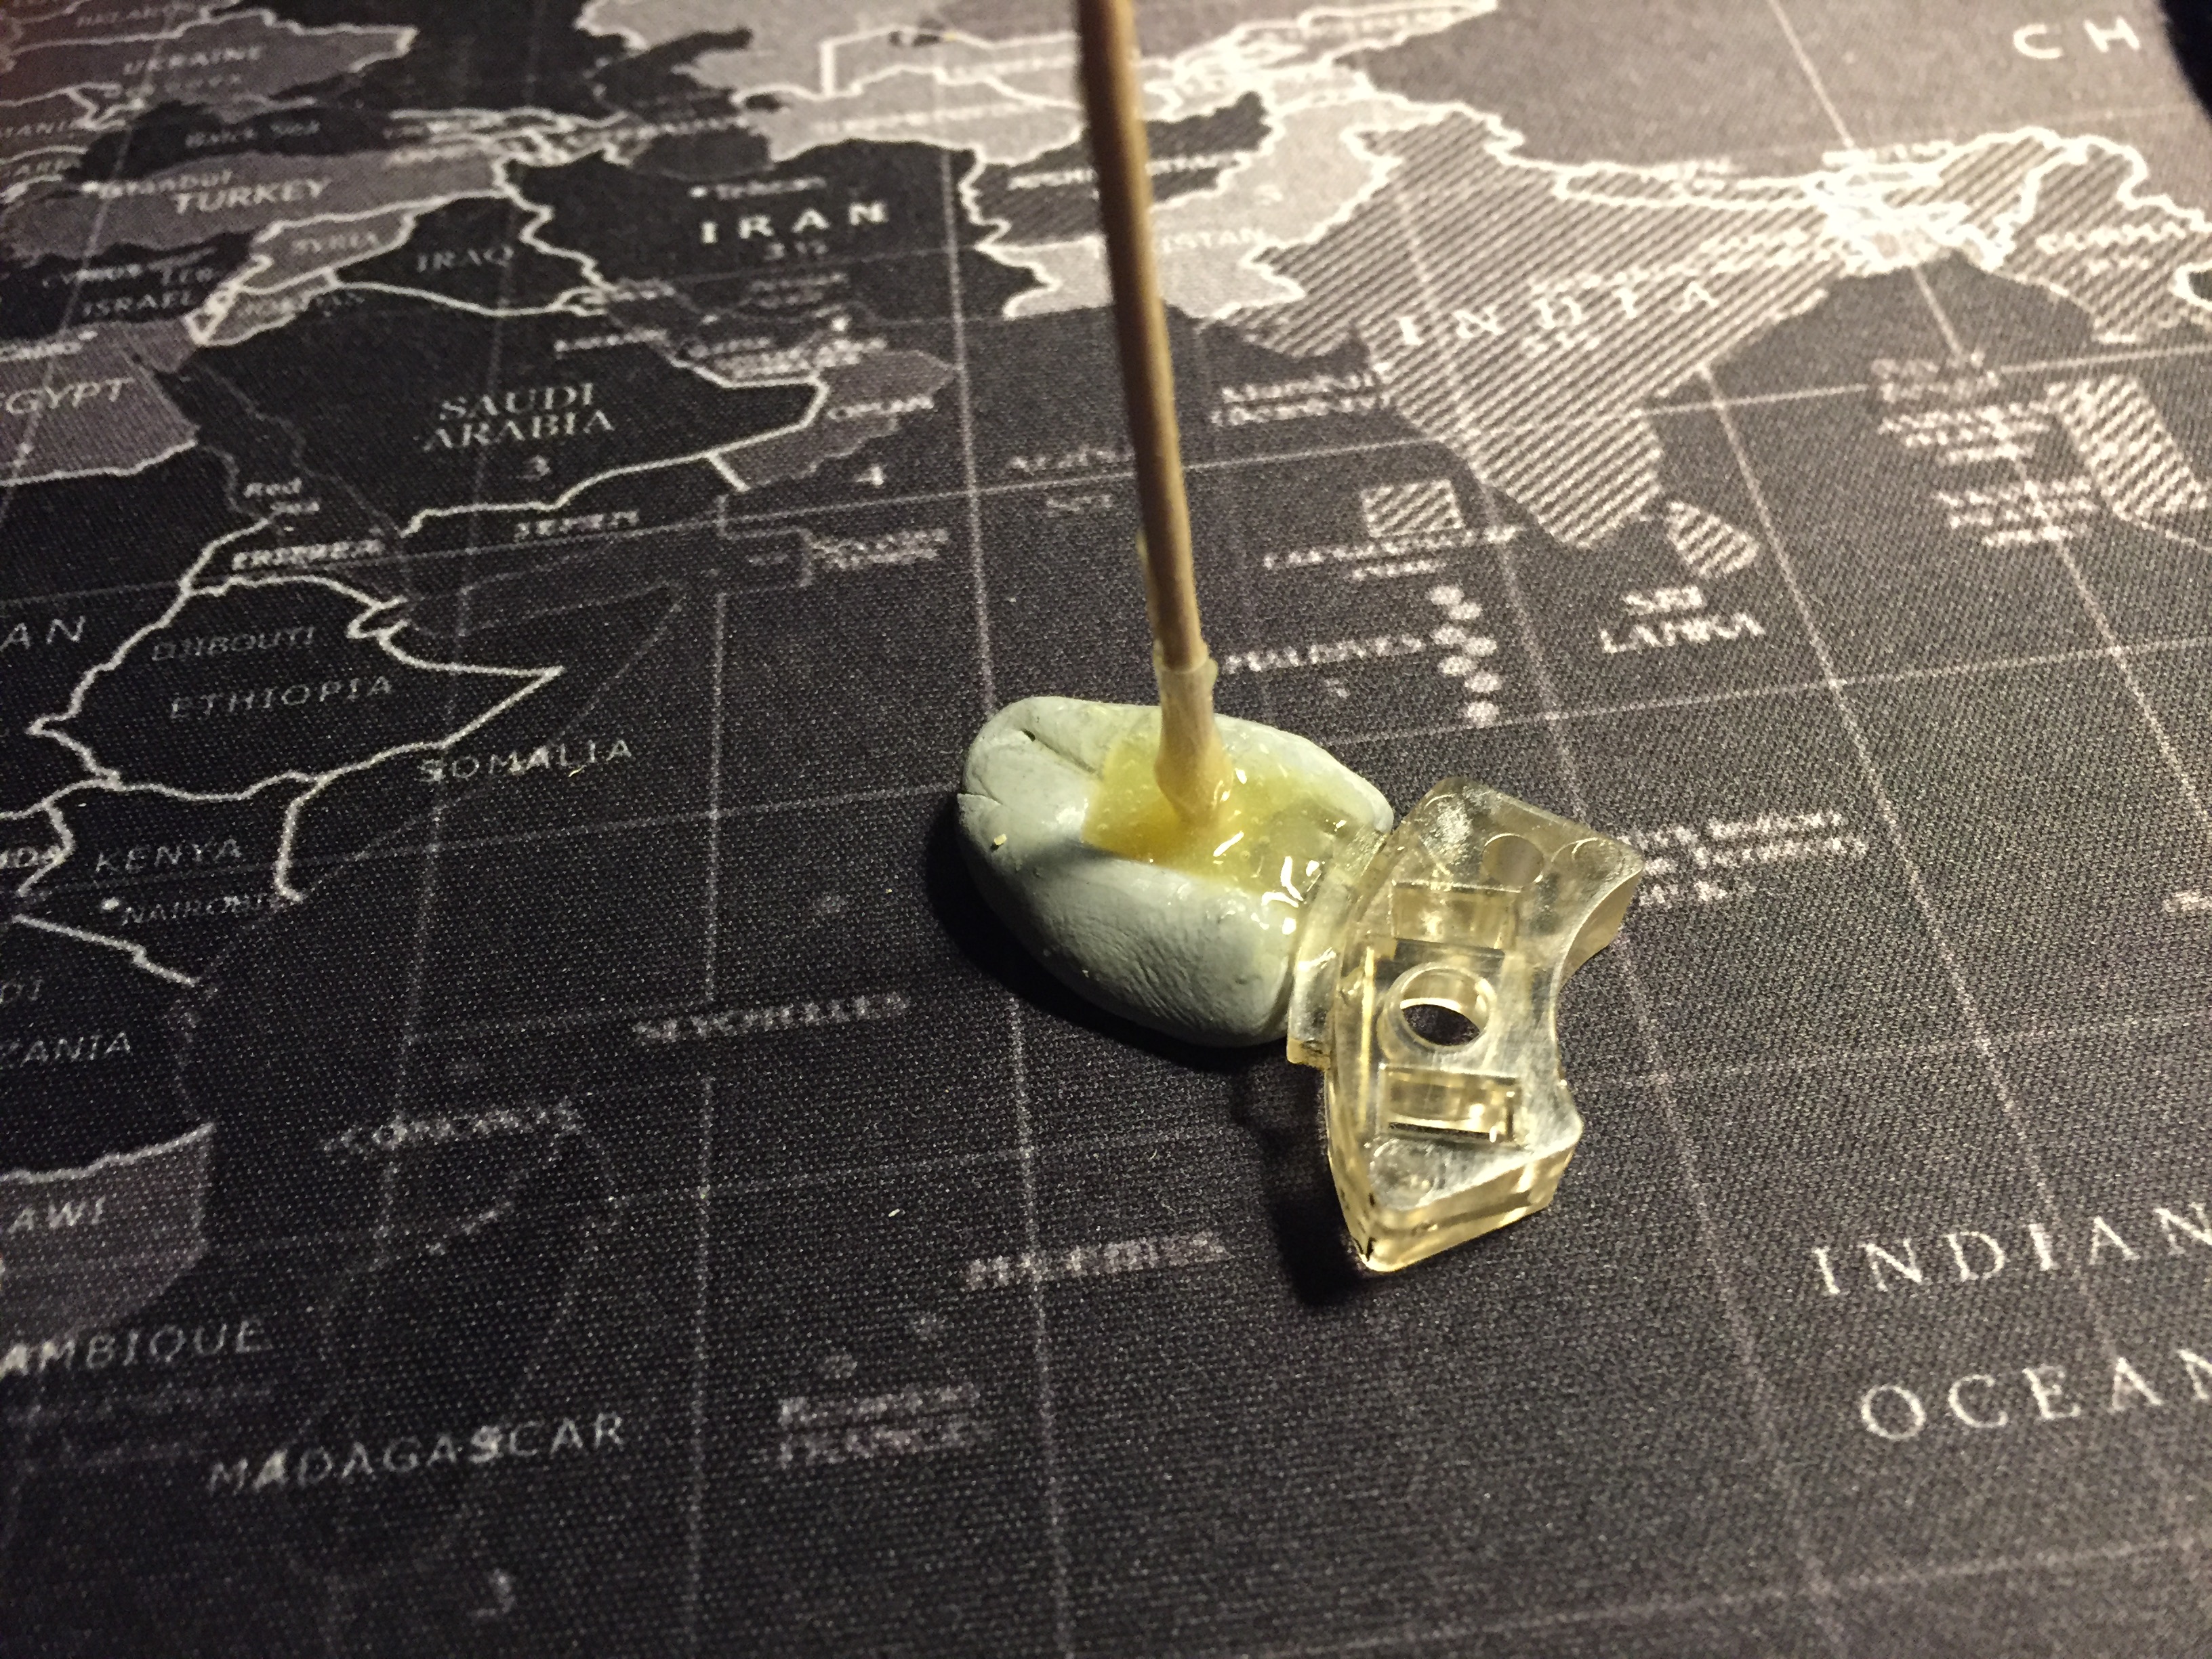
The hole was in the wrong spot, so I had to do a couple of rounds of epoxying but here is the actuator with the correct position hole and filed down to fit. Should be better than new.
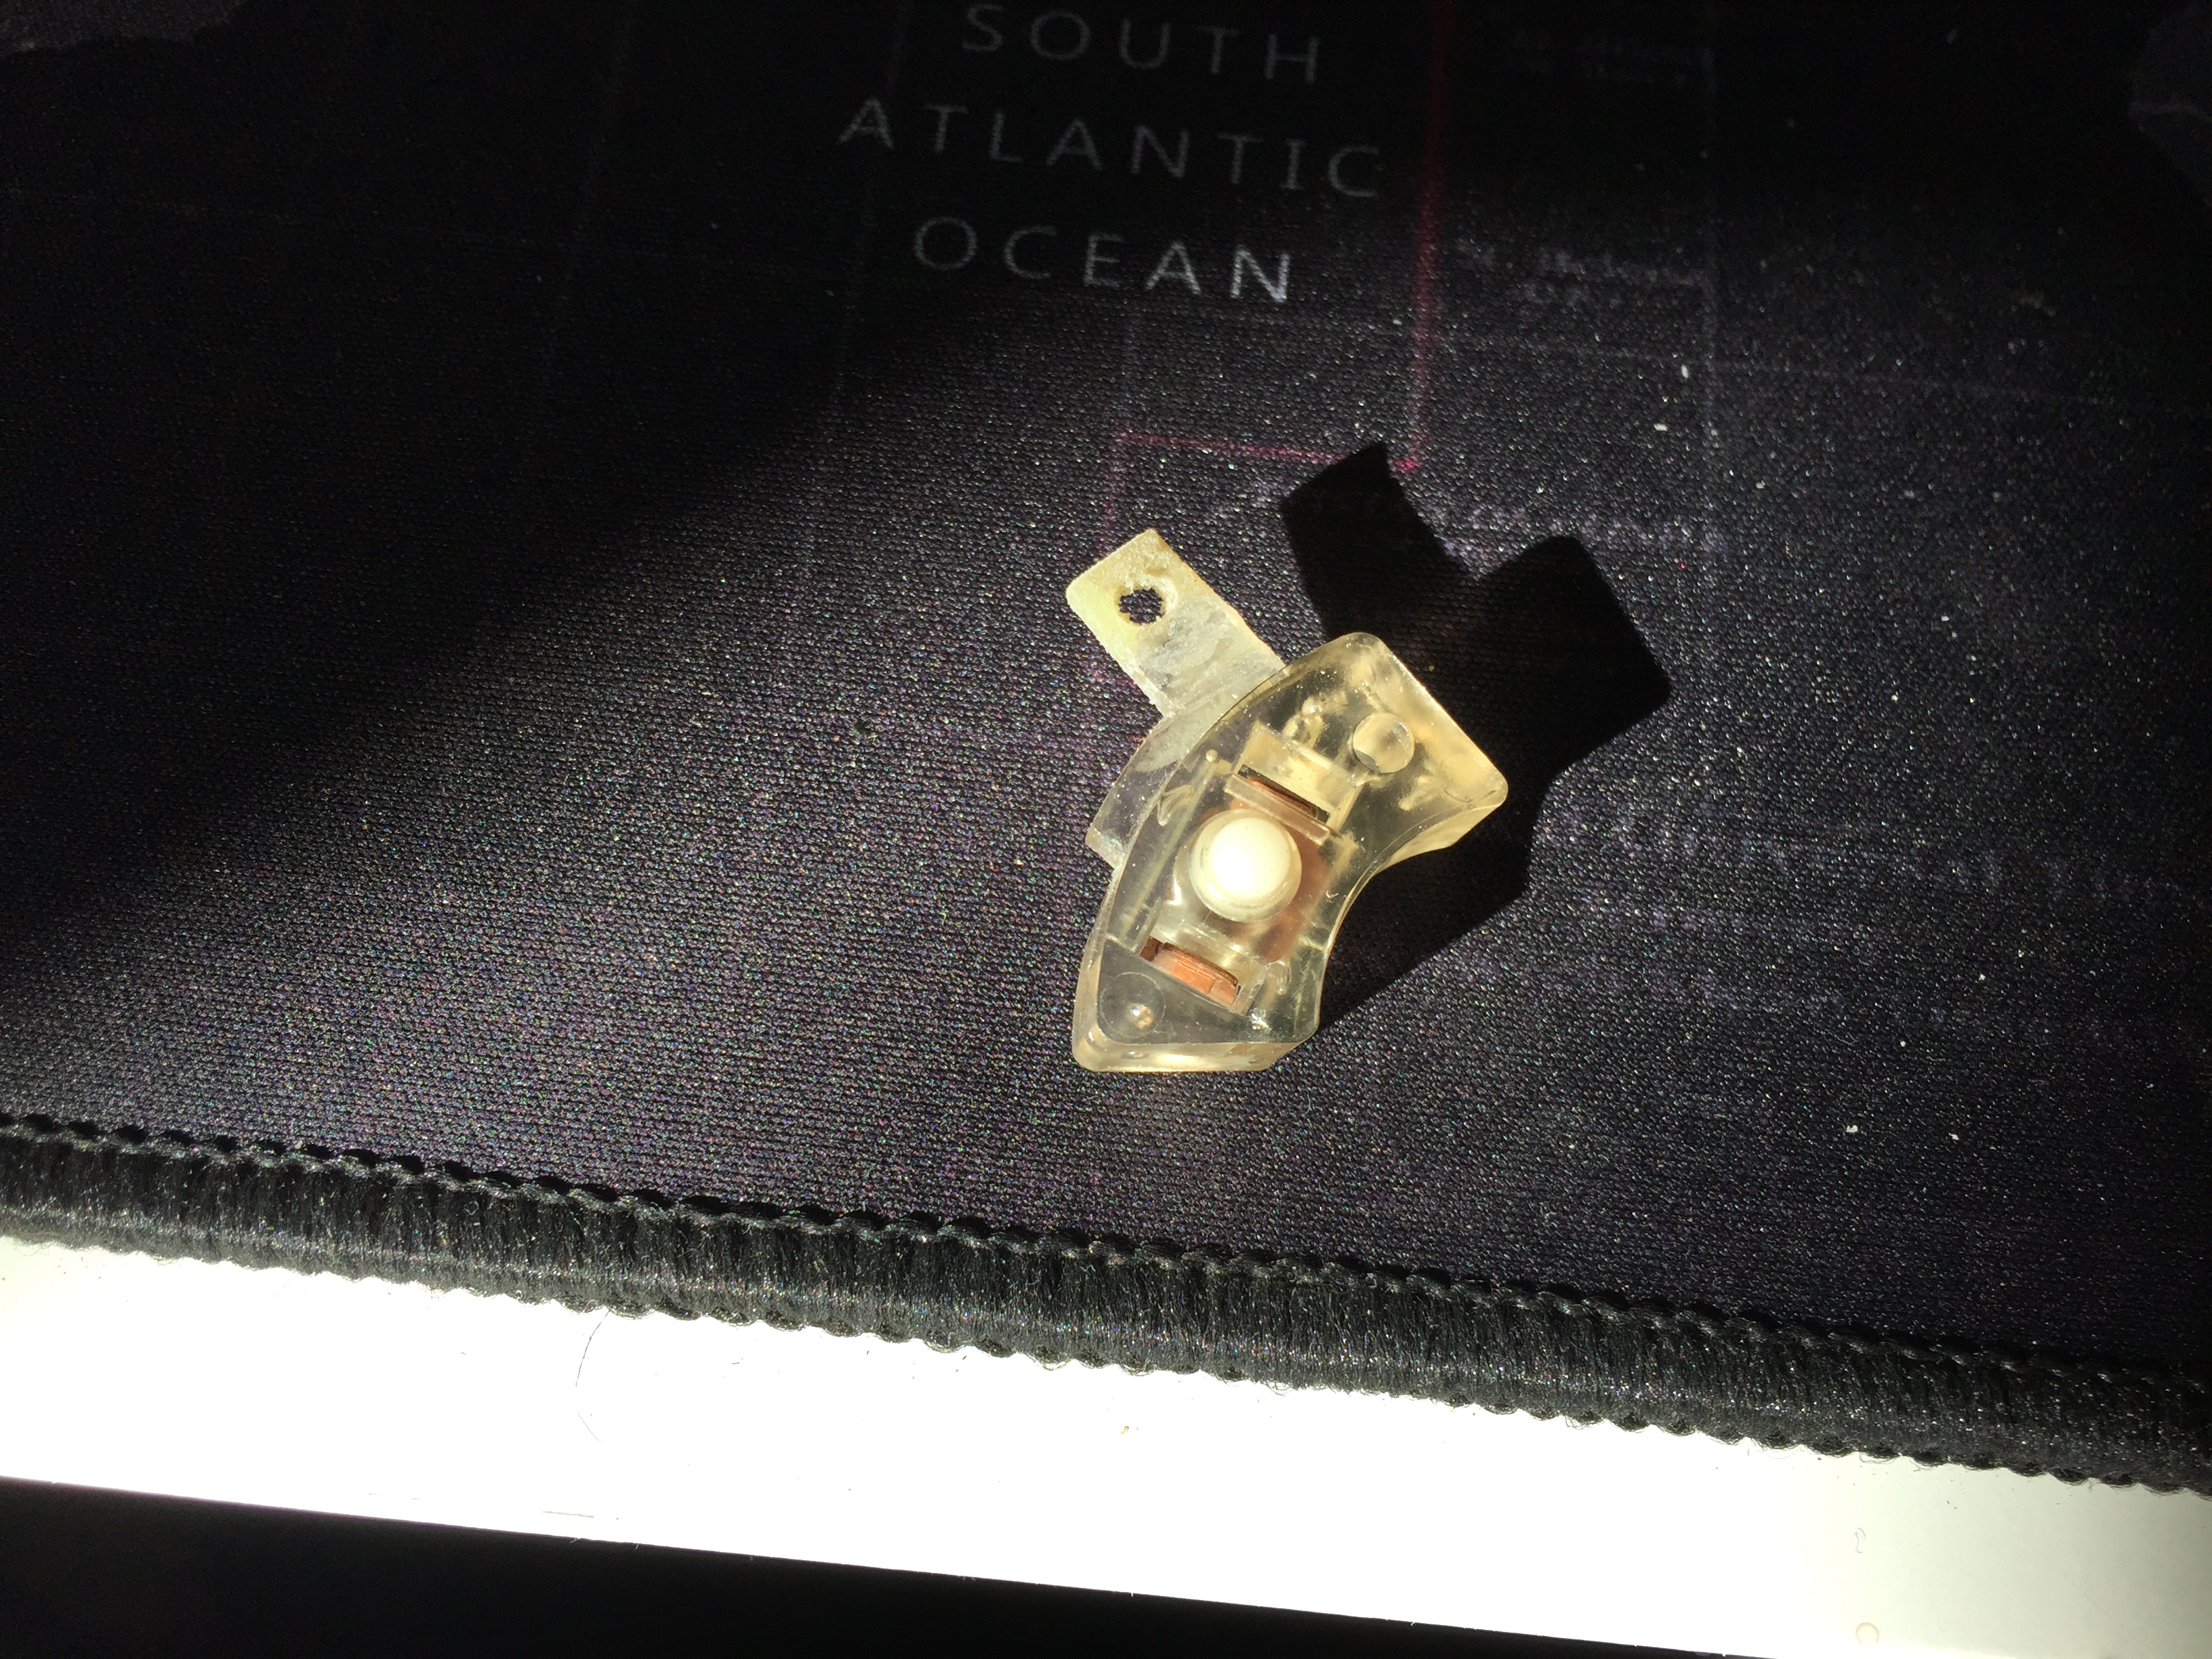
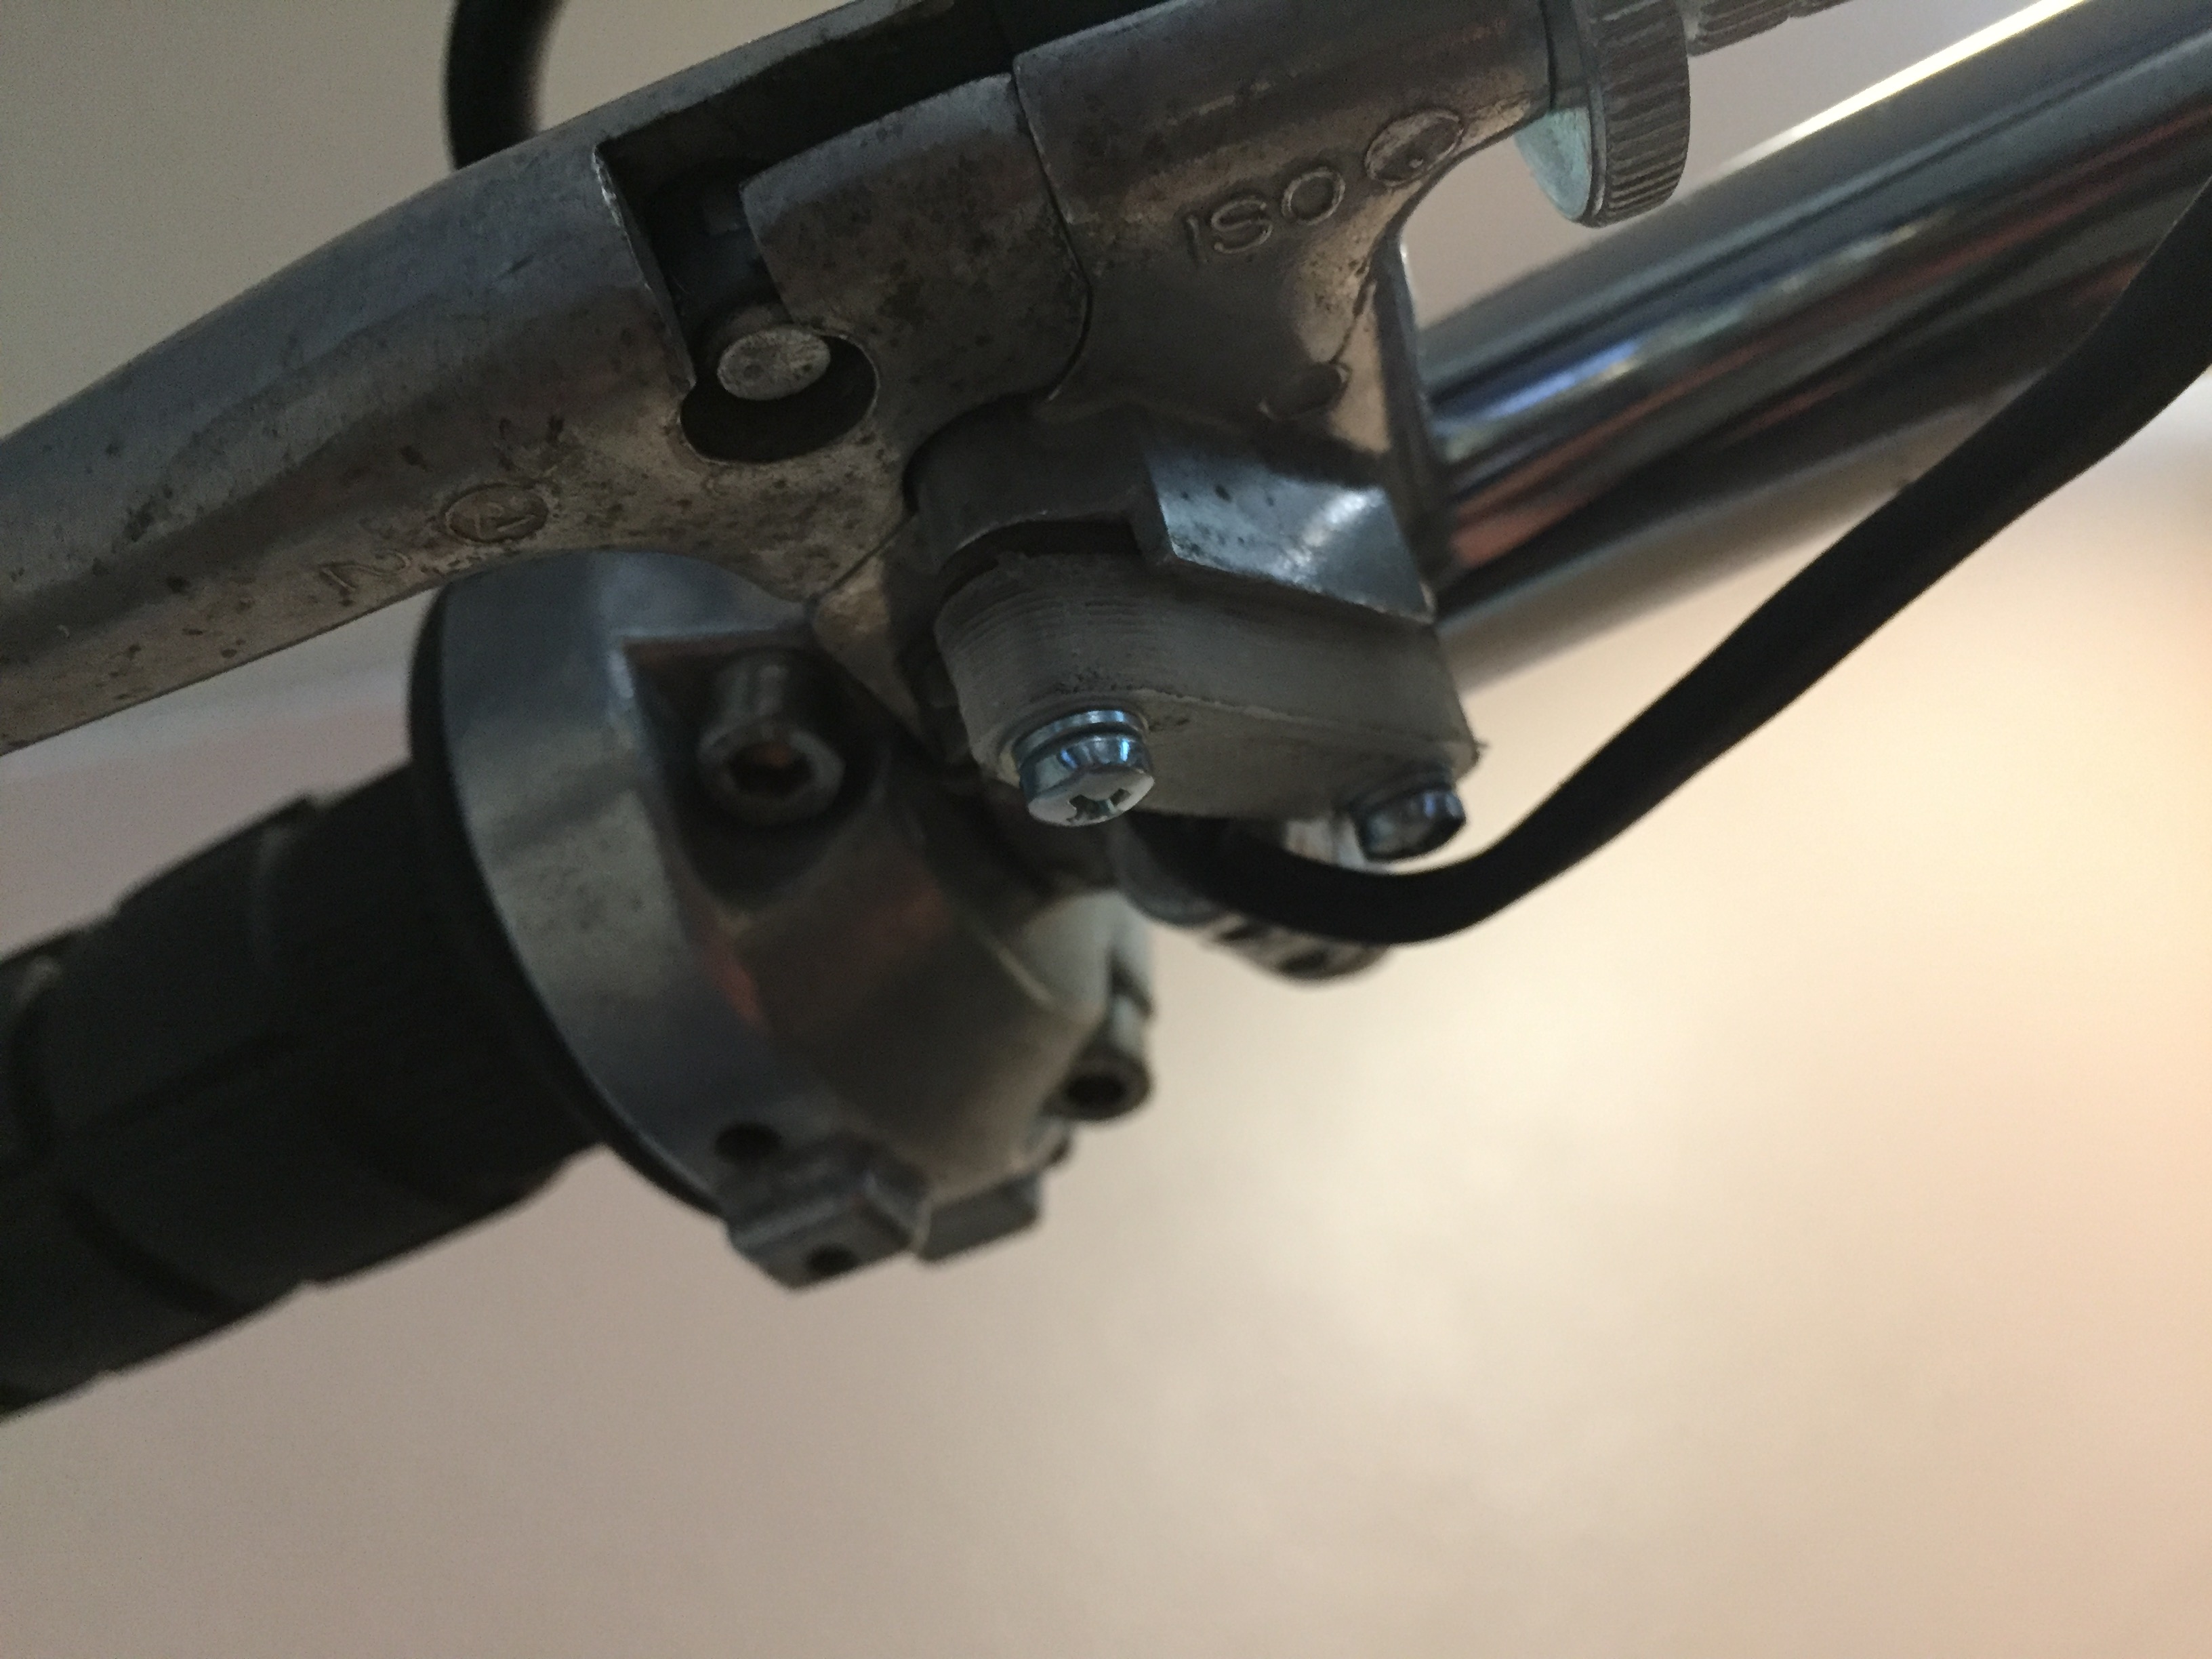
And here is the switch all buttoned up and back on the bars. Fitment is great and should last plenty long.
I used an old kneaded eraser, some tape and a toothpick to make a mold for the G/flex that would get me close enough to the correct shape. Not the best solution as the epoxy stuck to the eraser, but I was able to peel most of it off and then scrape the rest with an xacto.
The hole was in the wrong spot, so I had to do a couple of rounds of epoxying but here is the actuator with the correct position hole and filed down to fit. Should be better than new.
And here is the switch all buttoned up and back on the bars. Fitment is great and should last plenty long.
crazypj
Split personality, I fake being smart
That brake switch was always a horrible piece. It should syill be available as Suzuki used it on most bikes until pretty recently (2010 or so)
One GREAT thing they did was to incorporate the internal parts into a semi sealed unit. (if you ever had to 'chase' the tiny springs and ball bearings you know what I mean) Any parts person who says they cant get one needs to buck up and learn how to use Suzuki part numbering system.
I like the way you figured out how to repair light switch, there are probably thousands scrapped which only need the tab repaired
So back in April of last year when I went out to New Mexico to pick this bike up from good sir canyoncarver, I realized about 200 miles from there that I'd left the front wheel in his shop. I knew I wouldn't be ready for it for a while, so I set out on some research about front wheel swaps. The original front wheel on the RV125 is a 14" tire which is only available from Bridgestone for $200. To hell with that! After a bit of digging, I found a few people who had actually swapped another rear rim onto the front, as it bolts directly on to the front hub and only requires the use of an aluminum spacer to get the wheel centered.
After a few cancelled orders I was able to find a good shape rear wheel and hub for around $60 shipped. I couldn't believe the price since the thing damn near weighs 30 lbs with the tire on it. Once it got here I set out to work.
I soon found out, that this particular bike was the first production year which has a slide-through front axle rather than one that bolts up from the bottom. The design was changed in '74 after the first year of production. The front hub on this bike has a completely different offset than the later hubs and forks, so the swap would not be as easy as I originally thought.
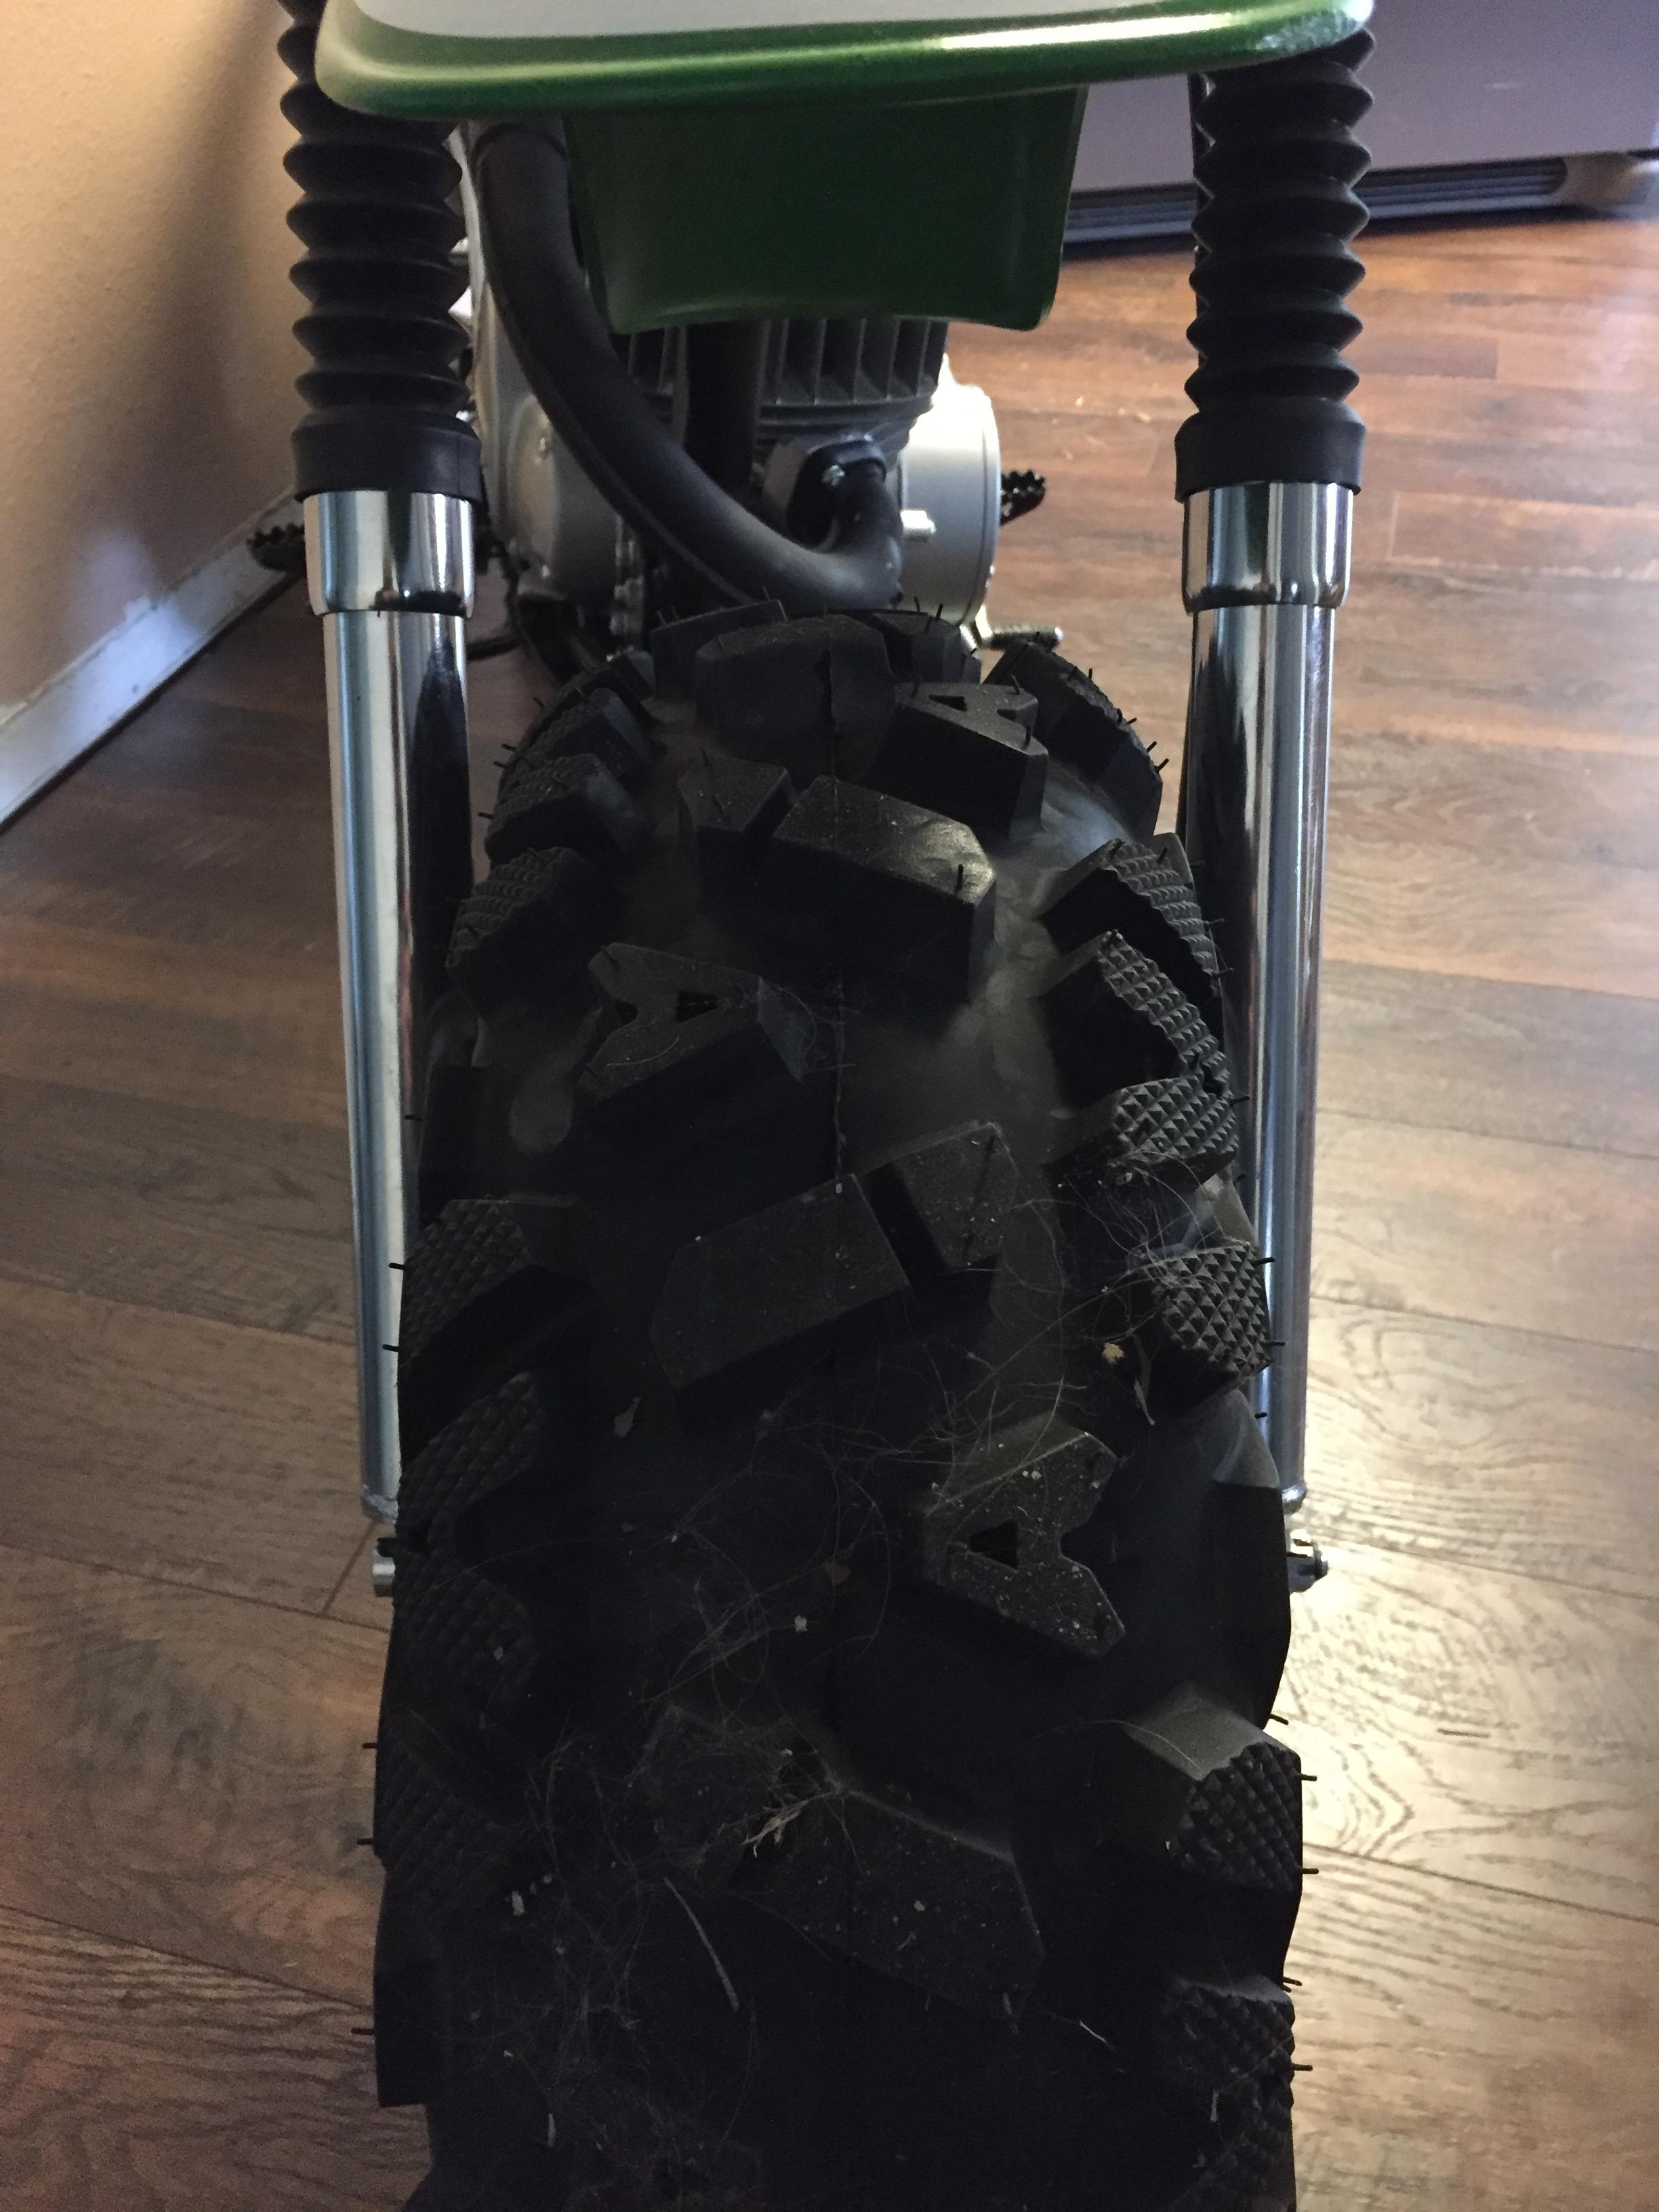
Bolted everything up and the wheel was offset 10mm to the right (looking forward), so I drew out a plan to get everything centered. Initial bolt up pic:
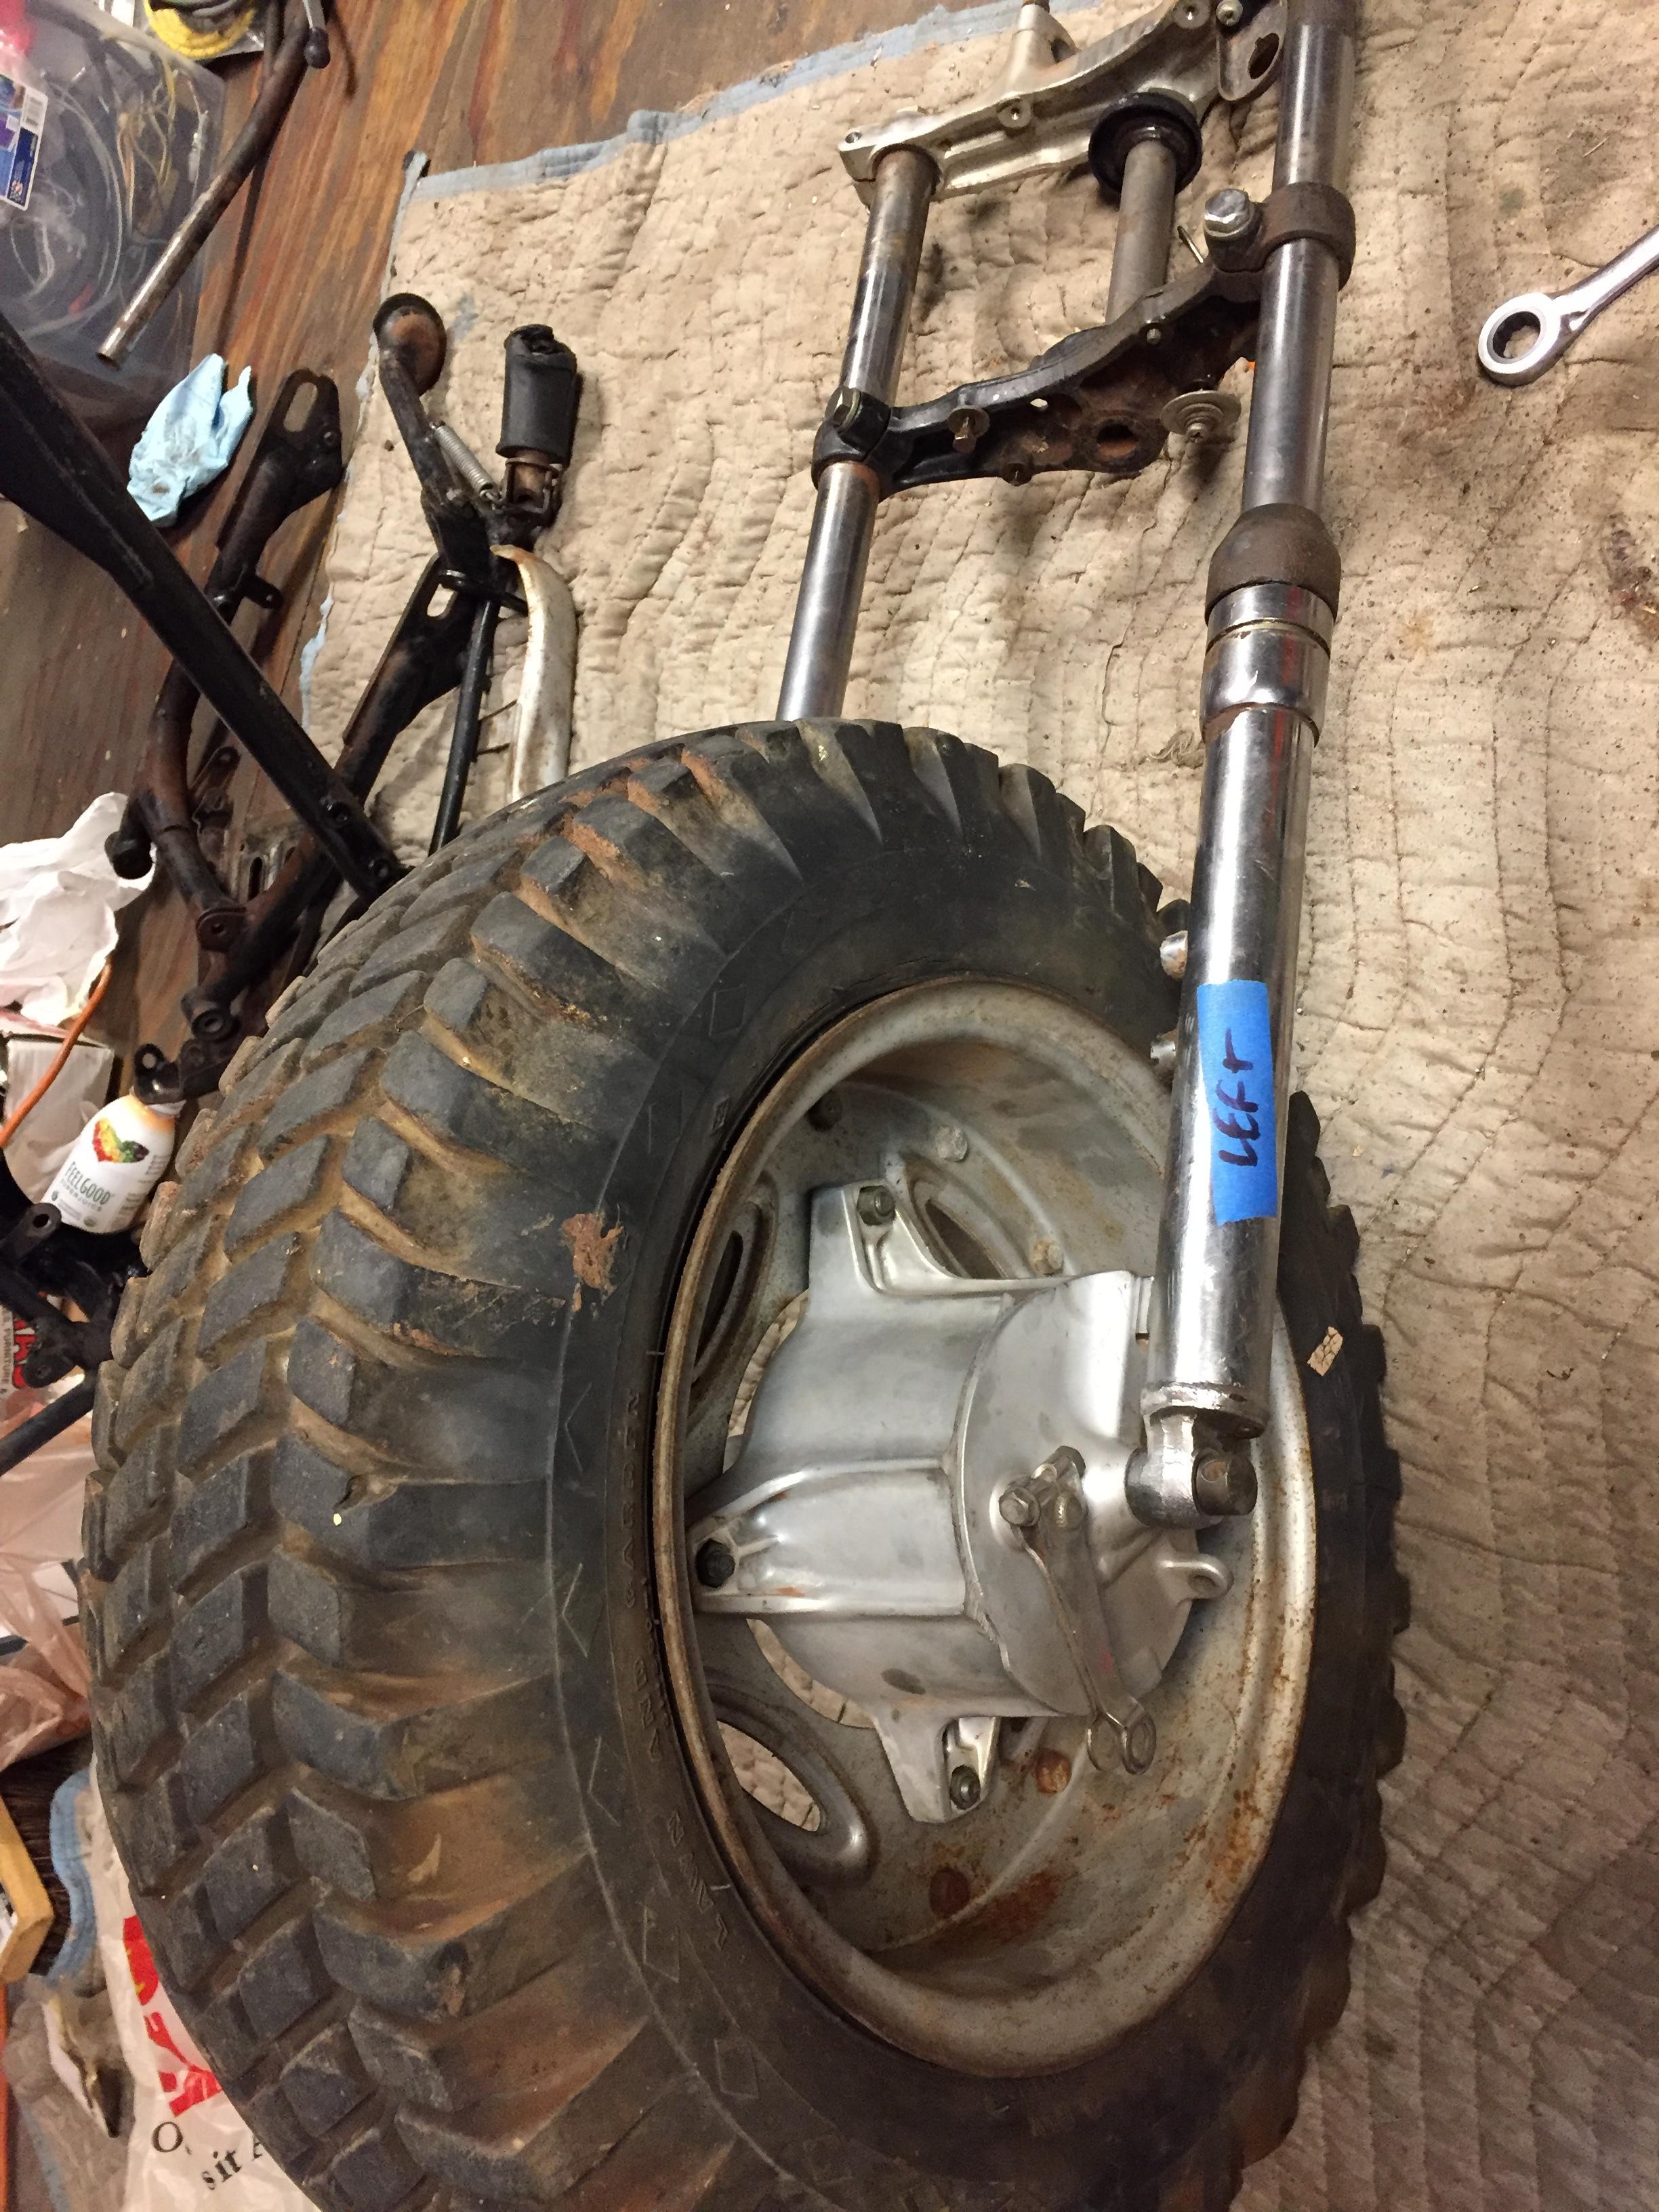
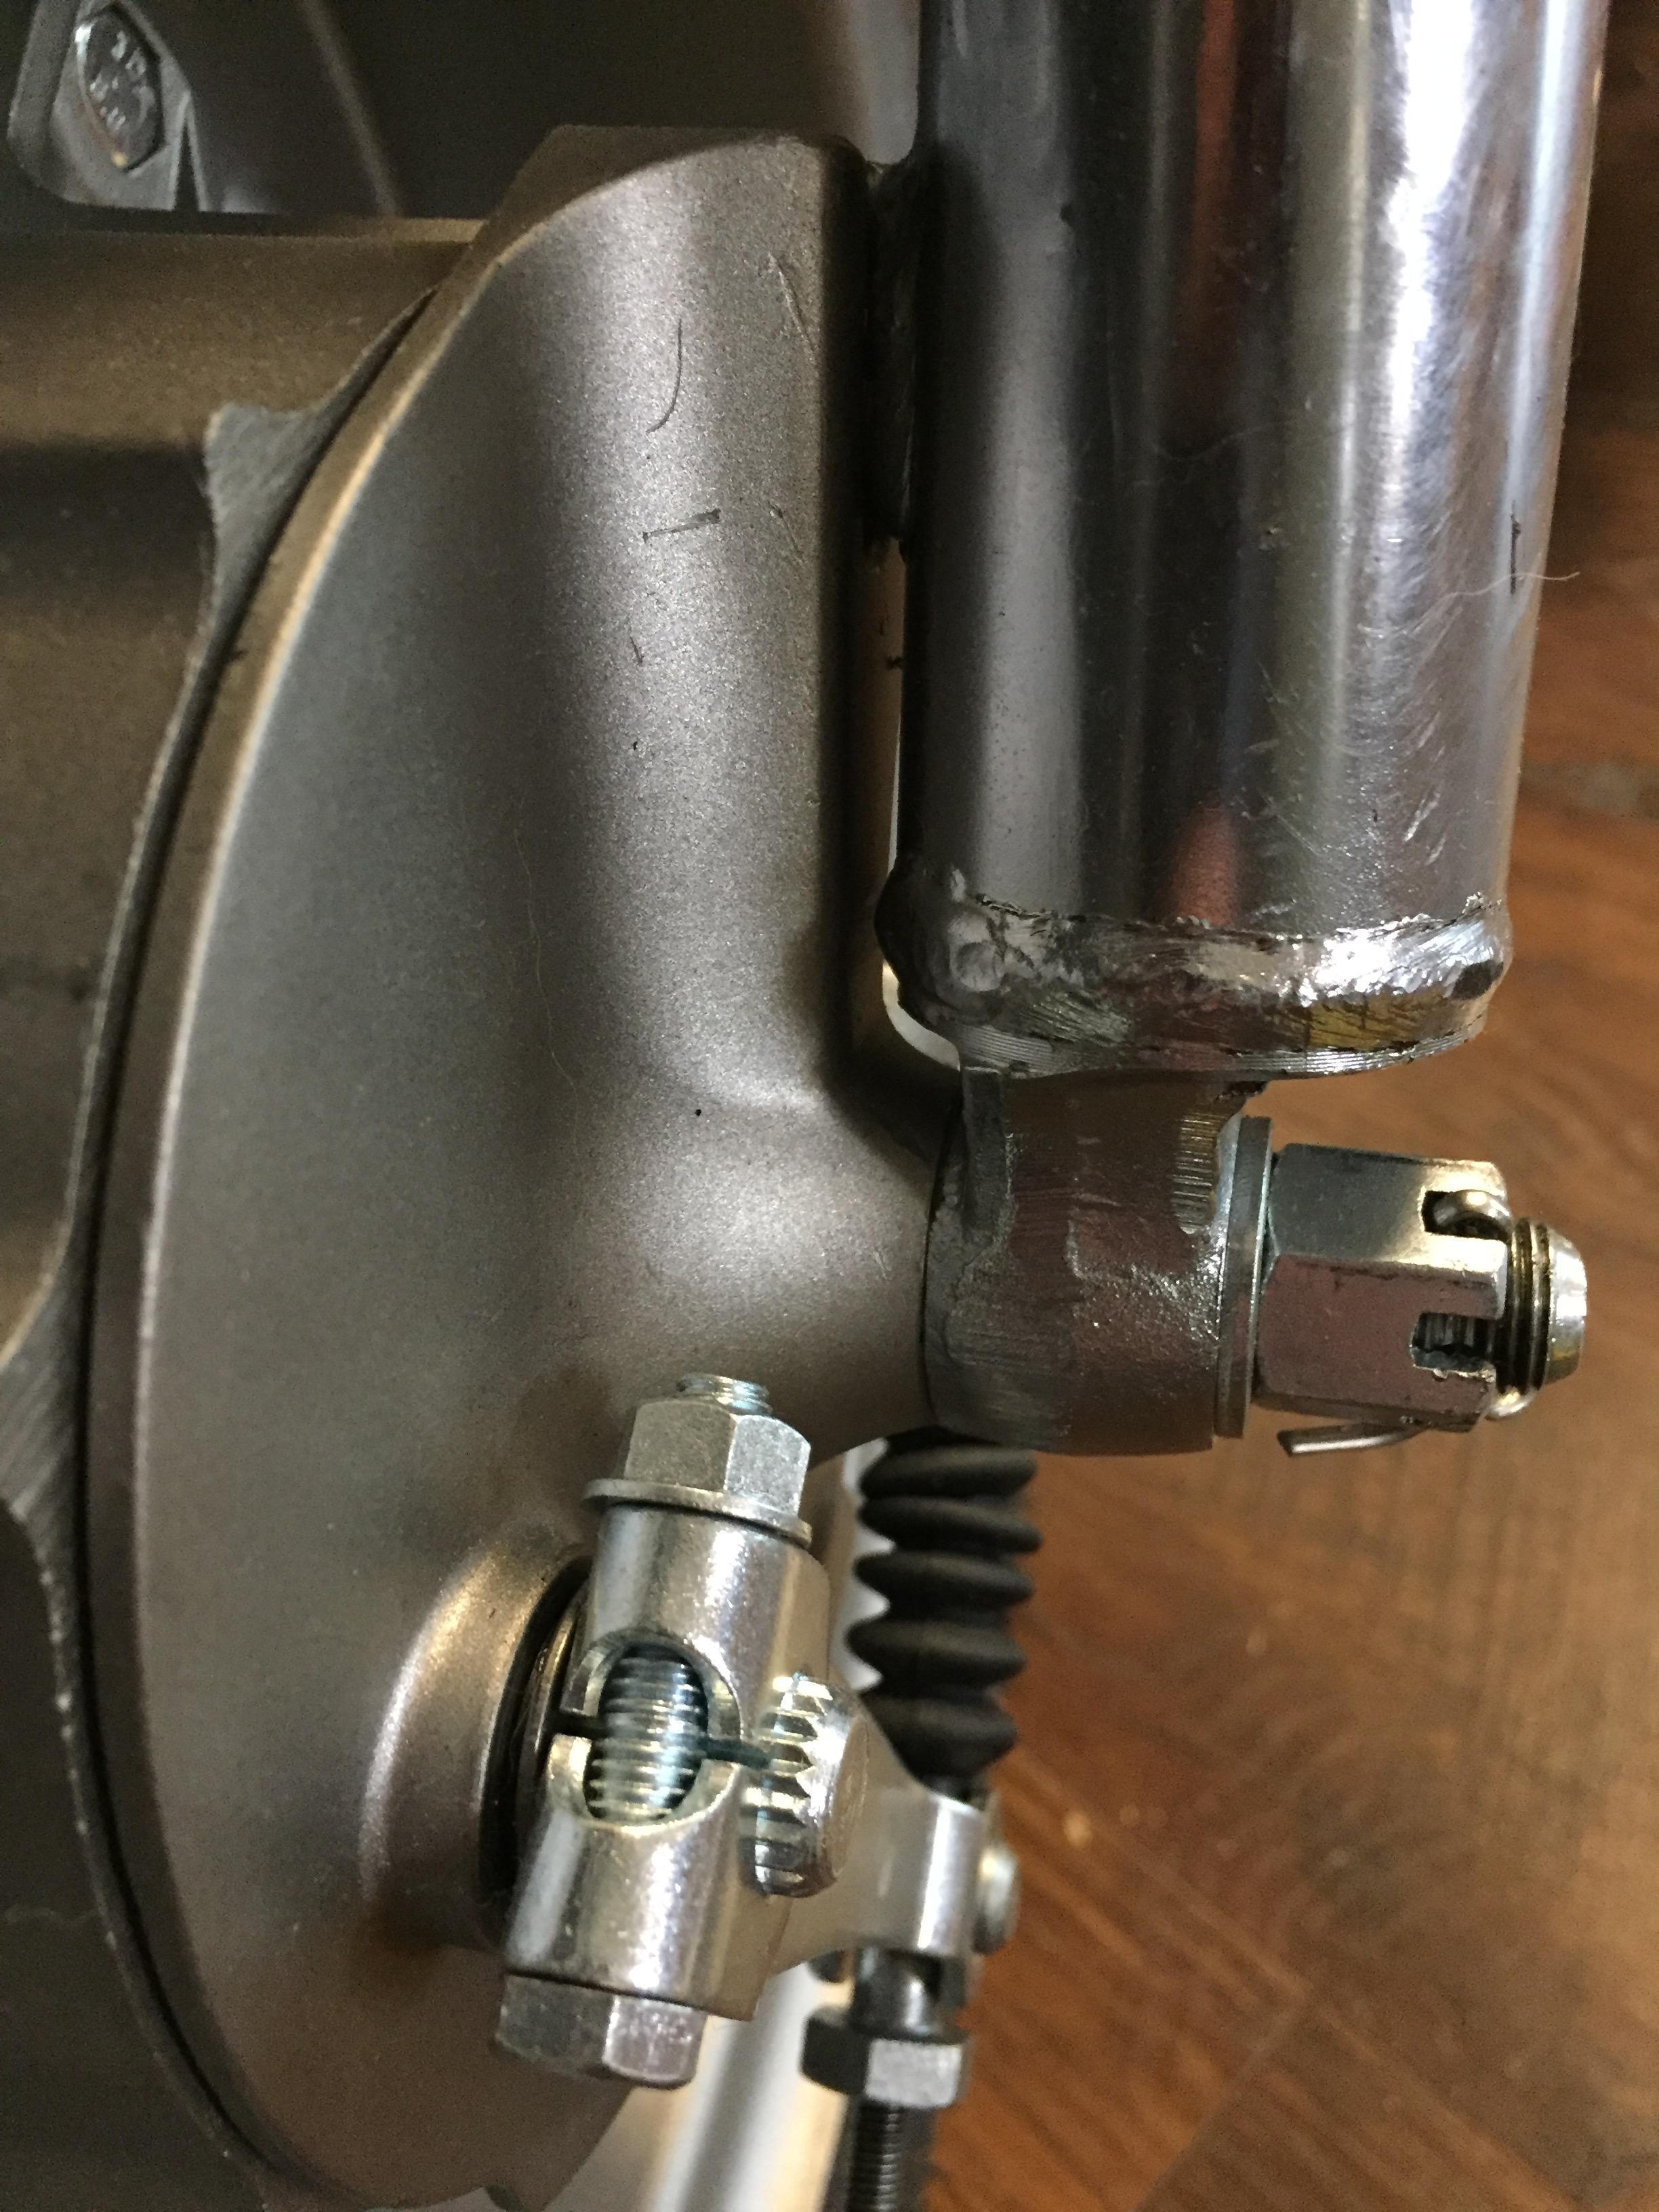
After some brainstorming, I figured the only way to make this work was to remove 5mm from the fork lower where the brake panel bolts up (the left side pictured here was originally 10mm wider than the opposite side, so I was not concerned with compromising the strength by removing 5mm). That got me closer to centered, but I'd need another 5mm to get there.
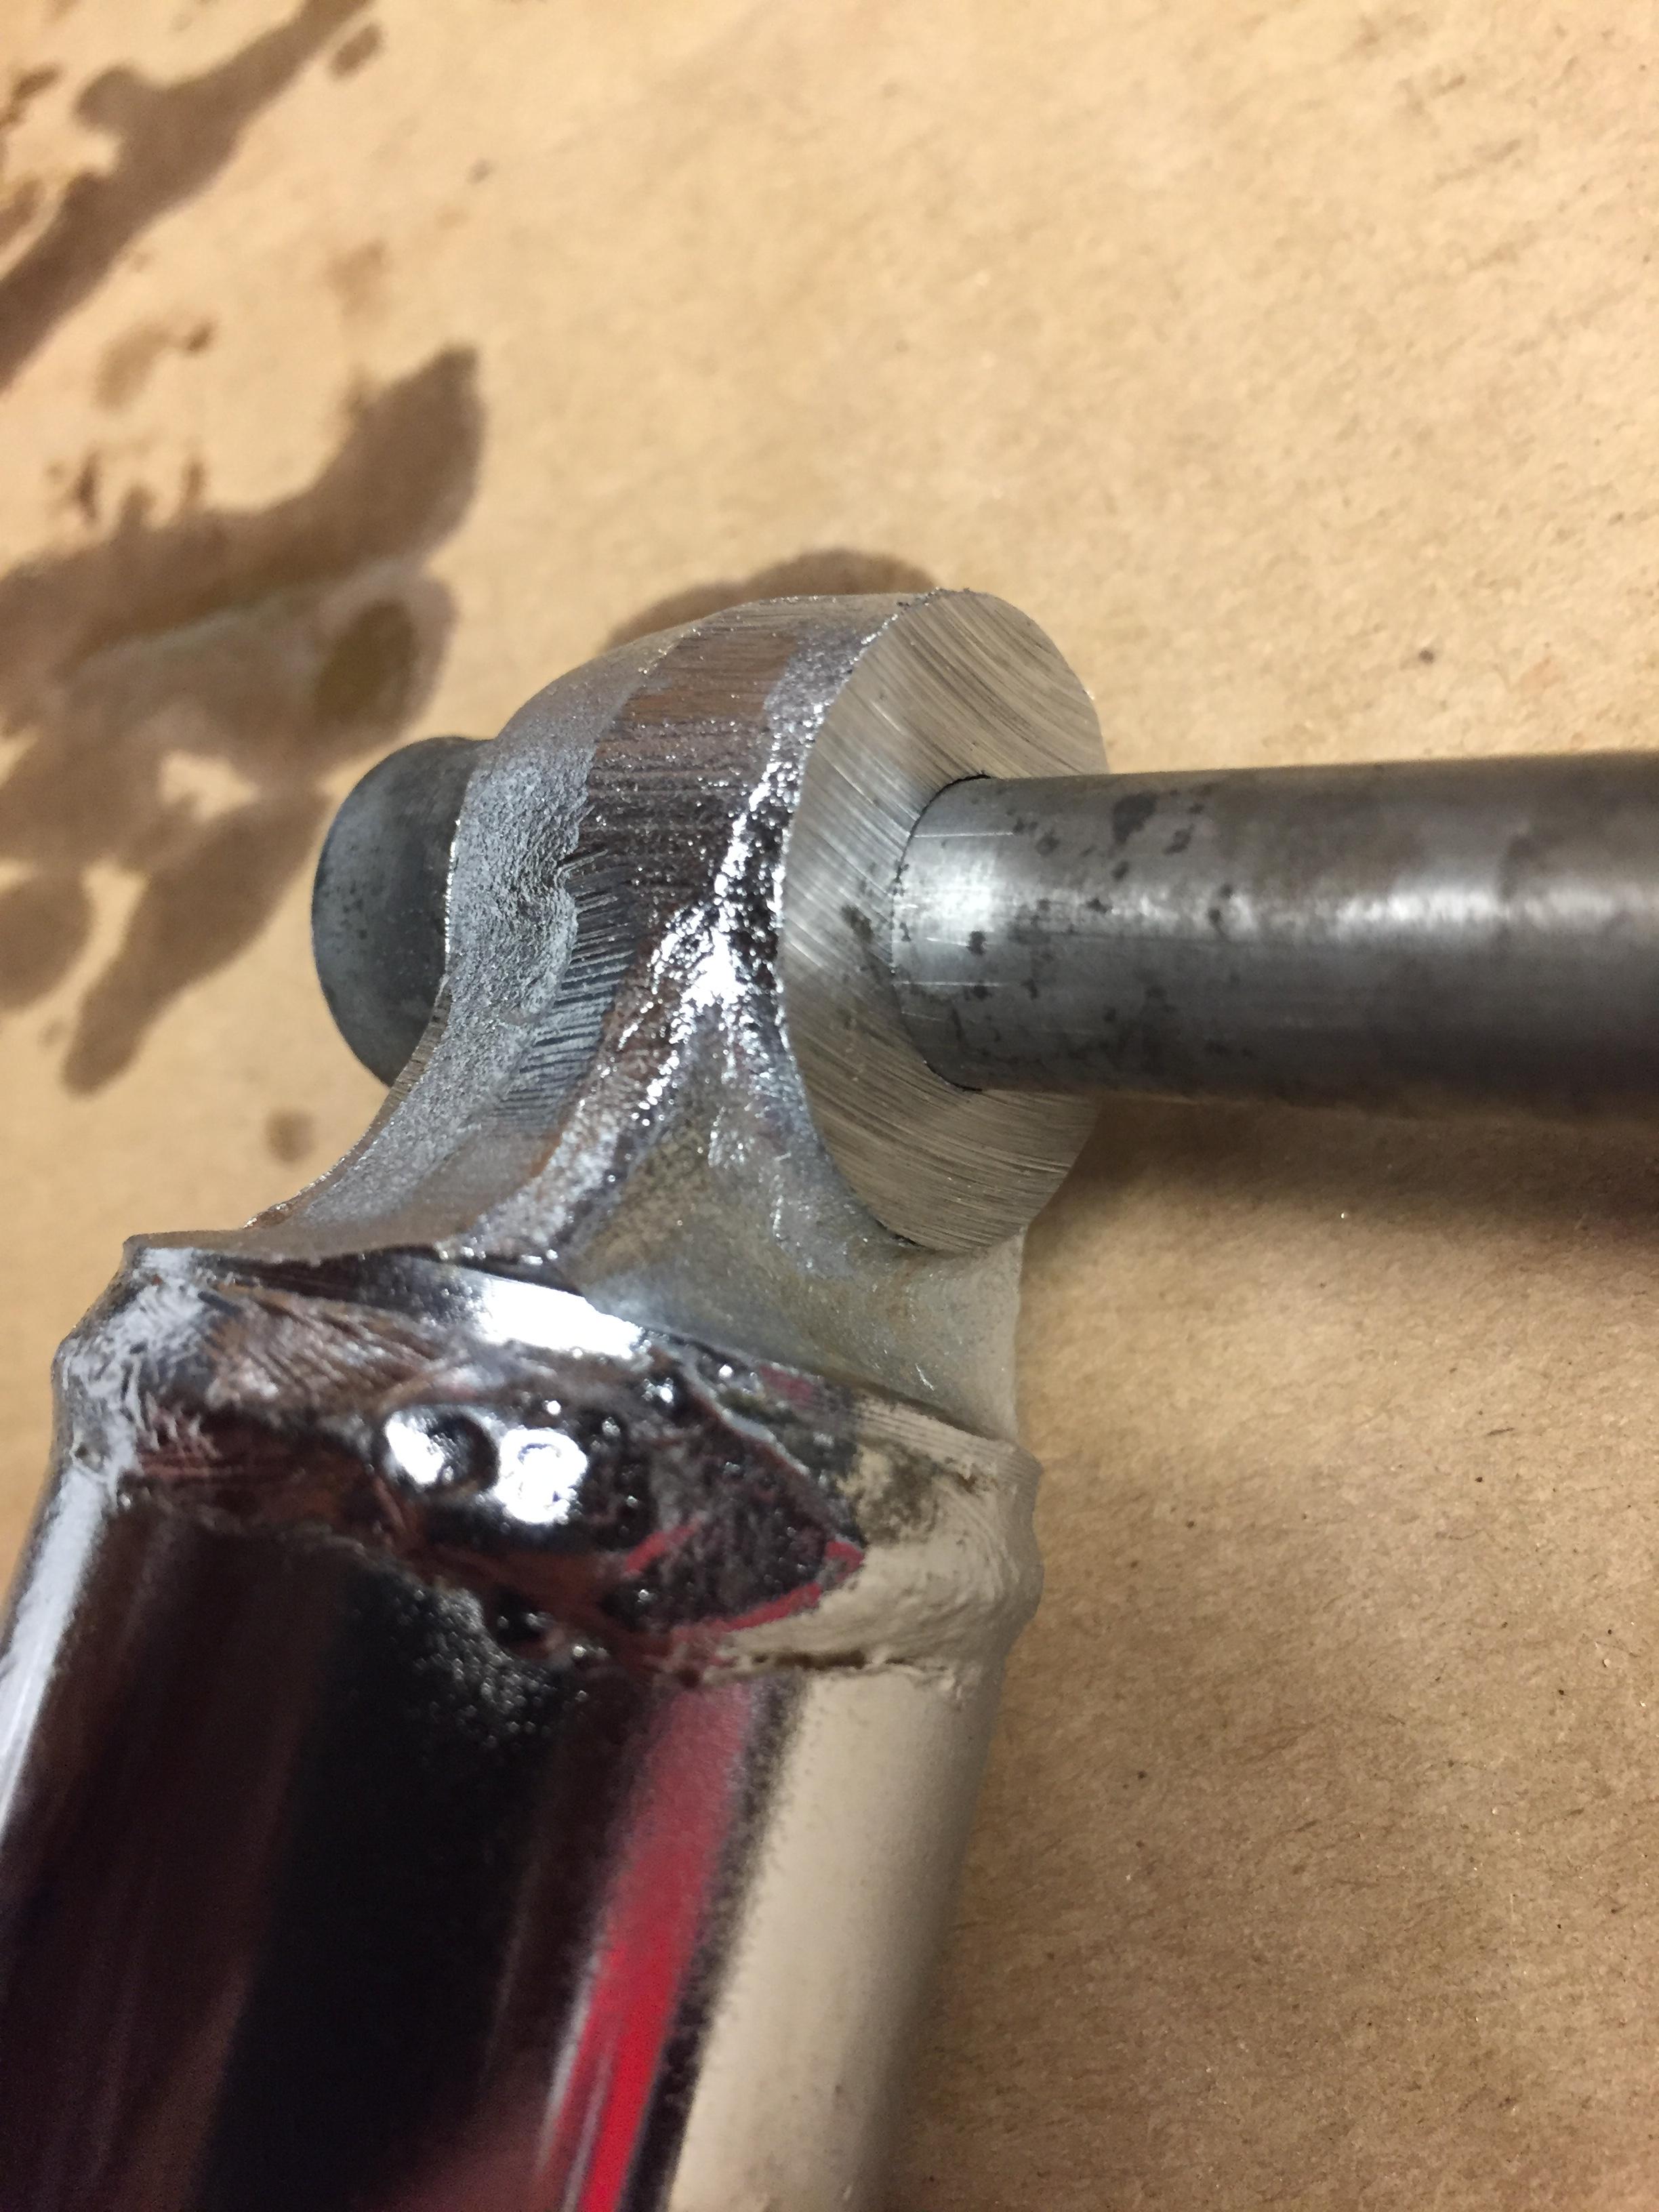
After talking with hurco, we decided it would be doable to stick the hub in the lathe and skim 5mm off the mounting surfaces where the hub bolts onto the wheel itself. The master at work:

With removing 5mm from the mounting surface on the hub, I was actually a bit concerned with the structural ability of the hub. I decided to draw up a spacer and have my uncle waterjet it out of some ~5mm aluminum. When everything is bolted together, the spacer will pick up some of the load from the hub.

After all that, the only thing left was to get everything tight back in between the forks. Mr. E was kind enough to whip up an aluminum axle spacer for the right side for the final piece of the puzzle, which you can see here placed outside of the original spacer/dust cover.
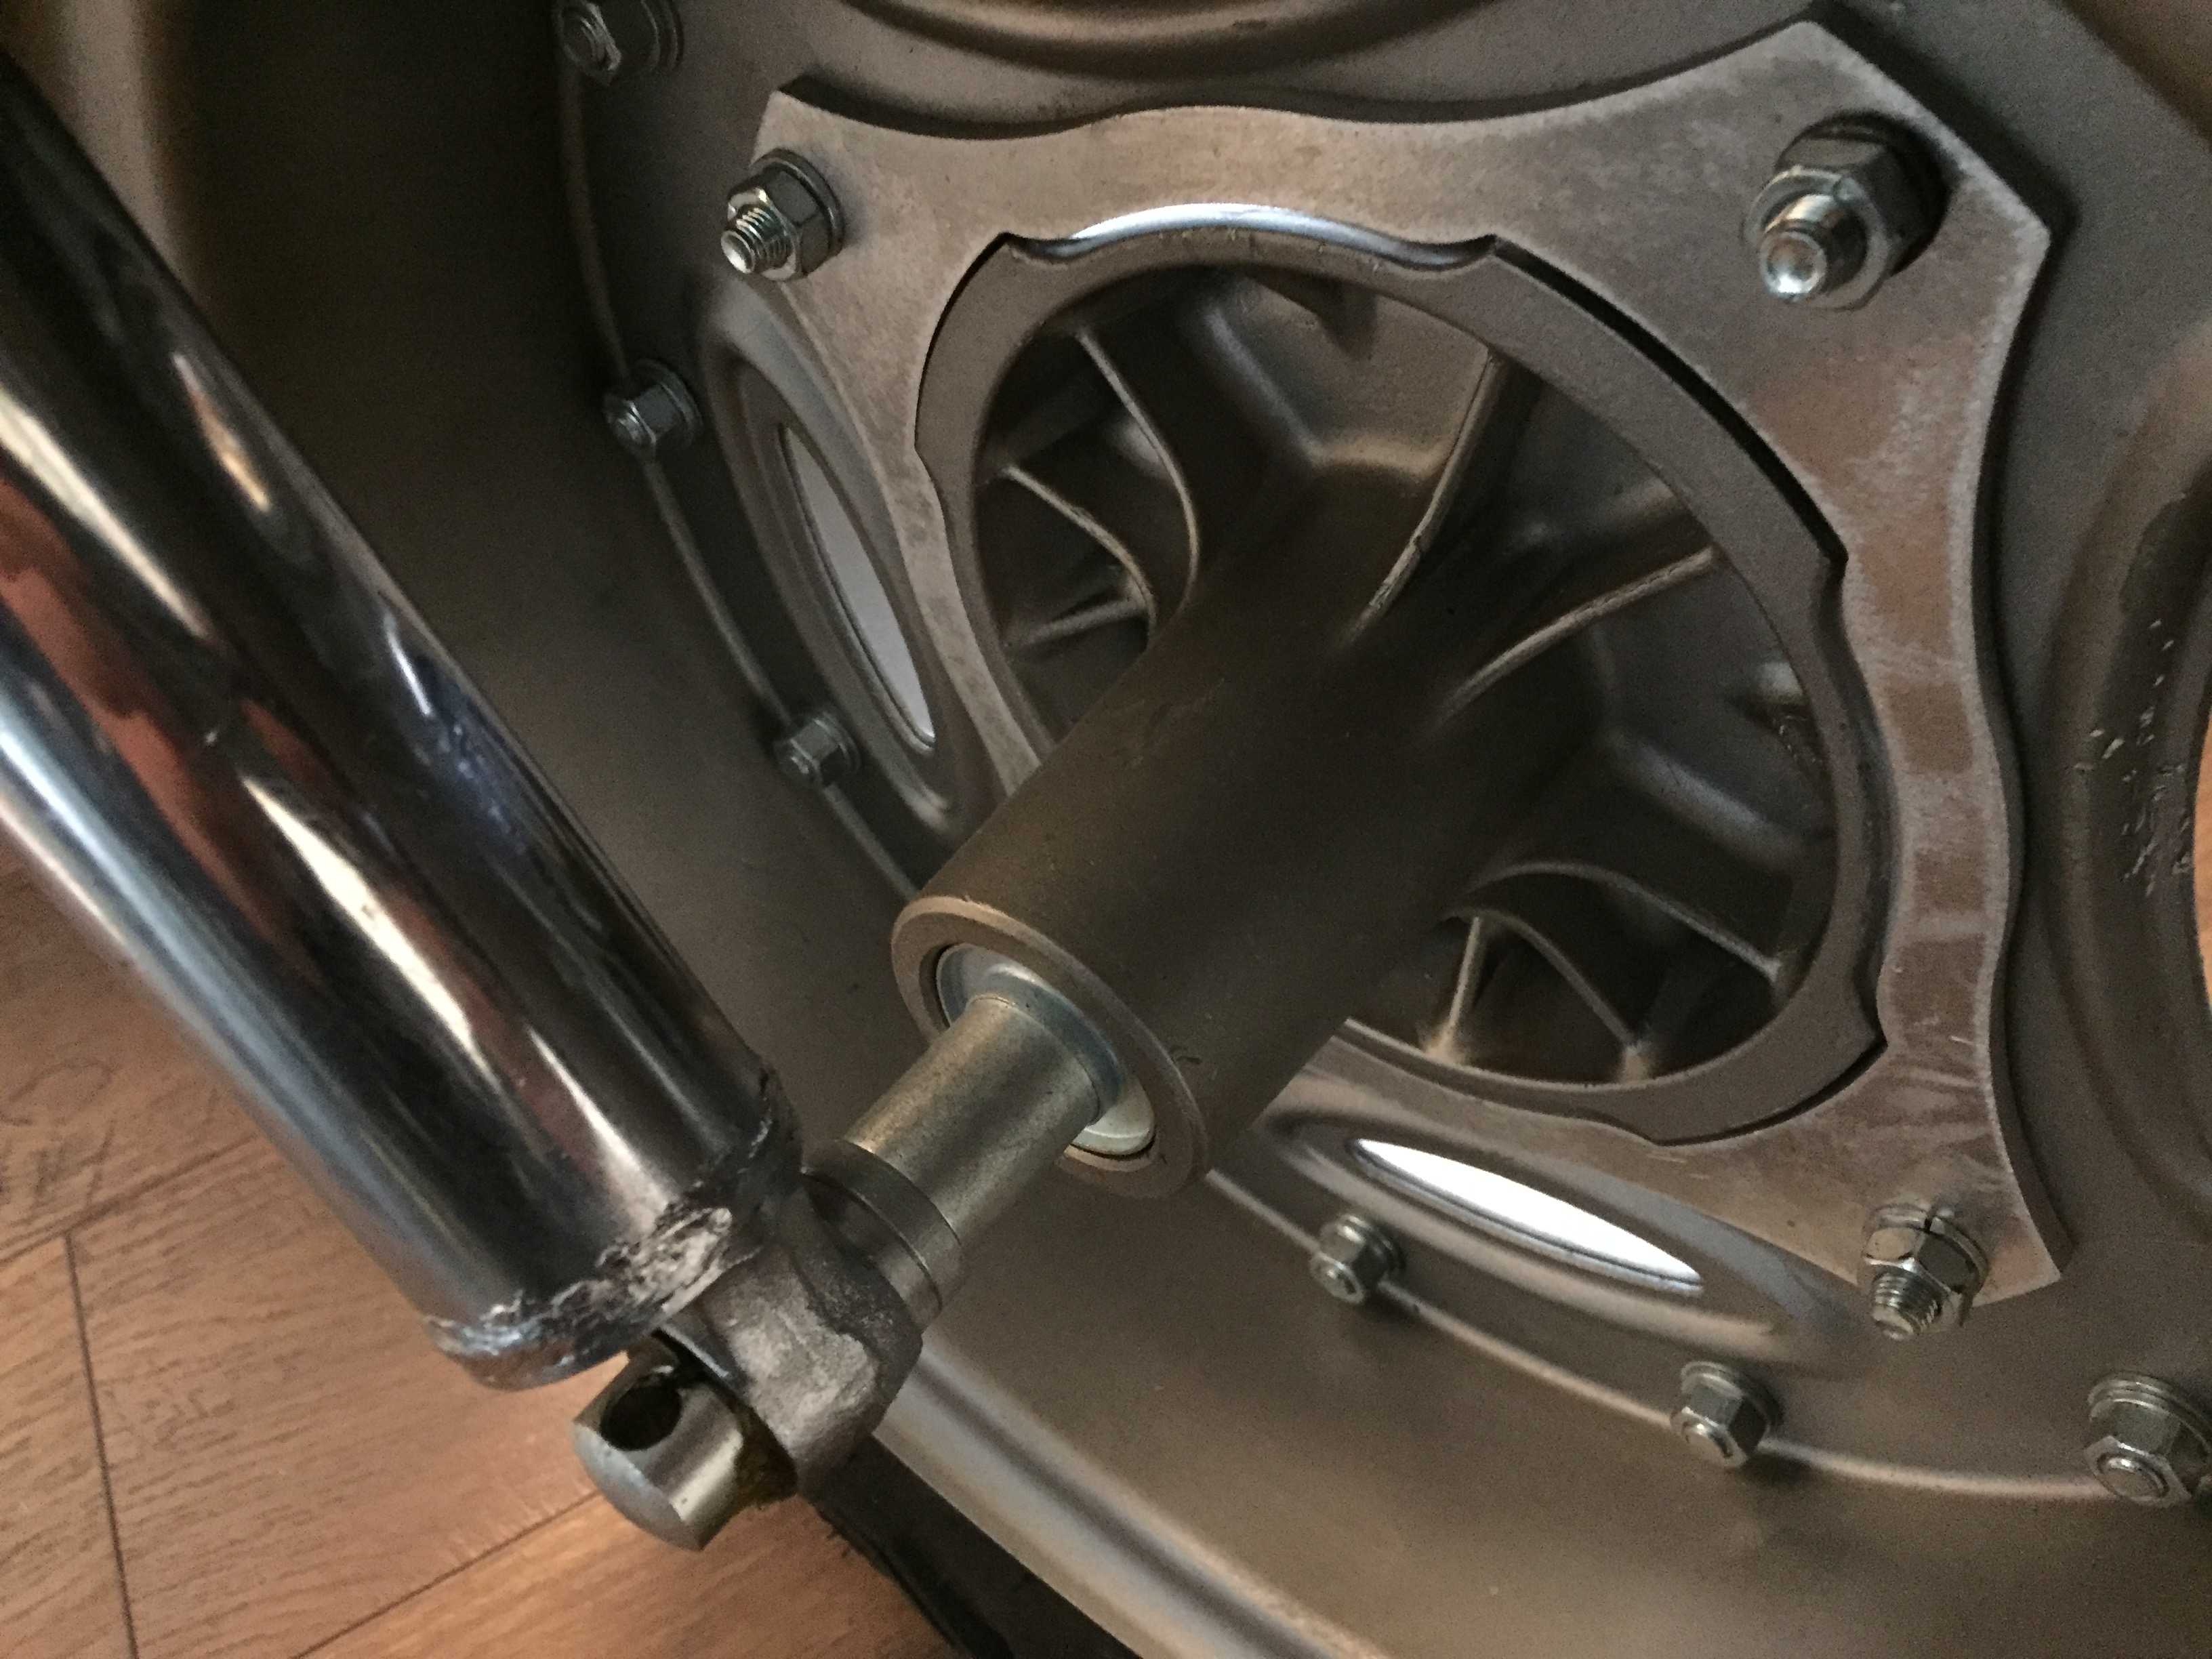
Here you can see the brake side bolted up, the fork lower now looks identical to the opposite side.
Whew. Looking back now that swap was WAY more work than I thought. But with a bit of planning and some helpful friends with lathes, everything lines up right and now I have a few more options as far as tires go.
After a few cancelled orders I was able to find a good shape rear wheel and hub for around $60 shipped. I couldn't believe the price since the thing damn near weighs 30 lbs with the tire on it. Once it got here I set out to work.
I soon found out, that this particular bike was the first production year which has a slide-through front axle rather than one that bolts up from the bottom. The design was changed in '74 after the first year of production. The front hub on this bike has a completely different offset than the later hubs and forks, so the swap would not be as easy as I originally thought.
Bolted everything up and the wheel was offset 10mm to the right (looking forward), so I drew out a plan to get everything centered. Initial bolt up pic:
After some brainstorming, I figured the only way to make this work was to remove 5mm from the fork lower where the brake panel bolts up (the left side pictured here was originally 10mm wider than the opposite side, so I was not concerned with compromising the strength by removing 5mm). That got me closer to centered, but I'd need another 5mm to get there.
After talking with hurco, we decided it would be doable to stick the hub in the lathe and skim 5mm off the mounting surfaces where the hub bolts onto the wheel itself. The master at work:
With removing 5mm from the mounting surface on the hub, I was actually a bit concerned with the structural ability of the hub. I decided to draw up a spacer and have my uncle waterjet it out of some ~5mm aluminum. When everything is bolted together, the spacer will pick up some of the load from the hub.
After all that, the only thing left was to get everything tight back in between the forks. Mr. E was kind enough to whip up an aluminum axle spacer for the right side for the final piece of the puzzle, which you can see here placed outside of the original spacer/dust cover.
Here you can see the brake side bolted up, the fork lower now looks identical to the opposite side.
Whew. Looking back now that swap was WAY more work than I thought. But with a bit of planning and some helpful friends with lathes, everything lines up right and now I have a few more options as far as tires go.
Now back to the fun unobtainium bits that needed fabrication. Somewhere along the line the PO had gotten rid of the factory airbox cover and replaced it with a now-rusted-out sheet metal version, installed with gobs of liquid gasket.
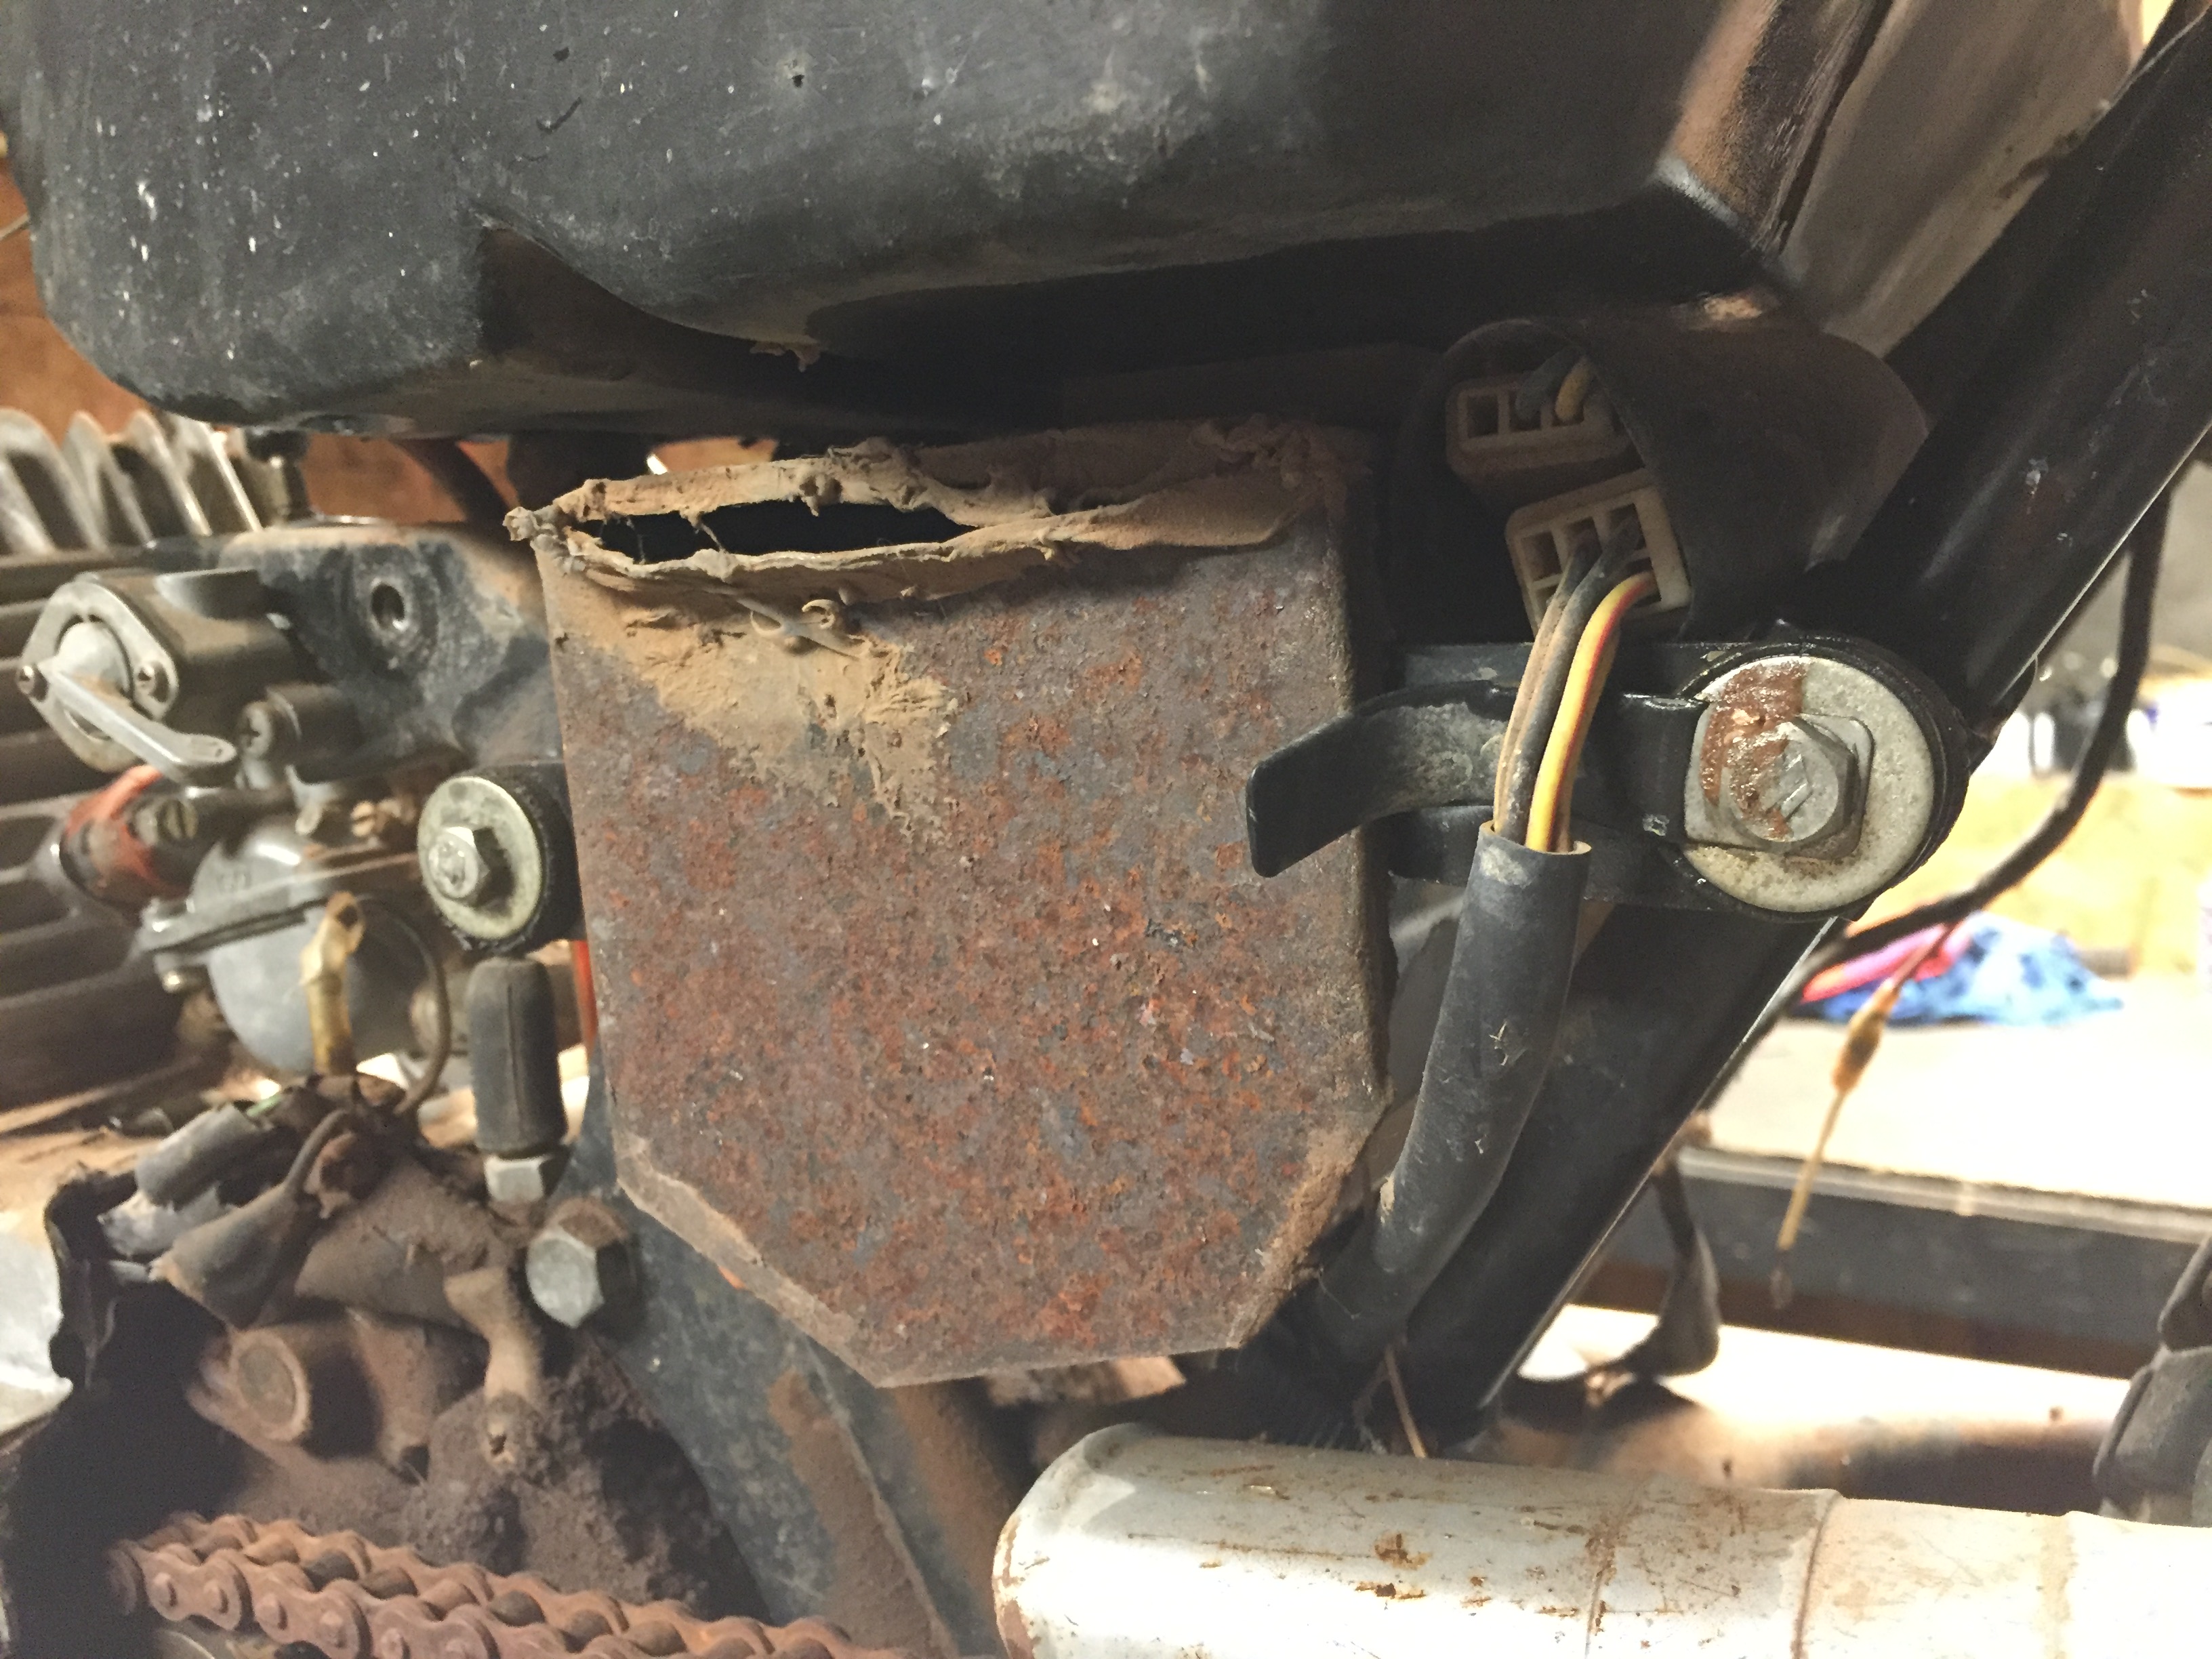
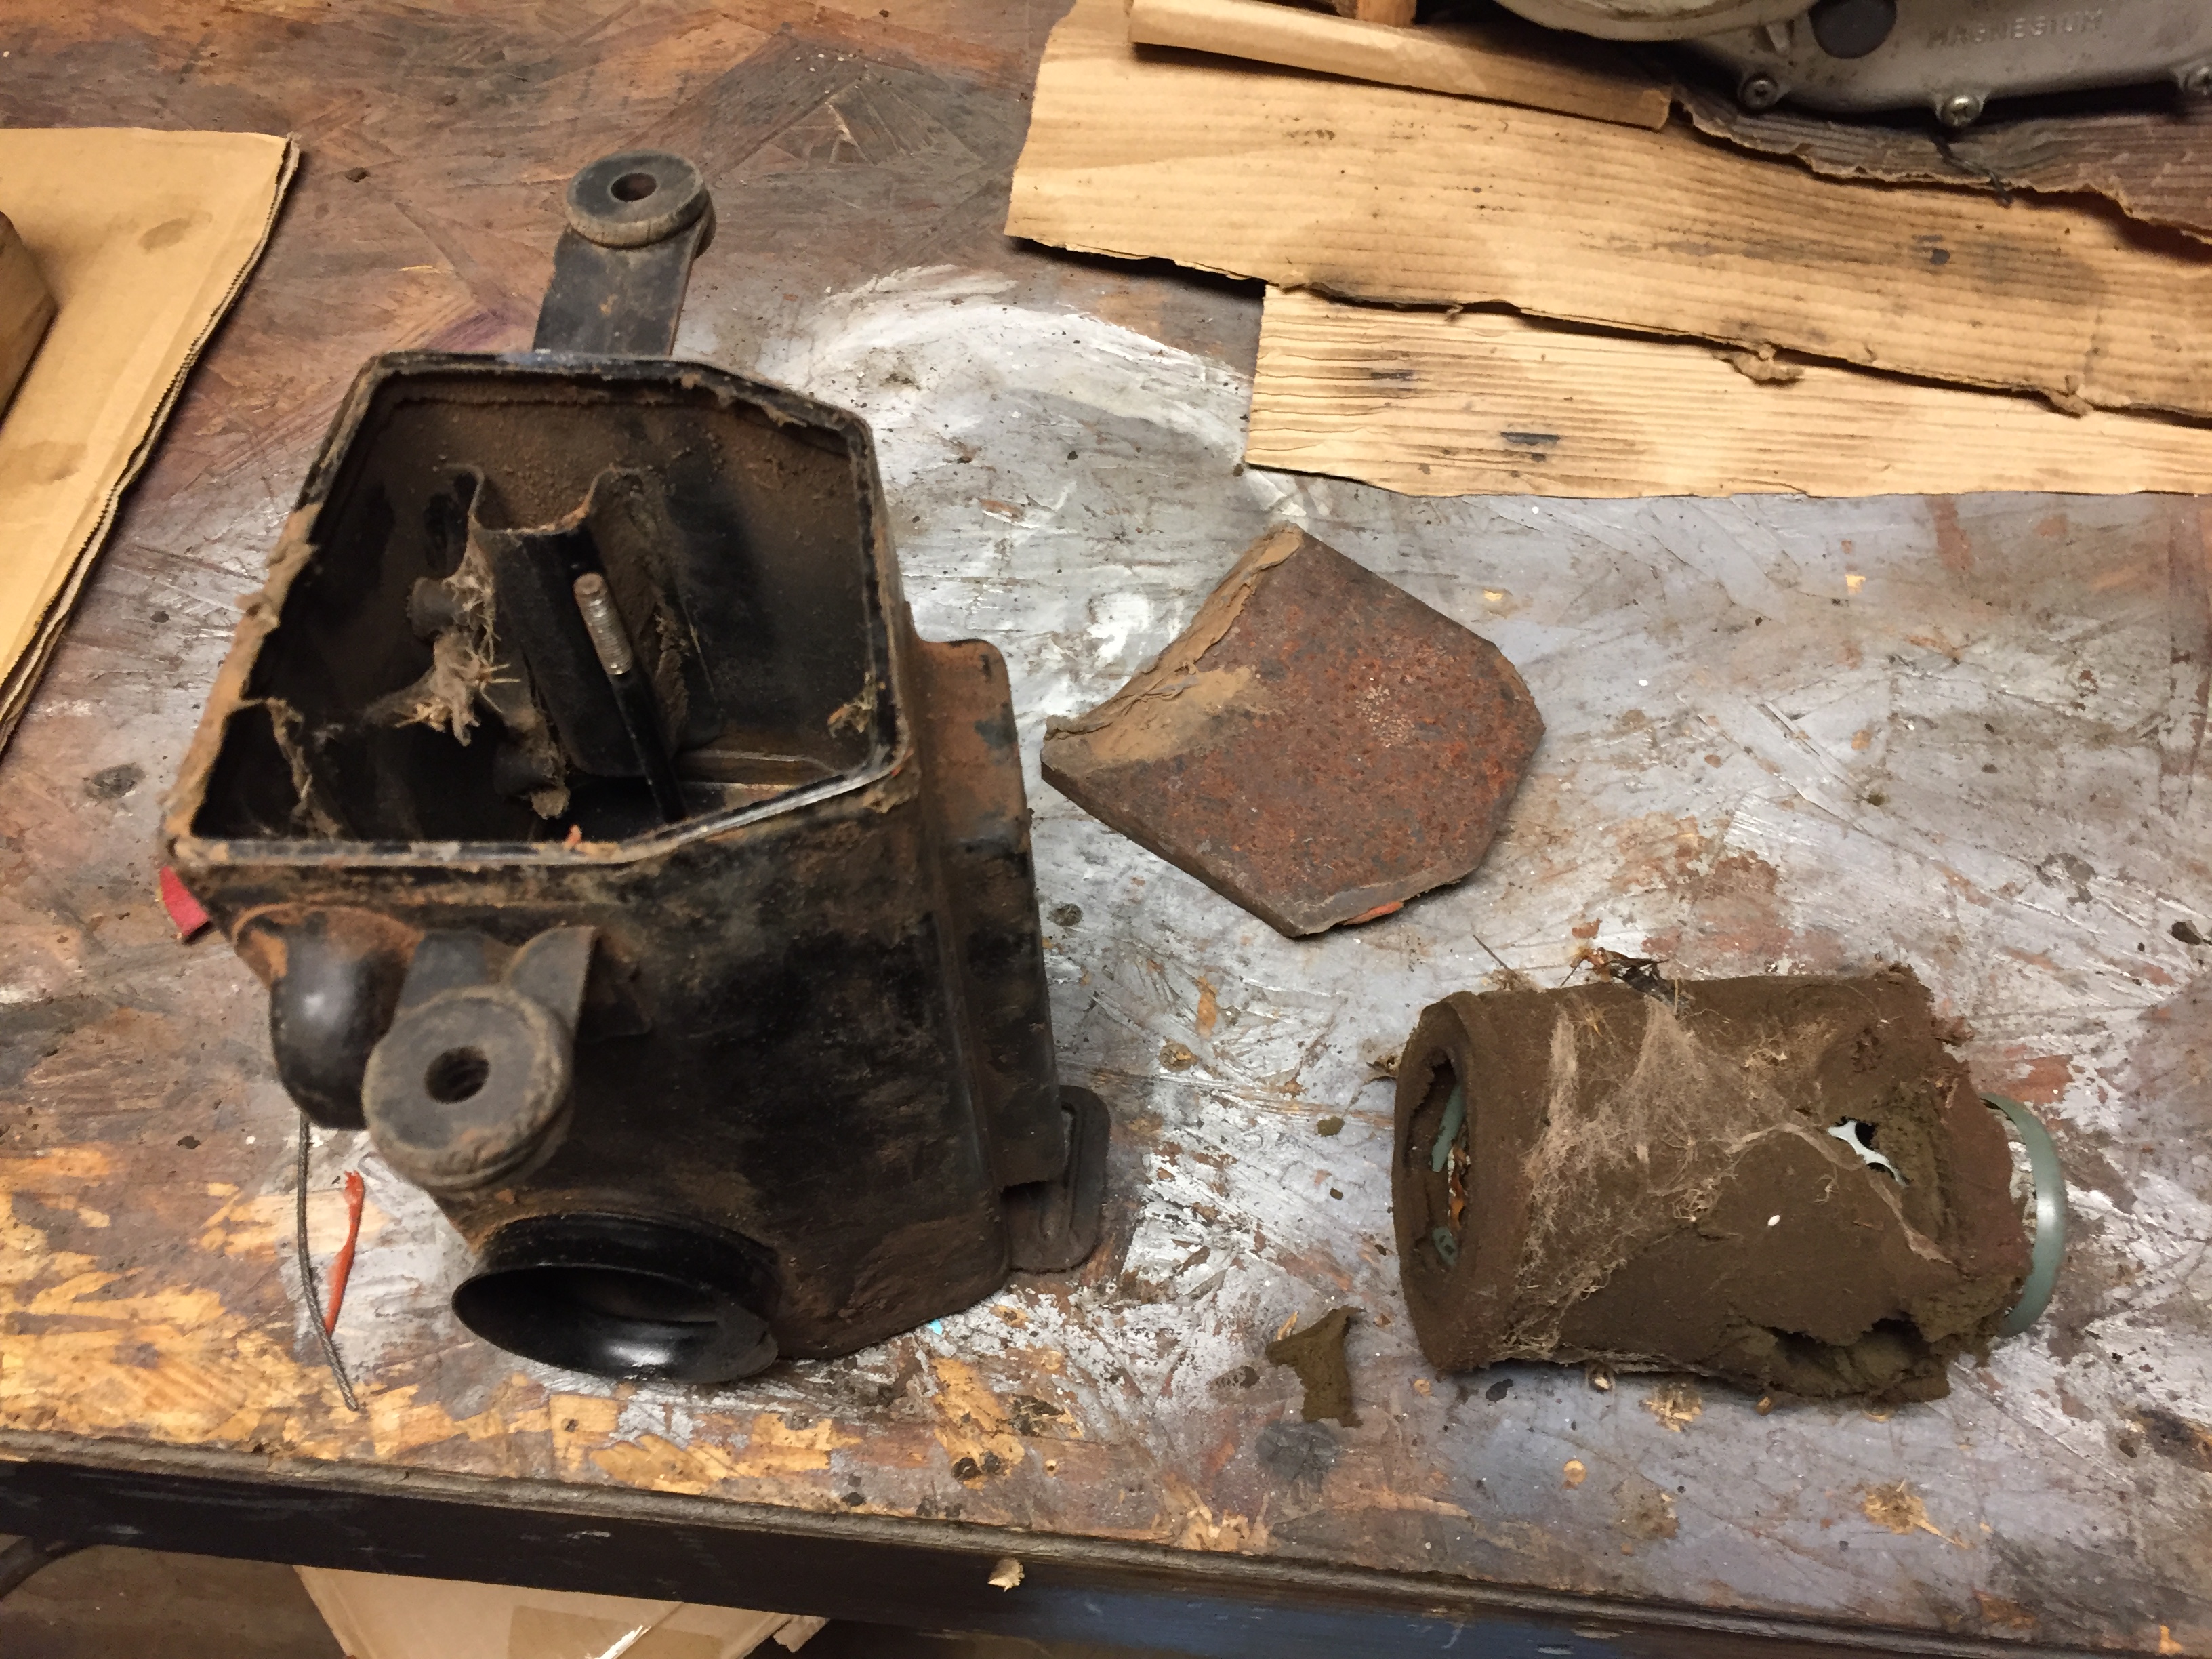
No bueno. After asking around on some RV125 groups and searching ebay to no avail, I decided to go ahead and make one up.
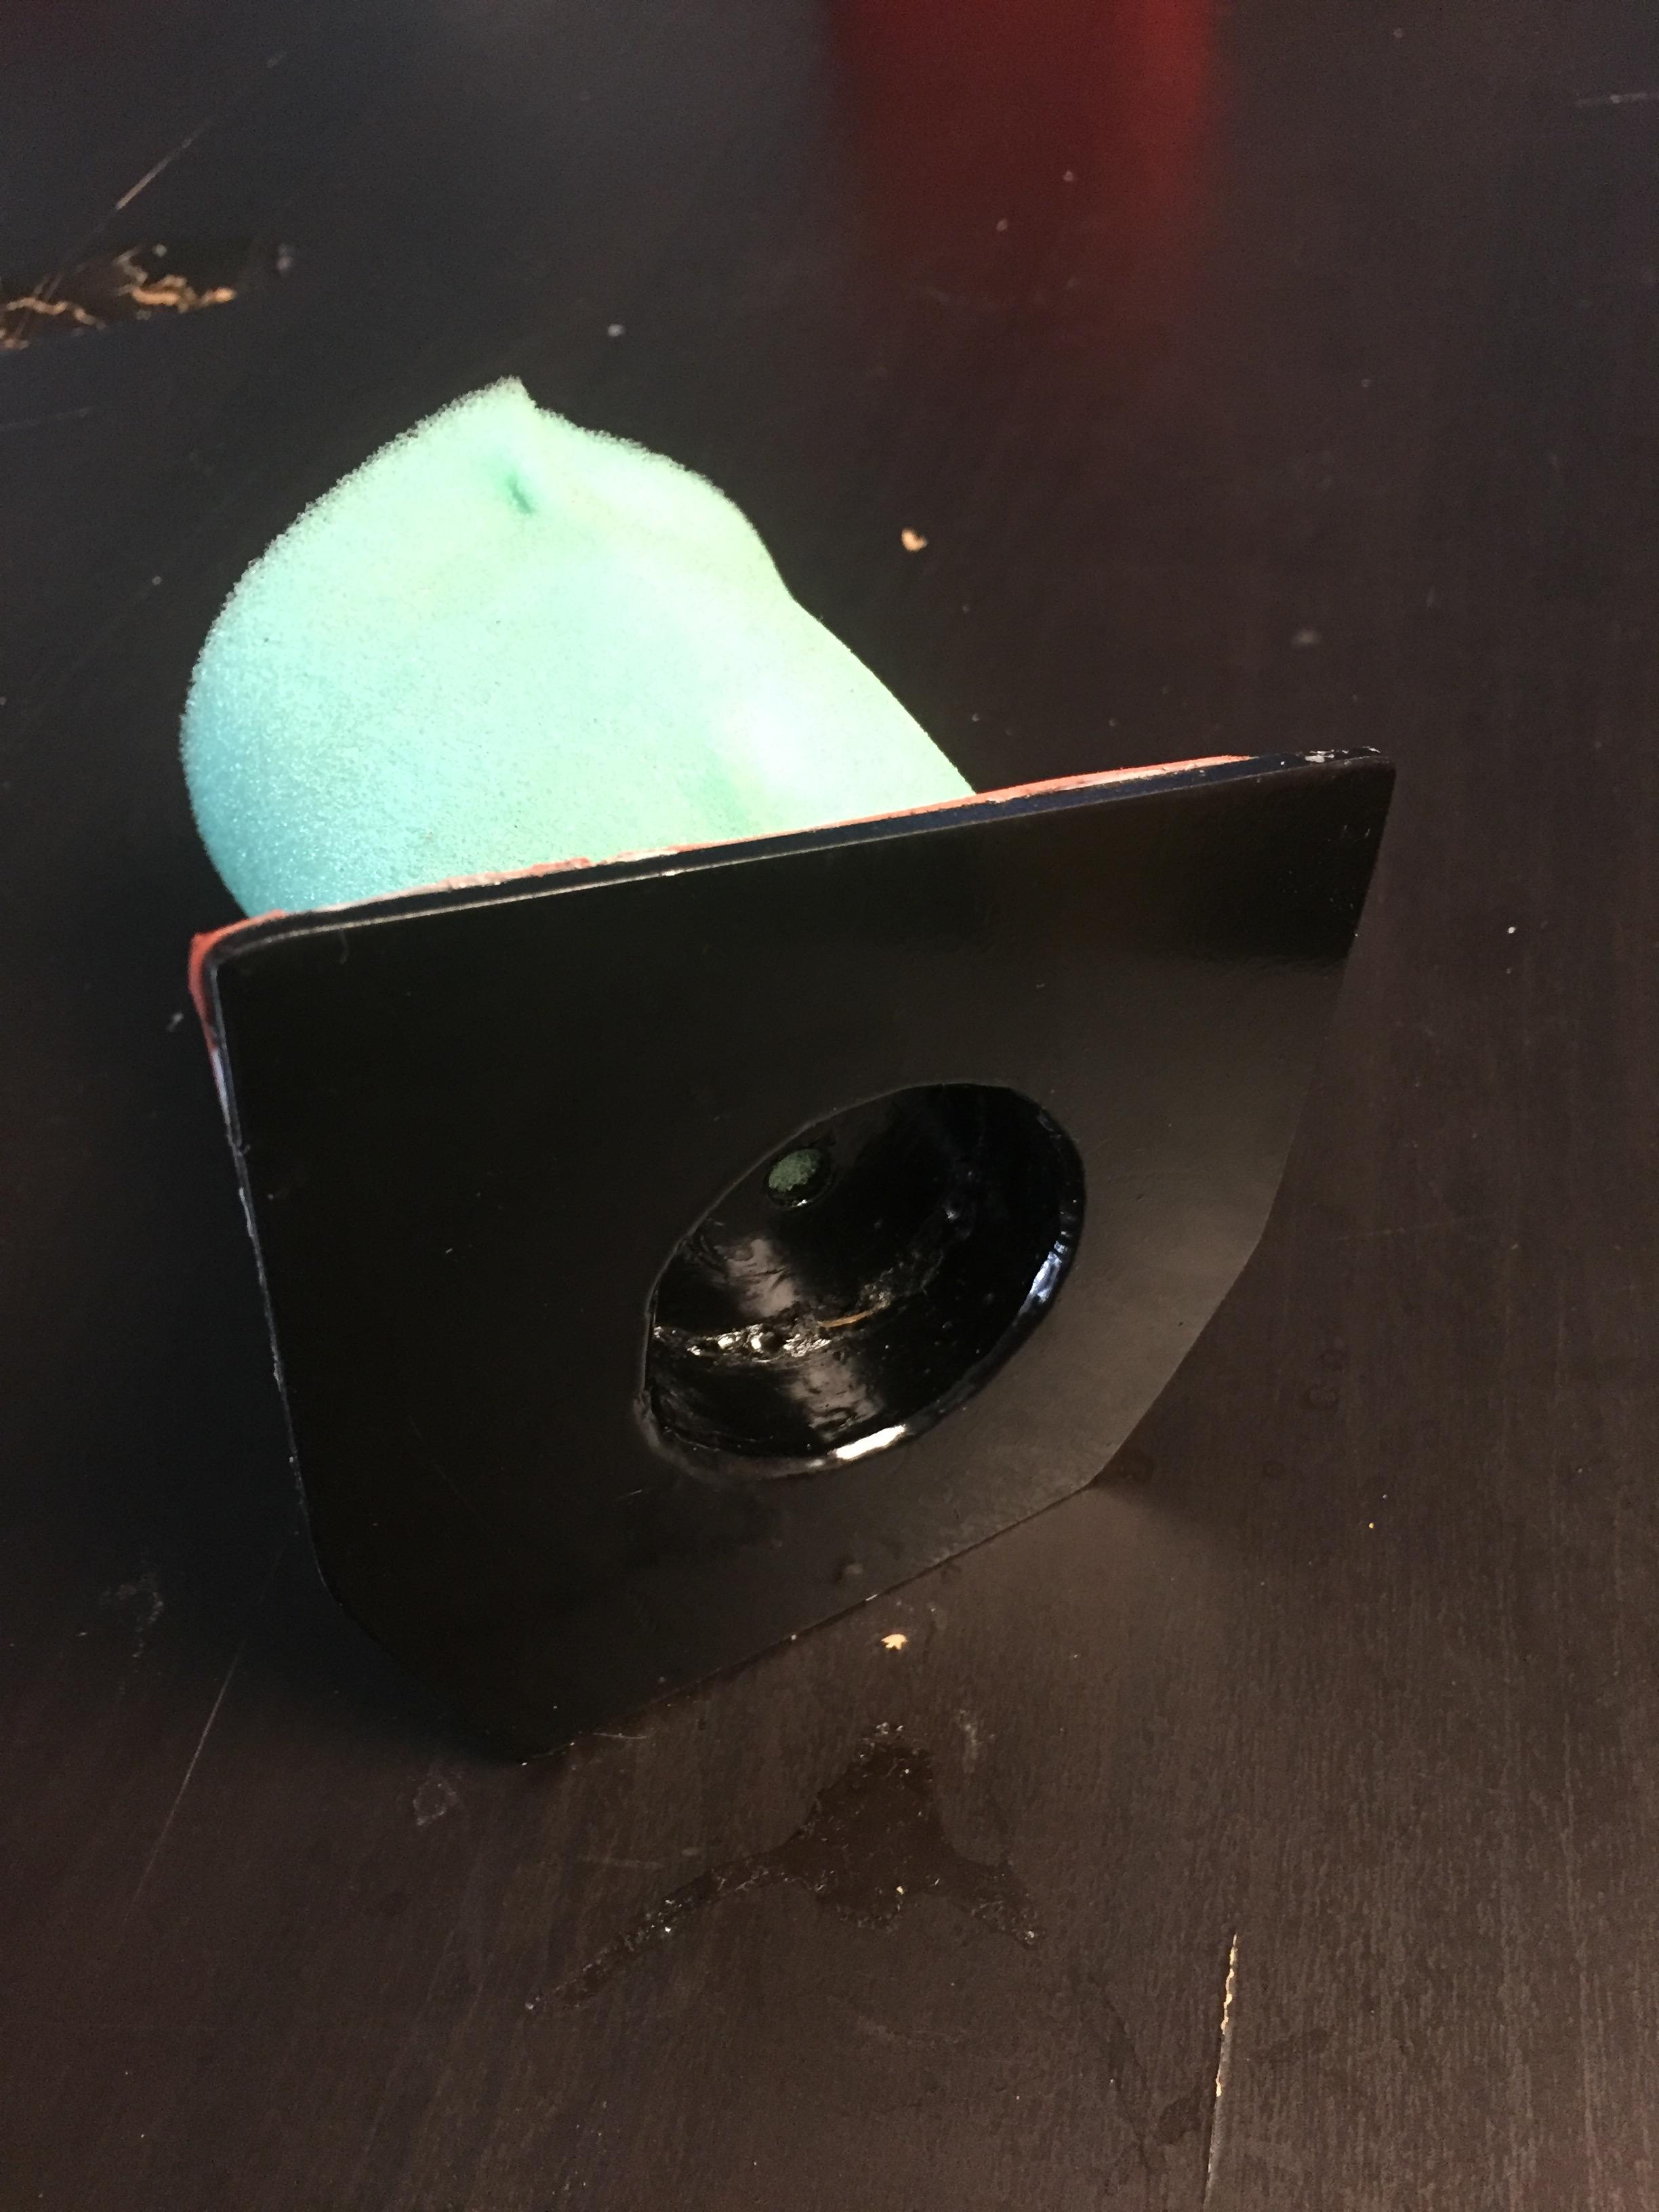
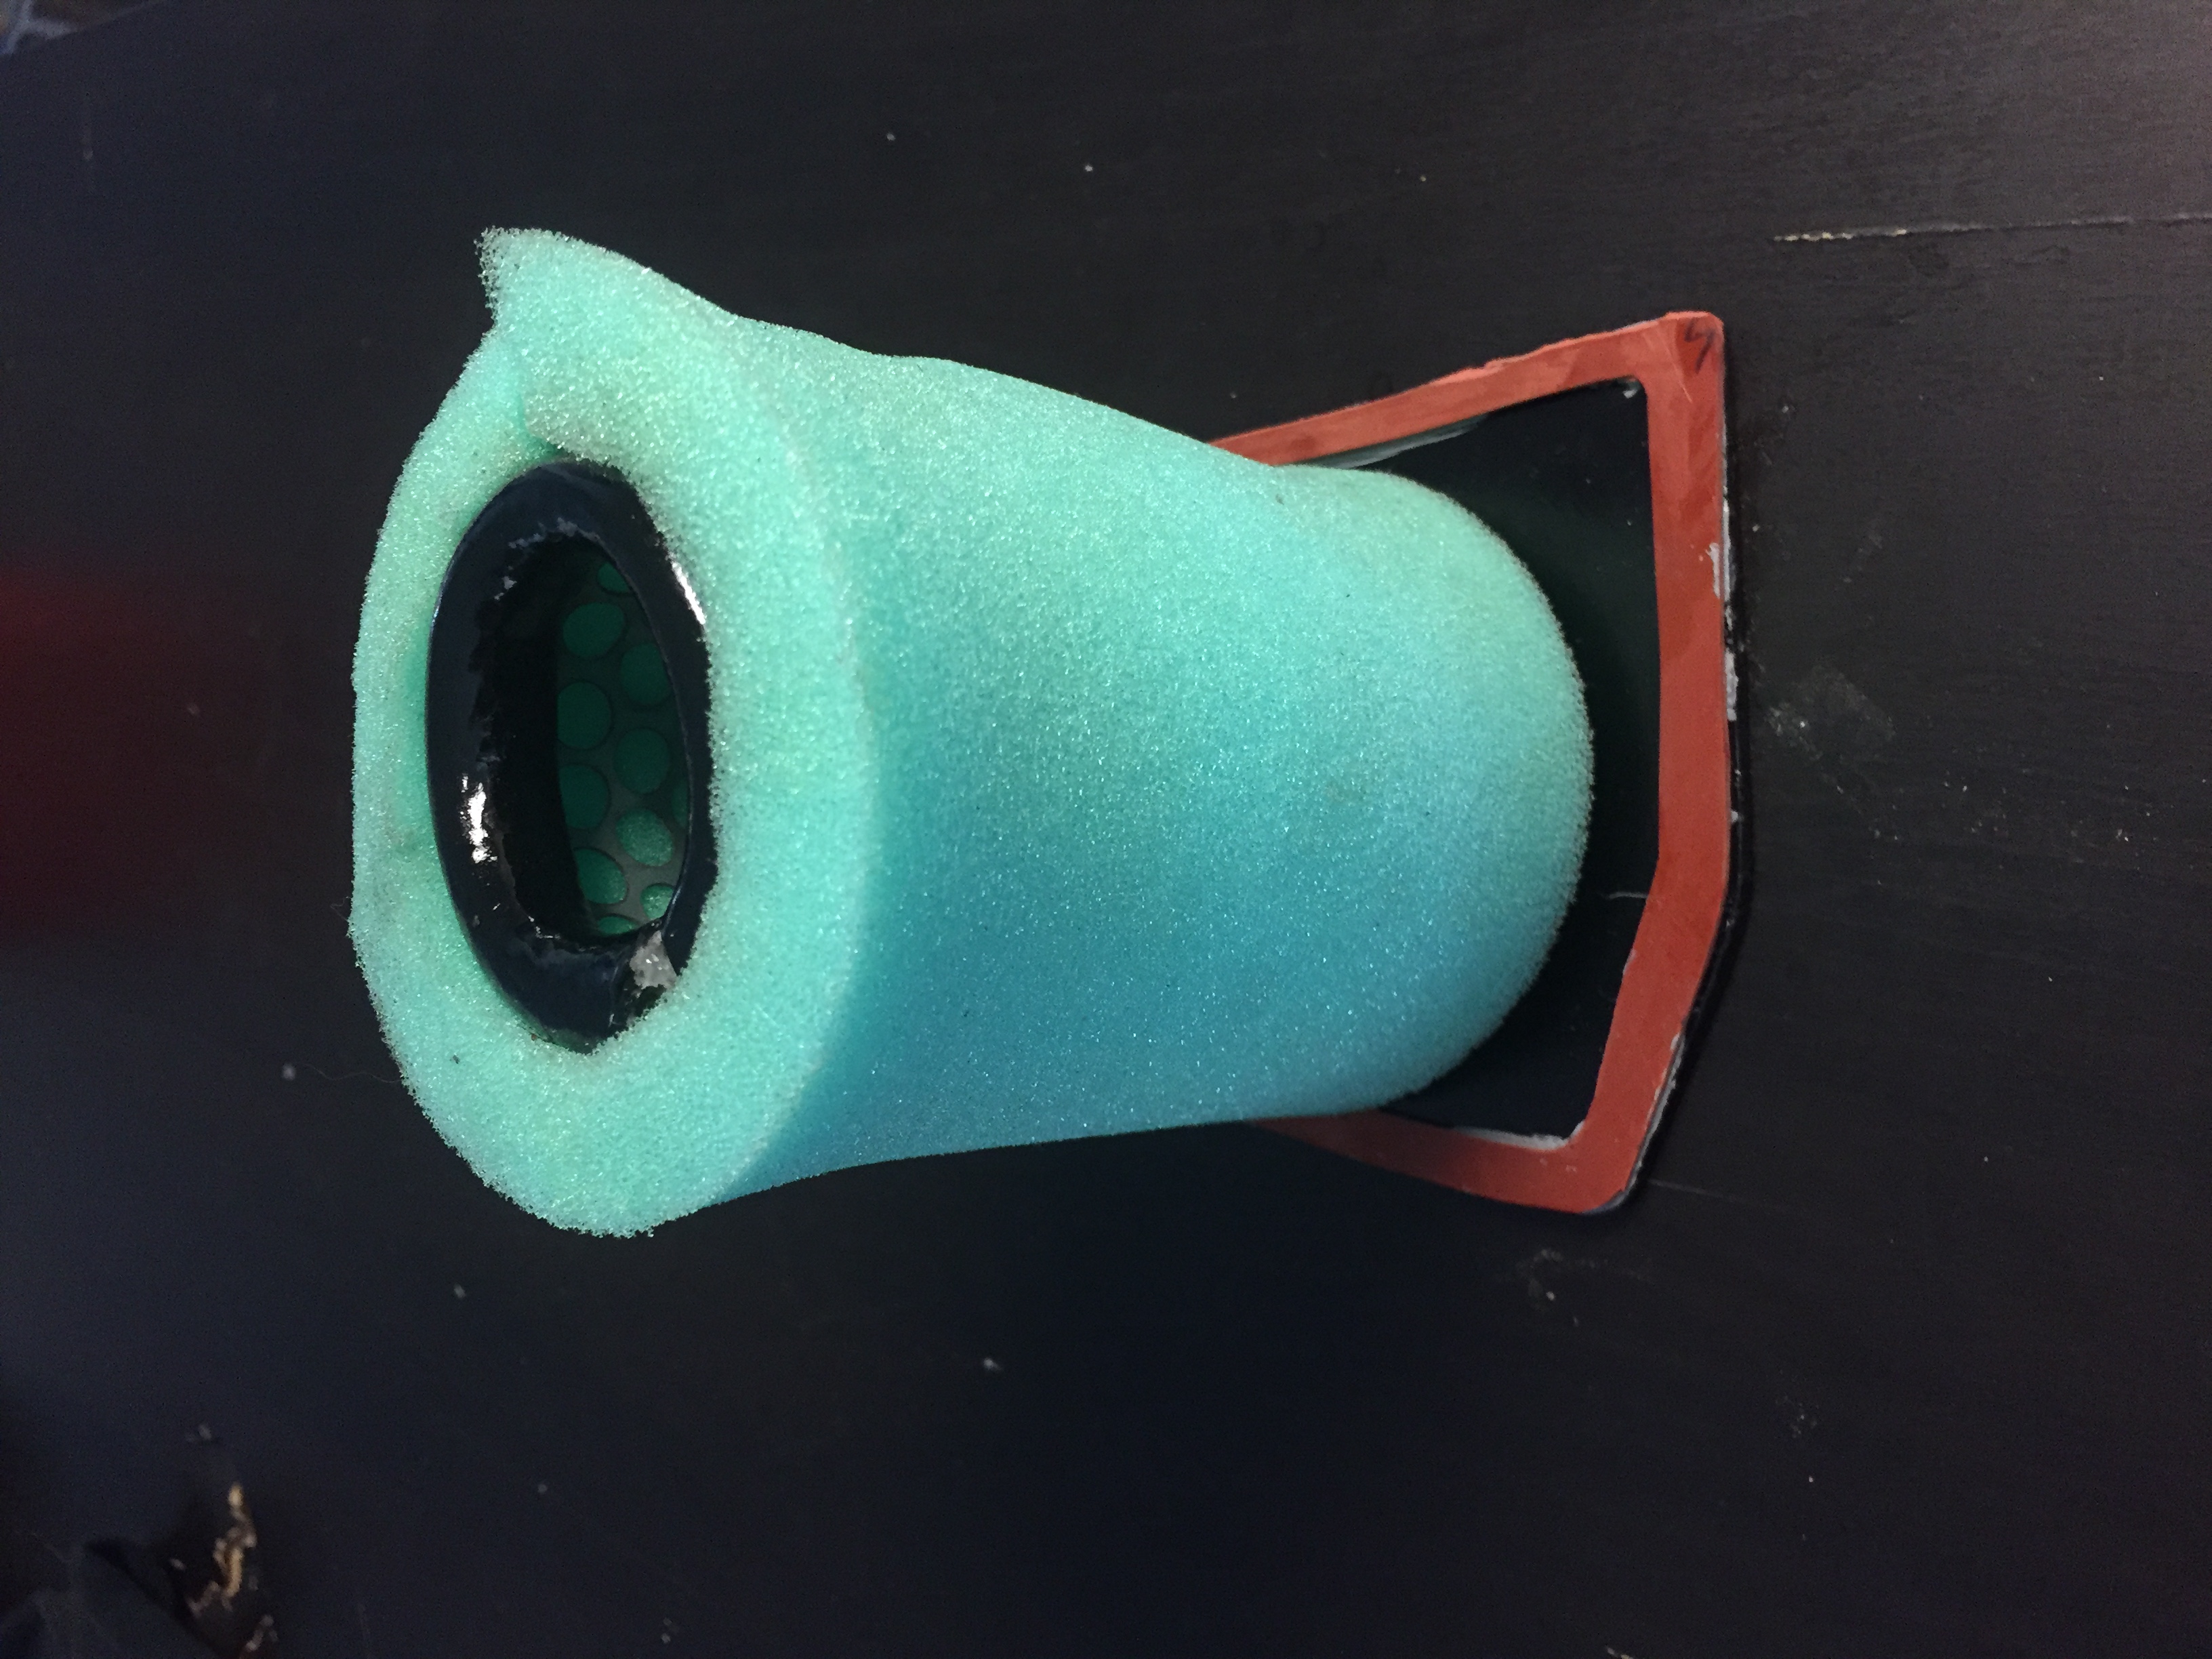
The threaded portion inside the airbox is recessed back from the outer face of the airbox, probably so it won't dig in to your leg if you decide to dump the thing. I used some scrap 1-3/4" exhaust pipe I had lying around to french in a recess for the wing nut. The face is (I think) some 3/16" scrap. I welded it all up, painted it gloss black to match everything else, and cut a rubber gasket to seal between the cover and the airbox. Used a bit of Yamabond to stick the gasket to the cover, and installed everything with a freshly made and oiled UNI foam material air cleaner. I took a large rubber grommet I had in the parts bin, cut one side off and glued it onto the back of the filter to help it seal to the inner wall of the airbox.
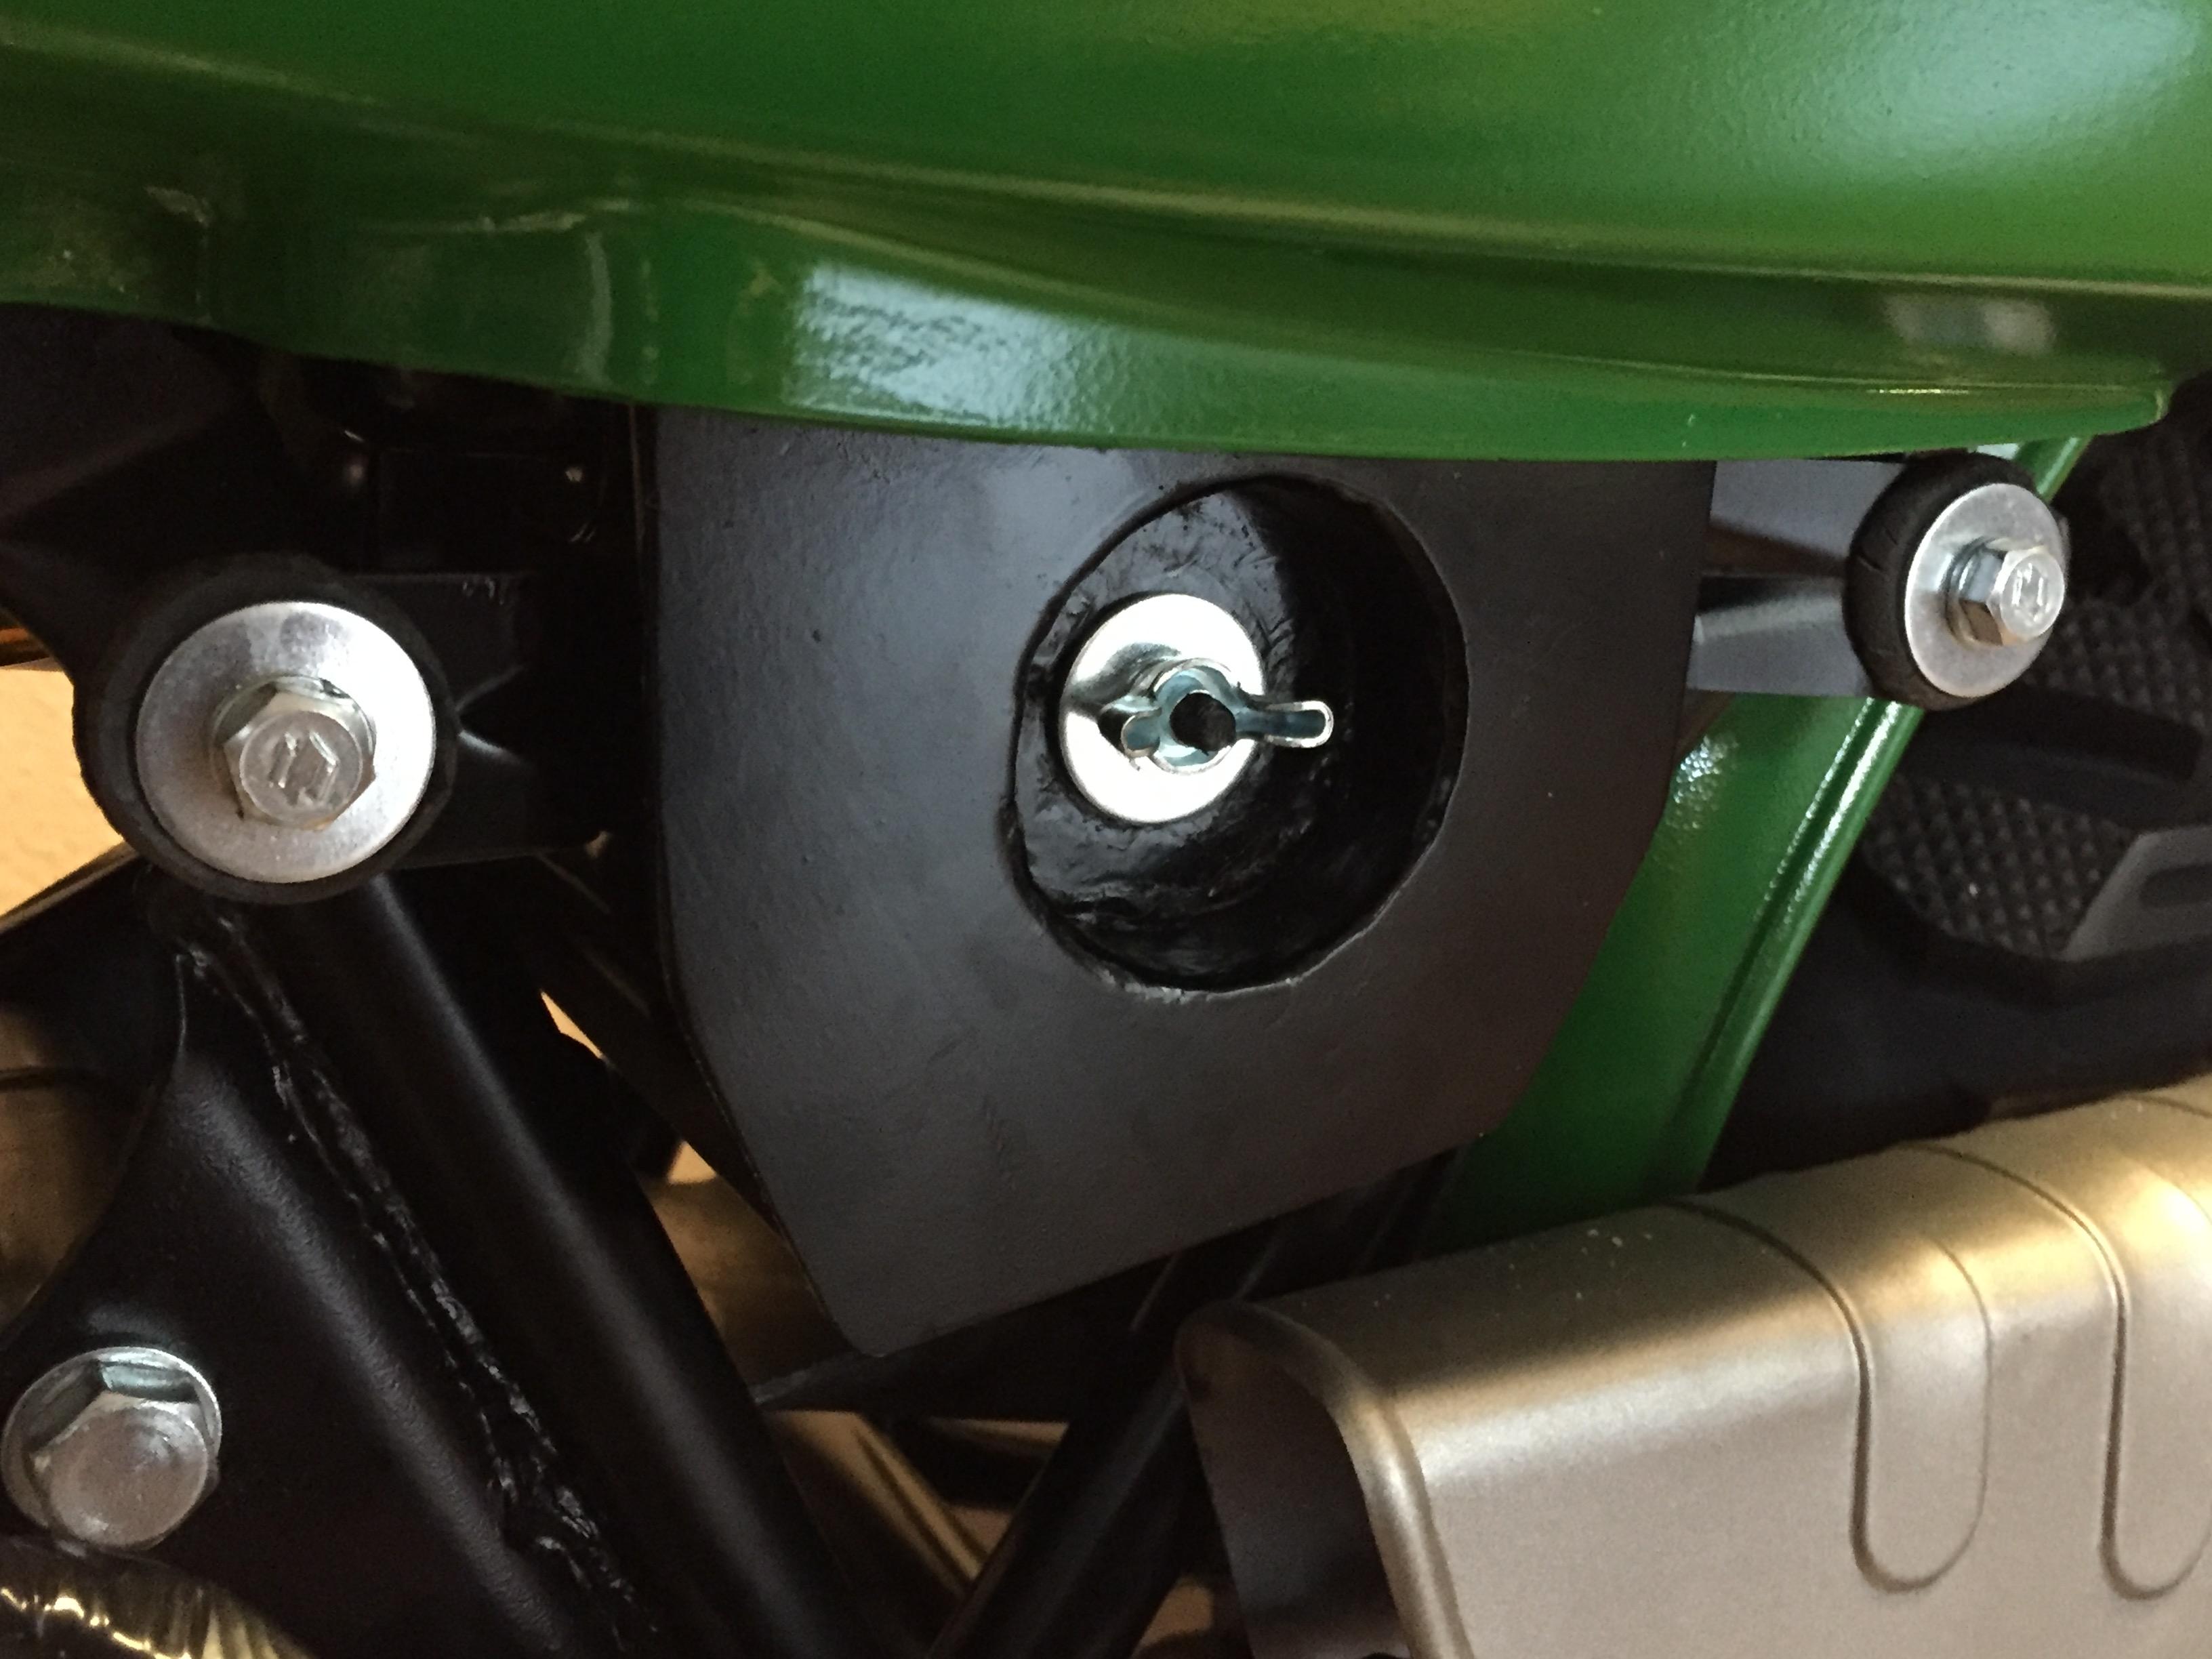
And here we are all installed.
No bueno. After asking around on some RV125 groups and searching ebay to no avail, I decided to go ahead and make one up.
The threaded portion inside the airbox is recessed back from the outer face of the airbox, probably so it won't dig in to your leg if you decide to dump the thing. I used some scrap 1-3/4" exhaust pipe I had lying around to french in a recess for the wing nut. The face is (I think) some 3/16" scrap. I welded it all up, painted it gloss black to match everything else, and cut a rubber gasket to seal between the cover and the airbox. Used a bit of Yamabond to stick the gasket to the cover, and installed everything with a freshly made and oiled UNI foam material air cleaner. I took a large rubber grommet I had in the parts bin, cut one side off and glued it onto the back of the filter to help it seal to the inner wall of the airbox.
And here we are all installed.
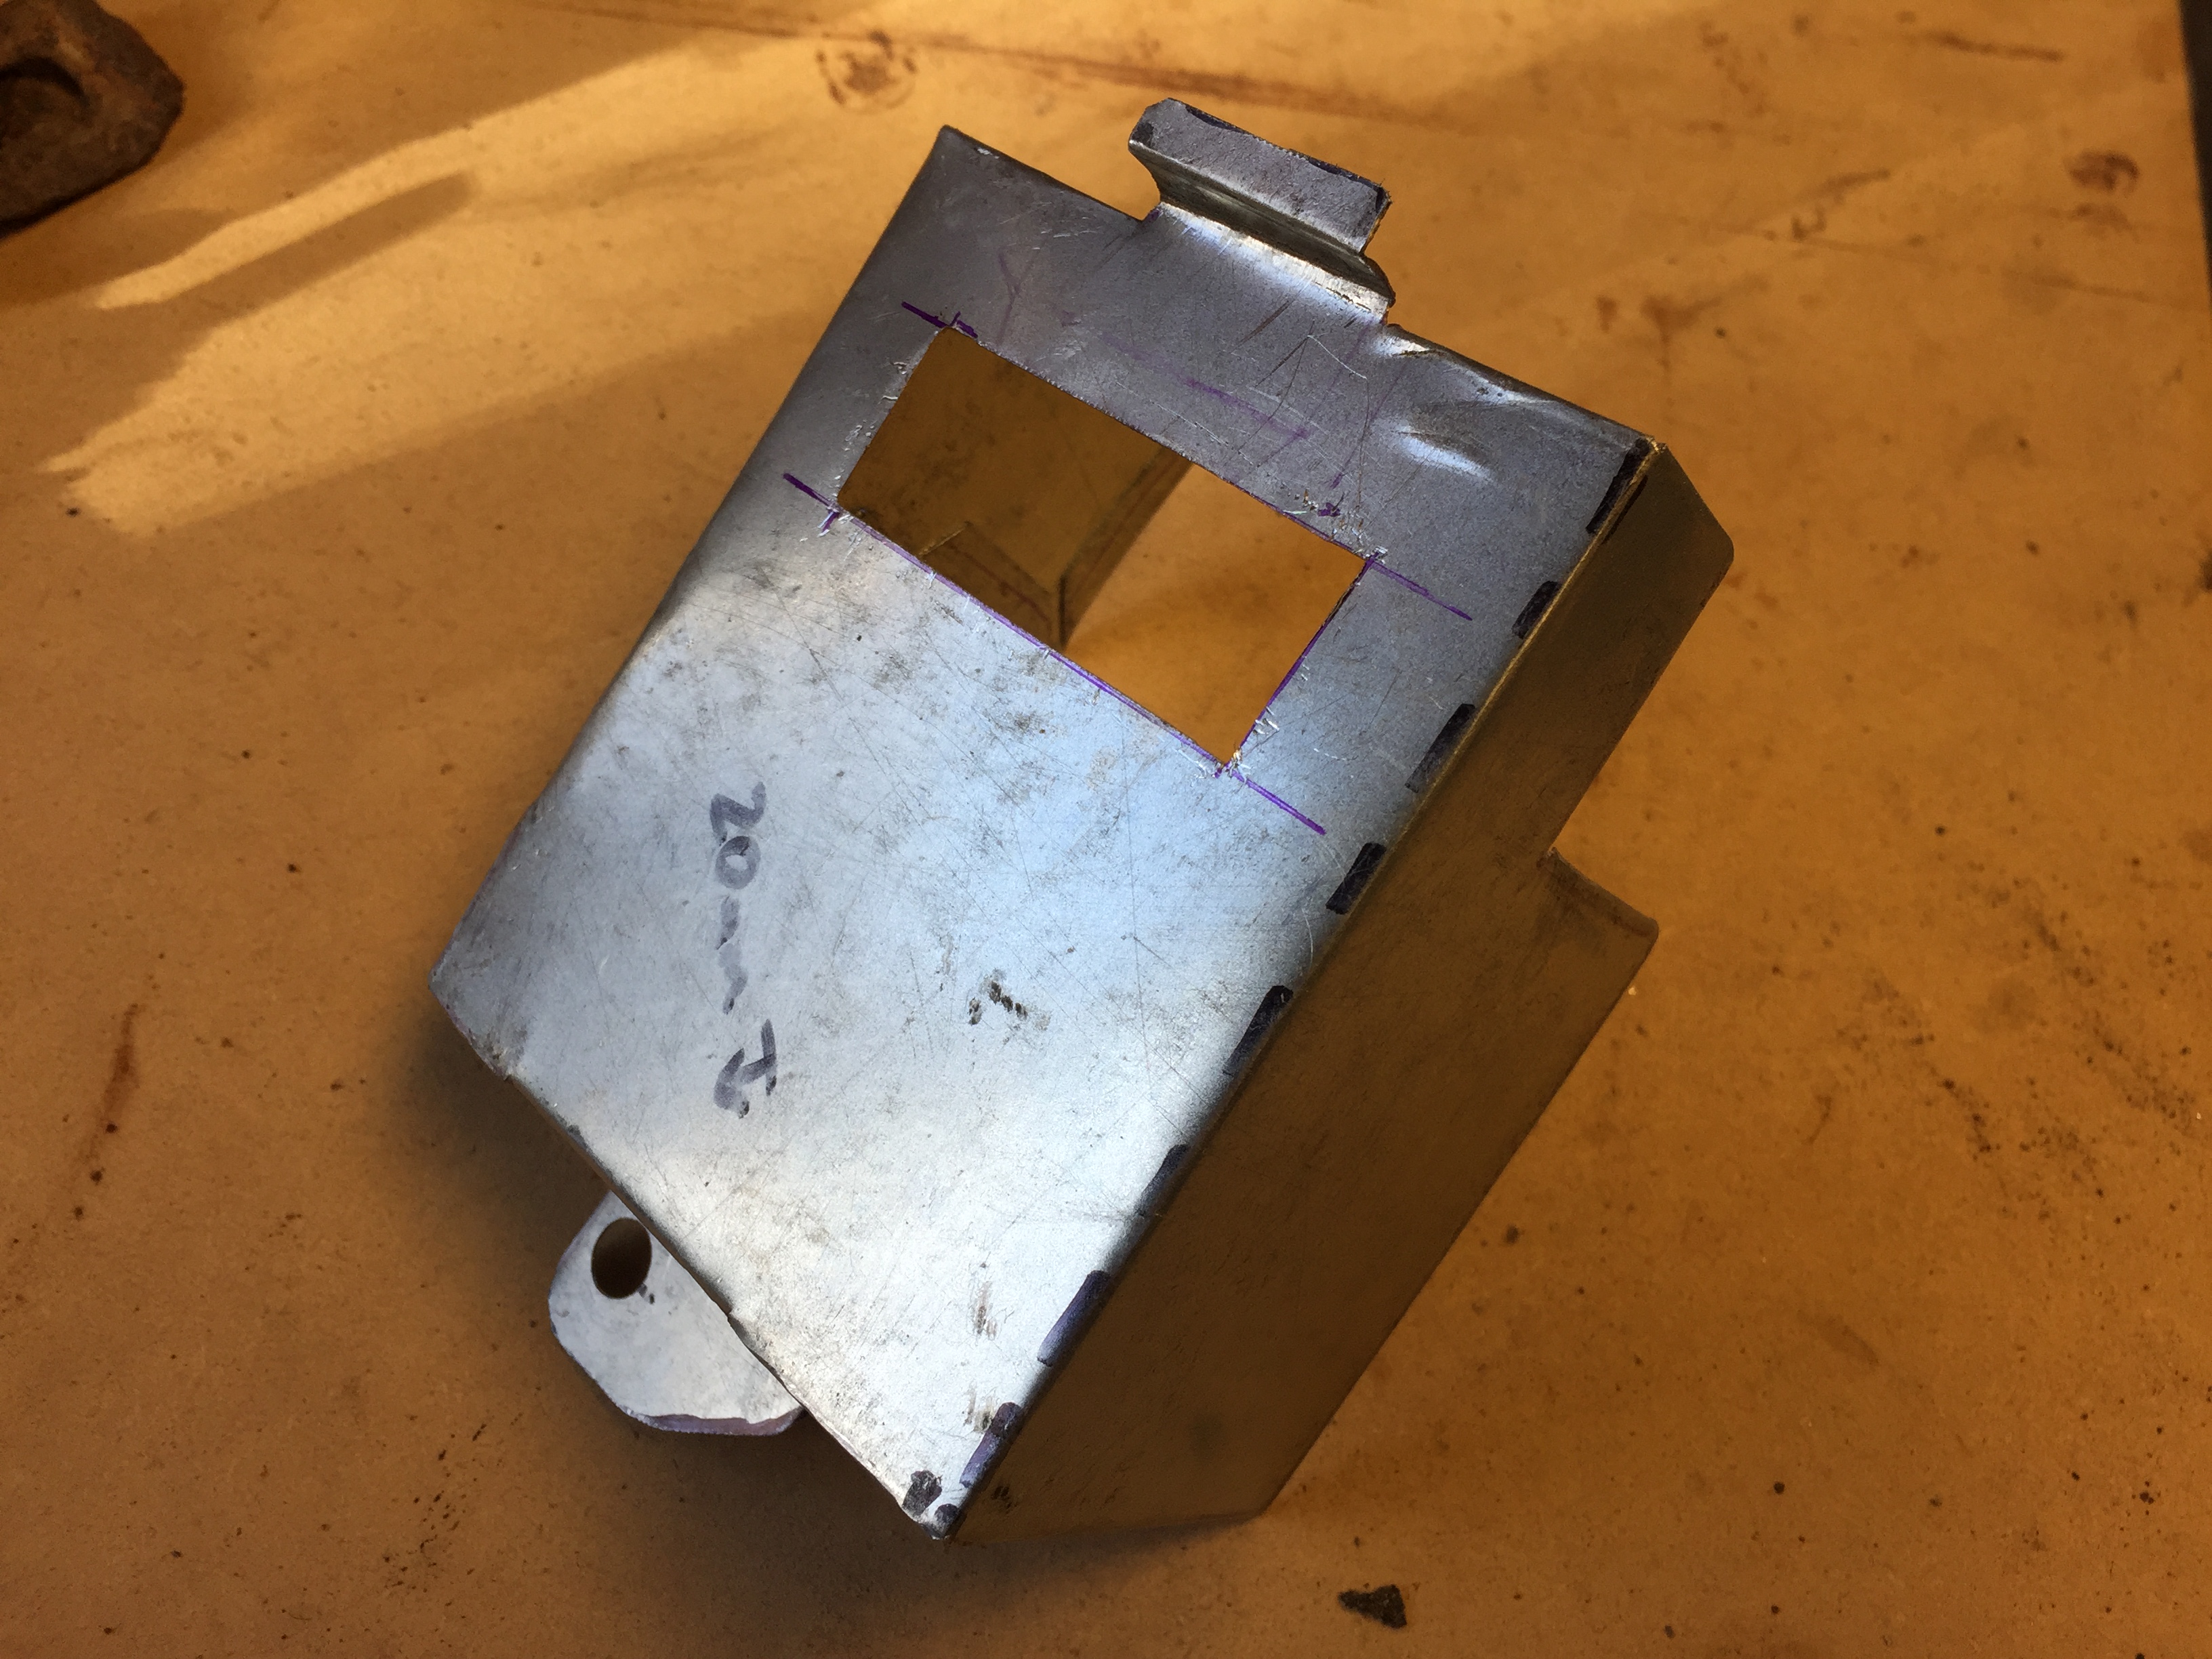
Another missing part that was difficult to source was the metal cover that holds the battery in place. DTT member cbrianroll happened to have one of these on hand, and he was able to send me a bunch of measurements and pics which was much appreciated.
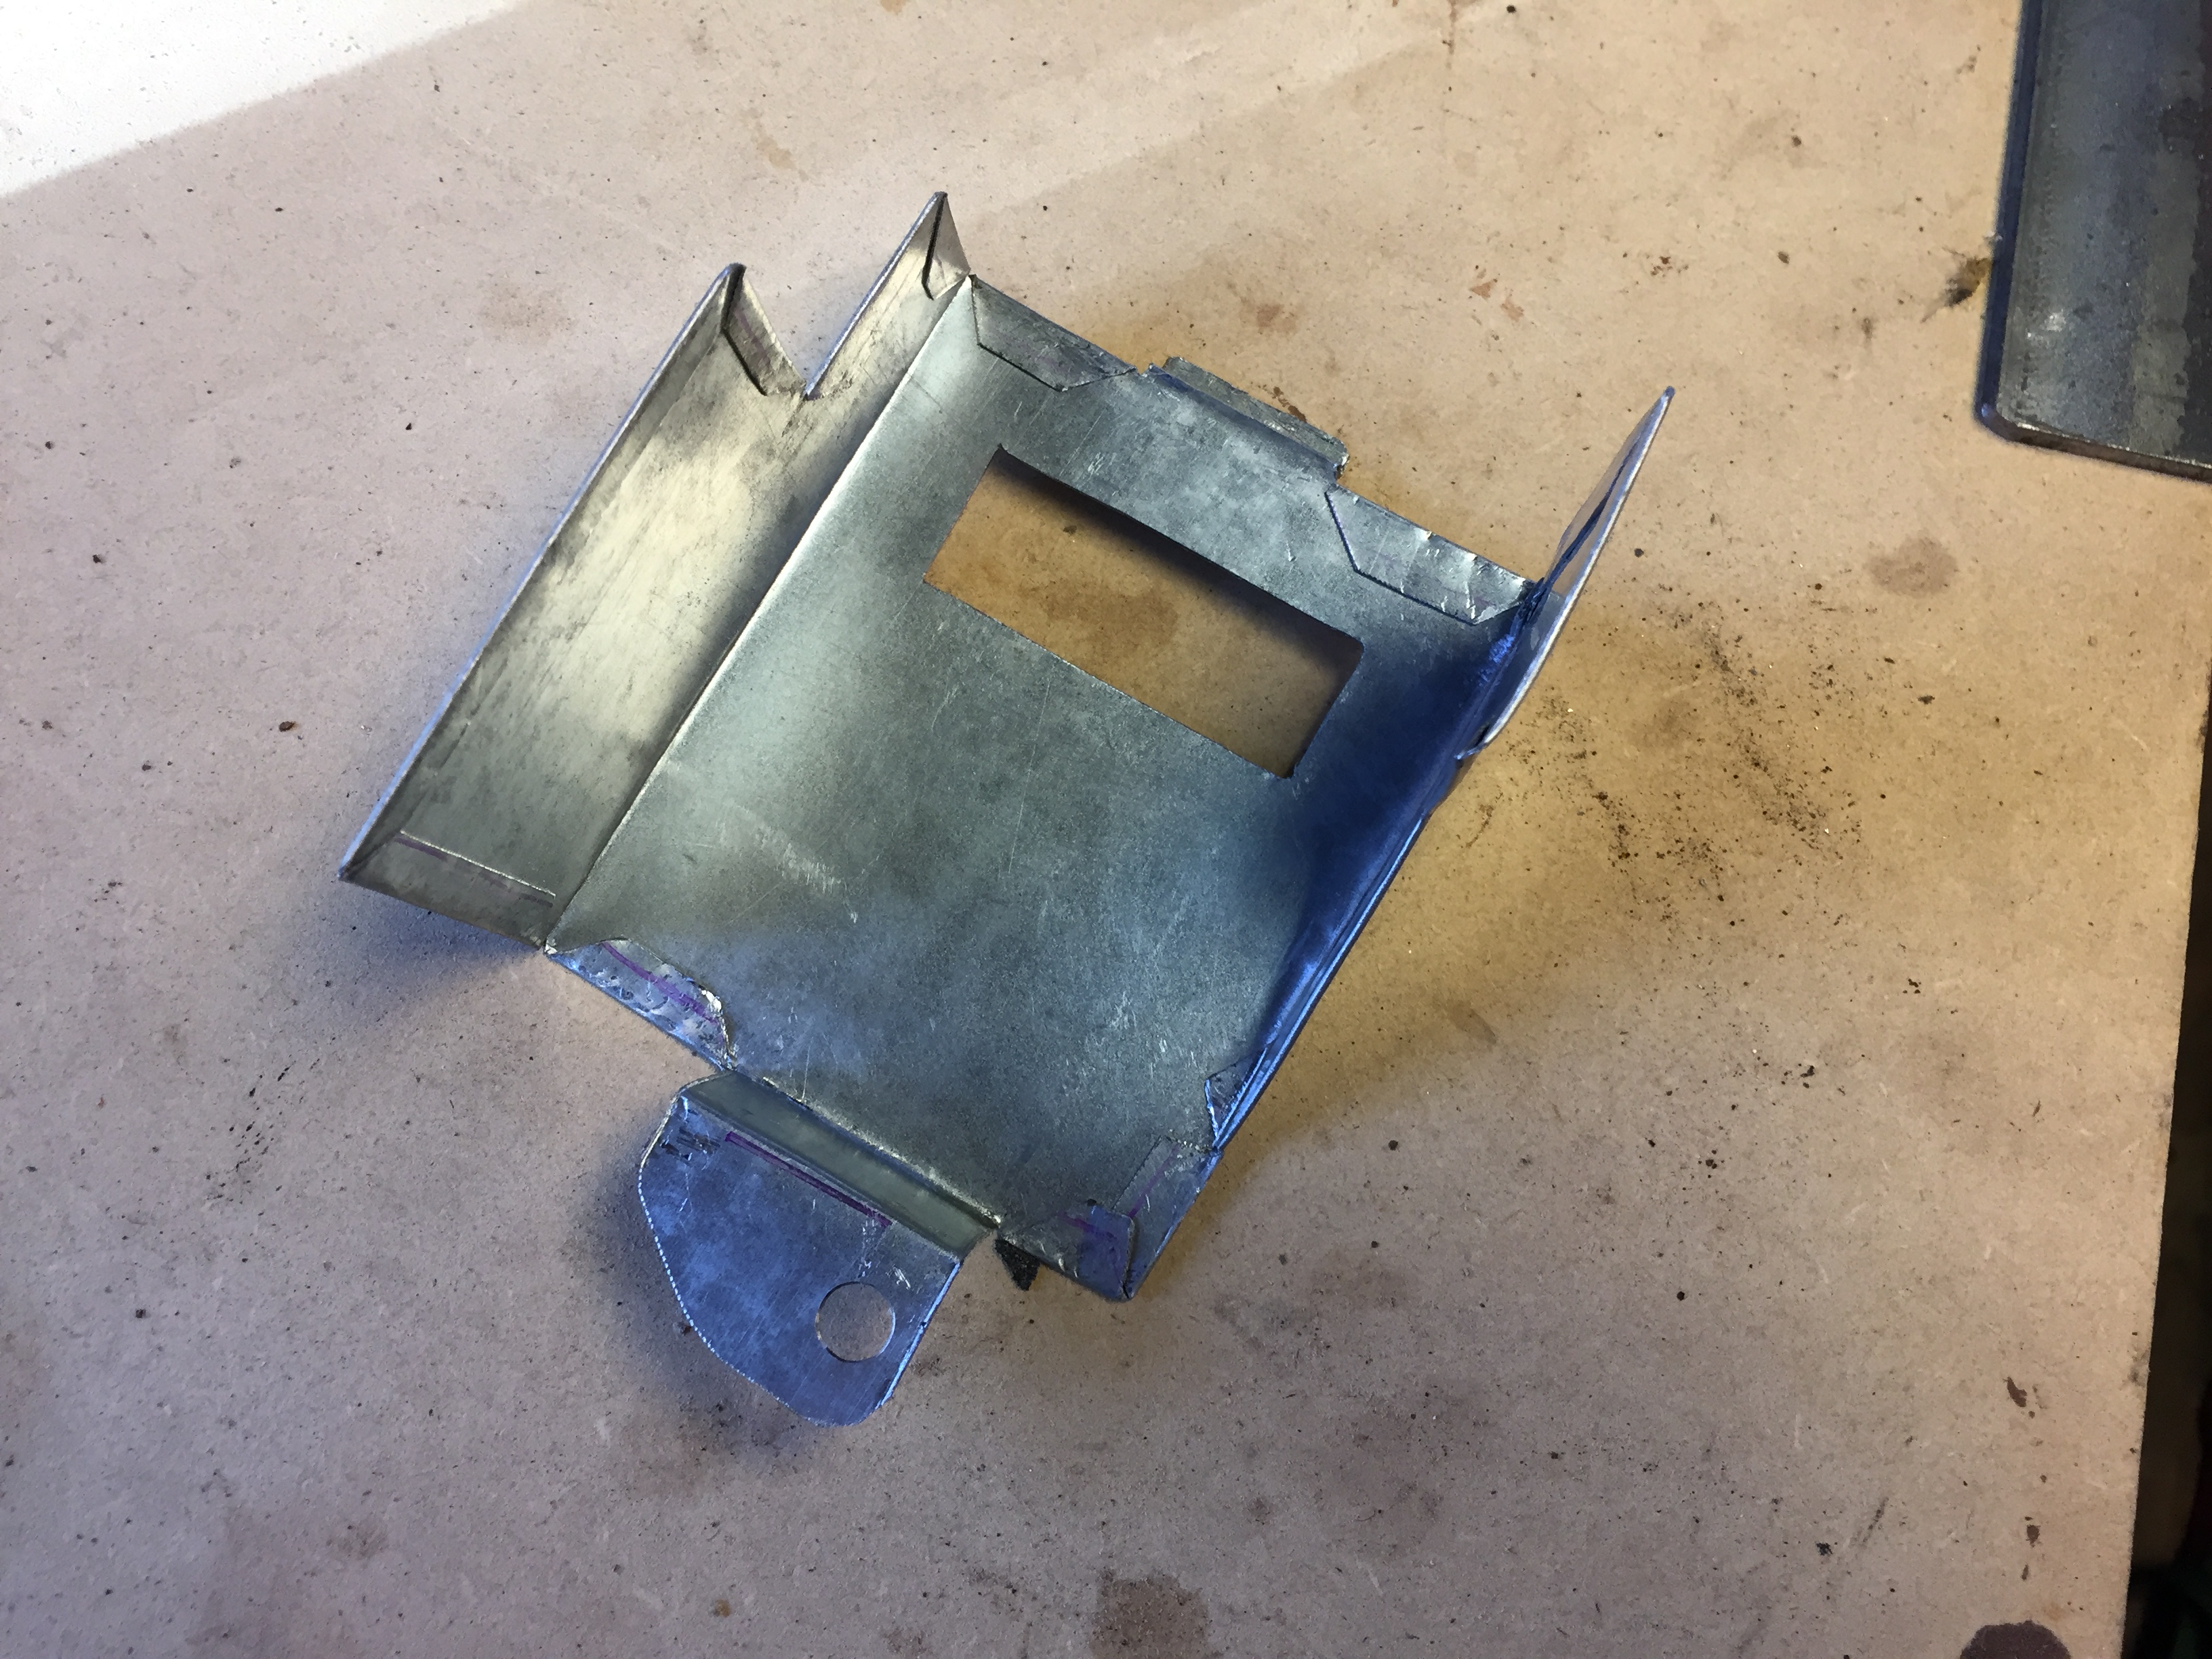
I drew it up in CAD as a flat piece, printed the drawing and transferred it to some sheet metal. I added flanges so I could fold the edges over to make it more rigid, as I only had 22ga sheet metal on hand. Cut out the shape with tin snips and hammered all the edges flat.

I haven't folded metal since high school metal shop so I figured this would be a fun project to dip into that again. I clamped a piece of angle iron to the workbench and started tapping away with a hammer. After 30 min of hammering and a few test fits, here's what I ended up with.
Again, it got painted gloss black to match everything else. I used some sticky back cork sheeting I've had kicking around on the inside for tighter fitment and to avoid any rattles or vibrations.
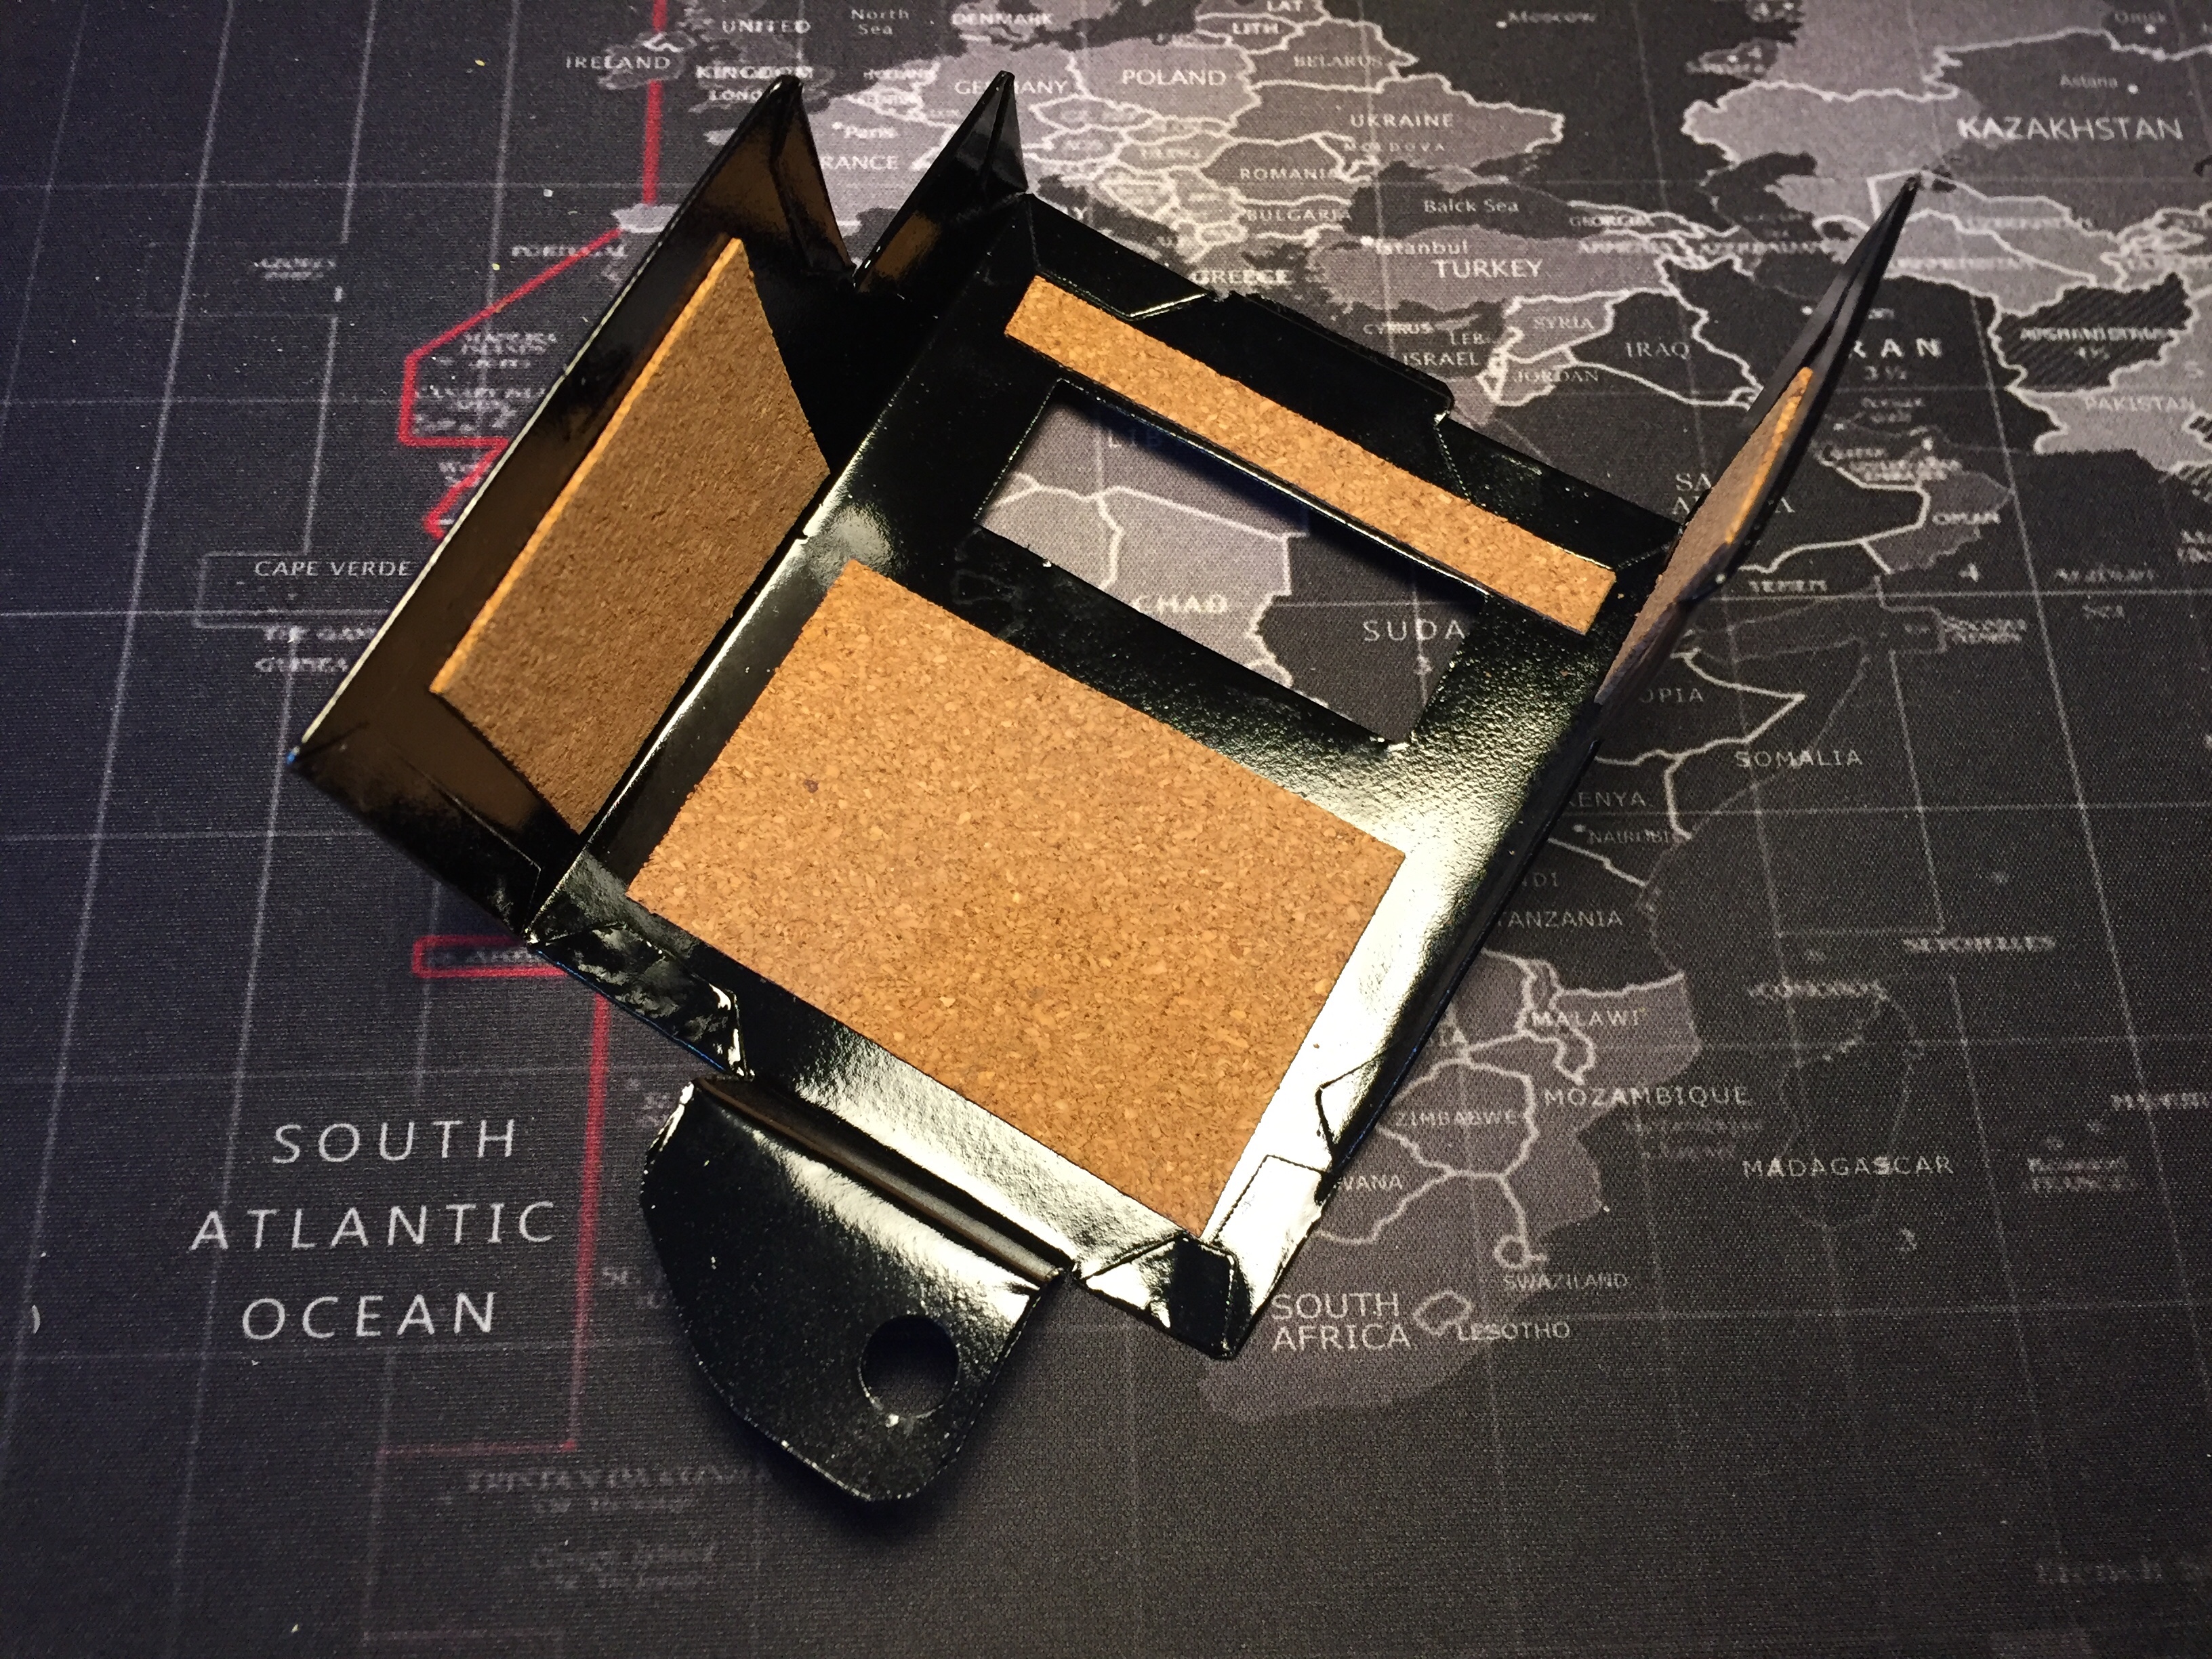
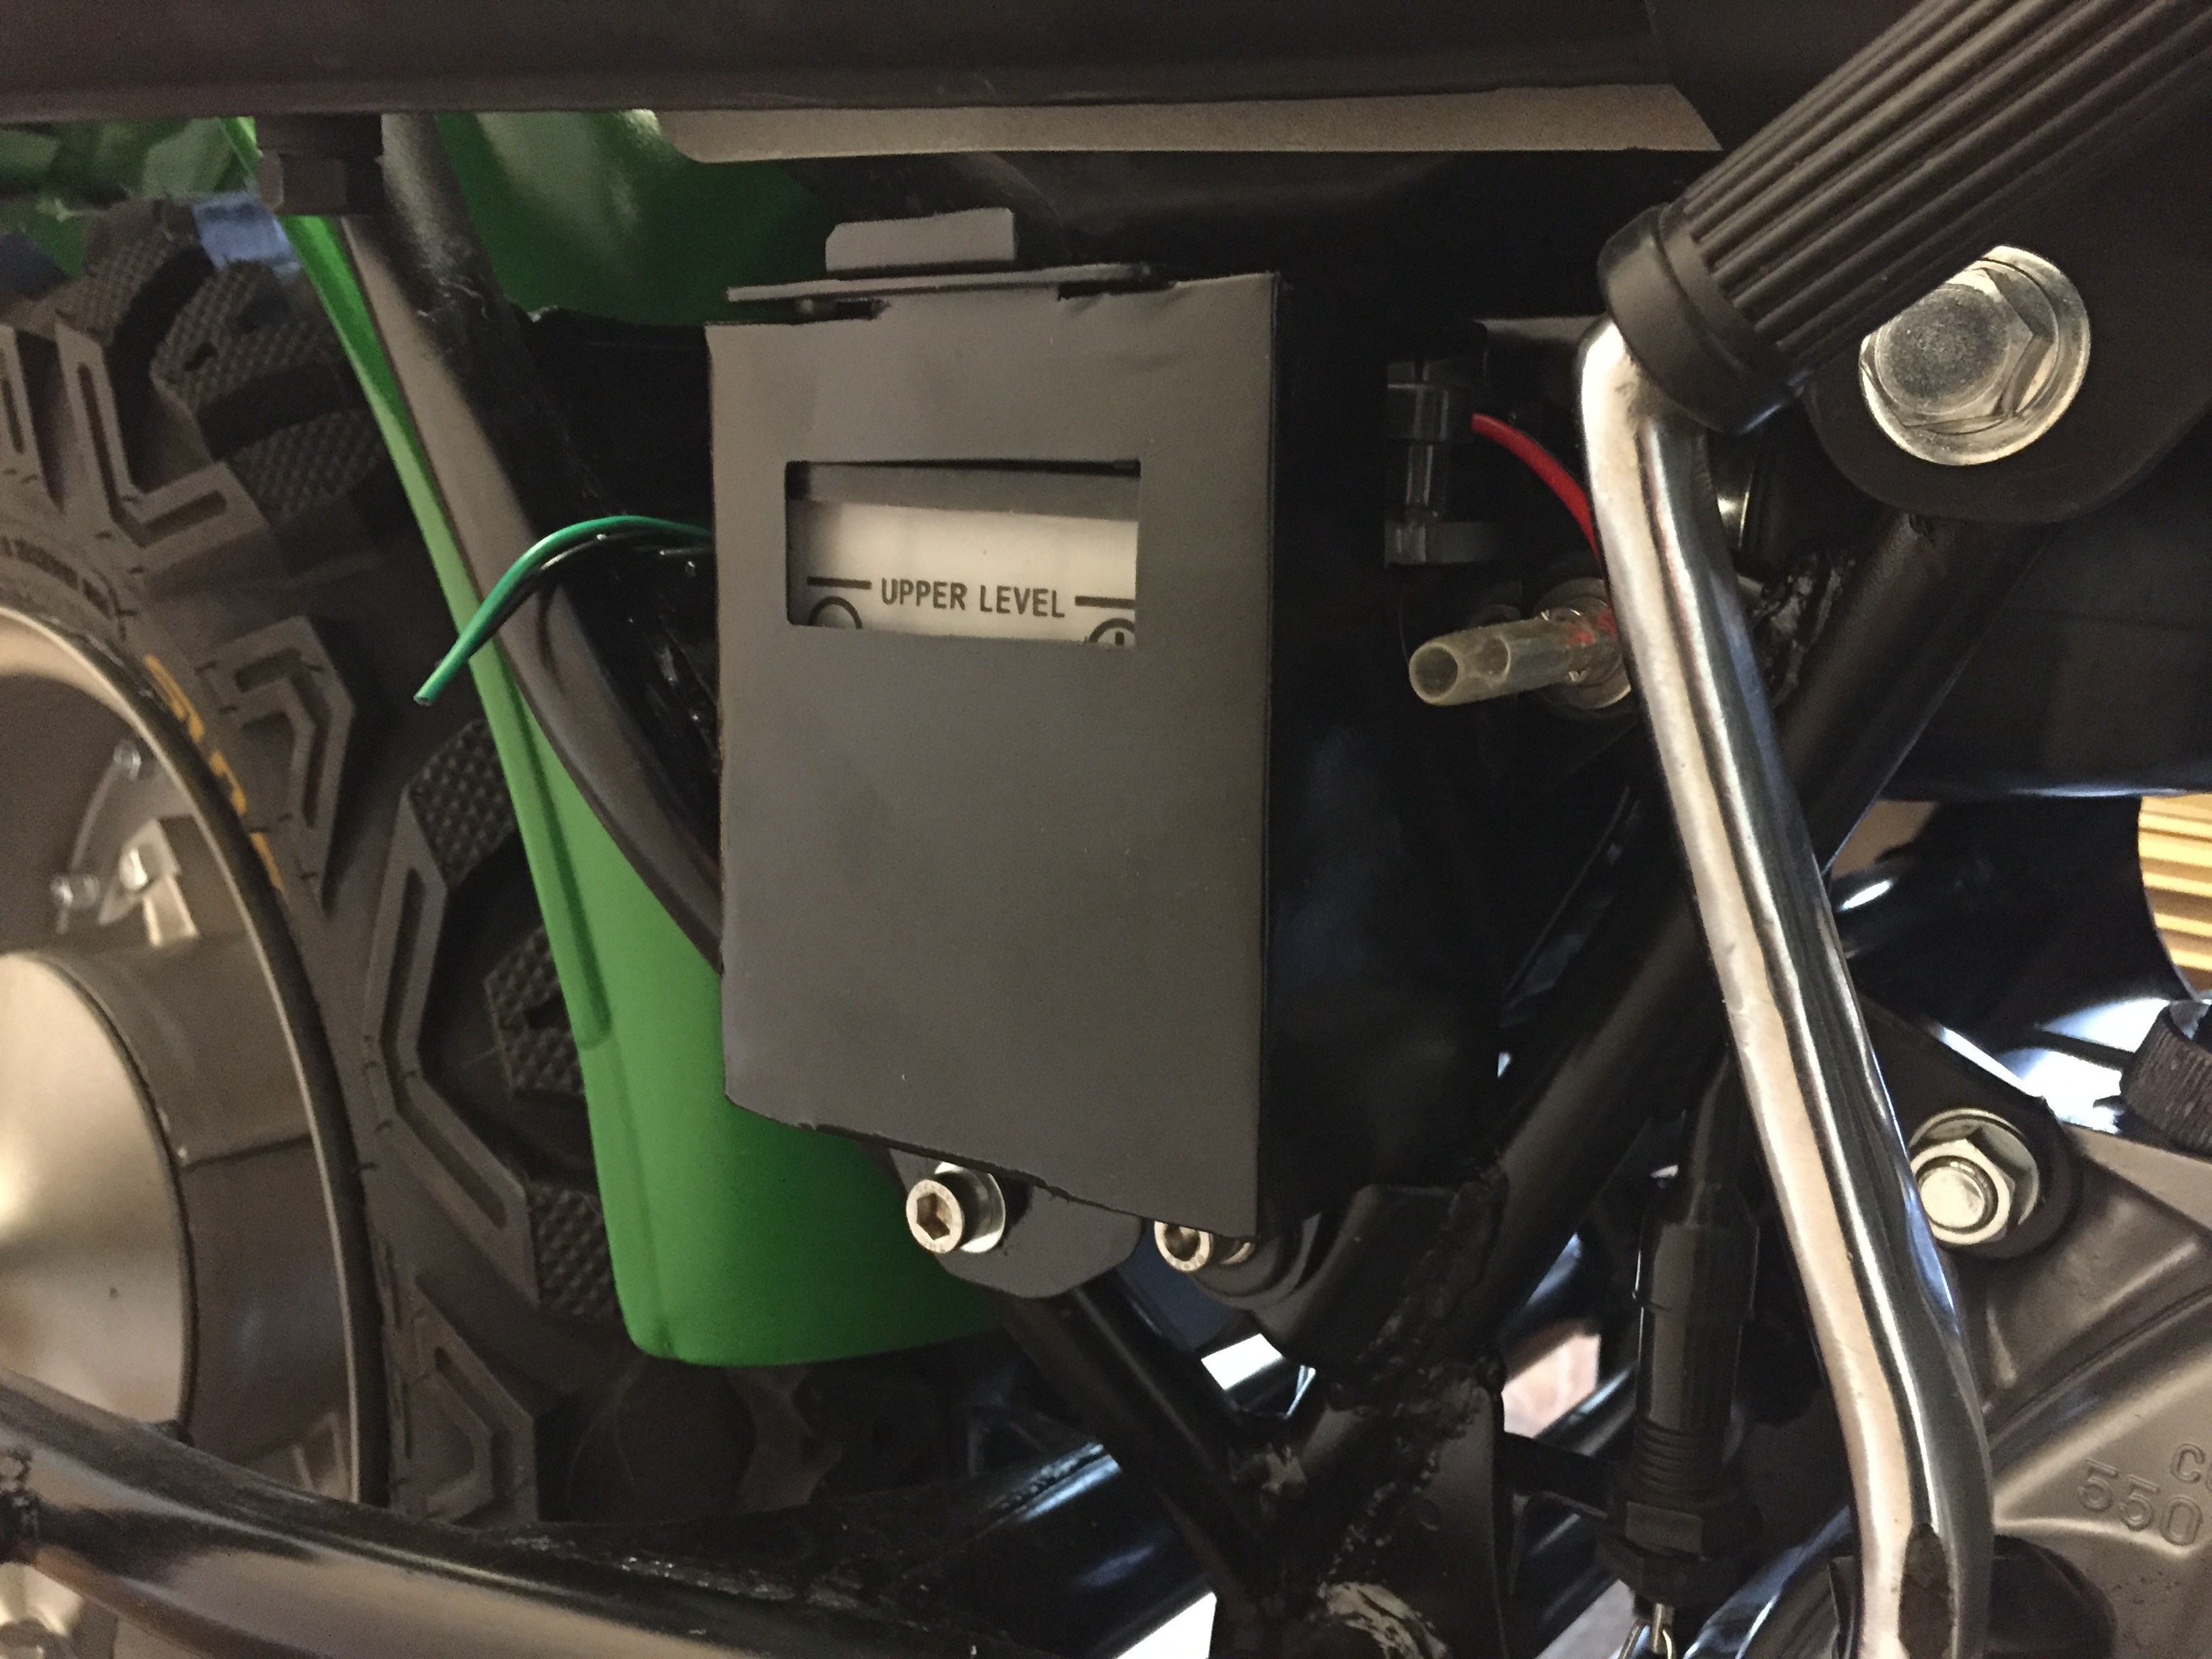
And with that, folks, we are up to date. All that remains on the punch list is wiring, check the timing, prime the 2t oil pump, add fluids and source a sprocket cover.
I drew it up in CAD as a flat piece, printed the drawing and transferred it to some sheet metal. I added flanges so I could fold the edges over to make it more rigid, as I only had 22ga sheet metal on hand. Cut out the shape with tin snips and hammered all the edges flat.
I haven't folded metal since high school metal shop so I figured this would be a fun project to dip into that again. I clamped a piece of angle iron to the workbench and started tapping away with a hammer. After 30 min of hammering and a few test fits, here's what I ended up with.
Again, it got painted gloss black to match everything else. I used some sticky back cork sheeting I've had kicking around on the inside for tighter fitment and to avoid any rattles or vibrations.
And with that, folks, we are up to date. All that remains on the punch list is wiring, check the timing, prime the 2t oil pump, add fluids and source a sprocket cover.
Re: The Van Van - '73 Suzuki RV125 "tracker"
I almost forgot, made this little bracket out of some aluminum angle I had lying around. It bolts up to the stock coil mounts and tucks the new coil up underneath the plastics nicely to leave room for the ever so rare air pump.
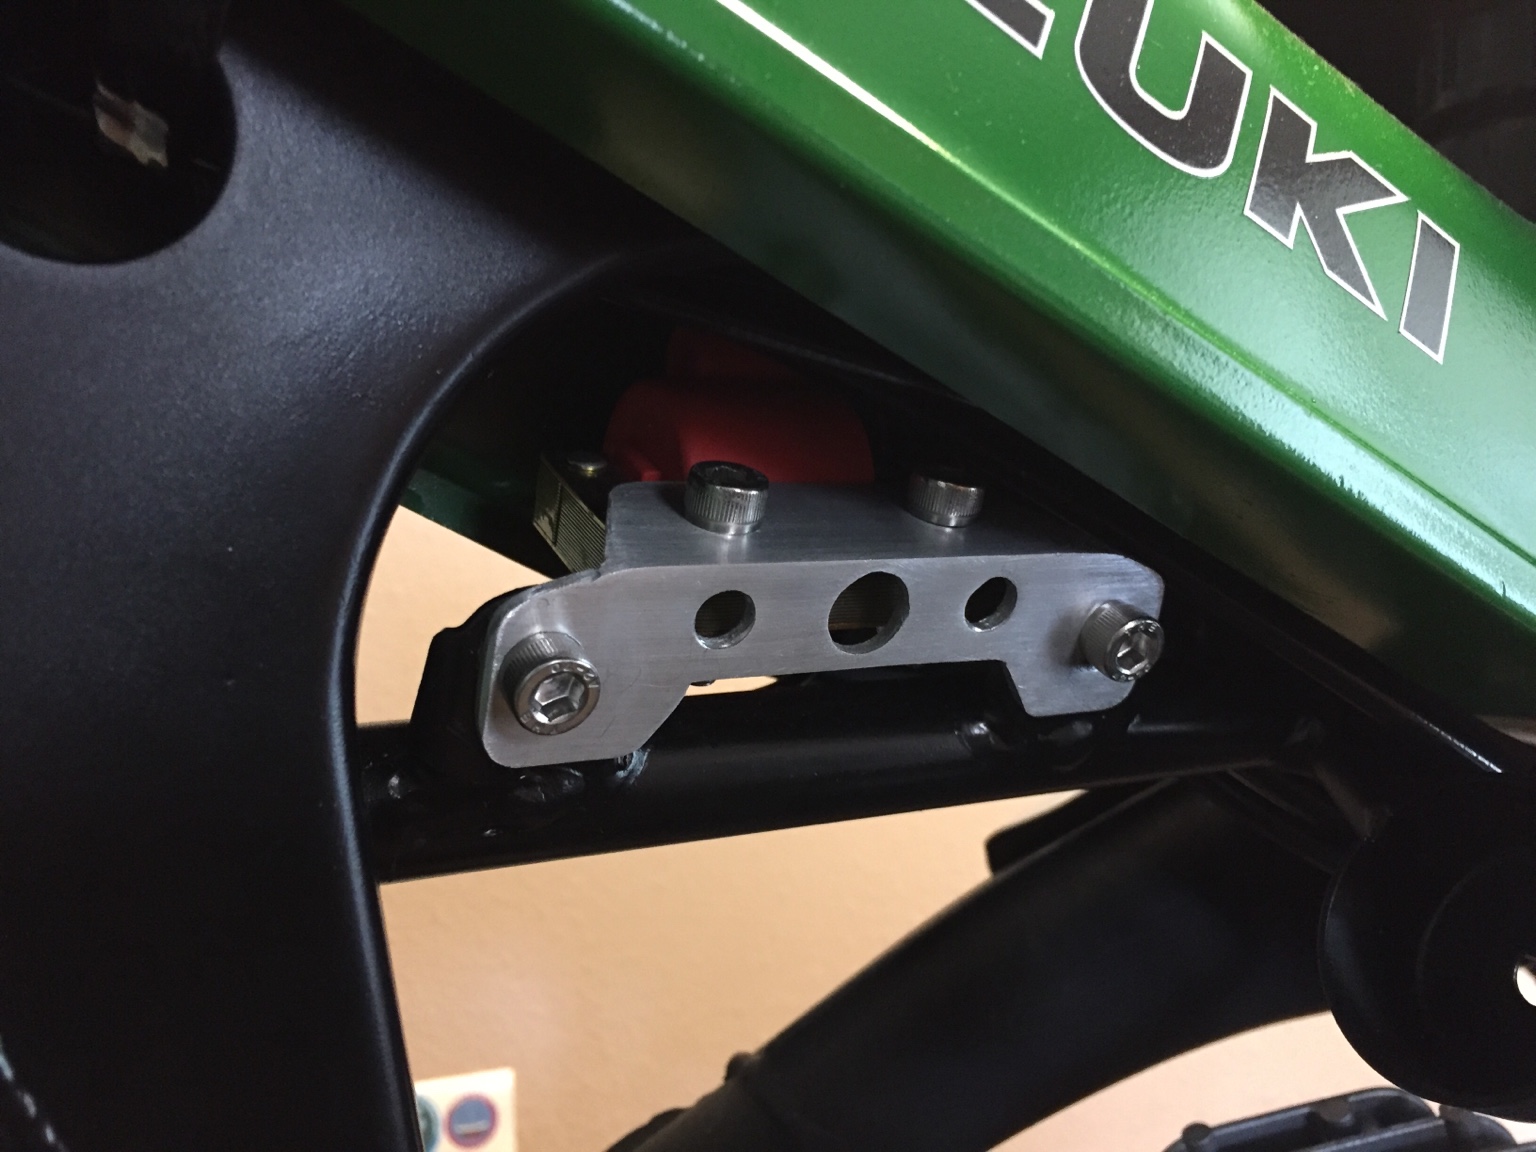
I almost forgot, made this little bracket out of some aluminum angle I had lying around. It bolts up to the stock coil mounts and tucks the new coil up underneath the plastics nicely to leave room for the ever so rare air pump.
JustinLonghorn
No Purple Hearts, No Blue Ribbons
I can definitely dig it, man!
crazypj
Split personality, I fake being smart
I don't think I've ever seen the 'bicycle pump' even though worked on plenty of Suzuki's over the years. Isn't a specific manufacturer and not 'Suzuki' branded? I do remember reading a road test (yep, that long ago) saying you would grow old trying to actually inflate tyres with it ;D
Ha, I was going to 3D print a little mold but I just grabbed a nearby eraser off the desk and went with it. Took some filing to get it to fit but much more efficient.
With the help of new DTT member here morto, I’ve been gathering the necessary pieces to put a stock harness back together. I plan to make a new harness from scratch eventually.
When I got the bike, the harness had been lopped off before the headlight bucket, so a lot was missing. Including the very difficult to pinpoint ignition switch and sub-harness in the headlight bucket that I only realized I was missing after trying to wire the thing up and staring at it blankly for a few hours.
The complete original harness and the old chopped harness. Sub-harness to the left, connects to main harness inside the headlight bucket.
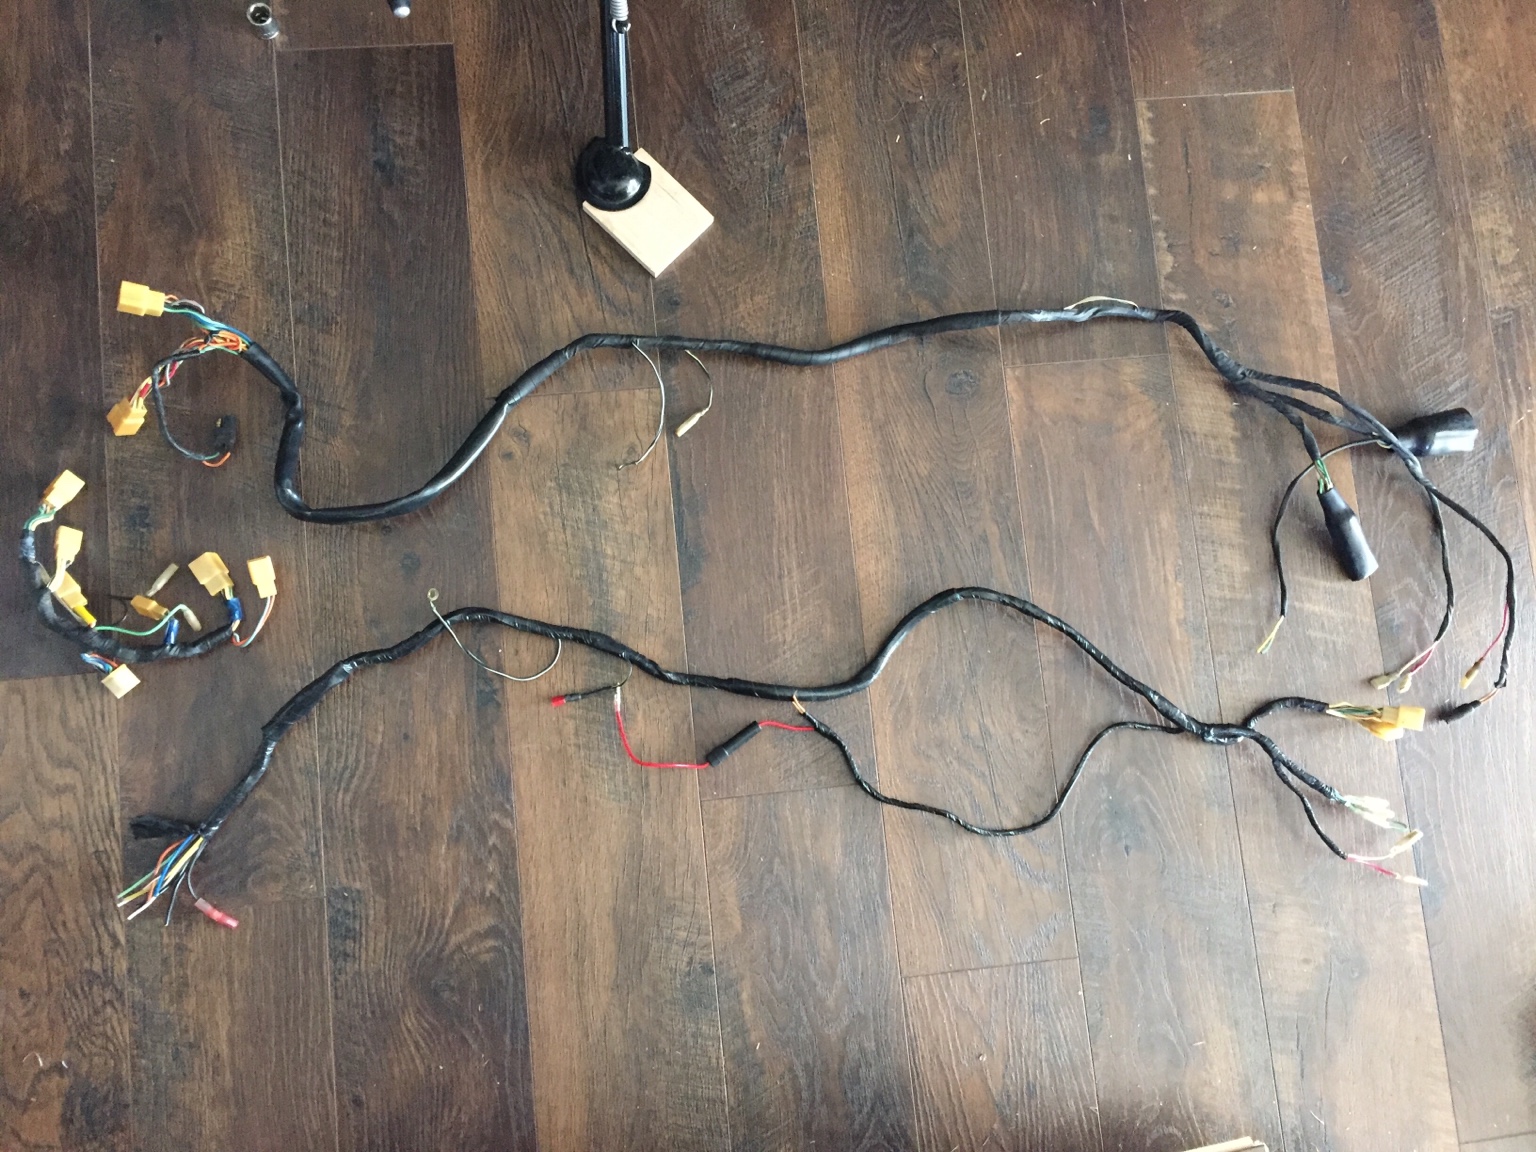
Original Suzuki Ignition switch. There are 3-4 part numbers in Suzuki’s parts fiche for this piece, but only one of them is actually the correct part. Shrugs.

And now the most important bit on the bike...
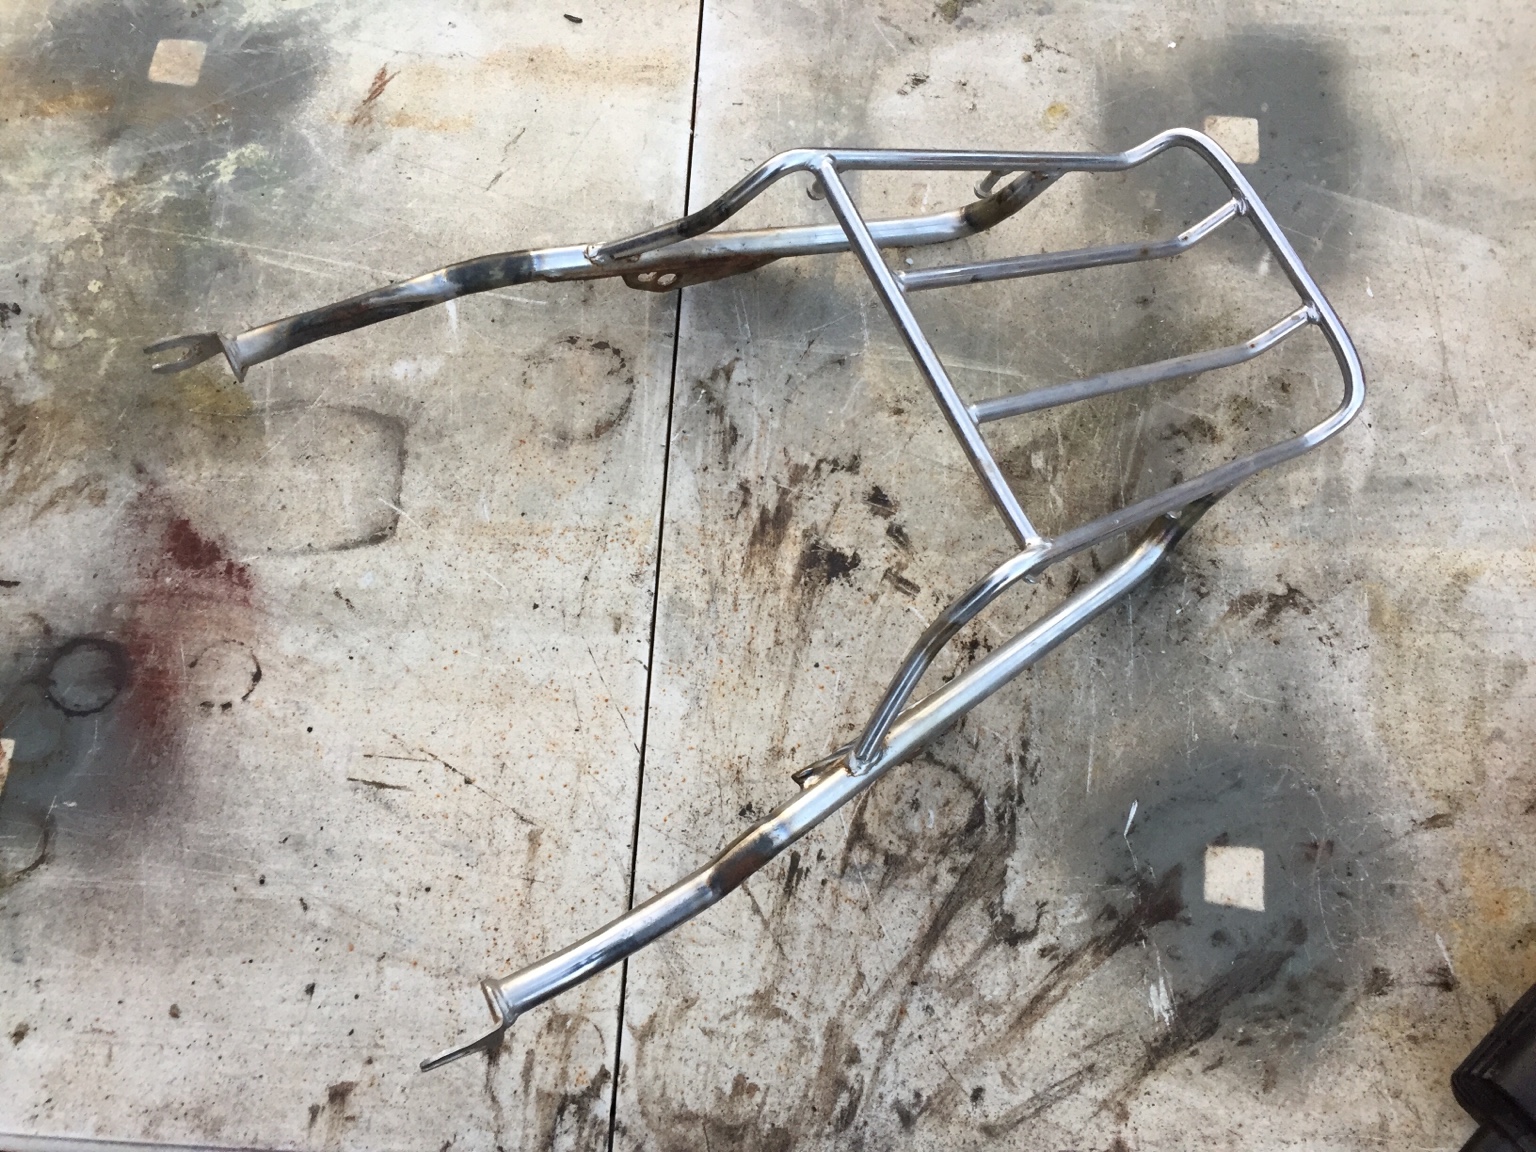
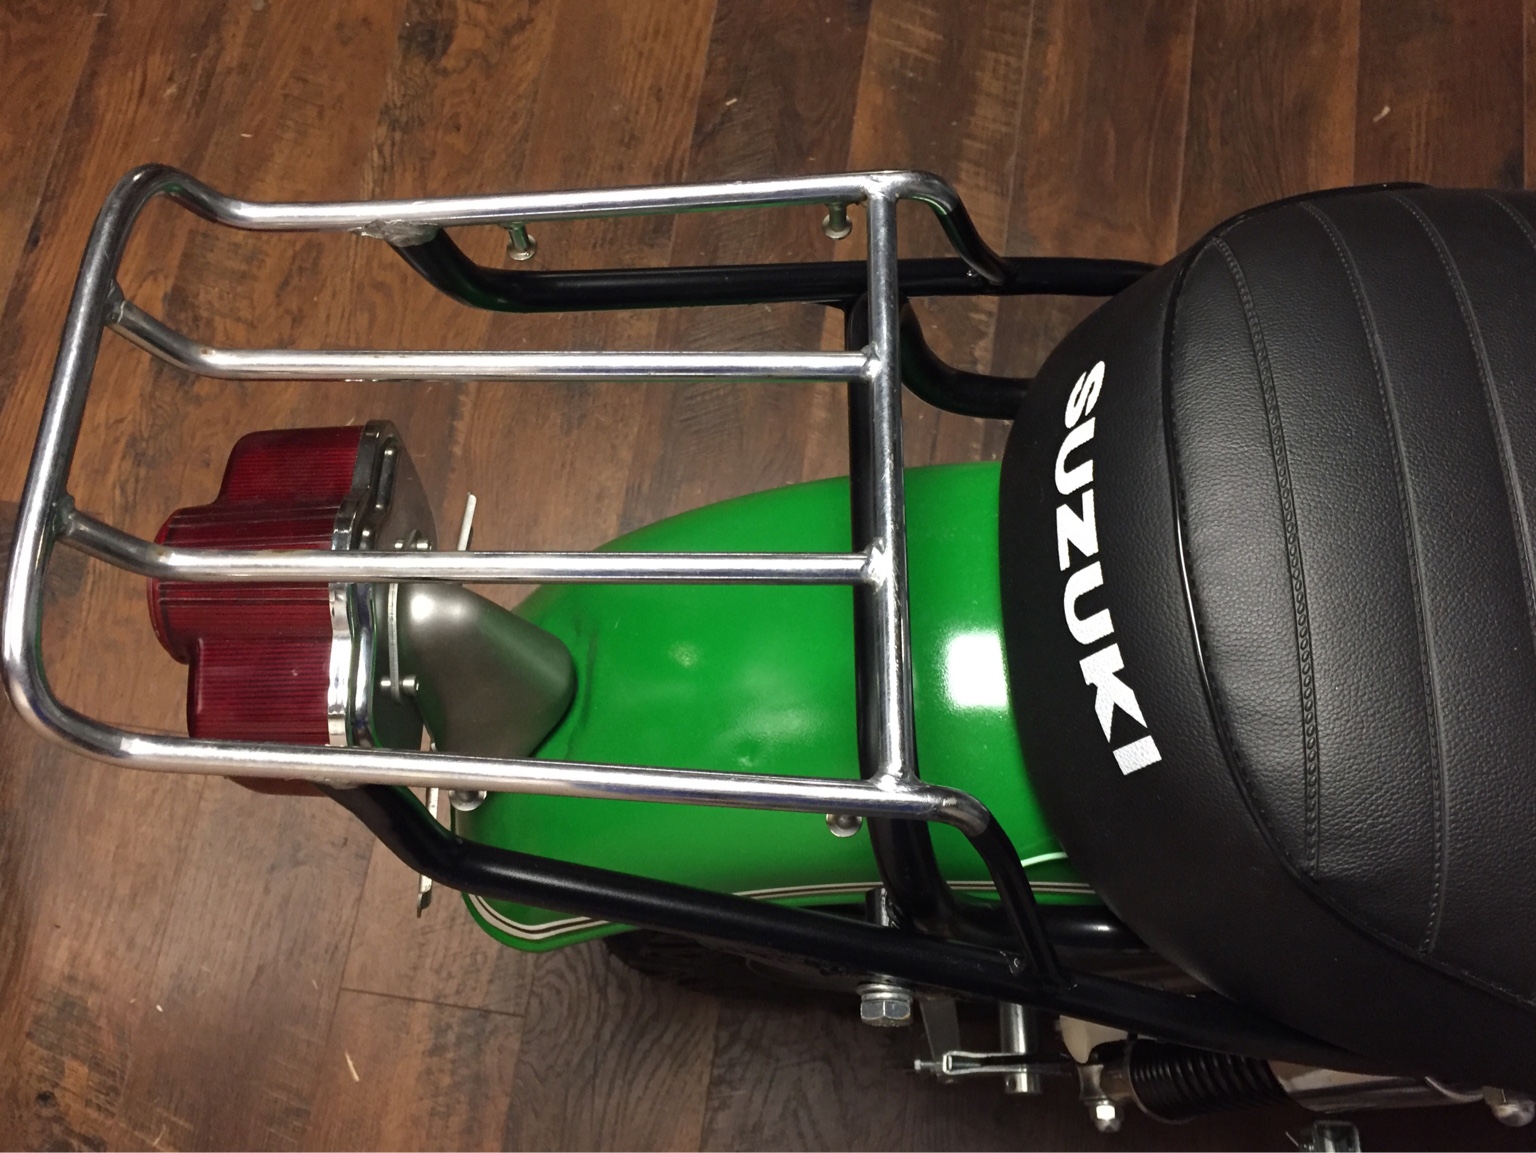
This old rack came with the bike, and it had kinda been bent to fit and the left side mount was flipped over and booger welded back on. Seeing as I replaced the mount on the frame since it was bent, I needed to refit it to my liking.
Cut the left side mount off, then trimmed both mounts down a bit to clean it up and get rid of the unnecessary holes. I painted the bottom half in black to cover up the rusty bits and get some paint on the welds, but I wanted to leave the top part original chrome for durability. Wasn’t sure how it would come out, but I think it looks ok and I won’t have to worry about paint chipping when I’m doing beer runs.
Before:
After re-fit, paint, and some new hardware:
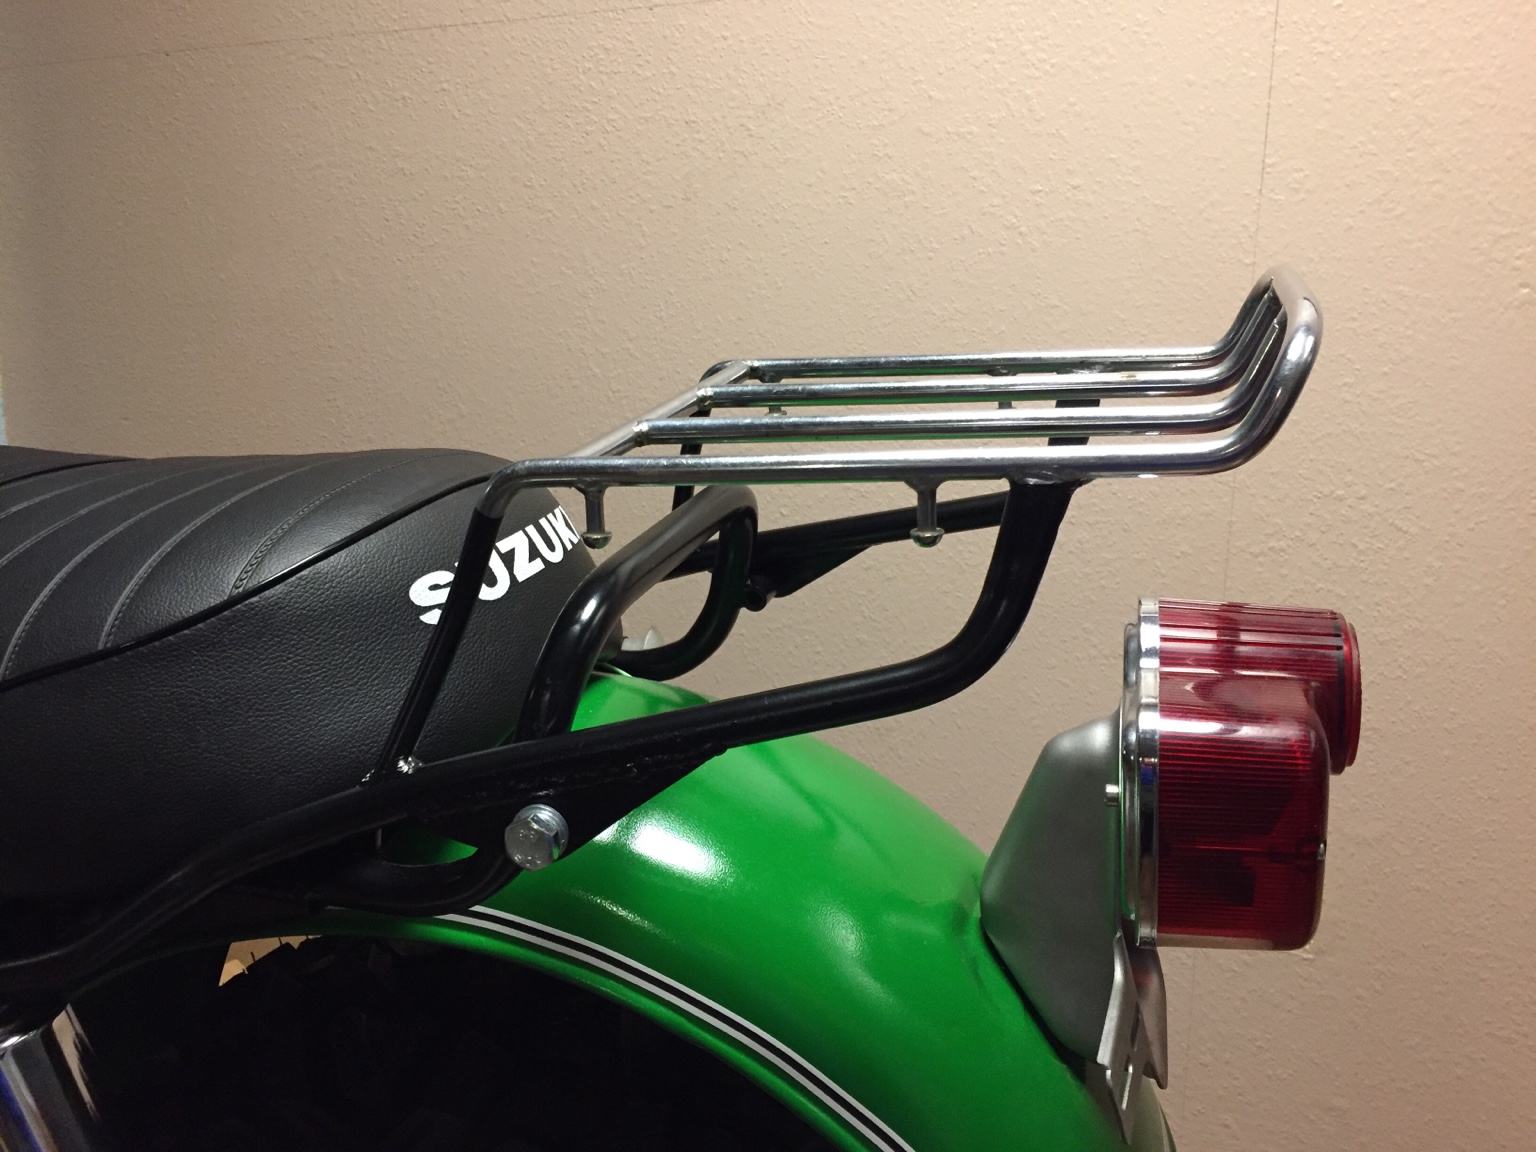
aaaand success
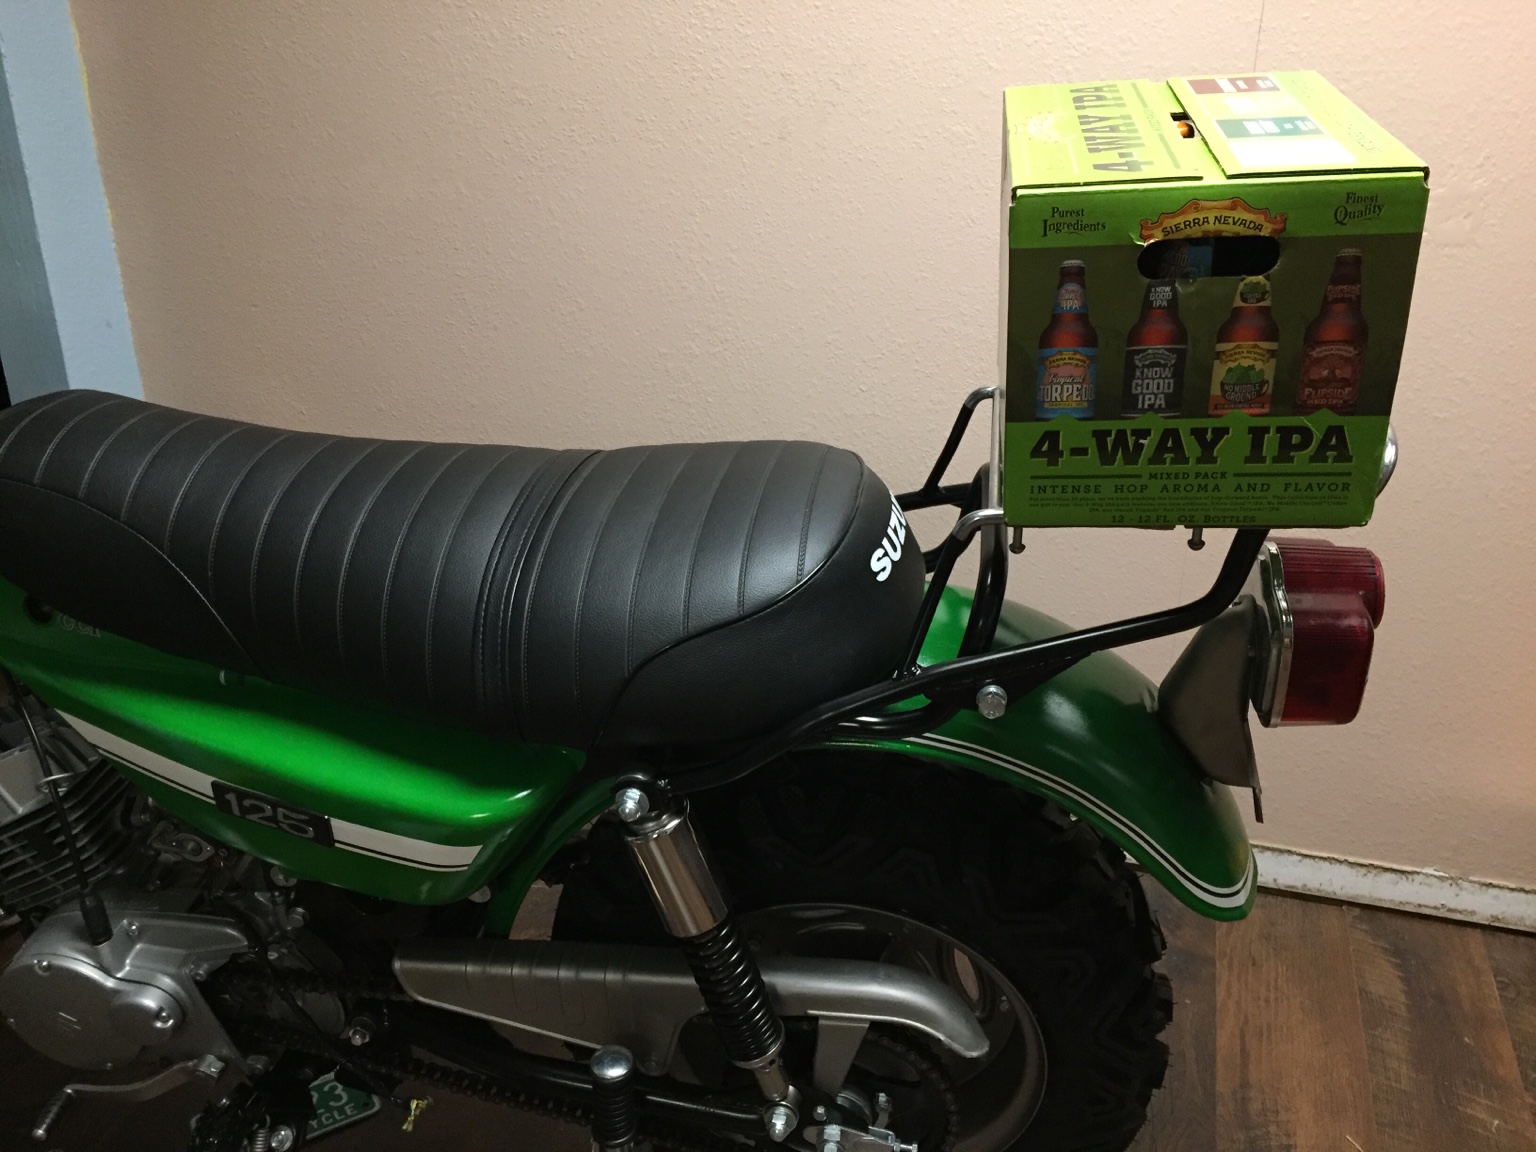
Now I just need to go to the flea market and buy a hip vintage milk crate to go on the back
With the help of new DTT member here morto, I’ve been gathering the necessary pieces to put a stock harness back together. I plan to make a new harness from scratch eventually.
When I got the bike, the harness had been lopped off before the headlight bucket, so a lot was missing. Including the very difficult to pinpoint ignition switch and sub-harness in the headlight bucket that I only realized I was missing after trying to wire the thing up and staring at it blankly for a few hours.
The complete original harness and the old chopped harness. Sub-harness to the left, connects to main harness inside the headlight bucket.
Original Suzuki Ignition switch. There are 3-4 part numbers in Suzuki’s parts fiche for this piece, but only one of them is actually the correct part. Shrugs.
And now the most important bit on the bike...
This old rack came with the bike, and it had kinda been bent to fit and the left side mount was flipped over and booger welded back on. Seeing as I replaced the mount on the frame since it was bent, I needed to refit it to my liking.
Cut the left side mount off, then trimmed both mounts down a bit to clean it up and get rid of the unnecessary holes. I painted the bottom half in black to cover up the rusty bits and get some paint on the welds, but I wanted to leave the top part original chrome for durability. Wasn’t sure how it would come out, but I think it looks ok and I won’t have to worry about paint chipping when I’m doing beer runs.
Before:
After re-fit, paint, and some new hardware:
aaaand success
Now I just need to go to the flea market and buy a hip vintage milk crate to go on the back
trek97 said:Cant see the pics
Yeah. For some reason the DTT app changed and I can't upload pics in order. Really annoying. Need to repost.
advCo said:Yeah. For some reason the DTT app changed and I can't upload pics in order. Really annoying. Need to repost.
Ill let Tim know.
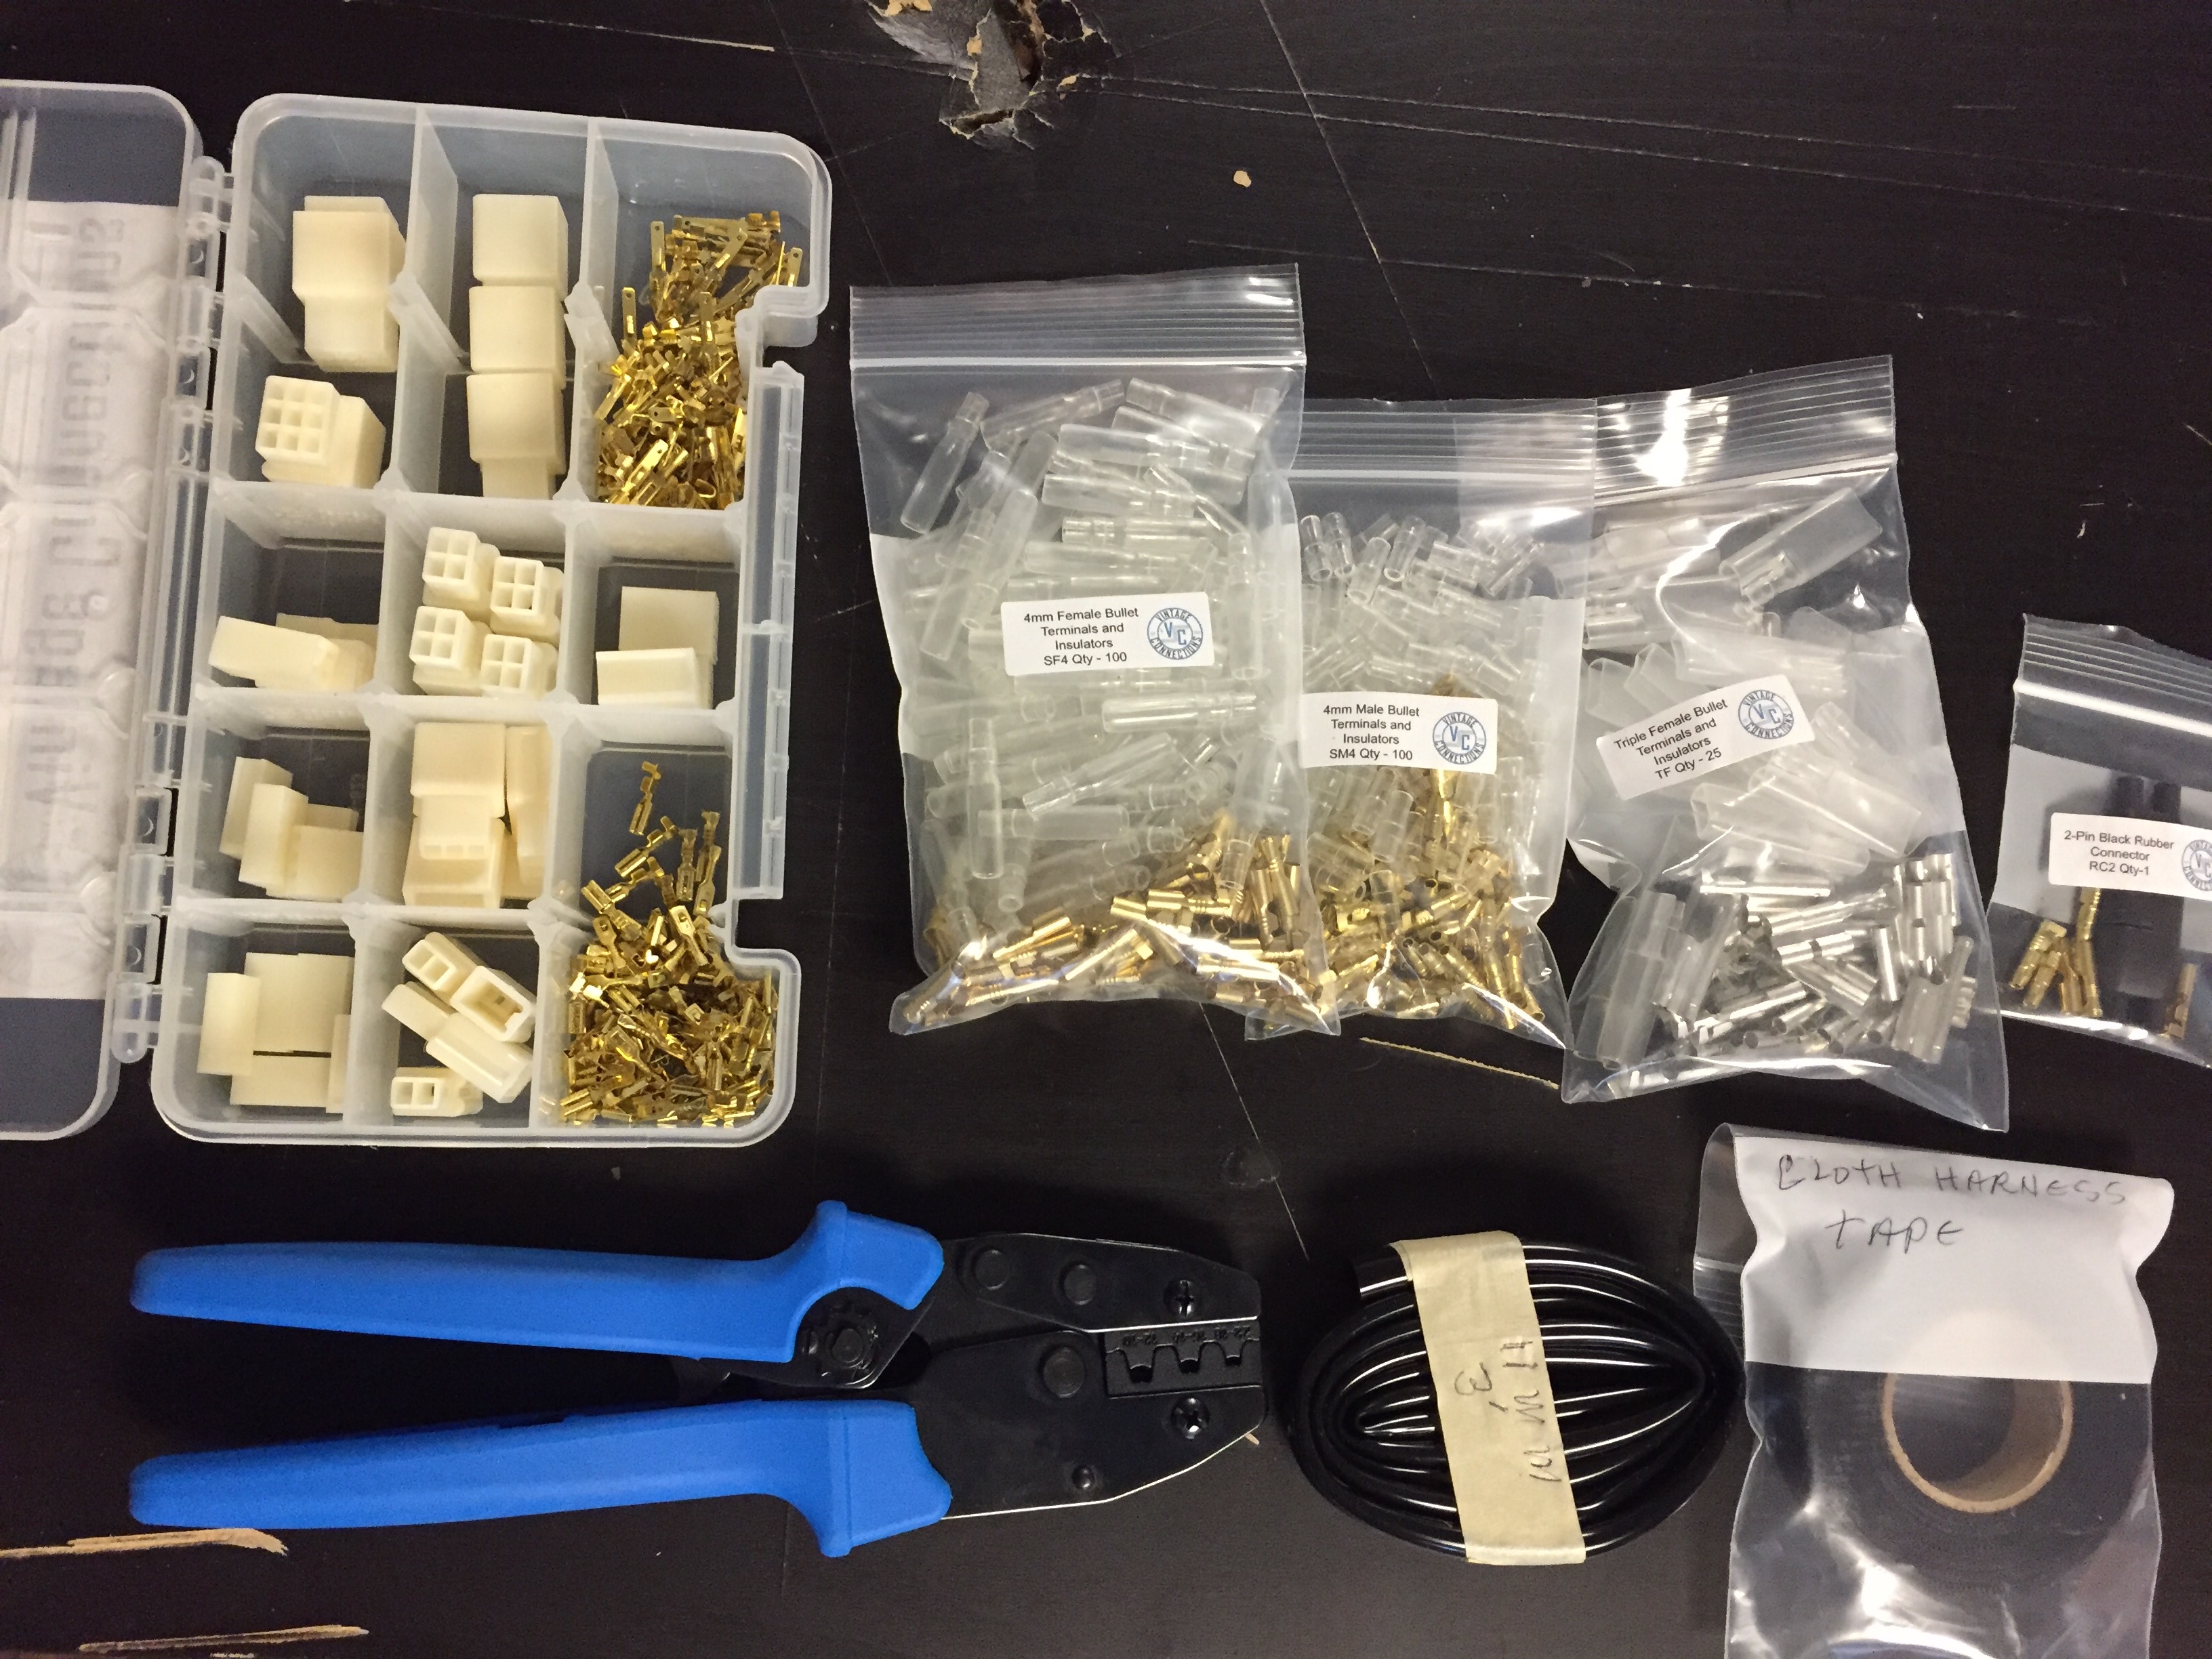
I finally bit the bullet and ordered a whole bunch of stuff from Vintage Connections to get this thing wired up. Stuff is absolutely top notch quality, I won't be caught doing any electrical work without it ever again.
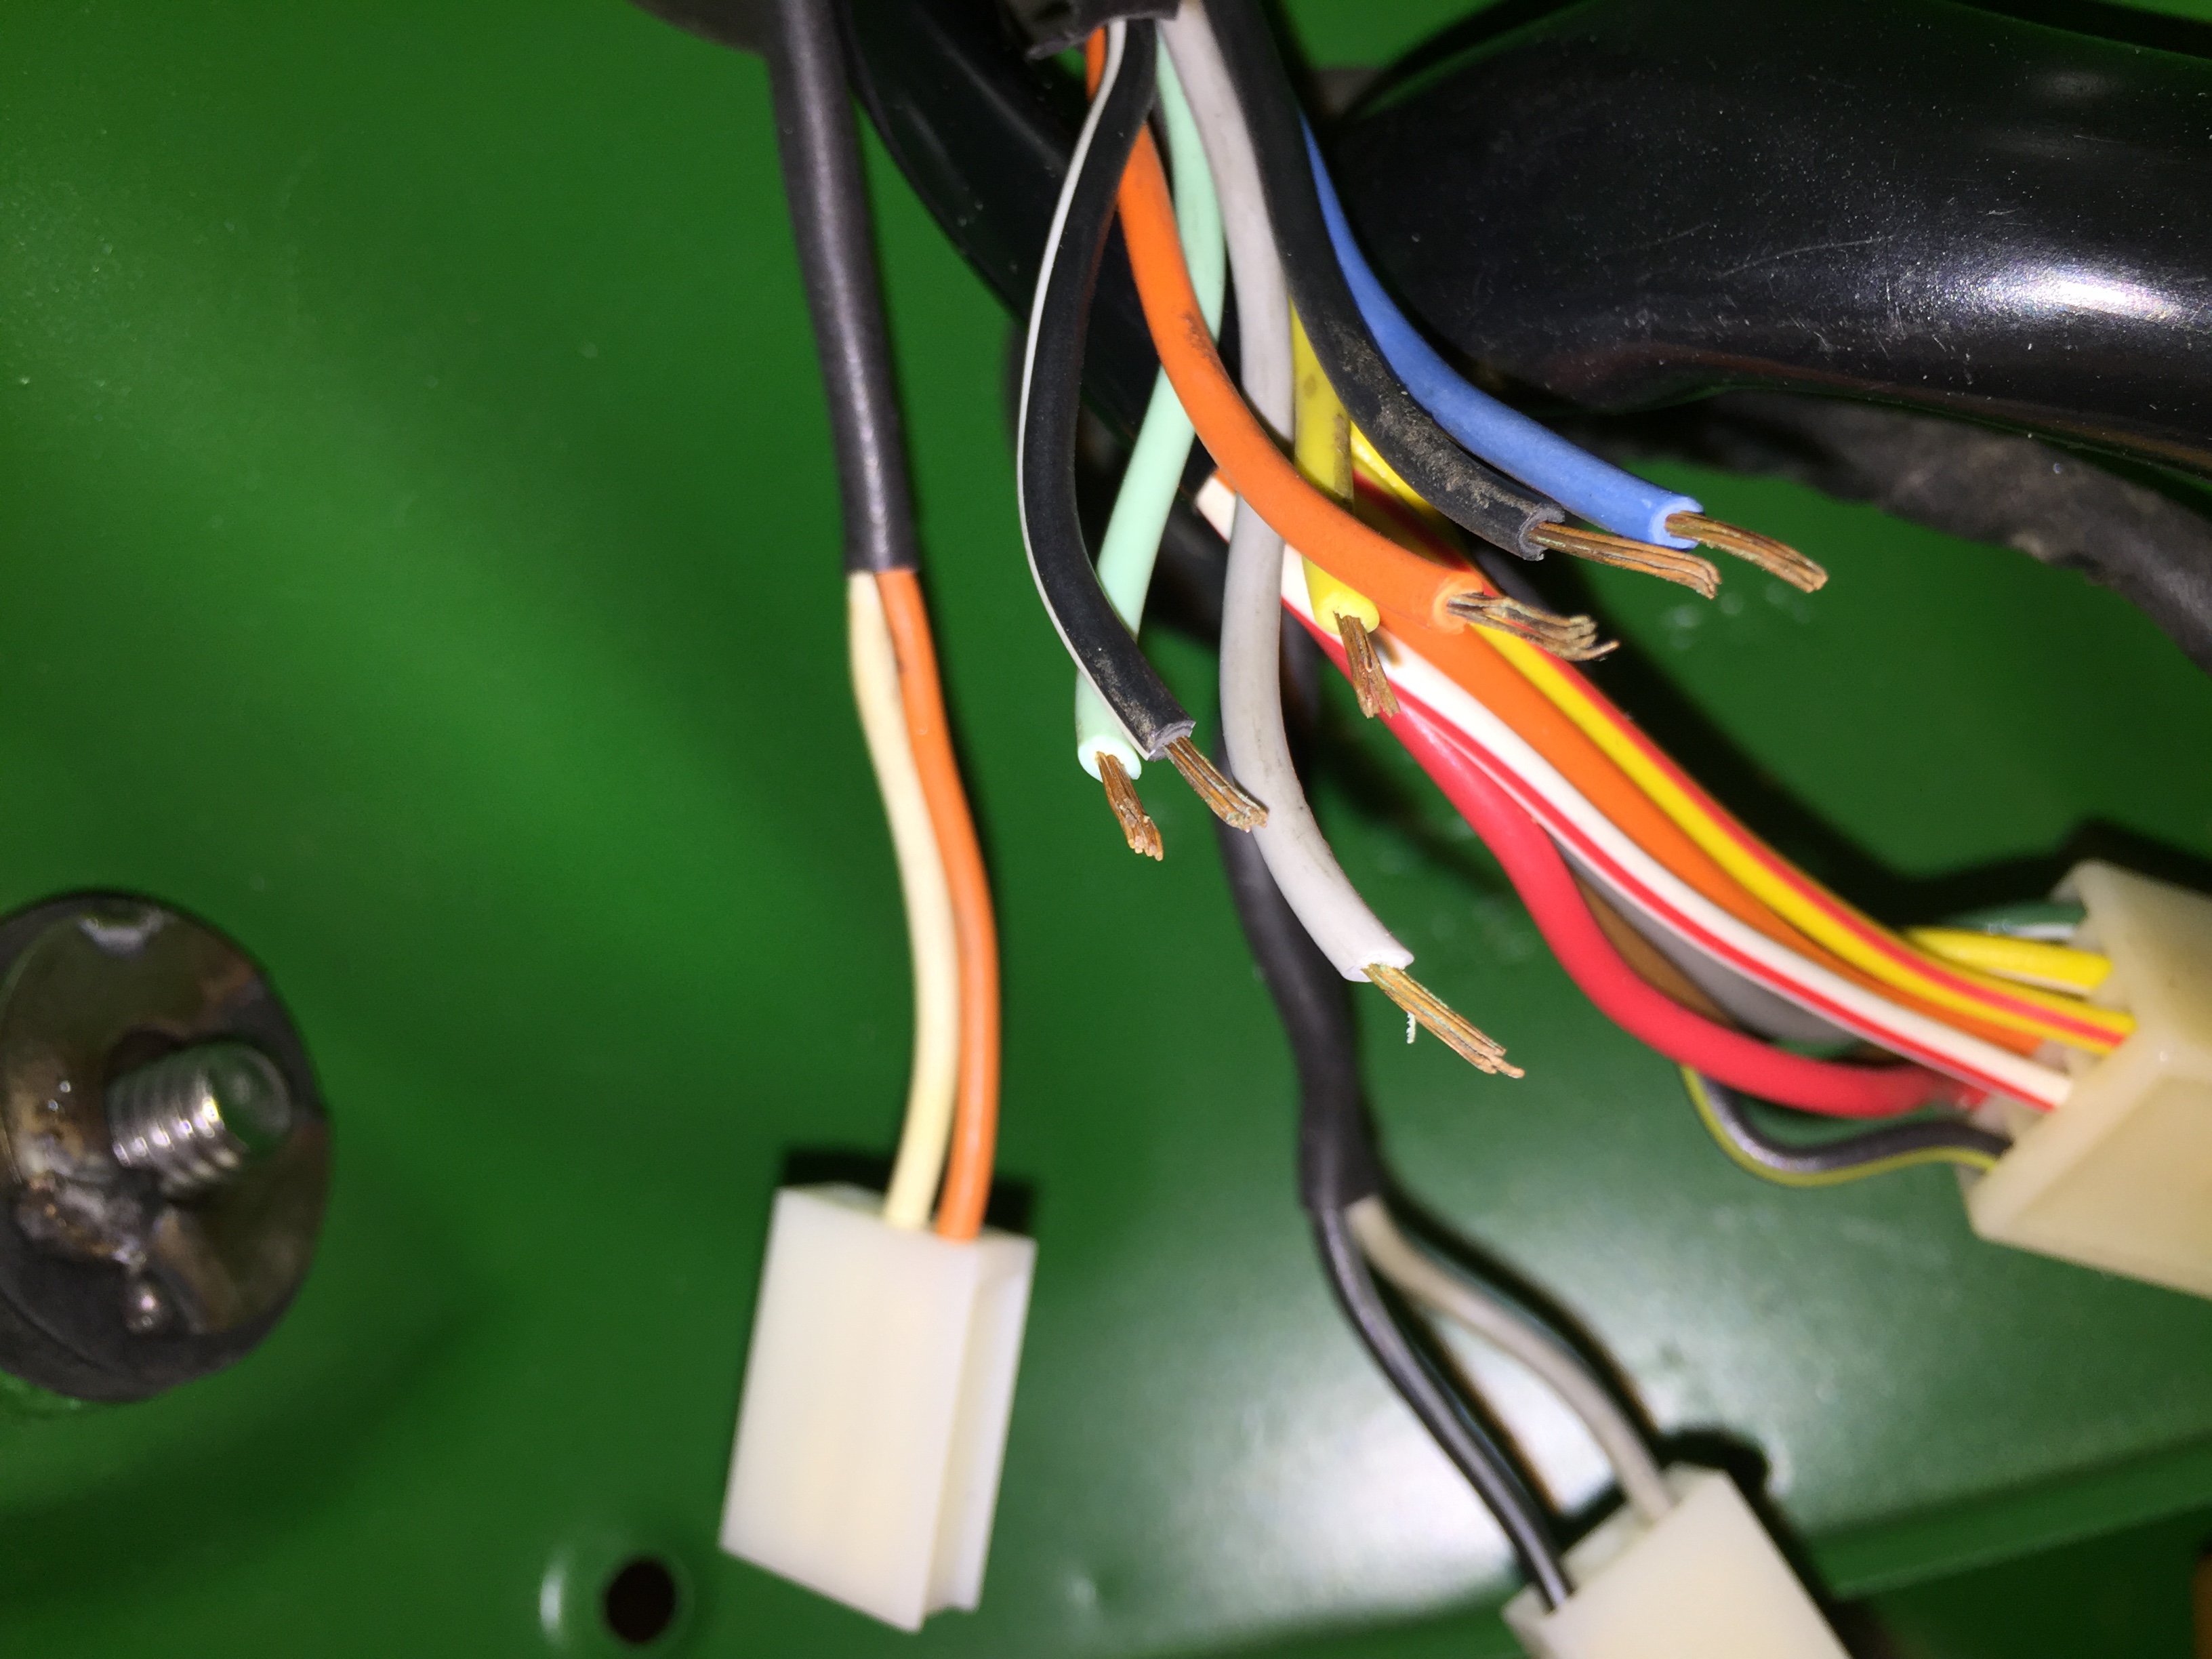
A neat little trick I use when putting new connectors on old wire is to use a mild acid bath to clean off any corrosion. White vinegar and as much salt as will dissolve in the vinegar comprise the acid. Then a bit of baking soda and water in a separate glass, this mixture is used to neutralize the acid. I use shot glasses for containers. Hold the exposed copper wire in the acid bath for about 15-20 seconds, swirling it around if possible. I like to splay out the wires so everything gets cleaned. Pull them out and then dip into the baking soda mixture, swirl them around a bit. Dry off with a paper towel.
Before:
After:
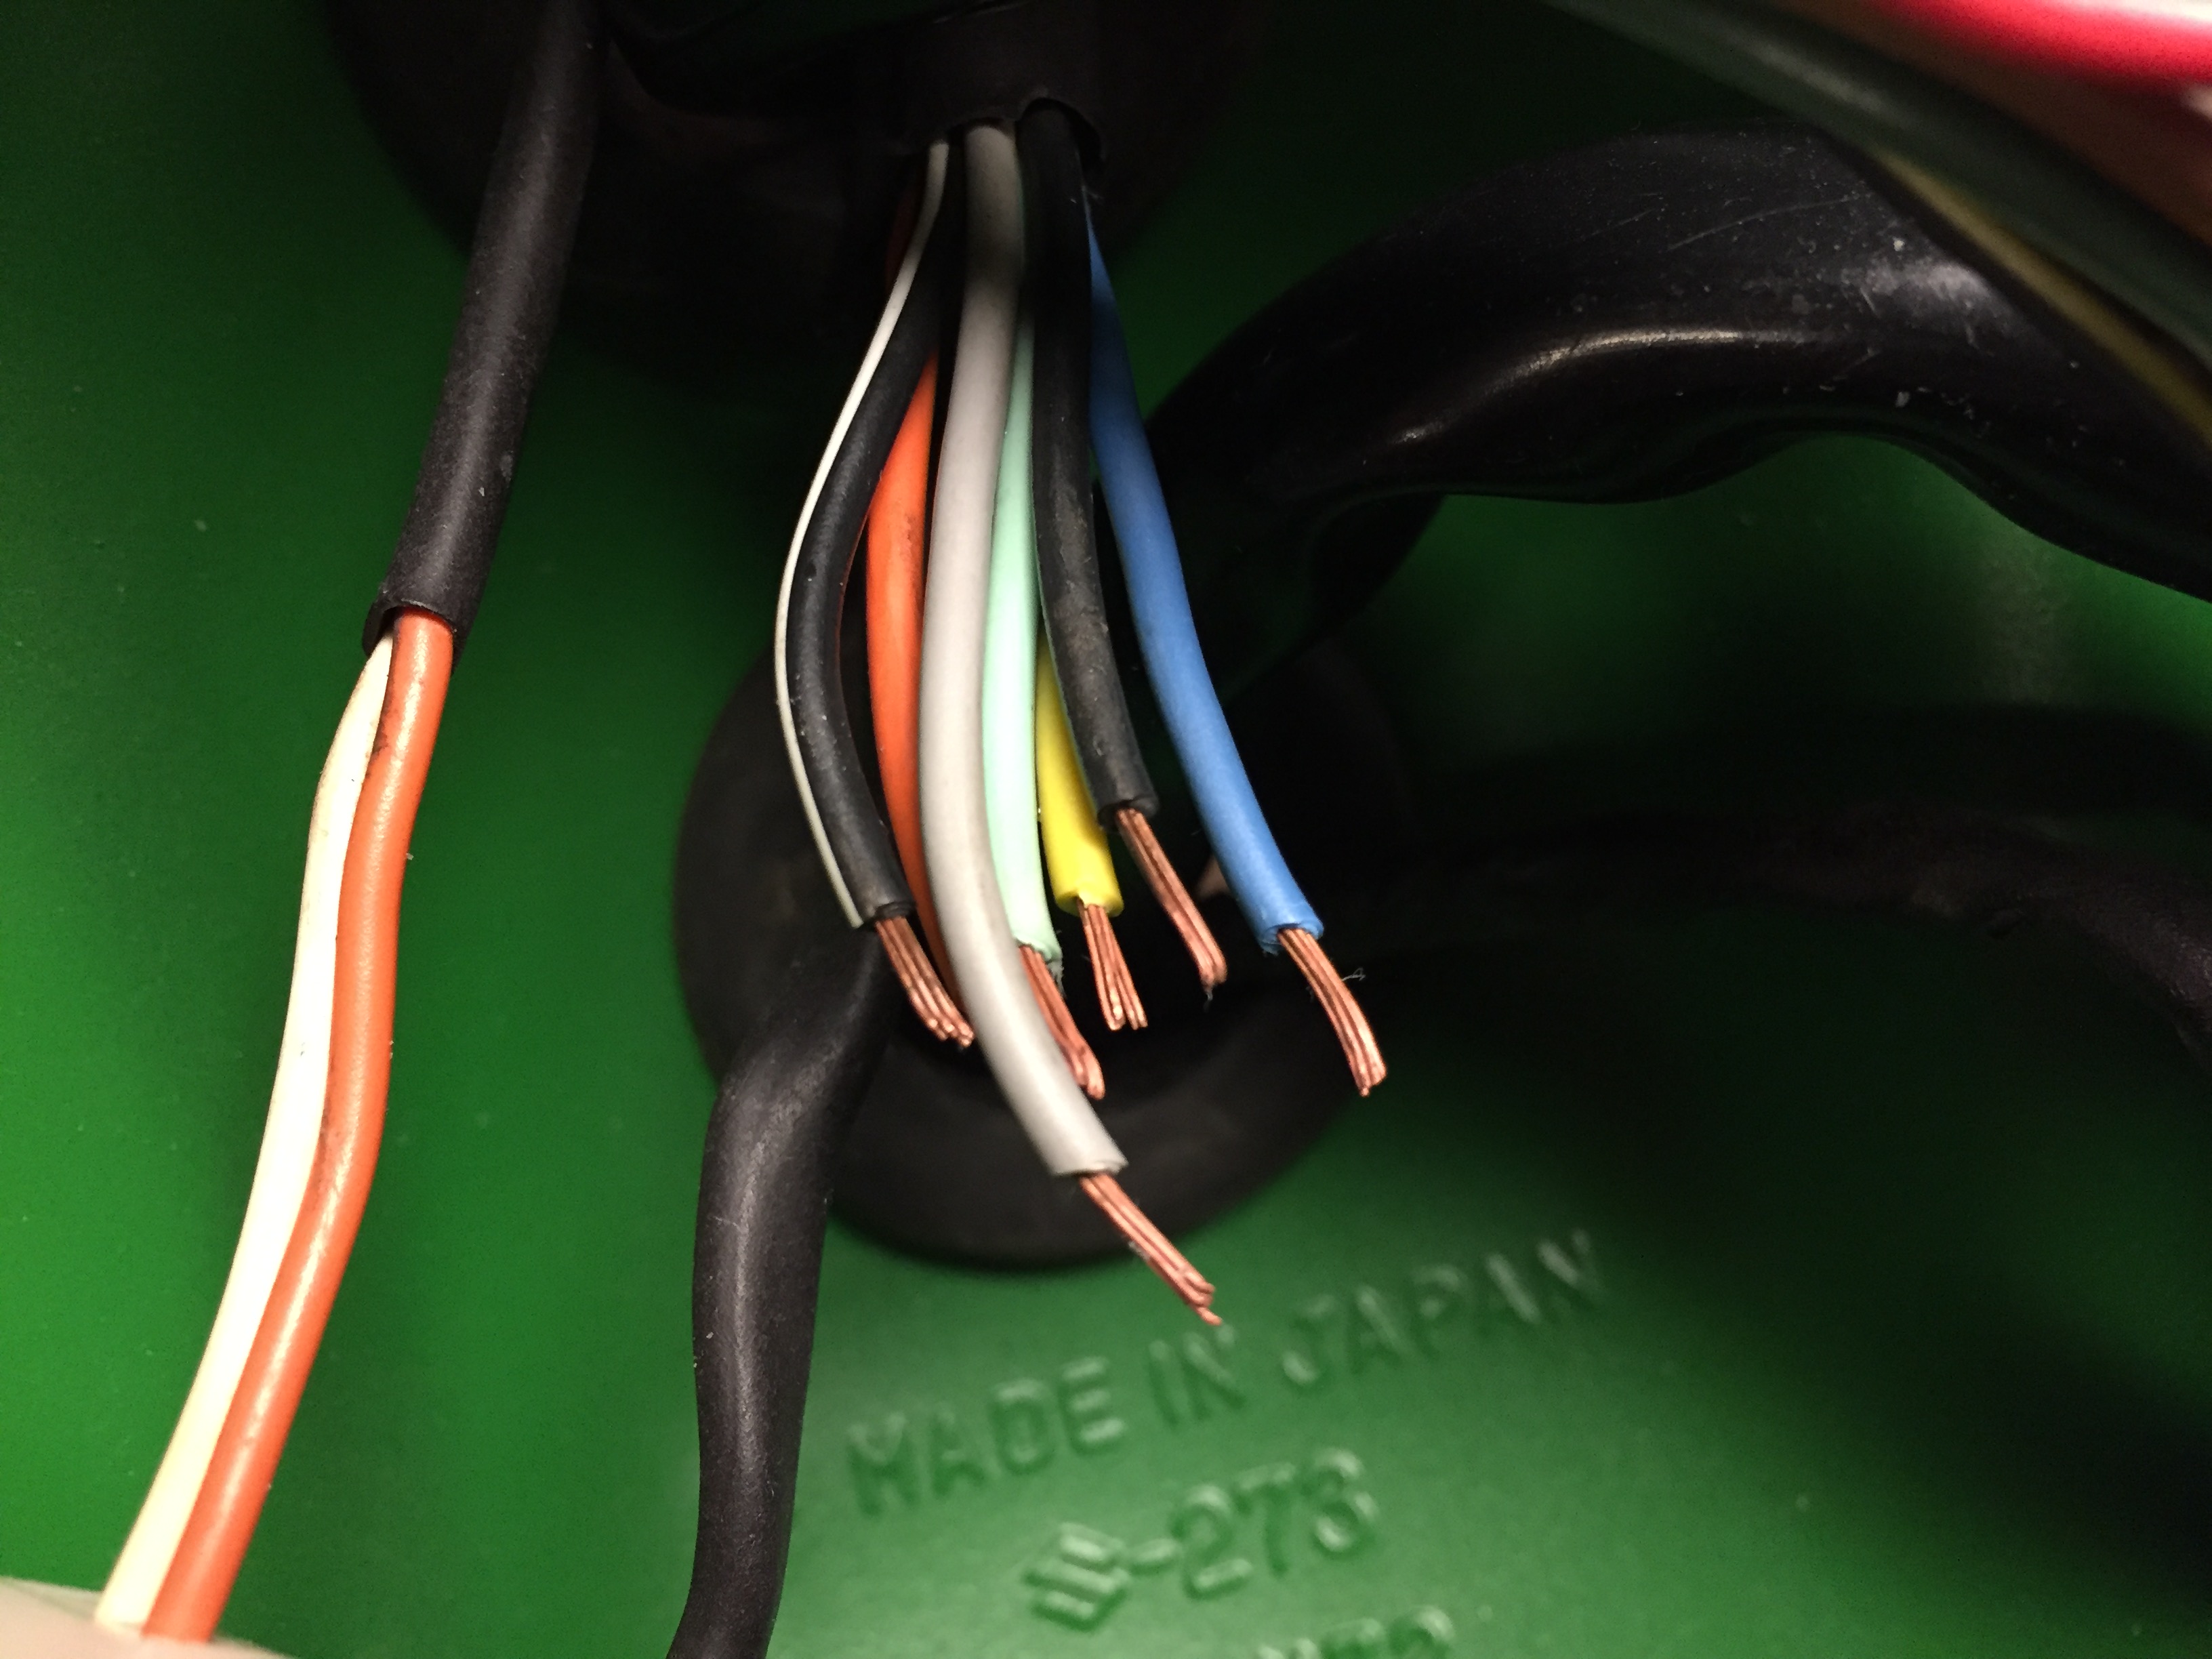
This trick works great especially if you need to solder an old wire.
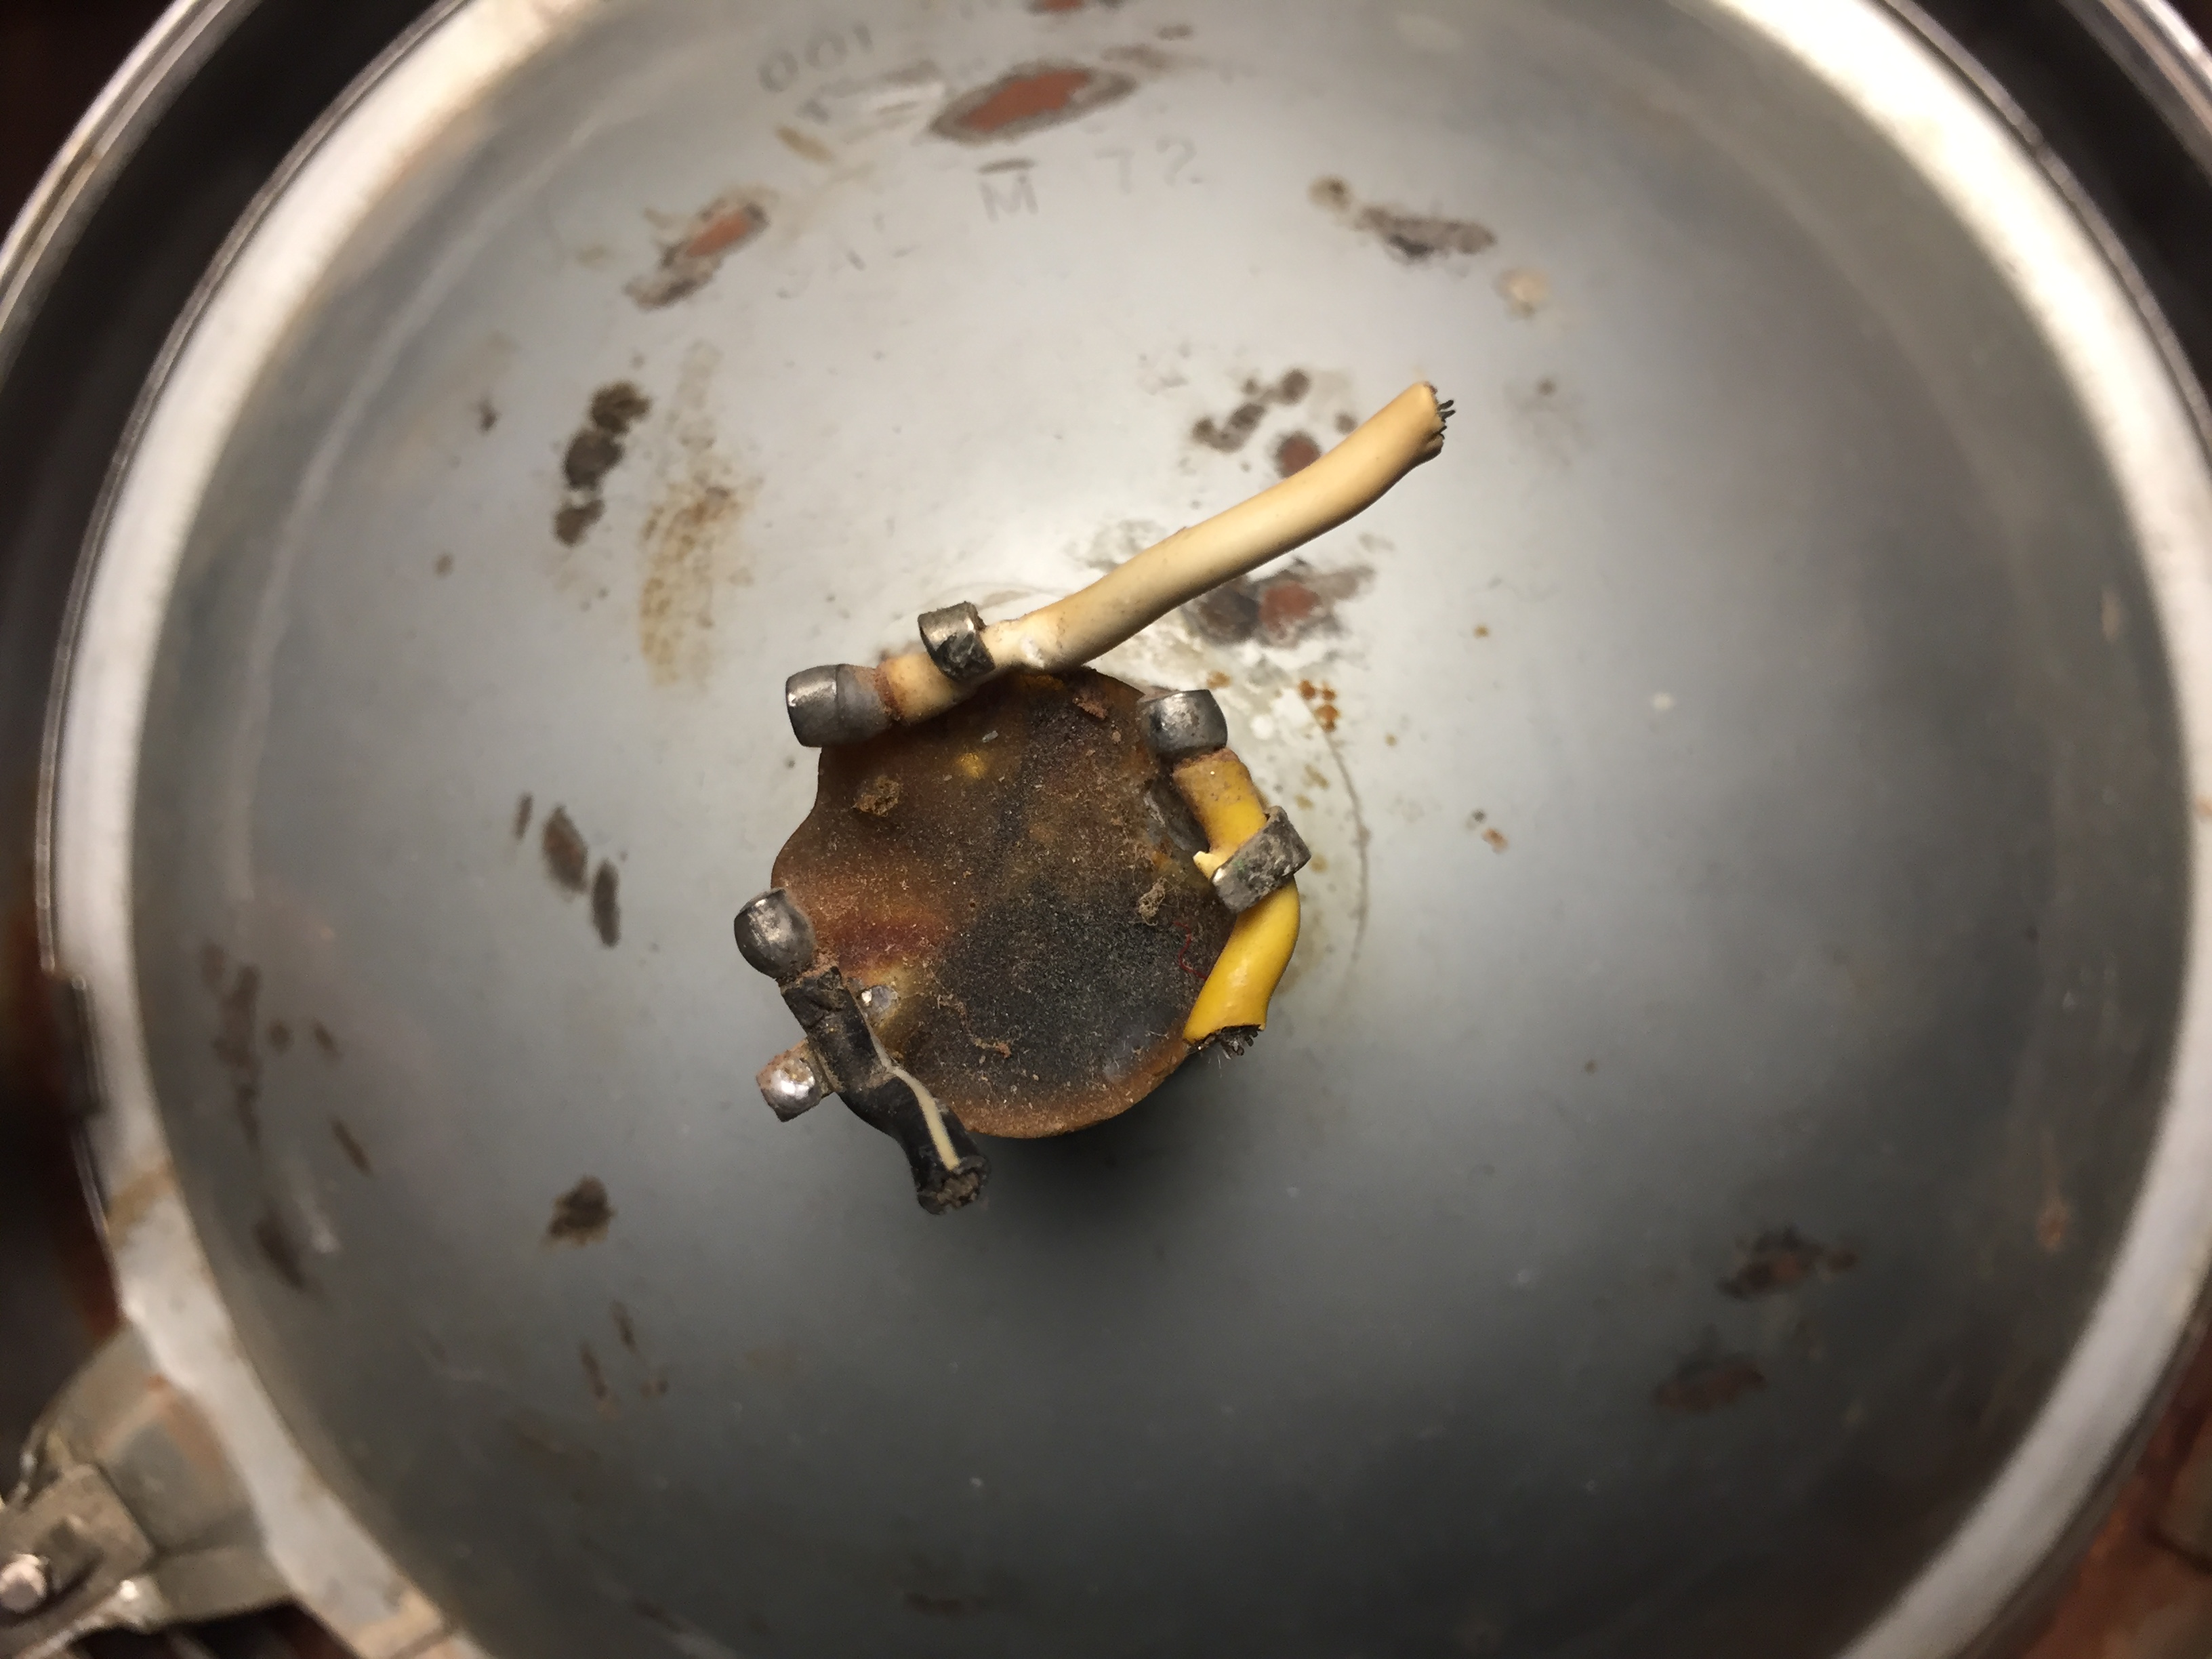
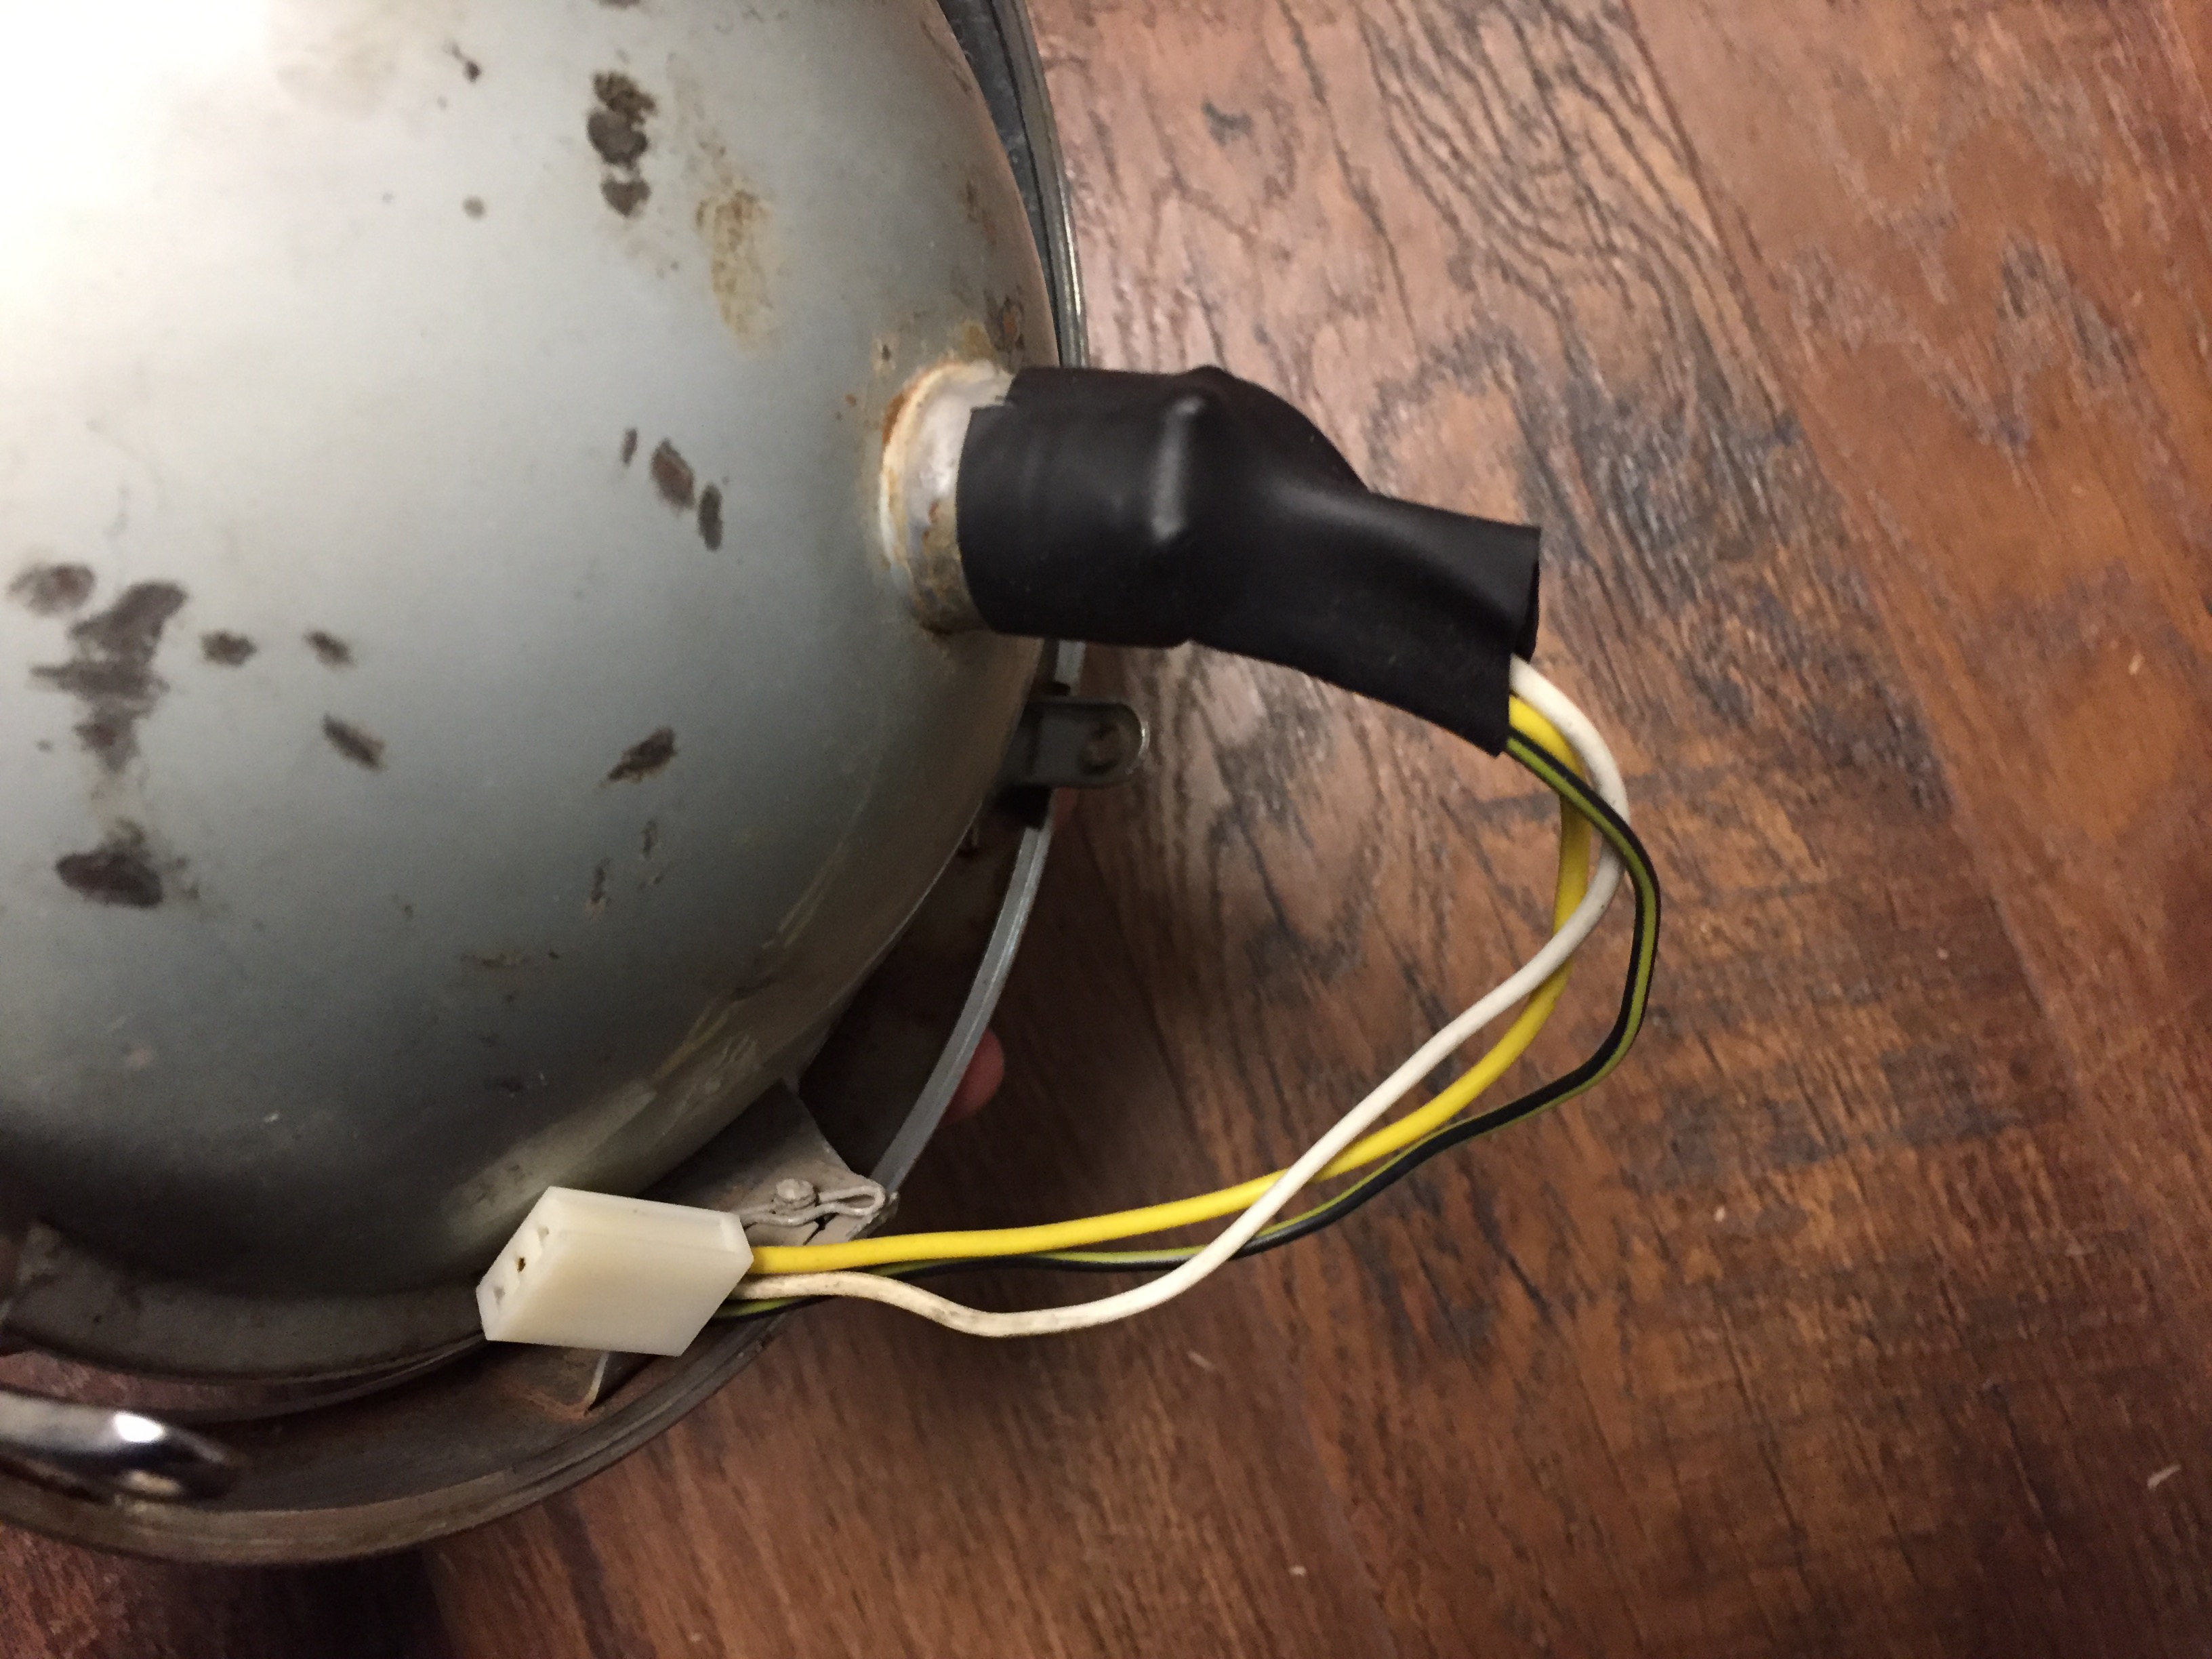
The wires had been cut on the headlight, so I carefully removed what was left of the old wires, soldered on some new ones and then covered with some heat shrink for protection. Finished off with a new block connector.
Here’s the subharness installed and everything wired up. All the lights work, haven't been able to test the headlight yet since I only had it running for about 10 seconds. Need to order a rear brake switch, the one I ordered from China came DOA. Surprising.

A neat little trick I use when putting new connectors on old wire is to use a mild acid bath to clean off any corrosion. White vinegar and as much salt as will dissolve in the vinegar comprise the acid. Then a bit of baking soda and water in a separate glass, this mixture is used to neutralize the acid. I use shot glasses for containers. Hold the exposed copper wire in the acid bath for about 15-20 seconds, swirling it around if possible. I like to splay out the wires so everything gets cleaned. Pull them out and then dip into the baking soda mixture, swirl them around a bit. Dry off with a paper towel.
Before:
After:
This trick works great especially if you need to solder an old wire.
The wires had been cut on the headlight, so I carefully removed what was left of the old wires, soldered on some new ones and then covered with some heat shrink for protection. Finished off with a new block connector.
Here’s the subharness installed and everything wired up. All the lights work, haven't been able to test the headlight yet since I only had it running for about 10 seconds. Need to order a rear brake switch, the one I ordered from China came DOA. Surprising.
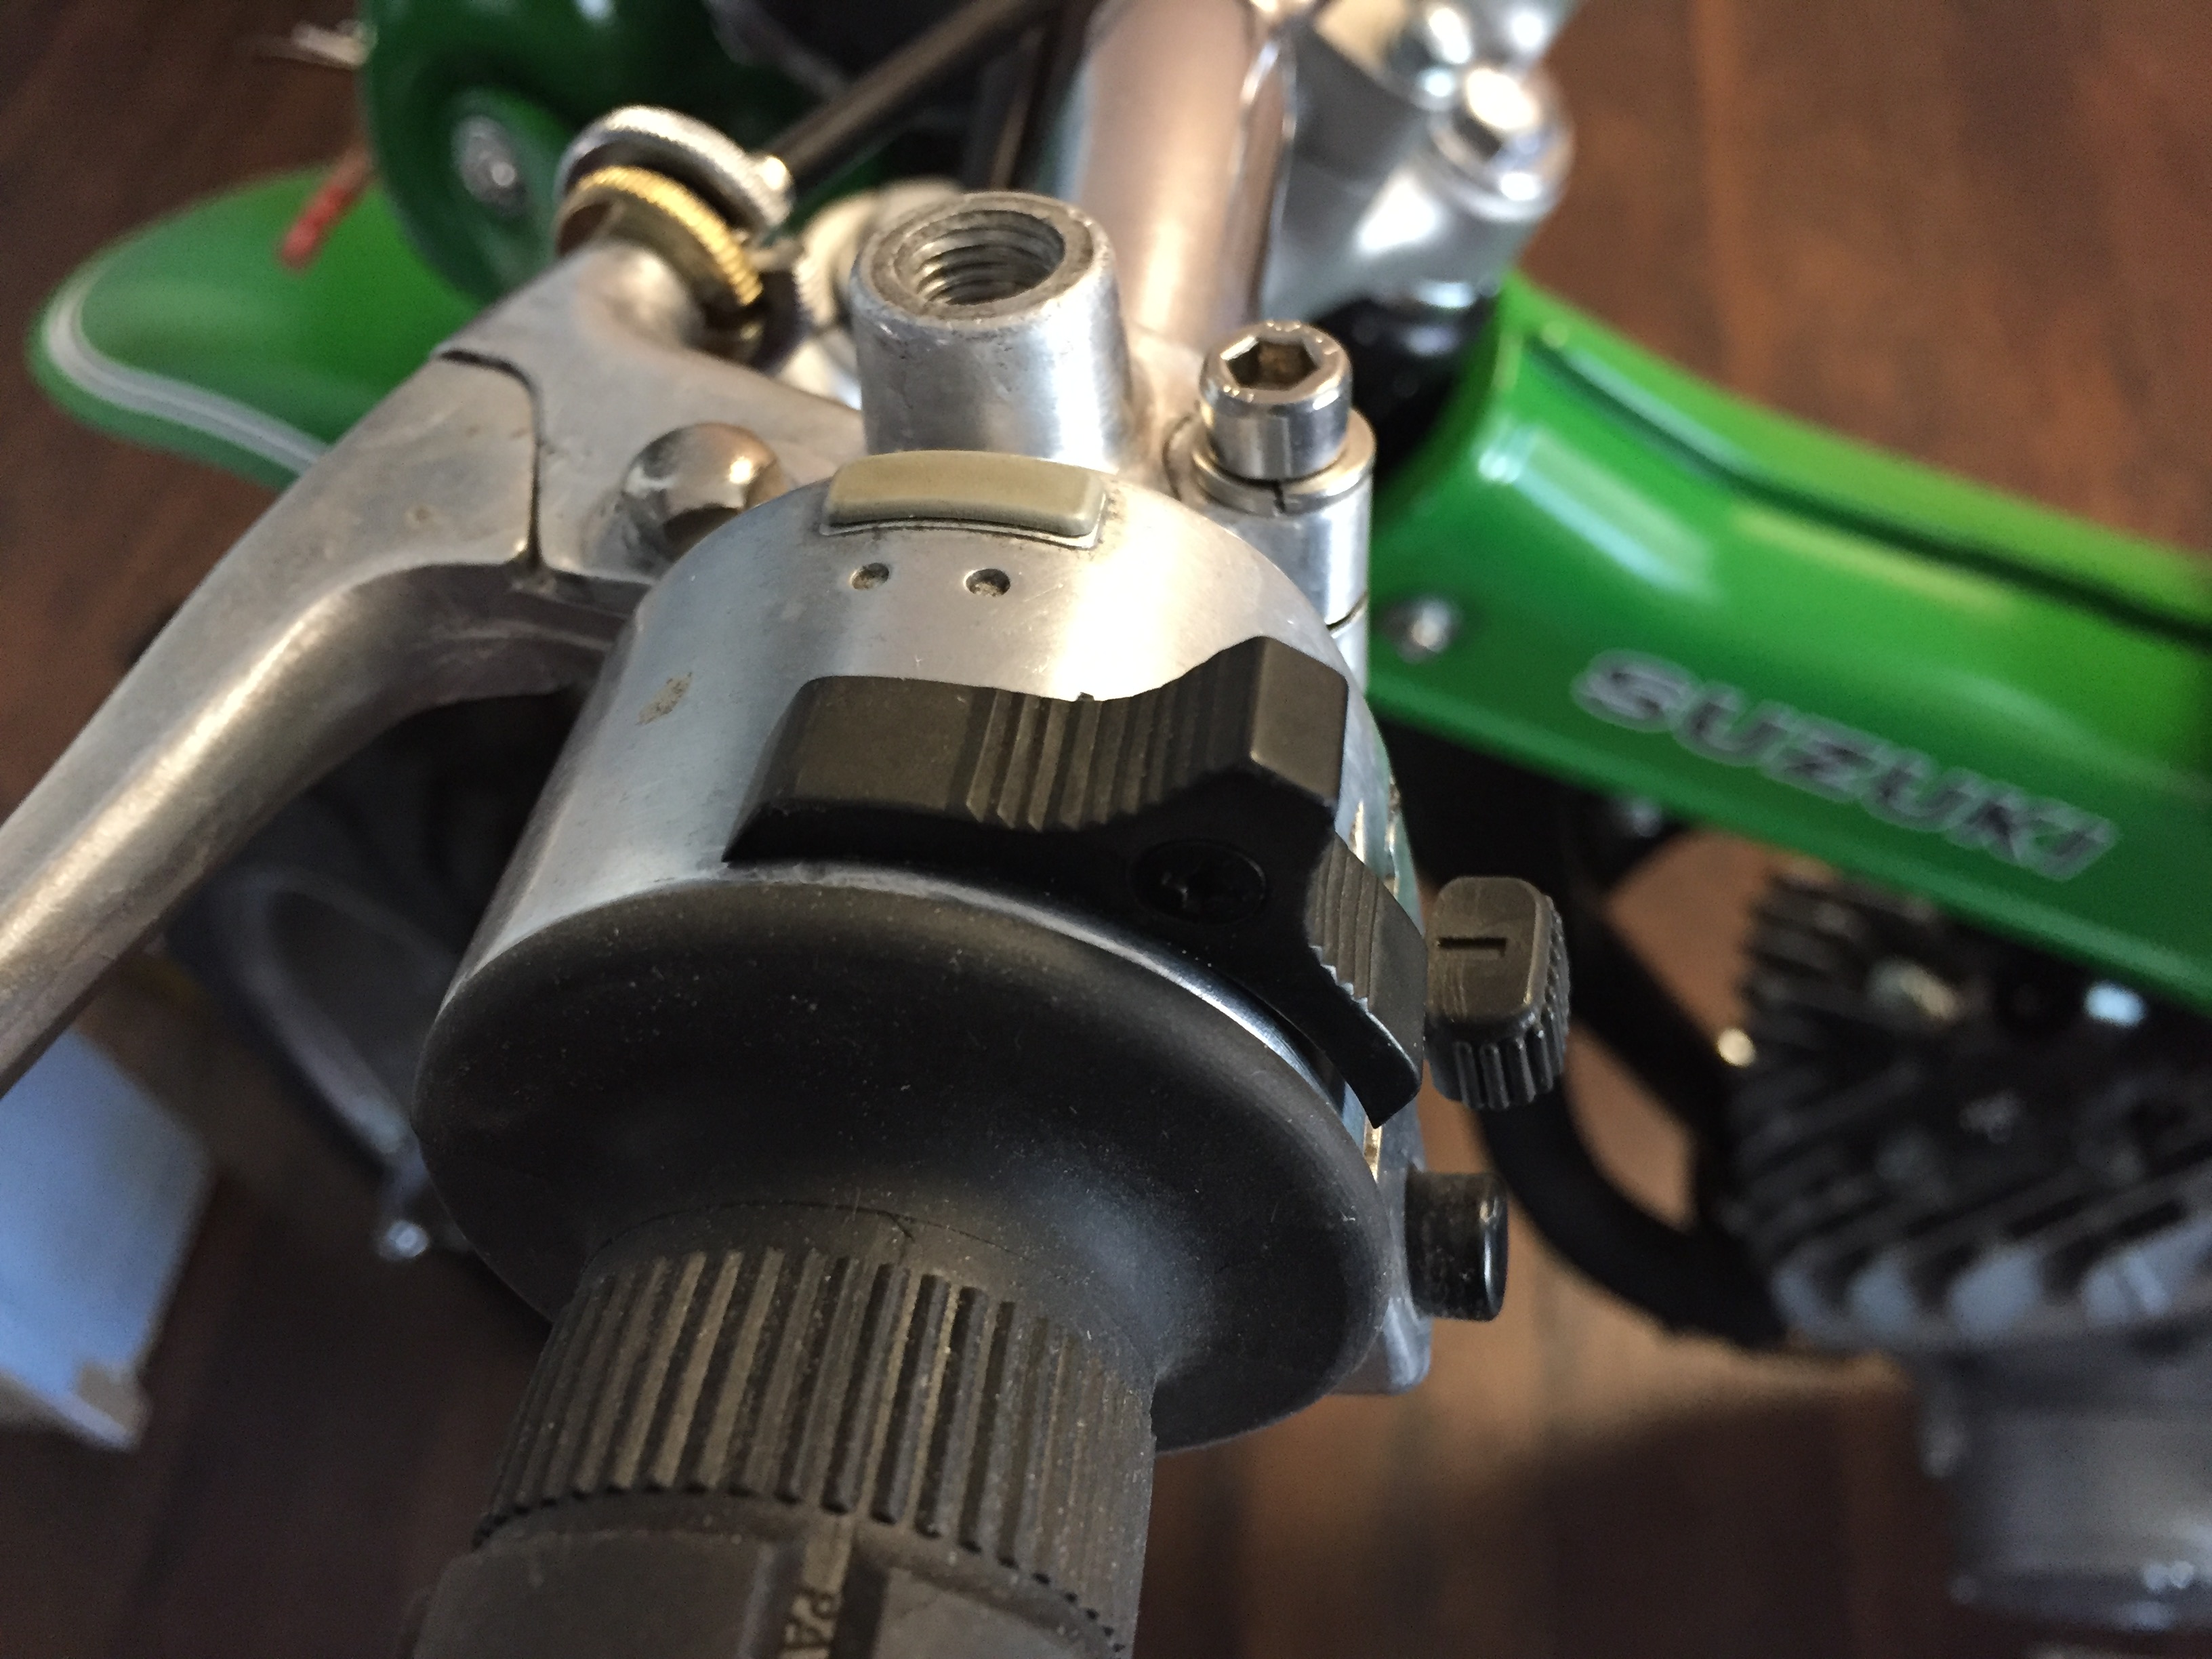
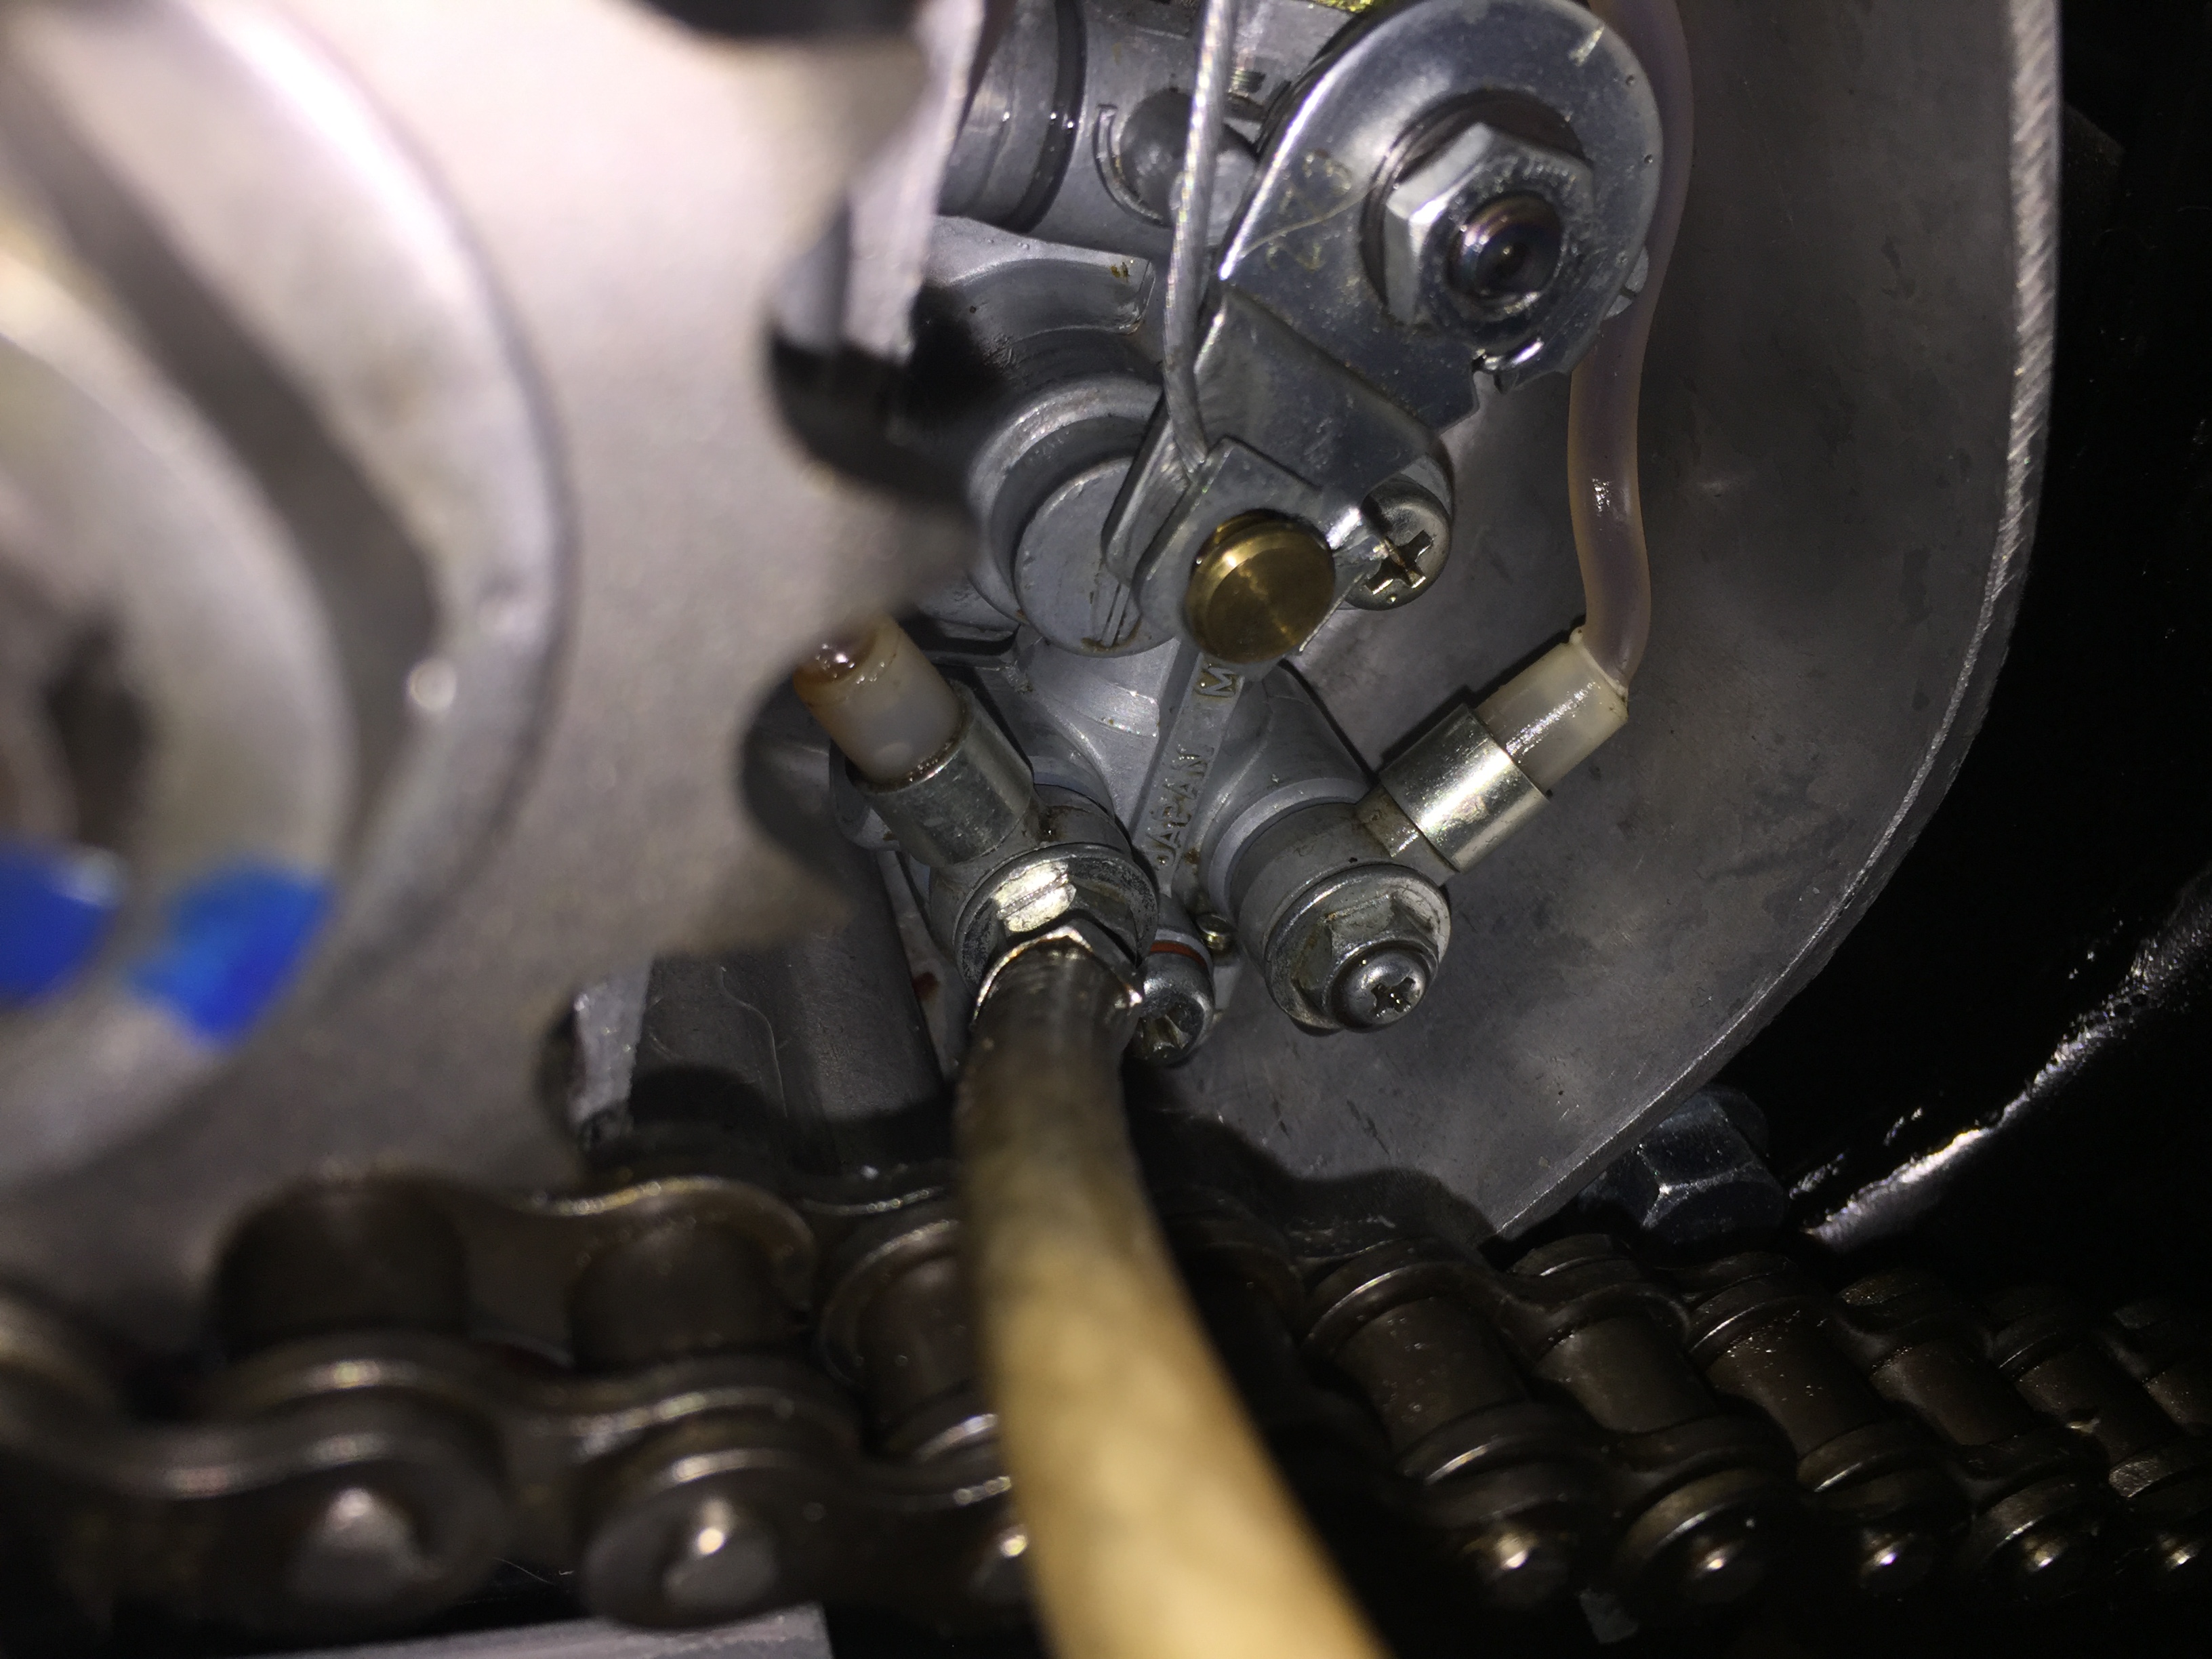
I filled an oil can with some 2/ oil for the line bleeding. The center bleeder screw bleeds the main line from the oil tank and pump itself - its kinda hidden in the first pic but you can just barely see the top of it between the two oil line bolts/behind the chain. That can be pulled and then replaced once all the air is out of the main line.

The small lines are bled by removing the small screw inside the nut that fastens the lines to the pump, in the above pic the left bleeder screw has been removed. You can see a small plastic washer is behind the screw so be careful not to lose it. Medium pressure on the tip of the oil can ensures a good seal, and a few pumps will get oil all the way up through the lines. Kind of awkward to hold the oil can on there and take a pic at the same time, but you can get the jist.
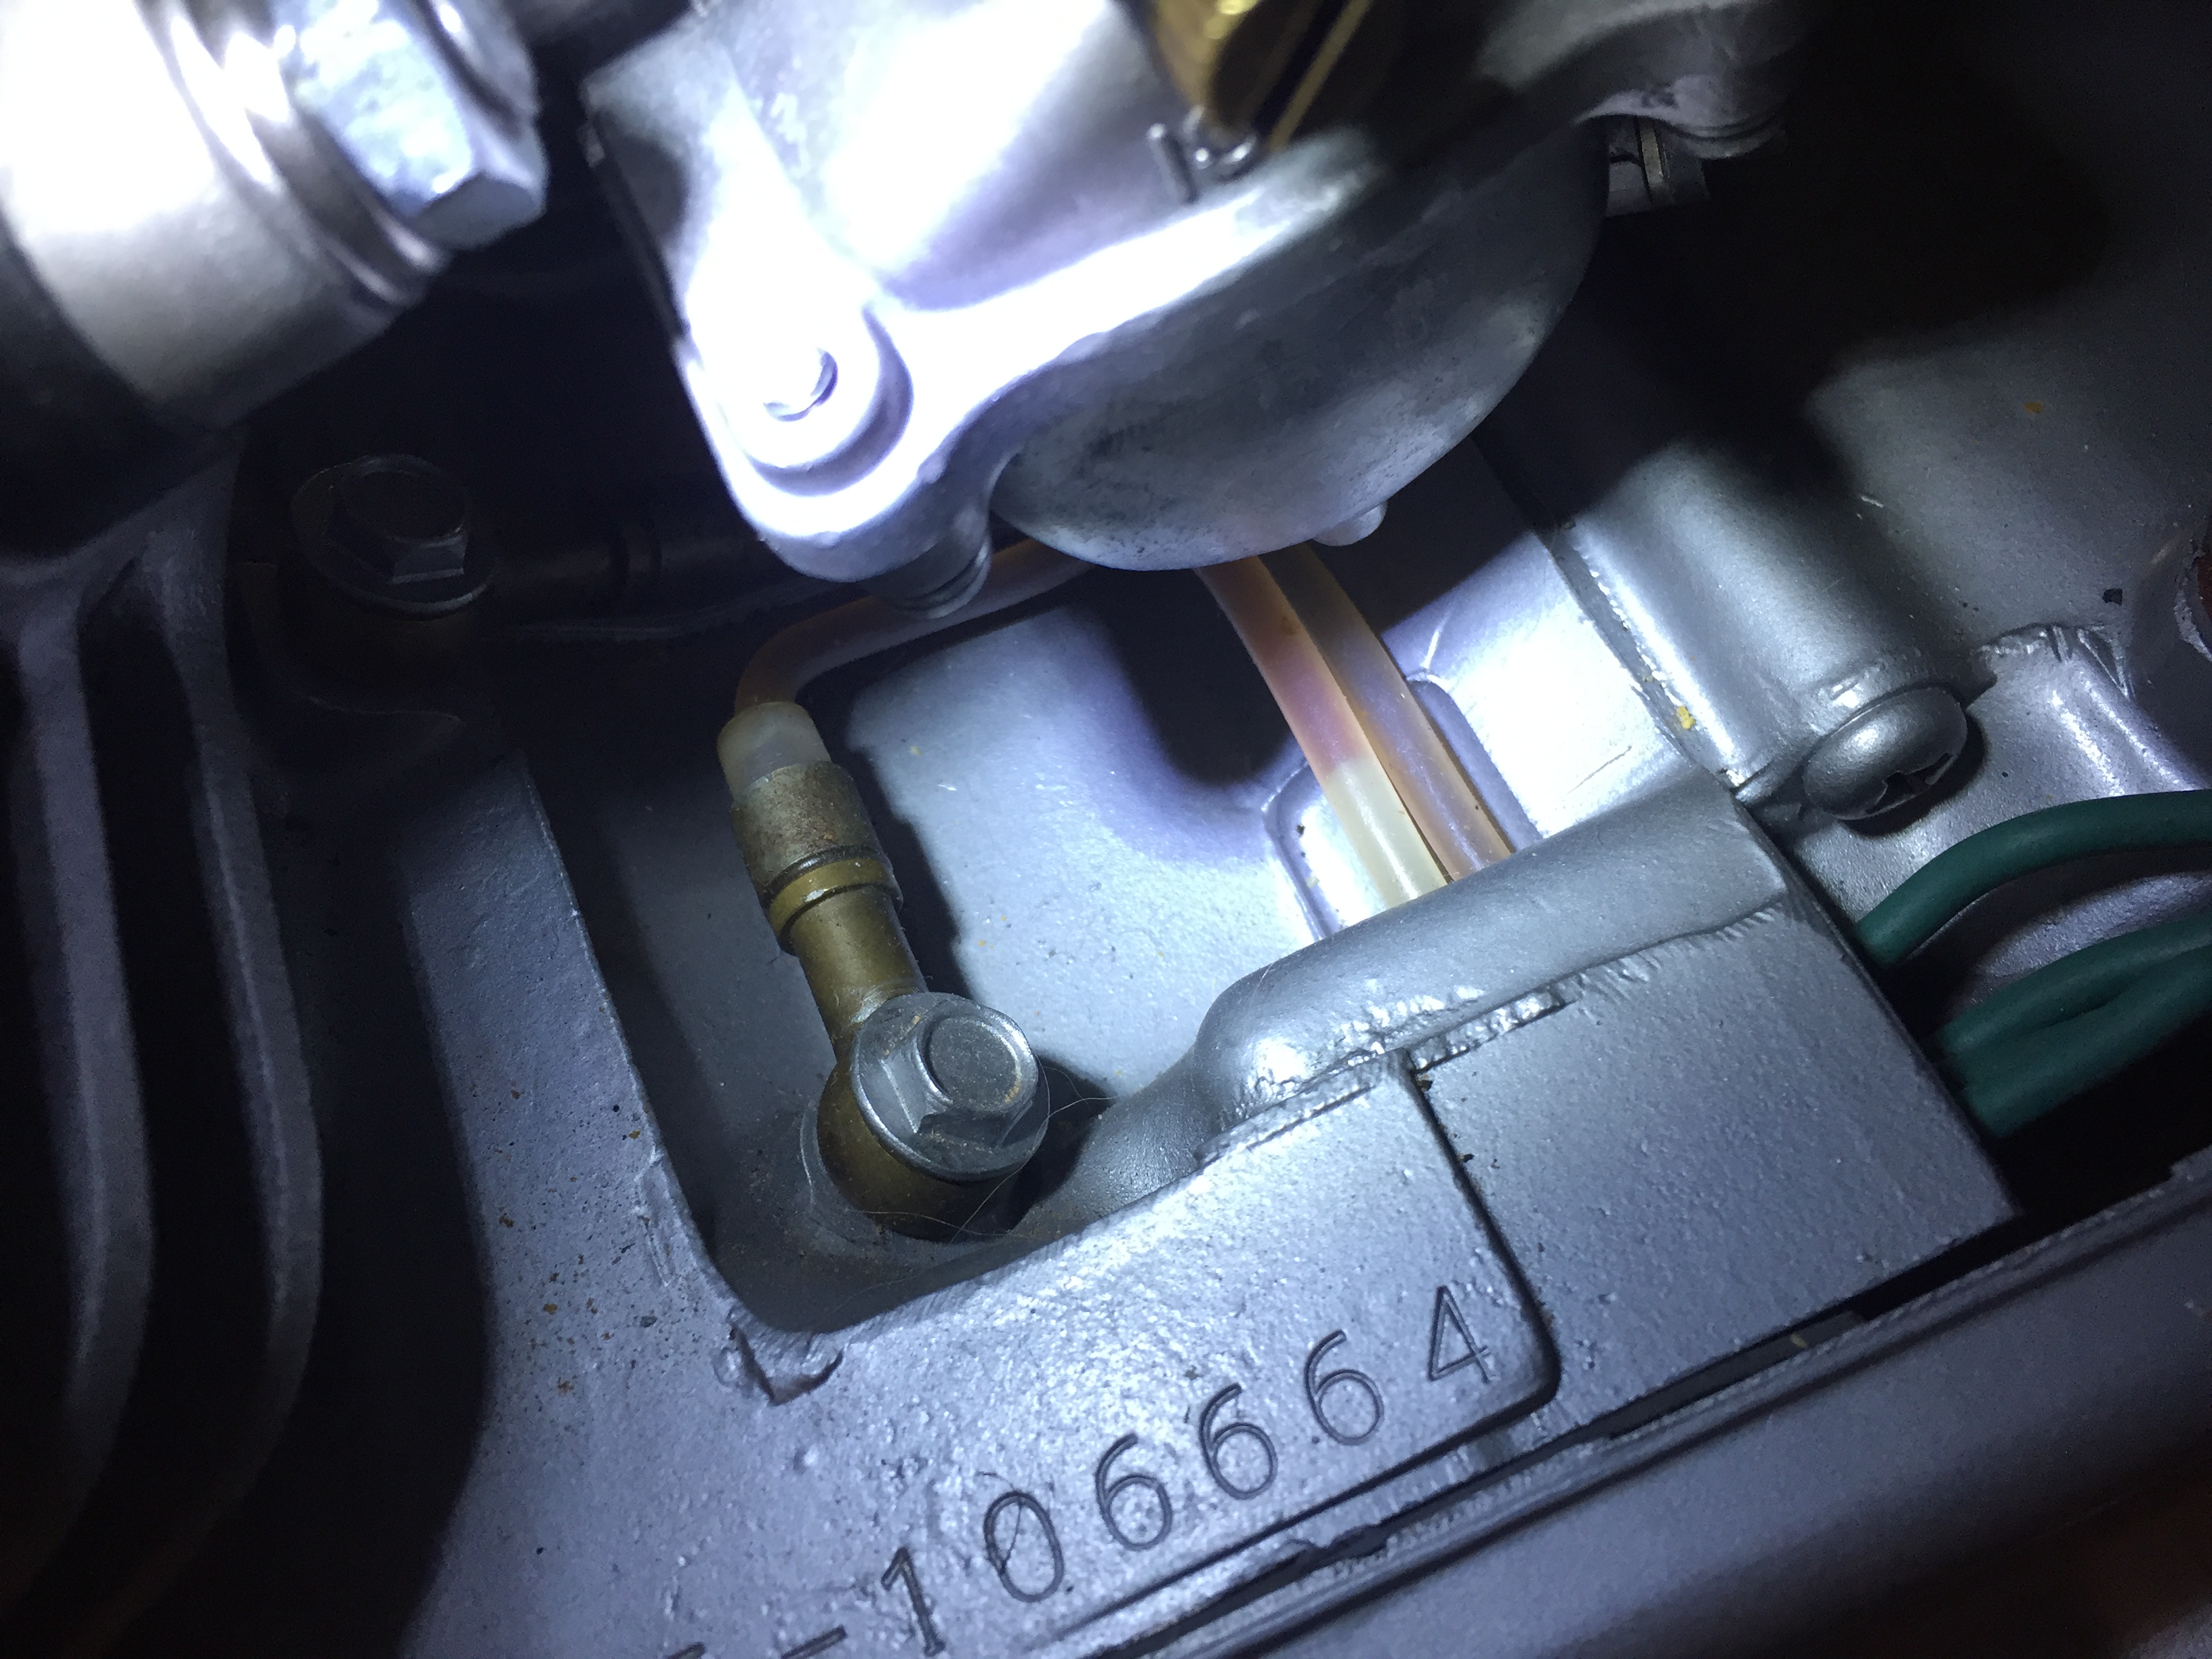
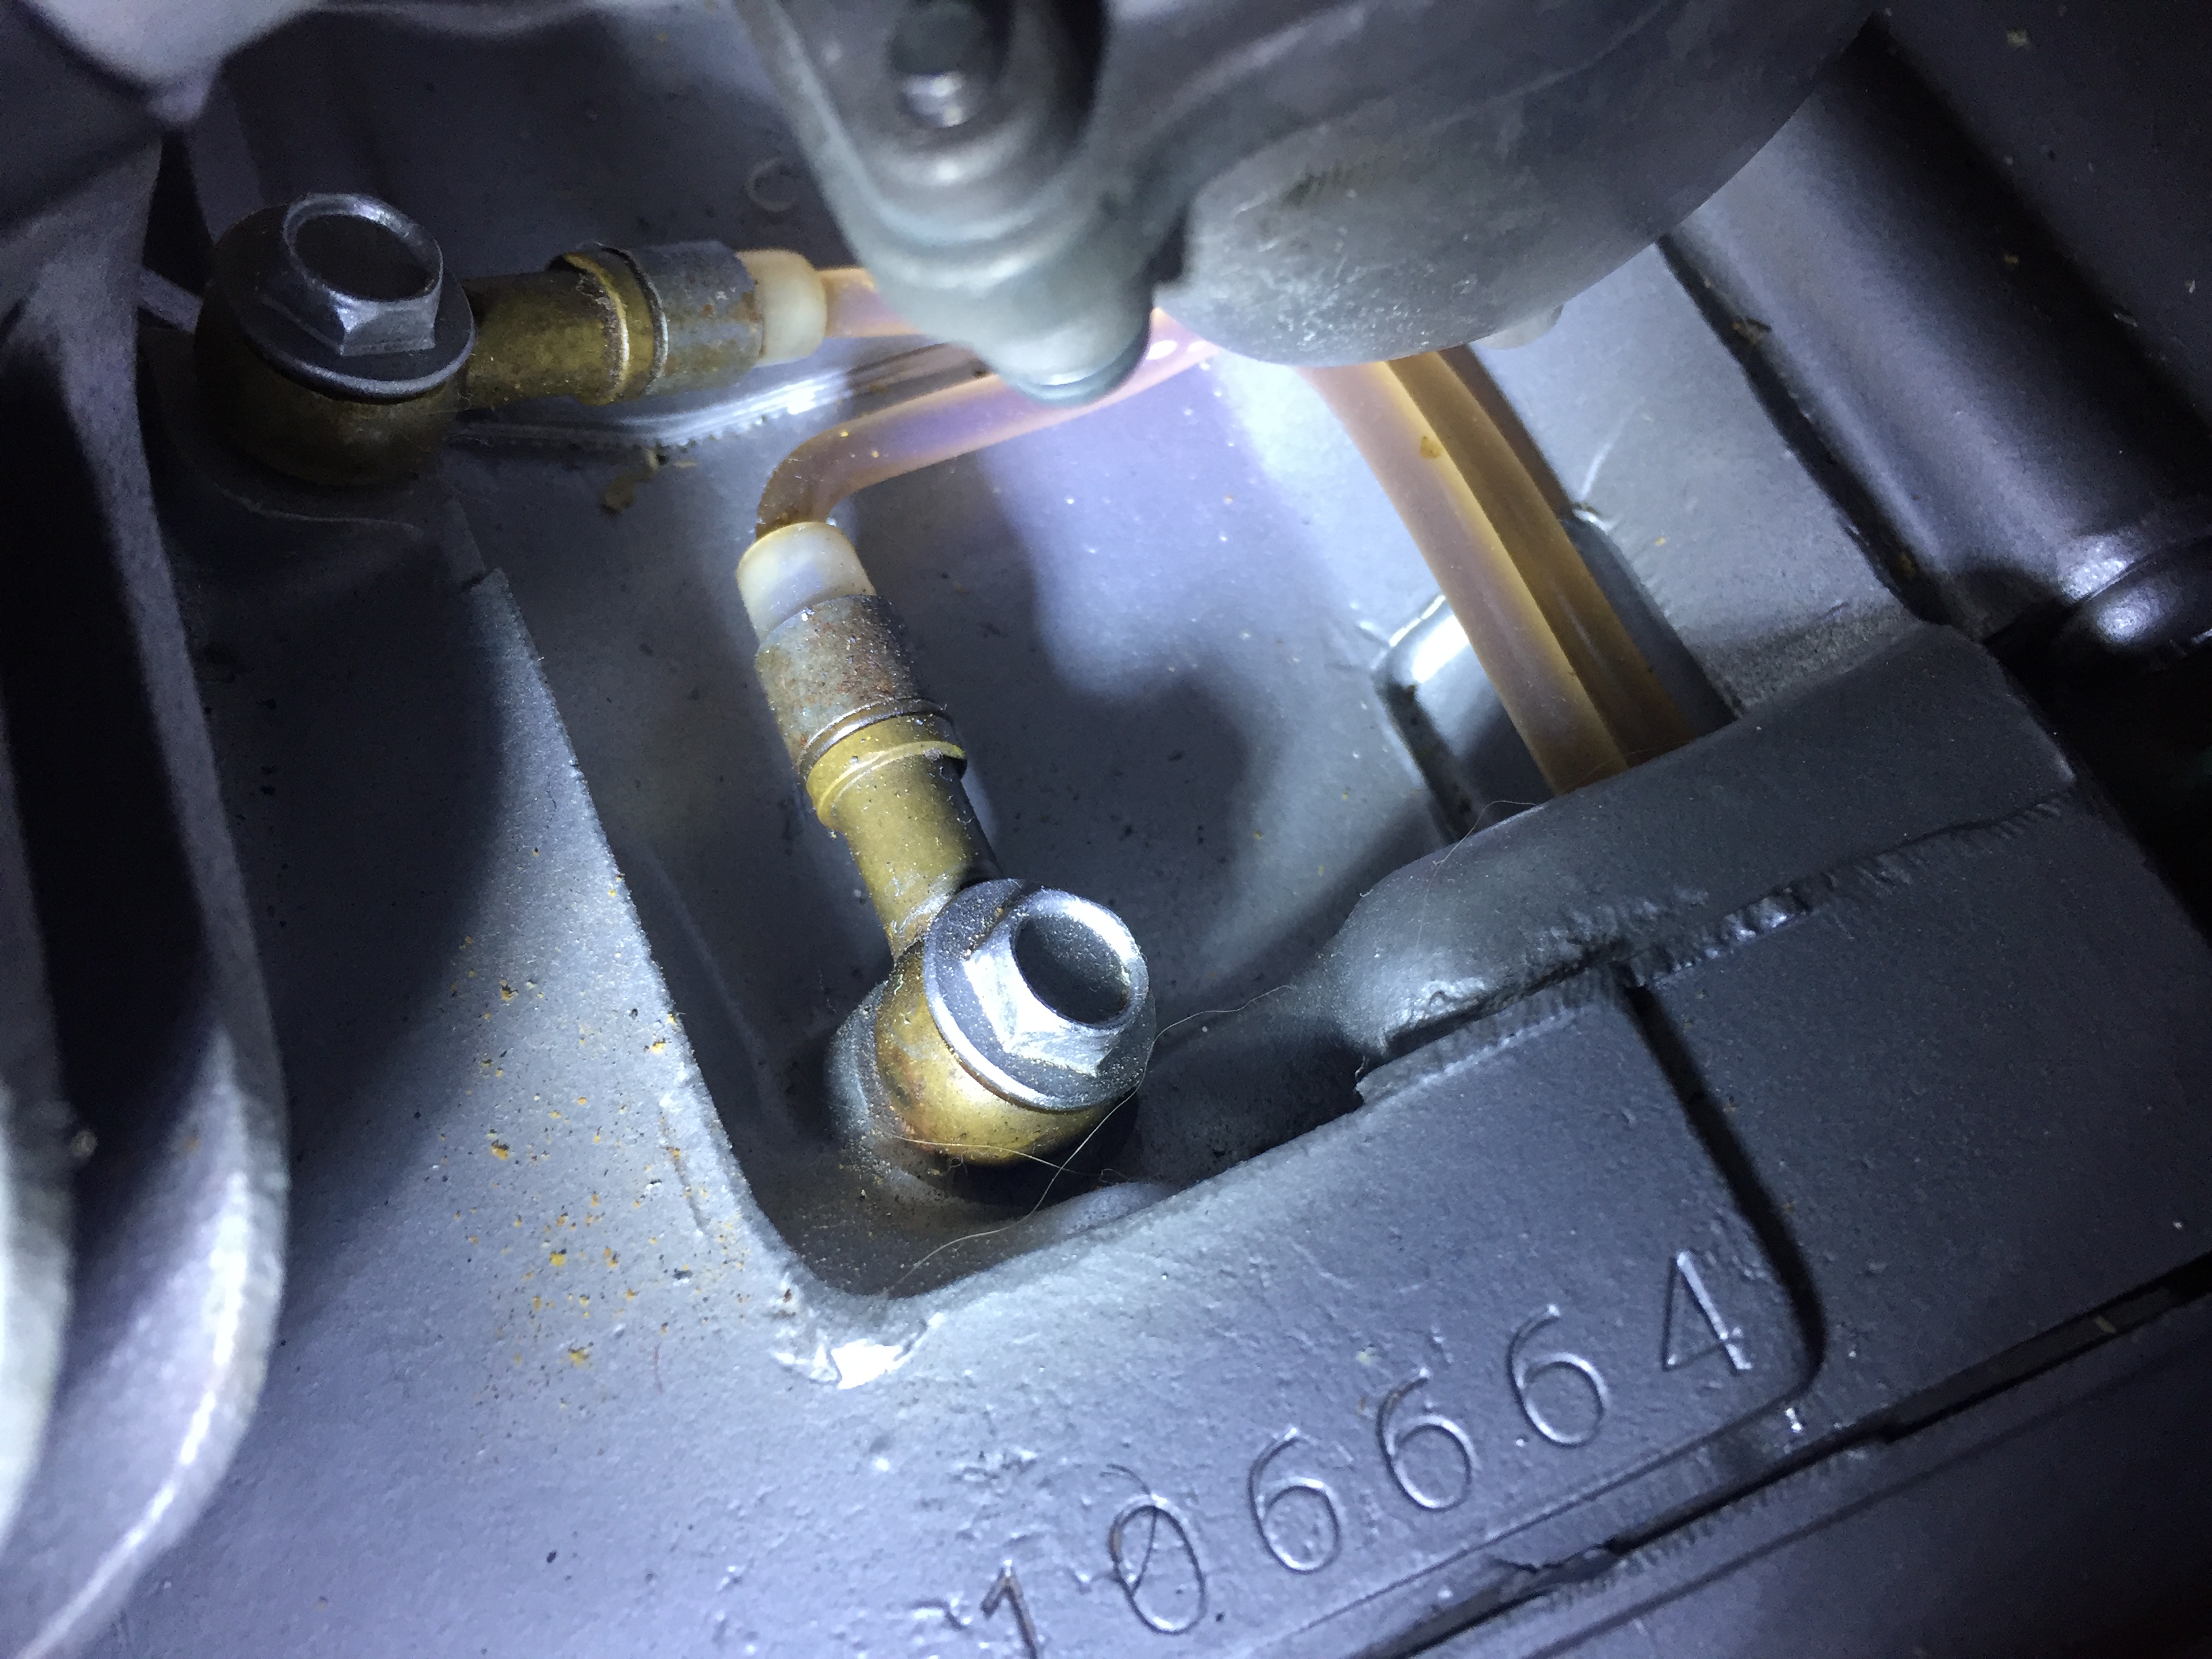
Here you can see a pretty large air bubble in the line before bleeding, and after bleeding the lines are nice and full.
The small lines are bled by removing the small screw inside the nut that fastens the lines to the pump, in the above pic the left bleeder screw has been removed. You can see a small plastic washer is behind the screw so be careful not to lose it. Medium pressure on the tip of the oil can ensures a good seal, and a few pumps will get oil all the way up through the lines. Kind of awkward to hold the oil can on there and take a pic at the same time, but you can get the jist.
Here you can see a pretty large air bubble in the line before bleeding, and after bleeding the lines are nice and full.


