Yam RD 250 Paint Thread

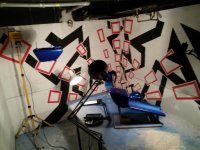
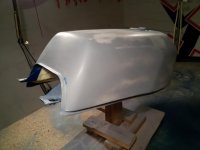
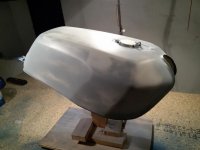
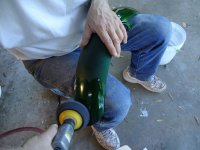
next step was sanding sanding and again sanding....important not to sand trough the epoxy.the epoxy paint was so super nice to sand smooth, no comparison to normal 1 K rattle can primer.i used a marker to mark the areas which still needed some more sanding, i used a lamp to find them holding it against the light.

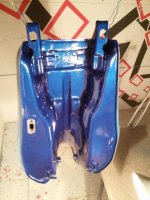
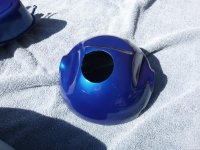
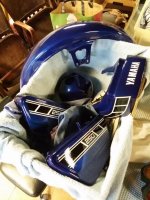
then the first layer of paint came on the parts,this was the biggest batch and man this was a LOT to spray,maybe next time i would split up the batch since one can concentrate more on one part.

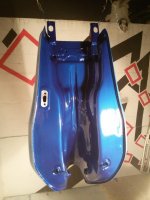
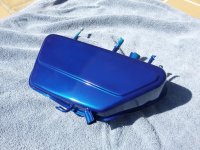
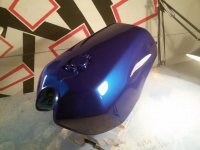
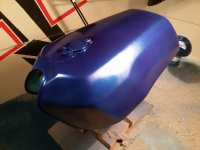
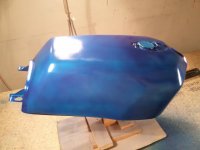
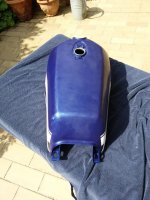
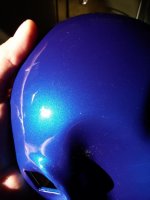
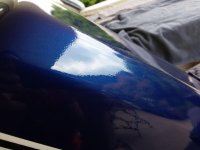
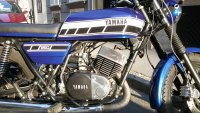
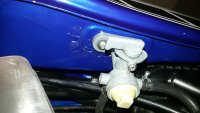
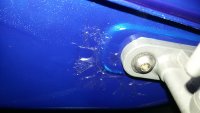
the color laid on like "baby" blue and with every layer it added strength and deepness.

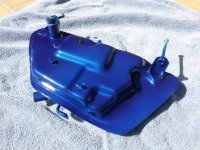
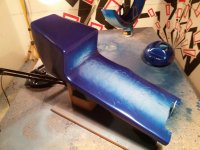
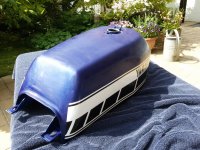
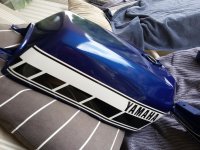
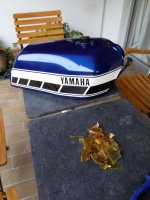
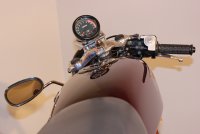
the tank was always treated separately which was a good idea,since it needed extra care,being a big eye catcher,first i sprayed the underside of it hanging.

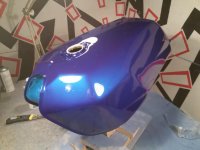
first i laid on 2-3coats of color
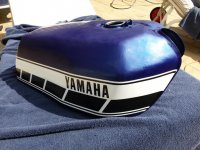
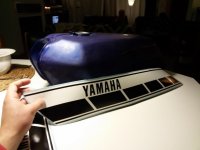
then i laid on the 1K clearcoat as a protection coat the scuff it before putting on the decals.
 

Attachments

  • 20150506_213107.JPG
    20150506_213107.JPG
    114.9 KB · Views: 247
  • 20150507_203712.JPG
    20150507_203712.JPG
    116.7 KB · Views: 249
  • 20150507_203624.JPG
    20150507_203624.JPG
    102.1 KB · Views: 262
  • 20150507_101319.JPG
    20150507_101319.JPG
    209.4 KB · Views: 236
  • 20150507_101312.JPG
    20150507_101312.JPG
    192 KB · Views: 228
  • 20150507_101308.JPG
    20150507_101308.JPG
    219.5 KB · Views: 237
  • 20150506_213117.JPG
    20150506_213117.JPG
    119.7 KB · Views: 242
then the big day came, i laid on color on the tank.
i was super super cautious not the have any dust (tack cloth used) or contamination on the part.i used a can of Dupli color silicone deagreaser all the way trough,and had no problems.
 

Attachments

  • 20150509_174027.JPG
    20150509_174027.JPG
    88.7 KB · Views: 246
  • 20150509_173339.JPG
    20150509_173339.JPG
    89.3 KB · Views: 238
  • 20150509_162916.JPG
    20150509_162916.JPG
    81.6 KB · Views: 233
  • 20150509_160702.JPG
    20150509_160702.JPG
    73.1 KB · Views: 233
  • 20150509_153857.JPG
    20150509_153857.JPG
    70.2 KB · Views: 235
  • 20150509_153906.JPG
    20150509_153906.JPG
    80.9 KB · Views: 234
then the process again started all over,after color and 1K clear coat i scuffed the parts,put on the decals,the only ones i didnt not put on where the tank decals (crazy big),i let them do by a specialst who wraps cars because i already narly had heart attacks at the other decals.
 

Attachments

  • 20150514_103123.JPG
    20150514_103123.JPG
    203.8 KB · Views: 235
  • 20150514_103117.JPG
    20150514_103117.JPG
    176.9 KB · Views: 247
  • 20150514_103057.JPG
    20150514_103057.JPG
    142.9 KB · Views: 229
  • 20150512_213820.JPG
    20150512_213820.JPG
    73.6 KB · Views: 232
then the 2K clear coat was to be sprayed....this stuff is awesome but at the same time dangerous!

i used full body protection.a balaclava, a mask with the right filter,gloves,no skin was exposed to that stuff.
just for an example: if you spray that stuff,you will feel your feet sticking to the ground cuz its so super sticky.like super glue.my finger once even got stuck to the can ;D

but YOU CANNOT compare the shine of 1K to the 2K spray paint....oooh man,you spray it and it keeps looking like its still wet.yes you get orange peel,but you will ge tit out with a little bit of polishing.

when you spray that stuff protect yourself,make everything ready and prepare good ventilation.

i laid around 4-5 layers of that stuff.
 

Attachments

  • 20150514_171517.JPG
    20150514_171517.JPG
    147.4 KB · Views: 252
  • 20150518_181424.JPG
    20150518_181424.JPG
    98.6 KB · Views: 242
  • 20150519_135558.JPG
    20150519_135558.JPG
    176.4 KB · Views: 226
  • 20150519_135602.JPG
    20150519_135602.JPG
    82.3 KB · Views: 233
finally everything was done...then i had a bad surprise.i heard a noise out of the tank when i rinsed it with water to get the dust out of it and found a big piece of my liner in it.
so i hope this is just a surplus from lining the tank....
it was a b´´´ to ge tout of the tank.
i filled the tank with some premix and will ride it this way,lets see if it will rust,then i maybe need to redo the lining on the tank....hope i wont need to destroy the paint.... :mad:
 

Attachments

  • 20150519_192718.JPG
    20150519_192718.JPG
    111.8 KB · Views: 261
Maritime said:
So Ryan, you are up for BOTM because of this great work. Cheers ;D

omg i´m so excited!!!!i love this forum!

makes me want to buy a new bike and start all over (my gf wont allow this ;D )
 
A little look how she looks now,in the sun,still not polished will do that in winter :)
The rattle paint still holds up fine,even at the tank opening,looks like day one even though theres always gas fumes around there.
I'm very happy!
 

Attachments

  • uploadfromtaptalk1436910477570.jpg
    uploadfromtaptalk1436910477570.jpg
    409.8 KB · Views: 247
  • uploadfromtaptalk1436910461388.jpg
    uploadfromtaptalk1436910461388.jpg
    1.1 MB · Views: 224
I had a bad surprise yesterday when i looked under my tank.
Seems like i made a mistake and painted to much of the area where the petcock touches the tank.
I tried to make a blank piece of steel where the petcock is fixed...
Gas seem to have 'creeped' under the 2K.....it didnt felt wet when i touched it,the paint is fully intact,the epoxy primer too,so i hope this will hold up this season so i can repair it then...
 

Attachments

  • uploadfromtaptalk1438094814324.jpg
    uploadfromtaptalk1438094814324.jpg
    727.3 KB · Views: 239
  • uploadfromtaptalk1438094825035.jpg
    uploadfromtaptalk1438094825035.jpg
    696.1 KB · Views: 253
Very likely you are exactly correct i your assessment. The clear is probably pretty impervious to the fuel, but the blue probably is quite easily dissolved. I usually try to 1) leave a bare steel patch bigger than the o ring seal, and 2) make sure the paint is super thin - even if I have to sand it thin - so the o-ring can sufficiently compress. Otherwise, I mask off the exact footprint of the petcock and then the petcock fits fair down on the steel and doesn't interact at all with the paint.

You may be able to salvage the situation by removing the petcock and sanding the paint off under it. You have to stop the fuel from eating the blue or it will continue to do damage.

You can have this same situation around the fuel cap as well, so maybe inspect it and sand all the paint of the sealing area if present. Otherwise fuel will wick into the blue and ruin a much more obvious place.
 
Thanks mobius!

So i guess i have to:

Take the petcock off
Get the fuel out of the tank before :)
Sand the whole tank with 1000
Sand the area around petcock flat
Tape down bigger area around petcock
Degrease
Shoot 1 can of 2K over the whole tank
...
Before i waste half a bottle of 2K i can lay down another coat on the rest of the tank...however these cans are just 200ml...what you think?
Or i lay it down thicker on the bottom of the tank and tape off the top.
 
jpmobius said:
Very likely you are exactly correct i your assessment. The clear is probably pretty impervious to the fuel, but the blue probably is quite easily dissolved. I usually try to 1) leave a bare steel patch bigger than the o ring seal, and 2) make sure the paint is super thin - even if I have to sand it thin - so the o-ring can sufficiently compress. Otherwise, I mask off the exact footprint of the petcock and then the petcock fits fair down on the steel and doesn't interact at all with the paint.

You may be able to salvage the situation by removing the petcock and sanding the paint off under it. You have to stop the fuel from eating the blue or it will continue to do damage.

You can have this same situation around the fuel cap as well, so maybe inspect it and sand all the paint of the sealing area if present. Otherwise fuel will wick into the blue and ruin a much more obvious place.

hey mobius!

long story short.i had to order an adapter for my gas petcock since the original one is way to expensive and will break soon again.now i sanded a bigger area around the petcock oring to bare steel in order to keep the gas from the paint.how much space do you leave between paint and oring?

i thought about clearing all over the sanded area (also under the oring) but i guess this will lead to the same problem i had before?

thanks in advance!
 

Attachments

  • Hahn.jpg
    Hahn.jpg
    1.8 MB · Views: 255
Hey guys!

long time no near.i´ve been busy converting my RD to 350 and many other things.
i´m planning on polishing the paint finally the next weeks so i will need some advice.

i´ve ran into a product called "meguiars ultimate compound",it gets great feedback from customers.
I saw some videos where its applied only by hand and gets the paint really nice and shiny.

My clear coat has mostly a shiny finish, some parts have some orange peel and some a slight dull appearance (top of the tank).Will I be able to polish that out just by hand with this product?Any experiences?

Thanks in advance guys!
 

Attachments

  • DSC01040.JPG
    DSC01040.JPG
    292.9 KB · Views: 662
Just for you (and well additionally, because I'll have to buff up my dad's car) I checked, what my mate uses in the shop to polish the race cars after painting.

Teroson WX180 Polish.

http://www.henkel-adhesives.de/industrielle-anwendungen/produktsuche-4248.htm?nodeid=8797702750209

It's a blu-ish compound a bit thinner than the handwashing soap you use in your shop. Absolutely ace stuff, which brings back a really beautiful shine to old paint. (That's where I used it, so it should be fine for your clear coat!)

Cheers,
Greg
 
Ryan Stecken said:
My clear coat has mostly a shiny finish, some parts have some orange peel and some a slight dull appearance (top of the tank).Will I be able to polish that out just by hand with this product?Any experiences?

Without seeing it in person and based on your description, I would say no, probably not. However, you should be able to polish it to a VERY high level of shine. The process is simple enough, but does take a little practice and care as paint is fairly easy to damage. It also requires that you have sufficient clear to allow you to sand it flat without cutting into the color under it. This is not difficult to avoid if you are careful. The goal is to sand the paint so that the surface is perfectly smooth with no orange peel in it. On bike parts, you can focus on the large areas and not fuss too much over the edges as they are extremely easy to damage and only have a very small impact on the overall appearance. When I paint, I focus on the edges and make sure the paint goes on very wet there so it flows out well and I don't have to fuss at polishing them. You want to use very fine #1500 - #2000 grit paper very wet, and take great pains to not contaminate the paper and introduce scratches that are bigger than those left by the paper. You should use a semi-flexible rubber pad to keep the surface as "flat" as possible. It is helpful to have a soft rubber squeegee handy to strike off the water so you can see if all the peel is gone. Once the surface is perfectly flat and uniformly dull you are done sanding. If you have enough clear you can sand the edges of the decals perfectly flat so no ridge exists, but I would suspect you do not have that much clear on your parts as it takes quite a lot for thick decals like you have. So be very careful when sanding the edges there as well as it is easy to cut through. Once you are done sanding it is time to polish. In theory this could be done by hand on the materials you used as heat generated by machine polishing is not required, but you really need a machine. I use a little air driven 90 degree grinder/polisher/sander with a 4" wool pad on it to start. You will need some compound to go with it. This is basically just another sanding operation, except now the grit size is so small that the scratches are pretty much invisible to the naked eye and the result is shiny. You have to be careful when machine polishing to avoid the sharp corners and edges as you can cut through them fairly easily. I protect suspect edges and such with some masking tape at first, and when done, remove the tape and very carefully polish those areas as a separate task. After polishing with compound you can switch to a foam pad on your buffer and use some finer glazing compound (swirl remover) to improve the surface even further. At this point you should be well beyond what a new car is sold with and should be very happy. I like Meguiar's products, but there are many others. Here is what I use, a picture of a sanded fender getting polished with coarse compound (you can see the opposite end has already been done - I'm using a foam pad here for some reason but normally would be using a wool bonnet), and an example of results you should easily be able to achieve yourself.
 

Attachments

  • coarse.jpg
    coarse.jpg
    52.3 KB · Views: 434
  • fine compound.jpg
    fine compound.jpg
    51.3 KB · Views: 363
  • DSC00424.JPG
    DSC00424.JPG
    1.3 MB · Views: 246
  • IMG_0296.JPG
    IMG_0296.JPG
    2.5 MB · Views: 238
Back
Top Bottom