Down under, an idiot and a 400F

You could look into cans that can be disassembled. For my 7fitty exhaust, I took a Vance&Hines aluminum can that was too long, cut it in half, and repacked it. Then I welded it to a Yamaha end pipe at the cone to tie it into the 750 Supersport headers. The can is held together with rivets at the cone end and at the exhaust end are three cap screws. The whole back comes off. There are several style Supertrapps built very similarly.

8eeb9a2d7734ac6120a7e63015f0fad4.jpg
 
hillsy said:
LOL....can you commit any more than this?? ;D

Hahahahaha. I'm almost certainly going to probably definitely think about that one for sure ;)

Just making sure I can attach it to the frame in a clean way and it will fit with the secondary tube diameter and I'm pulling the trigger on 2.

It's 99.6% chance of ending upon the bike.
 
neevo said:
Finally!!! Someone agrees with me.
I agree. ;) Just offering that a lot of aftermarket cans including many Yoshimuras are easily customizable as long as the girth is right. Those Cone mufflers are also very nice. Cone labels their reverse cones as Triumph mufflers. They're really meant for a Triumph.

Anyway, great build. There's a lot of ingenuity going on here.
 
That's been the biggest hurdle with aftermarket cans deviant... girth.

With my 120 rear tyre it's been very hard to find options that compliment the smallish rear tyre along with the small frame of the 400 too.

This thread has mostly been about technical or specific questions. Post up a which do you prefer pair of images and it's funny how across the board people go.

Good thing is people are not making comments about either option being wrong, just personal preference which shows it's going in the right direction :)
 
I know that there are a billion government regulations on vehicles in OZ.


Are you constrained by any of those?
like "must be rearward of the axle" or other such?


One thing that might help your concern with the visual weight of the cans with the somewhat skinny tire compared to modern bikes is to give them some distance.
Having the thickest part of the exhaust closer to the center of the rear wheel when seen from profile will give it separation from the visual weight of the black tire.


All the vintage Kerker, Mac and Yishi pipes had the meat of the can closer to the center of the rear wheel, fwiw.


One 1 person has to live with it, and that's you!
 
Bozz, I believe the only major issue I will have to deal with in regards to the exhausts are noise. Worst case I am make up an insert to quieten them down for inspection if required.

Good info re the weight of the exhaust, might get on google images and see how some other bikes make it work.
 
Question for the experts.

Merge for the headers exit ID is 1.875"

Muffler comes in 1.75" or 2"

Both options will need a solution to bring down/up in size for merge.

Which should I go for. Thinking 1.75" as it will be quieter.
 
it'd be easier to make a sleeve to fit the 2" muffler inlet over the header end than to make a stepped connector, and also the sleeve can be made as a temporary baffle (think half a coke can with holes in the base over the outlet of a 4 into 1 with the muffler jammed over it - it does work and will get you through a RWC test - been there done that), i realise that you'd be knocking up something a little more sophisticated you prob get the general idea.
then once rego has been achieved it can then revert to a simple sleeve to connect the slimmer header to the wider muffler inlet
not to mention you'll get better flow and possibly even fruitier exhaust note
just a thought
 
Been a crazy week away for work, but nothing invigorates the senses more than popping round to my buddy Darren to grab the bike and freshly completed headers!

I'm going for a raw industrial look so they are staying as is for the moment, unless I decide later to polish them. Time will tell on that one.

First up we went for a simpler solution for the mount to the head by making some collars on Darren's CNC, then removing the studs and replacing them with stainless hardware and spring washers:


Darren had a few complications welding all the headers, the first of which was the angles they were entering the first merges. This was solved by swapping the inside headers to the outside. The second issue was welding up the merges, turns out they are not a butt joint (lap instead), which meant controlling the puddle and keeping the weld neat was a challenge. Darren did an amazing job welding them all up and did 1000% better than my best to get them to this stage:


The raw/industrial look is really executed to perfection with the Spring clips. These are an aesthetic choice, but also mean the headers can be separated from the secondaries (so 3 distinct sections: headers, mid section/secondaries, mufflers). The headers are joined in pairs which means they can be easily separated and the centre ones can be removed for oil filter changes if required:


Now I need to organise the secondary templates in PVC and order up my mufflers.

Final gratuitous pictures:


1fasgsxr said:
Very nice ! ;D
MotorbikeBruno said:
Those pipes are incredibly sexy. I love this thread :)

Thanks gents. Means a lot to get an endorsement from peeps like yourselfs. The missus wasn't very impressed with the pipes (her idea of a bike is a shiny chrome Harley), so I'm chuffed to hear others like the look too :)
 
It's way more common to use studs as threads in head will get damaged over time, particularly as your going to be removing centre pipes for filter changes
I would make some stainless studs and use brass or copper nuts (stainless on stainless tends to friction weld together)
 
Get some hex brass and turn some up, you got a lathe and need more practice (brass turns real nice and will turn 'blackish over time) ;)
 
I've been looking at an auto tensioner solution for my CB, however the case simply isn't big enough to accept one, so I set out to make a manual tensioner, which would remove the need for the locking nut and also mean the issues in the springs not having enough tension would also not apply.

I'd seen some options around on the interwebs and so set about trying to make my own. First step was to take a trip down to my local bolt shop, for a selection of stainless bolts in a few sizes (as I didn't know exactly what I needed in length) in M8 and M5.

The plan was to drill the M8 out to thread it for an M5 bolt.

First up I popped some round stock in the lathe, threaded it for M8 so I could use it to mount the bolt. I was surprised to find the hole was not centred, God knows why, so instead I used some nuts to mount the bolt in the 3 jaw and it turned out to be a much better solution:


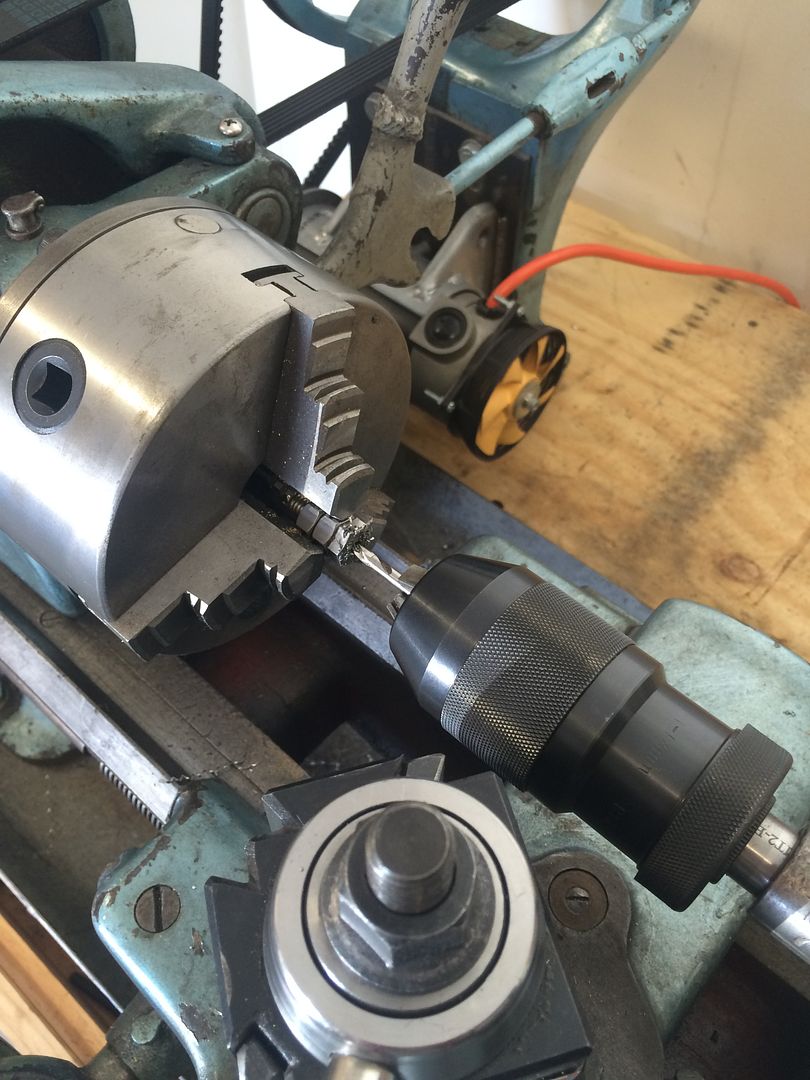
I used the lathe chuck to start the thread cutting so it would be straight. Then finished it off by hand:


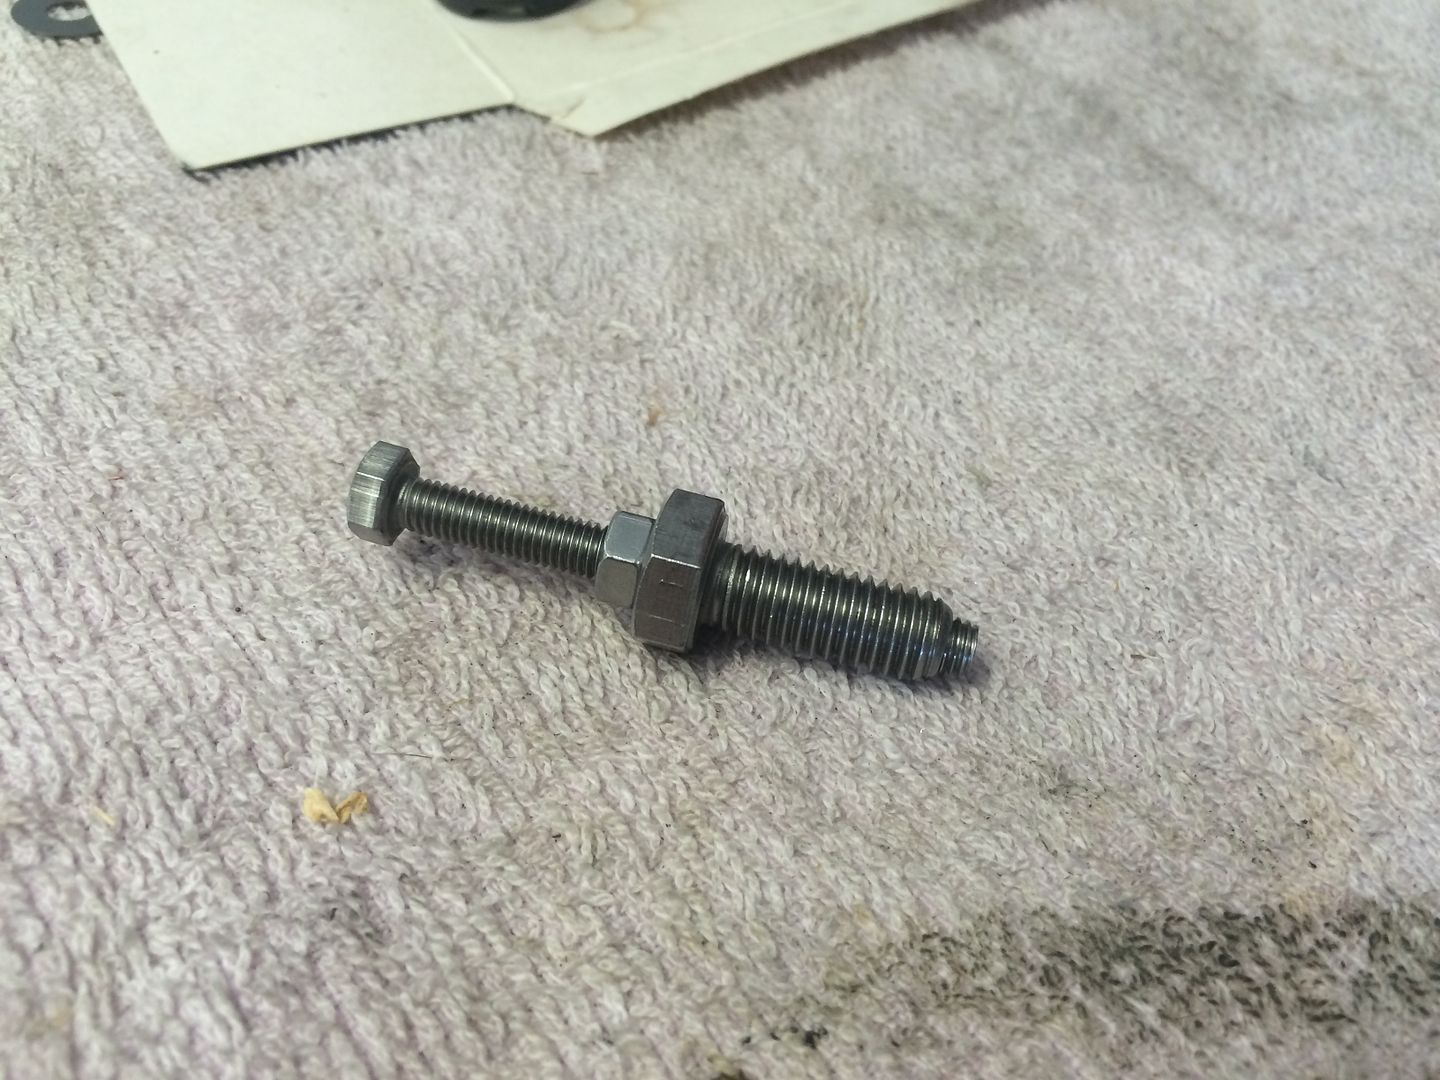
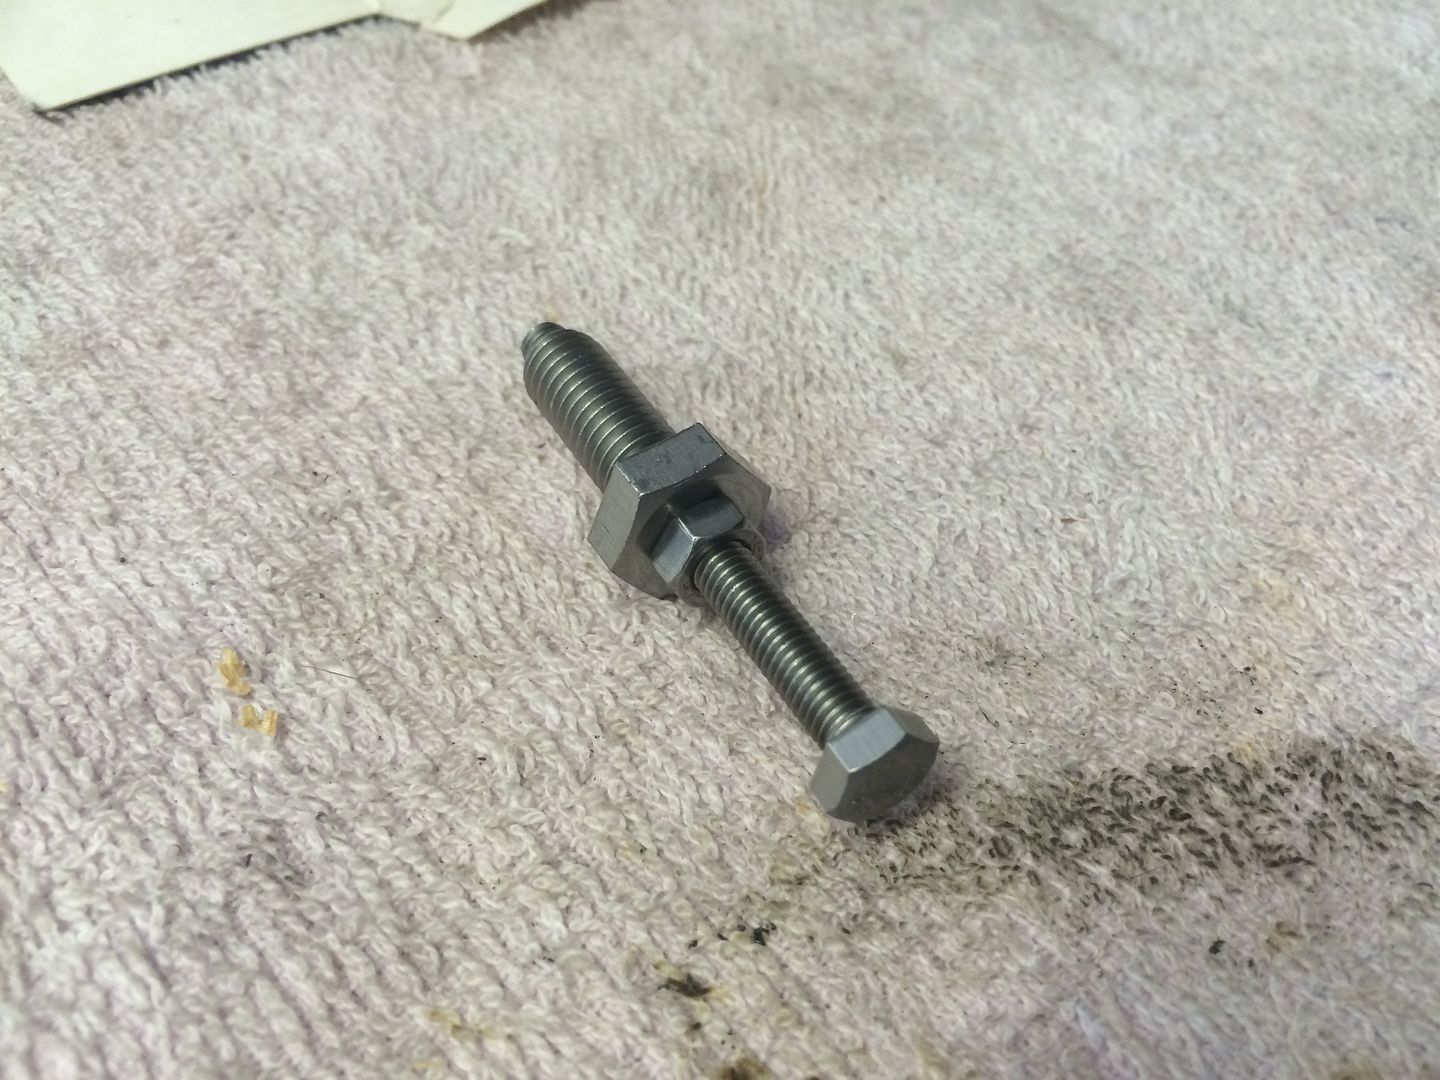
The original plan was to have a thread the length of the bolt, but my M5 tap was starting to bind about half way, so I drilled out the far end to 5mm and kept the thread to about 20mm down the bolt to reduce the risk of snapping the tap. I also faced the front of the bolt so it would seal better:


All done so far, plus I have a copper washer kit coming too so I can seal it all up:


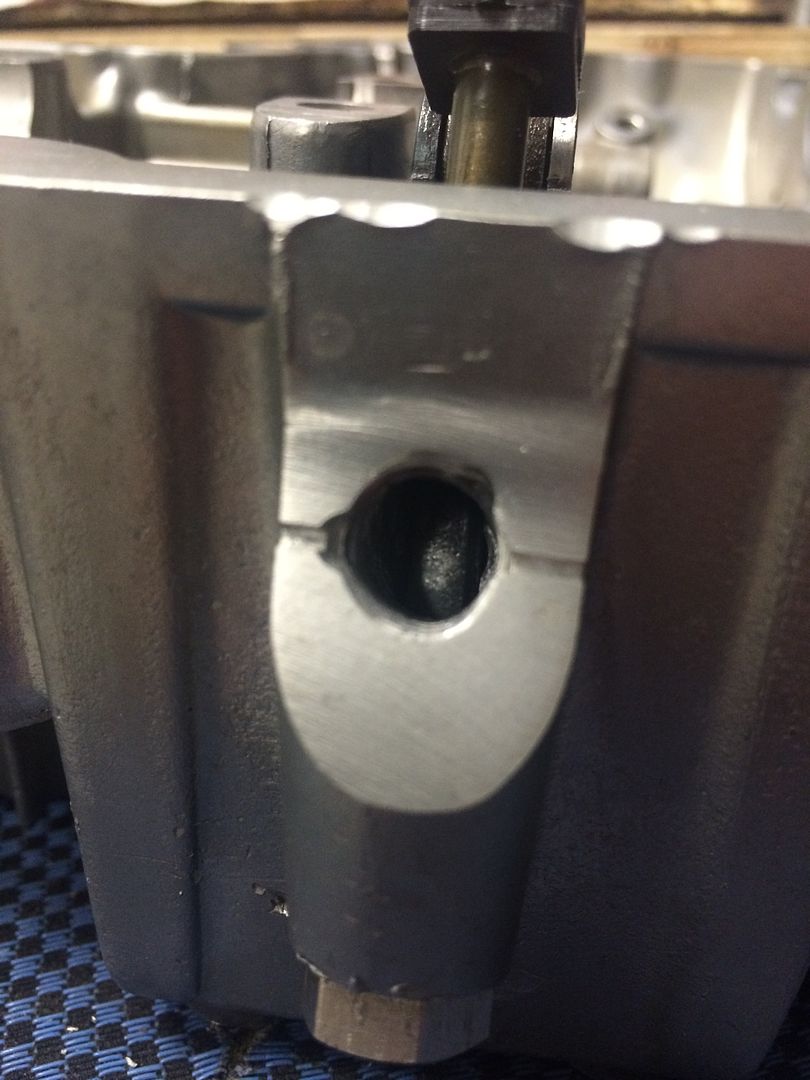
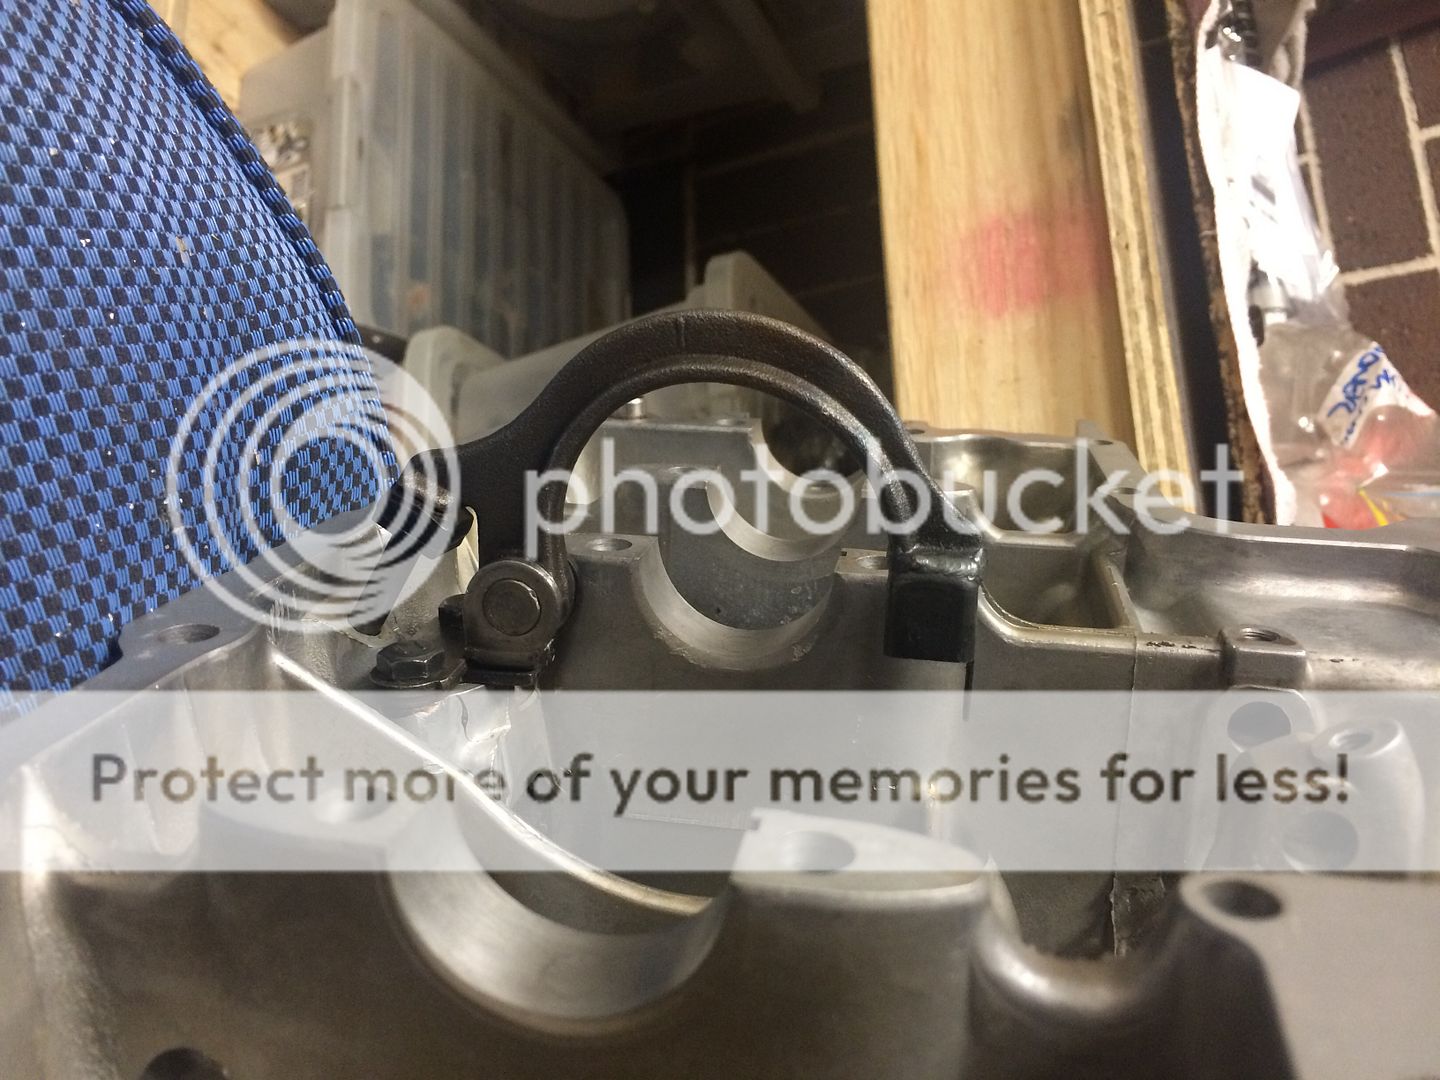
Not sure what the original owner of the bike had done to the bike, as the thread to the tensioner arm was pretty wrecked, so I tapped the thread to tidy it up. Turns out the main M8 bolt was a little too long as when I put the tensioner arm back in, the flat section was not being seen through the front locking bolt hole. I assumed the flat section should be all visible (to the point where you can see where it's not flat), so I took the bolt to the lathe and trimmed it right down to increase the range of movement for the tensioner arm. Here you can see how far down the arm goes:


All done with the bolt tightened down on the case. Plenty of adjustment on the manual adjuster:


However I still think I need a bit more adjustment as this is as far down as the tensioner arm will go:

 
Back
Top Bottom