
We noticed you are blocking ads. DO THE TON only works with community supporters. Most are active members of the site with small businesses. Please consider disabling your ad blocking tool and checking out the businesses that help keep our site up and free.
You are using an out of date browser. It may not display this or other websites correctly.
You should upgrade or use an alternative browser.
You should upgrade or use an alternative browser.
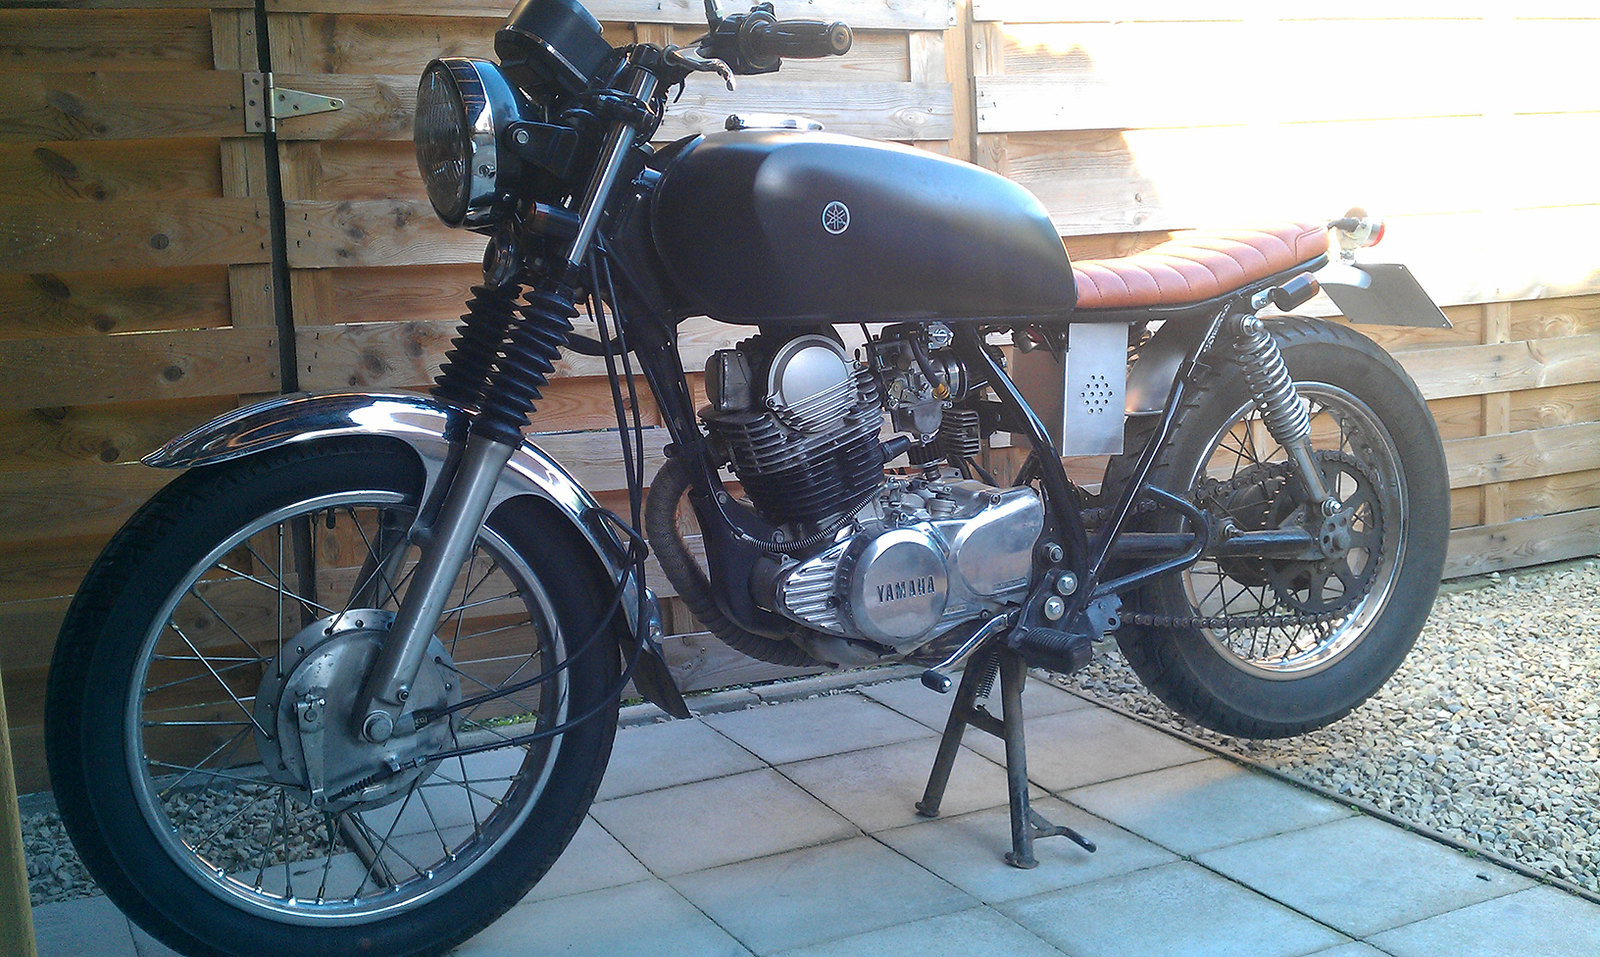
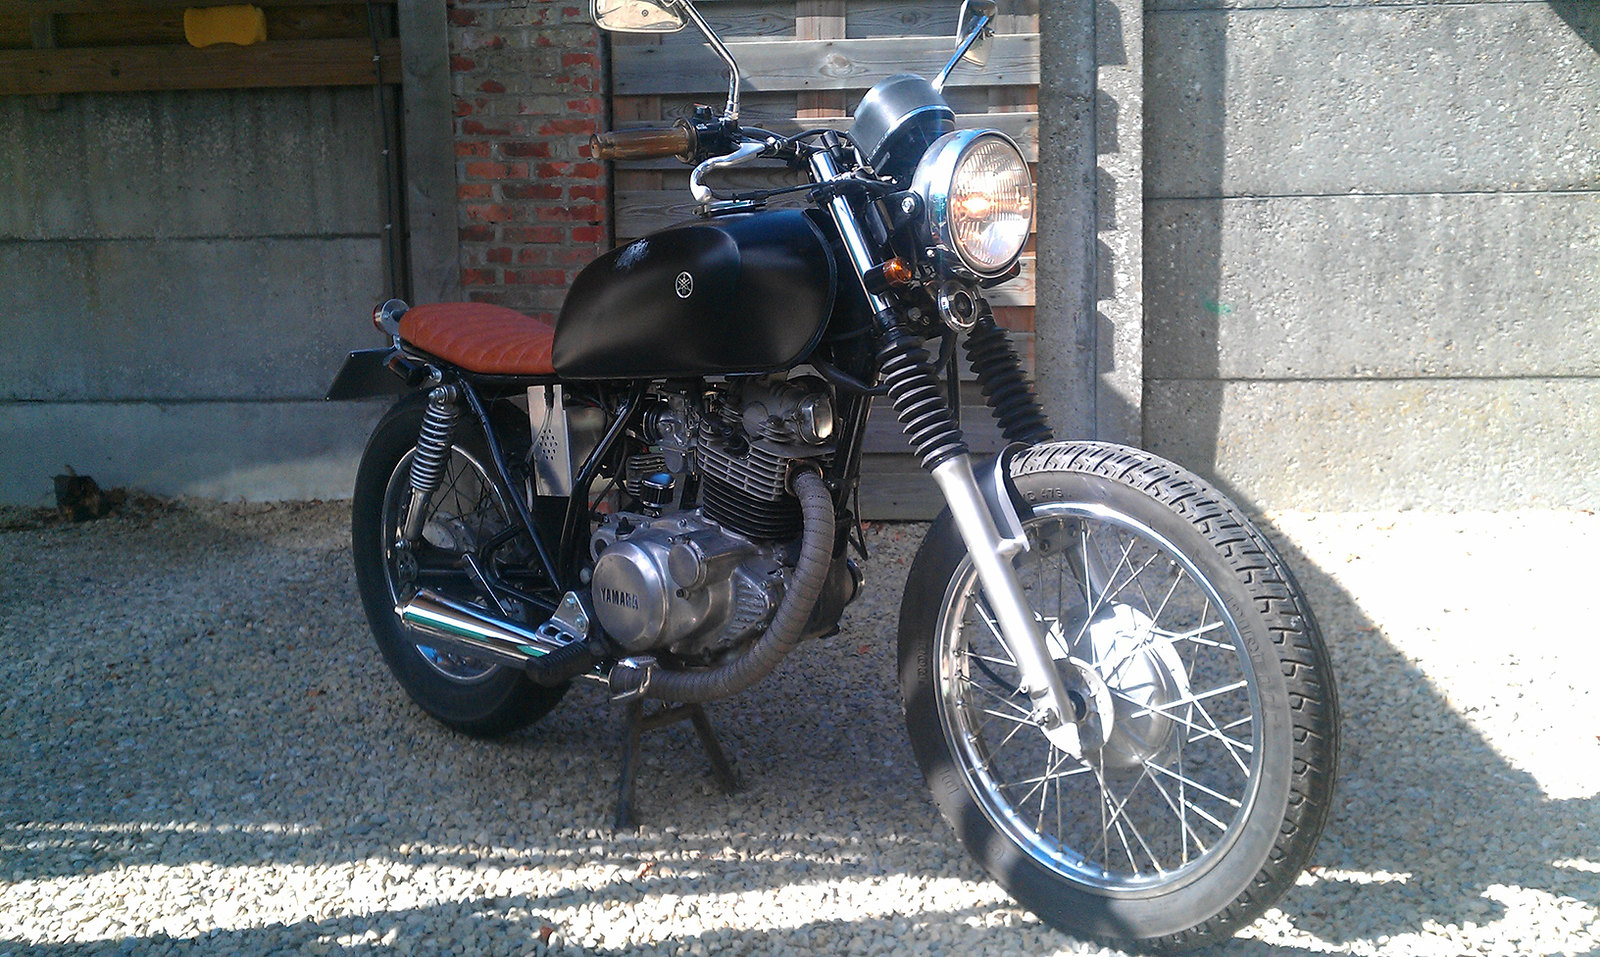
SR250 Brat/Street Tracker - First Build (aka Little Trouble Kid)
- Thread starter chiel
- Start date
I plan on using a set of Progressive Suspension shocks (12-1202 w/03-1394C springs; 75/120 lbs). I believe they are 13" (about 330mm) shocks from a '83 XS650 Heritage Special. I temporarily installed them and they look like they will fit w/o issue. Maybe there were frame/shock mounting differences between what was shipped to the USA and elsewhere? Did your chain hit on the top or bottom of the swing arm with the 320 shocks? Maybe too little sag (or springs too heavy duty)? Originally wanted to put on a 15" set from a XT500 to raise the seat higher (I'm 6' 2" with a 33" inseam) but the rear brake light switch lug got in the way and I didn't want to cut it off.chiel said:What rear shocks are you using on your SR if you don't mind me asking? I tried XT500 320mm stereo shocks, but the chain rubs the swing arm axle so had to mount the OEM shocks.
chiel
New Member
The chain hit the top of the swing arm and the springs wouldn't compress by simply sitting on it. They would only give if you jumped on it with all your might or take a large speedbump. So didn't really test them 'cause the chain would constantly rub the swingarm. And they were only on their lowest setting. It could well be that they are the same 15" XT500 shocks you wanted to try. The swingarm also had clearance issues with the stock exhaust, so had to cut that one off ;D
I have seen several other SR250 builds that used the 330mm/13" shocks (Tracker named Mexico, for one, had 335mm/13.19" shocks). Not sure why you had difficulty, but it sounds like the spring rate was too much for your weight and if they were 15"/381mm (eye-to-eye) then I might see problems with clearance - but I would think 320mm shocks would fit fine. Not sure why the OEM exhaust would have clearance issues with the OEM swingarm either (but understand why you would want to cut off that heavy exhaust/resonator - but you would need to either remove the center stand or fab-up an alternative bracket as a stop).
chiel
New Member
Sorry for the wait guys. A lot of things have been going on lately, and not all bike-related, but i'm still giving her some love on the side ") Updates will follow shortly. Thanks for the bookmark bigring, i really like where i am headed too ;D Still a lot more work to do, but so little time… As for the shocks zap2504, i also researched the builds/posts before i installed the springs, but for some reason these don't seem to move an inch. Maybe the springs are indeed heavy duty, or maybe the piston is stuck/busted. It takes a lot of force to partially compress the spring, and i do mean a lot. I think the clearance issue with the stock exhaust could have something to do with the bike being lowsided by the p.o.. All along the right side problems have been covered up, so i guess the exhaust took a hit and bent towards the swing arm. Only solution was a threesome between me, the exhaust and the old, rusty hacksaw. But hey, any excuse is a good one, so you won't hear me complaining ;D
Updates will follow shortly. Thanks for the bookmark bigring, i really like where i am headed too ;D Still a lot more work to do, but so little time… As for the shocks zap2504, i also researched the builds/posts before i installed the springs, but for some reason these don't seem to move an inch. Maybe the springs are indeed heavy duty, or maybe the piston is stuck/busted. It takes a lot of force to partially compress the spring, and i do mean a lot. I think the clearance issue with the stock exhaust could have something to do with the bike being lowsided by the p.o.. All along the right side problems have been covered up, so i guess the exhaust took a hit and bent towards the swing arm. Only solution was a threesome between me, the exhaust and the old, rusty hacksaw. But hey, any excuse is a good one, so you won't hear me complaining ;D
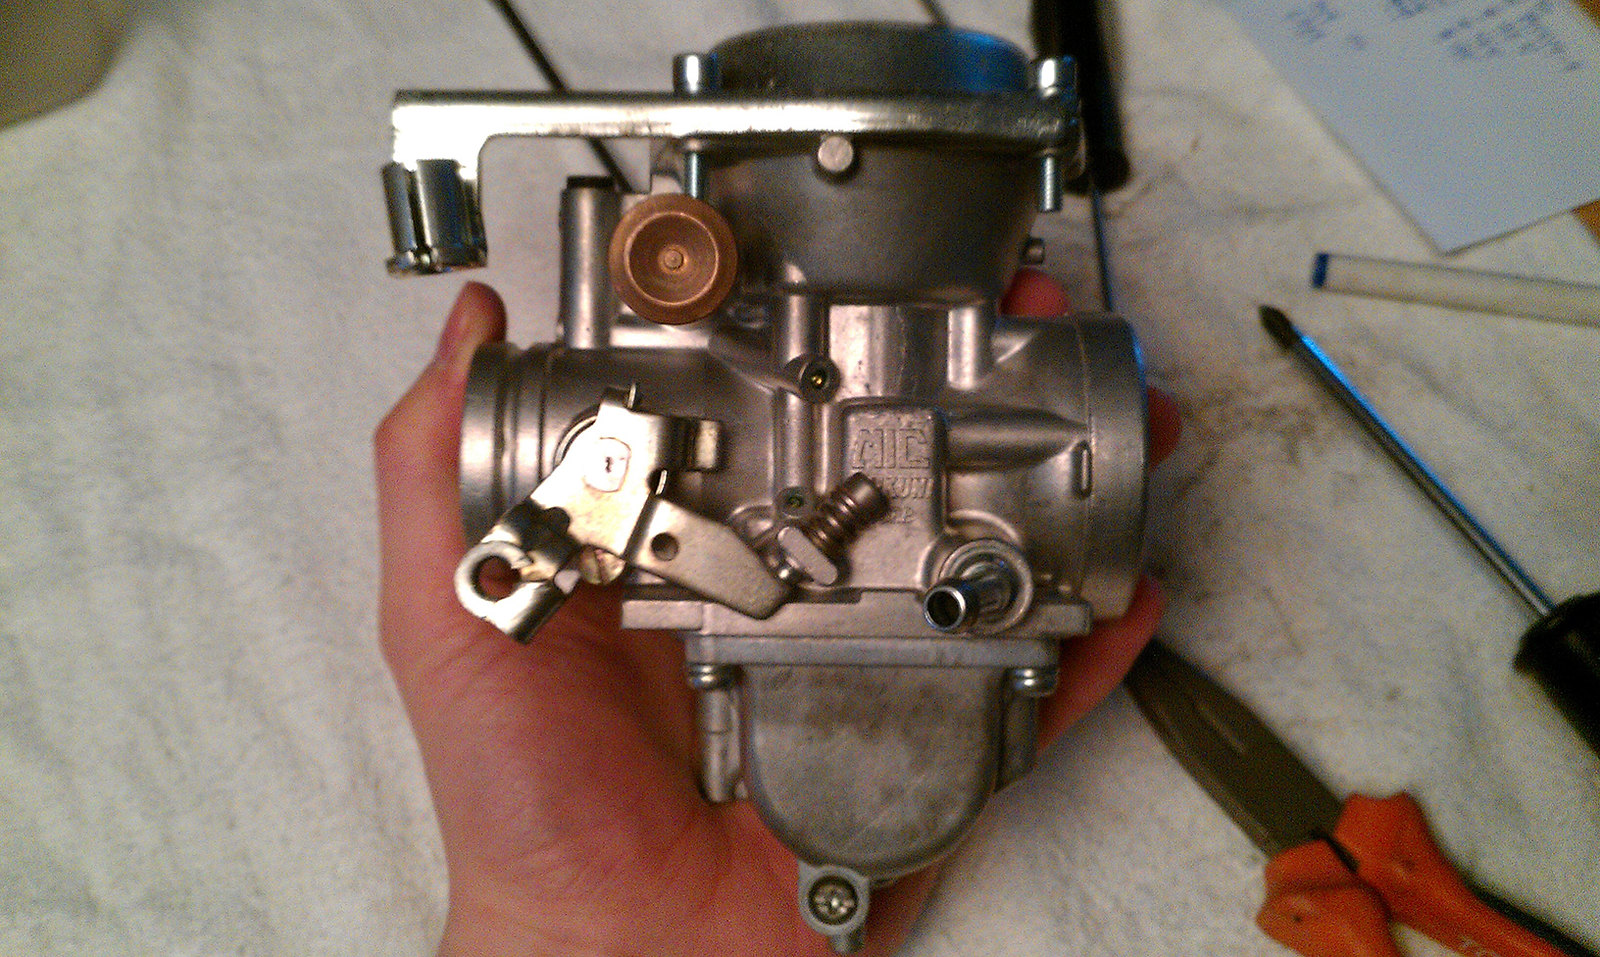
Had the carbs cleaned ultrasonic, so they're looking brand spankin new. Still have to fit them, but i'm waiting for a new manual petcock. I'll post pics and a write-up when everything arrives next week.
Edit: Almost forgot. Fabricated and mounted a new bump-stop for the center stand and replaced the center stand springs with new old stock. So that's already been taken care of.
Updates will follow shortly. Thanks for the bookmark bigring, i really like where i am headed too ;D Still a lot more work to do, but so little time… As for the shocks zap2504, i also researched the builds/posts before i installed the springs, but for some reason these don't seem to move an inch. Maybe the springs are indeed heavy duty, or maybe the piston is stuck/busted. It takes a lot of force to partially compress the spring, and i do mean a lot. I think the clearance issue with the stock exhaust could have something to do with the bike being lowsided by the p.o.. All along the right side problems have been covered up, so i guess the exhaust took a hit and bent towards the swing arm. Only solution was a threesome between me, the exhaust and the old, rusty hacksaw. But hey, any excuse is a good one, so you won't hear me complaining ;DHad the carbs cleaned ultrasonic, so they're looking brand spankin new. Still have to fit them, but i'm waiting for a new manual petcock. I'll post pics and a write-up when everything arrives next week.
Edit: Almost forgot. Fabricated and mounted a new bump-stop for the center stand and replaced the center stand springs with new old stock. So that's already been taken care of.
chiel
New Member
It's been a while, but life got in the way. Got a ton of work done on the bike, but didn't have time to update these posts. Since there is a lot to talk about i'll update in pieces.
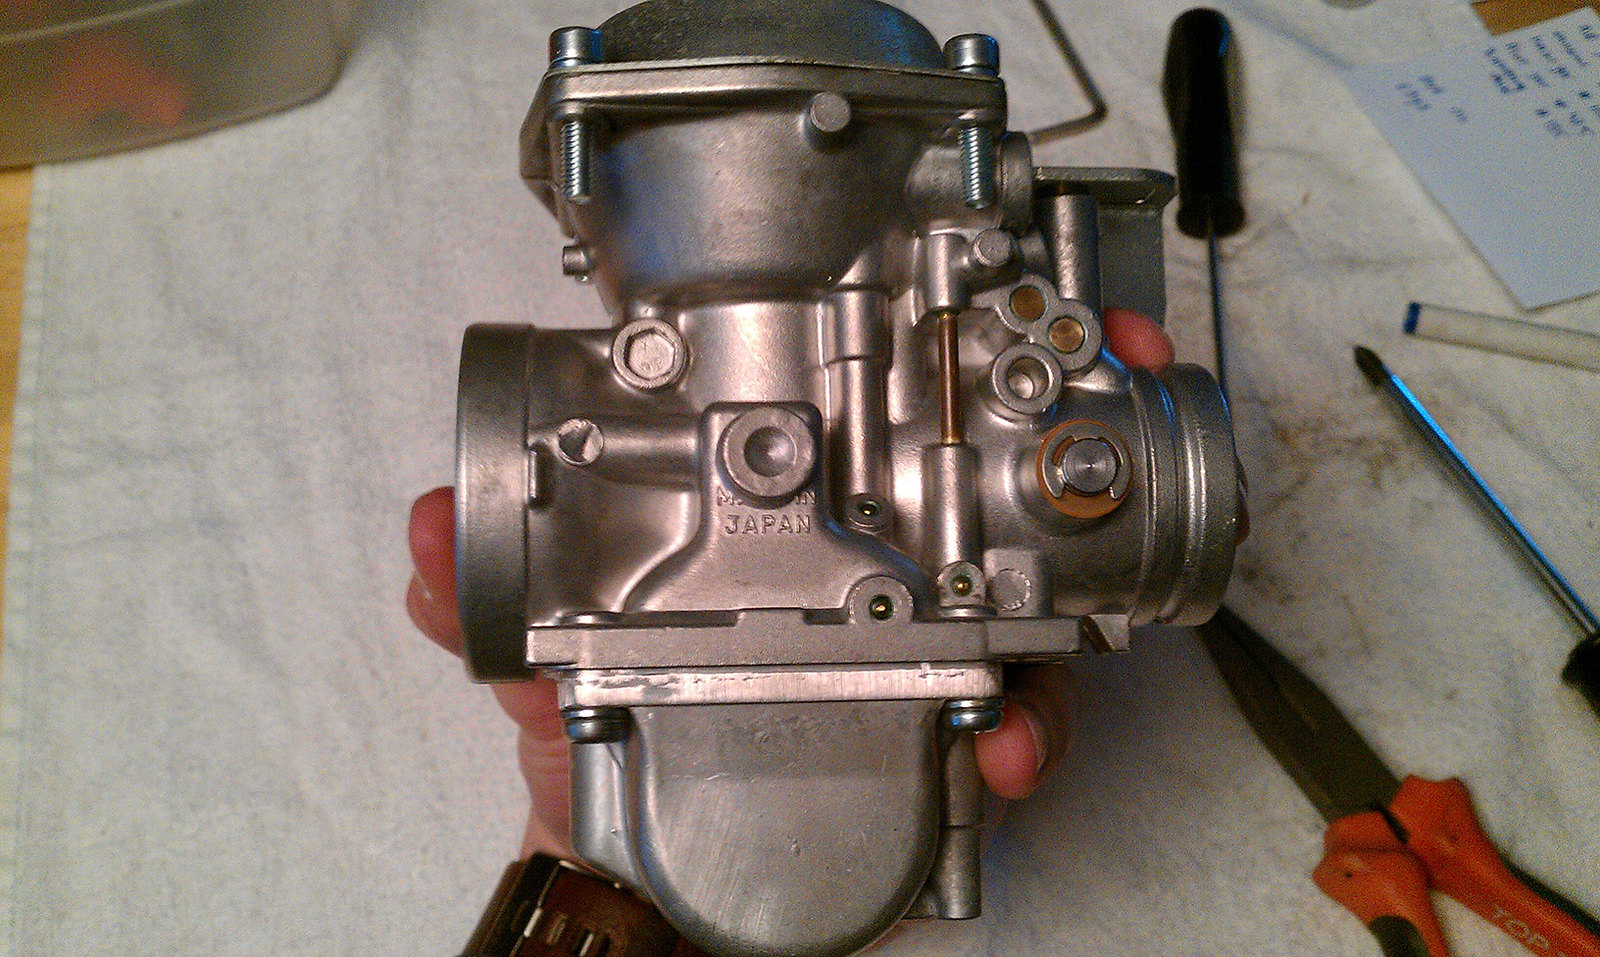
First things first: Carb cleaning.
Since the manual cleaning with carb cleaner and a brush didn't really work out (she was still running lean) i had the carb cleaned ultrasonic.
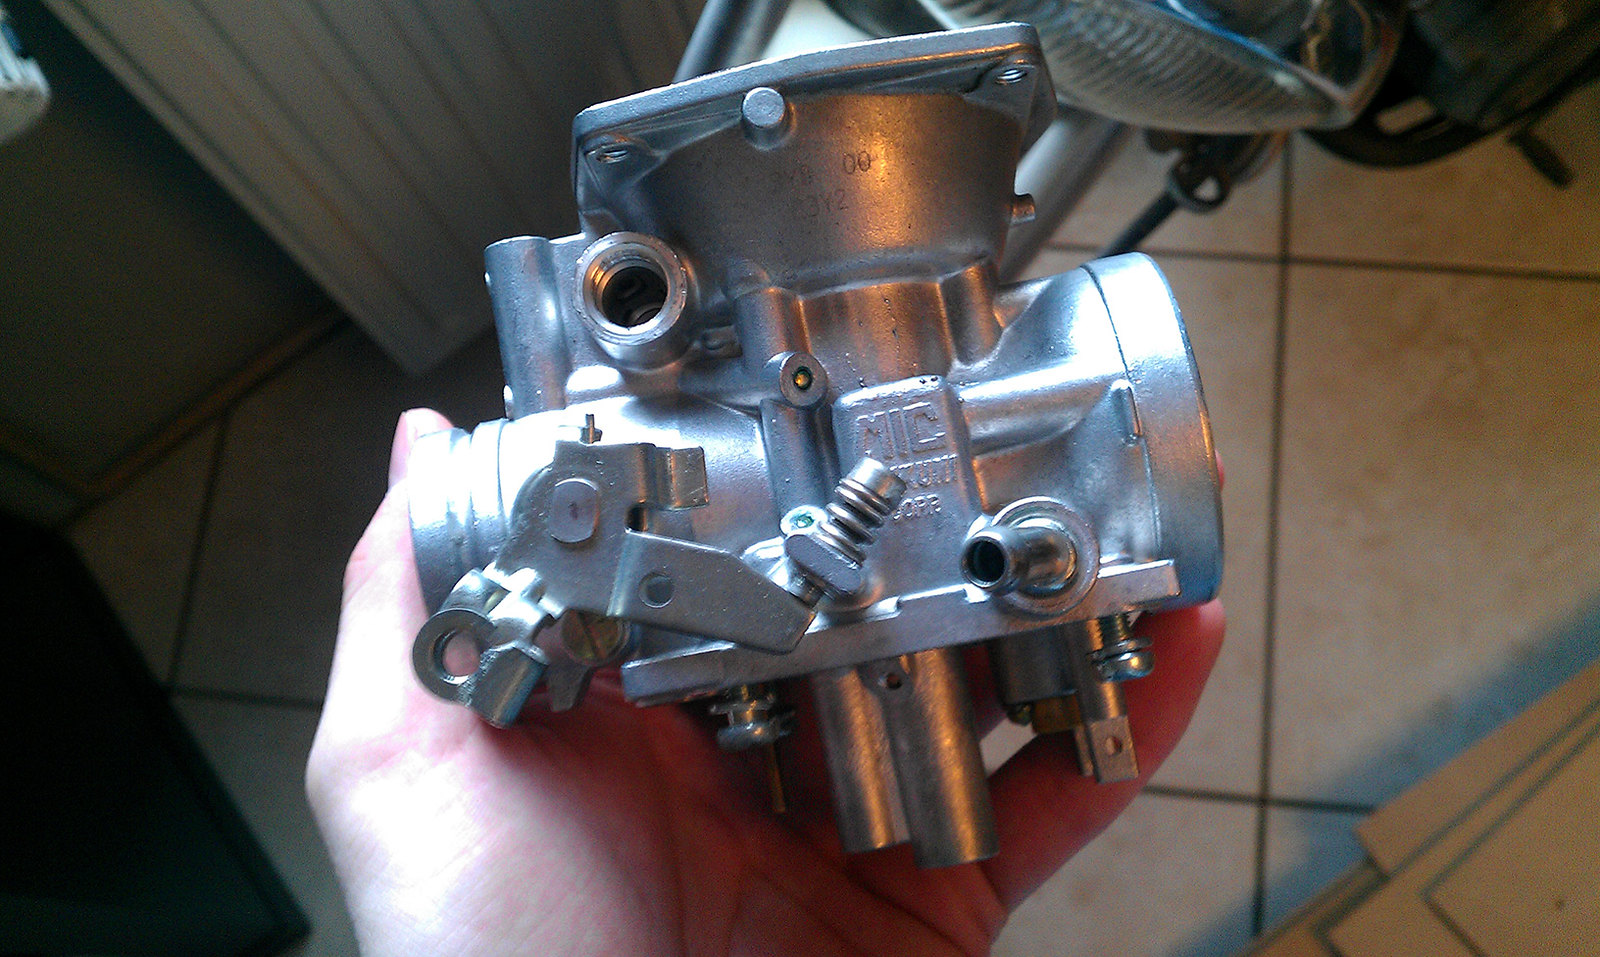

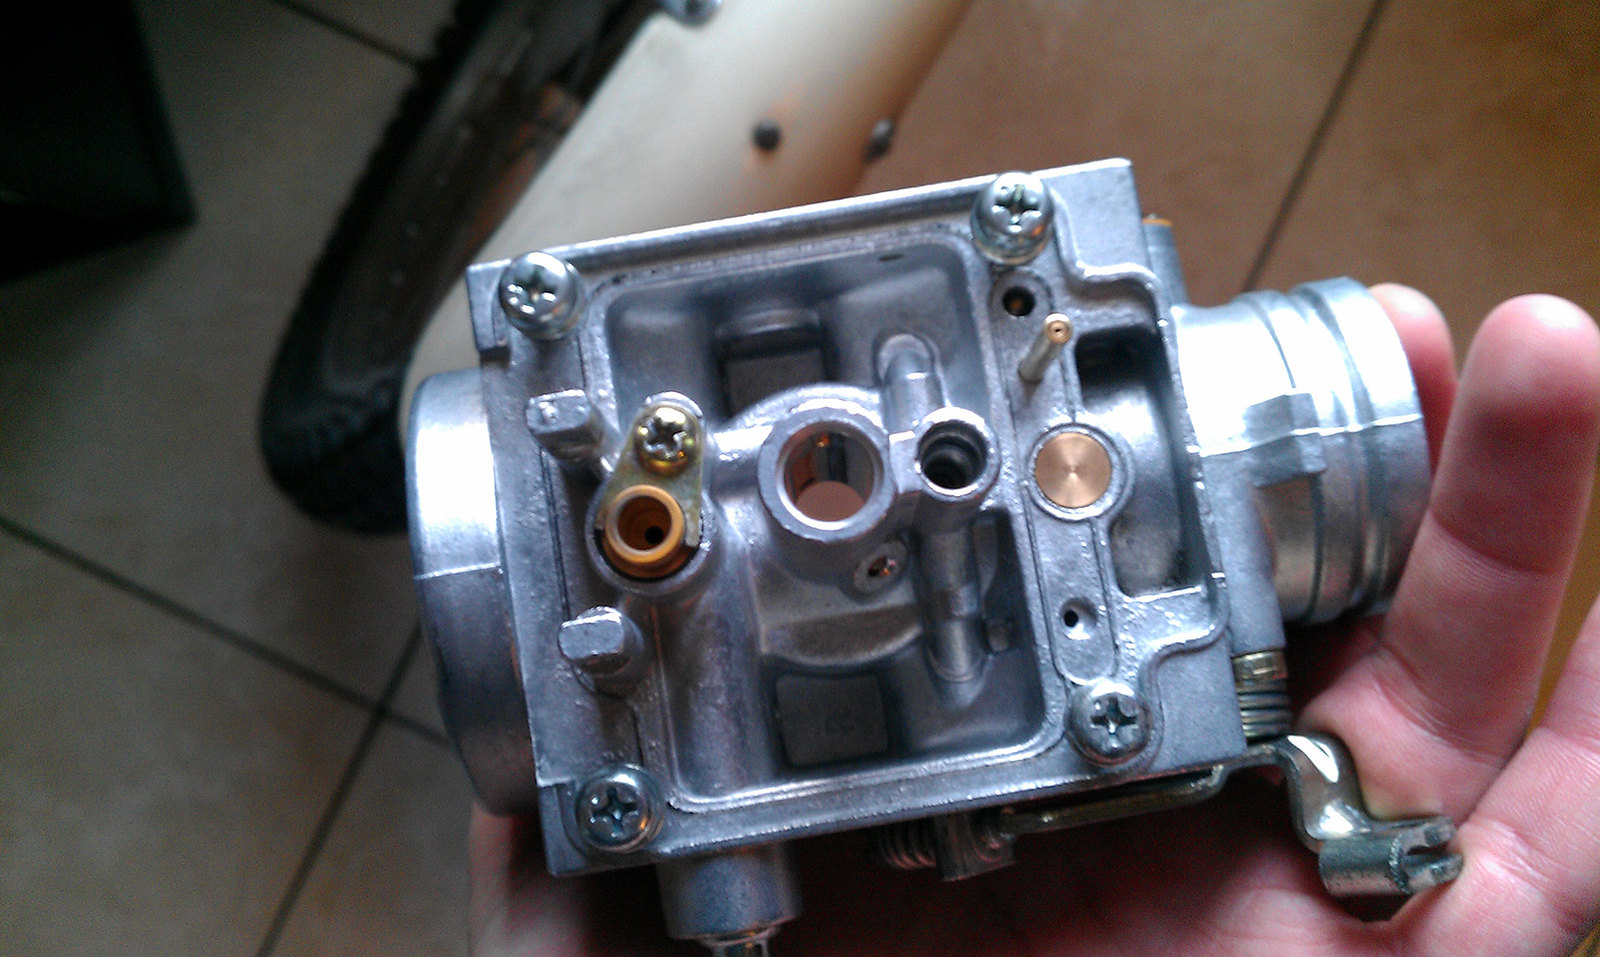
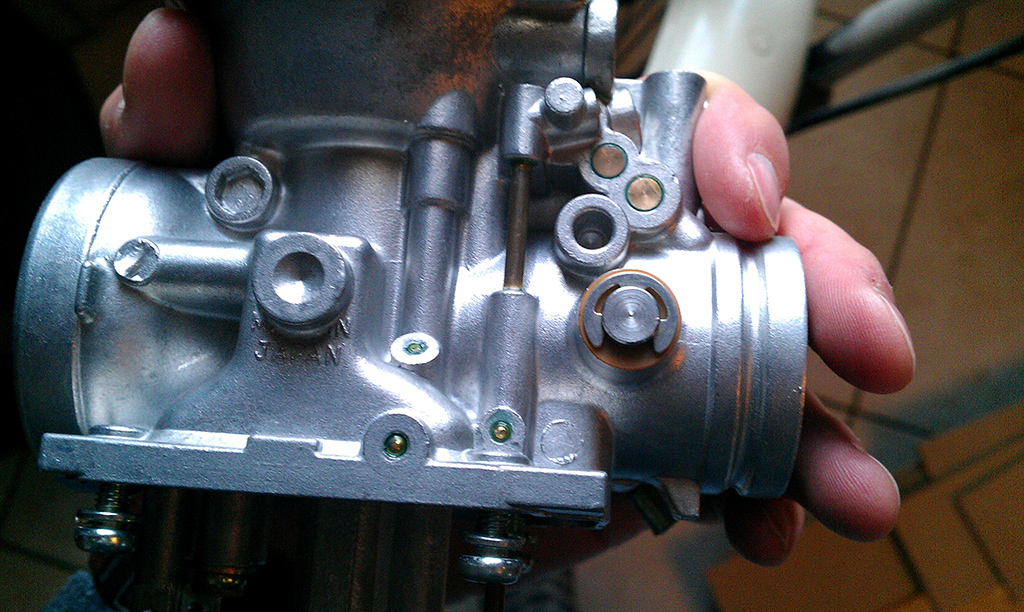
Looks a lot cleaner
Re-assembly:

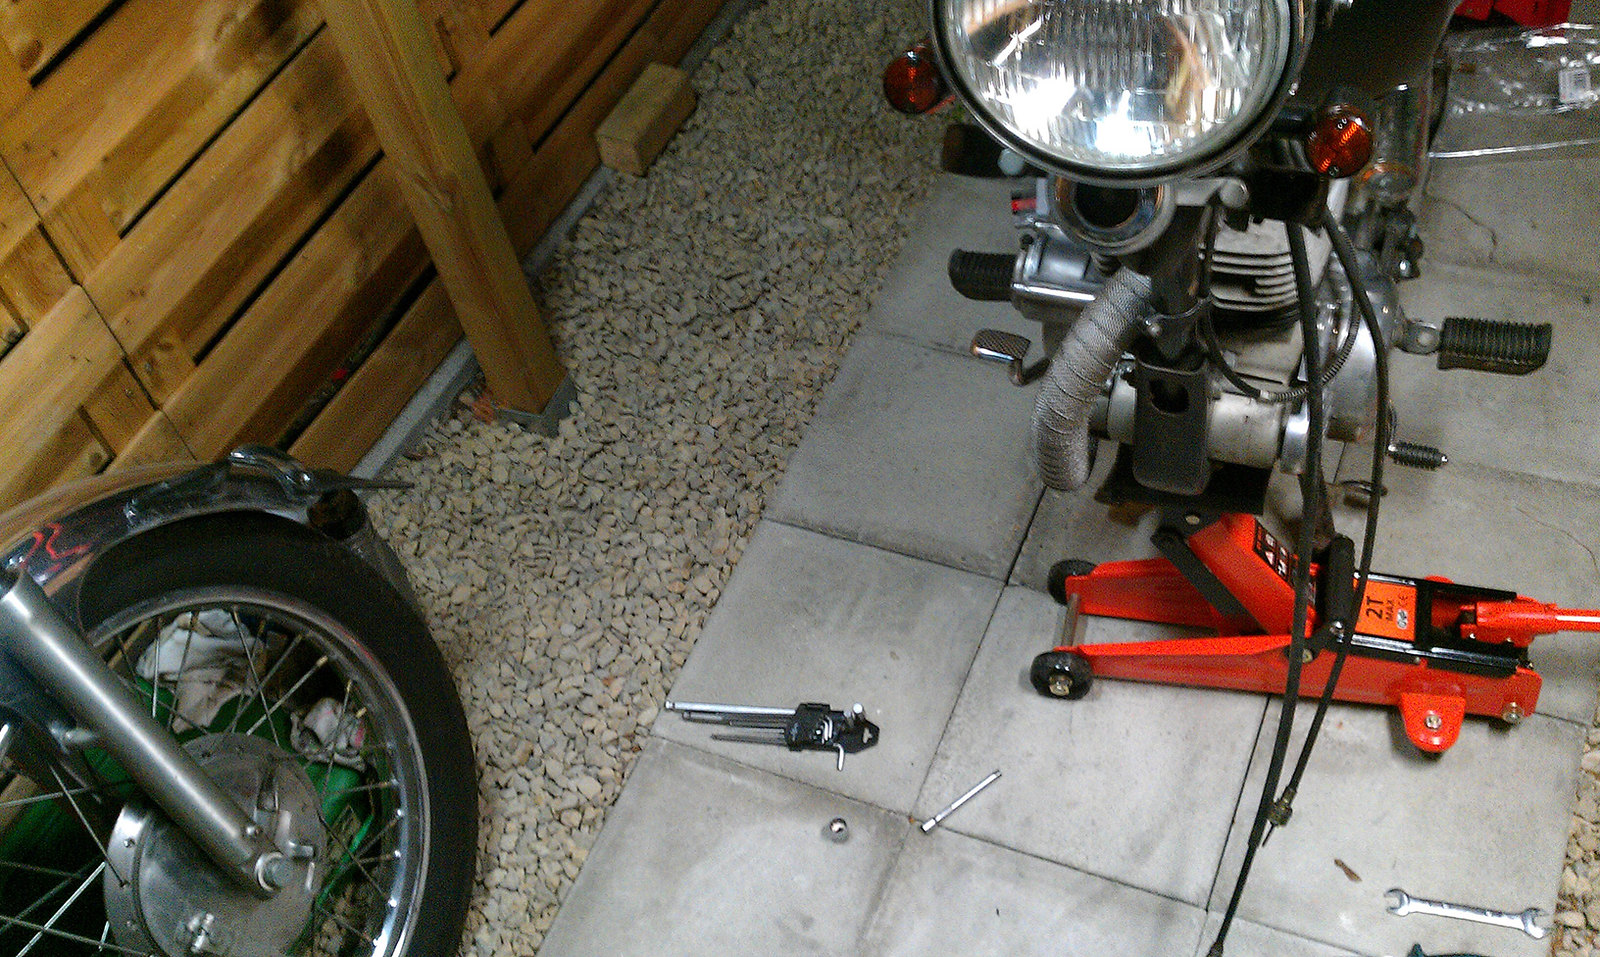
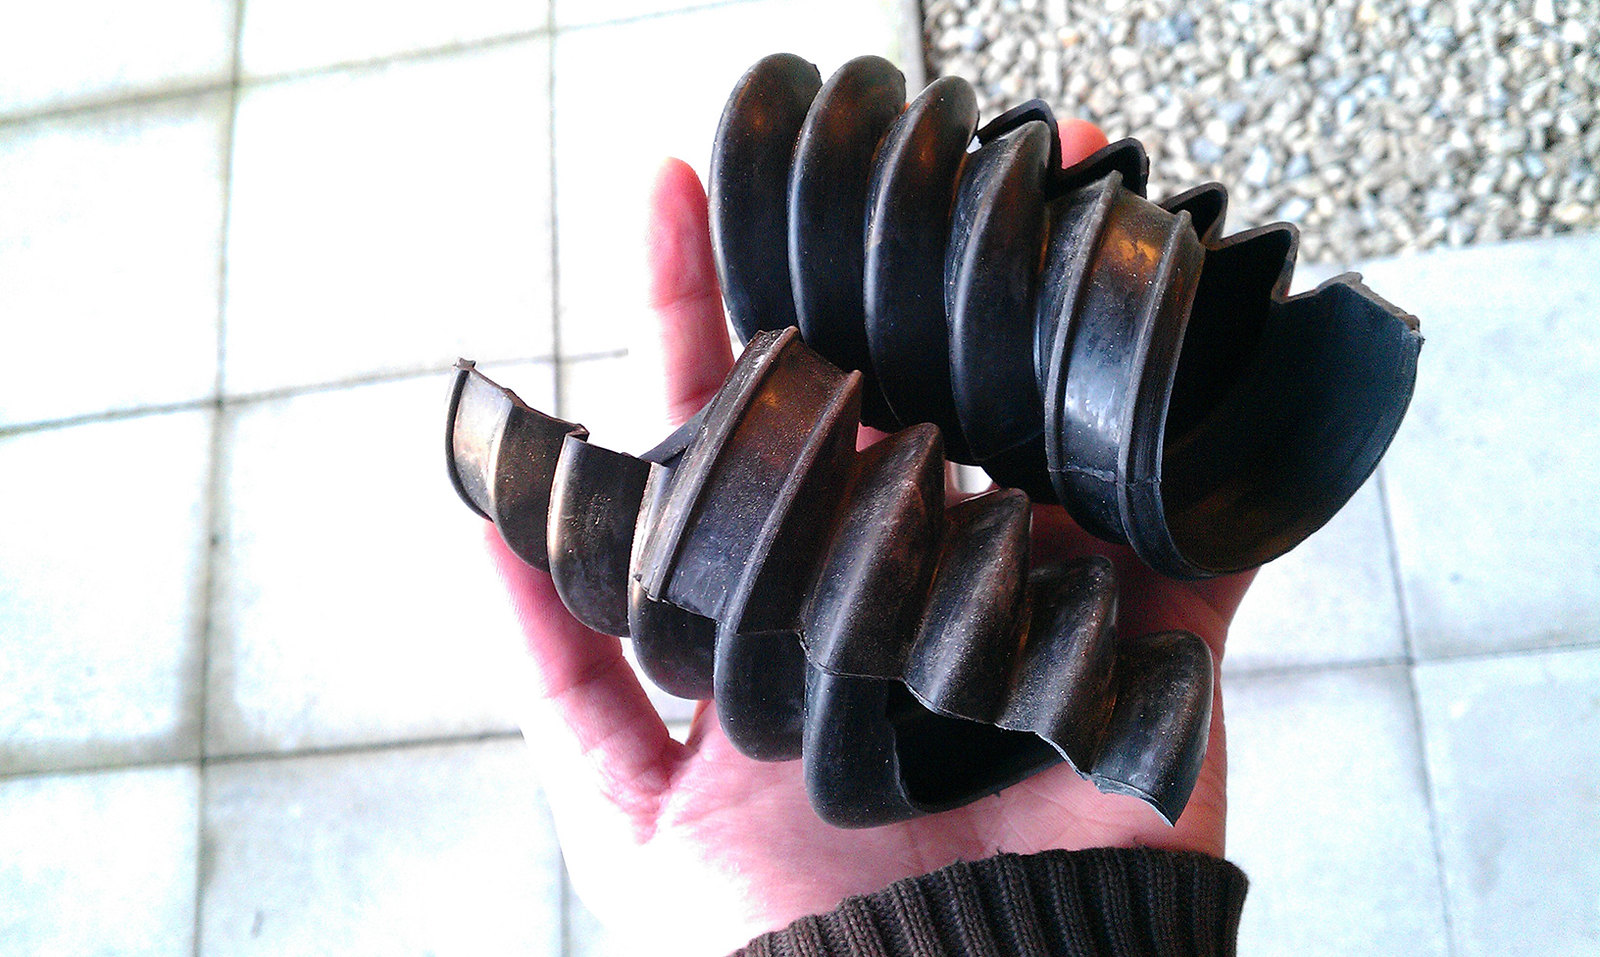
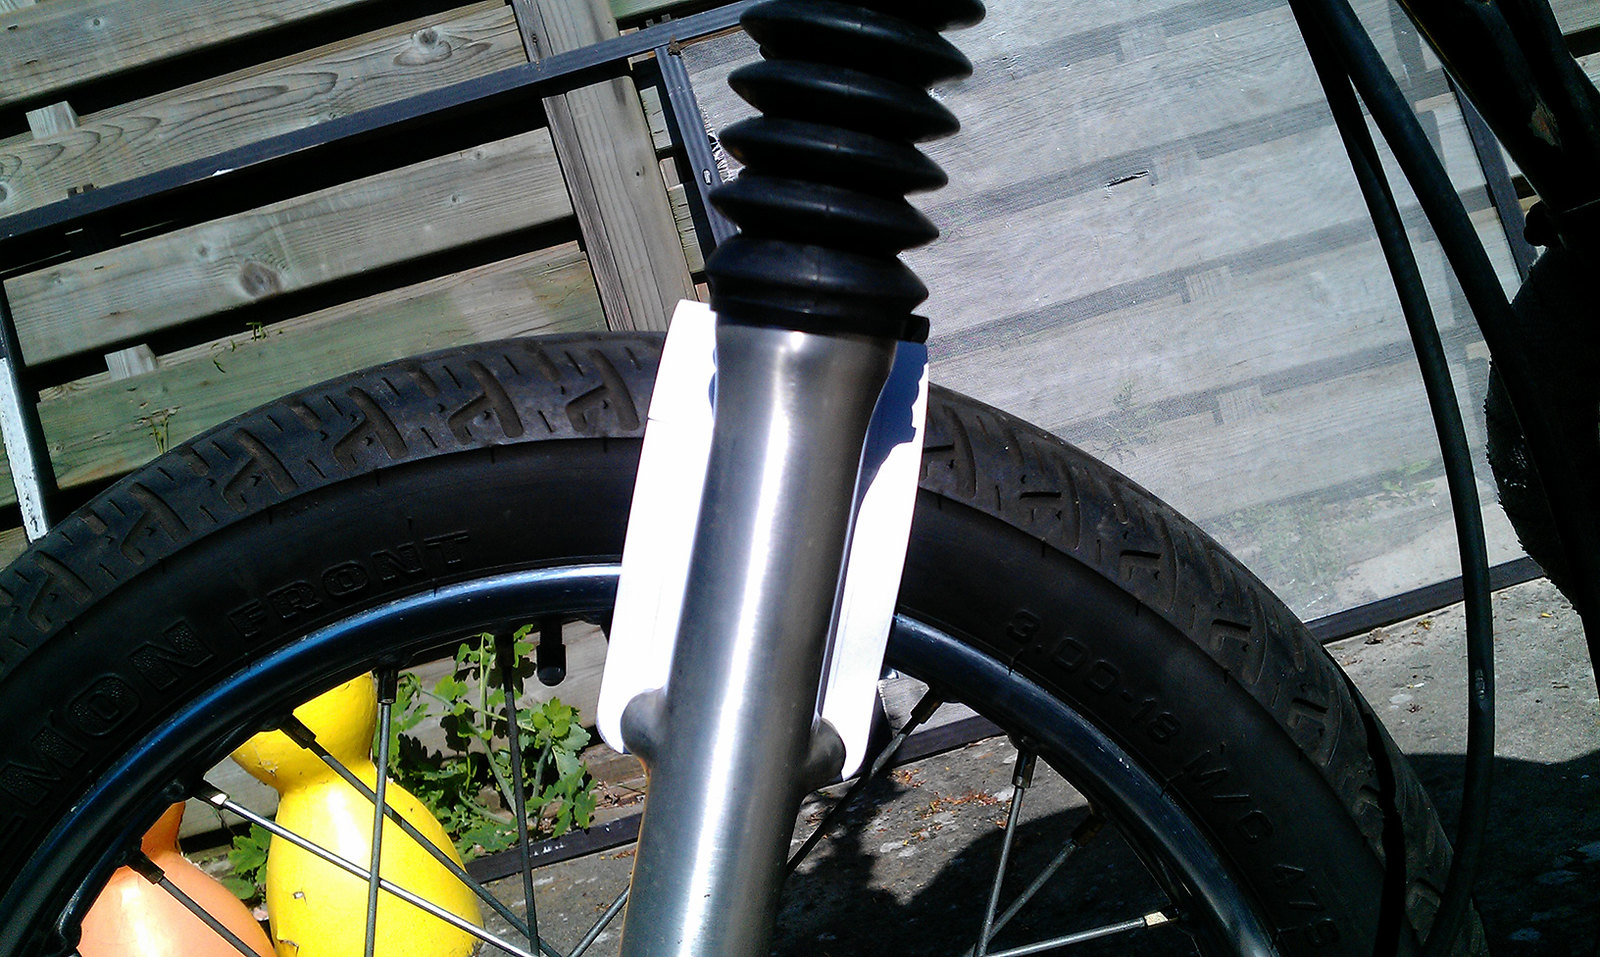
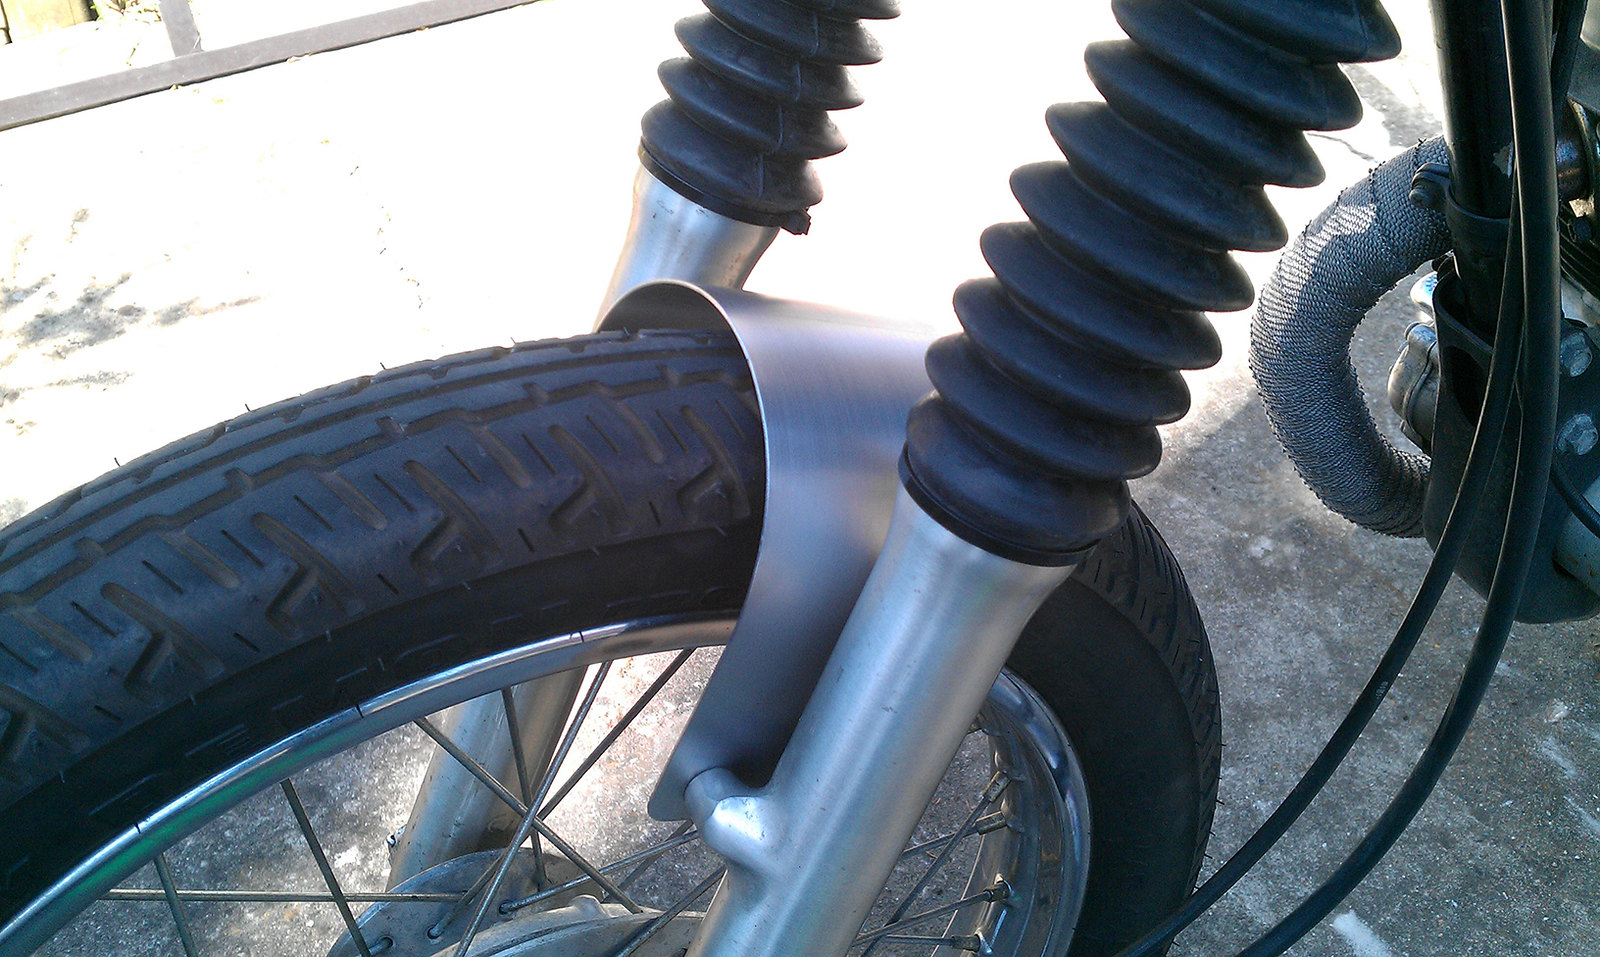
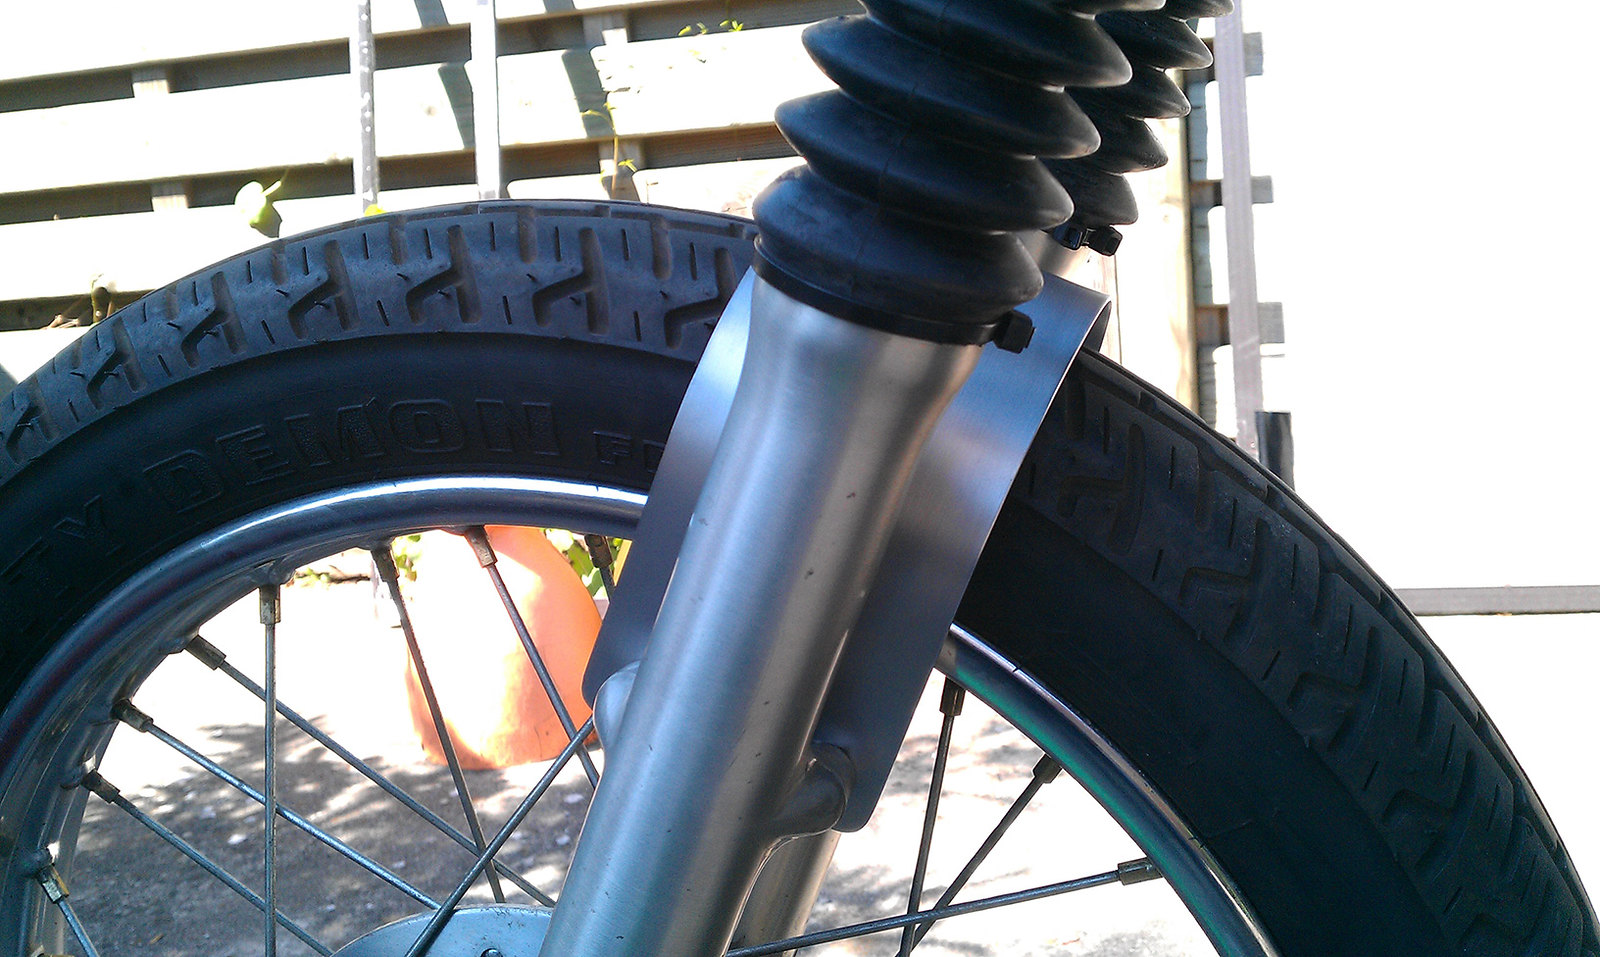
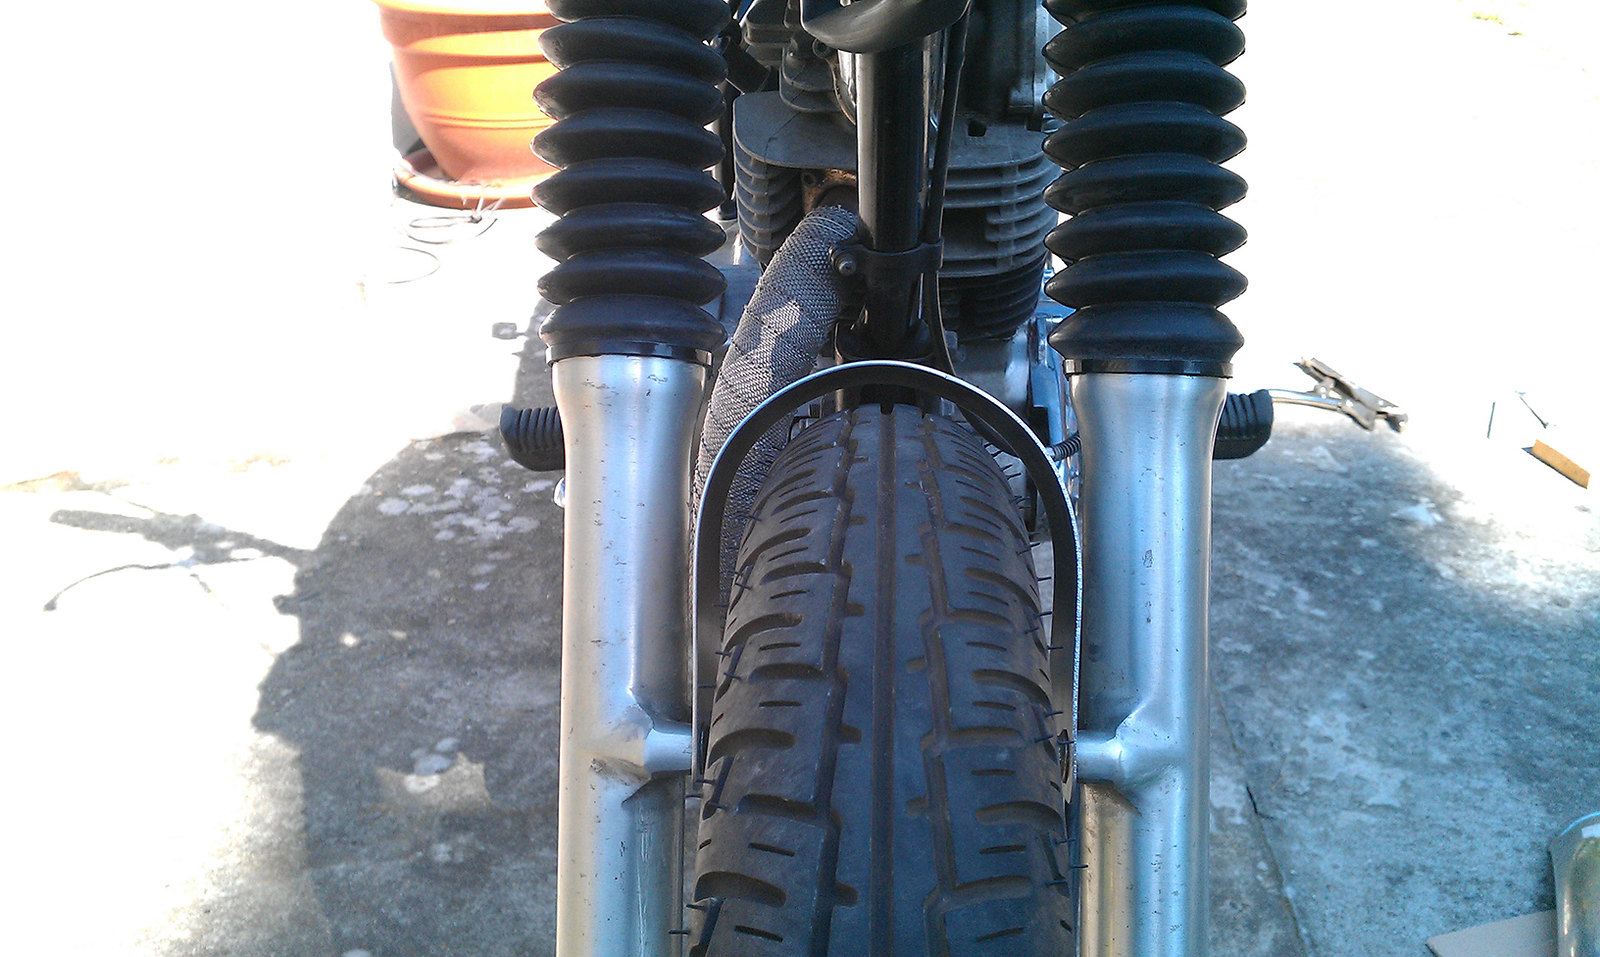
Next up i tried to fit fork boots, so had to figure out a way to lift the front without a bike-lift:
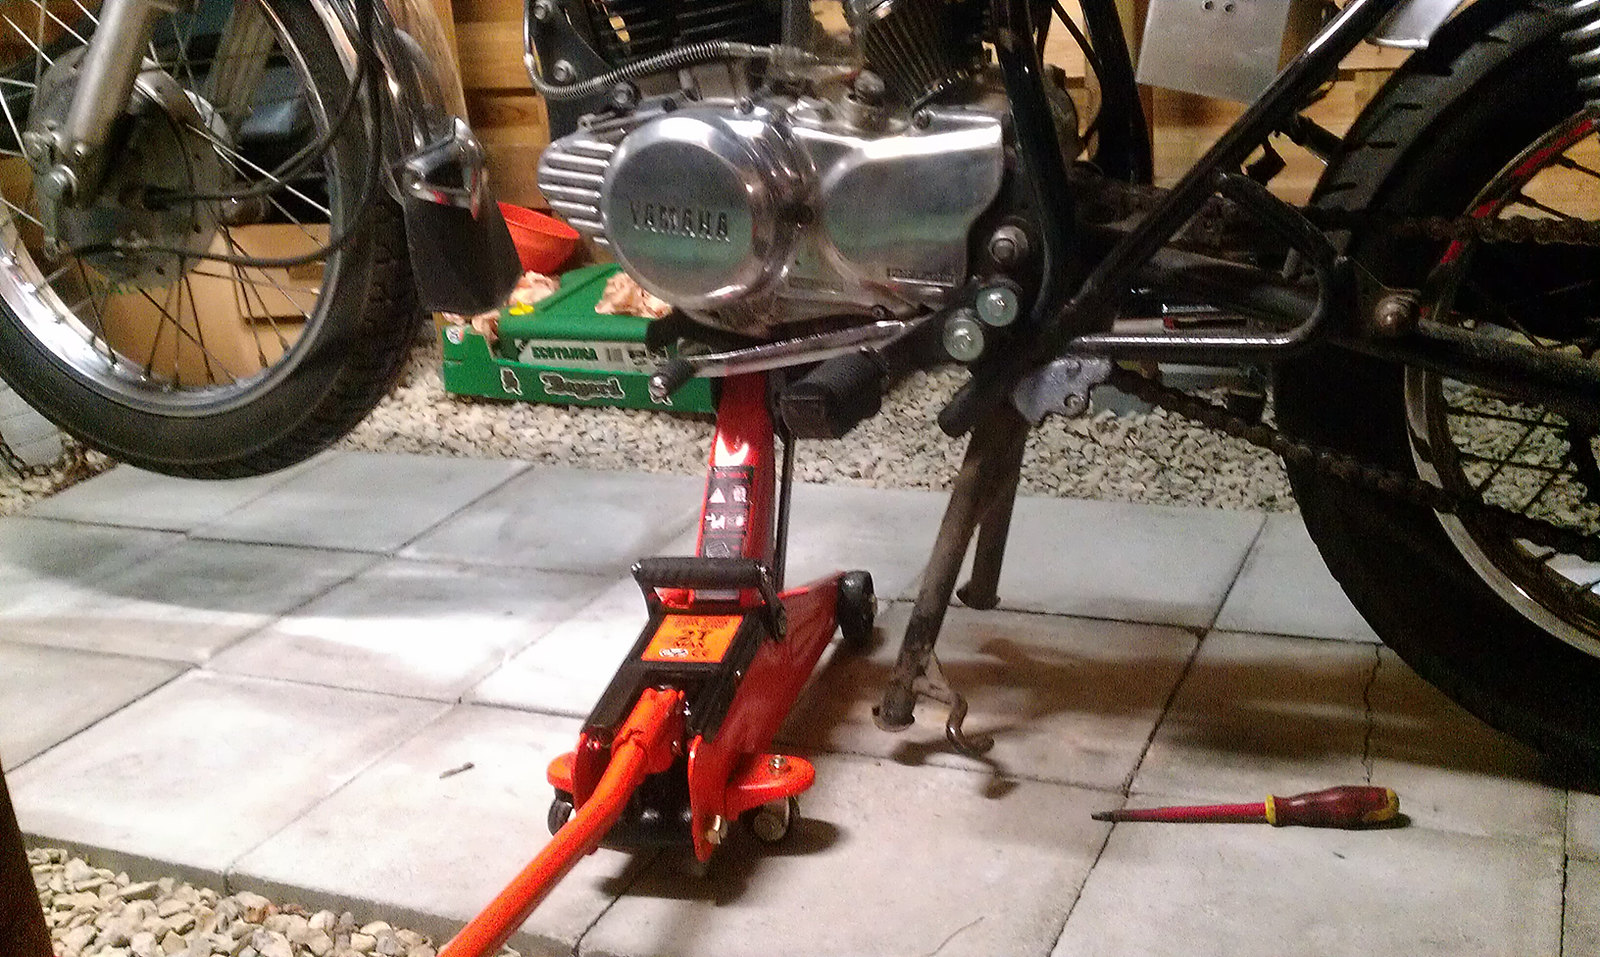
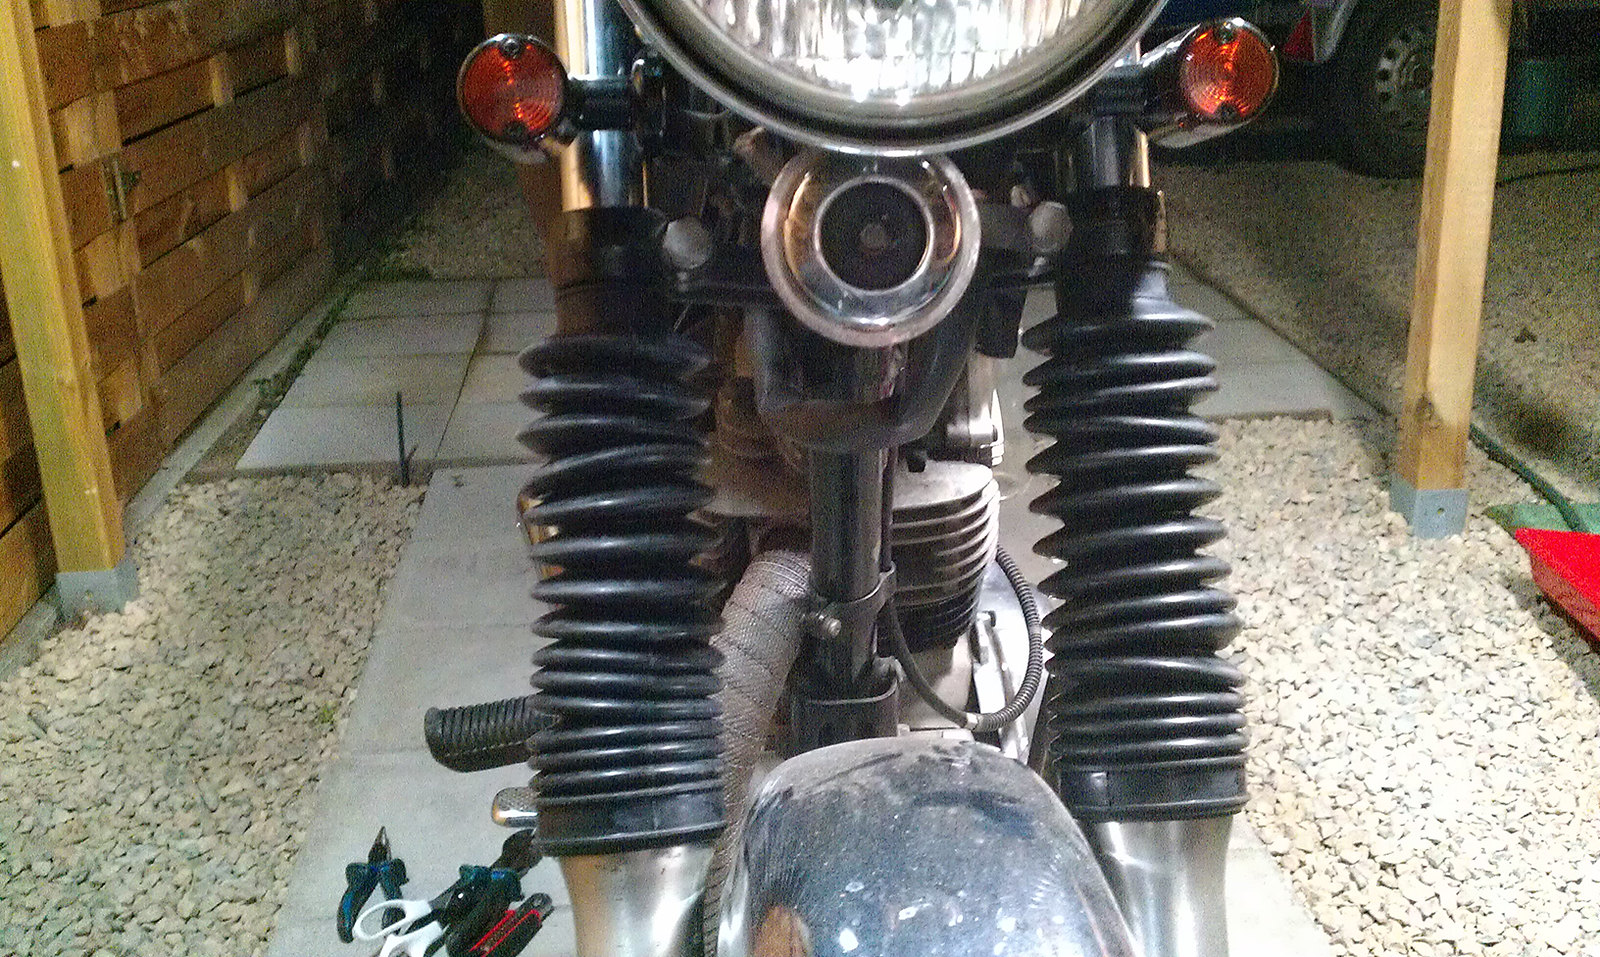
Fitted, but still a little ugly:

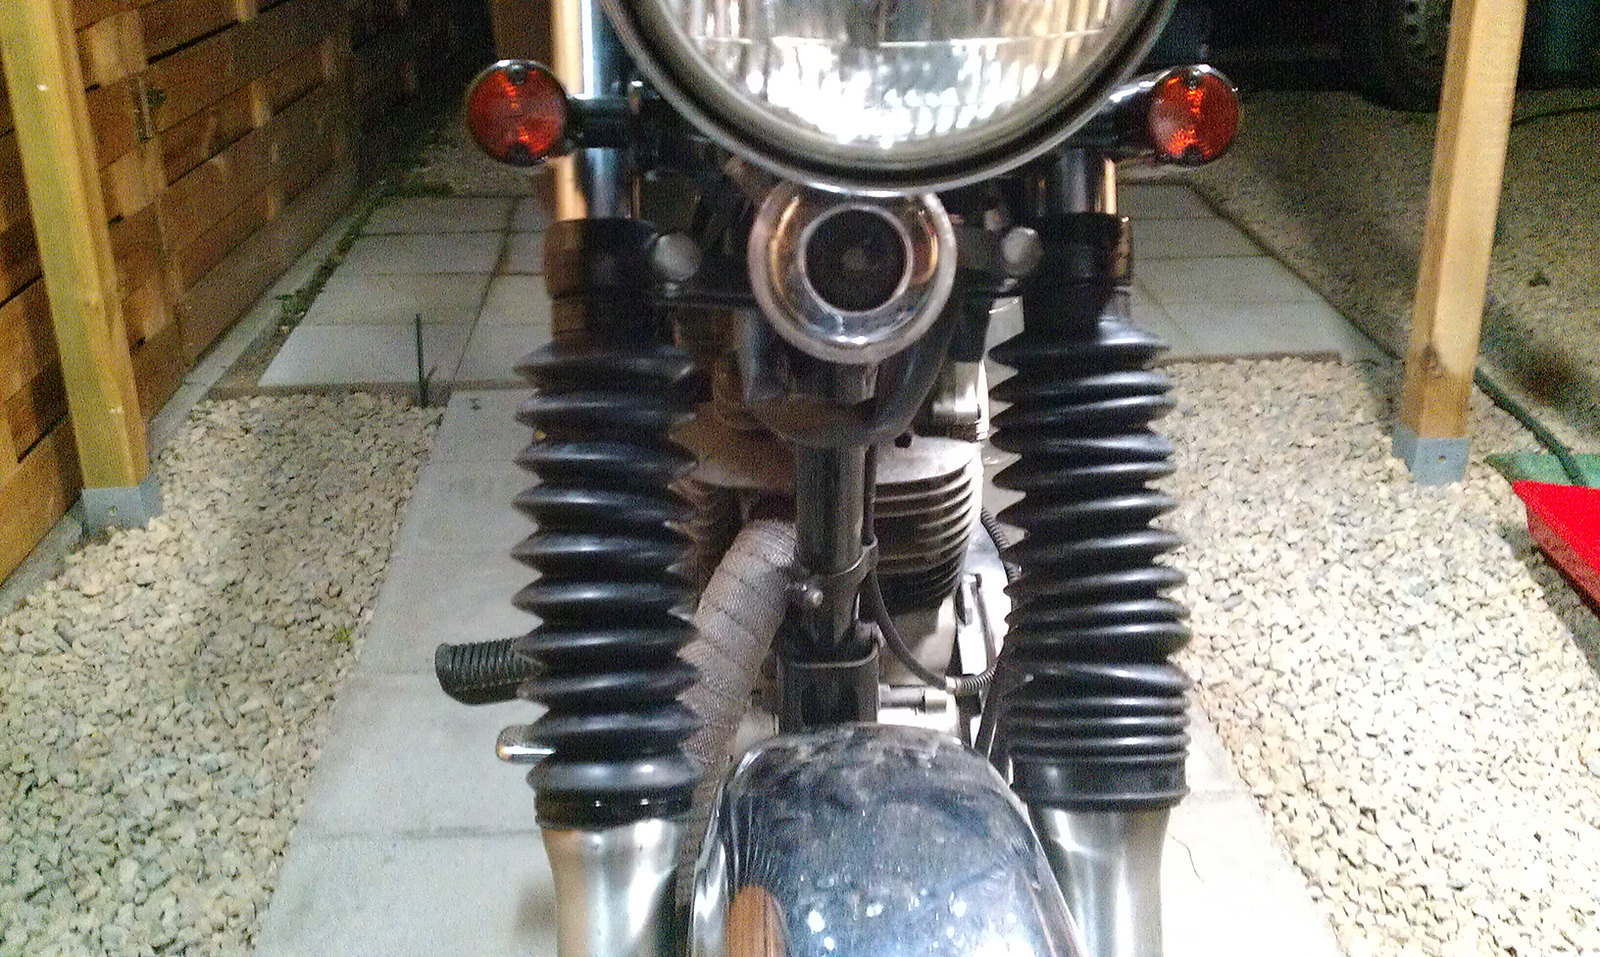
Fixed and shortened the left one:
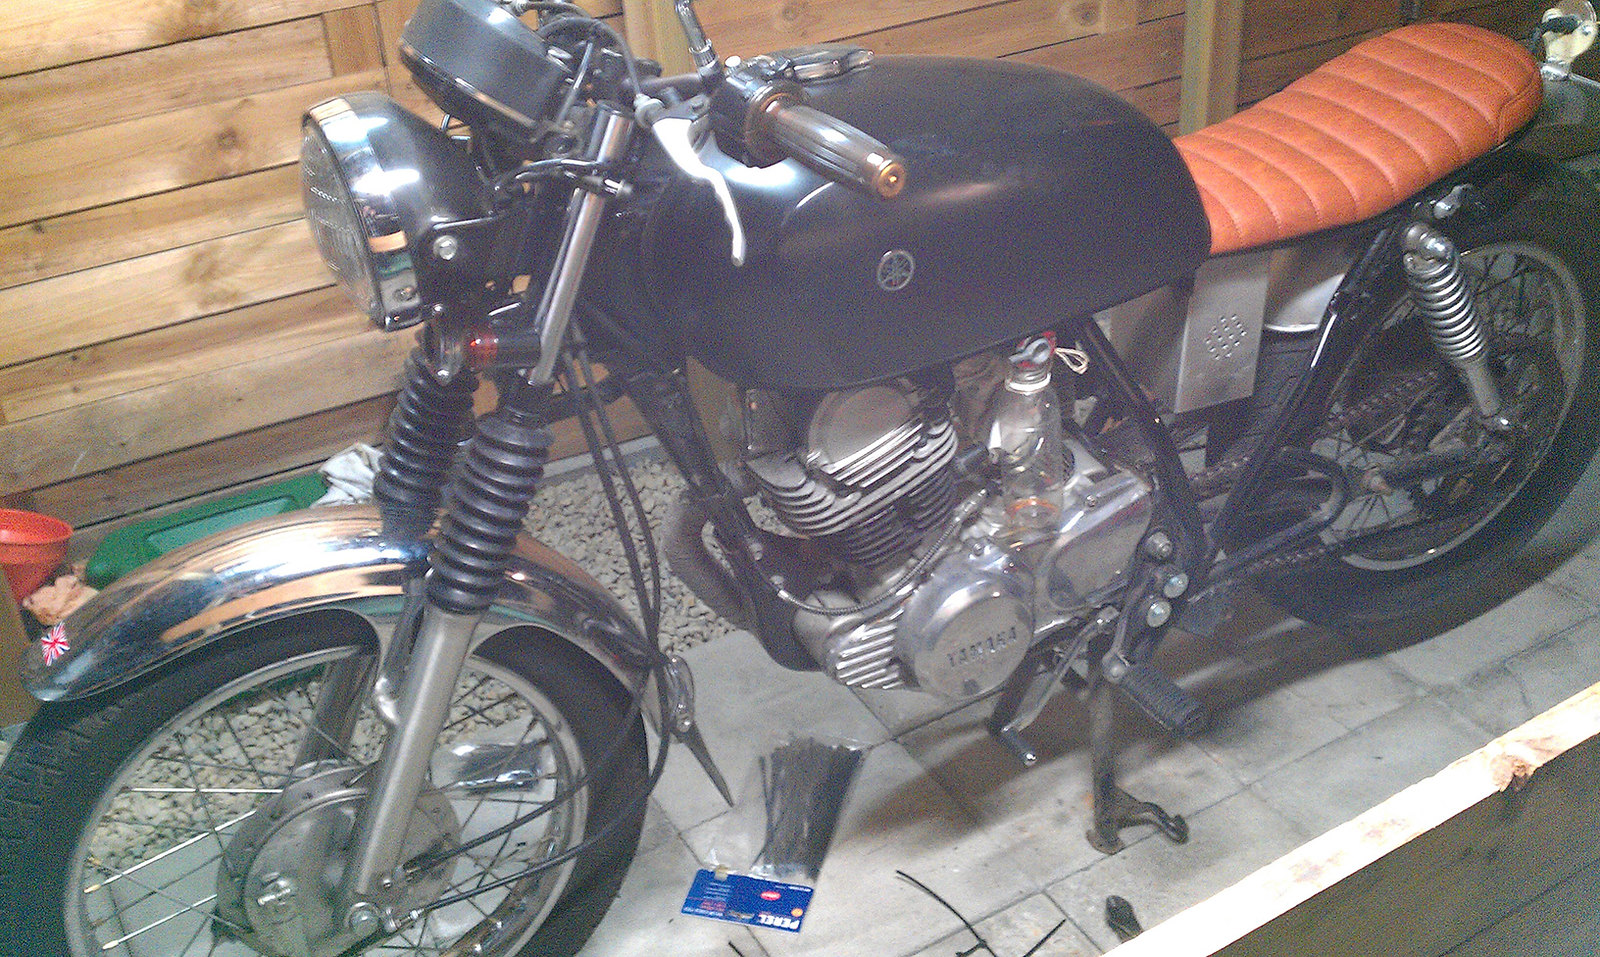
Done:
Leftovers:
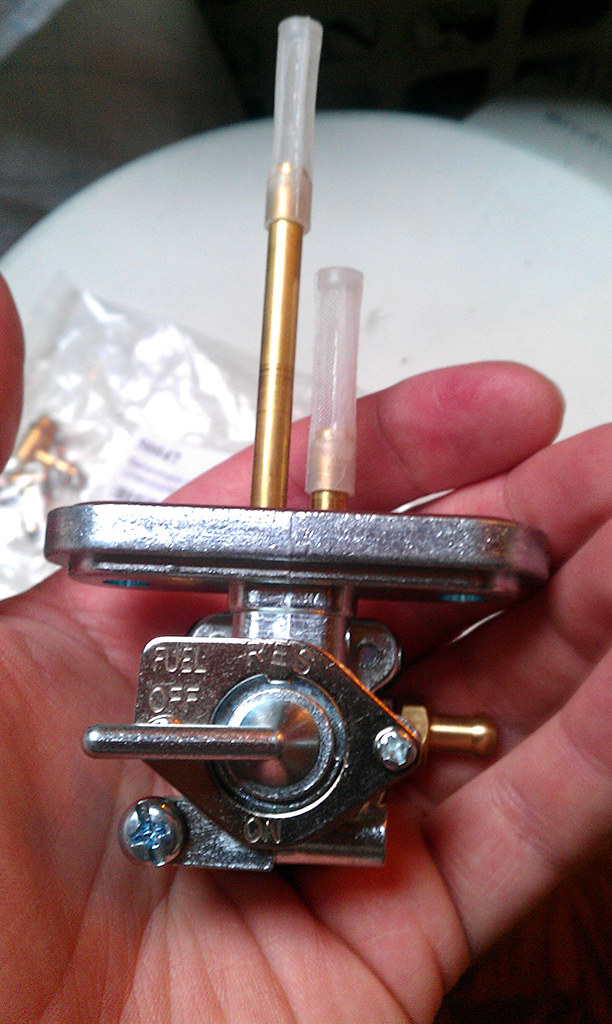
Next thing on the list was a new petcock. The old vacuum-type wasn't doing it's job anymore and refurbishing didn't help. So swapped the old for a manual petcock. A lot smaller, and a lot easier:

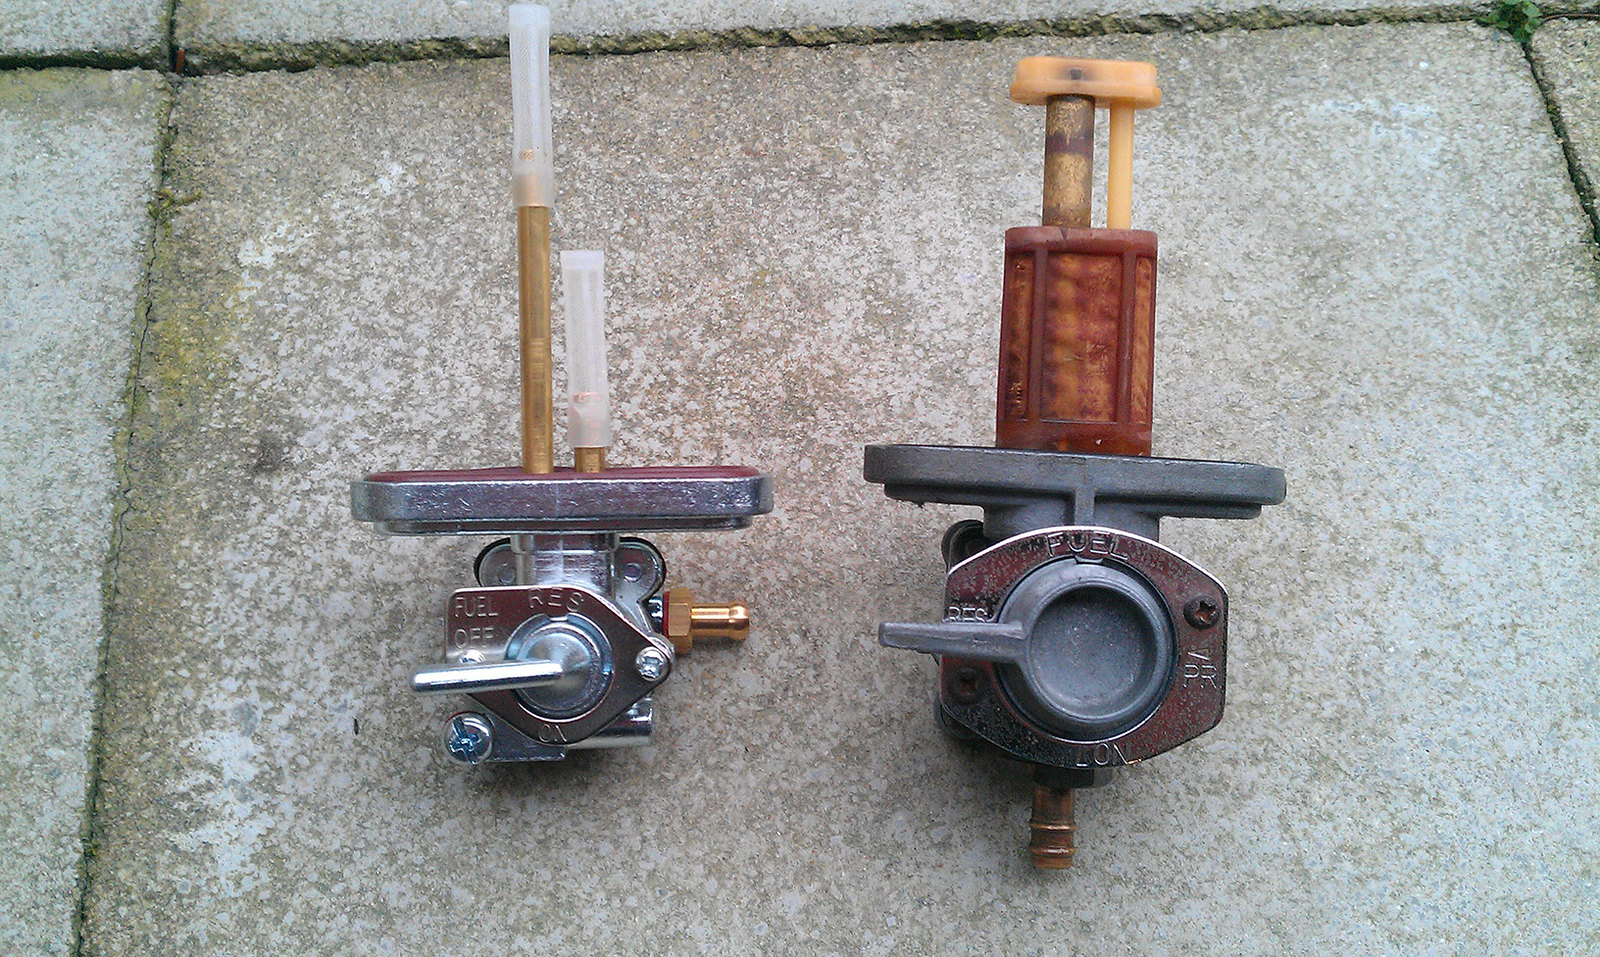
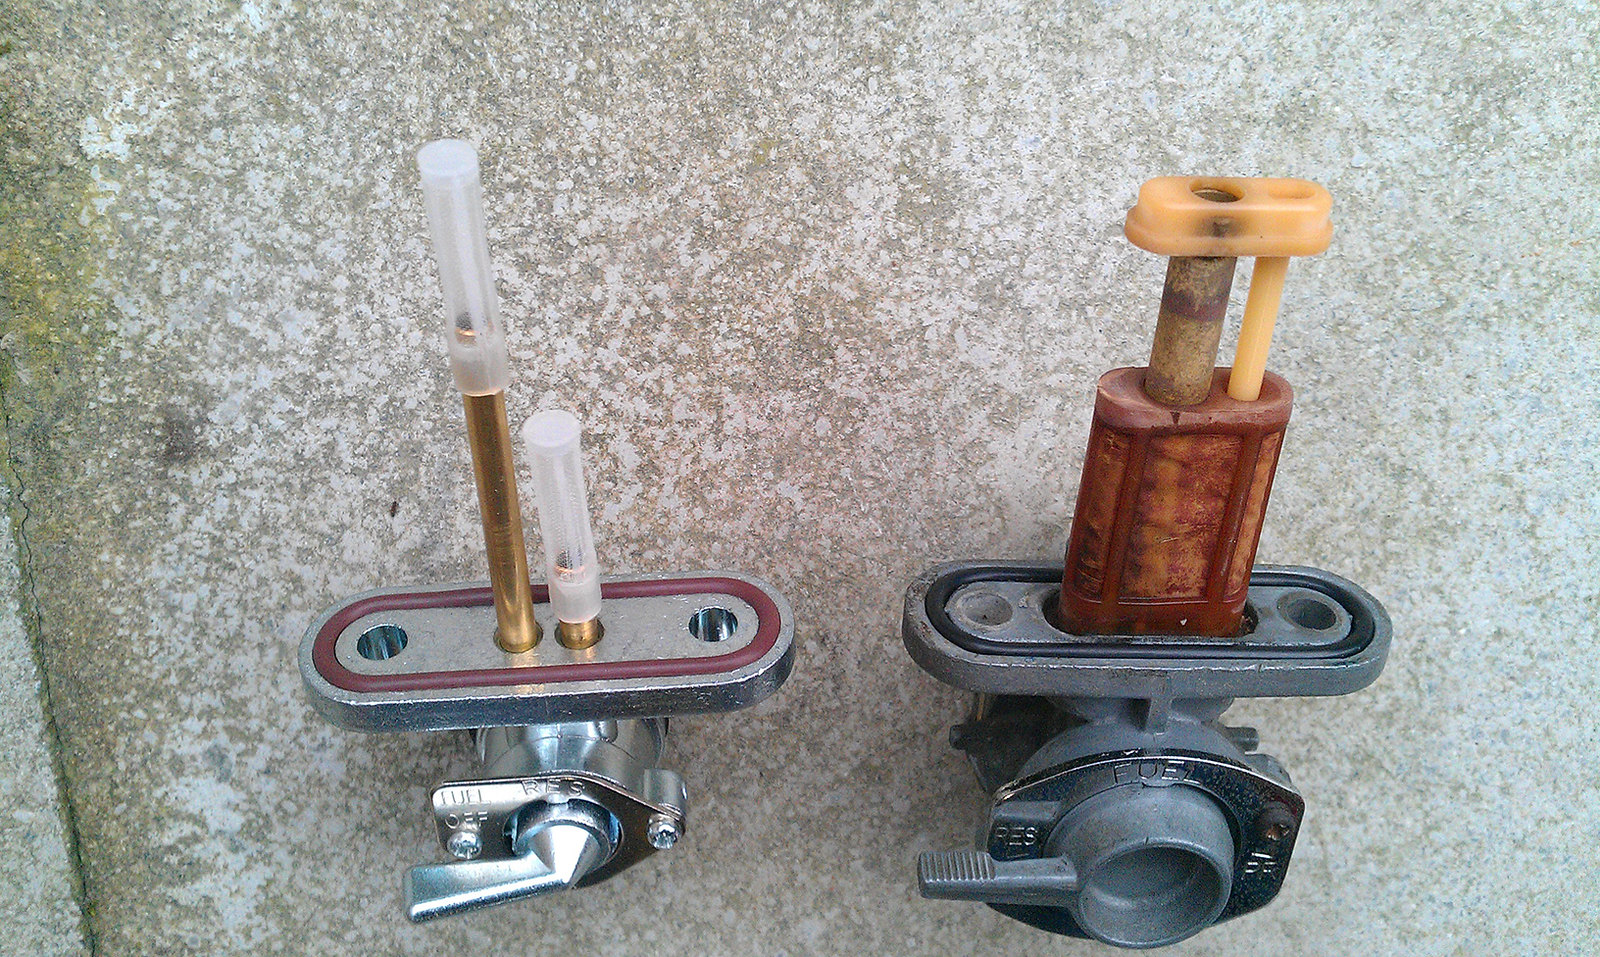
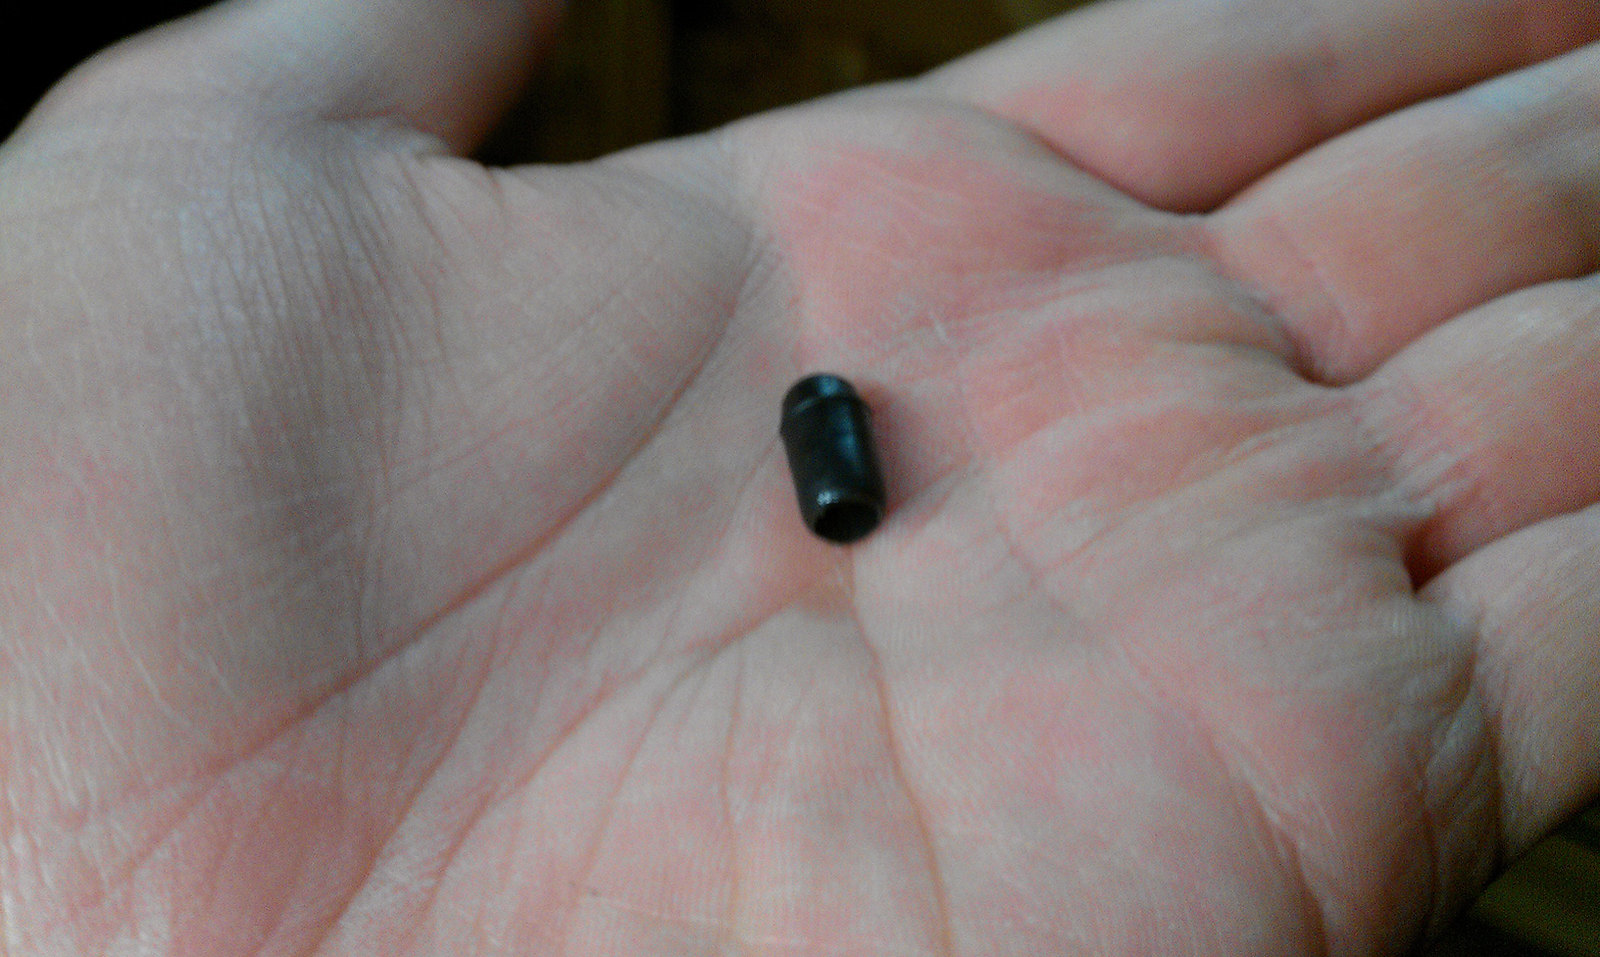
Since the old was a vacuum-operated petcock, i had to plug up the vacuum port on the carb boot:
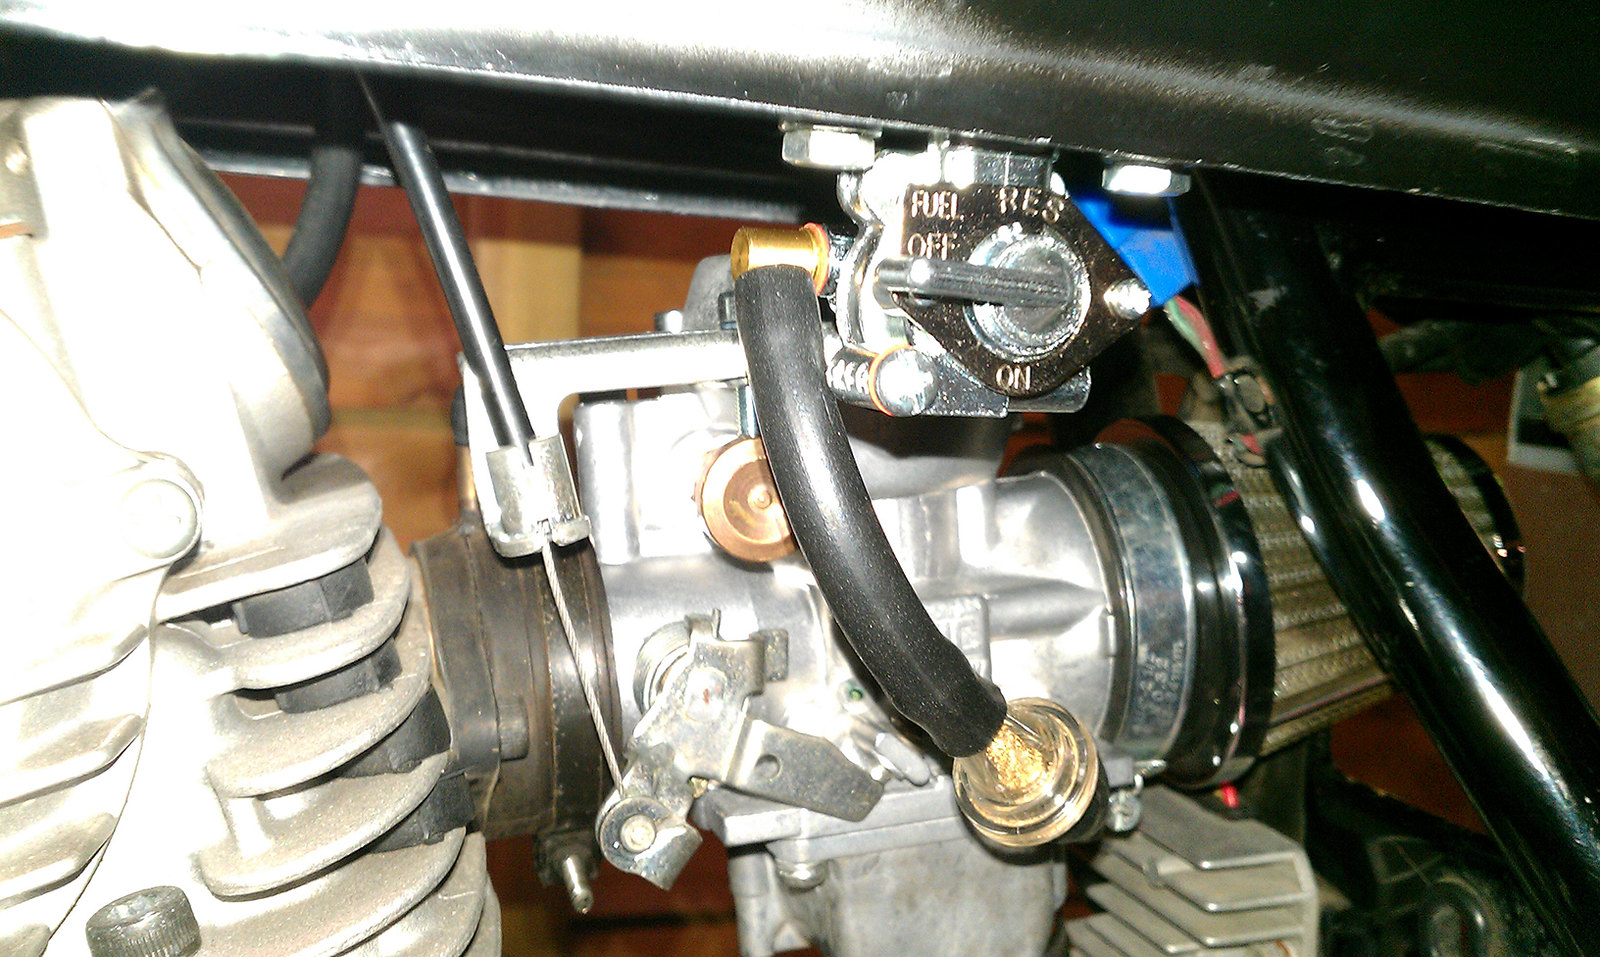
All mounted and ready to go (still a crappy camera though):
That's it for now. Still a lot of work to show (just have a look at that chain and rear sprocket), but that's for the next time.
First things first: Carb cleaning.
Since the manual cleaning with carb cleaner and a brush didn't really work out (she was still running lean) i had the carb cleaned ultrasonic.
Looks a lot cleaner
Re-assembly:
Next up i tried to fit fork boots, so had to figure out a way to lift the front without a bike-lift:
Fitted, but still a little ugly:
Fixed and shortened the left one:
Done:
Leftovers:
Next thing on the list was a new petcock. The old vacuum-type wasn't doing it's job anymore and refurbishing didn't help. So swapped the old for a manual petcock. A lot smaller, and a lot easier:
Since the old was a vacuum-operated petcock, i had to plug up the vacuum port on the carb boot:
All mounted and ready to go (still a crappy camera though):
That's it for now. Still a lot of work to show (just have a look at that chain and rear sprocket), but that's for the next time.
chiel
New Member
After assembly of the cleaned carb i ended up testing her for about 600km
No more flooding the bike while coasting, gone with the stuttering. Only problem now is, she seems to be getting too much air.
Does this plug look normal?
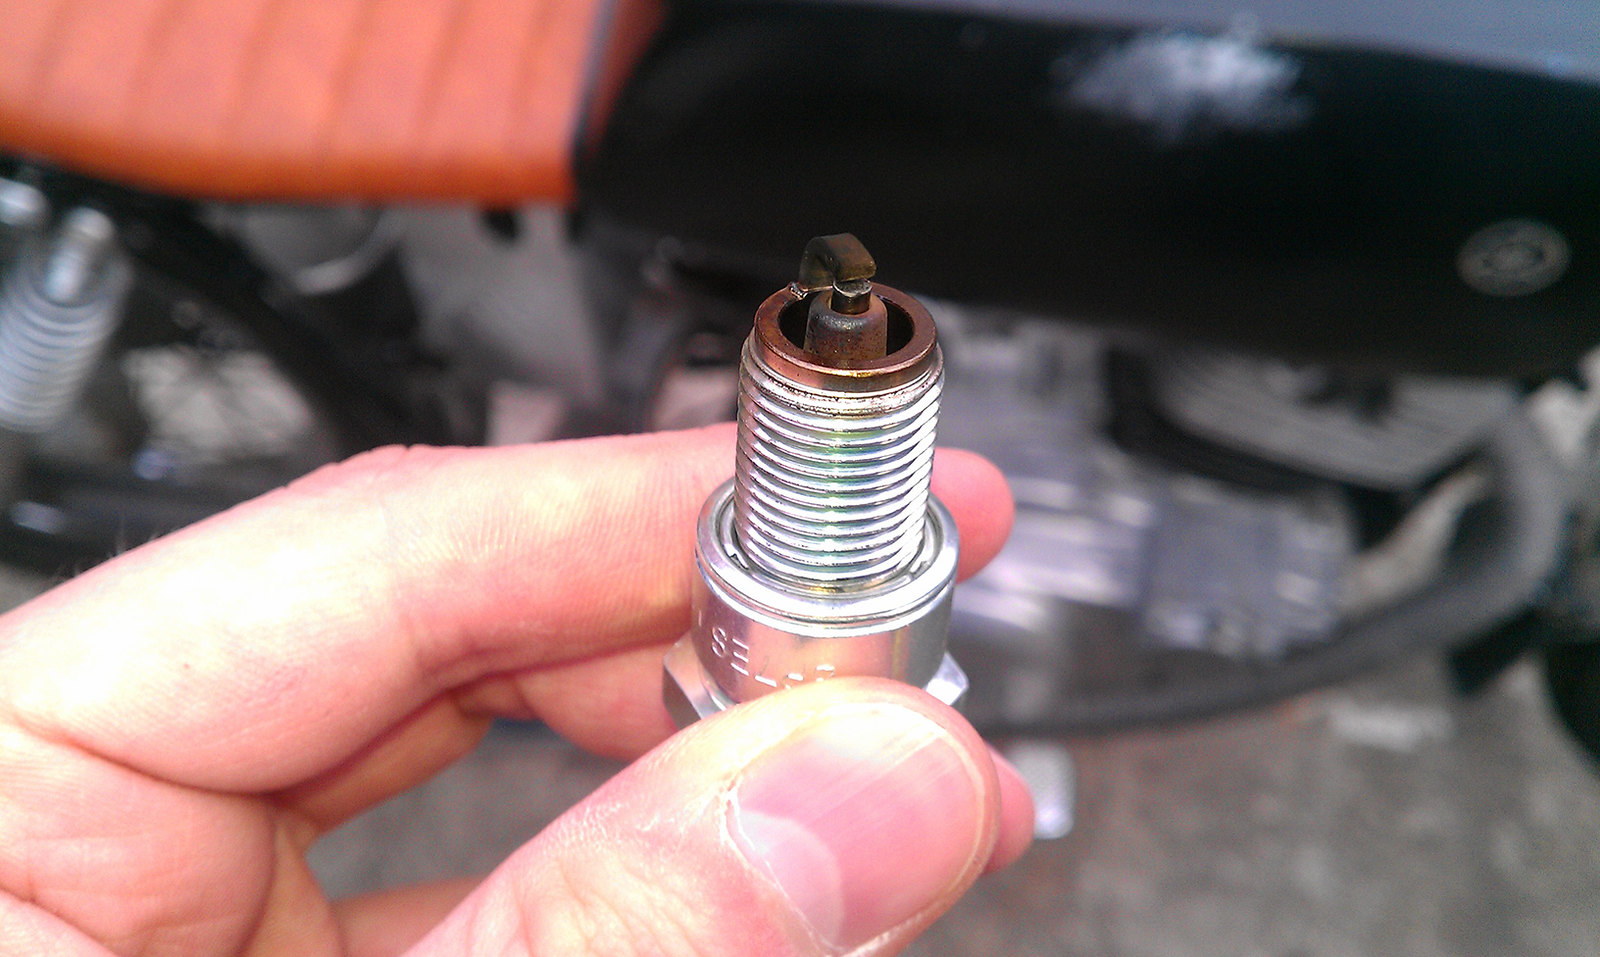
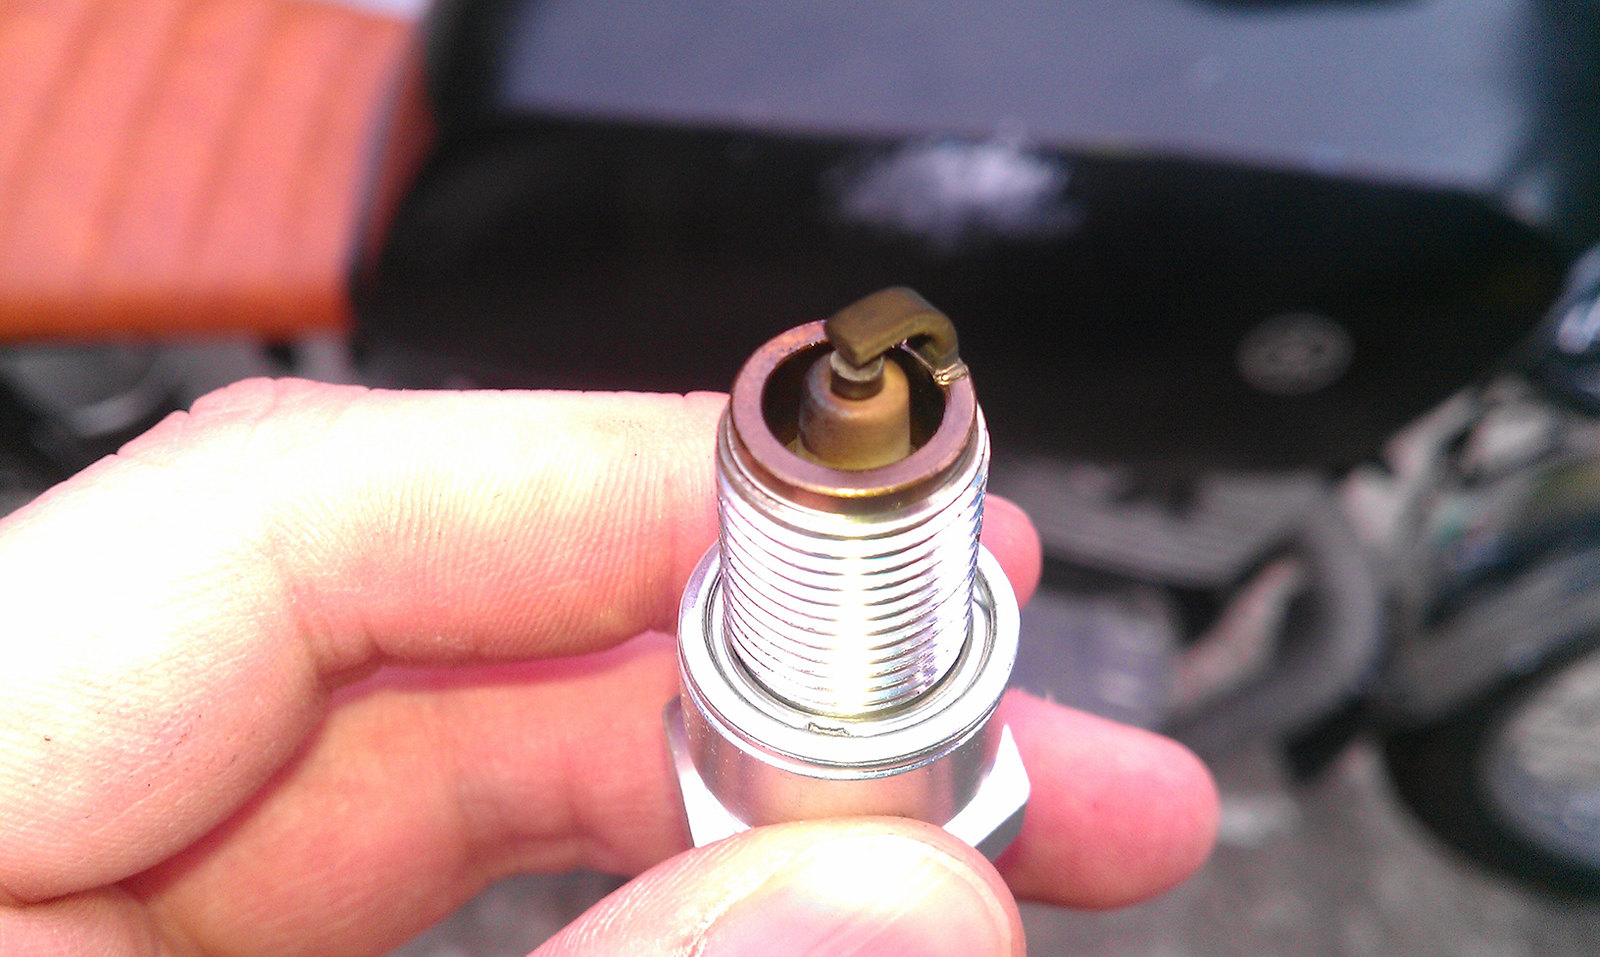
You really can't see it in these pics, but the plug has a bright-pale orange look to it.
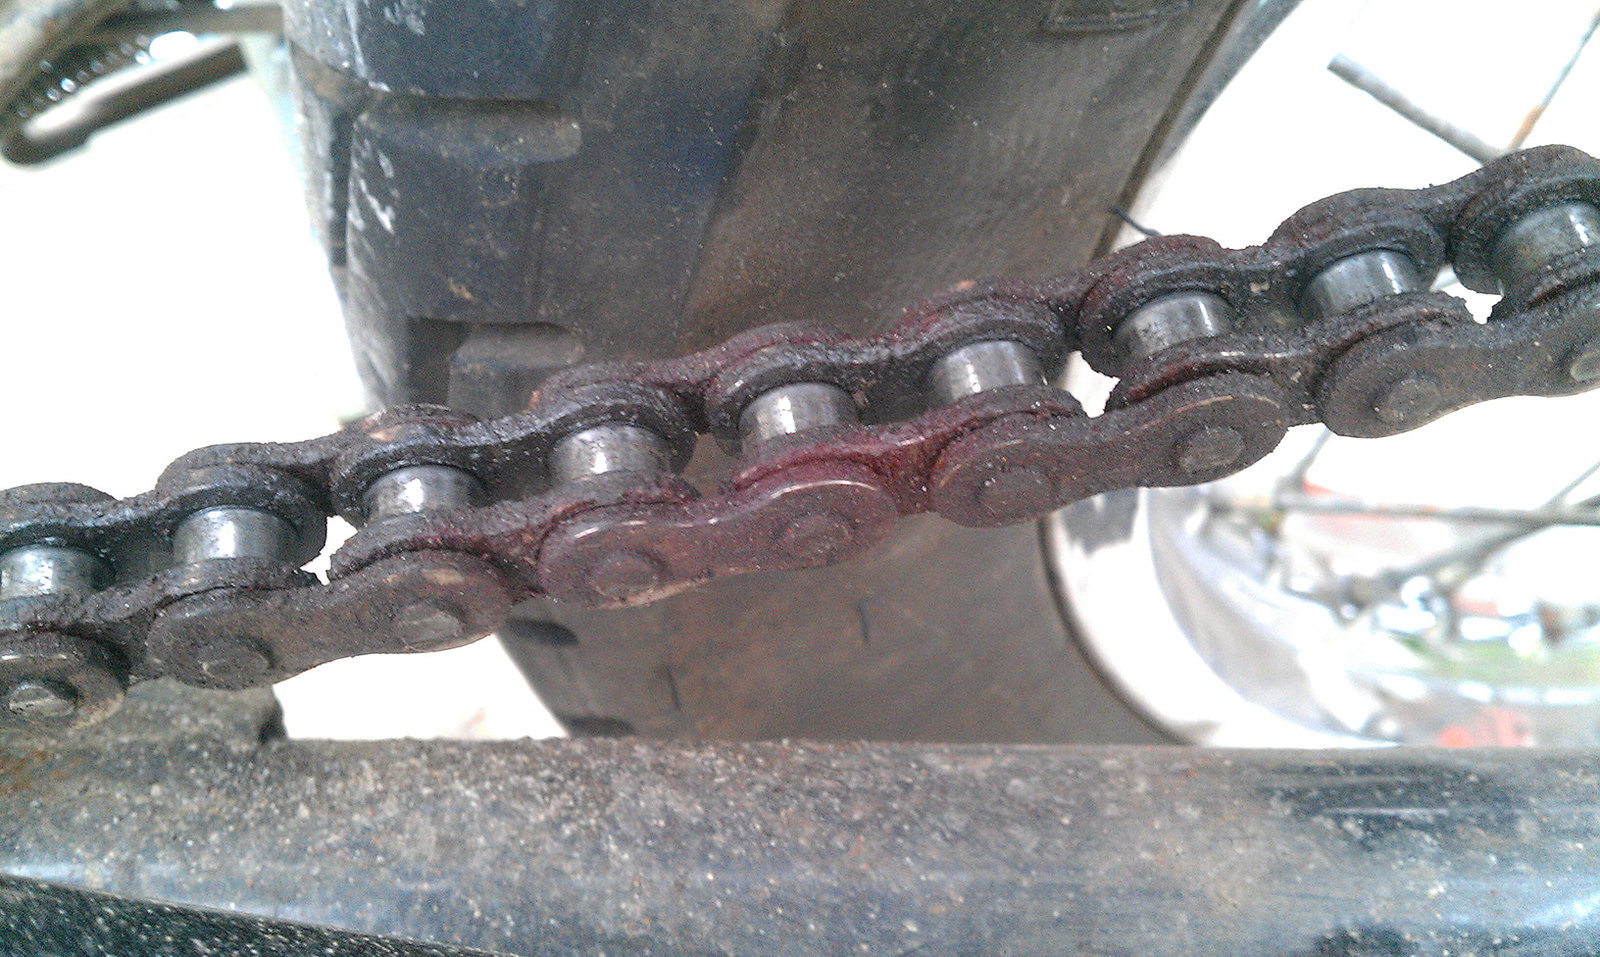
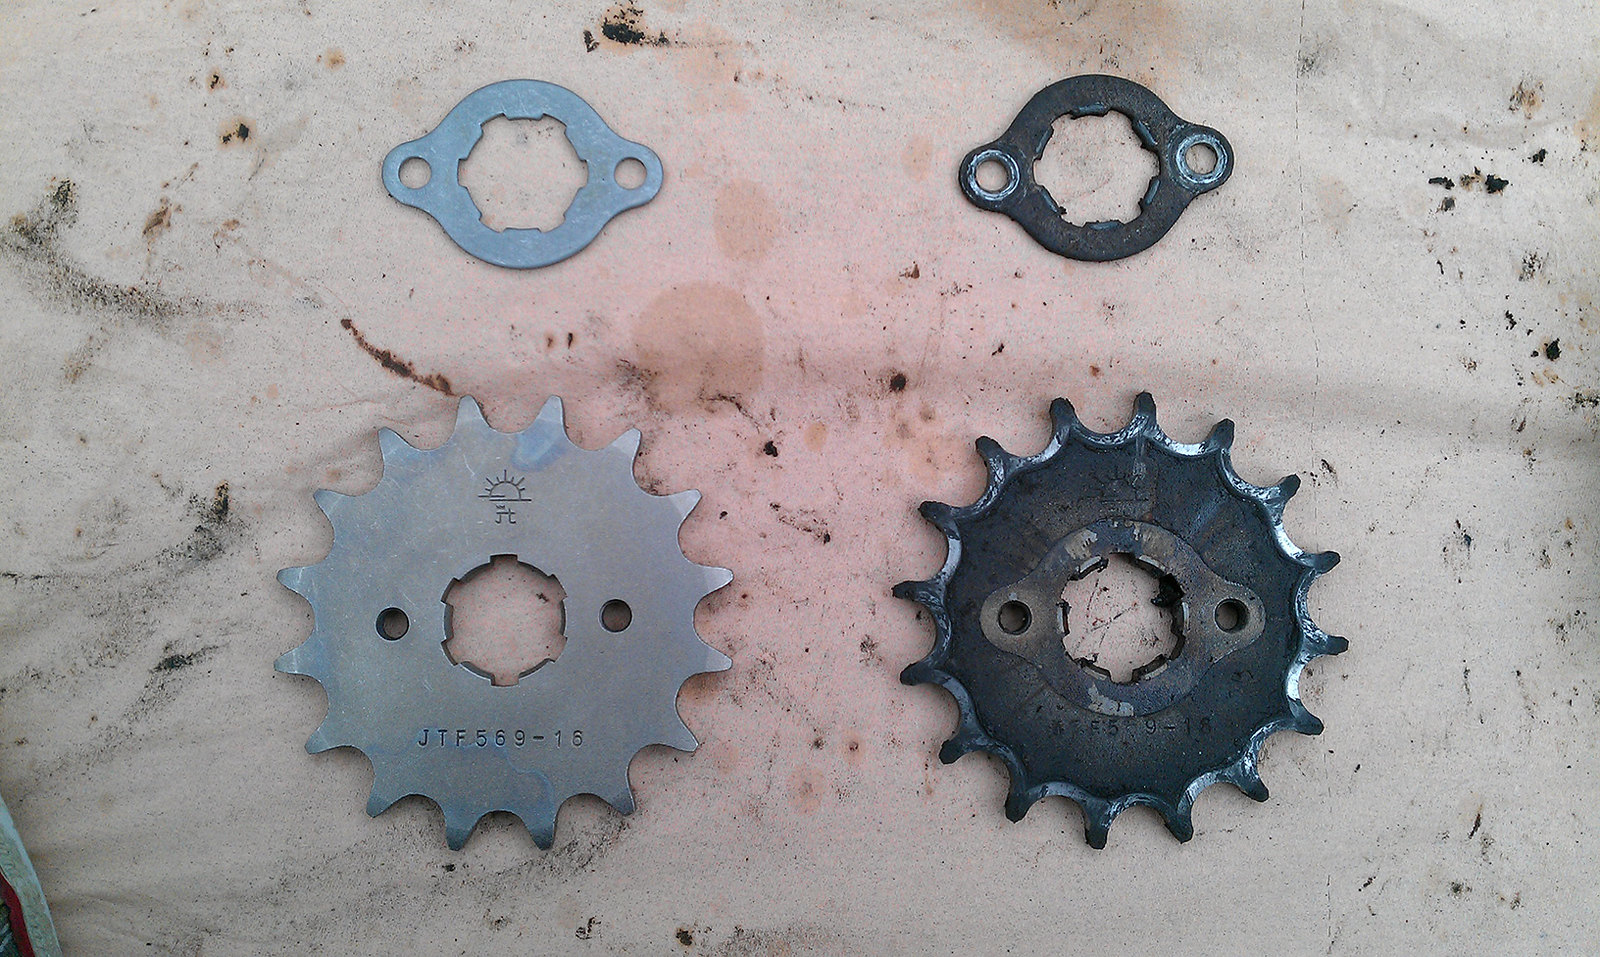
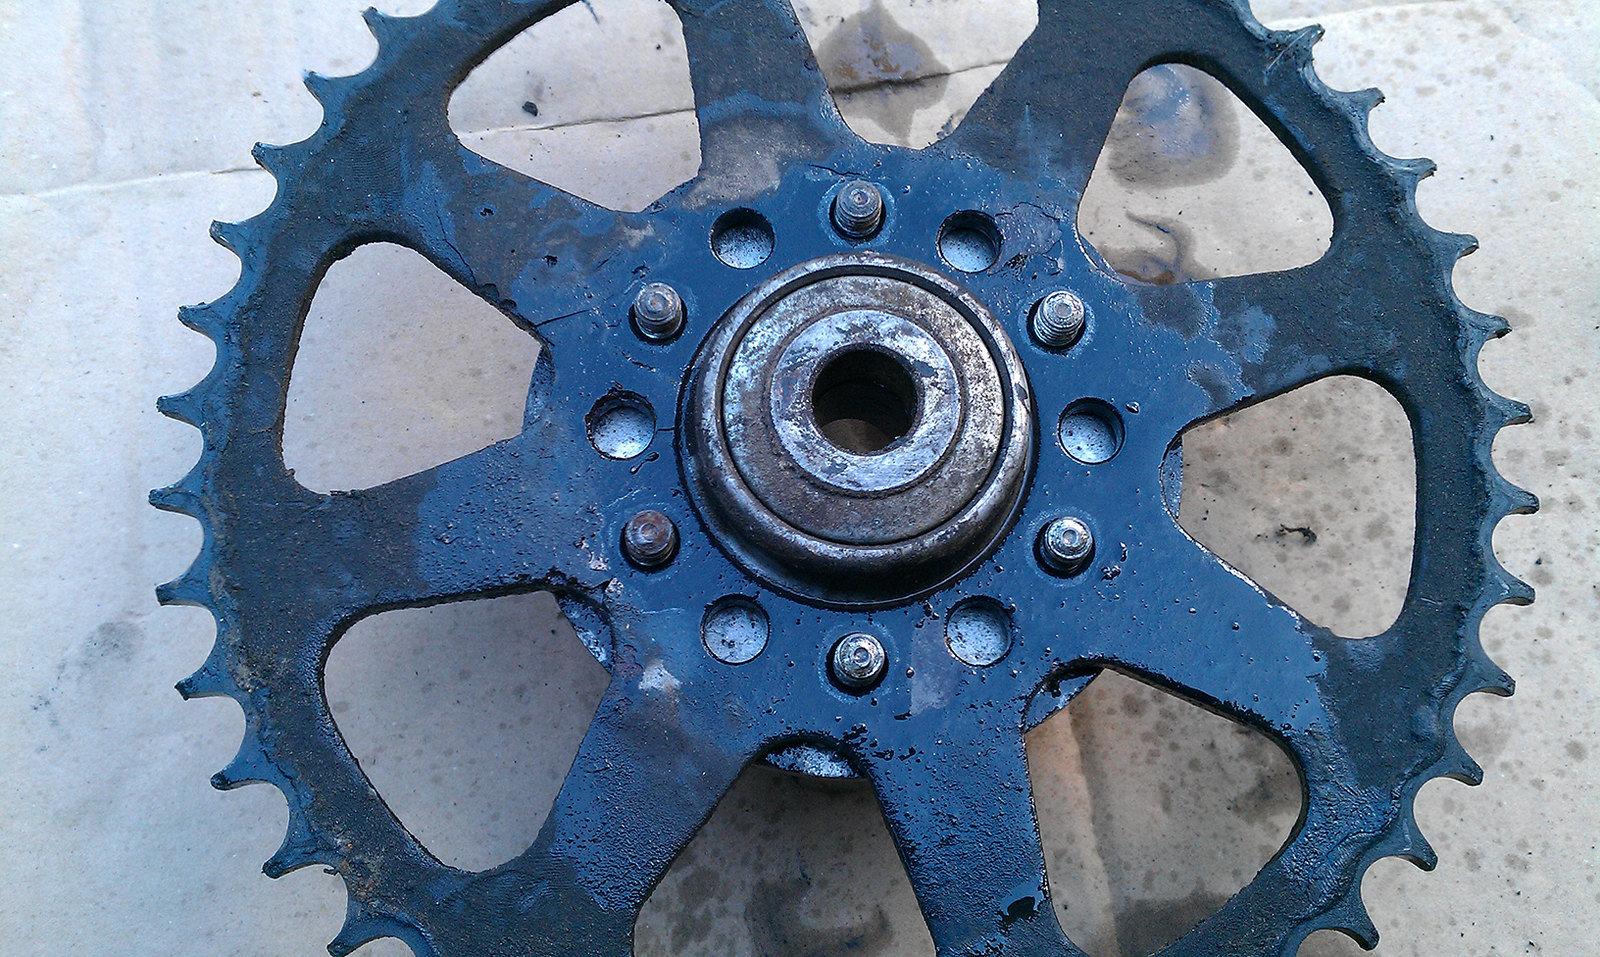
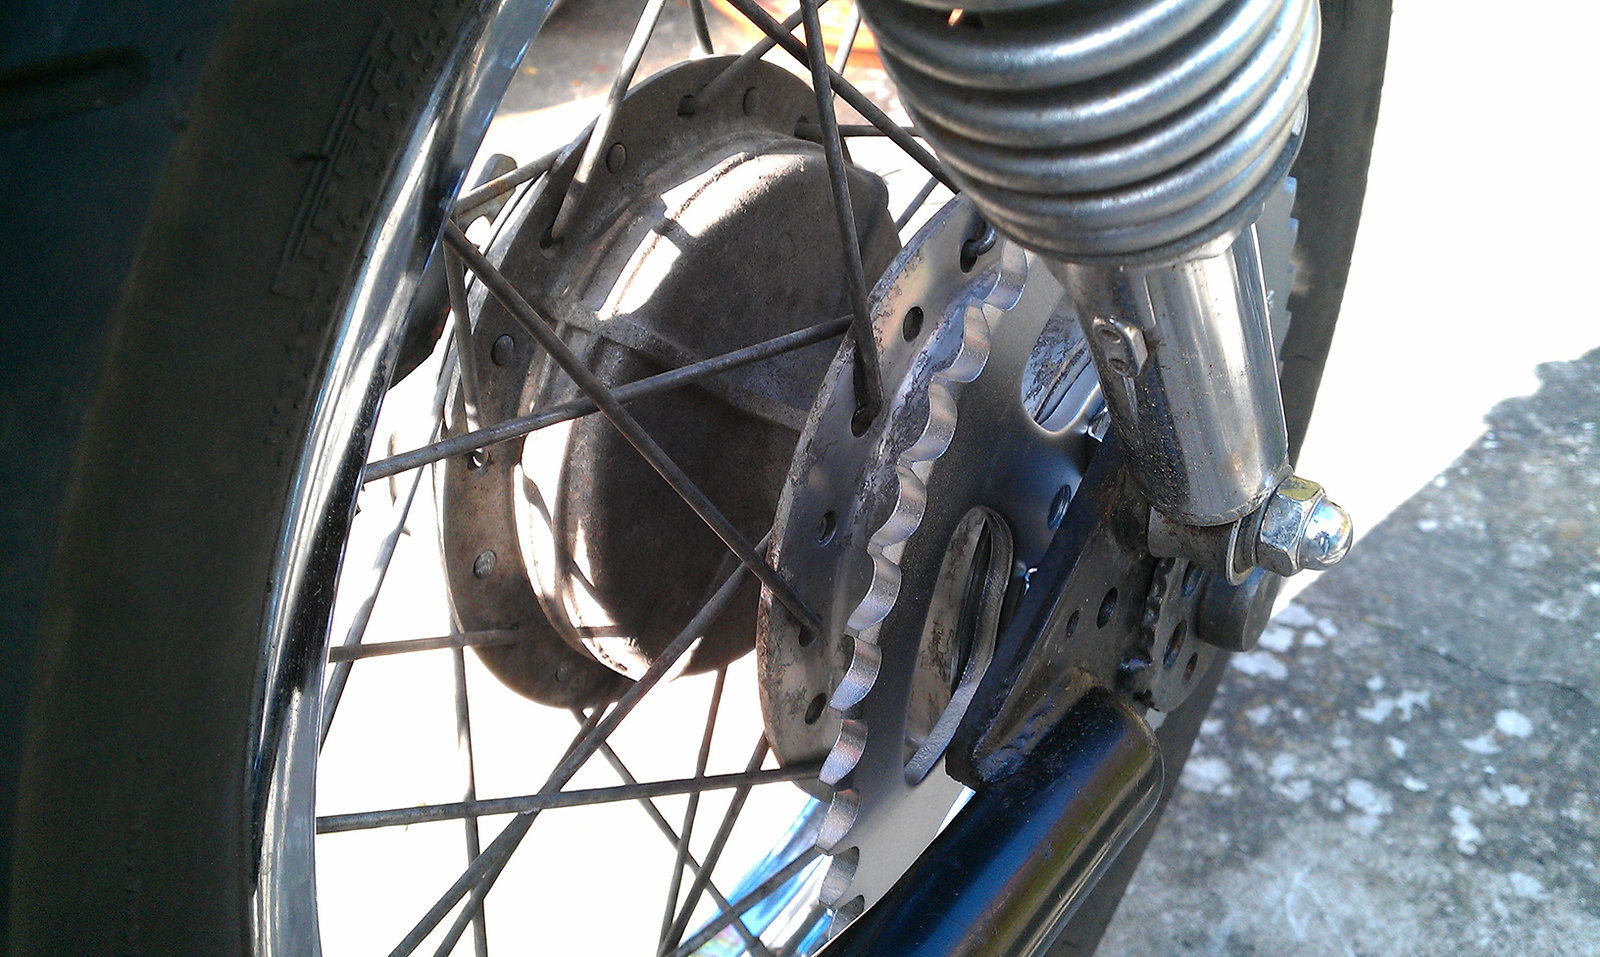
So, on to the big works. Have a look at this sprocket and chain combo:
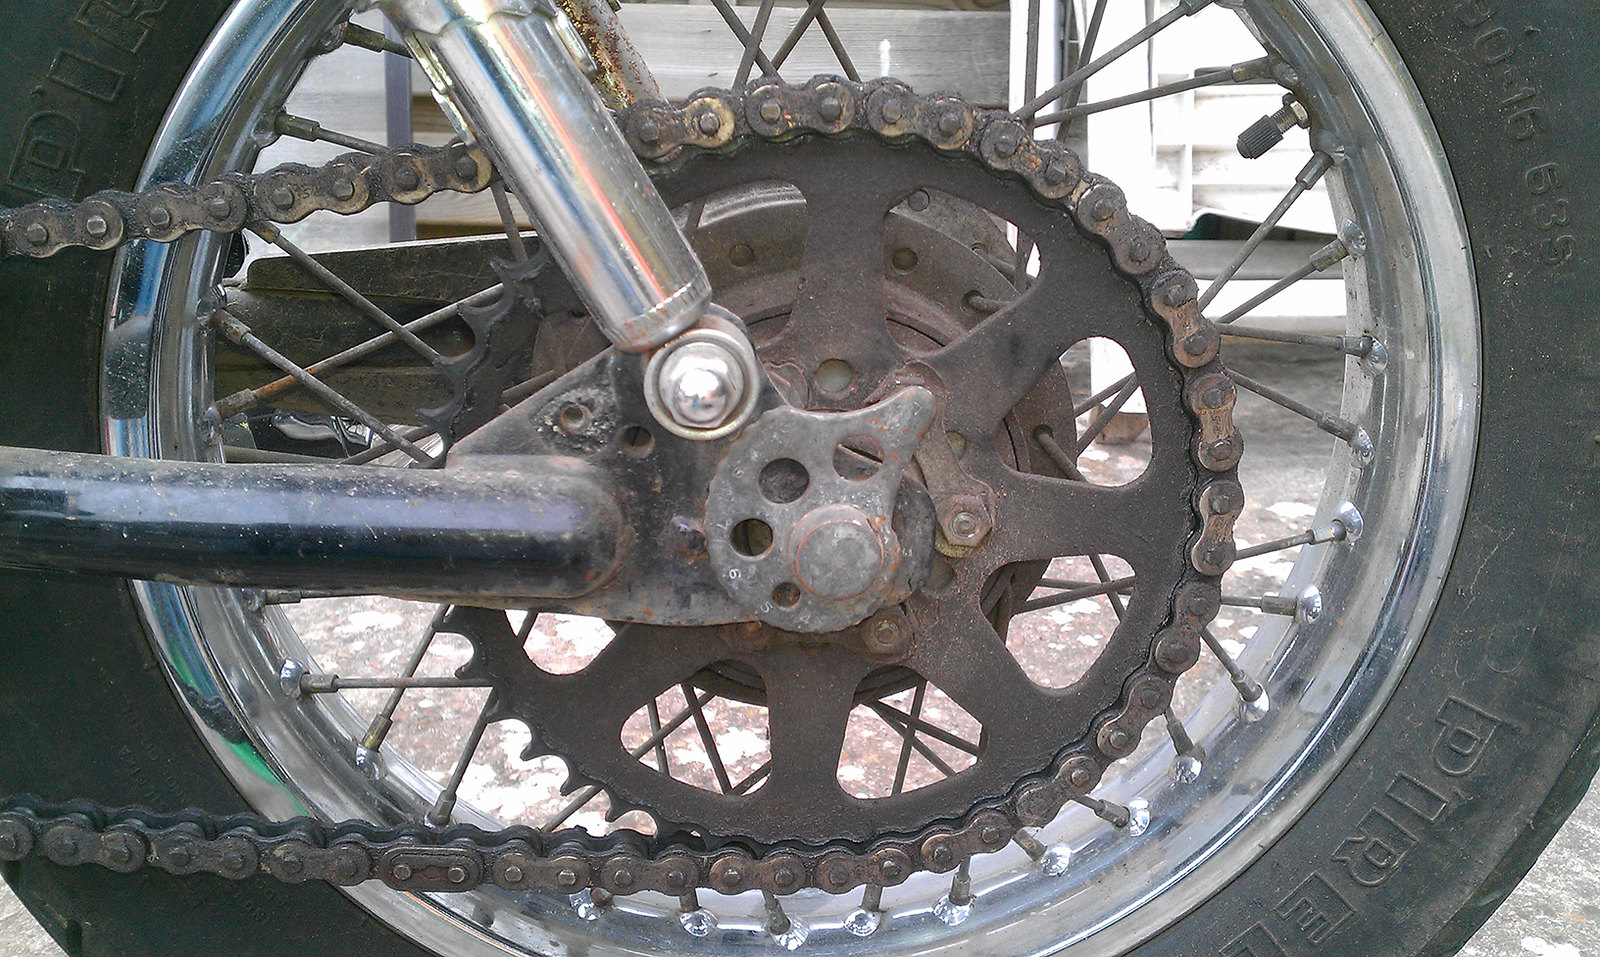
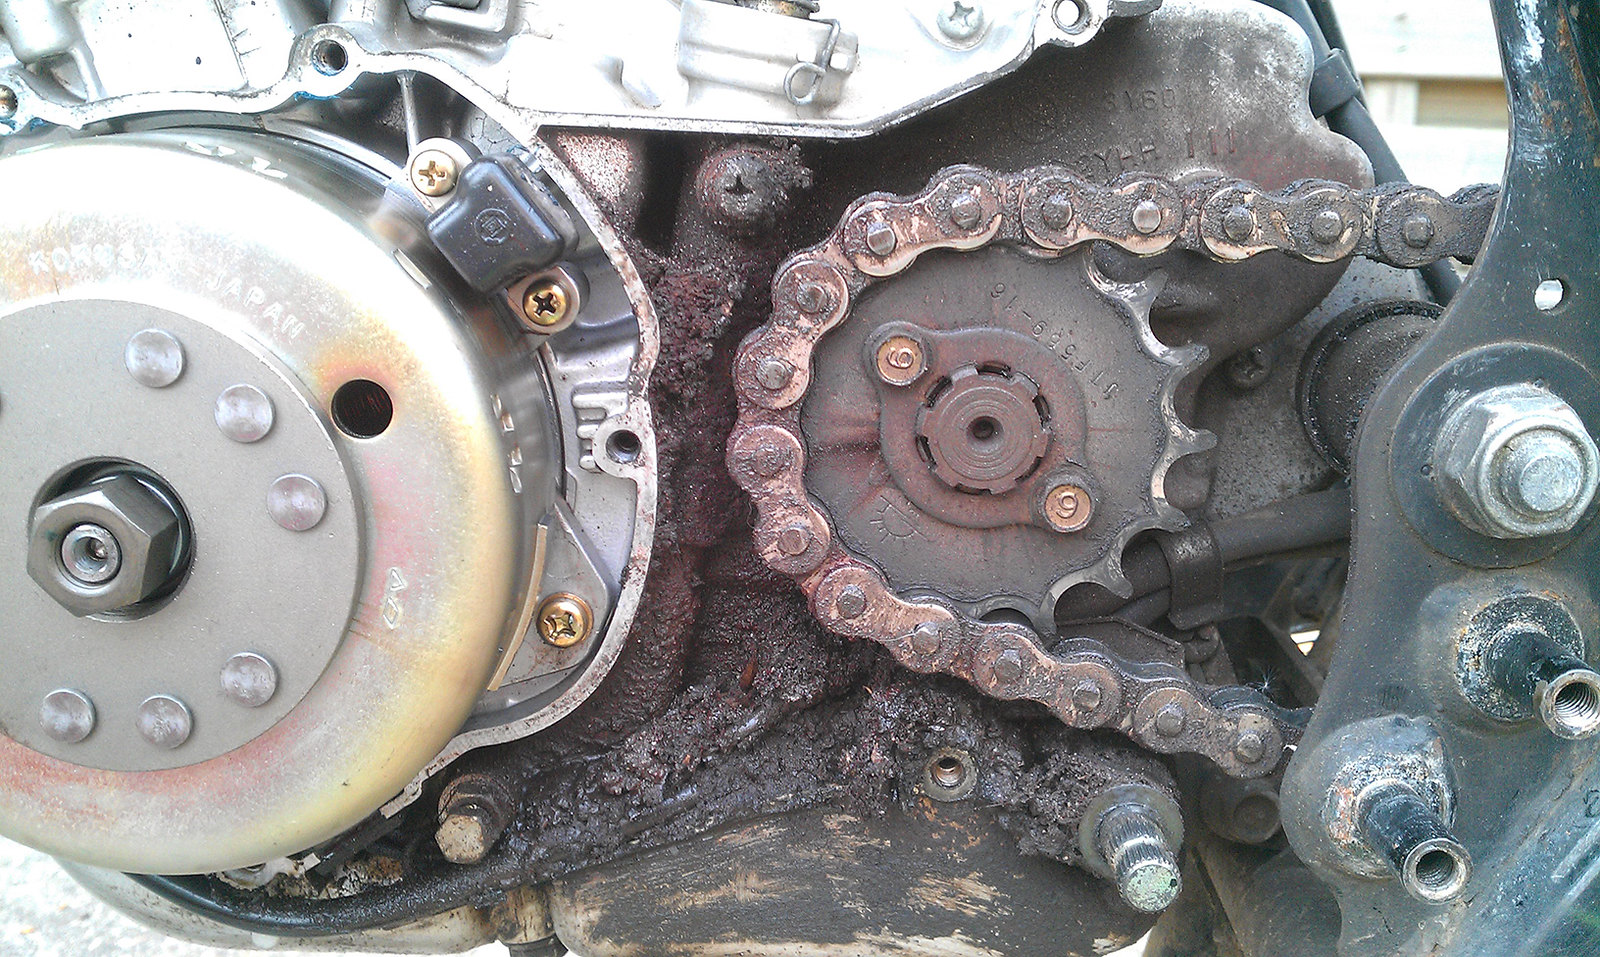
And the front sprocket. Including 20 years of grime and dirt:
The previous owner tried to convince me the sprockets and chain were ok, just in need of a little cleaning.
Comparing them to the replacement sprockets, i'm beginning to think he needs a guide dog:
(Granted, i didn't really check the chain too, since i was going to change or clean every bolt on this bike)

On to the cleaning.
Before:
After:
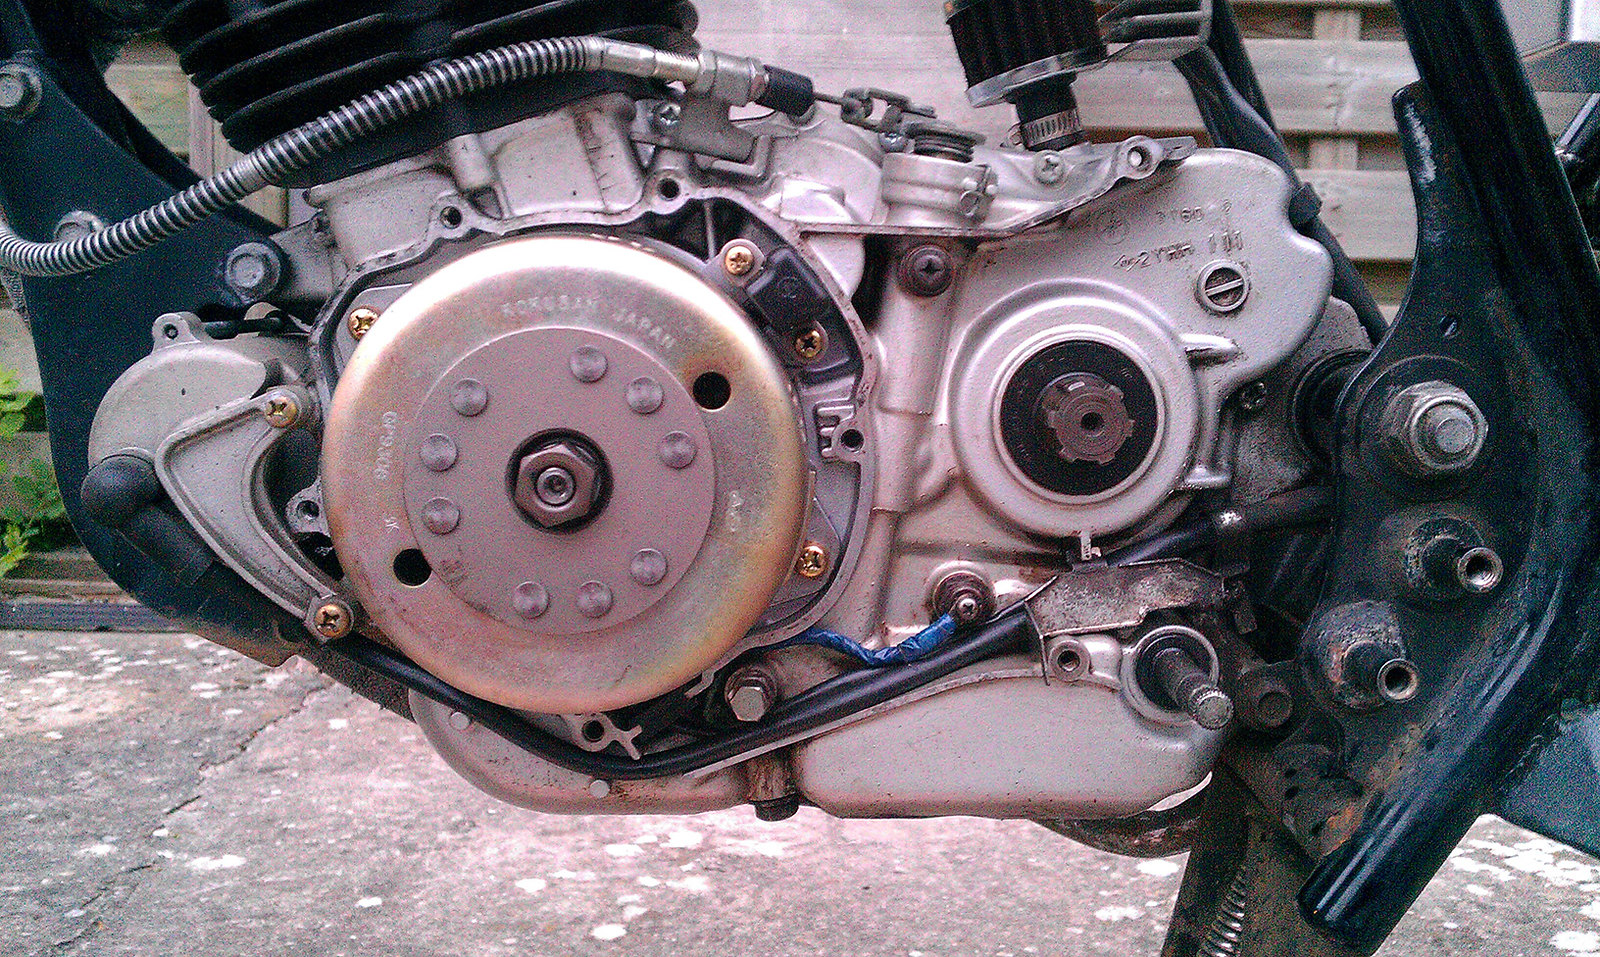
The neutral wire was exposed by all the dirt (and possibly something the chain picked up):
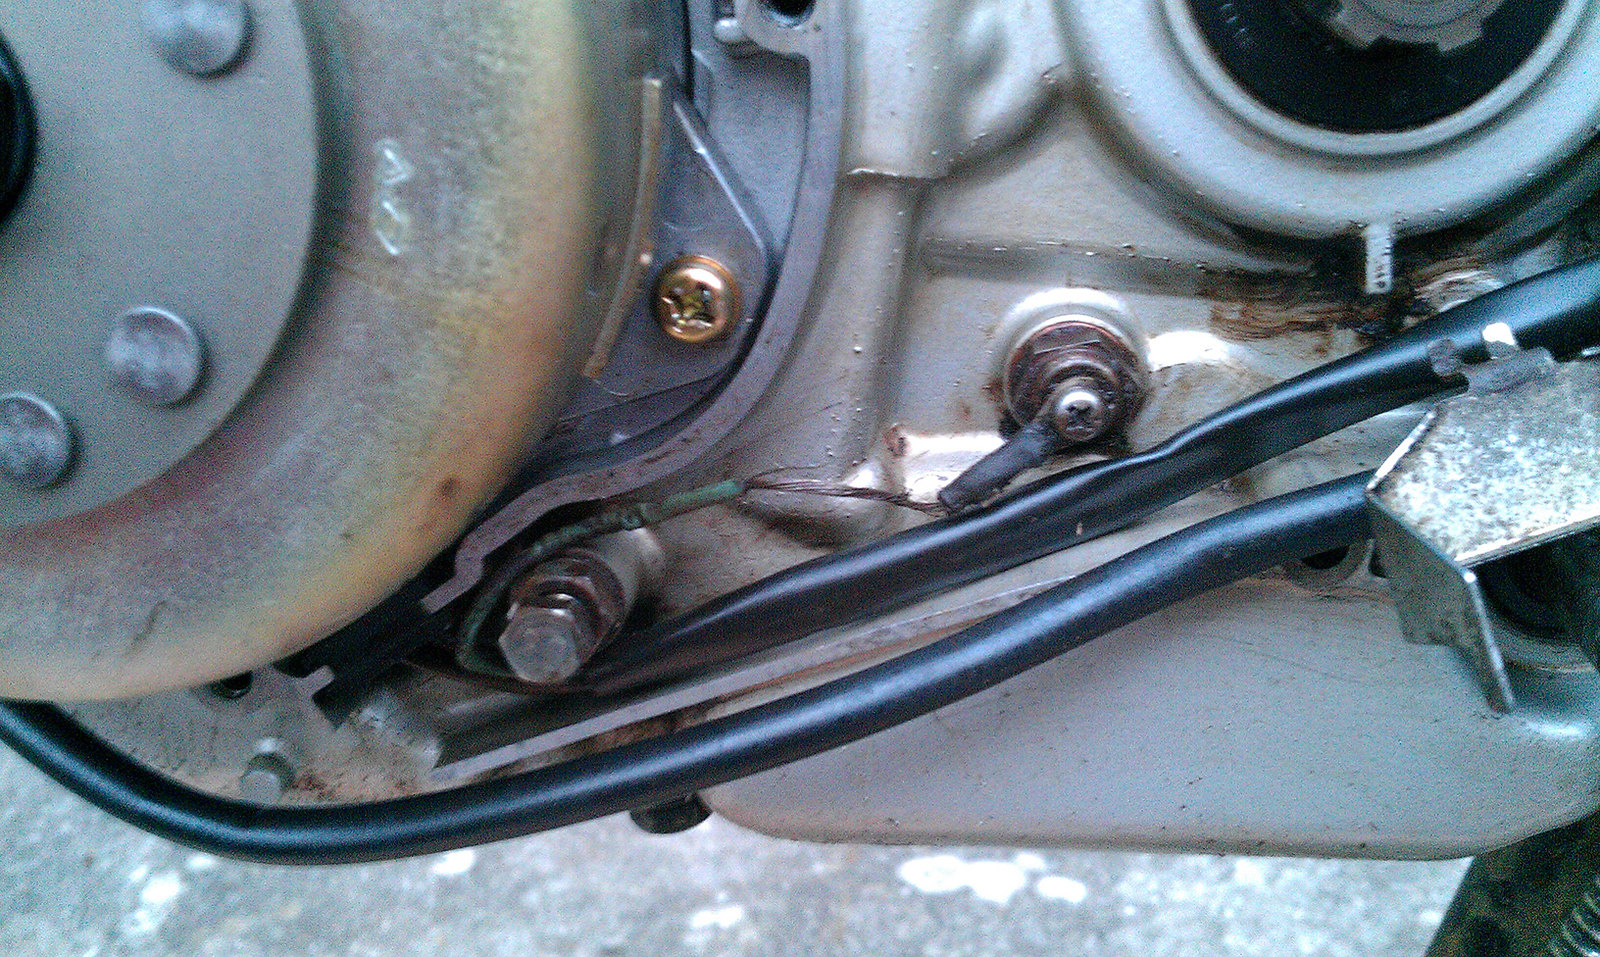
Temporarily insulated and new sprocket mounted:

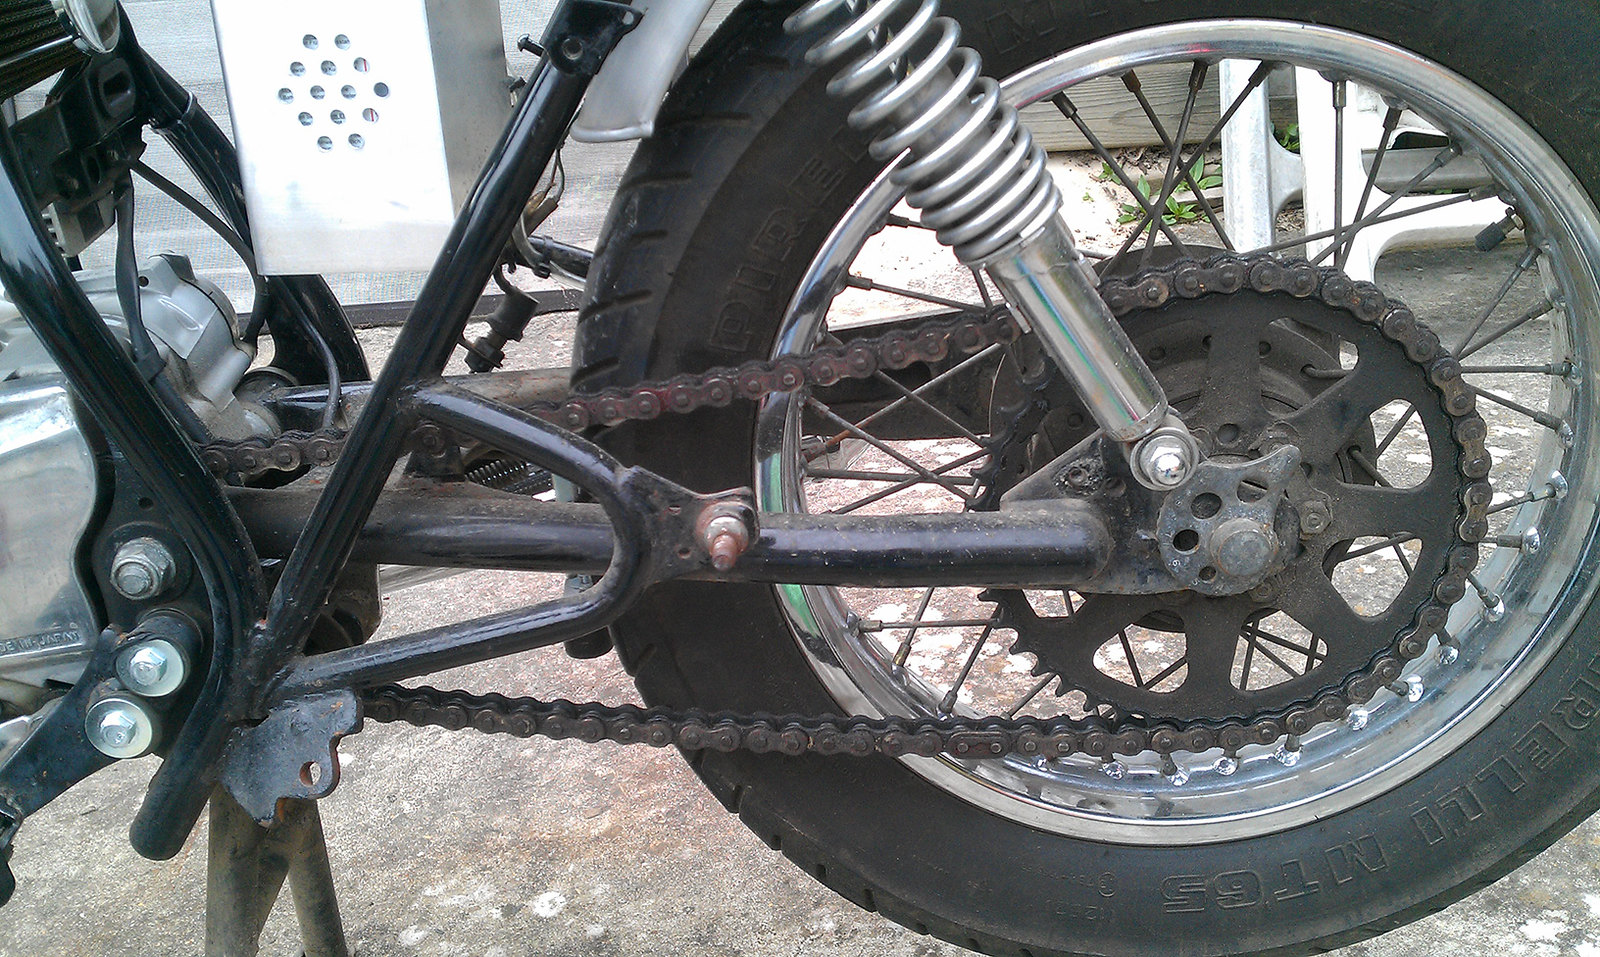
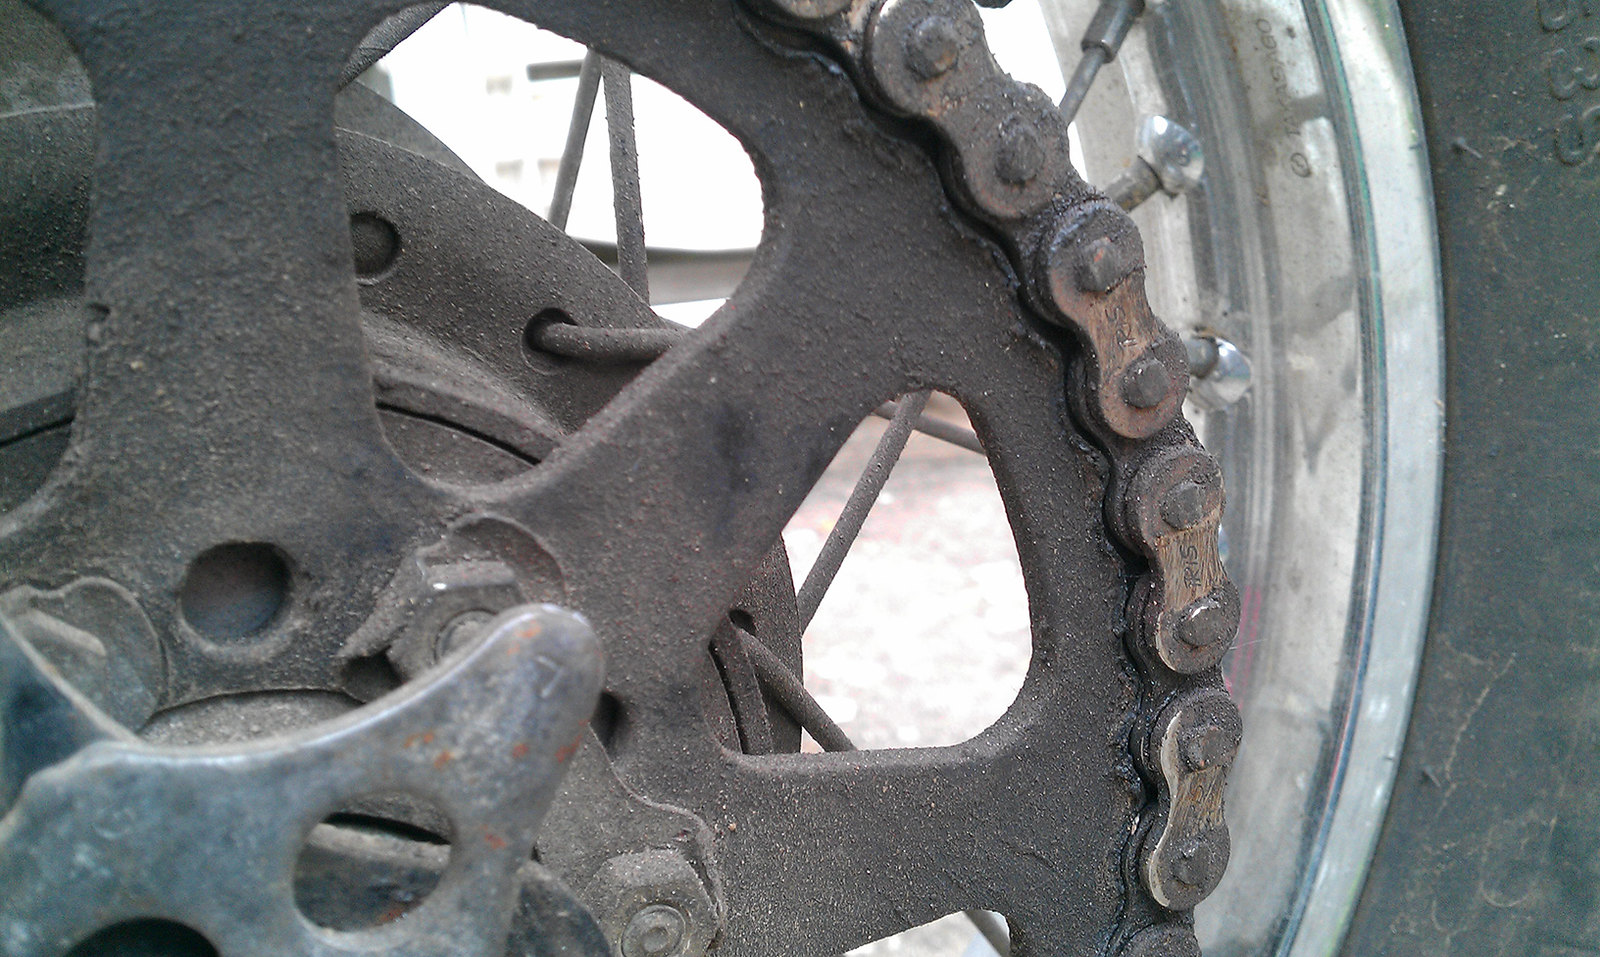
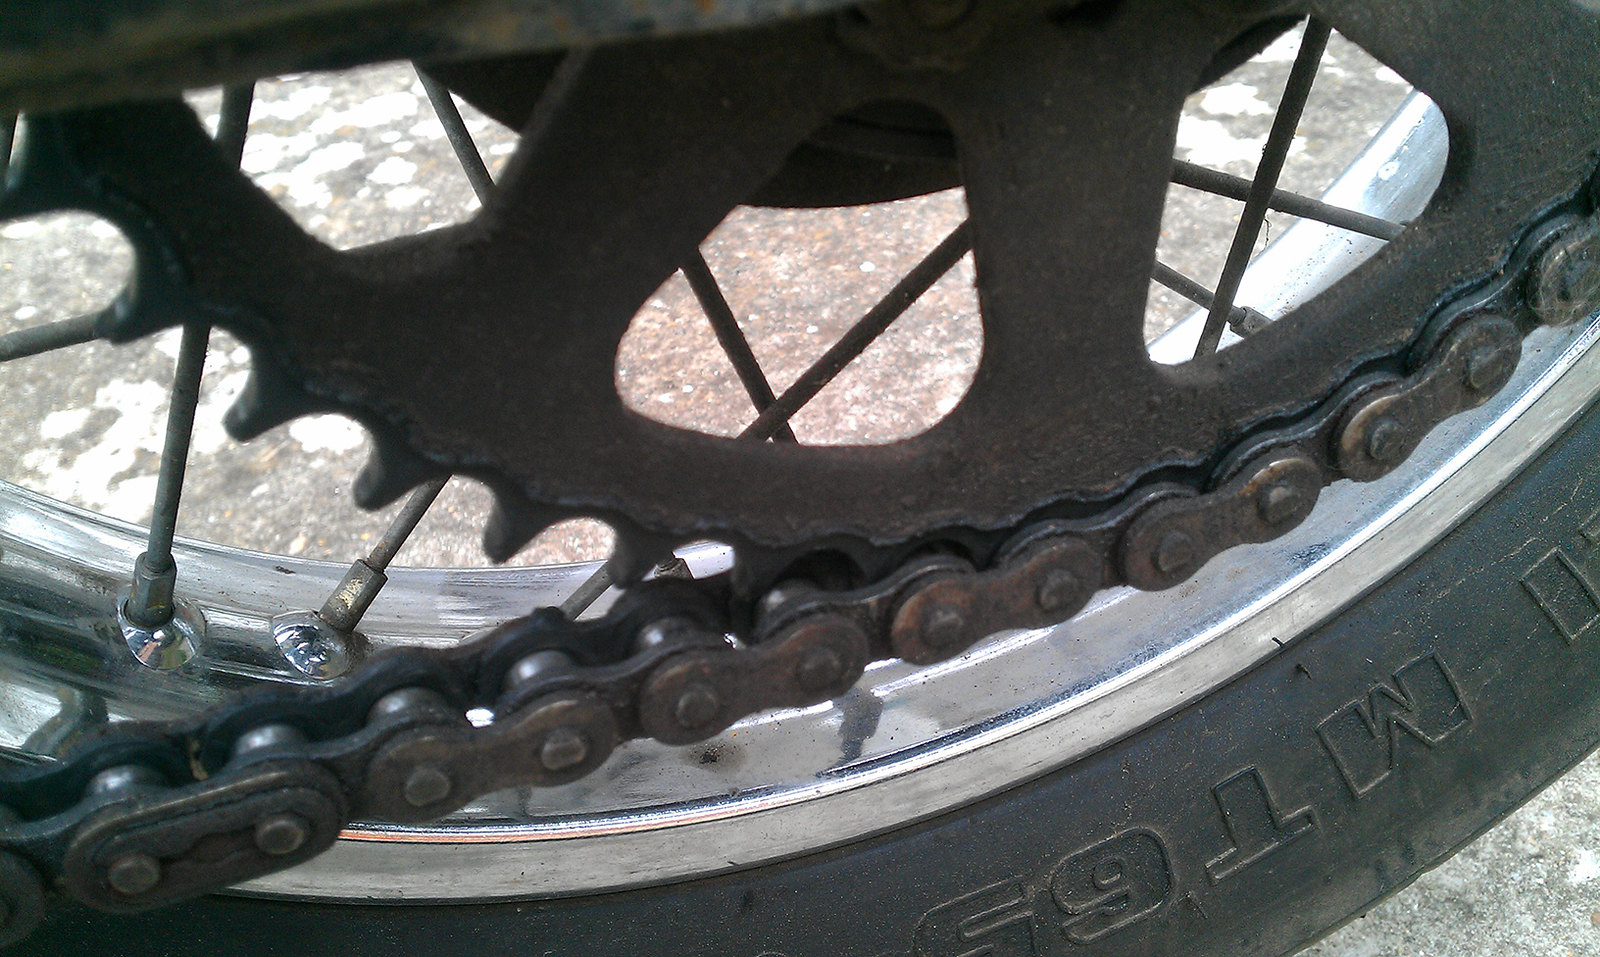
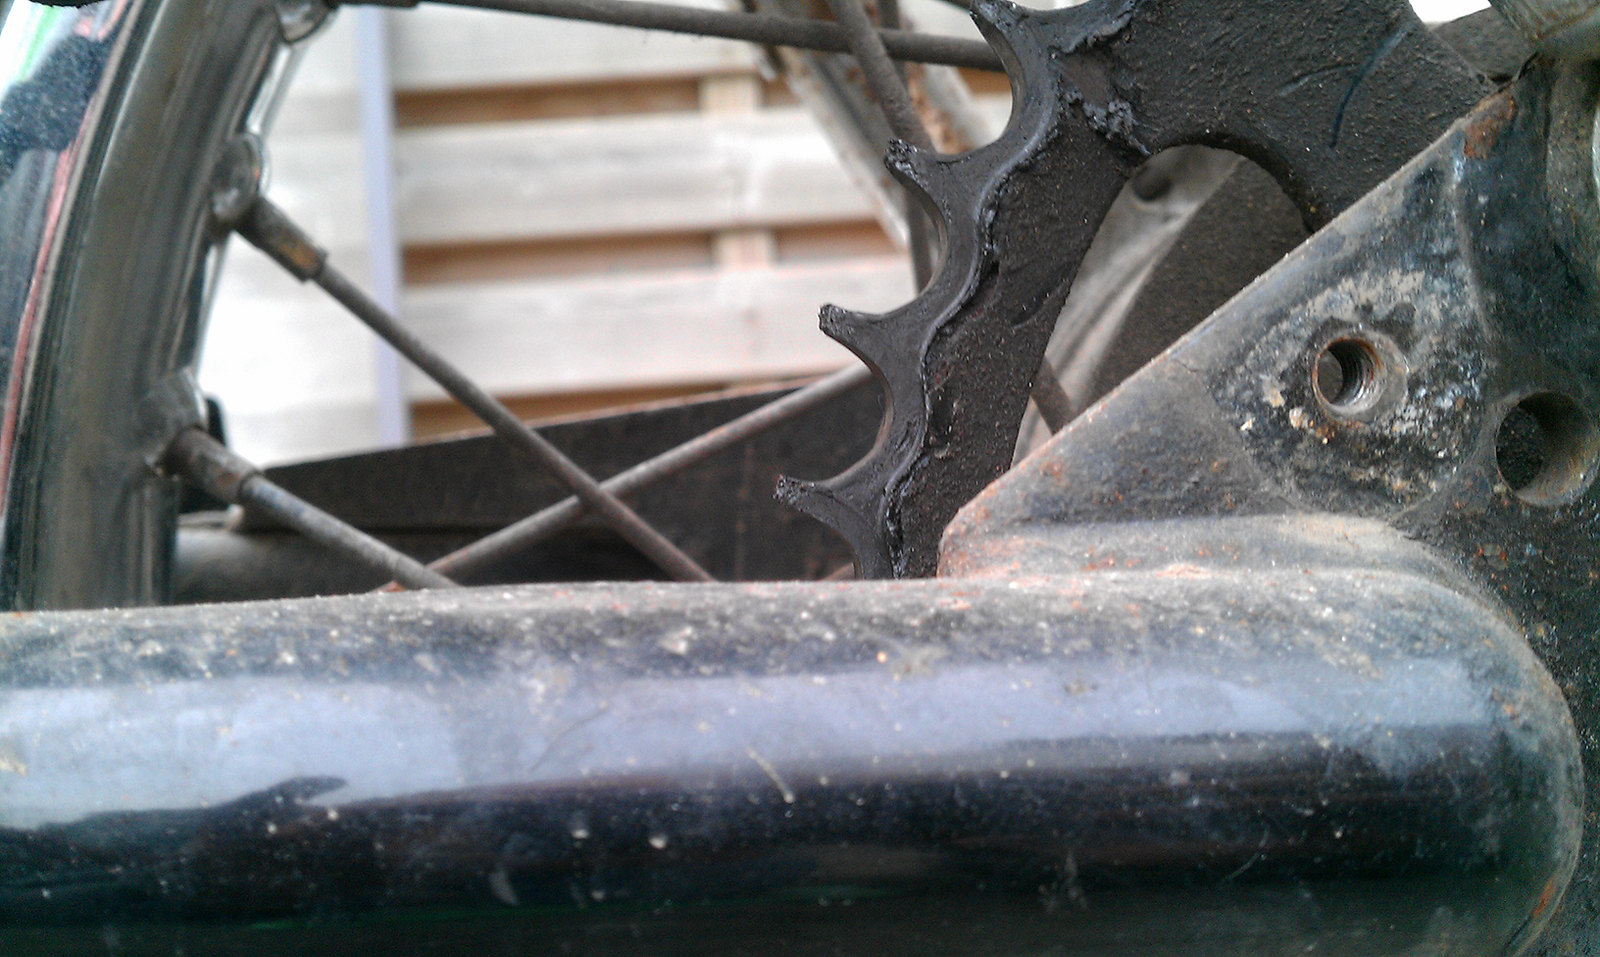
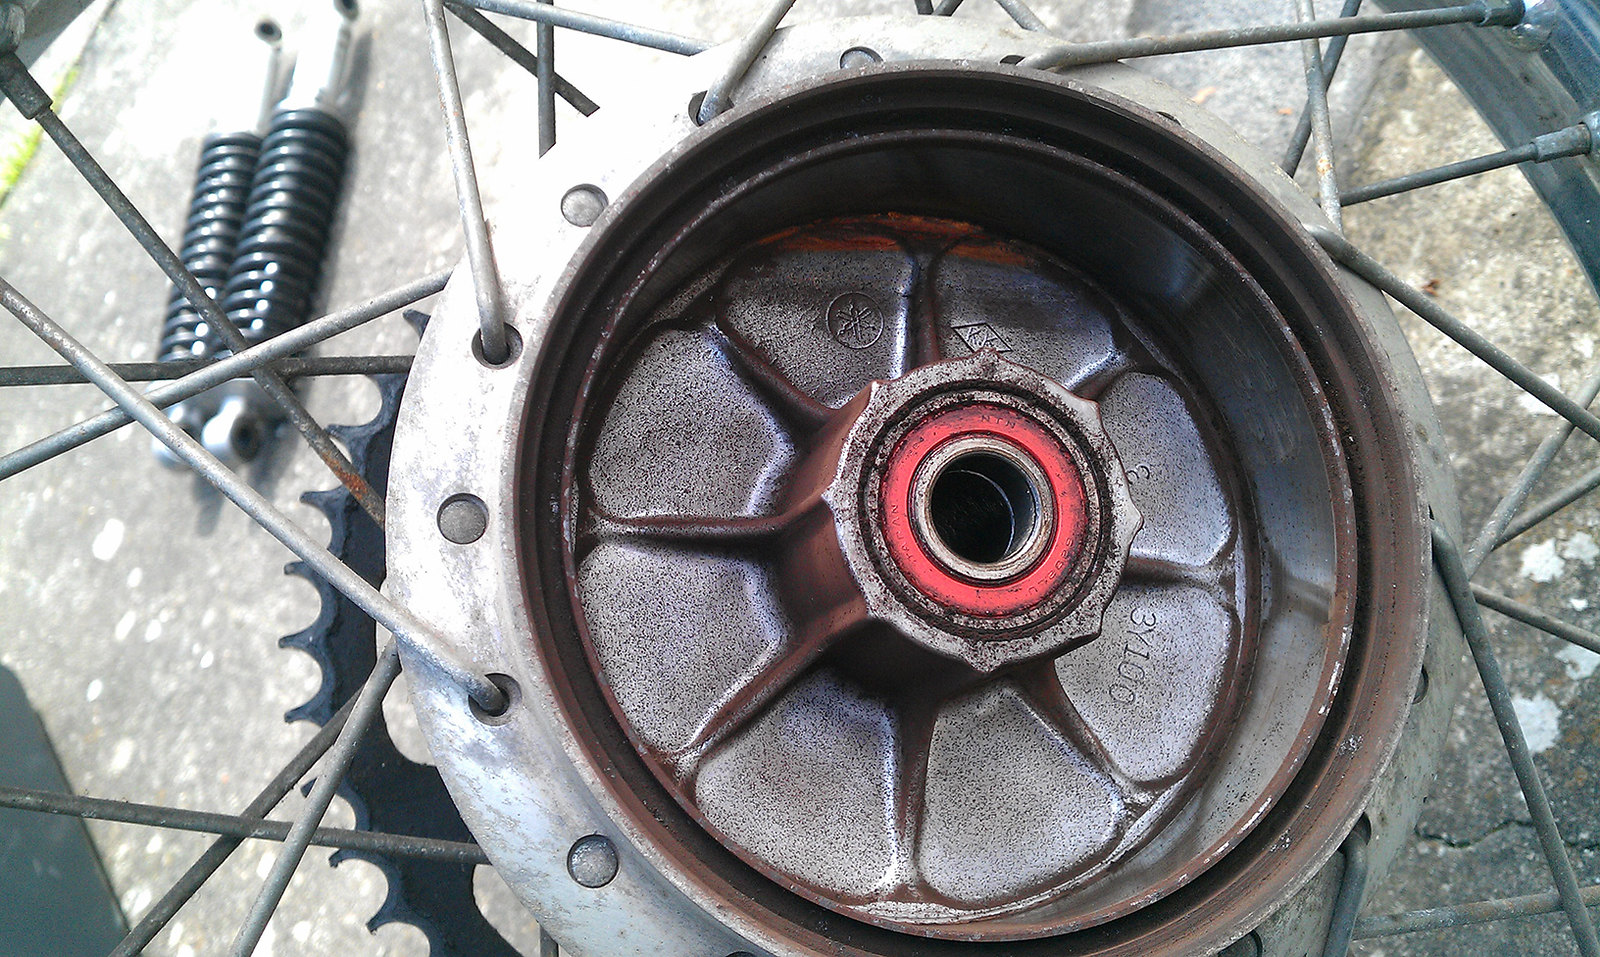
On to the rear sprocket:
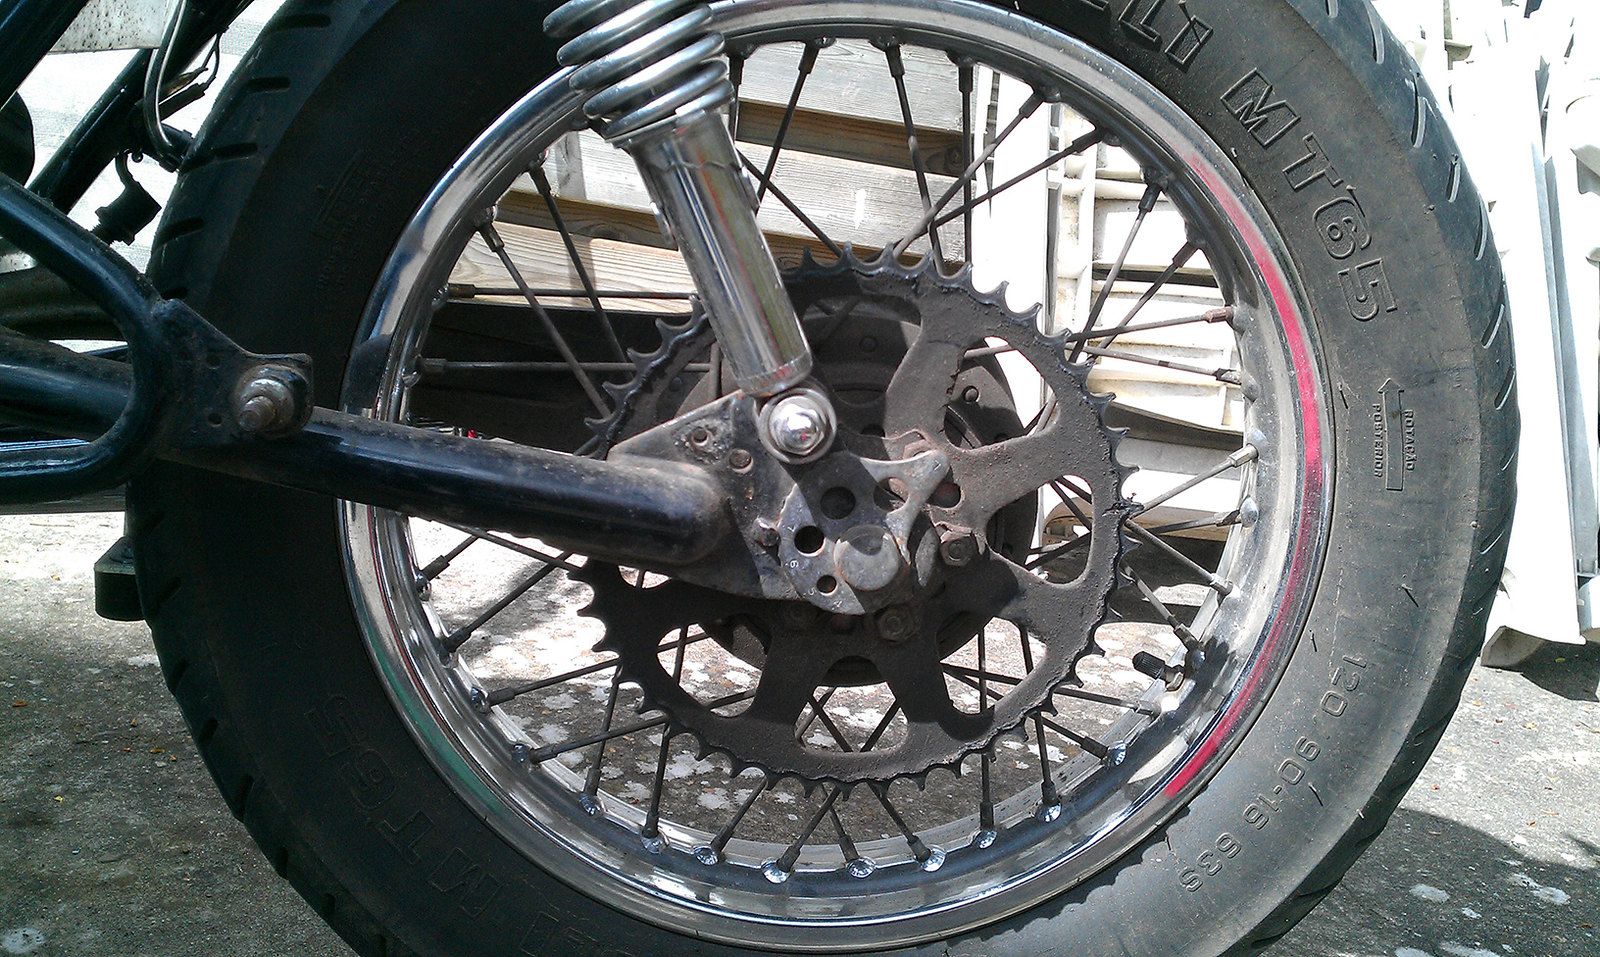

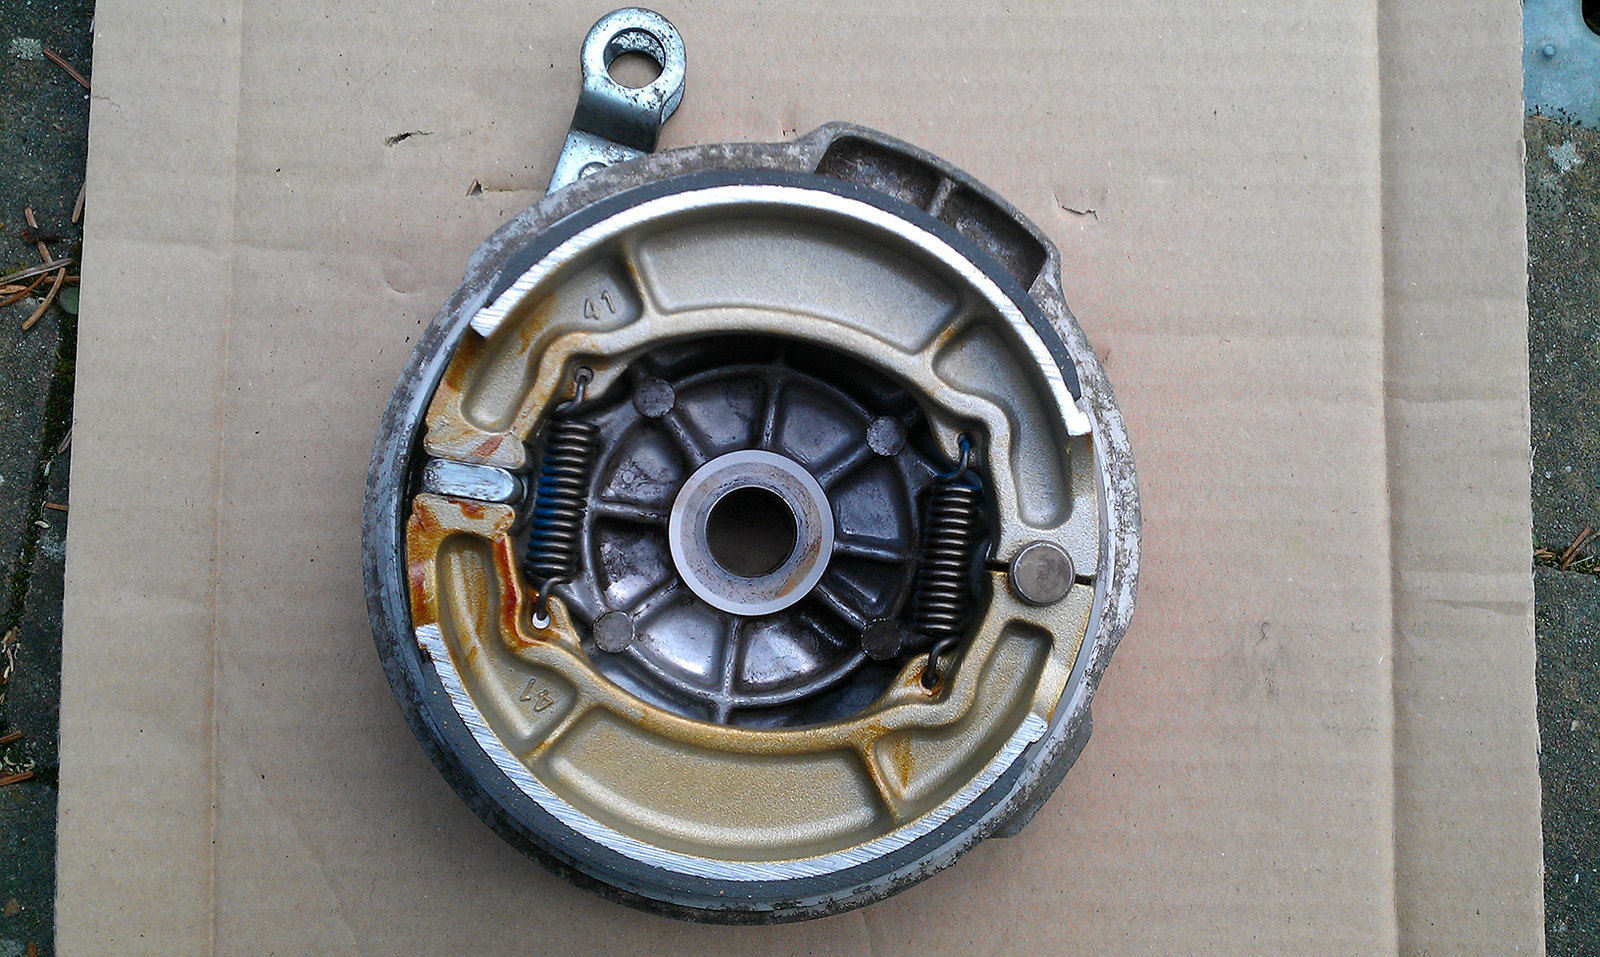
The brakes seemed ok, but where rusted and squeaky, so decided to change these too:
Before:
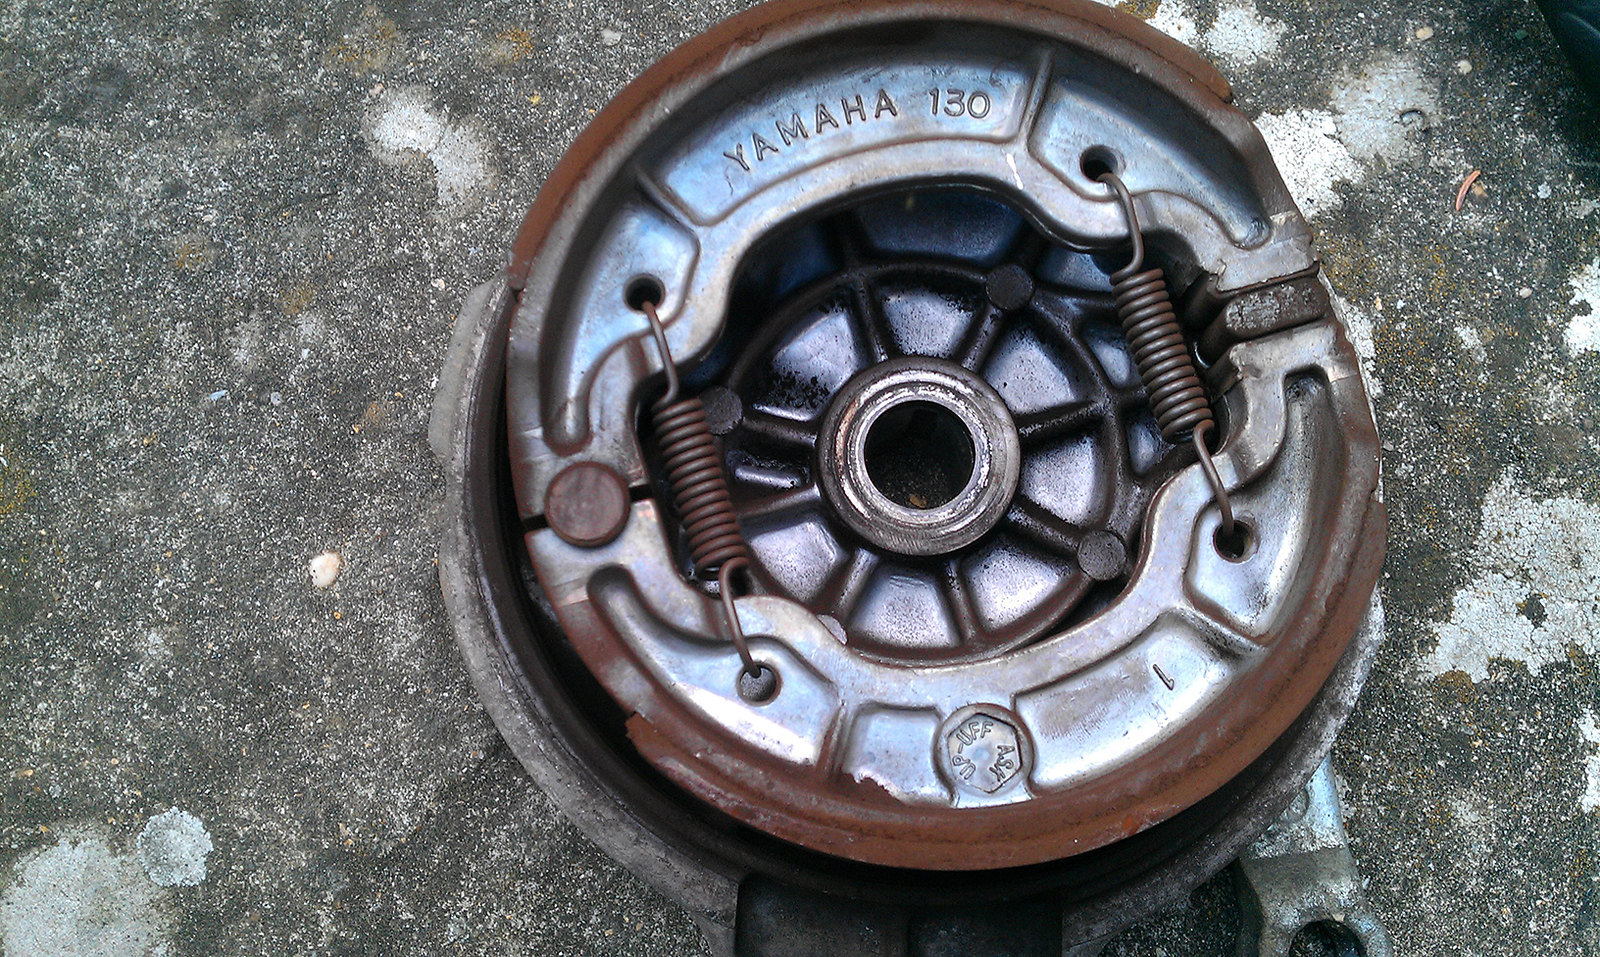
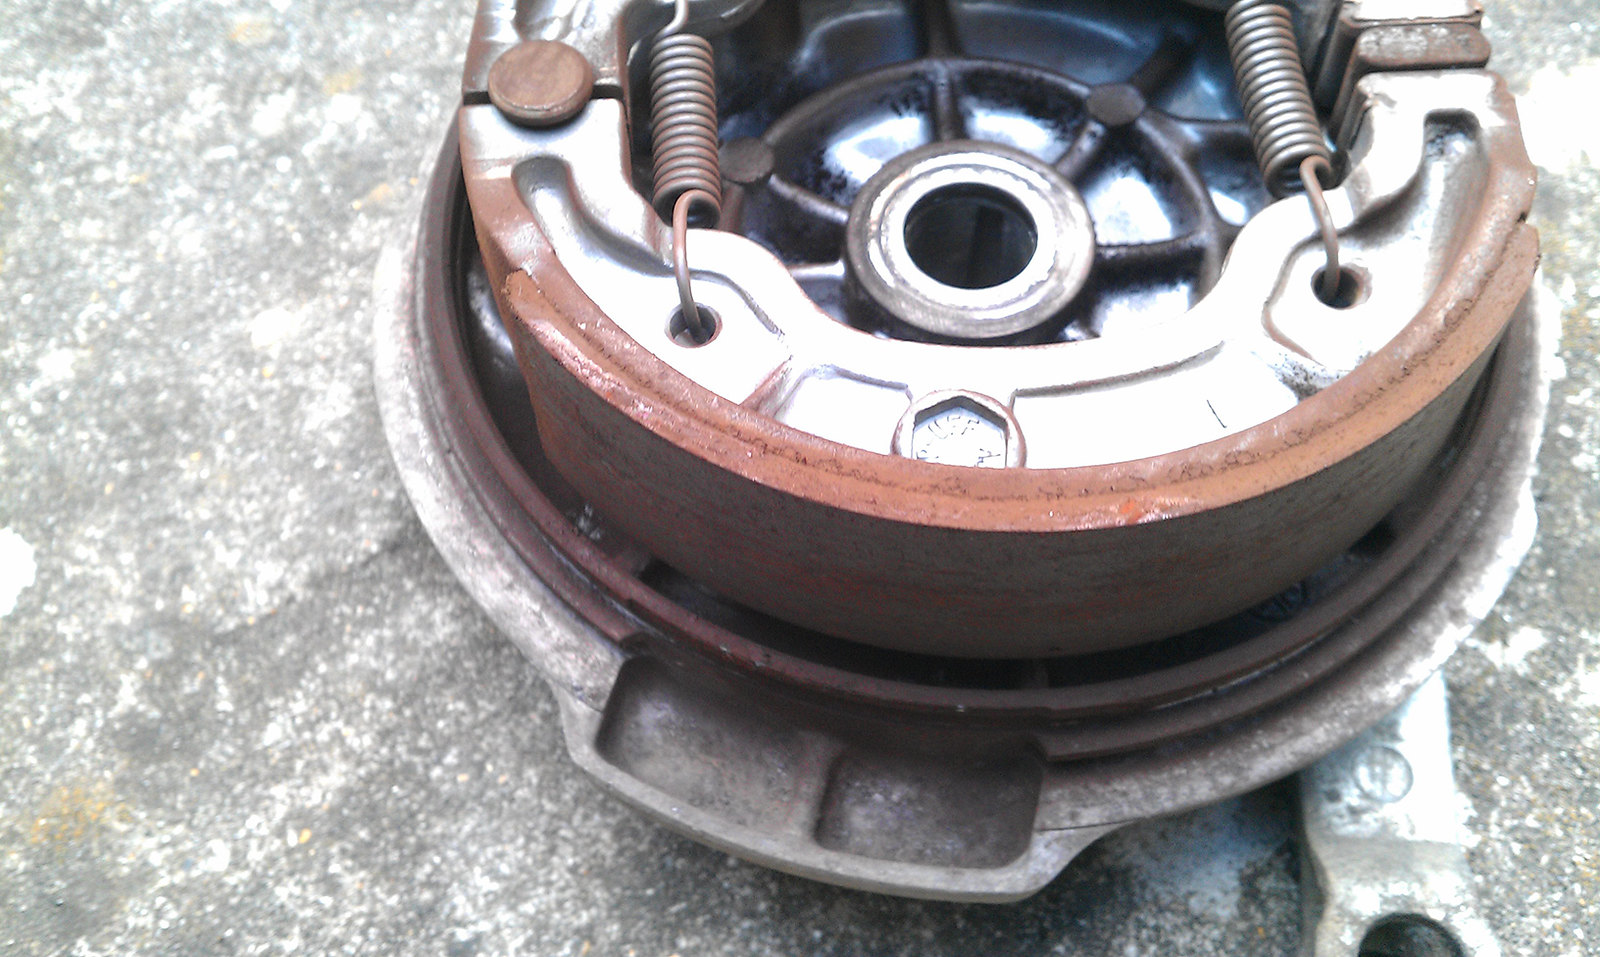
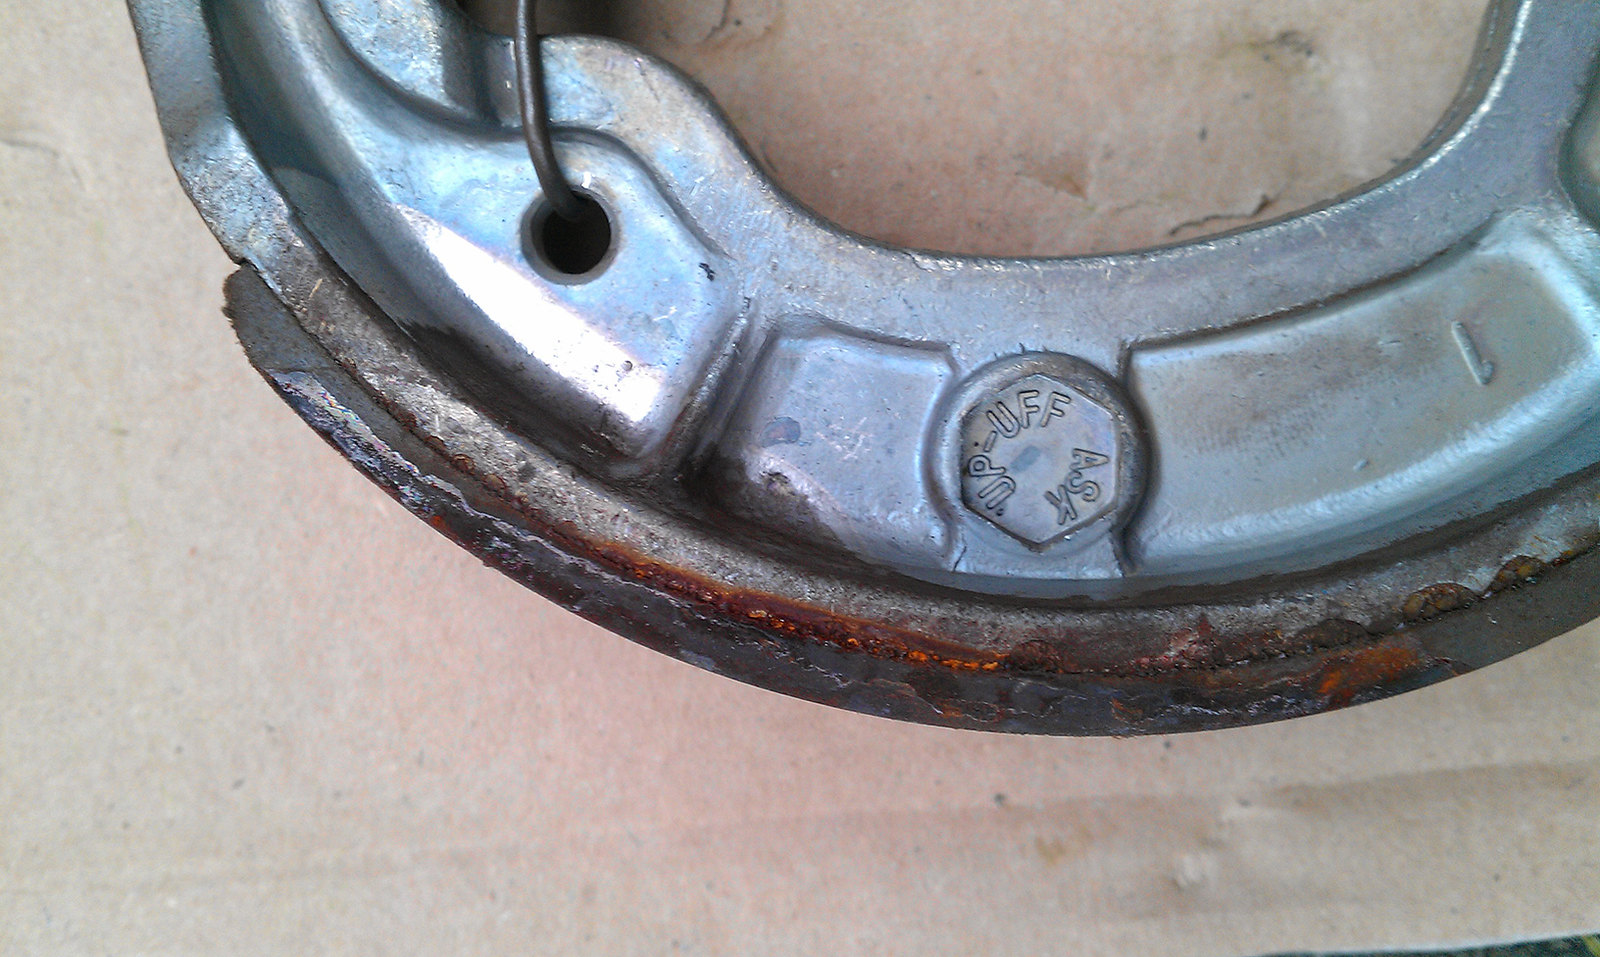
New brakes: (Front and back)
Trying to get the old sprocket off:
And mounted the new:
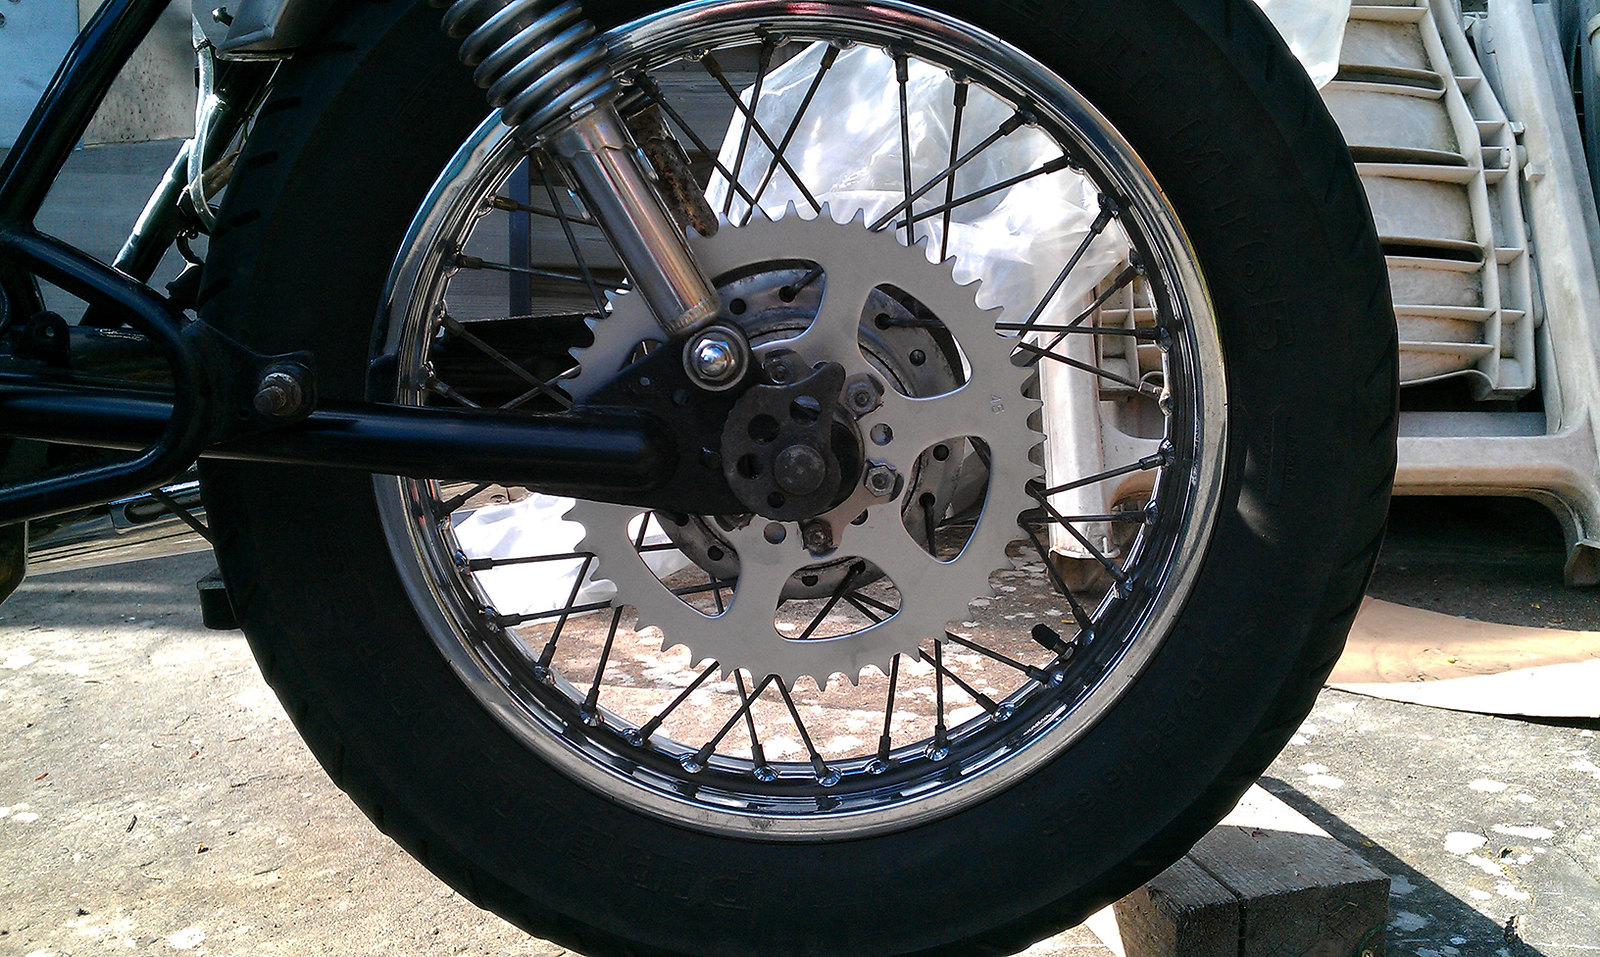
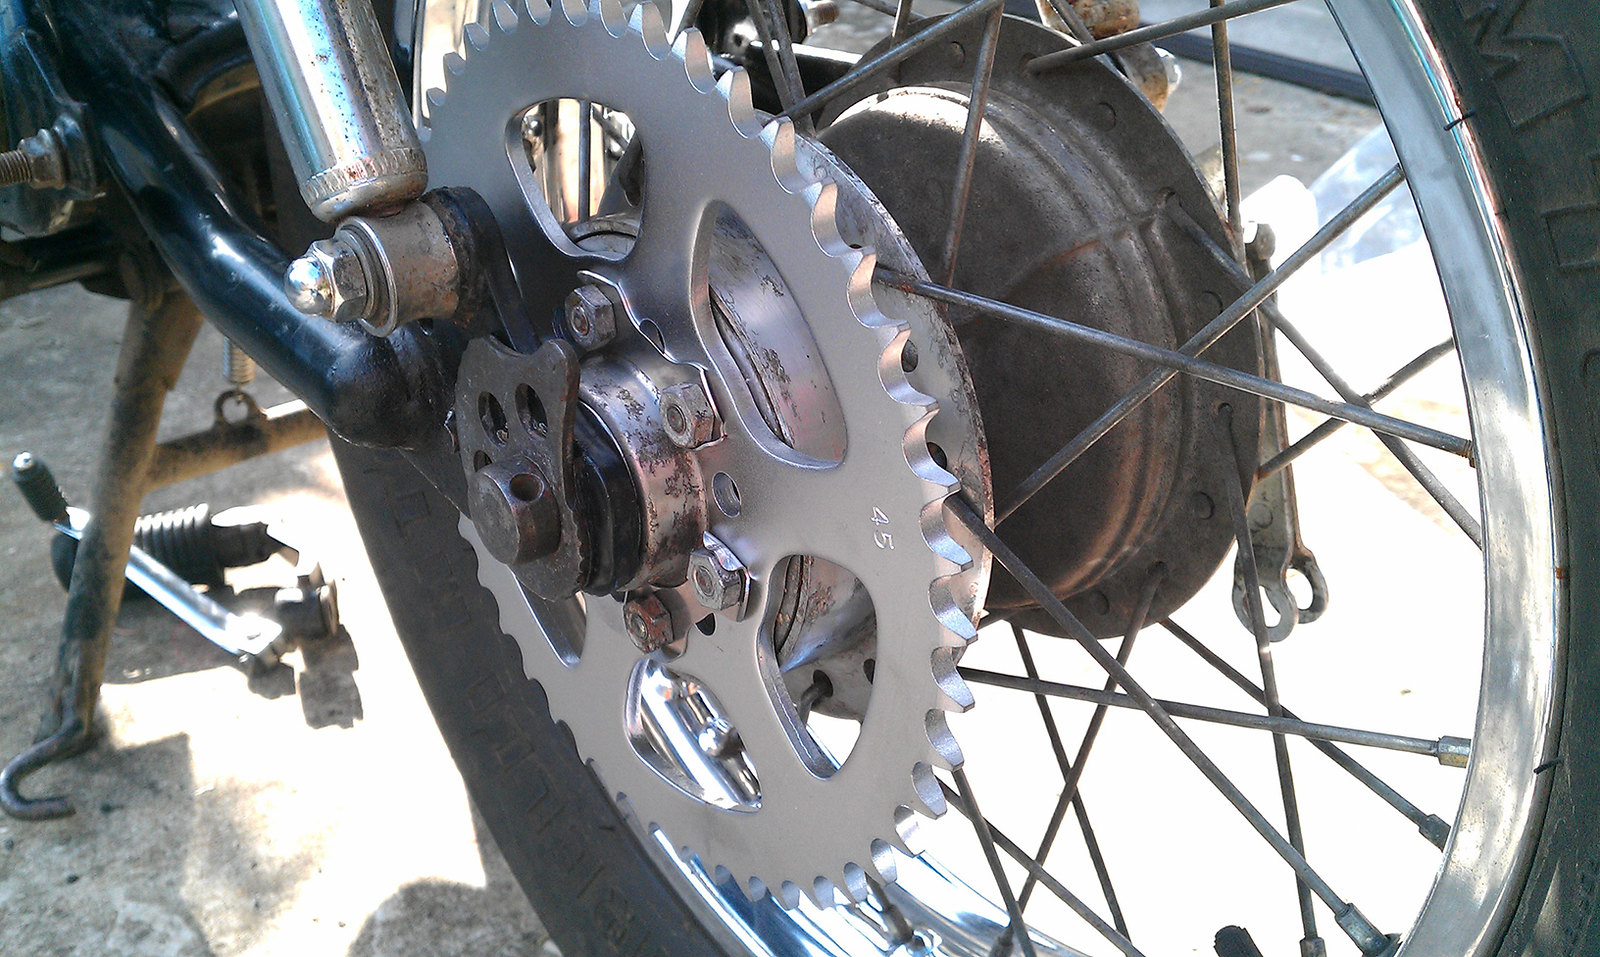
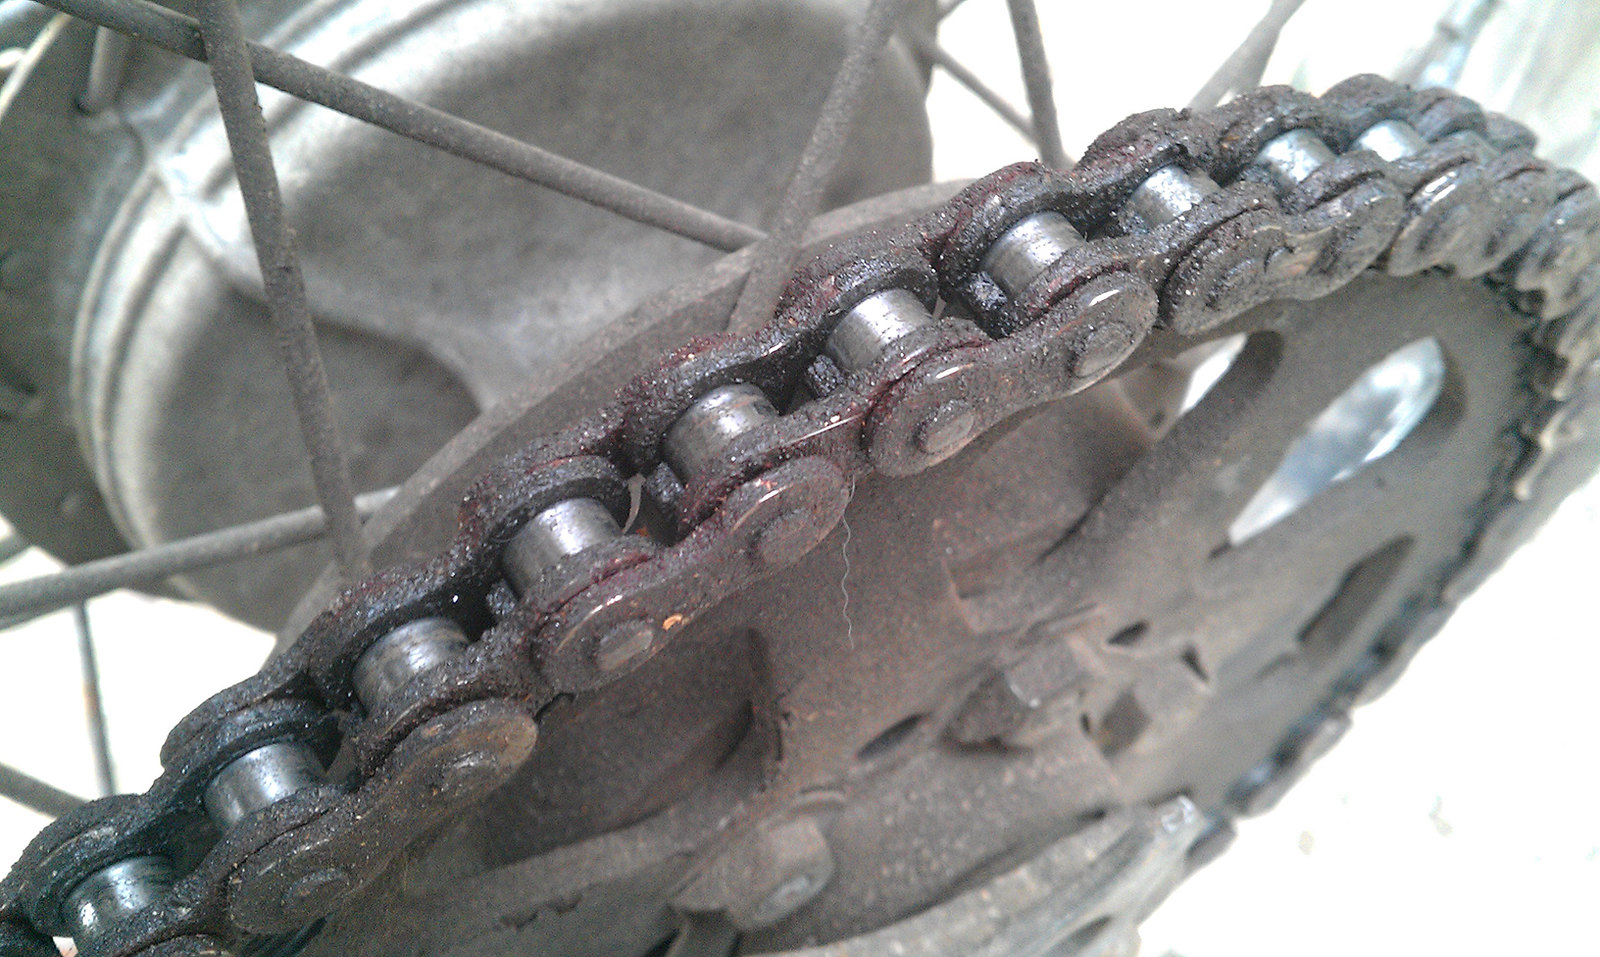
Riveting the new chain:
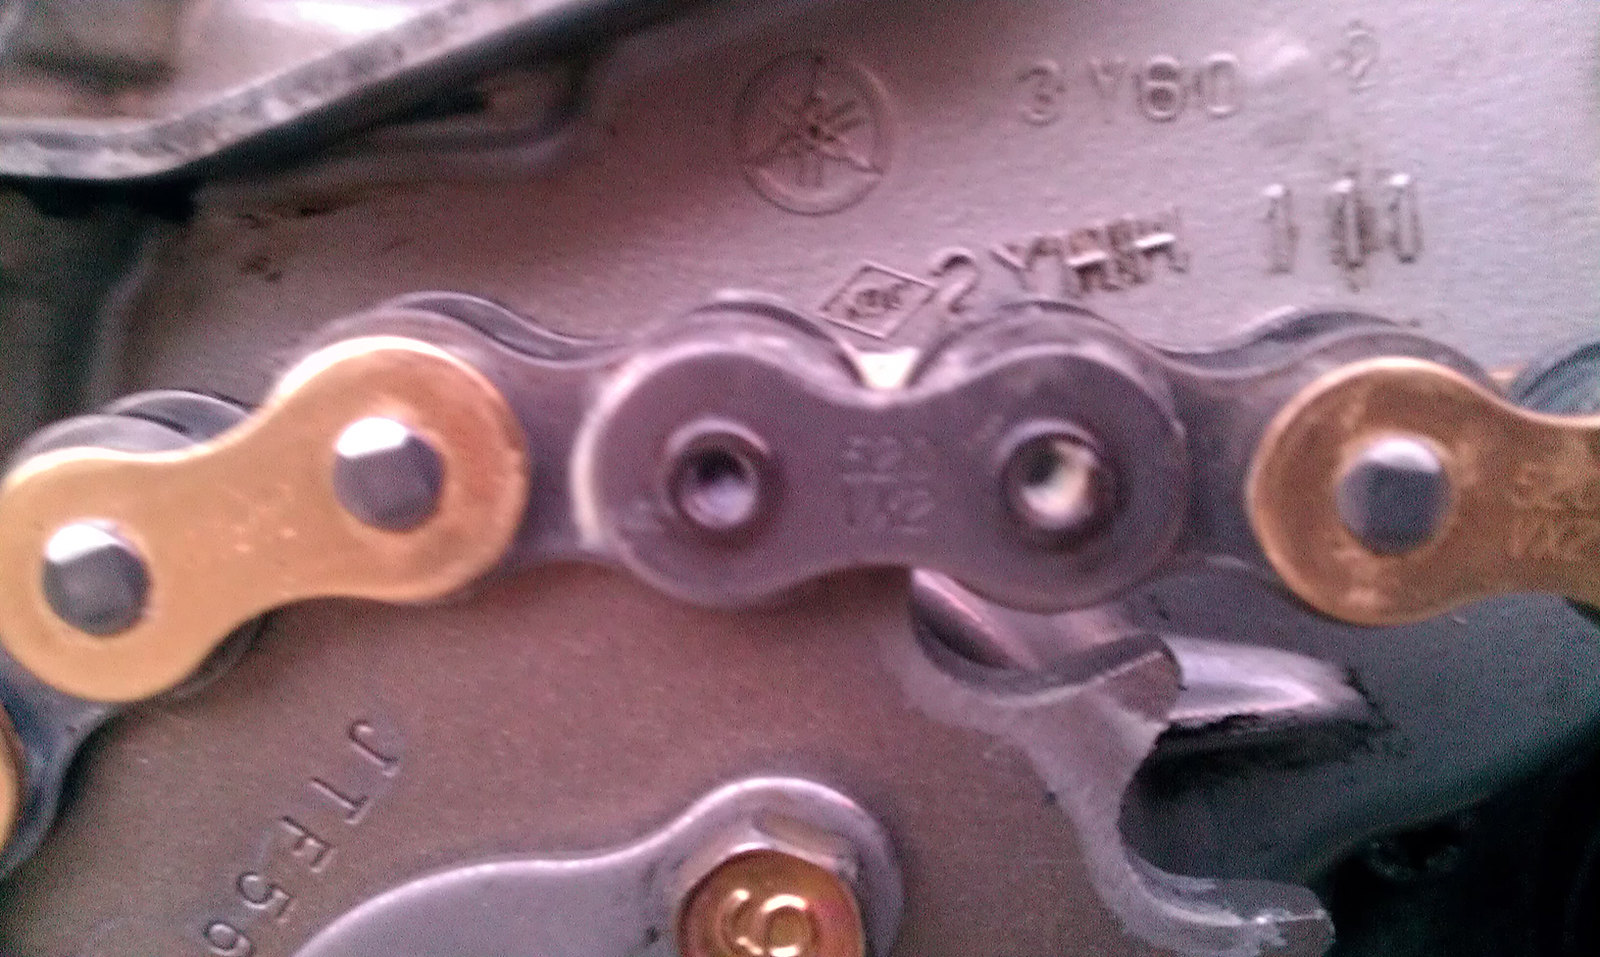
Some bling-bling:
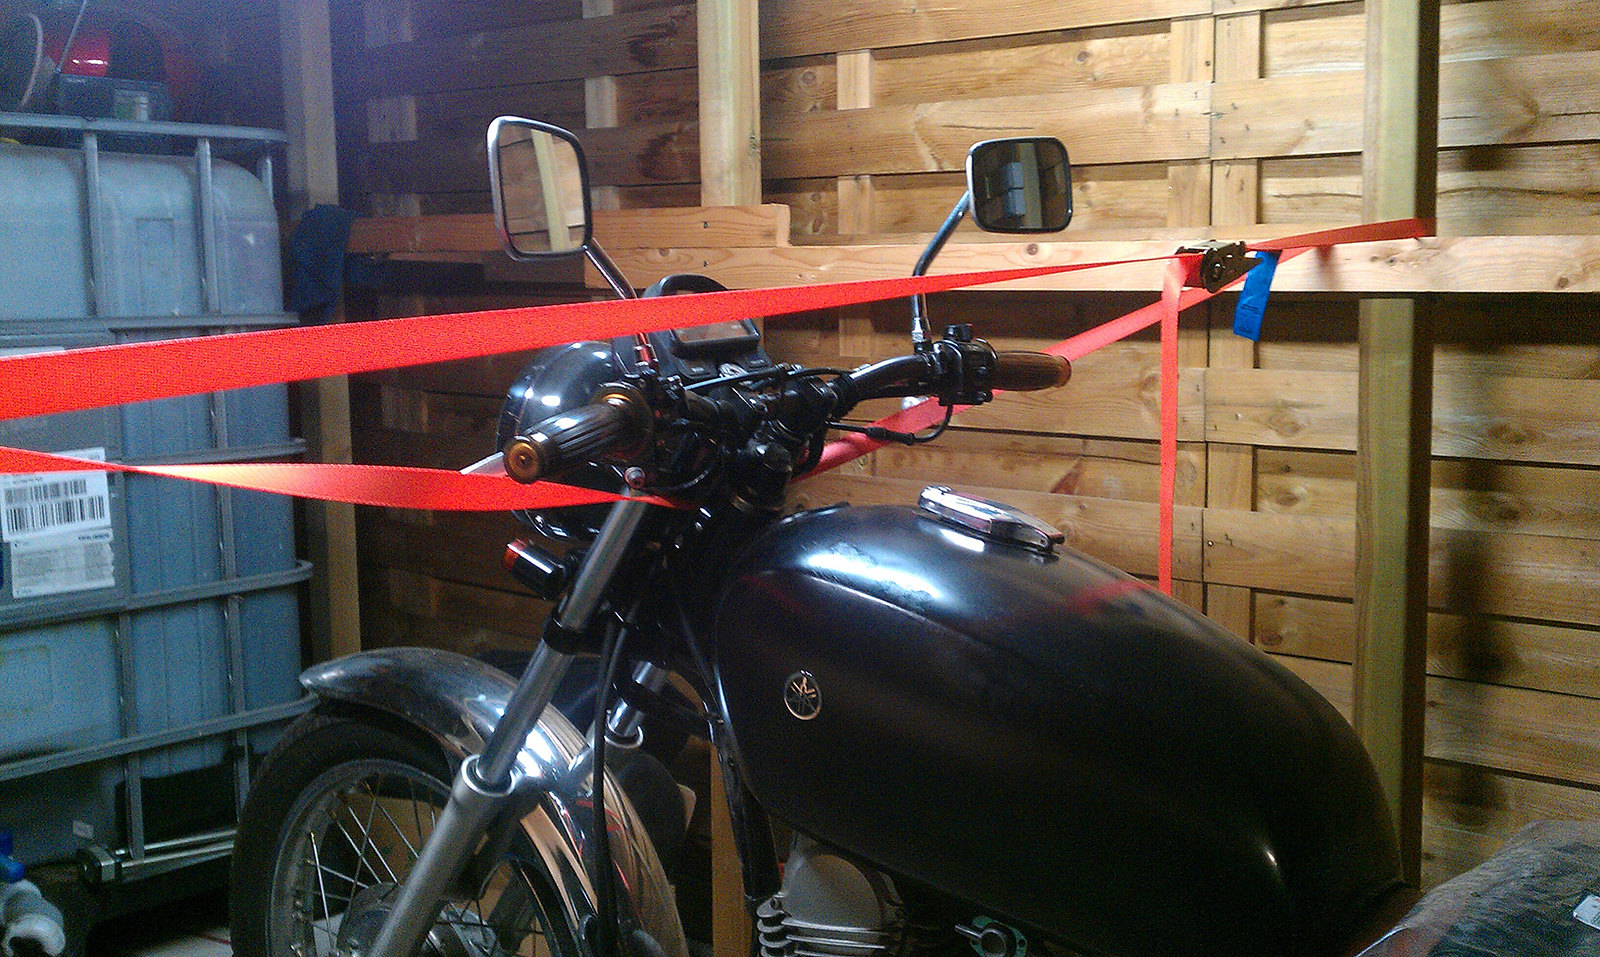
Didn't really like the long and wobbly front fender, so decided the make a front brace.
Paper mock-up:
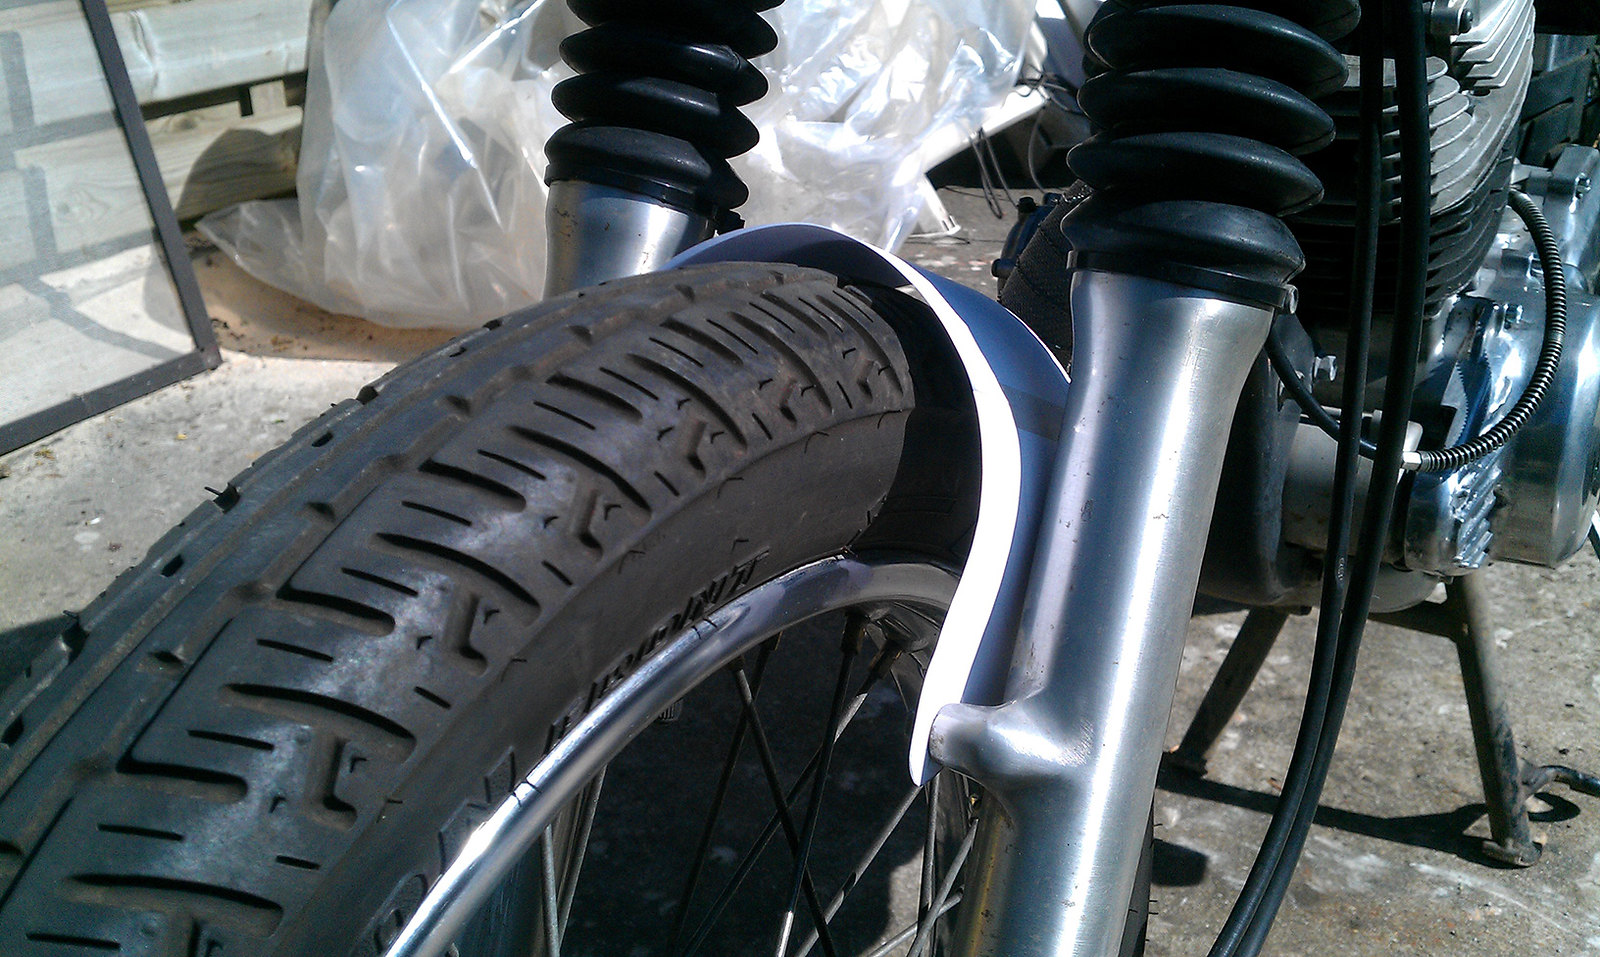
And copied the template onto a 2mm steel plate:
Including cable holder:

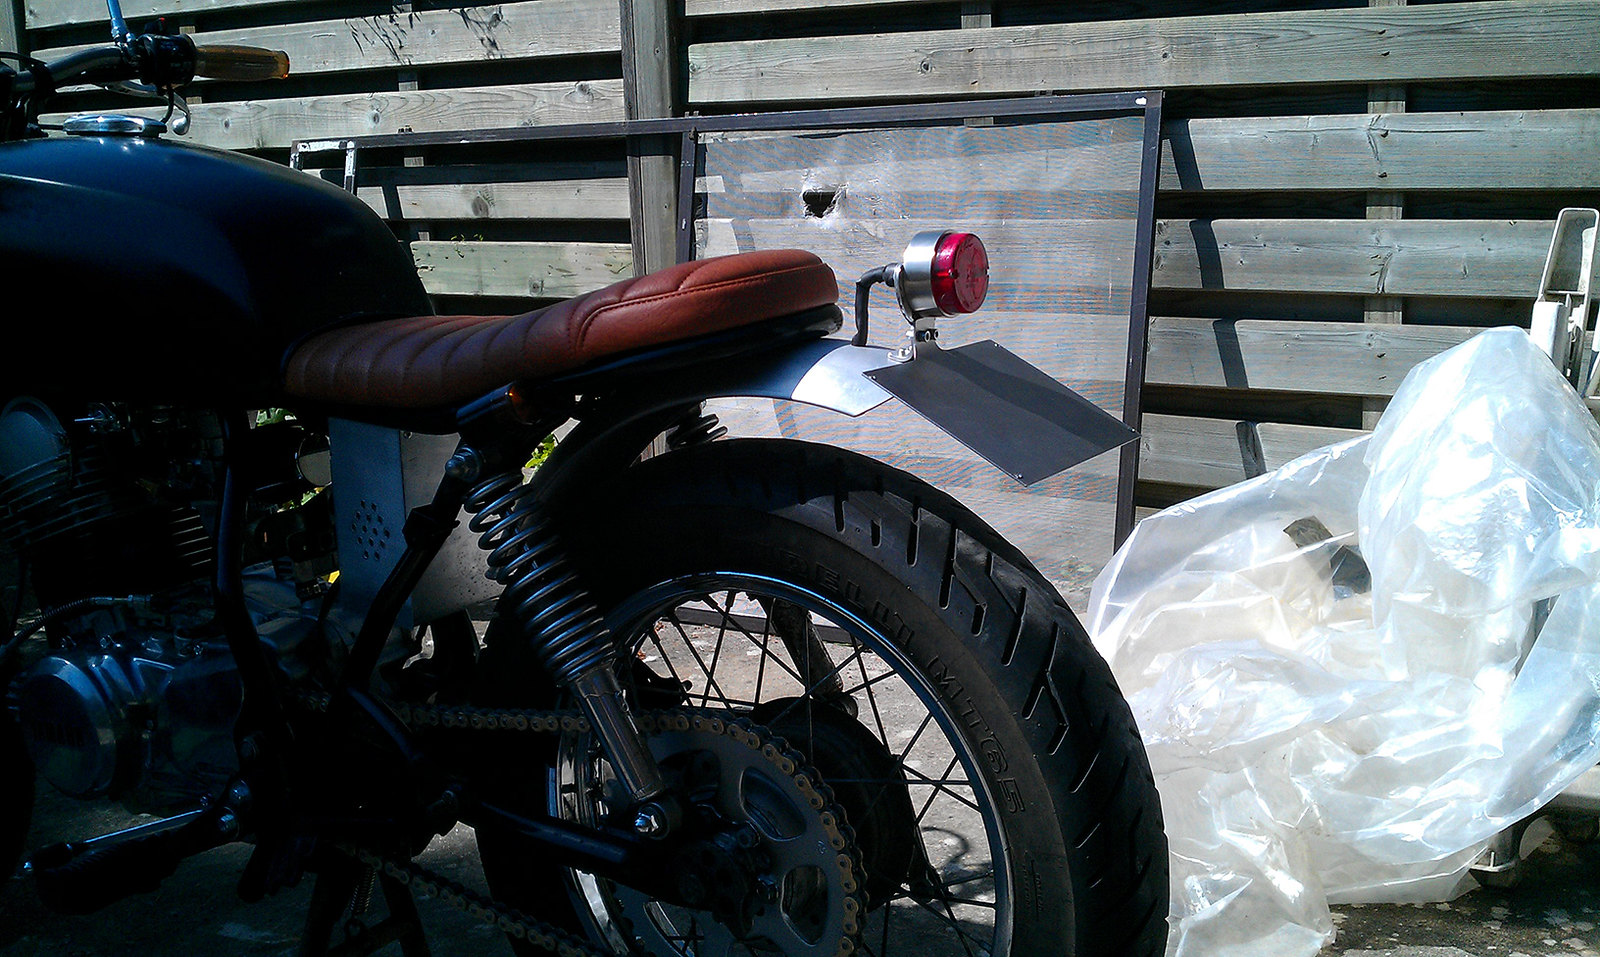
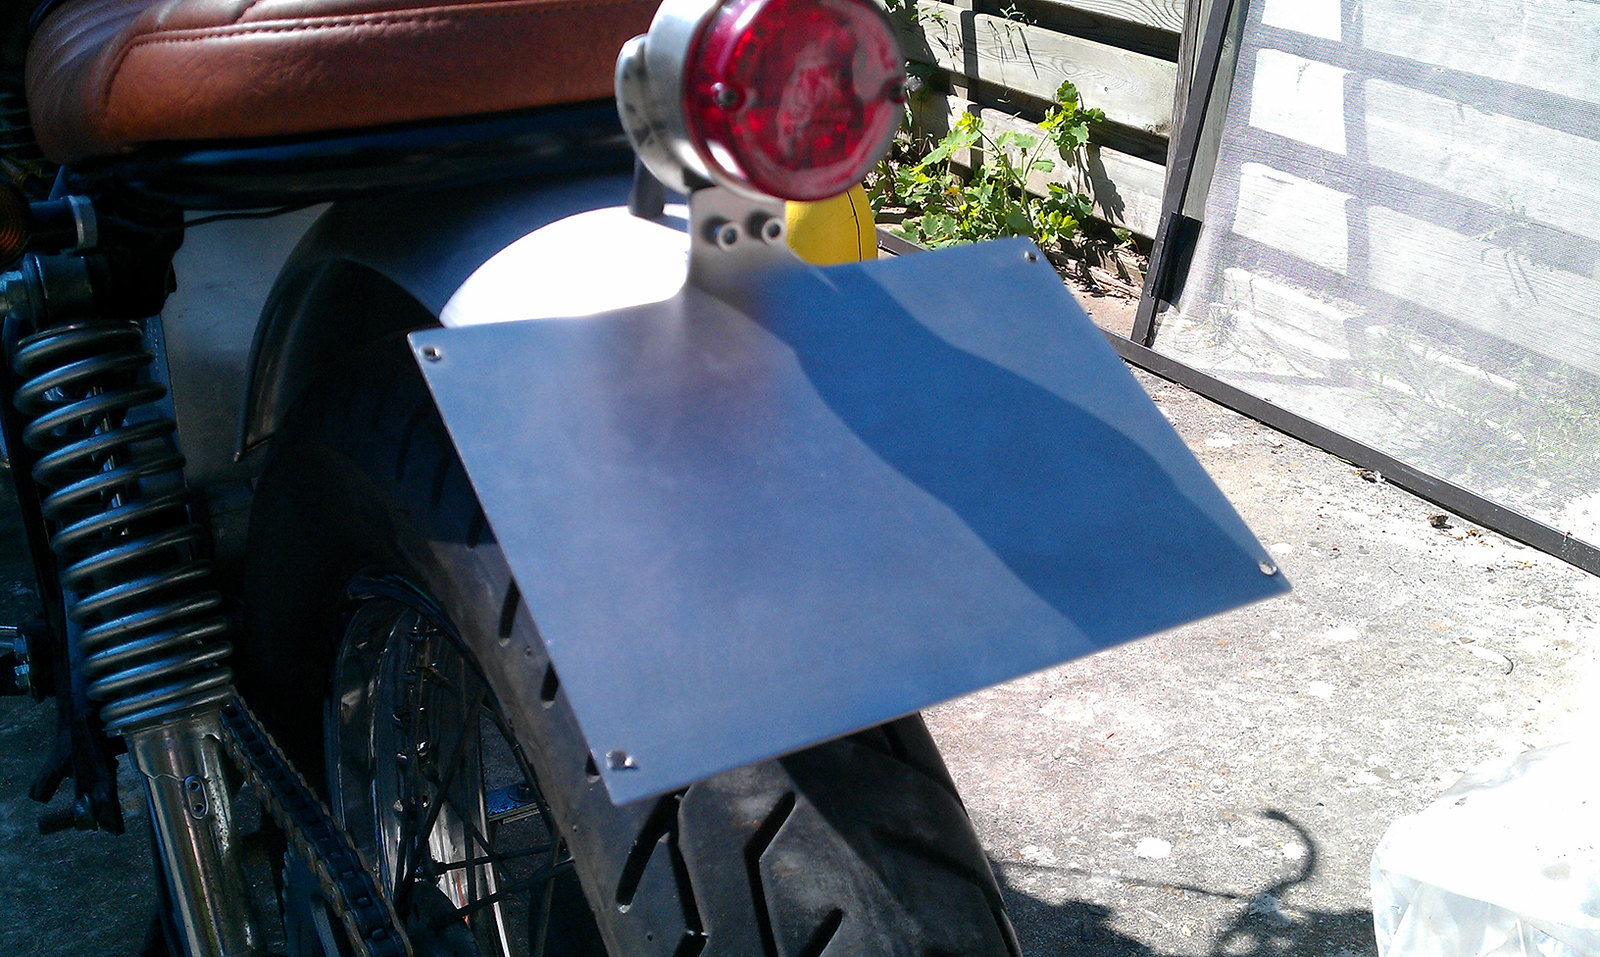
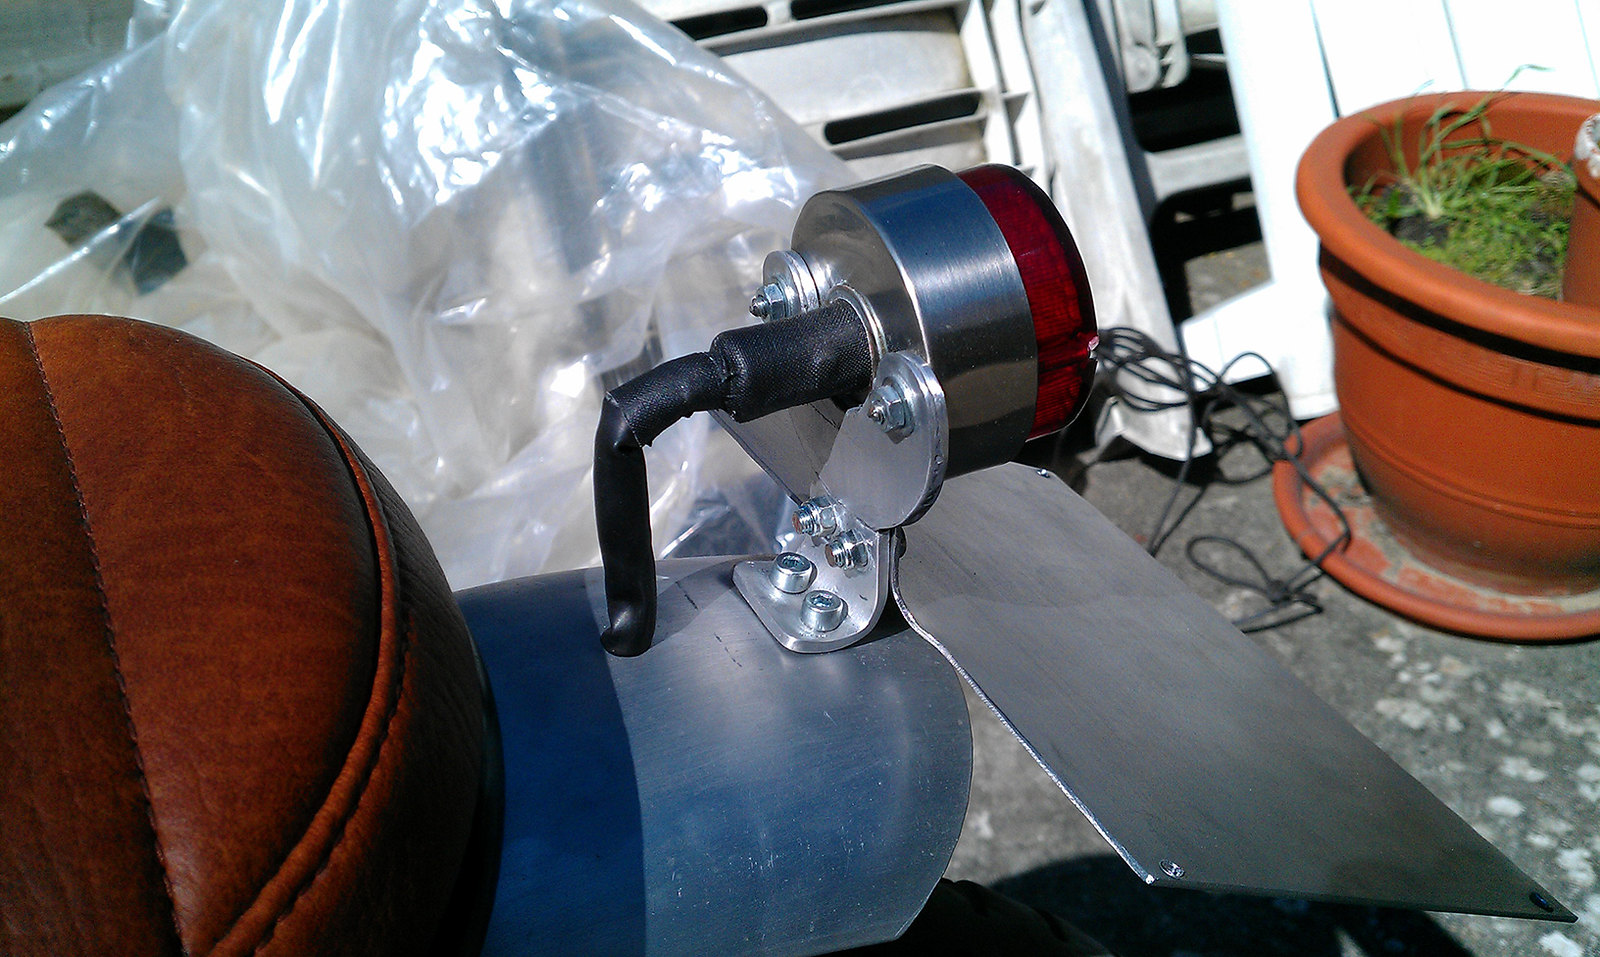
Also re-made the wimpy aluminum plateholder with the same steel plate: (don't mind the crap in the background)
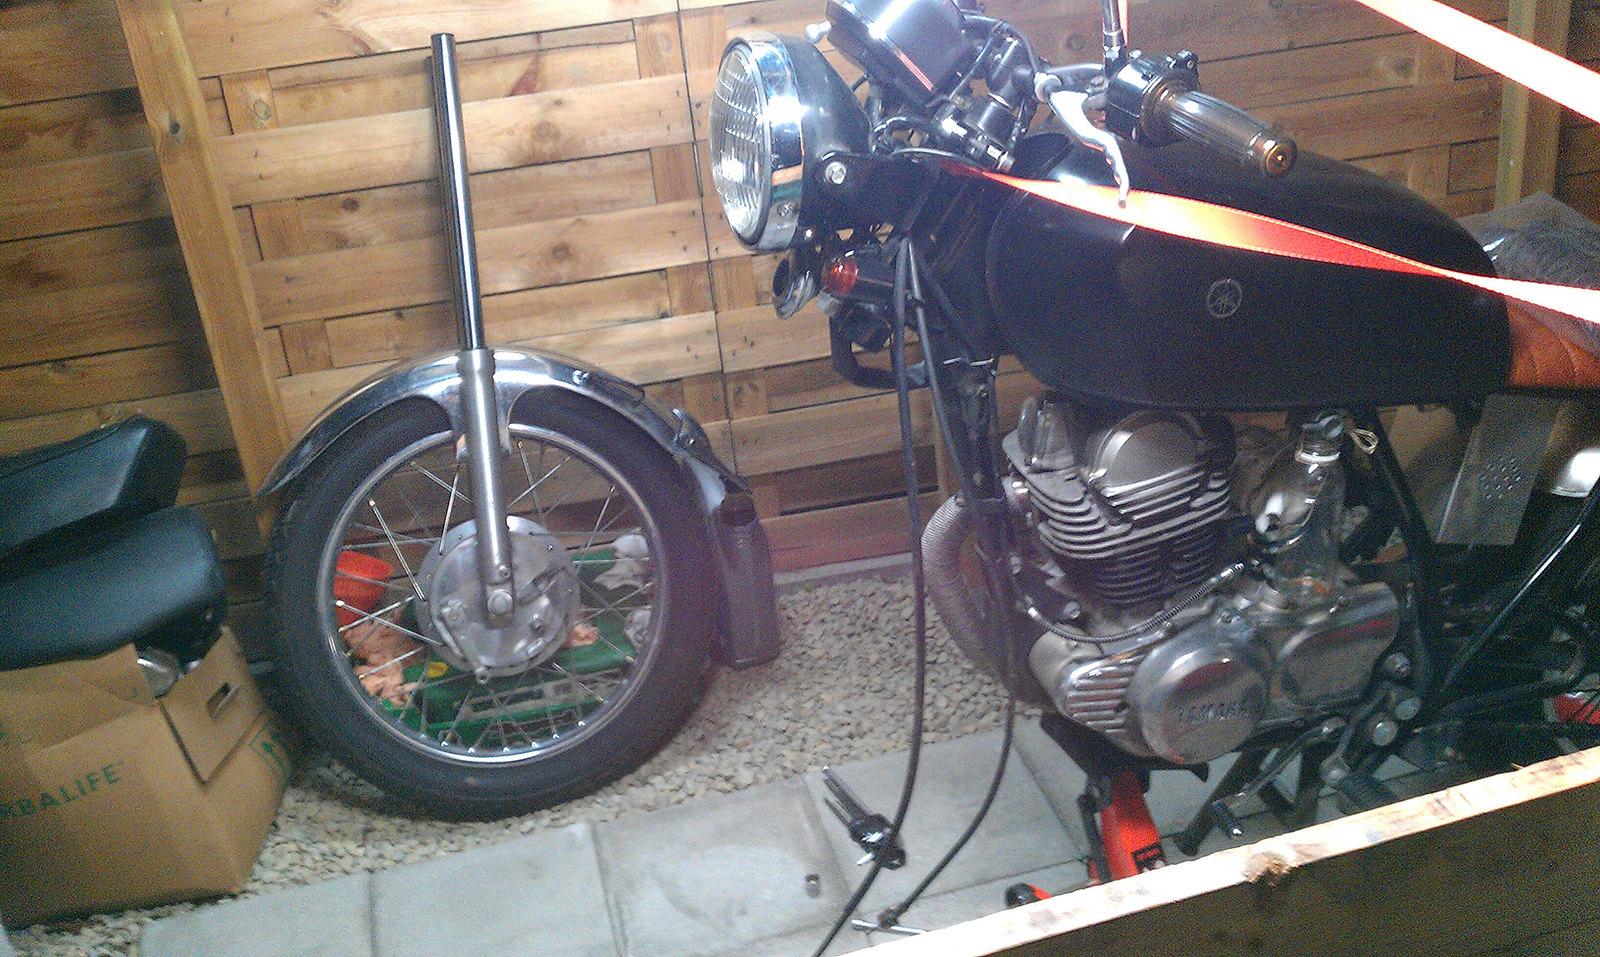
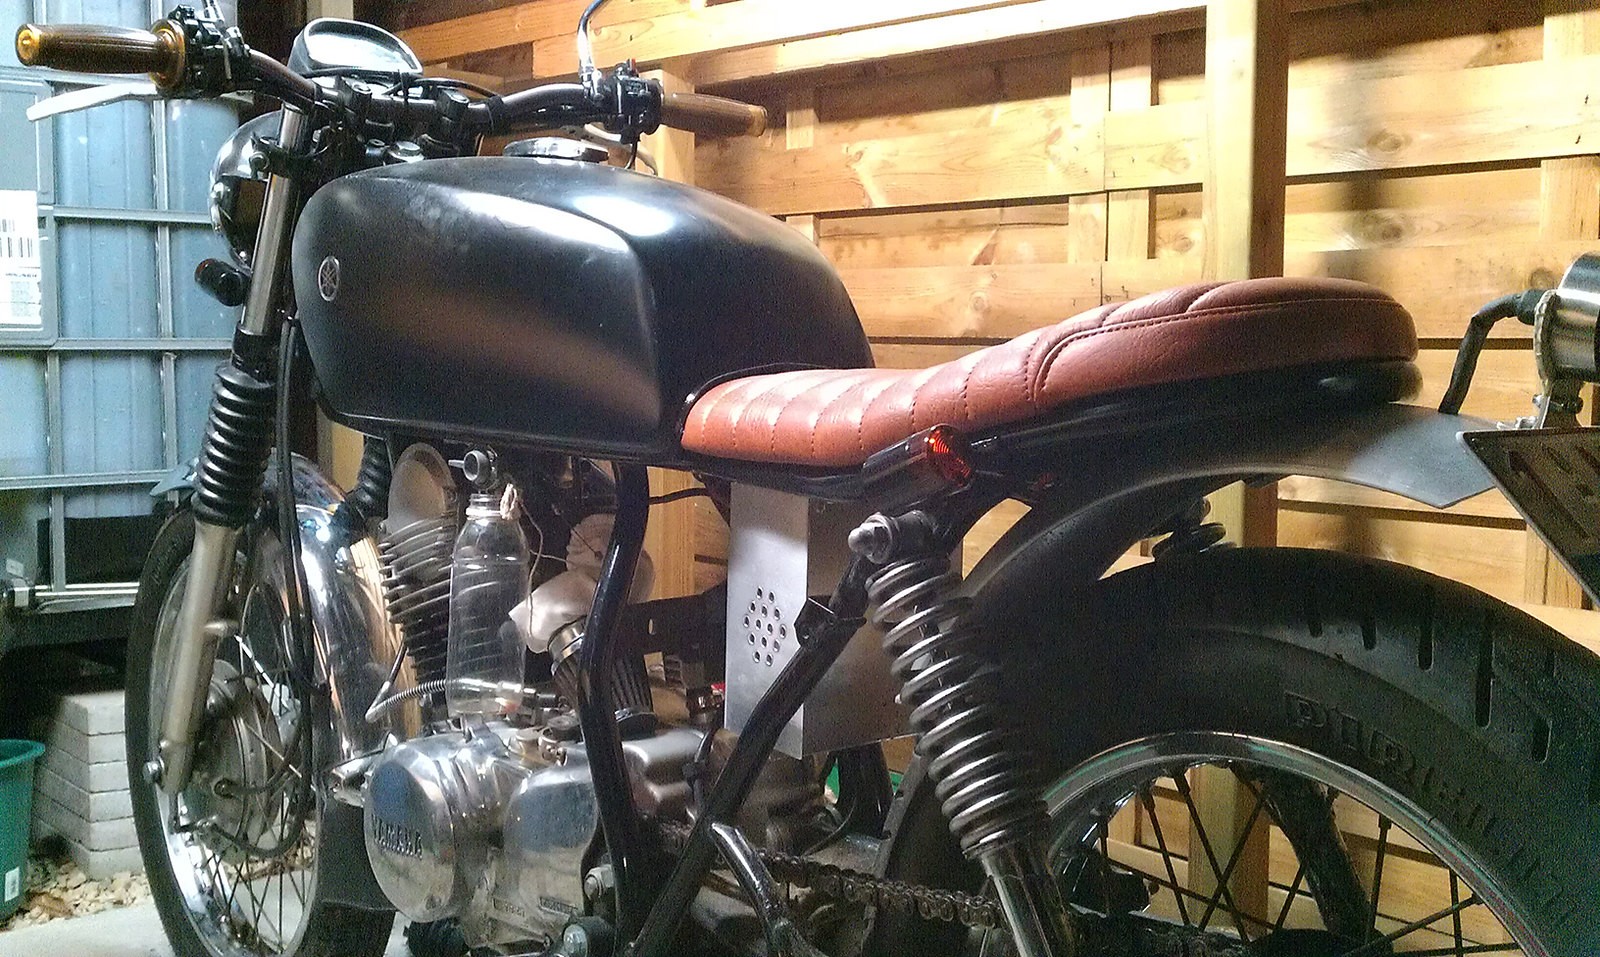
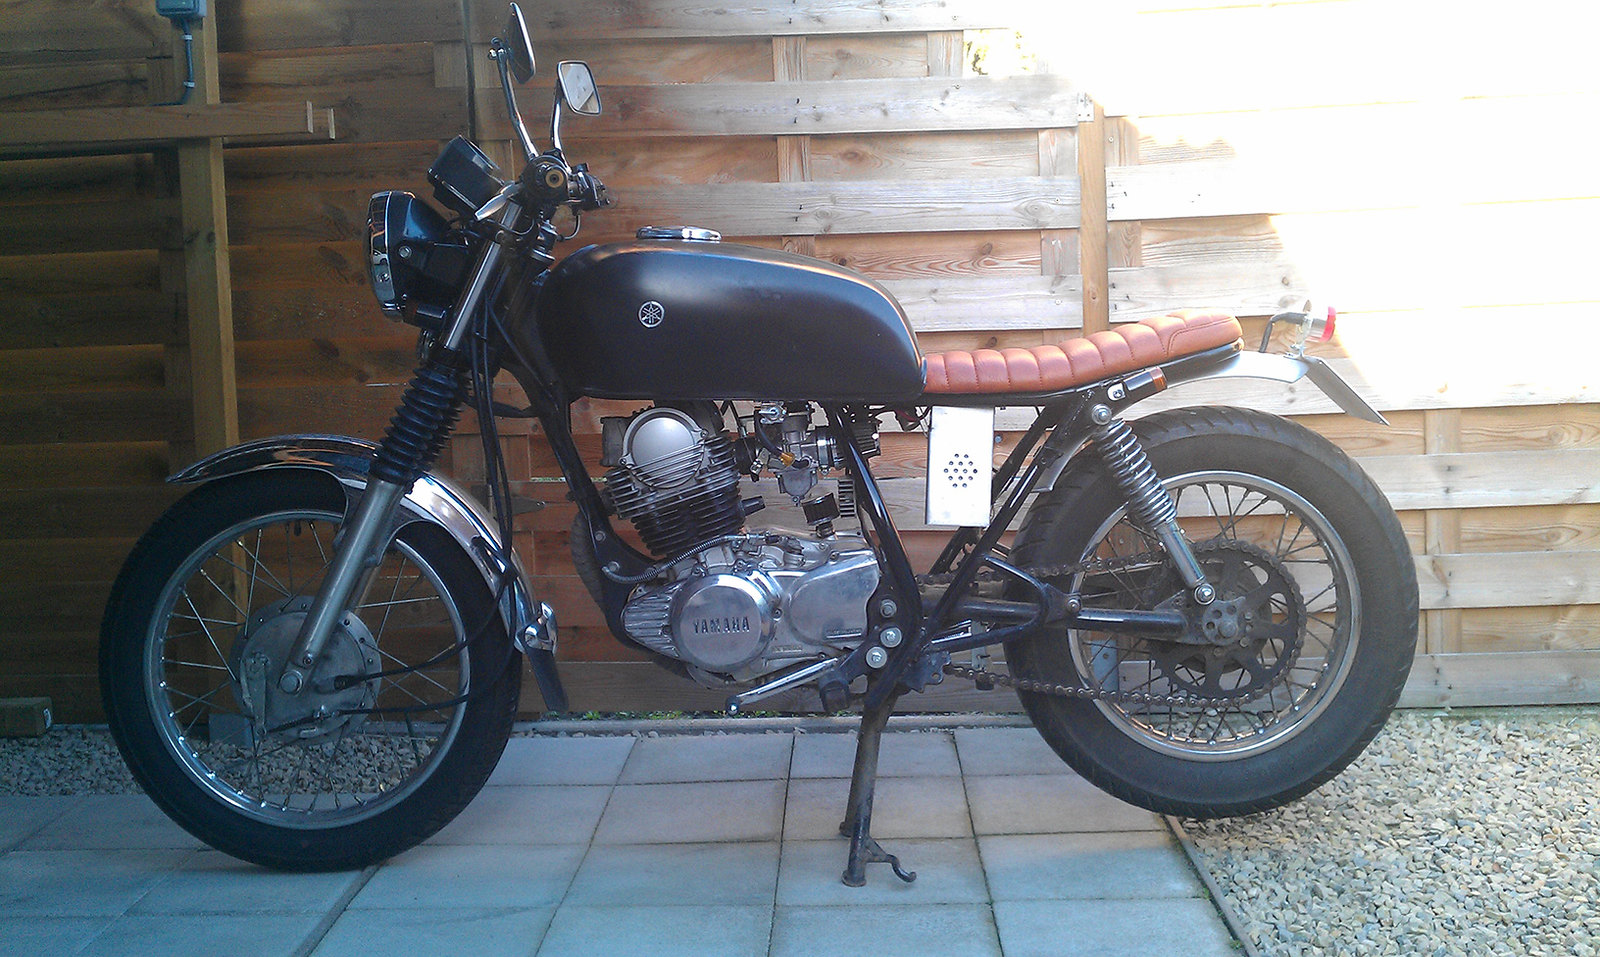
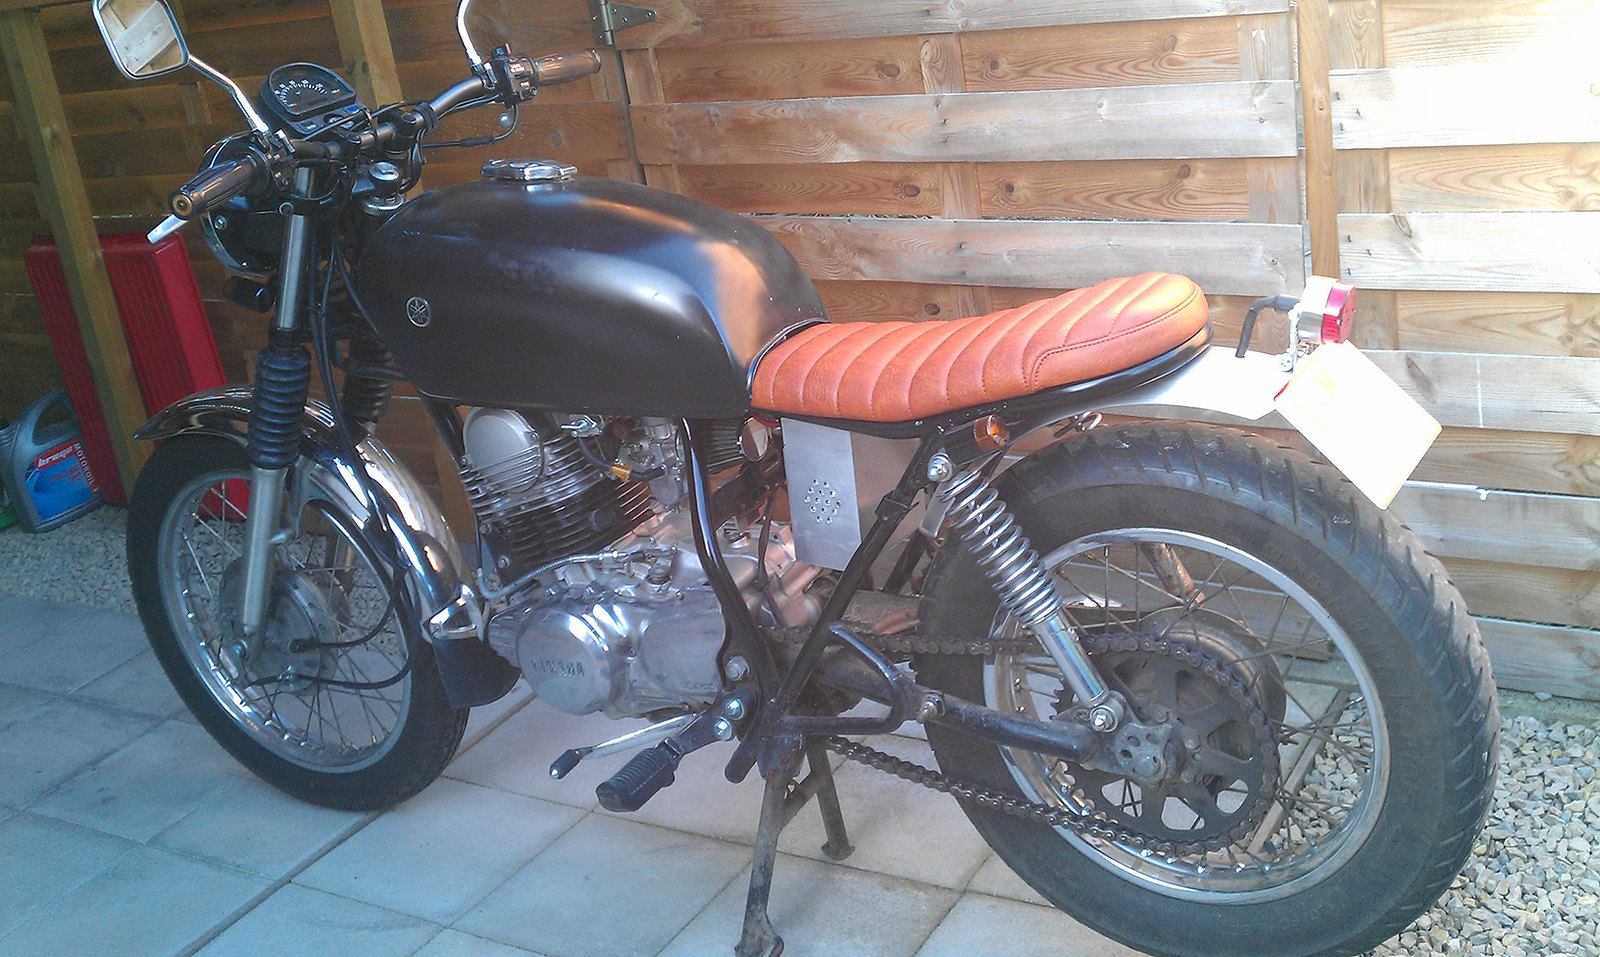
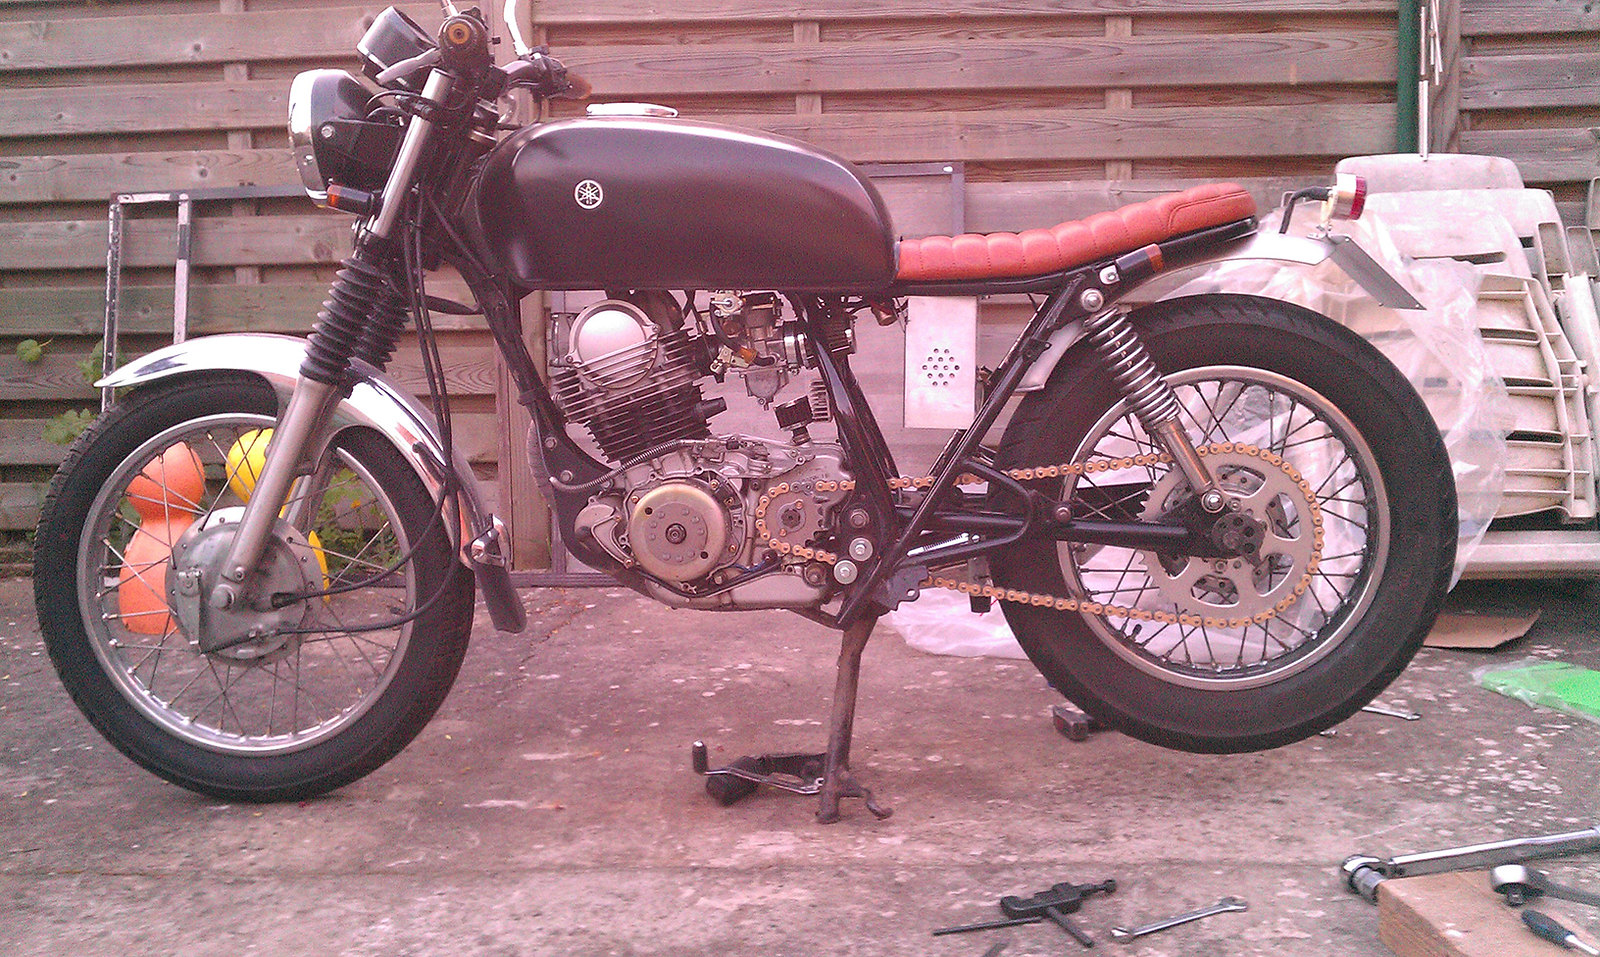
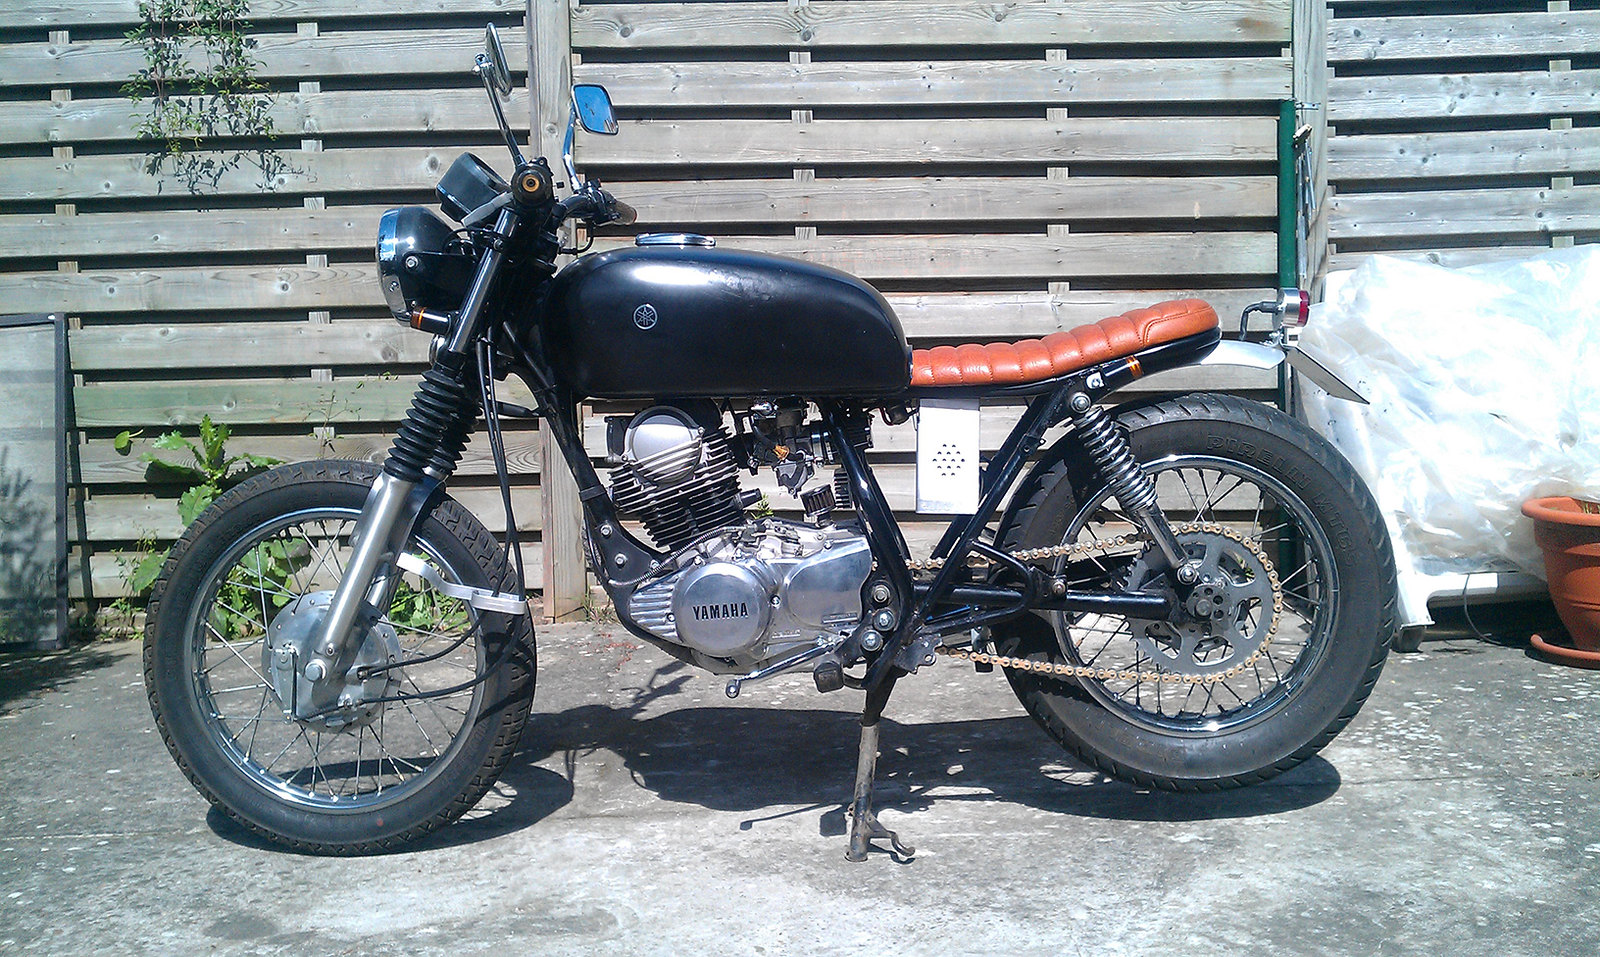
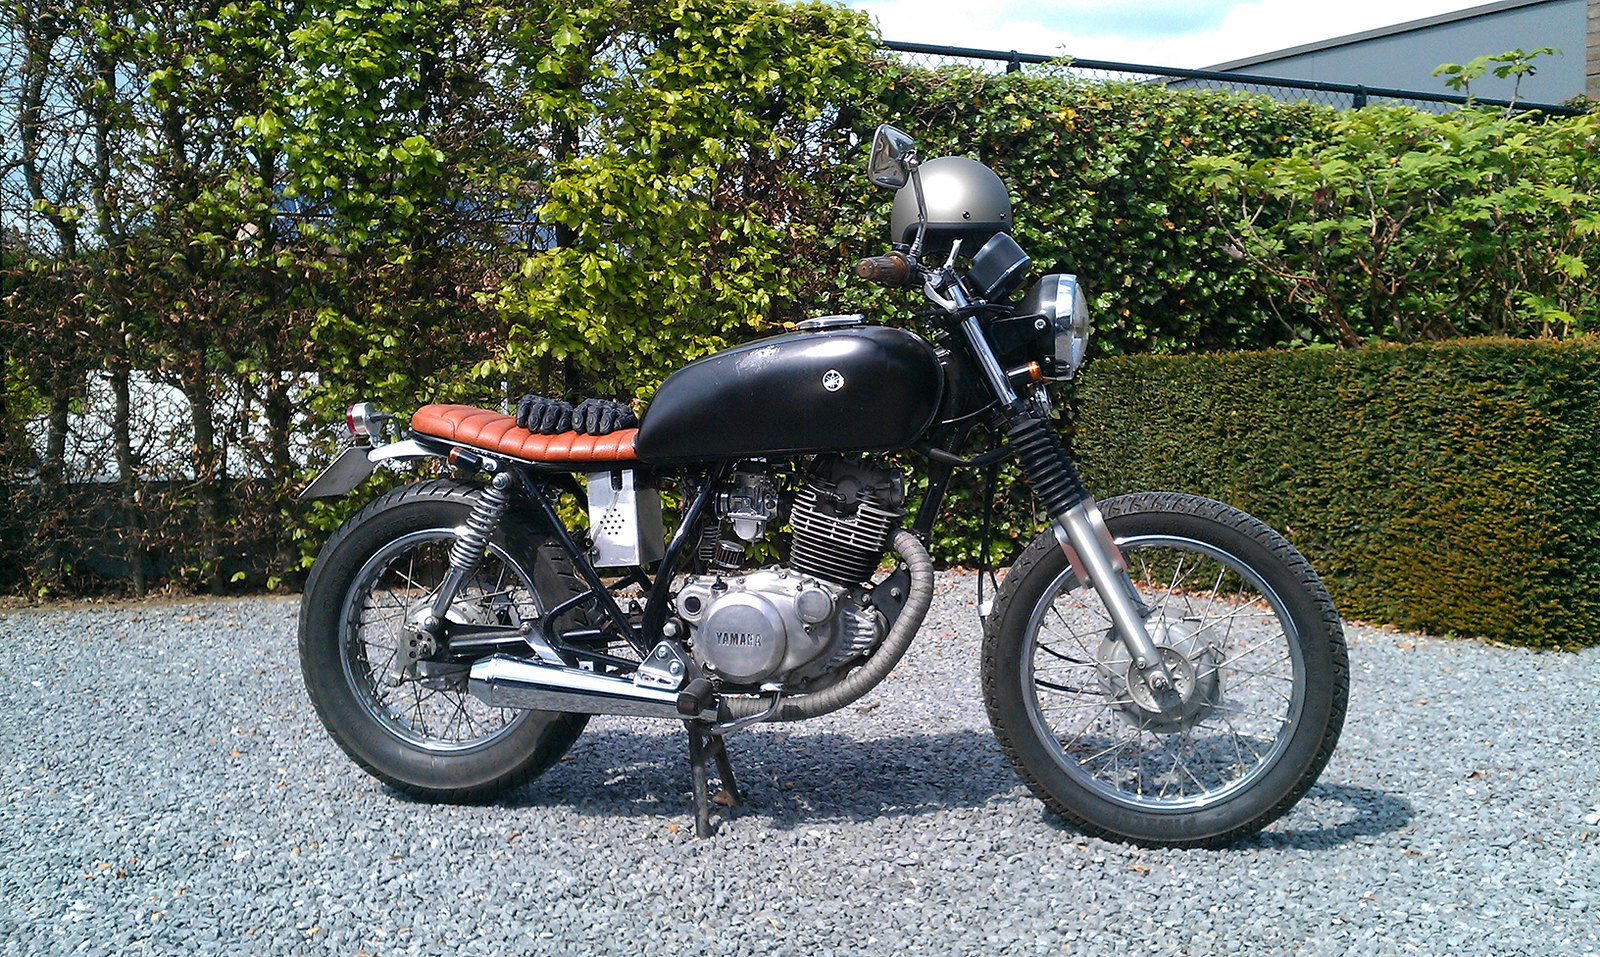
Ready for another test ride: (Without the front fender she looks a lot more grown-up)
And some test ride porn:
She drives wonderful (apart from the carb, but i'm working on that).
The new front brace works great. Instant feedback in the corners and she finally wants to go where i want her to go.
But alas, this was v1.0 and i decided to rebuild her from the ground up, so at the moment she is stored in a million labelled pieces gathered in three boxes. Current state:

So, still a lot of plans, and i'm trying to get them done by the time i planned my holiday so i can reassemble her into v2.0
All i can say for now is, she's going to be sweet
No more flooding the bike while coasting, gone with the stuttering. Only problem now is, she seems to be getting too much air.
Does this plug look normal?
You really can't see it in these pics, but the plug has a bright-pale orange look to it.
So, on to the big works. Have a look at this sprocket and chain combo:
And the front sprocket. Including 20 years of grime and dirt:
The previous owner tried to convince me the sprockets and chain were ok, just in need of a little cleaning.
Comparing them to the replacement sprockets, i'm beginning to think he needs a guide dog:
(Granted, i didn't really check the chain too, since i was going to change or clean every bolt on this bike)
On to the cleaning.
Before:
After:
The neutral wire was exposed by all the dirt (and possibly something the chain picked up):
Temporarily insulated and new sprocket mounted:
On to the rear sprocket:
The brakes seemed ok, but where rusted and squeaky, so decided to change these too:
Before:
New brakes: (Front and back)
Trying to get the old sprocket off:
And mounted the new:
Riveting the new chain:
Some bling-bling:
Didn't really like the long and wobbly front fender, so decided the make a front brace.
Paper mock-up:
And copied the template onto a 2mm steel plate:
Including cable holder:
Also re-made the wimpy aluminum plateholder with the same steel plate: (don't mind the crap in the background)
Ready for another test ride: (Without the front fender she looks a lot more grown-up)
And some test ride porn:
She drives wonderful (apart from the carb, but i'm working on that).
The new front brace works great. Instant feedback in the corners and she finally wants to go where i want her to go.
But alas, this was v1.0 and i decided to rebuild her from the ground up, so at the moment she is stored in a million labelled pieces gathered in three boxes. Current state:
So, still a lot of plans, and i'm trying to get them done by the time i planned my holiday so i can reassemble her into v2.0
All i can say for now is, she's going to be sweet
Nice work mate.
I can tell you that pod filter isn't doing you any favors, it is blocking some of the air ports on the carby and might be why you are having troubles. Buy a K&N or Uni if you want a pod. the cheap ones have a lip inside the rubber boot.
I can tell you that pod filter isn't doing you any favors, it is blocking some of the air ports on the carby and might be why you are having troubles. Buy a K&N or Uni if you want a pod. the cheap ones have a lip inside the rubber boot.
chiel
New Member
Thanks Brodie.
I know the EMGO pod is a cheap knock-off filter, so i'm looking for a K&N one (preferably the oval XS400 one), possibly with a velocity stack inside to emulate the stock airbox, but i still have to go to the shop and figure things out. At least it's on my ever growing to-do list
I know the EMGO pod is a cheap knock-off filter, so i'm looking for a K&N one (preferably the oval XS400 one), possibly with a velocity stack inside to emulate the stock airbox, but i still have to go to the shop and figure things out. At least it's on my ever growing to-do list
mannydantyla
Been Around the Block
excellent work!
I have seen others (different bikes; similar CV carbs) have good success by using short PVC pipes (like 1 1/2") connected to the carb(s) by Neoprene plumbing drain connections and connecting to either pod filters or a larger PVC manifold. And re-jetting was not required.chiel said:Thanks Brodie.
I know the EMGO pod is a cheap knock-off filter, so i'm looking for a K&N one (preferably the oval XS400 one), possibly with a velocity stack inside to emulate the stock airbox, but i still have to go to the shop and figure things out. At least it's on my ever growing to-do list
I like the look of your DIY fork brace but have a hard time imagining that the 2mm steel sheet is stronger than the OEM fender (I believe it's 1 mm but the edge is rolled-over). I decided to cut mine back (front and rear) so it tapers out at both ends but looks flat across the bottom (retains part of the rolled-over strength) - and still (barely) retains the fender hole for the cable holder.
Edit - forgot to add that I also lowered it about 30mm so there was less air gap from the tire.
chiel
New Member
Thanks guys.
Found the same explanation about the lip inside the cheap pods blocking the inlet ports (http://www.caferacer.net/forum/project-builds/22163-81-suzuki-gs1000gl.html#post280105). Mine doesn't seem to be blocked completely, but well enough for it to get less airflow than the stock airbox.
@zap2504: Will have a look at home depot tonight for some PVC connections. As for the DIY fork brace i can't really vouch for the whole "stronger than oem fender", it just feels a lot tighter going into corners and the bike holds her line perfectly. Compared to my fender it feels a lot better, but then again, my stock fender was trashed and crappy, so not really a reference.
update: almost finished prepping for powdercoat, so will update progress soon when everything is out for paint.
I think the issue is that some pods block essential air inlets for proper mixing and internal air pressure balancing, not necessarily reduction in airflow through the venturi (but maybe that too).
I believe the SR250 carb is 34mm at the venturi so measure the inlet end to see what size neoprene coupler you need (maybe 1 1/2"?).
Edit - from cosworth's velocity stack it should be 55mm (a little larger than 2") but you would want the inside of the PVC pipe to be the same as your inlet (not sure if the ID of 2" PVC is the same; there are different "Schedules" (thicknesses) so maybe).
cosworth
Coast to Coast
I had a cheap ebay (read: chinese) k&n knock off filter on mine. It didn't block the ports. Bike ran well. Decided for some bling and bought a proper velocity stack. All port are exposed to actual intake velocities, not behind a wall of rubber with about 7-8mm in front of them. Not blocked, but airflow was slightly impeded.
I do a fair bit of highway riding and the bike struggled at 110kph. Not to get there or maintain it, but to just cruise at 110. With the velocity stack it sits rock solid at 120.
I have a stock air jet, stock idle jet. One top ring showing on the needle and a 145 main jet. I have thought about trying the 155 again with two lines showing. However, I need to install a float valve first. I have a leaky carb from an overfilled float bowl when parked.
The stack:
http://www.speedmotoco.com/product-p/sdp-bs34.htm
FYI - that plug looks ok, but I'm colour blind (don't rely on me). Tan with a hint of soot makes me happy.
samsquantch
Been Around the Block
Great little bike - how fast can these 250s go?
chiel
New Member
Thanks for the tips guys. Been busy sanding, blasting and painting stuff, so missed these posts apparently. I ended up ordering the oval tapered K&N filter that's used by the XS650 crowd, to some success. Will see how it works out when the bike is up and running again.
@zap2504: Went shopping for PVC pipes, but couldn't find any that would fit, so will try the filter without first. Thanks for the tip though.
@cosworth: Does your SR reach 120 easily? Or does it take some time? I only went up to 100-110 km/h at a slow pace. The exhaust started to produce such a screaming noise i stopped testing because i thought the engine couldn't handle it ;D But it does take a while until it reaches high speed. As for the plug color. It looks ok on the picture, but in real life it is a bright orange that's been faded.


