Follow along with the video below to see how to install our site as a web app on your home screen.
Note: This feature currently requires accessing the site using the built-in Safari browser.
We noticed you are blocking ads. DO THE TON only works with community supporters. Most are active members of the site with small businesses. Please consider disabling your ad blocking tool and checking out the businesses that help keep our site up and free.
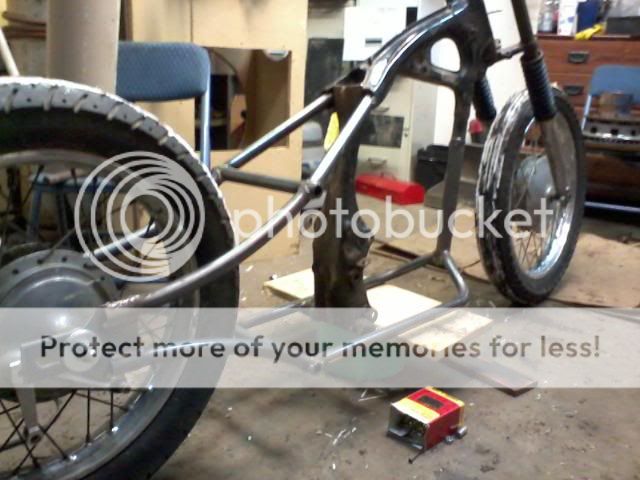
This is my first post and my first bike project. I bought a 72 honda cl350 a couple months back really cheap with a title so I thought it would be a good beginner project. As you can see from the pics I have chopped alot of the frame off. I didnt like the uneven lower frame rails so that had to go and there is a dent in the down tube so I will be replacing/lengthening it. The last pic is a sketch of what the frame will eventually look like. Im a college student so I dont have a ton of time/money to work on it but with winter break approaching I will have more time at least.
Yeah hopefully it turns out the way I want. Can't wait to be done with these last few weeks of school and then I will be able to do the fabrication and not just demolition lol. I sold some of parts that I didnt need so now I have some cash for tubing. I am getting some plate steel from my buddy this weekend to cut the rear axle mounts out of. Probably have those done middle of next week. Ill post pics. I made a little table for my horizontal band saw that bolts on when the blade is tilted up vertically so I can cut shapes out of sheet metal or plate. My buddy and I used it to cut some styling into his homemade suicide shifter for his xs650 and it worked surprisingly well. Let me know if you guys have any suggestions for the bike. Also I wanna clean up the motor but I dont want to tear it all down. Whats a good thing to used to get the crap off of it? It doesnt have to be polished just cleaned.
Alright so I finally have an update to post! I got the main portion of the hardtail completed. I think it turned out great but I will leave that up to u folks .
The jig I made for the halves of the hardtail
The two halves that I tacked on the jig
Hardtail sitting on the jig. Sewer pipe is a key component for any frame jig lol
Duct taped the lower frame rails on and through some scrap pieces coming down from the backbone to show what i will be doing. The tubes coming off the backbone wont be curved an the square down tube is temporary. I ordered tubing for that should be here by tuesday. Dont think I am goin to use the Honda tank. I was thinking about cutting the bottom of the tank out and using it as the base for a new tank. Anyone done that? Not a big fan of the stamped portions of the frame. Any ideas on how to dress that up would be nice.
Cool project. Purple power (auto store or walmart) works fantastic to clean grease and grime. If the clearcoat on the motor and other alum bits is yellowing/chipping you can use heavy duty easy off oven cleaner to remove it. After the easy off it will need repolished and clearcoated.
I really like the swooping seat rails and the axle plates are cool looking too. I'm not quite sure I understand how your jig works but if you've got everything under contol thats cool. The stamped metal is ugly as hell and to be honest if you've gone this far yu might as well get rid of it. If it were me I'd get the motor bolted back in there (or use some bracing which is probably need anyhow without the motor) and get the rest of the jig set up so you can remove the steer tube and backbone. As you know there is no tubing inside the 350 neck. Its all stamped steel. Can make your own or purchase from somewhere like here: http://www.bitterendchoppers.com/FramePartsPg1.html
I am goin to have to get some Purple Power. Thanks for the recomendation Troybilt and My94f2! Troybilt I was hoping you wouldnt tell me to cut the rest of the frame out haha! I am not sure if that is something I will do for this build. I might trim the seam on the back of the seat tube or whatever it is called and then just butt weld the 2 halves. I will take a picture to explain. Those seams that that they spot welded the 2 halves together with are my biggest pet peeve in the this project. Next bike will definitely be an all tubing frame. This one is a budget build. Alright next on the agenda is welding in the new down tube that finally showed up and then trying to figure out how to notch the frame rails to fit against the down tube. Wont get to that till the weekend probably. Thanks for the advice Troybilt! Much appreciated
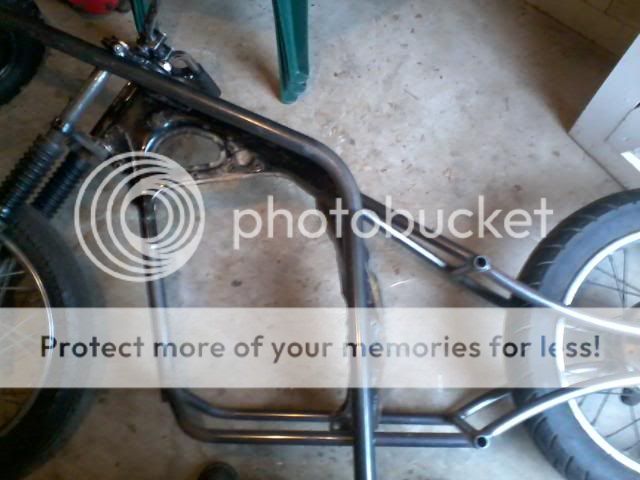
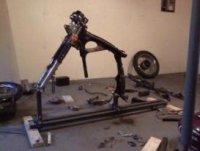
Finally got the frame welded up complete! Spent 11 hours yesterday finishing it and then went rolling around in the snow. I really like the stance. I headed back to school today so progress will be slow. I just going to be looking for parts like bars, rear fender, controls, headlight, and tail light. I am also working on designing a tank and seat.
What are some other gas tanks that will fit on my bike besides Honda tanks? The stamped backbone seems like it would make it difficult to fit other tanks on a cb or cl350 besides the factory one.
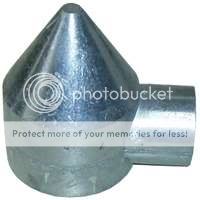
I'm picking my motor up from my buddy's house this weekend so I can get the front motor mounts made up. With the new lower frame tubes the motor is going to be a tight fit. As far as accessories I am thinking riser bars and a vintage unity spotlight for a headlight. Also I think I am going to try and make a tail light out of a bullet shaped fence cap like this:
I just have to find a lens that fits. Still looking for a fender to cut up. After the motor is mounted I will be able to design my foot controls. Anyone got suggestions for the bike?
Thanks Bobbed_out! I actually didnt bend the tubing myself. I made wood templates for each bend and then gave them to a local fab shop and they matched the templates perfectly.
Ok so as I expected the motor does not fit so I am going to be modifying the stamped section just a bit. Nothing unsafe though lol.
Well kinda of... I actually drew an arc on a piece of plywood using a string, a pencil, and a nail. Then I cut the arc out and gave that to the fab shop. I used the arc to make the jig that is pictured earlier. I had to trim the rolled tube to the right length to fit in the jig and then slot one end for the axle plate and notched the other end. Hope that makes sense. i don't have a picture of the original template.
I got a little update. I went home from college over the weekend and got a little bit done on the bike.
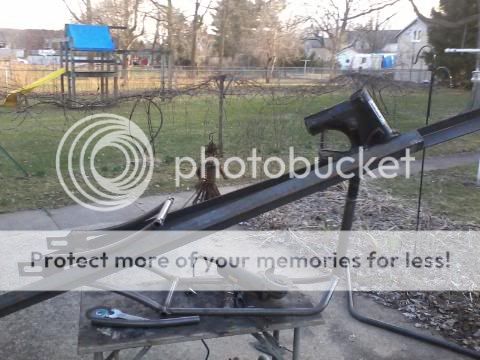
The backbone I got bent up. It is made out of 1.5 inch tubing 1/8 inch wall.
I used the angle iron from my crappy frame jig to brace the frame. Then I cut the stamped steel out of the frame. I finally took your advice troybilt. However I am not going to replace the head tube. I am just going to blend the back bone into the stamped steel. I still have alot of finish work to do as well as welding the new backbone in. Should look alot better when its done.
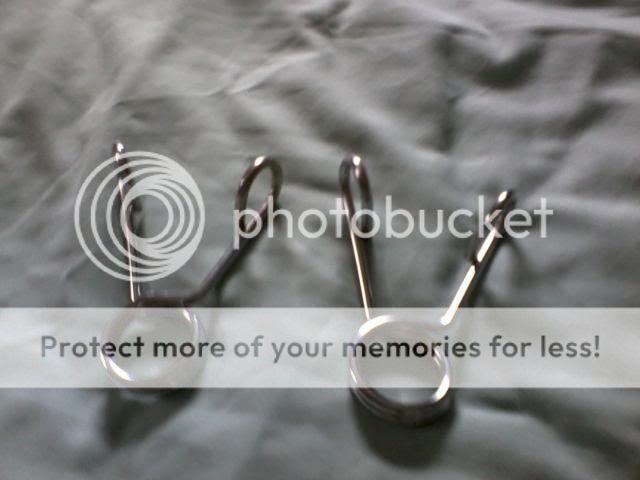
These are some springs that I found at a local thrift store for $1. They are clamps to hold weights on a bench press bar. I thought I might be able to used them for seat springs but they are not heavy duty enough. Oh well, I will find something to do with them.
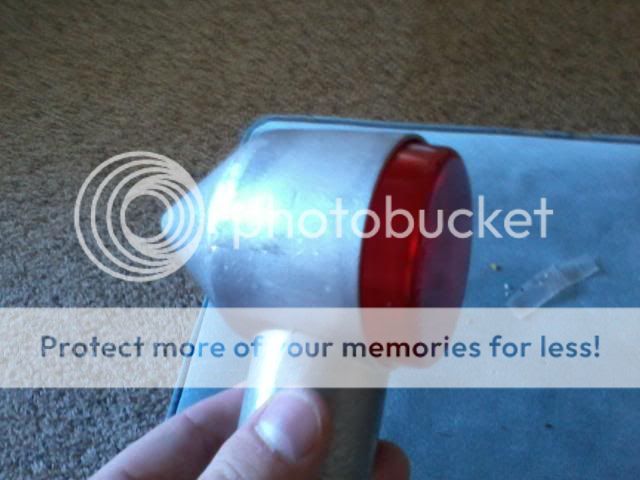
This is my budget tail light. Unfortunately the light I used is only a marker light and I don't think that will work for a break light. It is a little too big also.
Kind of depressing to cut the frame again but it had to be done . Hope to make more progress in a couple weeks.
Man that is going to be sweet. A couple things you might consider: make 100% sure the motor will go in there. The 350 stamped frame has a recess that the motor fits around. If there is any doubt at all make the top of the backbone longer and the downtube continue a little farther back on the bottom rails. The downtube is where you are hurting for room.
The way its pictured now I don't think the motor will go in there. If you do end up with the downtube further back in the frame make sure you have clearance for the carbs.
Something else, the back bone length is very short and it will greatly limit your tank choices. Von Yinzer is running a minibike tank on his 350 chop and it barely fits. . The other tricky spot will be tying that into the stamped part. Very tricky indeed. Major props to you for giving it a go.
One suggestion is to level your table up and use clamps to clamp the frame down. Then make sure the frame is sitting level. Once you get it level it makes it easy to plumb the downtube of the backbone. You can toss you rear axle back in and mark the center. Then tie a string around the steer tube and take it back to the mark. Makes getting it a lined back up real easy.
Hope I'm not over stepping here but thought it might help save some headaches... Good luck man I can't wait to see how she comes out
This site uses cookies to help personalise content, tailor your experience and to keep you logged in if you register.
By continuing to use this site, you are consenting to our use of cookies.

 looks like a good start. i like the drop out design