72 xs650.

andrew

Been Around the Block
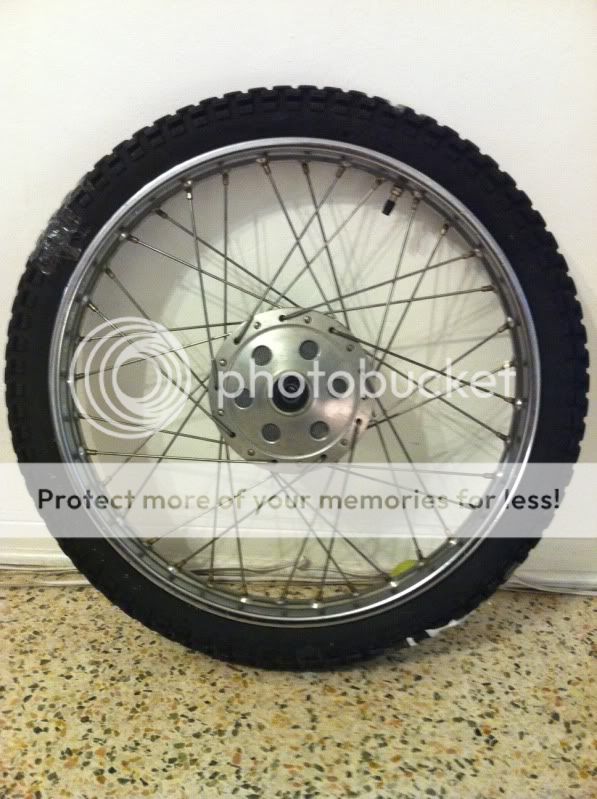
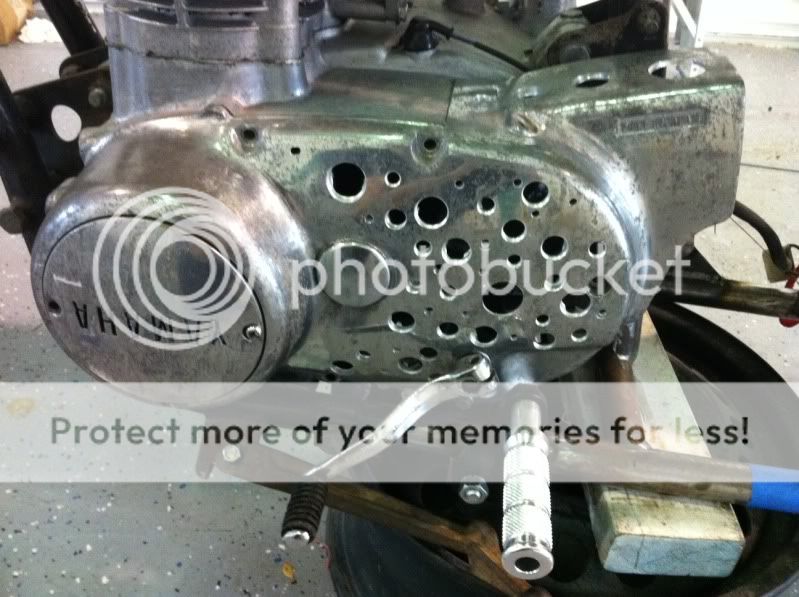
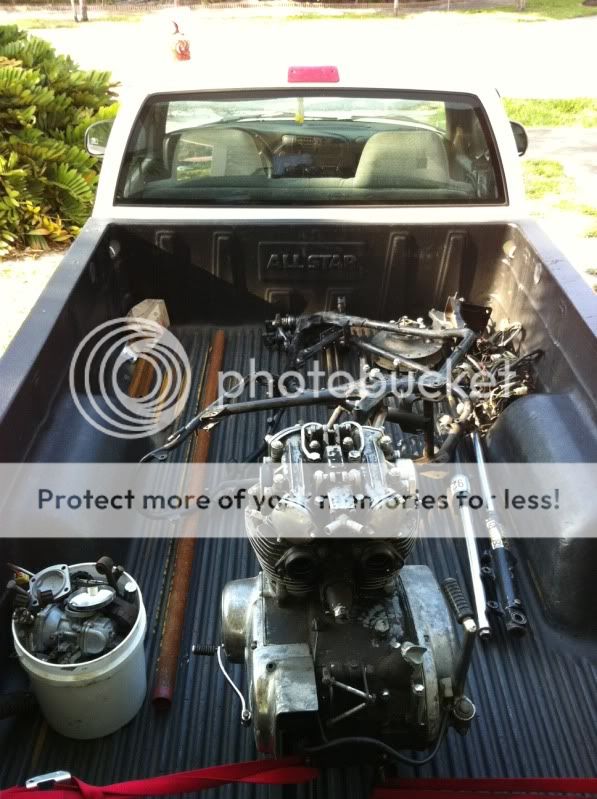
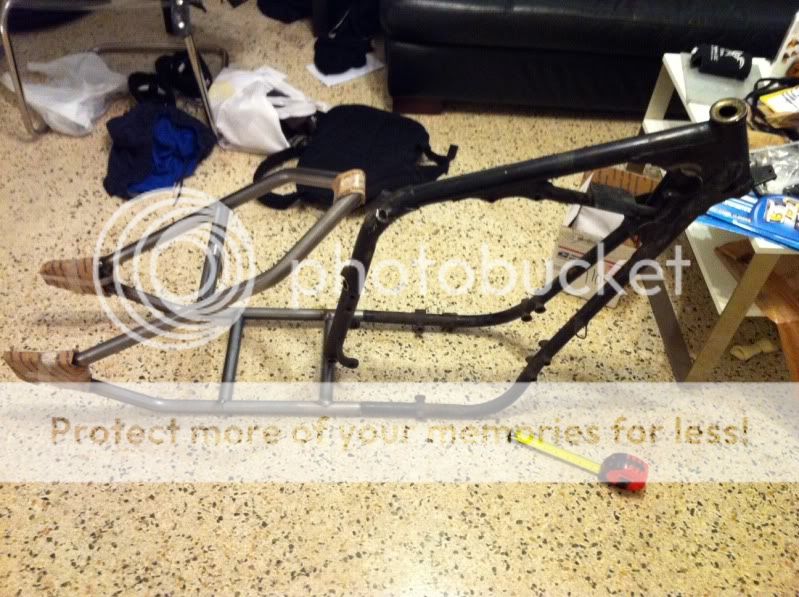
a few weeks ago i bought a partial basket case from a friend of a friend. i got the 72 frame and motor, late model forks and triple tree, axles, wiring harness, carbs and a bucket full of random hardware.
x21.jpg

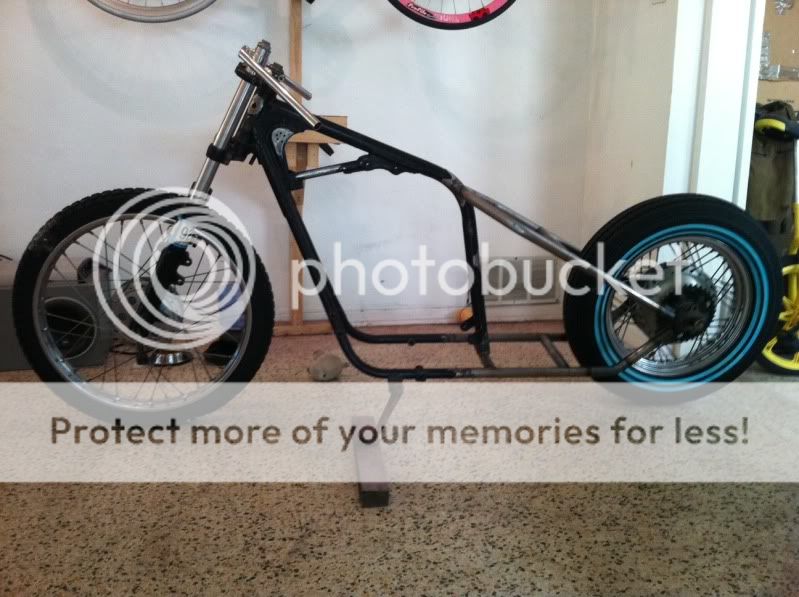
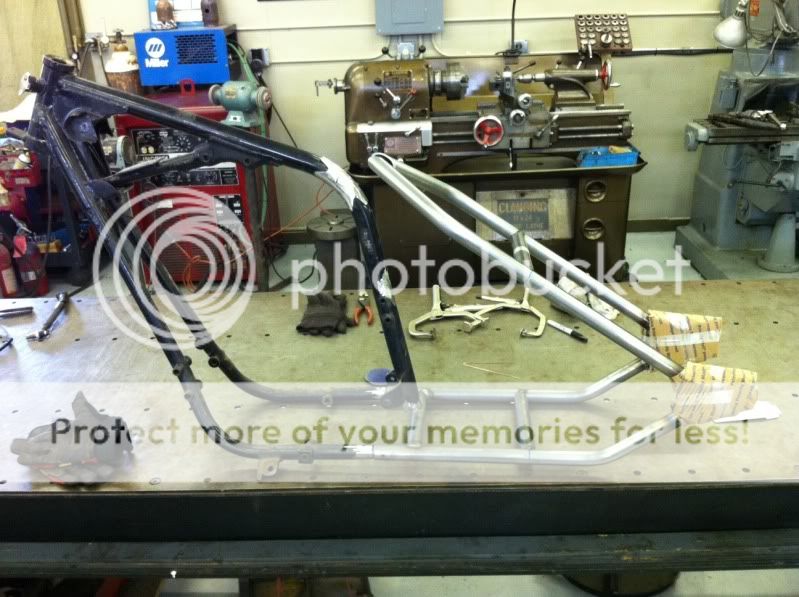
got it home and started cutting it in half. i ordered up a hardtail section from TCbros, when that showed up i took the front frame half and the tail section to my buddies shop to mate the two.
x22.jpg

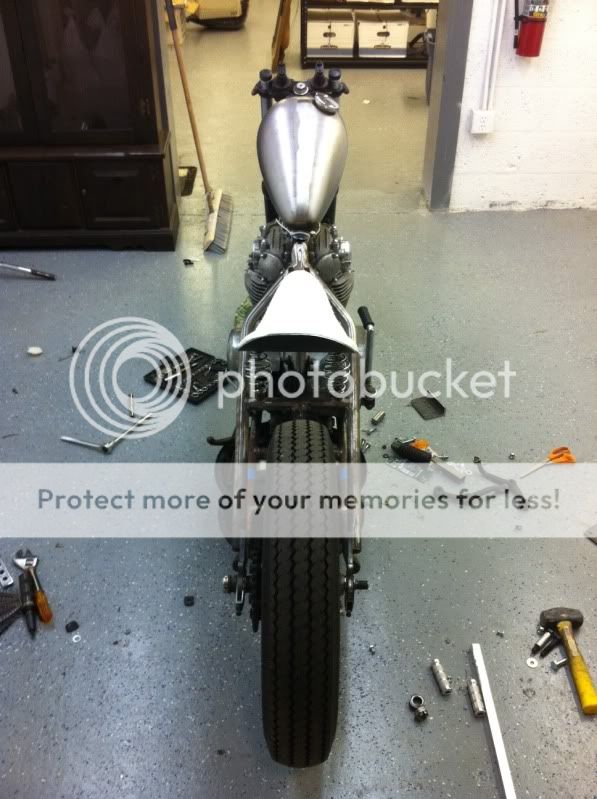
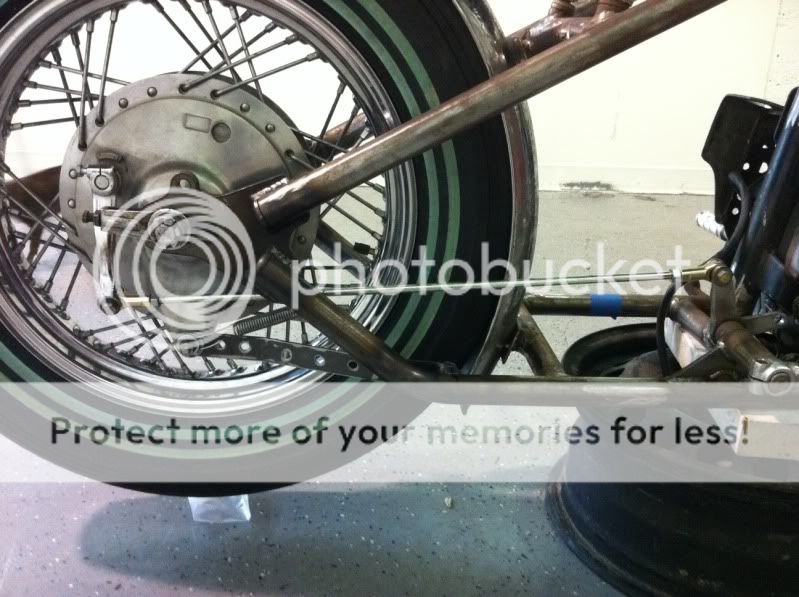
first test fit/mock up.
x23.jpg

as you can see, even though these hardtails are designed to fit early and late frames, they def. dont fit the early frames very good at all.
x1.jpg

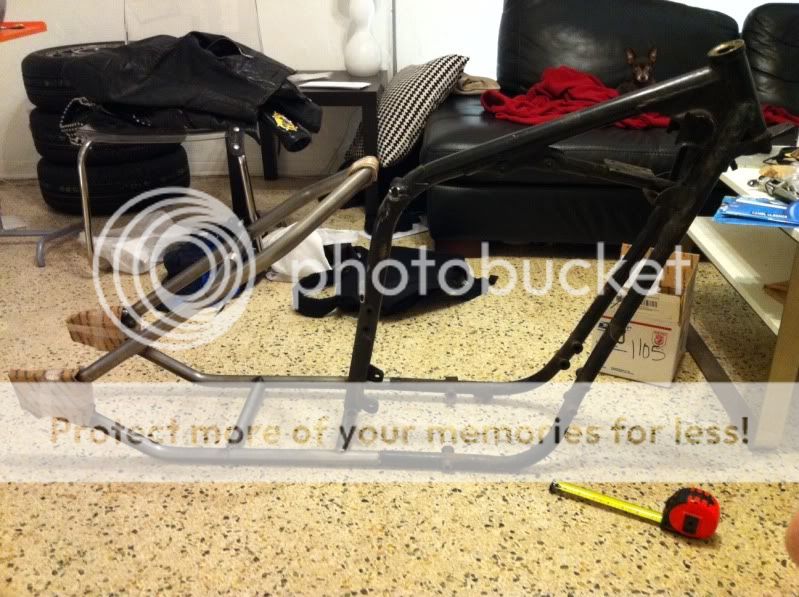
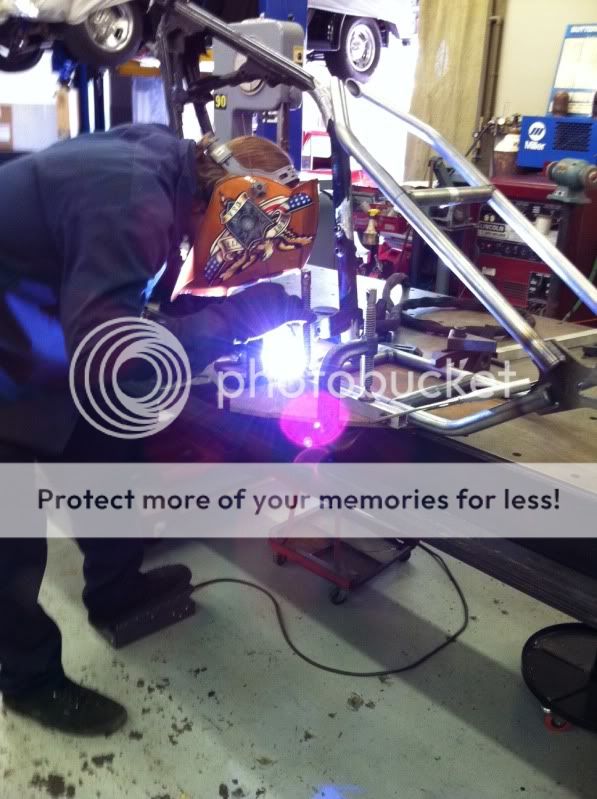
we ended up having to heat the rear lower rails to bend the entire seat rail area down to meet the stock back bone. and another issue we ran into was the slug to meet the upright frame piece to the bottom rail of the hardtail was completely too small. good thing my buddy own a hot rod shop and has every tool and lathe at his disposal. we had to machine and make a completley new slug that was wider and longer than the one supplied in the kit. not a big deal, just more time.
x2.jpg

.
x3.jpg

.
x4.jpg

.
x5.jpg

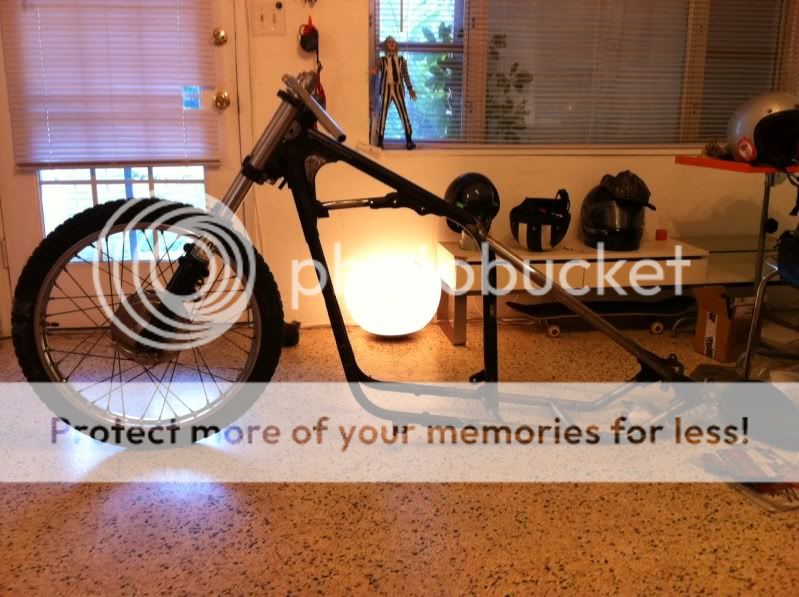
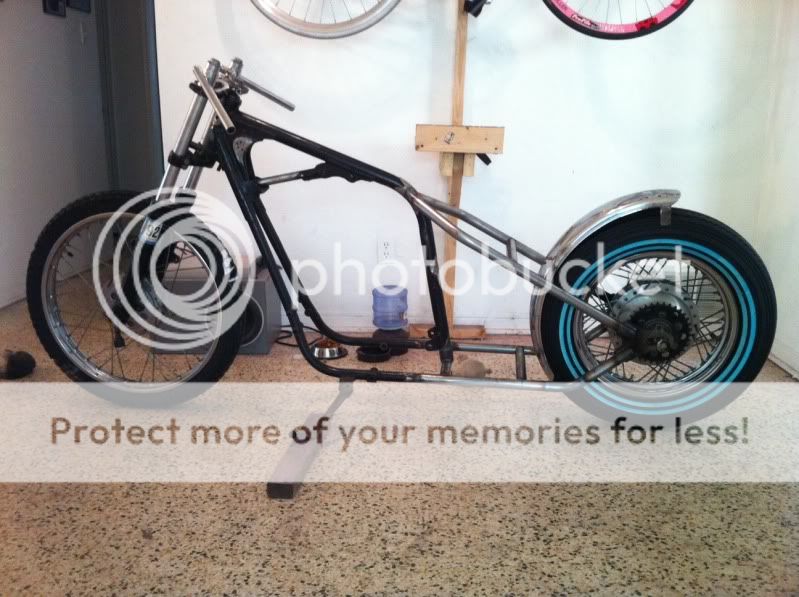
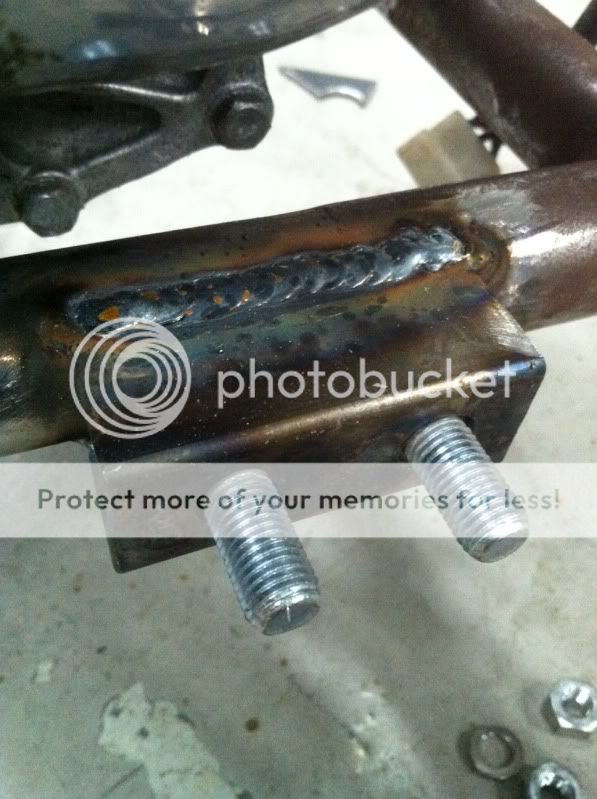
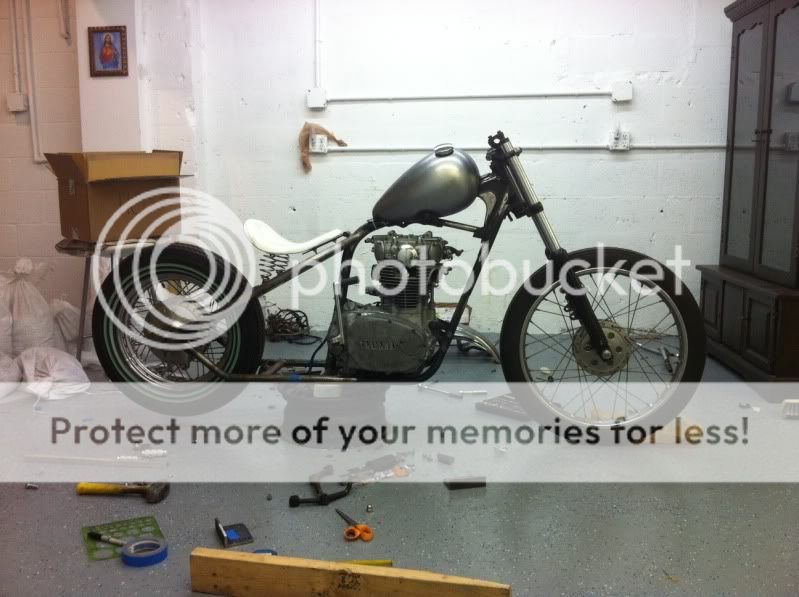
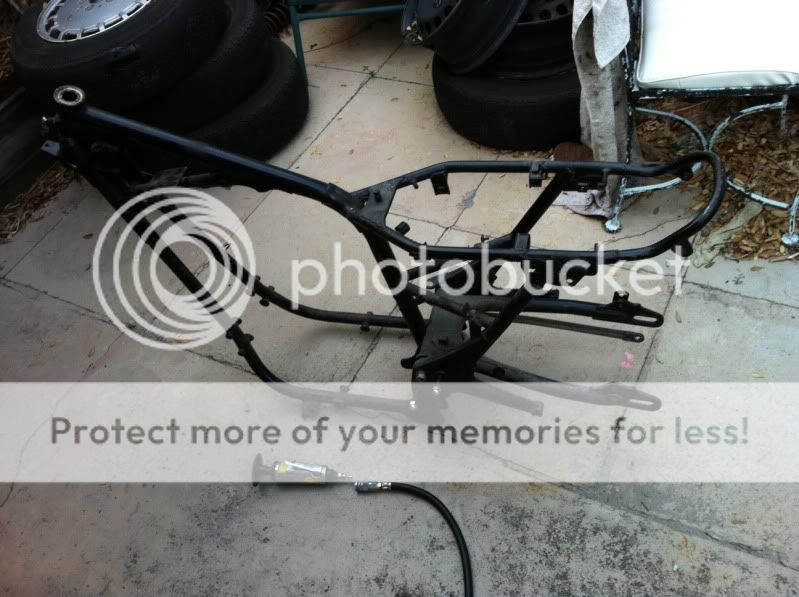
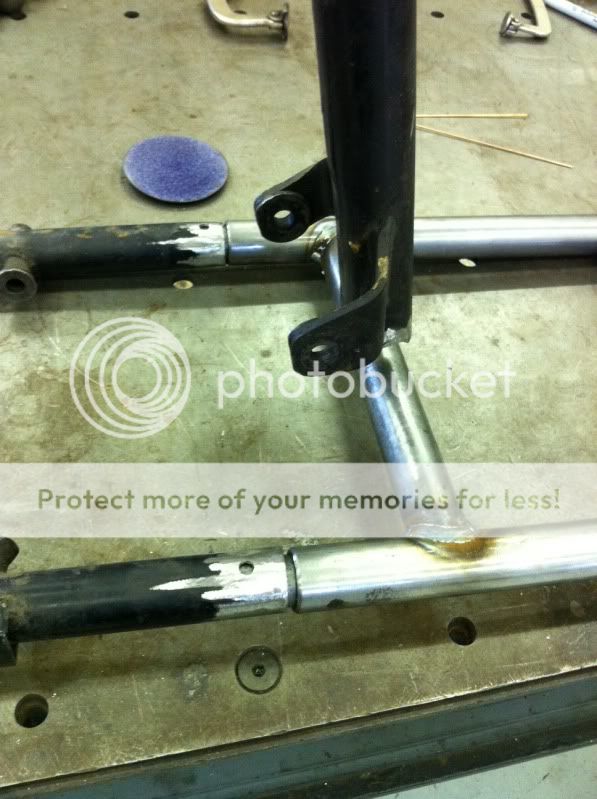
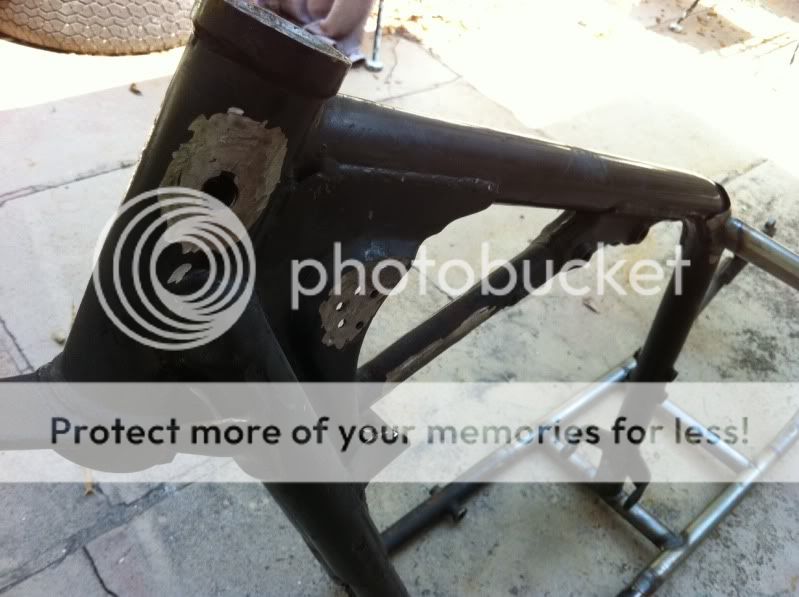
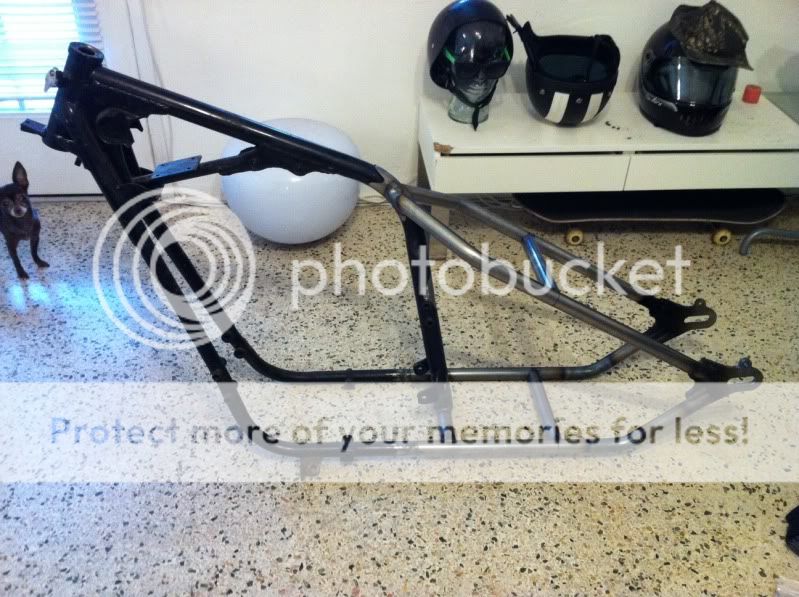
finished up the frame in time for the iron maiden concert that night. started cutting off all the unnessesary tabs and mounts on the frame.
x7.jpg

.
x6.jpg

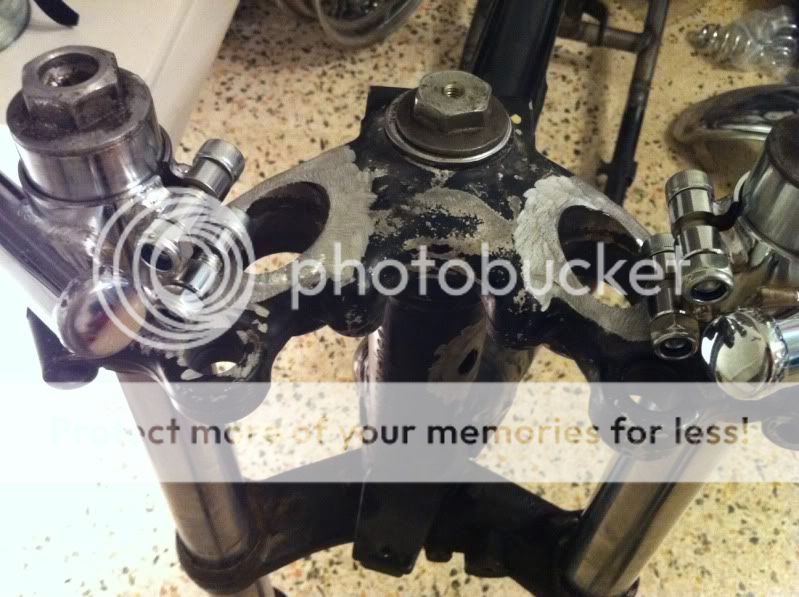
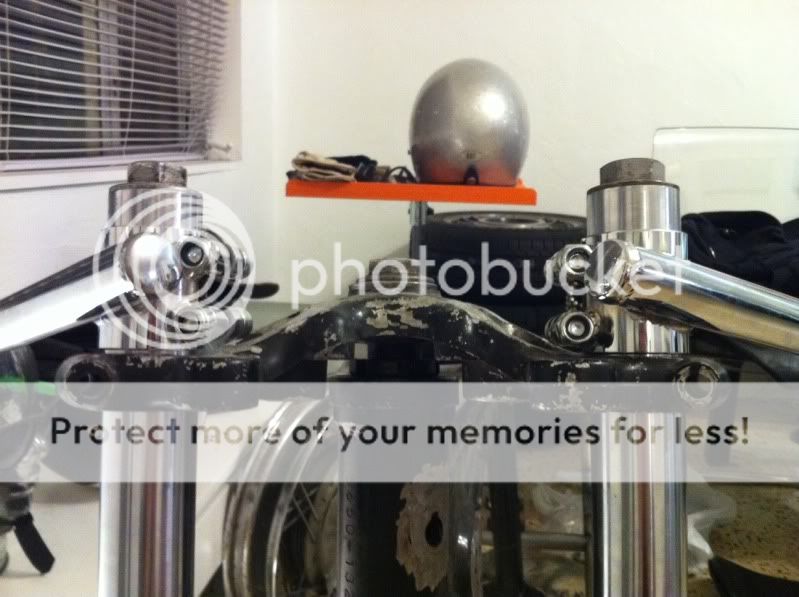
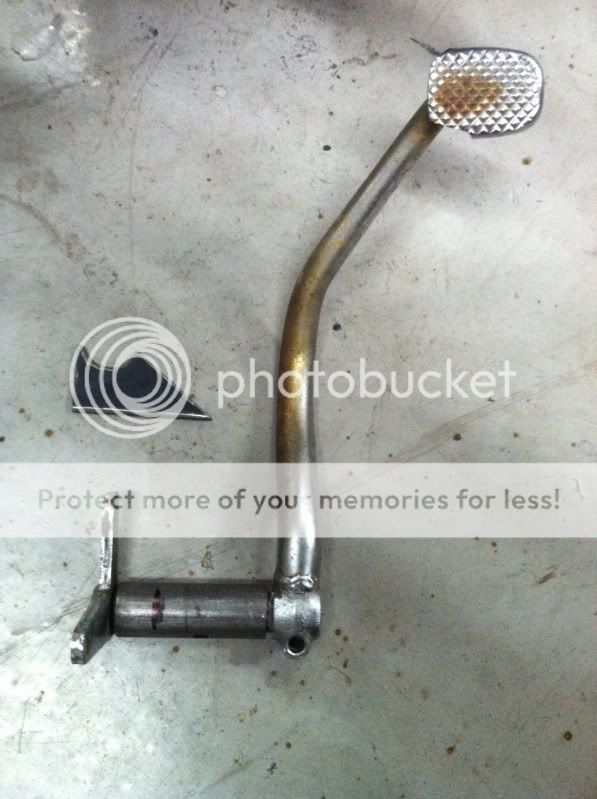
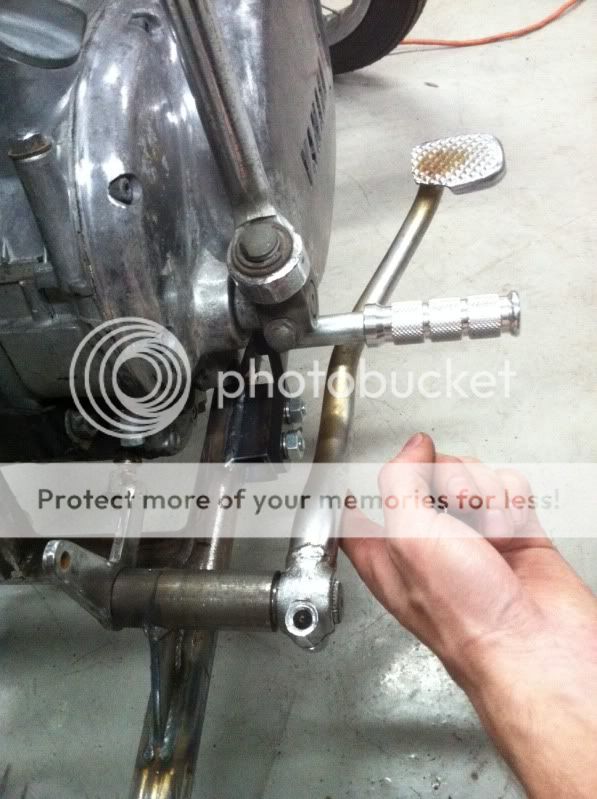
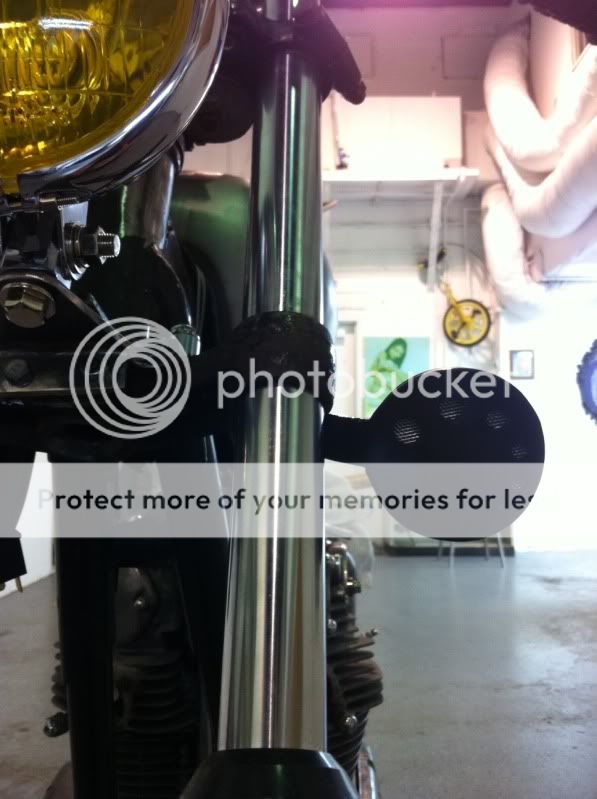
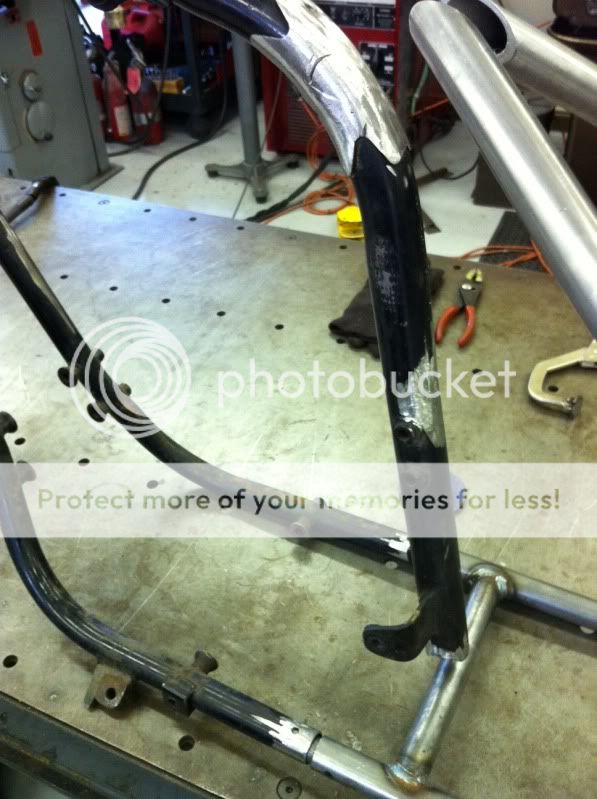
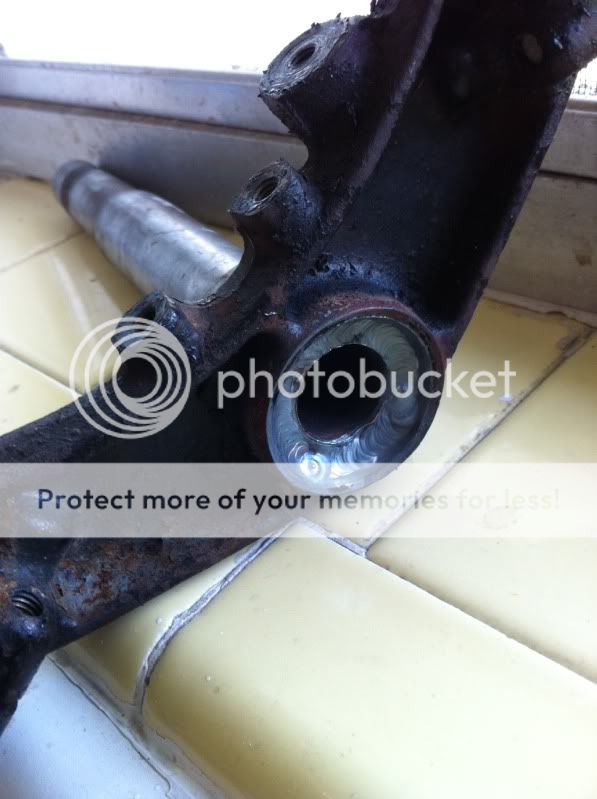
after i finished the frame i had to address the late model forks/triple trees on the early frame, as the late model lower triple clamp has a longer steerer stem. my first thought was to find someone who could tap the stem down another 3/4 -1". after a few calls, i soon found out no one had a tap that big nor in that size. called up a local chopper shop and talked to the guy and he said he had an idea. drove out to his shop and had him throw it on a lathe to remove the factory weld on the bottom of the lower clamp and then pressed it down 3/4 of an inch and then rewelded it back in place. problem solved. late model front end on an early frame with out stacking a bunch of lock nuts or washers to compensate for the height difference. to me, that would just look hokey and half assed.
x9.jpg

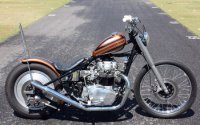
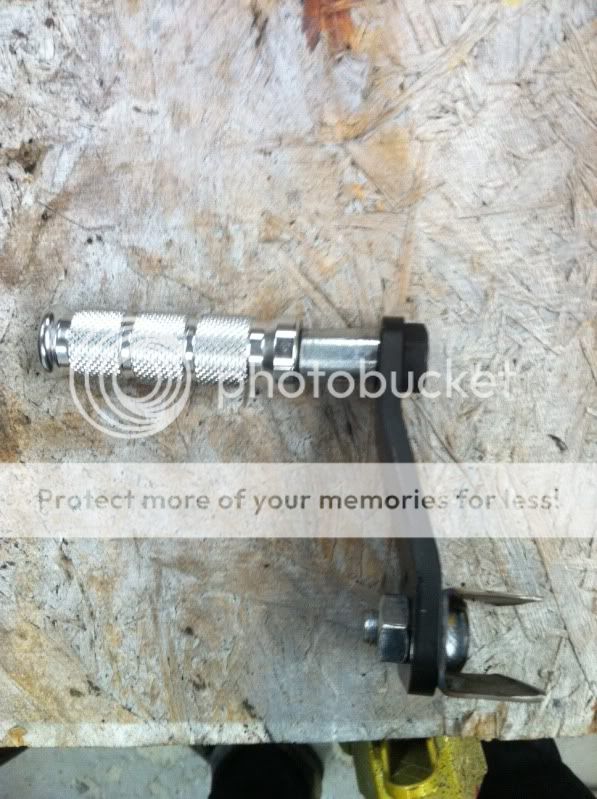
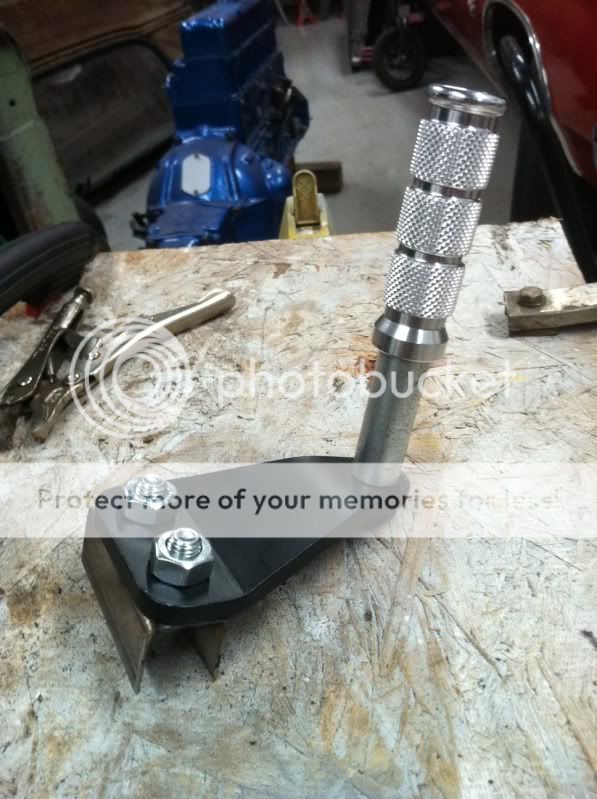
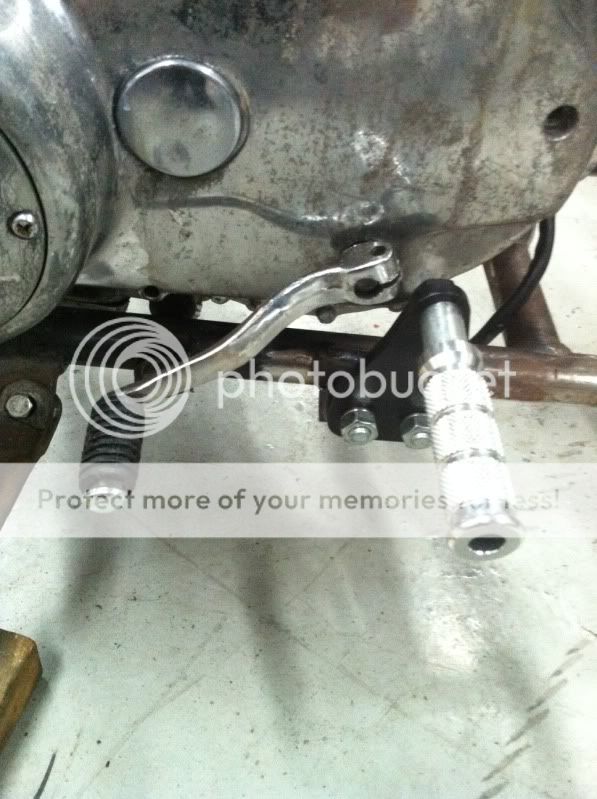
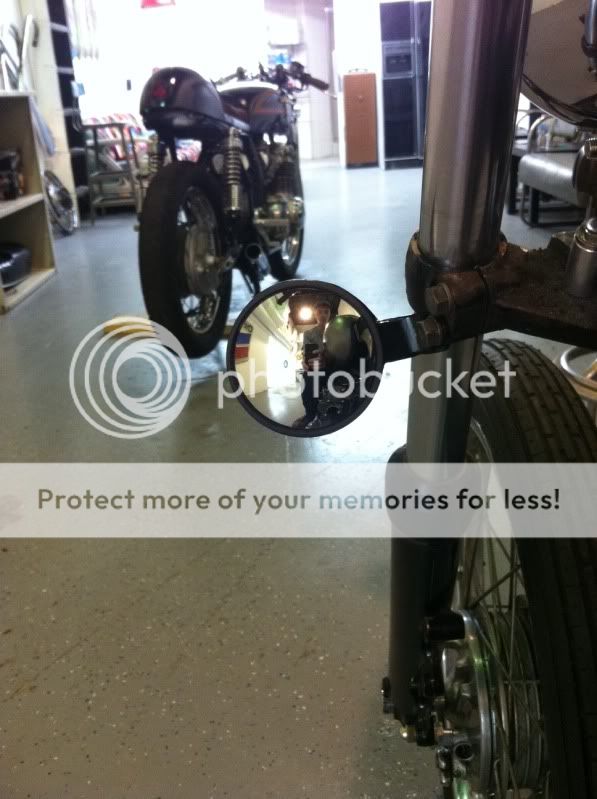
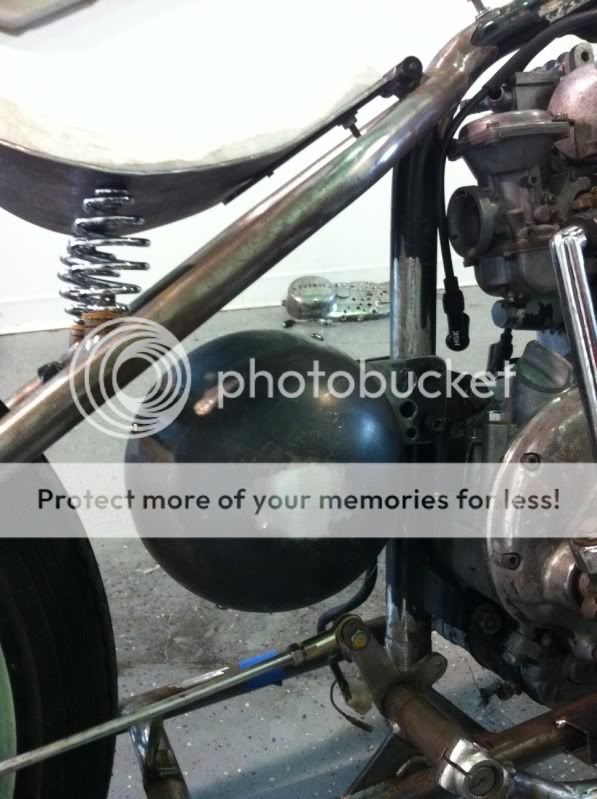
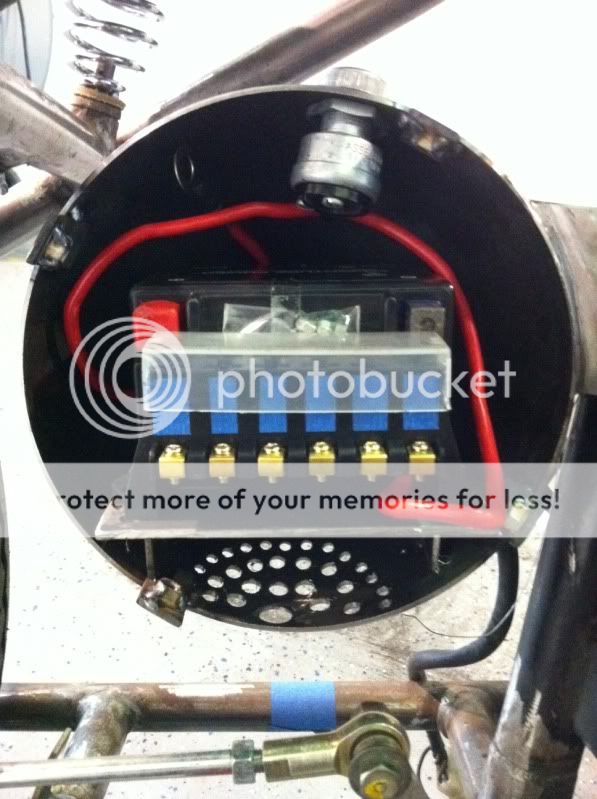
still have to have my biltwell solo seat pivot welded to the back bone and the spring mounts welded to the cross section of the frame and then i can blast it and paint up the frame. but that will be a ways down the road, as i still need to do a bunch of mock up and mount tabs for the mid controls, chain tensioner, battery box, etc.
 
Re: 72 xs650 bobber.

got my clip ons in the mail and soon found out that i would have to do some metal removal and smoothing to fit them above the triple clamp as i wanted to. cut and rough sand.
x16.jpg

.
x17.jpg

im going to remove all the other unnecessary tabs on the clamp as well and smooth it out. mot likely will get polished in the end.
 
Re: 72 xs650 bobber.

my 21" front came in the other day and i was dying to see how it would look sitting between the forks.
x13.jpg

really looking forward for my rear tire to show up monday so i can mount the rear 16" wheel and make it a roller. today i decided i would give drilling the hub a go and see what happened. heres how i did it. i drilled piolet holes from in inside out first. this way i could evenly space and center each piolet hole in the "boxes" of the hub. then i took a step bit from the outside of the hub and made them the size i wanted.
x10.jpg

i then took a cone sanding attachment and smoothed out each hole, giving them a slightly beveled apearance.
i then took the wheel outside and hit the inside with engine degreaser to get it nice and clean. after it was clean and dry i took a drill bit and moved it around each hole to "roughen" up the surface area for the jb weld to adhere to. i used jb weld keep the screen backing in the hub.
x18.jpg

i then cut out 6 pieces of metal screen, bent them up and then mixed up a batch of jb weld. slapped some n each hole and stuck in the screen pieces.
x19.jpg

.
x20.jpg

let it cure and now have a slightly different look to a more or less plane hub.
x15.jpg

.
x14.jpg

and that brings it up to date. im hoping to get to my buddies shop tomorrow to finish up the seat pivot welding as well as the spring mounts so i can mount my west eagle seat. updates soon.
 
Re: 72 xs650 bobber.

rear tire came in today. mounted it at work and slapped the wheel on the bike for mock up.
photo1-29.jpg
was kinda bummed that the front xs axle didnt fit into the xl175 wheel, as i read on another forum that it uses the same size axle....? guess ill just have to drill out the brake side of the hub as well as the bearings to make the xs axle work. i set an old xs front fender on the wheel to see how it would fit.
photo2-30.jpg
looks like itll work fine, im going to cut it down some, itll probably be 4-6" shorter in overall length. gotta order some threaded bungs so i can weld them on this weekend. hoping to get the fender bungs in place and welded on as well as the spring mounts and seat pivot. updates soon.... i hope.
 
Re: 72 xs650 bobber.

Cool stance. It doesn't have much of a stretch, does it?


It'll steer very weird with that steep front end, especially with the big wheel. I'd advise going to wider bars.


Attached is a little bit of inspiration.
 

Attachments

  • XS650_01-550x343.jpg
    XS650_01-550x343.jpg
    73.5 KB · Views: 1,039
Re: 72 xs650 bobber.

I had to do the same thing to my 35mm triple tree when mounting to my '72 frame. But, when I went to install the lower tapered bearing race on the stem, we found the stem actually tapers a bit as you come off the lower tree and the race was loose.

Have you mounted your bearings yet? We added some material to the stem in the bearing race area and turned it down to the right size.

What a PITA that all was. When I started it was under the assumption (given lack of information otherwise) that the later front ends would just bolt right onto the earlier frames. So it was one surprise after the other.
 
Re: 72 xs650 bobber.

PHeller said:
Cool stance. It doesn't have much of a stretch, does it?


It'll steer very weird with that steep front end, especially with the big wheel. I'd advise going to wider bars.


Attached is a little bit of inspiration.
the hardtail section i believe is 3" stretch, and retains 5" of ground clearance. (what tcbros claims) as for the front half, its the stock geometry. given the later forks arent any longer, i dont see why it would steer any different. perhaps im missing something here? guess i wont know till i get it a complete roller and coast it down my street.
 
Re: 72 xs650 bobber.

Tim said:
I had to do the same thing to my 35mm triple tree when mounting to my '72 frame. But, when I went to install the lower tapered bearing race on the stem, we found the stem actually tapers a bit as you come off the lower tree and the race was loose.

Have you mounted your bearings yet? We added some material to the stem in the bearing race area and turned it down to the right size.

What a PITA that all was. When I started it was under the assumption (given lack of information otherwise) that the later front ends would just bolt right onto the earlier frames. So it was one surprise after the other.
yes i put in the stock ball bearings. it all seems fine and tight right now, but i havnt torqued it down really tight, nor have i checked it too much for lateral play, but it seems fine at the moment. *crosses fingers*
 
Re: 72 xs650 bobber.

started working on this ol gal a few weeks ago. i am taking some time off from working on these cafe bikes to give my little chopper some attention. started by making some mid mounts. used 1x1 square tubing and welded 2 bolts from the inside out to attach the monstercraftsman brackets to. the nuts will get replaced with acorn nuts, as this is still mock up stage. the pegs are gsxr aluminum pegs.
photo2-105.jpg

.
photo2-109.jpg

.
photo1-103.jpg

.
photo3-86.jpg

.
photo5-23.jpg
 
Re: 72 xs650 bobber.

i used the brake pedal from a cb550 and made a pivot for it.
photo1-100.jpg

.
photo3-82.jpg
 
Re: 72 xs650 bobber.

didnt like the size or the feel of the west eagle seat, so i cut a new pan out of 11ga sheet metal and bent it. welded a few studs to the underside and did a rough cut of some foam so i could sit on it to mock up other parts.
photo2-104.jpg

.
photo1-99.jpg

.
photo3-81.jpg

.
photo4-46.jpg

since this photo, i have swapped out the 4" springs shown for a set of 3" springs.
 
Re: 72 xs650 bobber.

used some flat stock to make a brake stay for the rear hub. bent it to make up the width difference and drilled some holes for aesthetics. i had an extra set of seat spring bungs laying around so i used one of them, threaded the "nub" that would usually sit inside the spring and used it for an anchor point on the frame rail to attach to. also bought 2 heim joints and threaded some round stock to make the brake linkage.
photo2-103.jpg

.
photo1-98.jpg

.
photo3-80.jpg

the spring in the photos is the return spring, and is temporarily mounted, but will most likely stay in that area.
 
Re: 72 xs650 bobber.

taillight came in and i whipped up a bracket to attach it to. pretty much the plate bracket will attach at the axle, will be vertical, and the light will be fixed to the top like every other tail light bracket you see around. ill post pictures of it on the bike once its welded.
photo2-108.jpg

.
photo1-102.jpg

.
photo3-85.jpg
 
Re: 72 xs650 bobber.

drilled sprocket cover. will eventually get polished once i tear down the bike for paint/polish/chrome.
photo1-101.jpg

.
photo2-106.jpg
 
Re: 72 xs650 bobber.

got my headlight in, tinted it, and made a bracket to attach it to the lower triple.
photo3-83.jpg

also whipped up a 3" mirror to attach to the lower triple clamp. i really dislike anything hanging off the side of the bike, but the local law down here is strict with having atleast 1 mirror.
photo4-48.jpg

.
photo5-24.jpg

.
photo2-107.jpg

.
photo3-84.jpg

im working on a few more things at the moment, and am waiting on some parts to show up. updates soon.
 
Re: 72 xs650 bobber.

Looks like it's coming along well. Diggin all of the DIY fab work. I say take OCC off the air and repace it with The "DIY Bike Show".
 
Re: 72 xs650 bobber.

been meaning to update this for a little while now. ive got some things buttoned up, but still lots to do. finished up the electronics compartment.
photo3-91.jpg

.
photo1-108.jpg

.
photo4-52.jpg

.
photo1-107.jpg

the reg/rec. for the pma will mount on the bottom of the shelf. holes were drilled to allow cool air to the fins and to keep everything a tad bit cooler.
 
Back
Top Bottom