
We noticed you are blocking ads. DO THE TON only works with community supporters. Most are active members of the site with small businesses. Please consider disabling your ad blocking tool and checking out the businesses that help keep our site up and free.
You are using an out of date browser. It may not display this or other websites correctly.
You should upgrade or use an alternative browser.
You should upgrade or use an alternative browser.
SR250 New Zealand Garage Build
- Thread starter vphillipson
- Start date

vphillipson
New Member
vphillipson
New Member
Re: SR250 Build
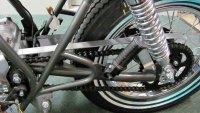
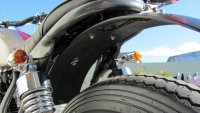
I made a chainguard out of a bit of aluminium flat bar, rivetedsome supports to it, looks a lot cleaner and less cluttered than the stock one.
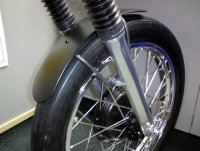
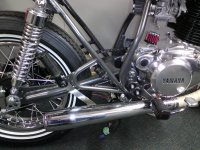
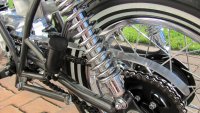
The original exhaust header was pitted with rust so I decided to wrap it, new ones are fairly expensive and postage is down here, it looks white in the picture but it has tuned a browny grey colour now which loks good.
I made a chainguard out of a bit of aluminium flat bar, rivetedsome supports to it, looks a lot cleaner and less cluttered than the stock one.
The original exhaust header was pitted with rust so I decided to wrap it, new ones are fairly expensive and postage is down here, it looks white in the picture but it has tuned a browny grey colour now which loks good.
Attachments

vphillipson
New Member
vphillipson
New Member
Re: SR250 Build
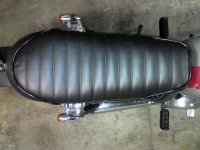
Bought some foam for the seat pan. Glued and shaped it but will leave the final cover for a professional.
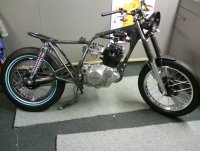
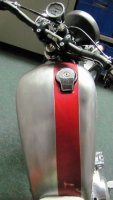
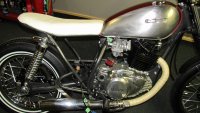
The more I researched the more I liked the bare metal tank look. I stripped the paint off it but left a stripe of the old paint
off to one side to break it up. Its got no clear coat or anything, I just polish it with wax every now and then and it doesn't
rust at all.
Bought some foam for the seat pan. Glued and shaped it but will leave the final cover for a professional.
The more I researched the more I liked the bare metal tank look. I stripped the paint off it but left a stripe of the old paint
off to one side to break it up. Its got no clear coat or anything, I just polish it with wax every now and then and it doesn't
rust at all.
Attachments
vphillipson
New Member
Re: SR250 Build
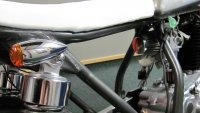
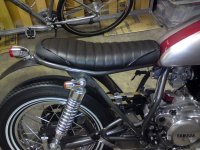
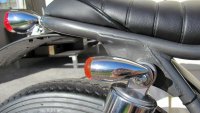
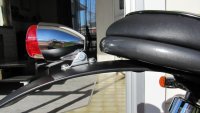
The seat came back from the upholsterers, they did a great job. Went down the home made route just to keep the cost of the project down. Mounted the tail light , time is coming to wire it up!
The seat came back from the upholsterers, they did a great job. Went down the home made route just to keep the cost of the project down. Mounted the tail light , time is coming to wire it up!
Attachments
vphillipson
New Member
Re: SR250 Build
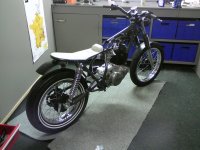
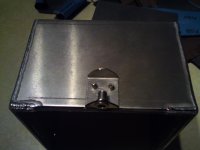
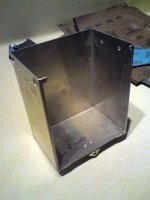
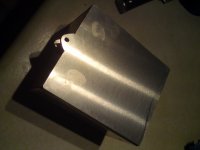
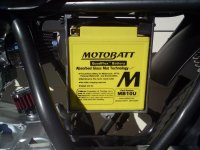
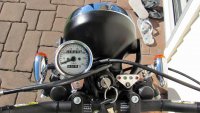
Decided to keep the standard size battery, I like the look of having nothing in the frame, but also having a visible battery box. Tried to make a feature of it, the lid comes of by removing a screw on the front. Had the box folded and welded, then gave it a light polish.
Decided to keep the standard size battery, I like the look of having nothing in the frame, but also having a visible battery box. Tried to make a feature of it, the lid comes of by removing a screw on the front. Had the box folded and welded, then gave it a light polish.
Attachments
vphillipson
New Member
vphillipson
New Member
vphillipson
New Member
Re: SR250 Build
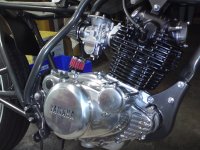
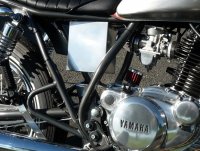
Made a small bracket for the recitfier and mounted it underneath the lower triple tree. Good airflow and hardly noticable.
Managed to source some new tank badges which were still on the way.
Made a small bracket for the recitfier and mounted it underneath the lower triple tree. Good airflow and hardly noticable.
Managed to source some new tank badges which were still on the way.
Attachments
vphillipson
New Member
Re: SR250 Build
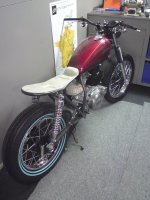
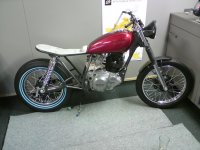
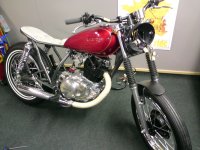
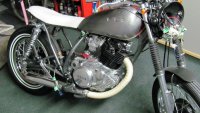
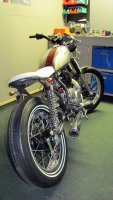
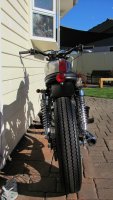
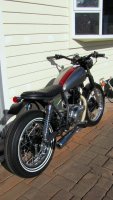
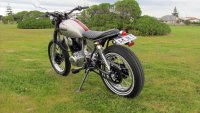
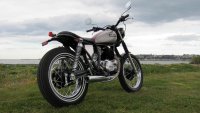
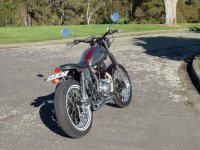
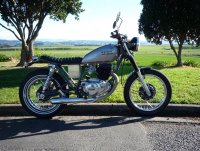
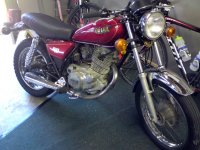
All done, here's a few finished pics.. picked up some cheap rear view mirrors, hopefully will go to bar-end ones later on.
Had great fun with this bike, a lot of time and not much money spent on it and shes looks completely different than before!
All done, here's a few finished pics.. picked up some cheap rear view mirrors, hopefully will go to bar-end ones later on.
Had great fun with this bike, a lot of time and not much money spent on it and shes looks completely different than before!
Attachments
vphillipson
New Member
vphillipson
New Member
Re: SR250 Build
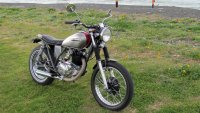
It goes really well, just put a new plug and lead on it, the old one was on its way out. Finding with the flat seat you kinda find the best place to sit vs the original one which was one area only. Sitting a lot lower so it corners a bunch better. Removing the airbox seems to have livened it up as well
It goes really well, just put a new plug and lead on it, the old one was on its way out. Finding with the flat seat you kinda find the best place to sit vs the original one which was one area only. Sitting a lot lower so it corners a bunch better. Removing the airbox seems to have livened it up as well
Canuck Plumber
Badges? We don't need no stinking badges!
Re: SR250 Build
Great looking build.
Great looking build.
SteveG
Been Around the Block
Re: SR250 Build
I've already got a cone filter for the bike, I've just got to finish cleaning the carb to fit it. Did you have to re-jet? I hear they run a bit lean without the air box. I was going to buy a new main jet and move the needle a click or two depending on how it ran.
vphillipson said:It goes really well, just put a new plug and lead on it, the old one was on its way out. Finding with the flat seat you kinda find the best place to sit vs the original one which was one area only. Sitting a lot lower so it corners a bunch better. Removing the airbox seems to have livened it up as well
I've already got a cone filter for the bike, I've just got to finish cleaning the carb to fit it. Did you have to re-jet? I hear they run a bit lean without the air box. I was going to buy a new main jet and move the needle a click or two depending on how it ran.


