Follow along with the video below to see how to install our site as a web app on your home screen.
Note: This feature currently requires accessing the site using the built-in Safari browser.
We noticed you are blocking ads. DO THE TON only works with community supporters. Most are active members of the site with small businesses. Please consider disabling your ad blocking tool and checking out the businesses that help keep our site up and free.
I got a surprise in the mail today so I had to do some test fitting. 13.25" hagon shocks from Dave Quinn Motorcycles. These should give me the clearance I need for the electronics tray.
In the second picture you can see how I decided to secure the battery. Made a couple hooks, welded them on, and found a use for a rubber strap that's been sitting around. Trimmed it and put a hole in each end.
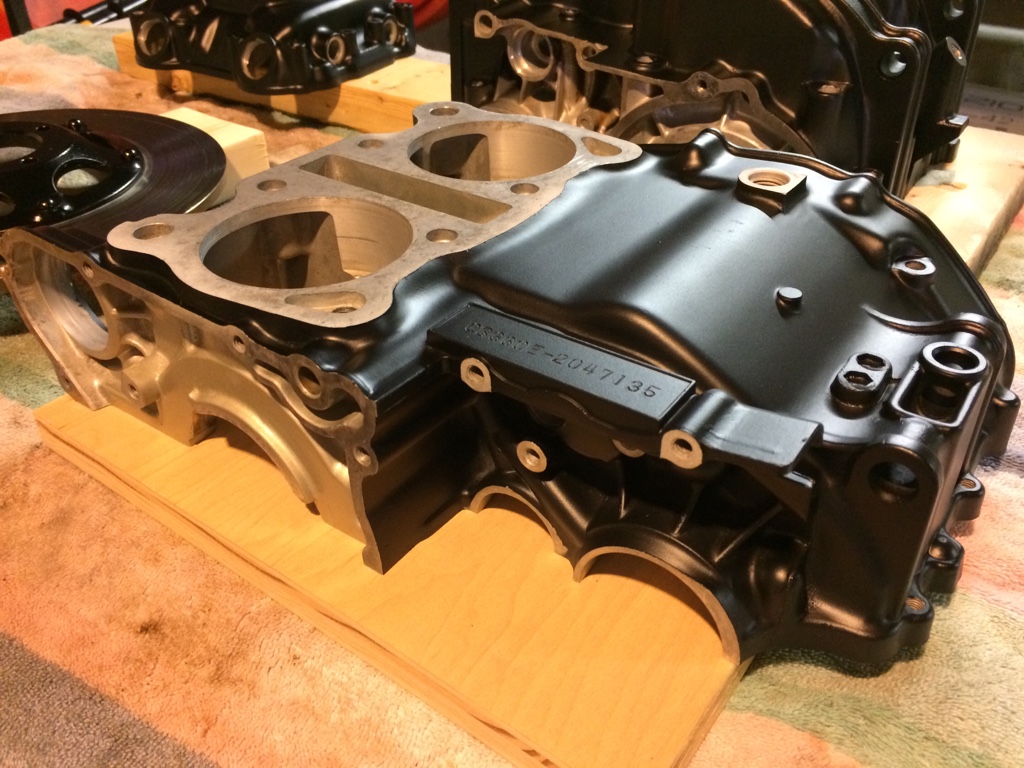
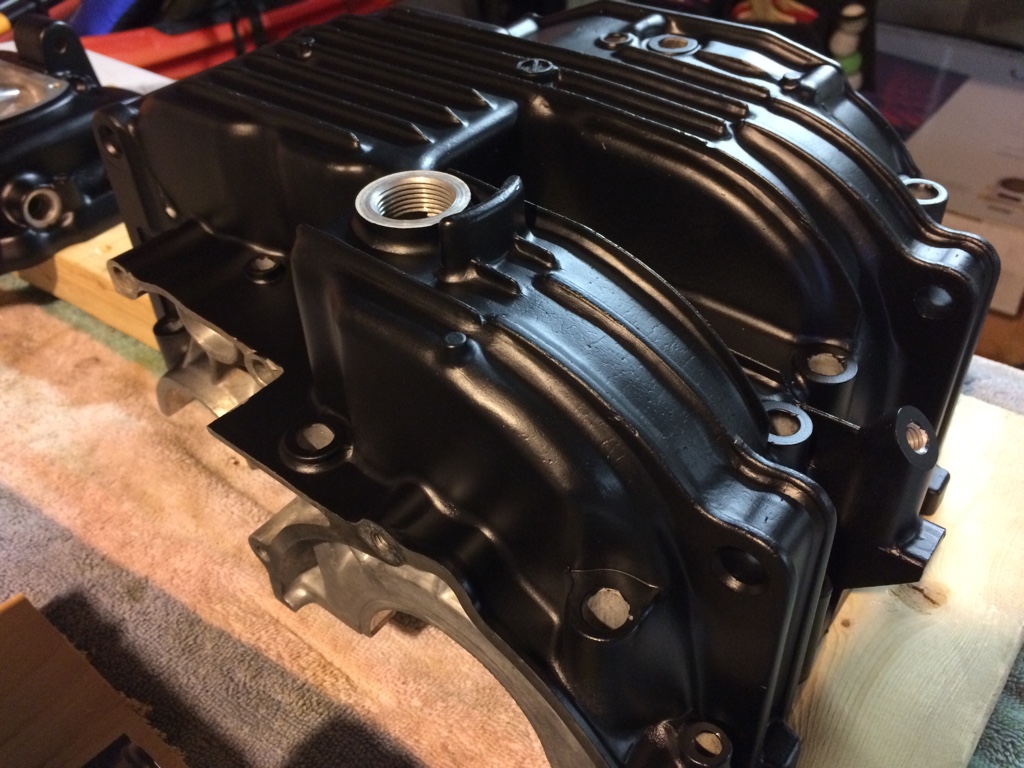
I also finished sand blasting my engine cases for paint. Cleaned them all real good to get rid of any glass particles but I'm going to clean them a second time before I actually paint. I want to make sure nothing is hidden in any little passage. The last thing I need is some glass beads ruining my engine!
I'm especially proud of how I decided to mount the seat. No bolts to deal with. I used a quick-latch http://www.quik-latch.com/black-anodized-mini-quik-latch.html so all I need to do is press a button to release the seat. And just have to snap the seat down to secure it. I got all my metal tabs from A&A Manufacturing. They were super helpful and even made me custom tabs for no extra charge!
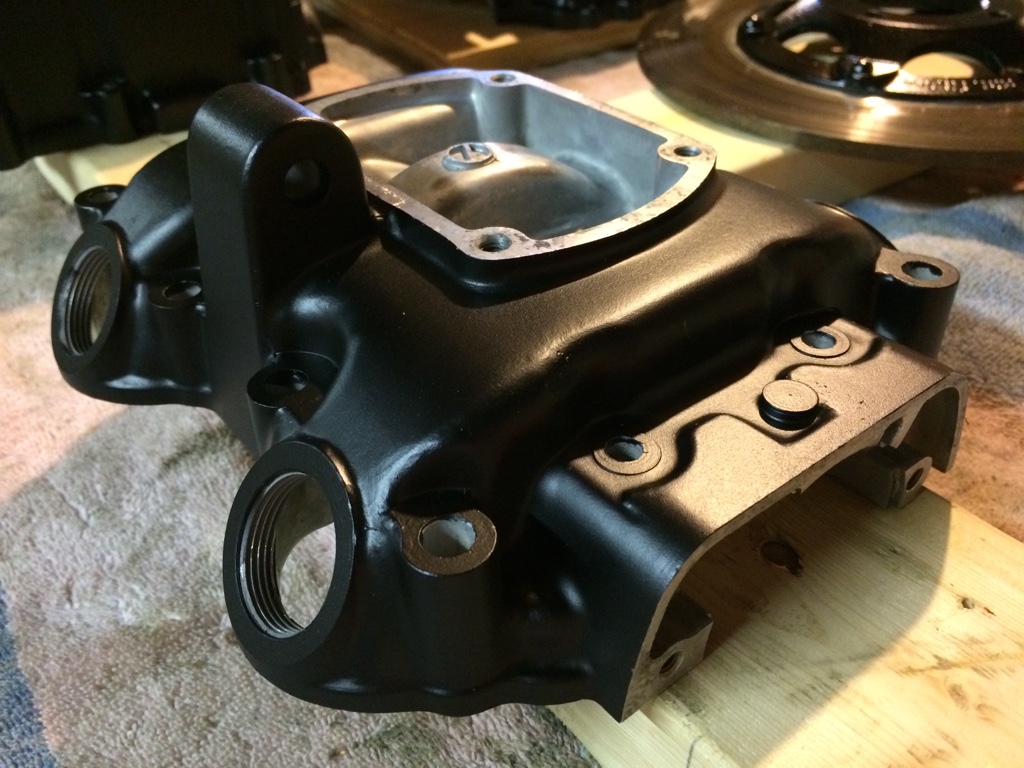
Painted my engine cases and valve cover today. I decided to go with vht satin black instead of aluminum and I'm really glad I did. The black really makes the brushed side covers and refinished cylinders and head stand out. I think I'm going to let the cases cure for a couple days and then give them another good cleaning to make sure absolutely no glass particles are left before starting the rebuild process
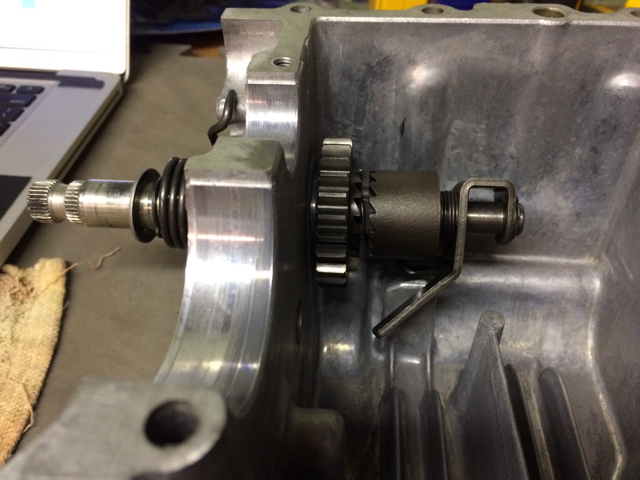
Started assembling the motor this week. Got the Kickstarter functioning properly. If you remember, that was the issue that had me taking the motor apart in the first place.
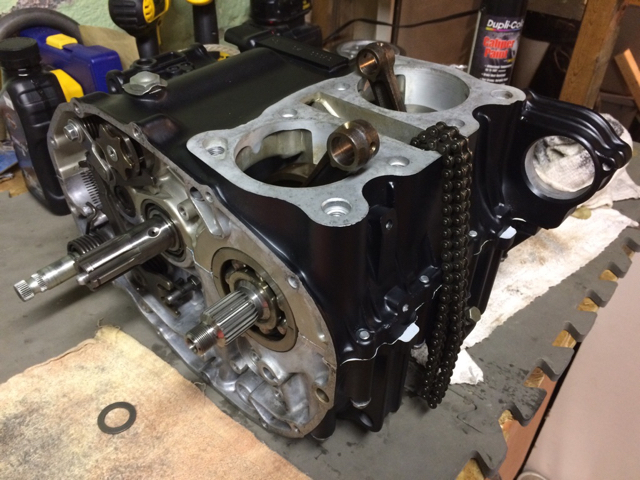
Got the rest of the bottom end assembled and sealed up
I found that wire wheels make great work with corroded bolts
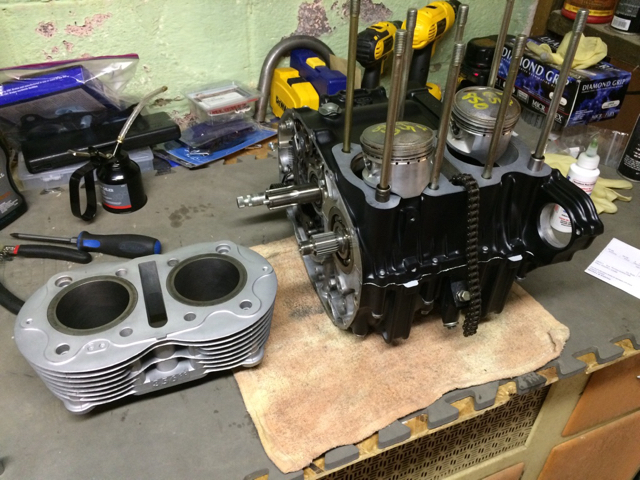
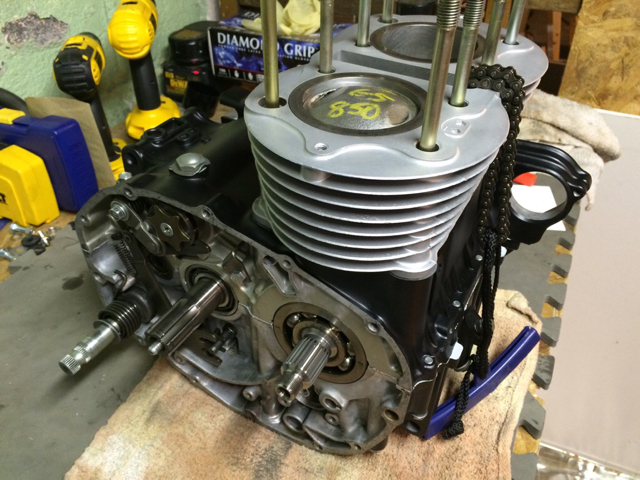
I started to assemble the top end but remembered that I hadn't ordered new circlips for the pistons. So I ordered them a couple days ago and they arrived today so I started on the top end. Got the Pistons on the rods and the cylinders installed
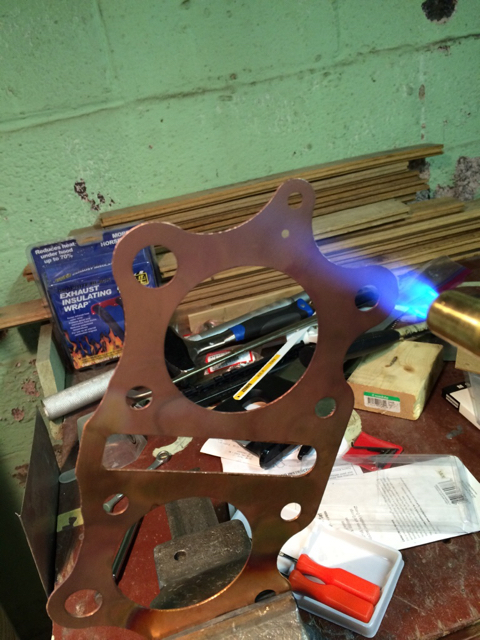
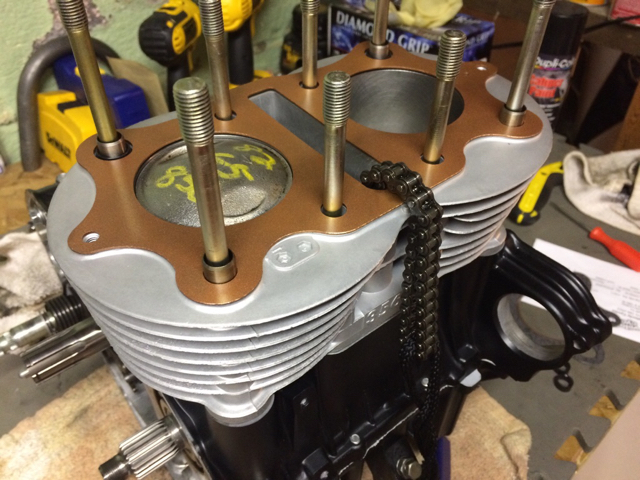
Annealed my copper head gasket and coated it with copper gasket spray, installed the gasket and head, tightened down the studs to spec, checked to make sure everything rotates properly, and nope! My Pistons are hitting the gasket. So I'm going to order a new gasket with slightly larger bore. The pic below shows how far the pistons extend above the cylinders. So getting that gasket right is going to be pretty important I guess.
I use a wire wheel on rusty bolts all the time but it also removes any protective coating. I'll usually coat the threads in copper coating to ensure it comes out the next time too.
I talked to Lani at copper gaskets about my problem and he suggested trying to just file the opening a little larger. A file didn't really do the job but the sanding wheel on my dremel made a good even larger opening. Now I need to get the copper coat off without scratching the surface of the gasket. I'm thinking about trying aircraft stripper. If that doesn't work, buy some permatex gasket remover. Any suggestions?
I use antisieze on any steel bolt that goes into aluminum. I use no glue on any gasket as good kits have a sealant already impregnated into the material.
Far as removing that coating use acetone or a gasket remover. Or your torch again since it is copper will just burn off. I wouldn't put any back on unless it was recommended by the person you bought the gasket from.
Thanks guys, yeah I annealed it. Lani had recommended annealing it and using copper coat so that's what I'm doing. I'll probably take the case bolts out one by one and add some antisieze to be safe.
If you annealed it, then you would have used steel wool or a scotch brite pad to scrub off the carbon.
You can use the same thing to remove any sealer.
I get gaskets dull red then drop into sink full of water.
Most of the oxide comes off and saves a little cleaning.
Copper doesn't harden with quenching and stays soft
As for anti-seize, Teflon plumbers paste or liquid works best for stainless into alloy.
Coppercote or copper anti -seize causes slight corrosion over time (although personally I haven't had issues with it, maybe 3~4 yrs isn't long enough for corrosion to happen?)
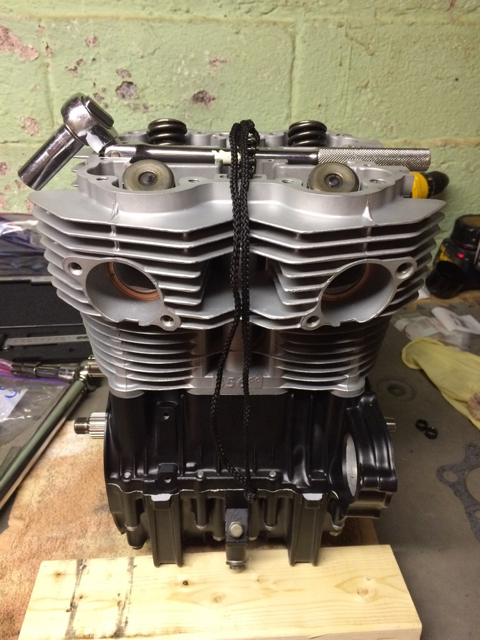
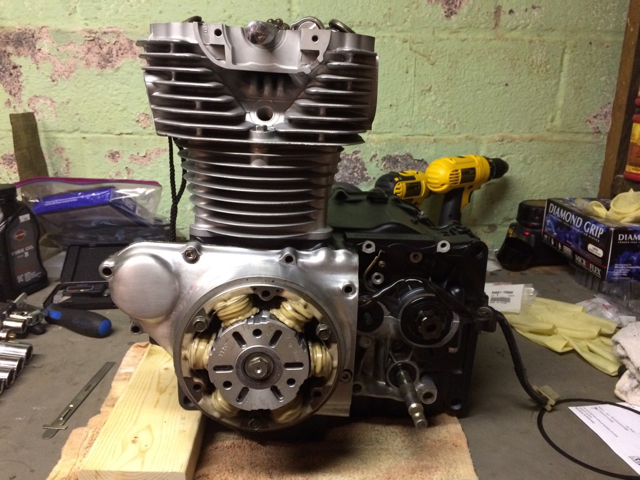
Thanks guys. I torched until red hot and dipped into a sink full of water. Then I used a scotch brite pad to clean it up. Double checked clearances with the head on. Then I coated the gasket and torqued the head according to the honda manual. Now I have the stator in place so I can move onto the cam next. It's starting to look like an engine again.
This site uses cookies to help personalise content, tailor your experience and to keep you logged in if you register.
By continuing to use this site, you are consenting to our use of cookies.