Follow along with the video below to see how to install our site as a web app on your home screen.
Note: This feature currently requires accessing the site using the built-in Safari browser.
We noticed you are blocking ads. DO THE TON only works with community supporters. Most are active members of the site with small businesses. Please consider disabling your ad blocking tool and checking out the businesses that help keep our site up and free.
This is my first build so hope all will be patient with me on this one.
After scanning second hand sales online for months found a 3 month old Motomia Enzo 150 CDI which is a copy of the original Honda CG 125 more or less the same, she is only 3 months old, guy bought it cash and sold it again with 3000km on the clock not even registered at Dealer yet, so contacted the dealer and can register on my name directly at no cost as the previous owner already paid licence and reg fees with them.
Here is what she looks like:
Well i start slowly purchasing the following goods:
1. Chrome Headlight
2. Chrome Mini Speedo (without warning lights) (increased bike speed up to 220km per hour ???)
3. Chrome Mini Tacho
4. Clip on Handle Bars
5. Mini Chrome Indicators
6. Fork Boots (till i can get nice chrome outer springs to replace)
so far i messed around with the electrics fitting and testing lights and speedo's and had to figure out where to add instrument warning lights so i decided to build them in my headlight.
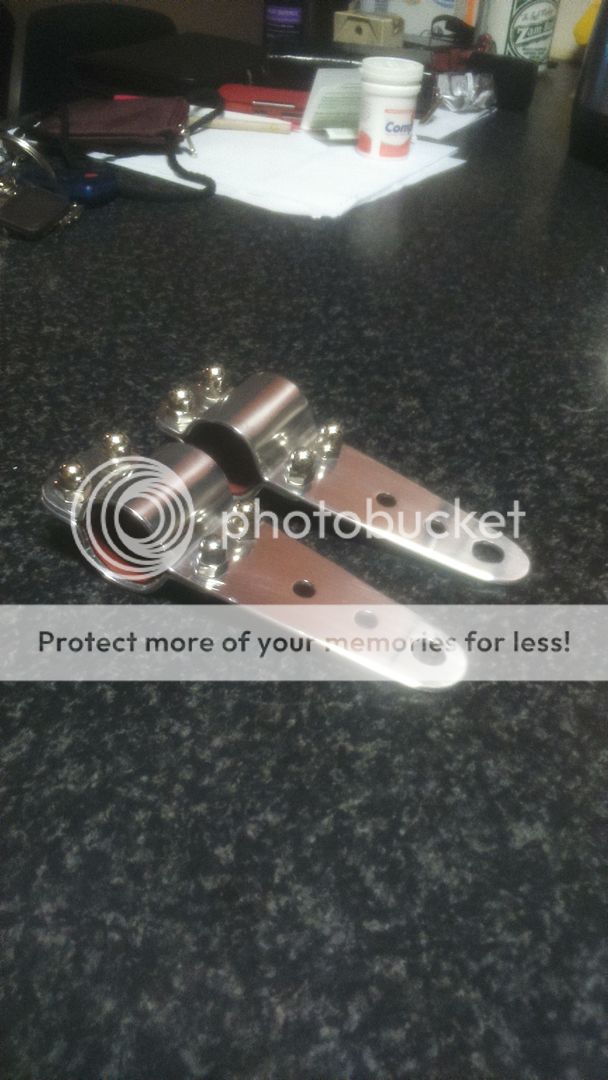
Fabricated some nifty headlight brackets out of some aluminium flat bar a bit of bending and grinding a polishing as i was not happy with the original ones still needs a bit more buffing but i a really happy with the results, what you guys think?
It appears that the Motomia is a South African brand? I do not believe they are available here in the US? Looks interesting, and that is a good choice for a seat. Interesting to use a nearly new bike, if the price was right that should make for a sanitary build without all the rust, corrosion and broken parts usually associated with a build.
It would seem that Motomia is South African as i have not seen it anywhere else on the net, being a new bike it was relatively easy being CLEAN
Well i had some time this weekend to finish my rear hoop and weld on some ears for my rear indicators and i had chance to work on my first draft of a seat, will get it done professionally as soon as the finances are right.
Seat upholstery self made (Best Try ;D)
Rear Hoop and seat done and mounted and brake lights and indicators mounted and everything works!! ;D ;D
Want to do something like this on the license plate but will fabricate something out of aluminium flat bar again and polsih as here in South Africa the smallest plate allowed is 250mm x 165mm which for this little bike is pretty big...
Still have to strip paint and spray the back wheel and polish the lip and then comes the last part is colour theme which i am going for this as i am a Graphic Designer i designed this theme and her name will be "Maria" after my better half! ;D ;D ;D ;D
what you guys think? Black base with white lace design then clear coat the heck out of it!
want to put the lace pin stripe over the tank and front mud gaurd as well.
Well got chance to finish the back wheel and polish the back brake hub and finally put together the last of the bike and also mock up the mirrors still need to sort mounting system for the mirrors inside the bar ends
Cool little build. We've got loads of these random copy-cat brands kicking around here in Panama as well. I've always thought about picking one up for cheap and hacking away at it for kicks. Sticking with the original Suzuki's for now, though.
A little more progress this weekend, so finally i was happy with a design for my stickers, had a friend cut them for me and after 5 tries they finally got me a set cut, me and the wife sat removing the small pieces (weeding) friday night and she helped me apply them with a bit of difficulty but we got there.
Here are pics after applying the stickers!
Fender
Left Cover
Right Cover
Tank 1
Tank 2
I shot it with clear coat the next morning just want it to cure for a few days then shoot it again and then polish with polishing compound to give it that clear gloss wet look!
Updates are going slow, i sprayed clearcoat and ended up in disaster so i took everything down to metal and started over but am using a better quality enamel paint and takes time to dry and will go slowly this time and not be too hasty to avoid messing up the paint job, going to go gloss black with gold decal pin stripes and canning the floral pattern as is makes it difficult to apply.
Well spent the last two weeks doing primer and flat black enamel, Rustoleum Grey Primer and Rustoleum Gloss Black Enamel.
Had to wait 48 hours between coats to flat sand and recoat but was worth the wait this time, then when fully cured i applied new decals and had to wait for a nice sunny day to do clear top coat.
Well got my sunny day this weekend and finally sprayed my topcoat.
I used Plascon Touch Up 2k Top Coat, which believe it or not is actually from SprayMax which is available in South Africa as Plascon Touch Up 2k Top Coat.
The wait for the enamel to dry was worth it as i am totaly stoked ;D at the results of this clearcoat ;D ;D ;D
Very overcast weather today so cant get nice outdoor pics of complete bike but will take a few sexy shots as soon as i can and post. 8)
Well yay, the sun came out and here she is finally complete and in all her glory! ;D ;D ;D ;D ;D ;D ;D
What do you all think? Bemy guest and leave a comment, thanks!
Well everyone, this was my FIRST one! NEXT is bobber chopper or maybe another Cafe - Until then keep the blood, sweat, tears and grease flowing.... ;D 8) ;D 8)
This site uses cookies to help personalise content, tailor your experience and to keep you logged in if you register.
By continuing to use this site, you are consenting to our use of cookies.


")


