Follow along with the video below to see how to install our site as a web app on your home screen.
Note: This feature currently requires accessing the site using the built-in Safari browser.
We noticed you are blocking ads. DO THE TON only works with community supporters. Most are active members of the site with small businesses. Please consider disabling your ad blocking tool and checking out the businesses that help keep our site up and free.
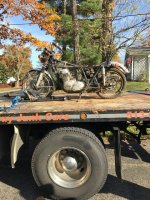
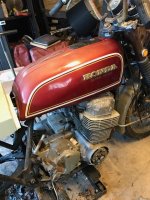
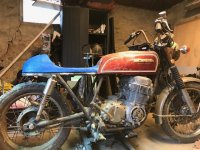
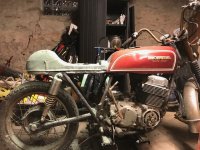
Hey guys, I was gifted the old mans bike about a month or so ago and have been slowly working on it. I figured i would start posting pics to show my progress. This is my first build so all suggestions and ideas are greatly appreciated. I am not a mechanic nor a fabricator and have been working on this bike while sourcing parts and learning as I go. This bike belonged to my father and had been passed around the family for years until it ended up back with me. I actually remember riding on the back of this bike with my father when i was a kid. I posted some of these pics in the new member area when i first recieved it but figured i would repost them here so any new people can see them. Sorry...I don't know why some of the pictures turned out sideways
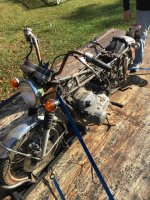
I decided that i wanted to ditch the k tank that was originally on the bike and decided to try and source an f tank. I got lucky through craigslist and found a guy selling a broke down super sport about an hour away and talked him into letting me seperate the tank from the rest of the bike!
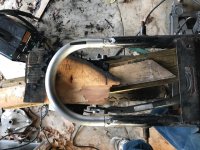
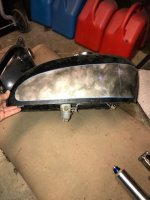
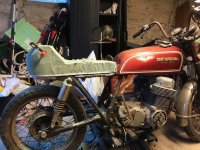
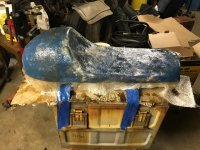
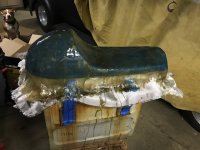
I had never made a seat cowl before and was debating weather or not i was going to buy one or try to give it a shot. Well, I decided to give it a shot....
It took me about 4 or 5 hours to shape the cowl. No problems. I then went on to the next step and started to fiberglass. Unfortunatley, I did not add enough hardener to the resin on the first coat and i had to gently wipe it off. Luckily, it did not distort the model and i continued with the correct resin/hardener mixture and had no problems after that. I applied 2 layers to the outside of the mold, let dry and then pulled out the mold. I then added 2 more layers to the inside of the mold, sanded, then sanded some more, and then sanded some more.
I made my own fiberglass seat cowl for my Xs650. First time to try. It's difficult to get the hump even. Mine is pretty thick from trying to get it right.
Love those F tanks. Cool project man. I bet your dad will really dig it. That said... I'm going to be that guy...
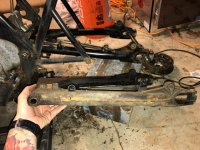
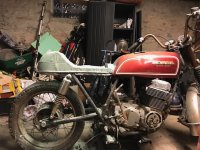
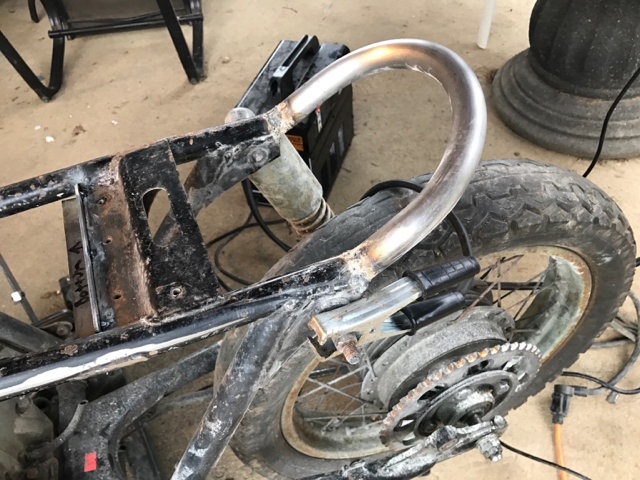
You are going to have some issues with your frame. There is nowhere near enough clearance between the "hoop" and the tire. One strong bump and it'll bottom out. No bueno. There are a few ways to fix it, but you'll want to do it sooner than later.
vonYinzer.....yeah, i was looking at the clearance and was thinking the same thing. I was trying to decide if i wanted to re-weld an upswept hoop but like the look and lines of a straight frame. any ideas?
Well... You're not going to change the movement of the swinger. Not realistically. So an upswept hoop is your best bet. Buikd for function then make it look rad.
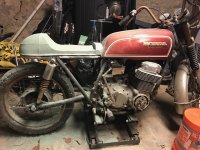
So, I've finally had some time to get back to work on the ol mans bike. Between the holidays and work I did not have a free moment to do anything. Anyways....back to the project!
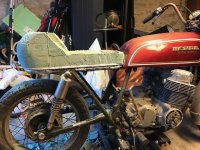
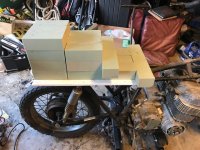
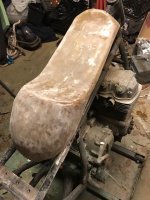
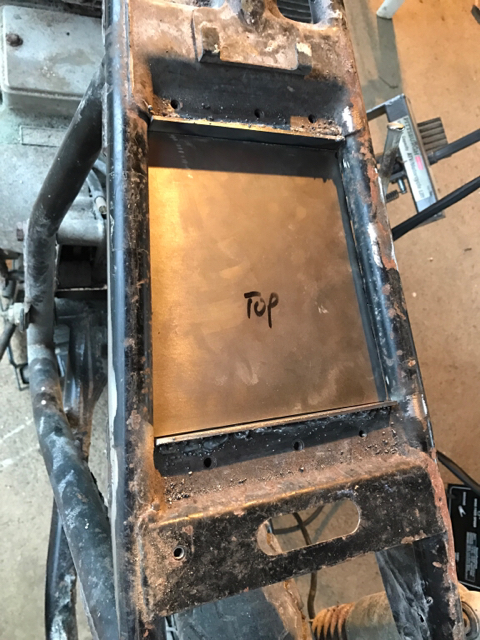
I have started to work on the electrics box but think I may end up putting it all in the tail (room providing). Speaking of the tail of the seat cowl....I have taken several people's advice and re-welded another tail hoop on to give my rear tire more clearance (I want the bike to look cool but also be extremely rideable). I shortened it a few inches and welded it up at about a 30degree angle. I also repurposed the seat cowl that I made (shown in the earlier pics) to fit the new dimensions of the frame.
This site uses cookies to help personalise content, tailor your experience and to keep you logged in if you register.
By continuing to use this site, you are consenting to our use of cookies.