Follow along with the video below to see how to install our site as a web app on your home screen.
Note: This feature currently requires accessing the site using the built-in Safari browser.
We noticed you are blocking ads. DO THE TON only works with community supporters. Most are active members of the site with small businesses. Please consider disabling your ad blocking tool and checking out the businesses that help keep our site up and free.
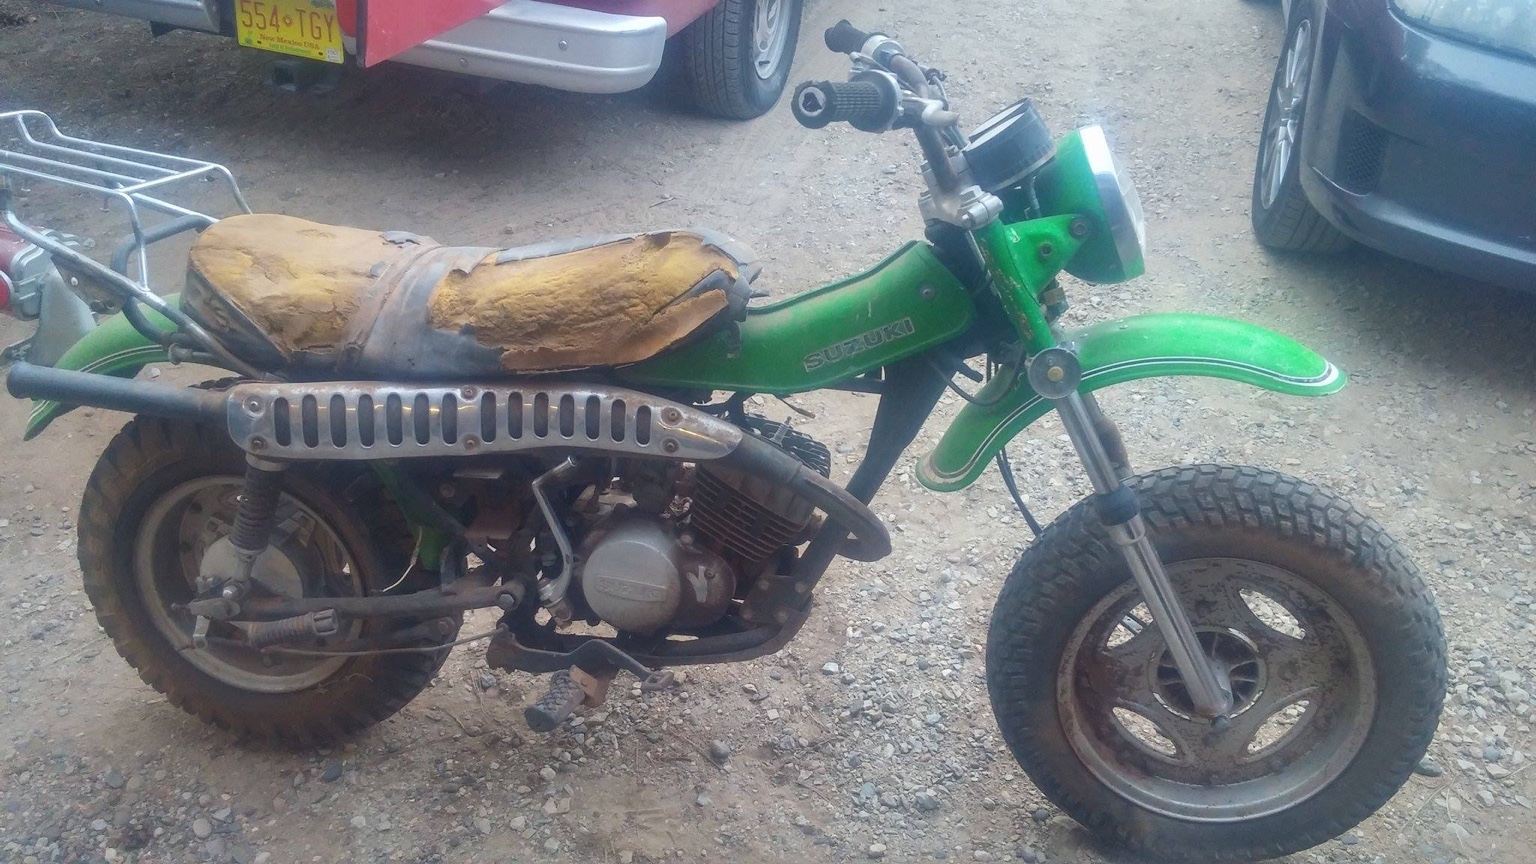
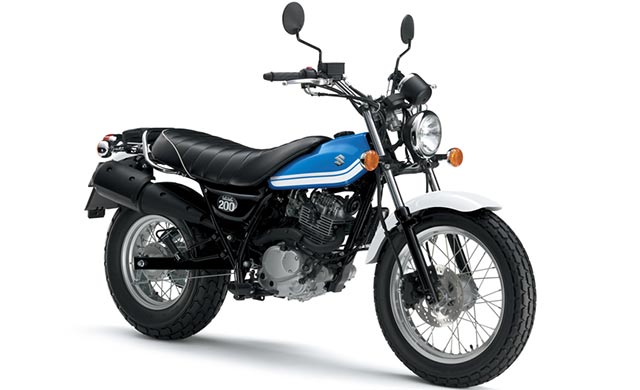
Without further ado, I present to you the Van Van!
Canyoncarver picked this old girl up a while back, and a while later I was searching for a CT70/90 I remembered he had it stored. With slightly larger tires and a 125cc 2 stroke motor, the RV125 is a cool alternative and should be a blast. We chatted about it and I made a plan to go out and grab it from him.
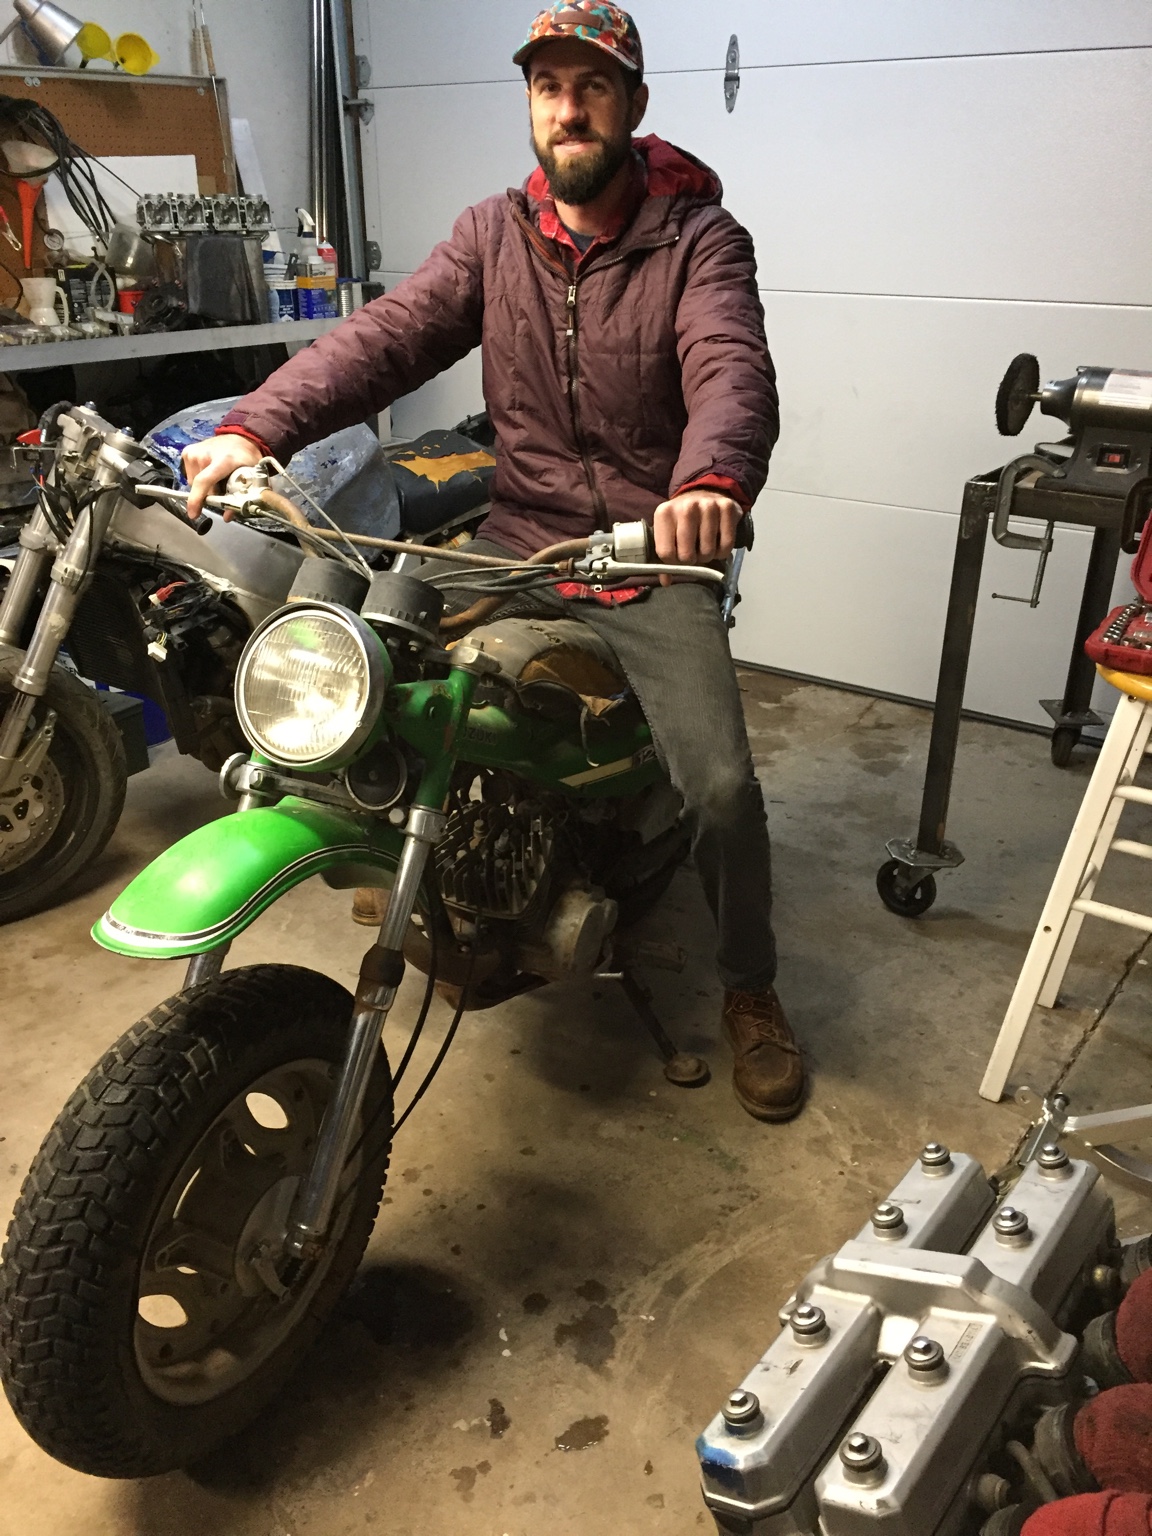
Here I am sitting on it in the canyoncarver shop. It's bigger than I originally thought, the beefy tires create a weird illusion that it's a smaller bike than it is, in photos anyways.
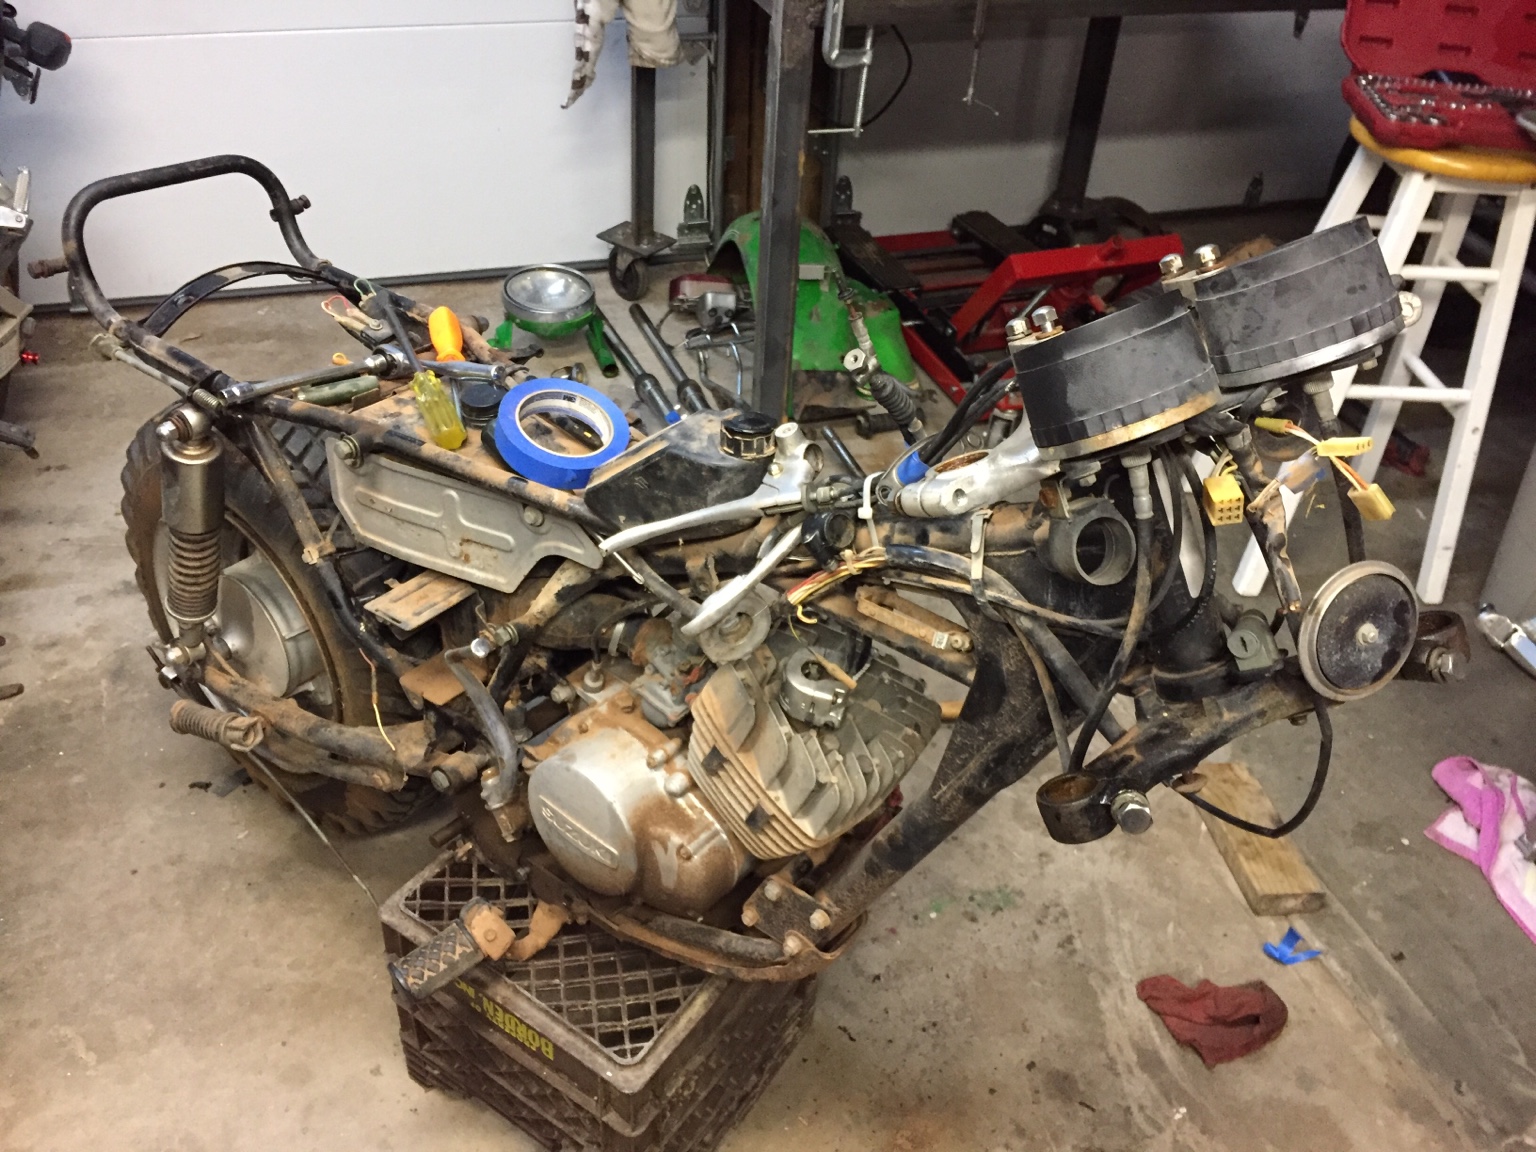
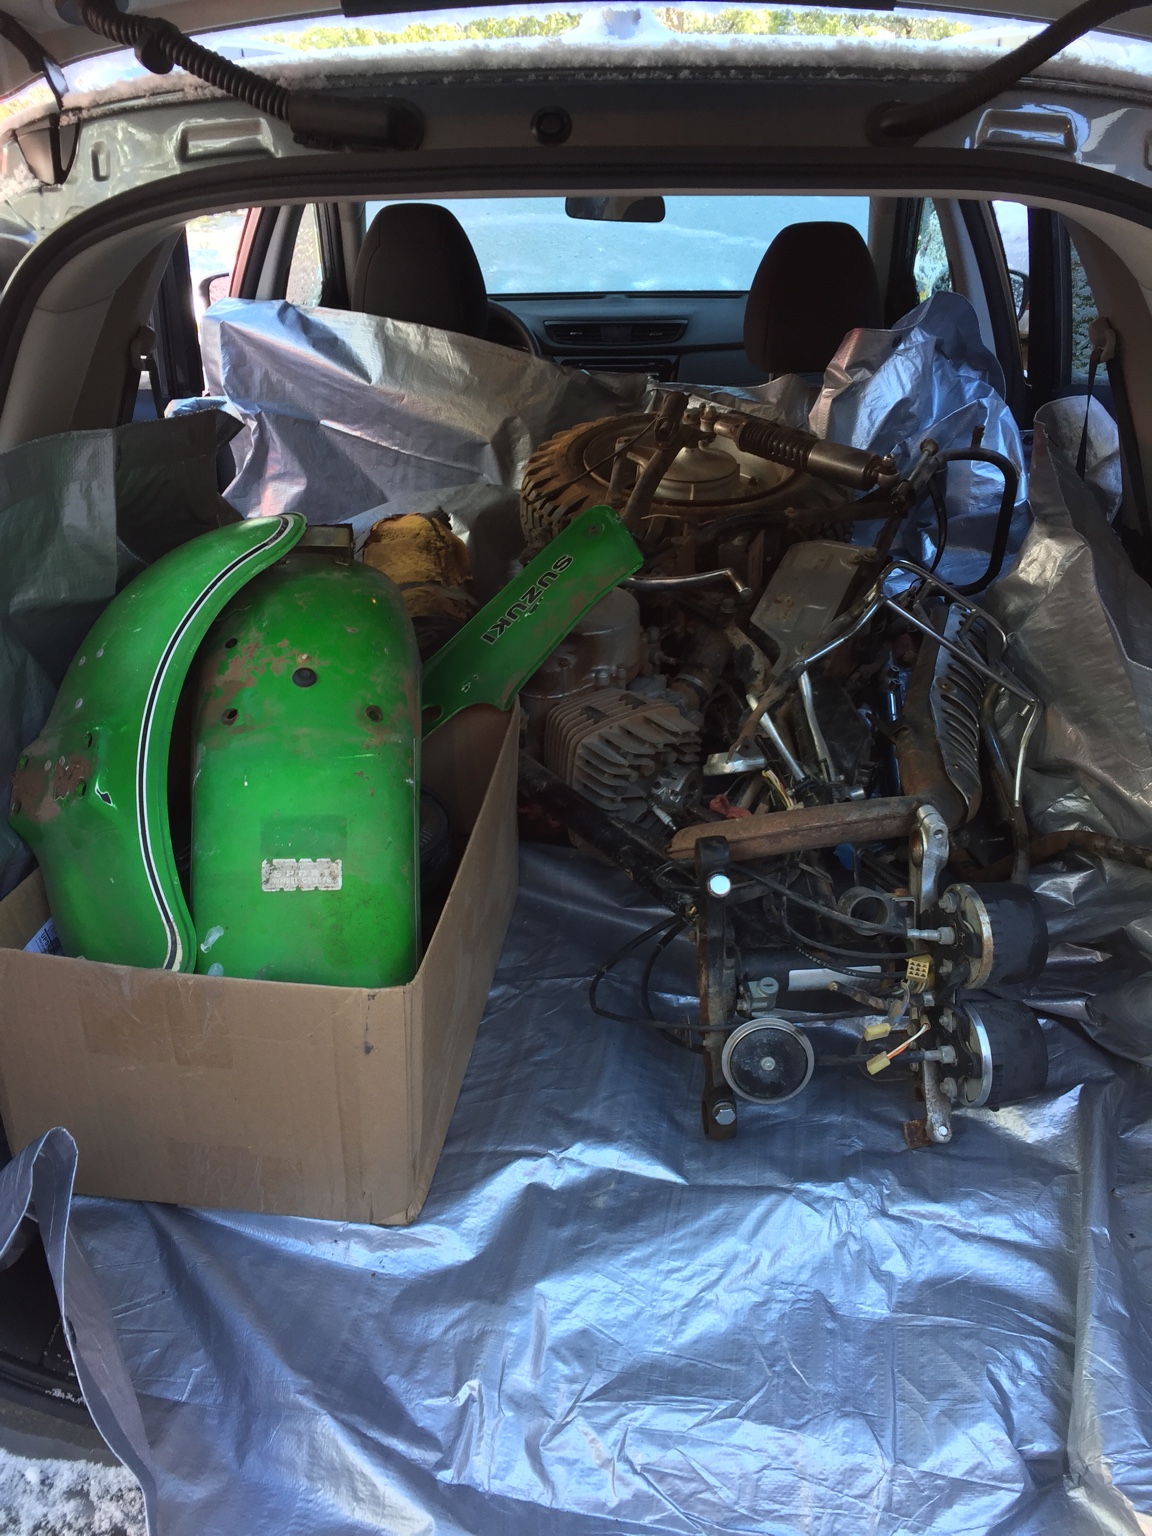
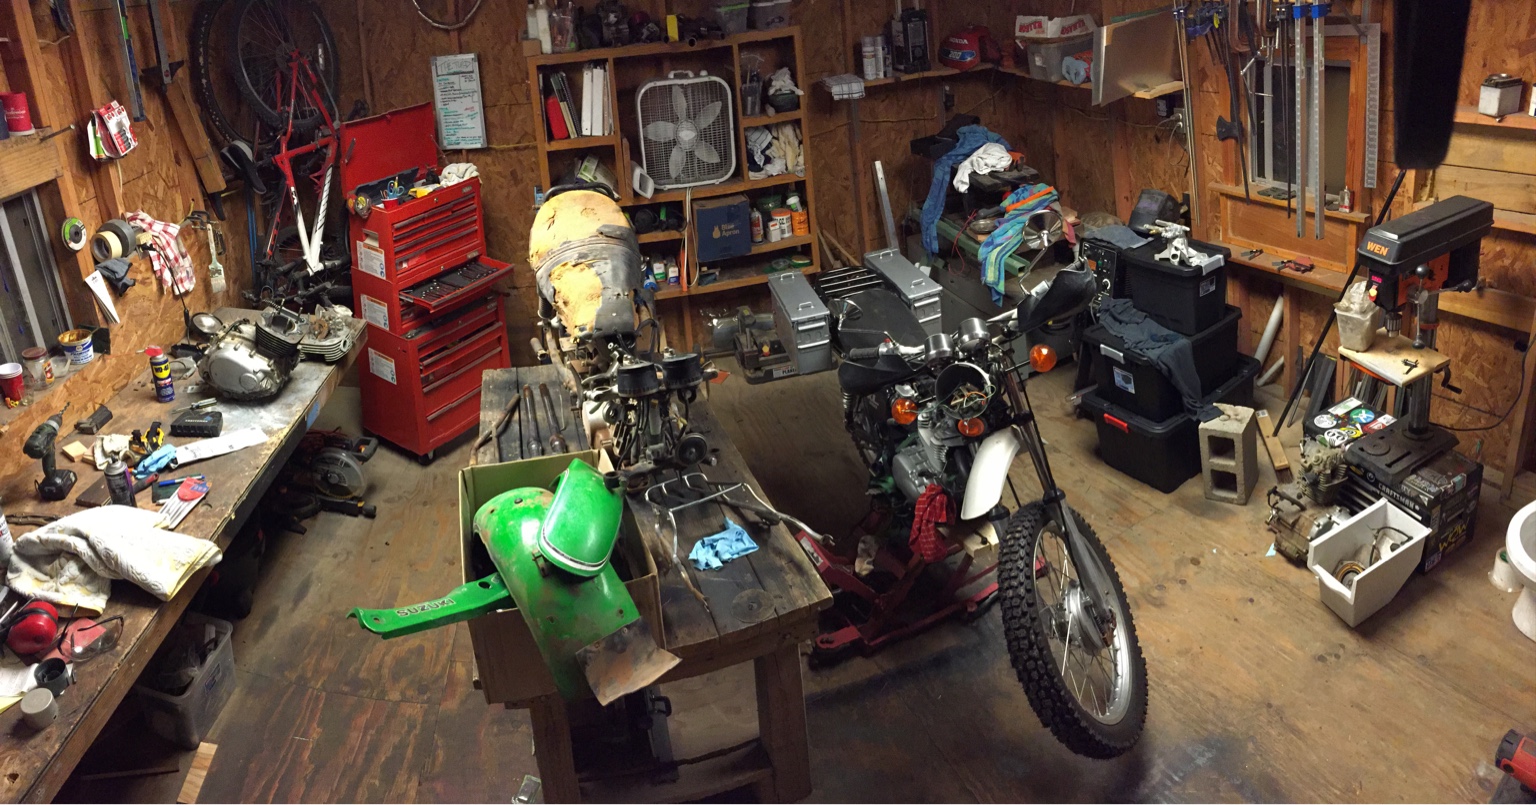
Since we flew out, rented a car and planned to stuff the bike in the back, disassembly commenced.
Fit like a glove. Good thing our rental ended up being an SUV. Everything is in there with the exception of the front wheel (woops!) but more on that later.
Back at the shop
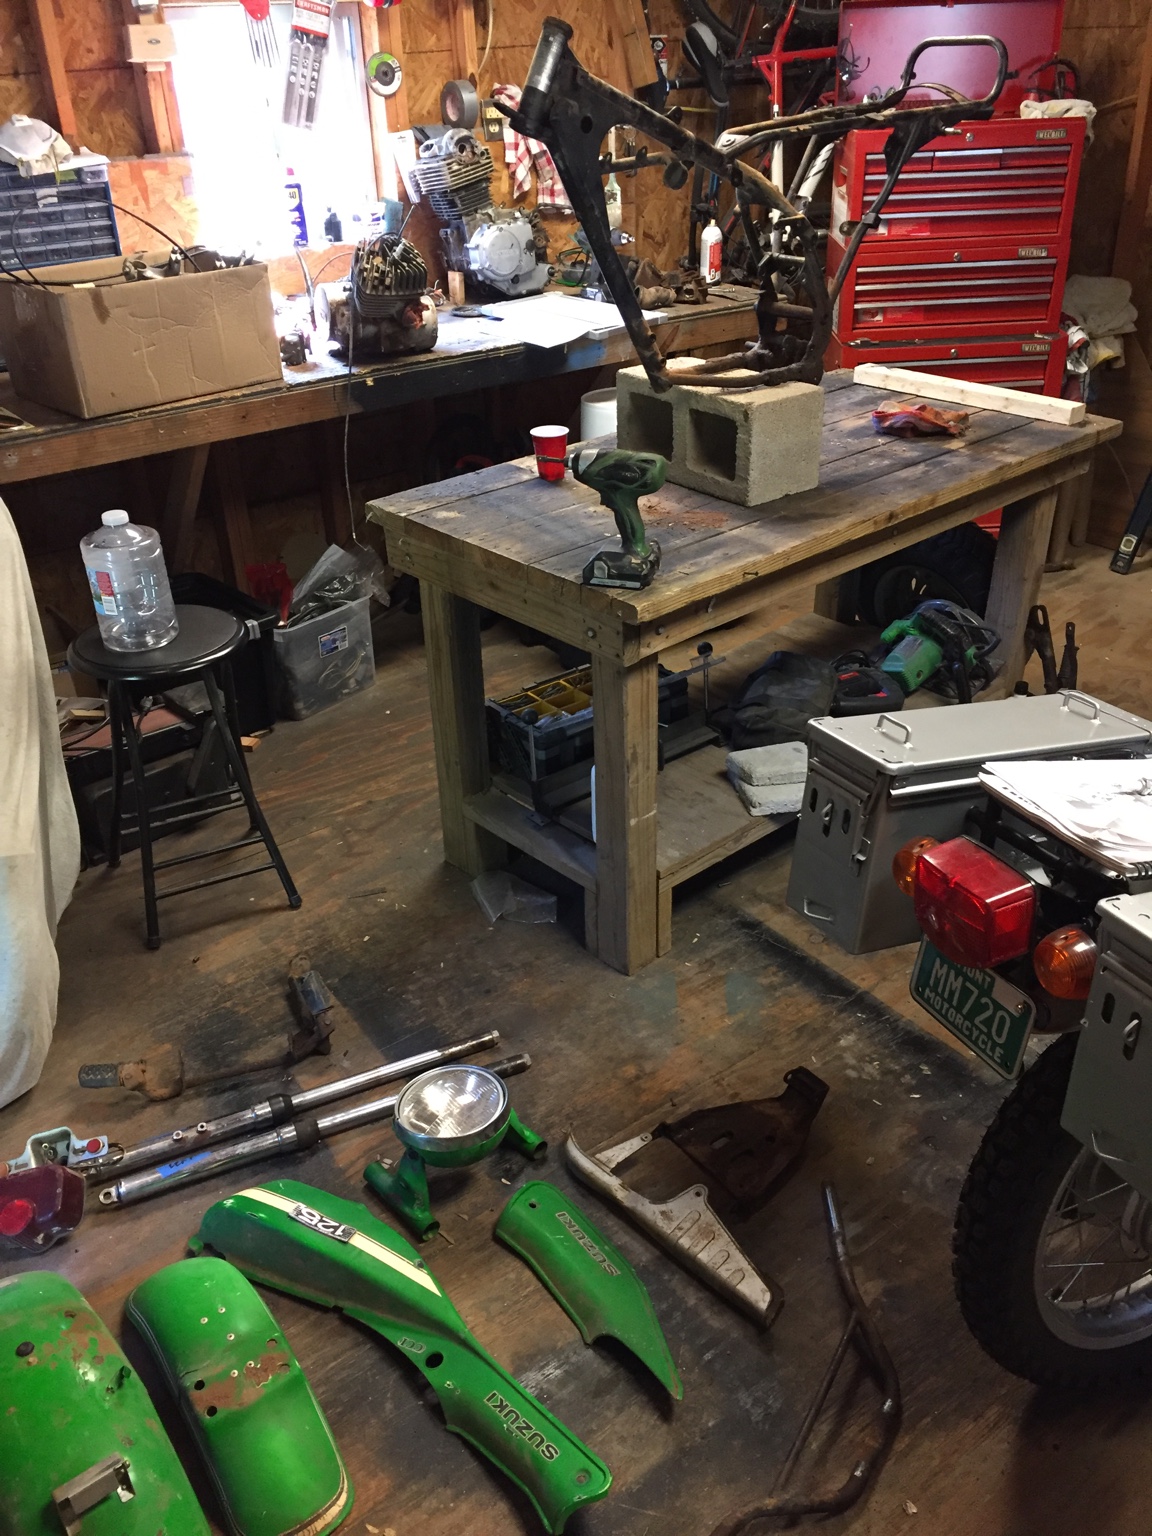
I was going to put it back together, fix the motor and ride it but since it was already more than halfway disassembled, I figured why not just go all the way and do it right. So disassembly commenced.
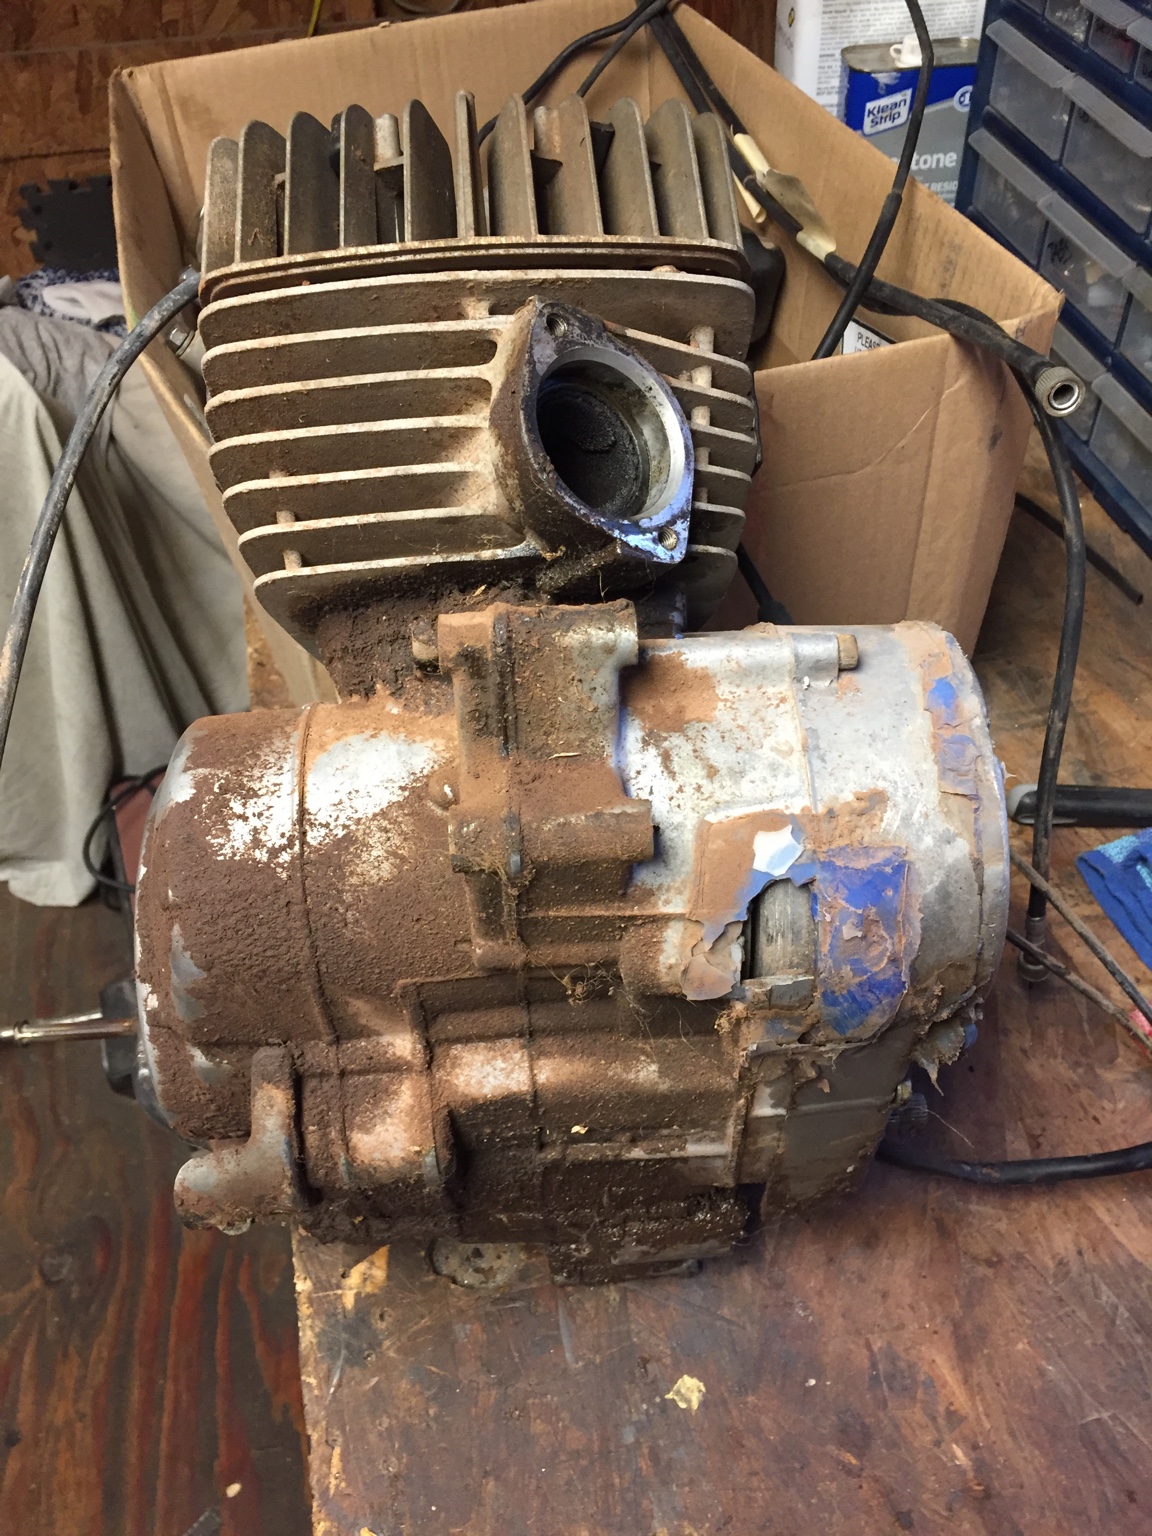
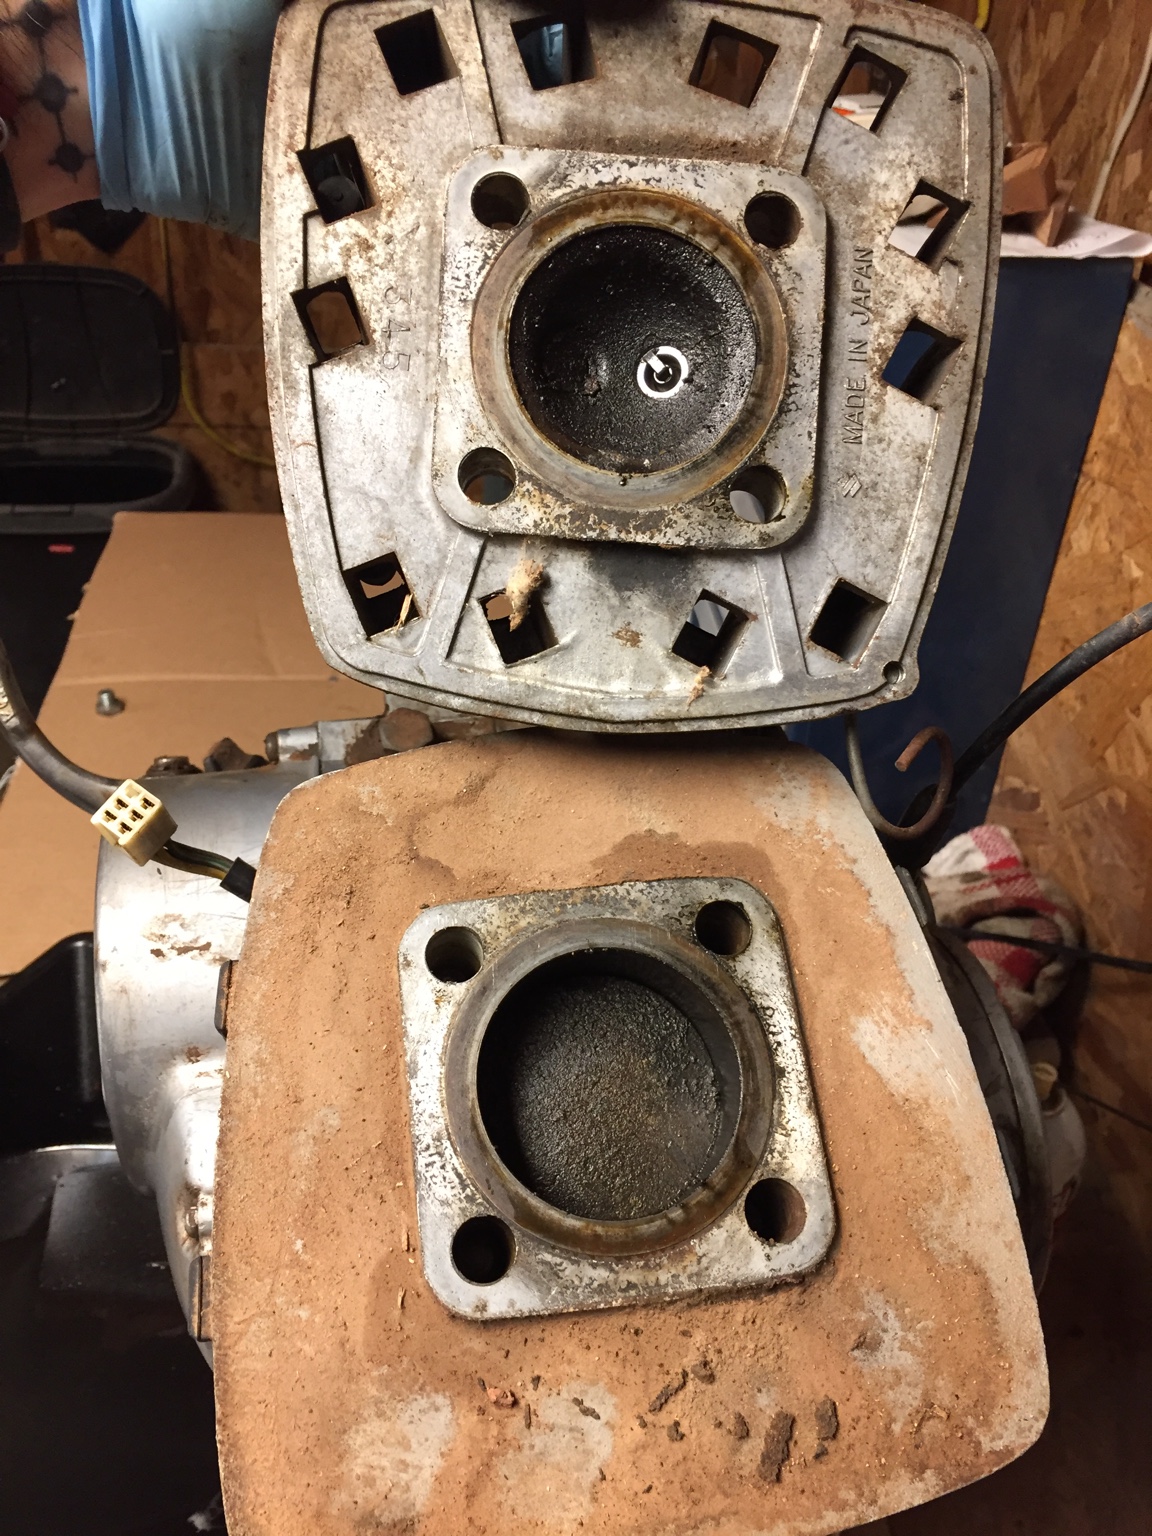
So the motor...yeah. Some PO had busted the cases on a rock or something, and "fixed" it with a shitload of RTV and probably a piece of metal. Well that didn't last and here we are. It's on the flywheel side and that is undamaged. I picked up a set of TS125 cases for dirt cheap (TS125 and RV125 motor are basically identical during the years that the RV125 was made) and a good condition stator cover from eBay first thing.
Other than that, the motor turned freely and feels like there's good compression there.
No head gasket?
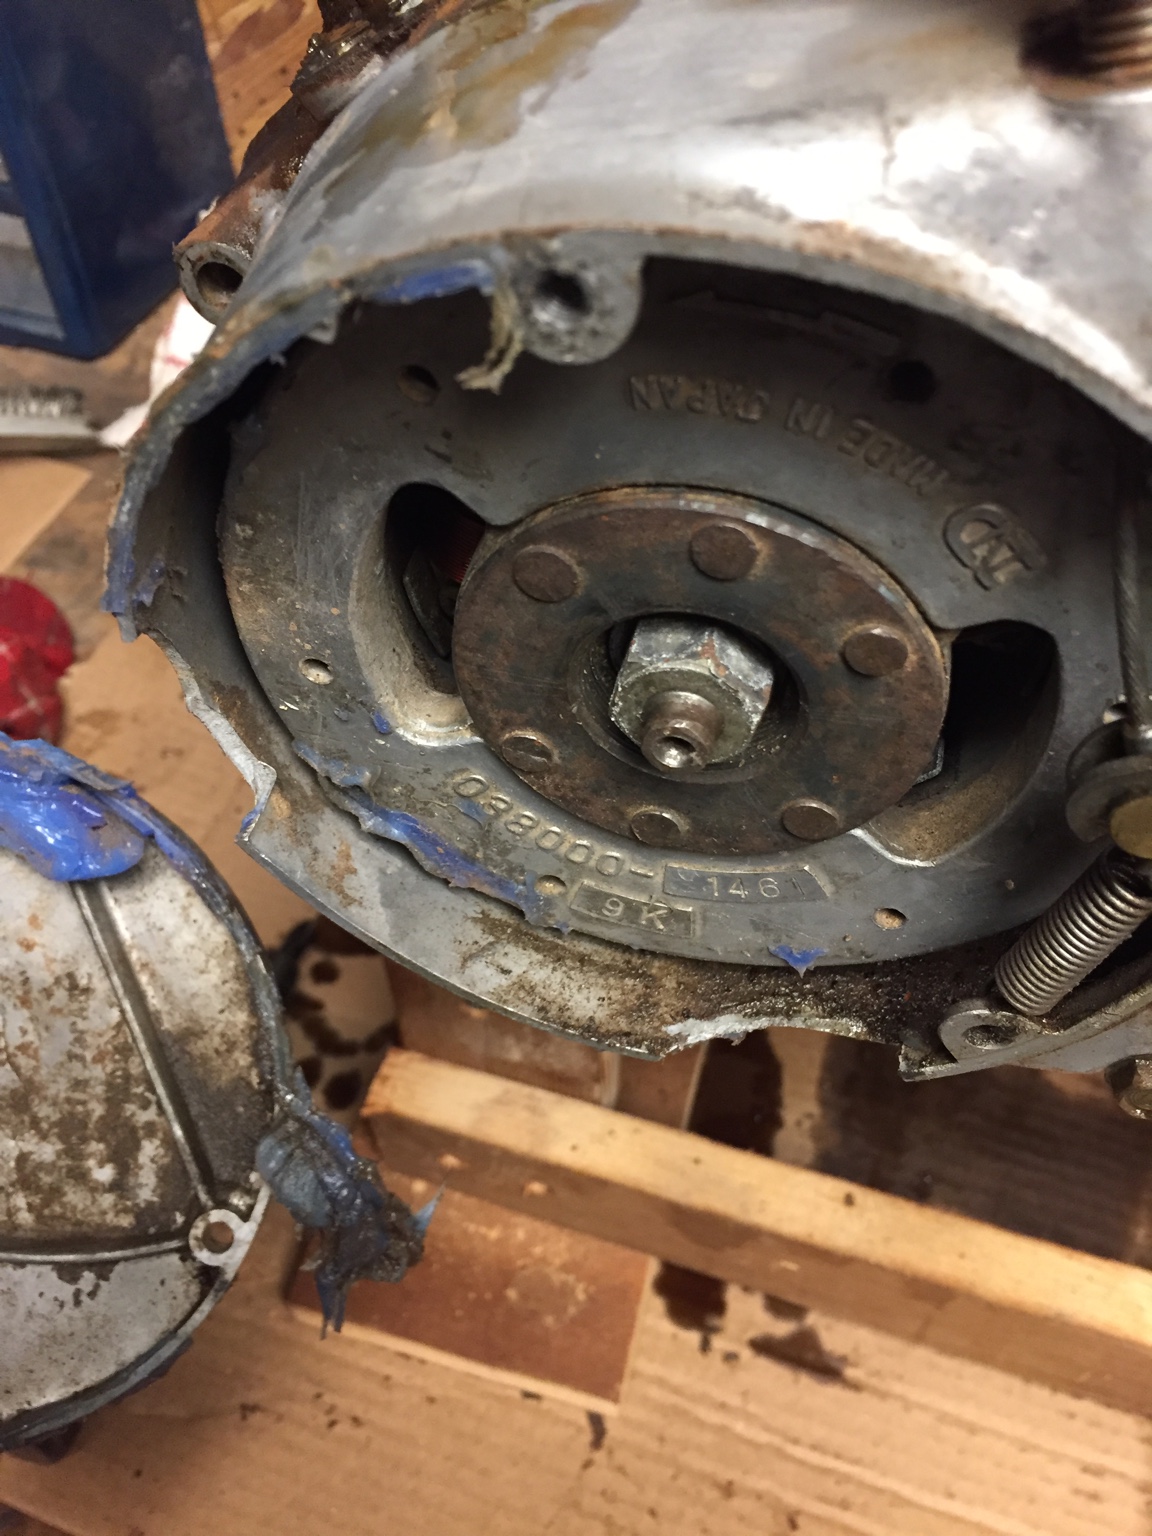
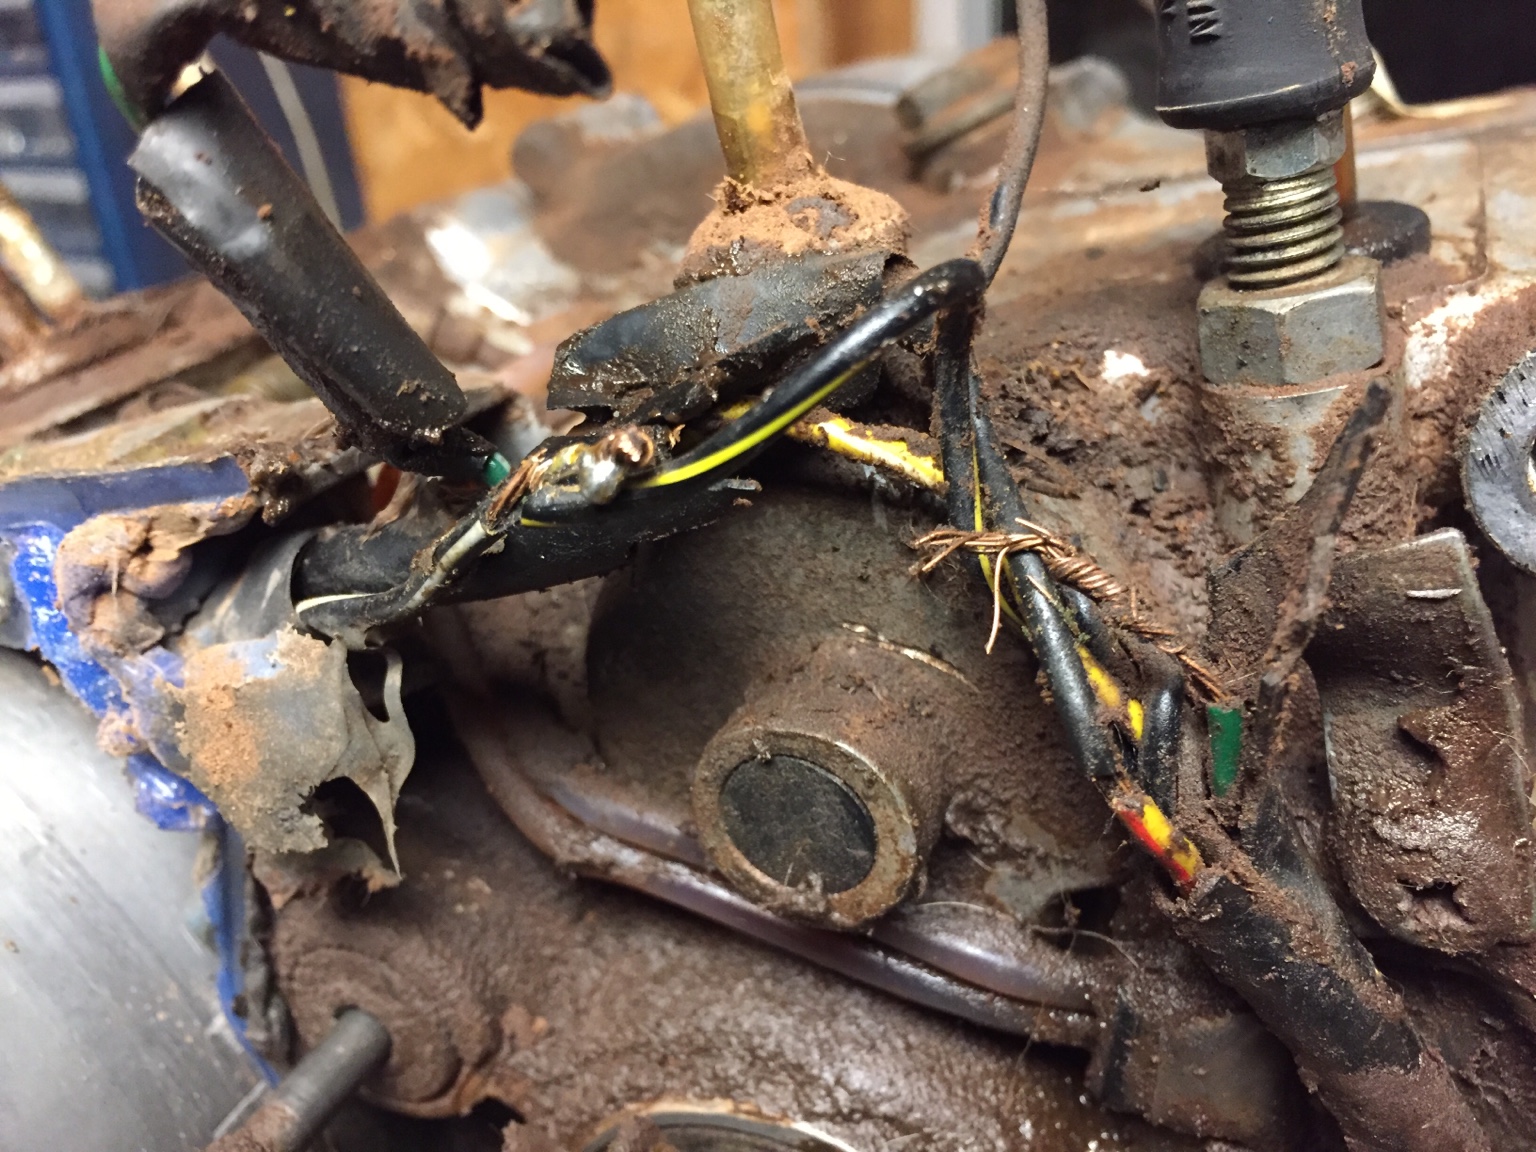
More damage to the stator cover. Upon further inspection this thing was dropped pretty hard on the left side.
That's supposed to be straight...
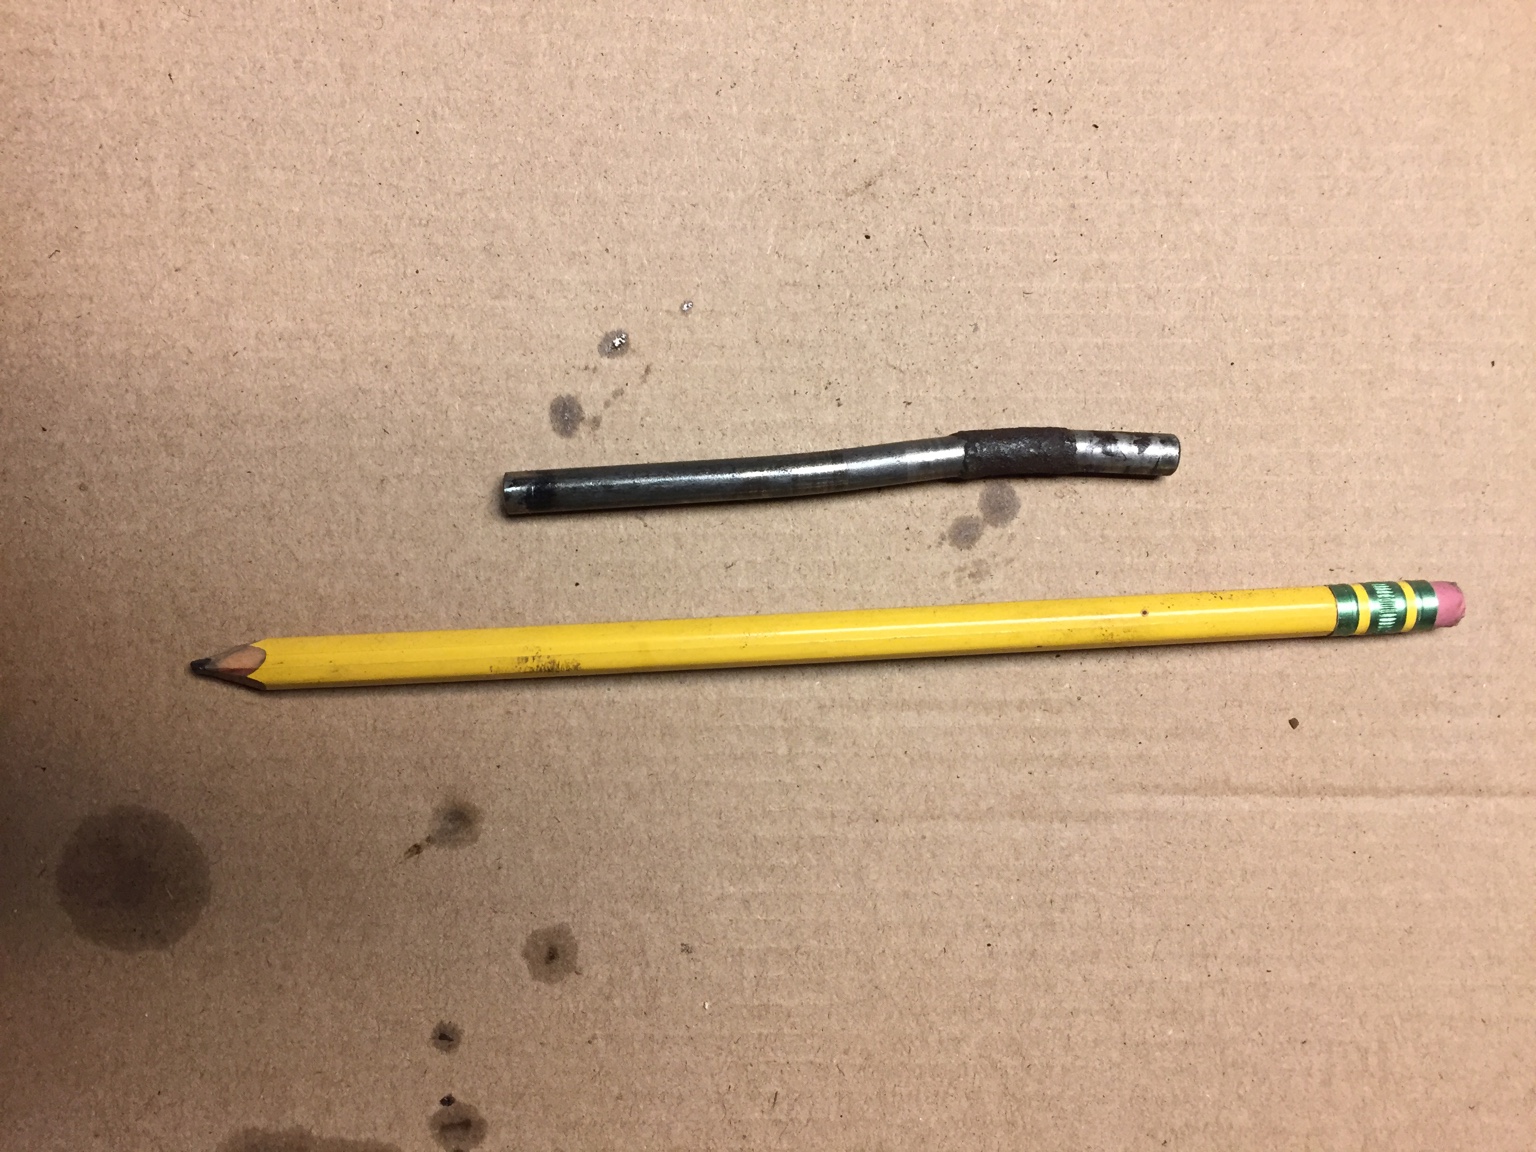
PO (not canyoncarver ;D ) did some nice work
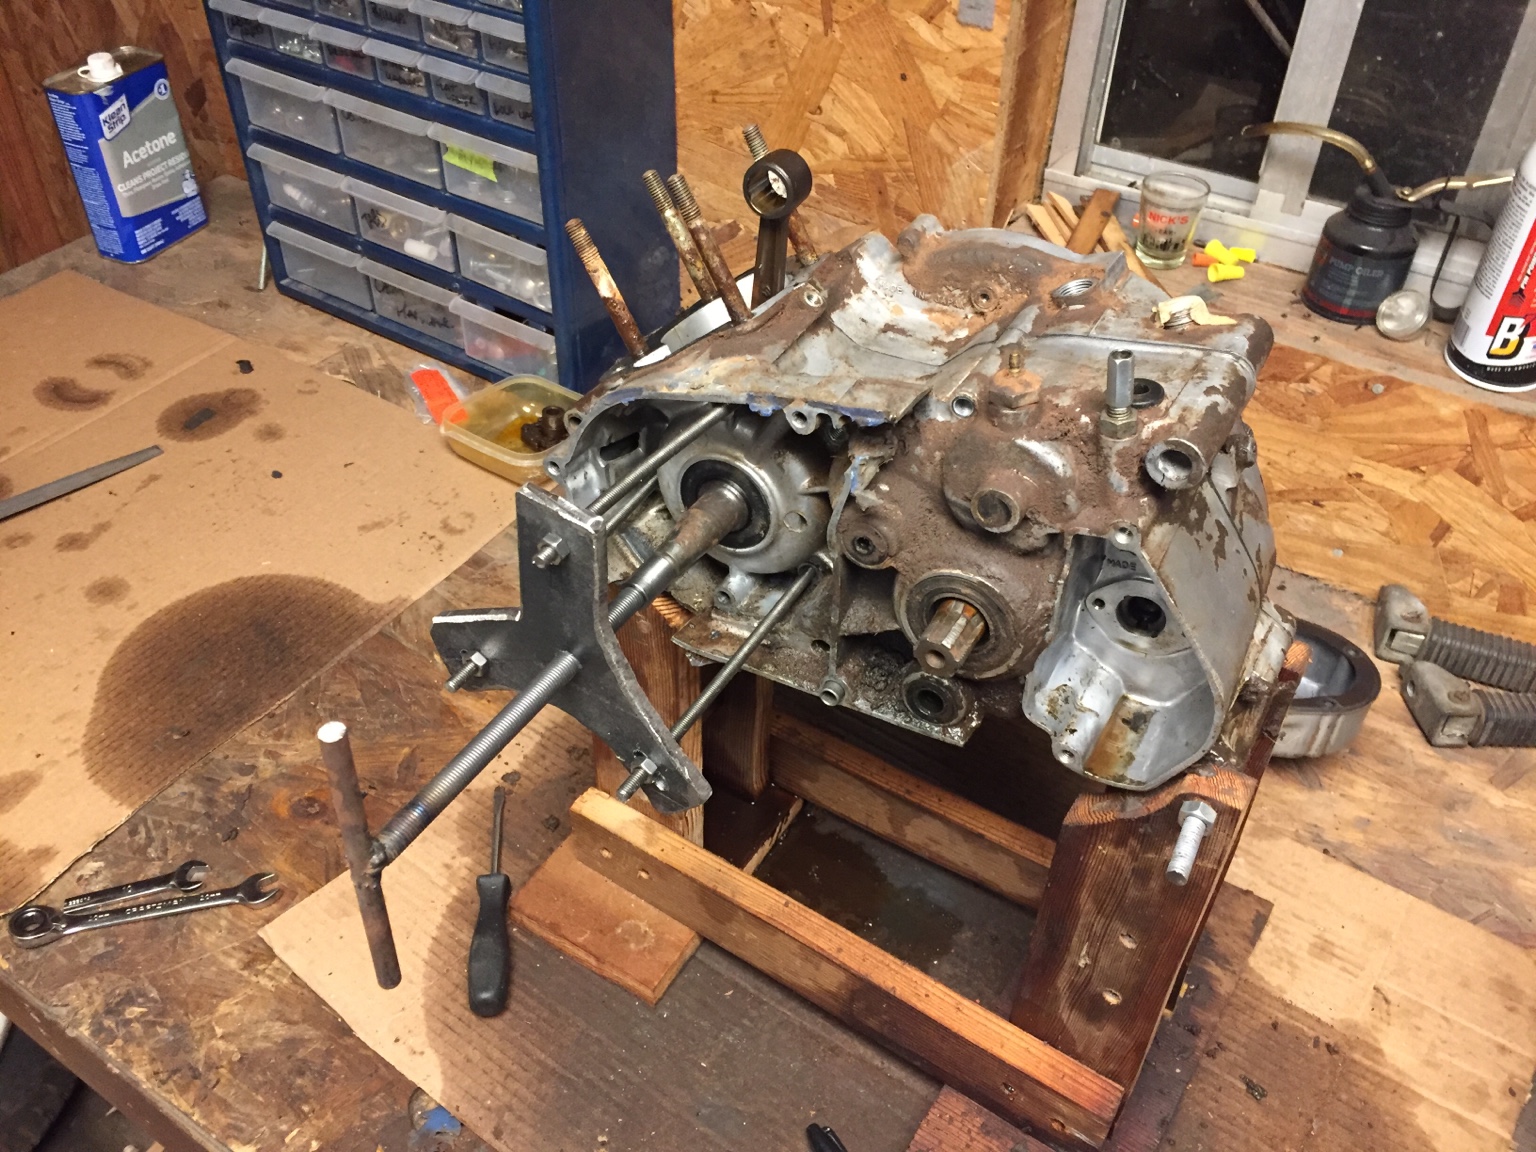
Torn down just about all the way. I made a DIY crank puller tool out of some 1/4" steel plate, some 6mm threaded rod and nuts, 10mm threaded rod and a threaded bung that Mr. E whipped up (for a different part of this project).
After trying it once or twice and realizing I forgot a crankcase joining screw (doh) the cases split smooth as butter.
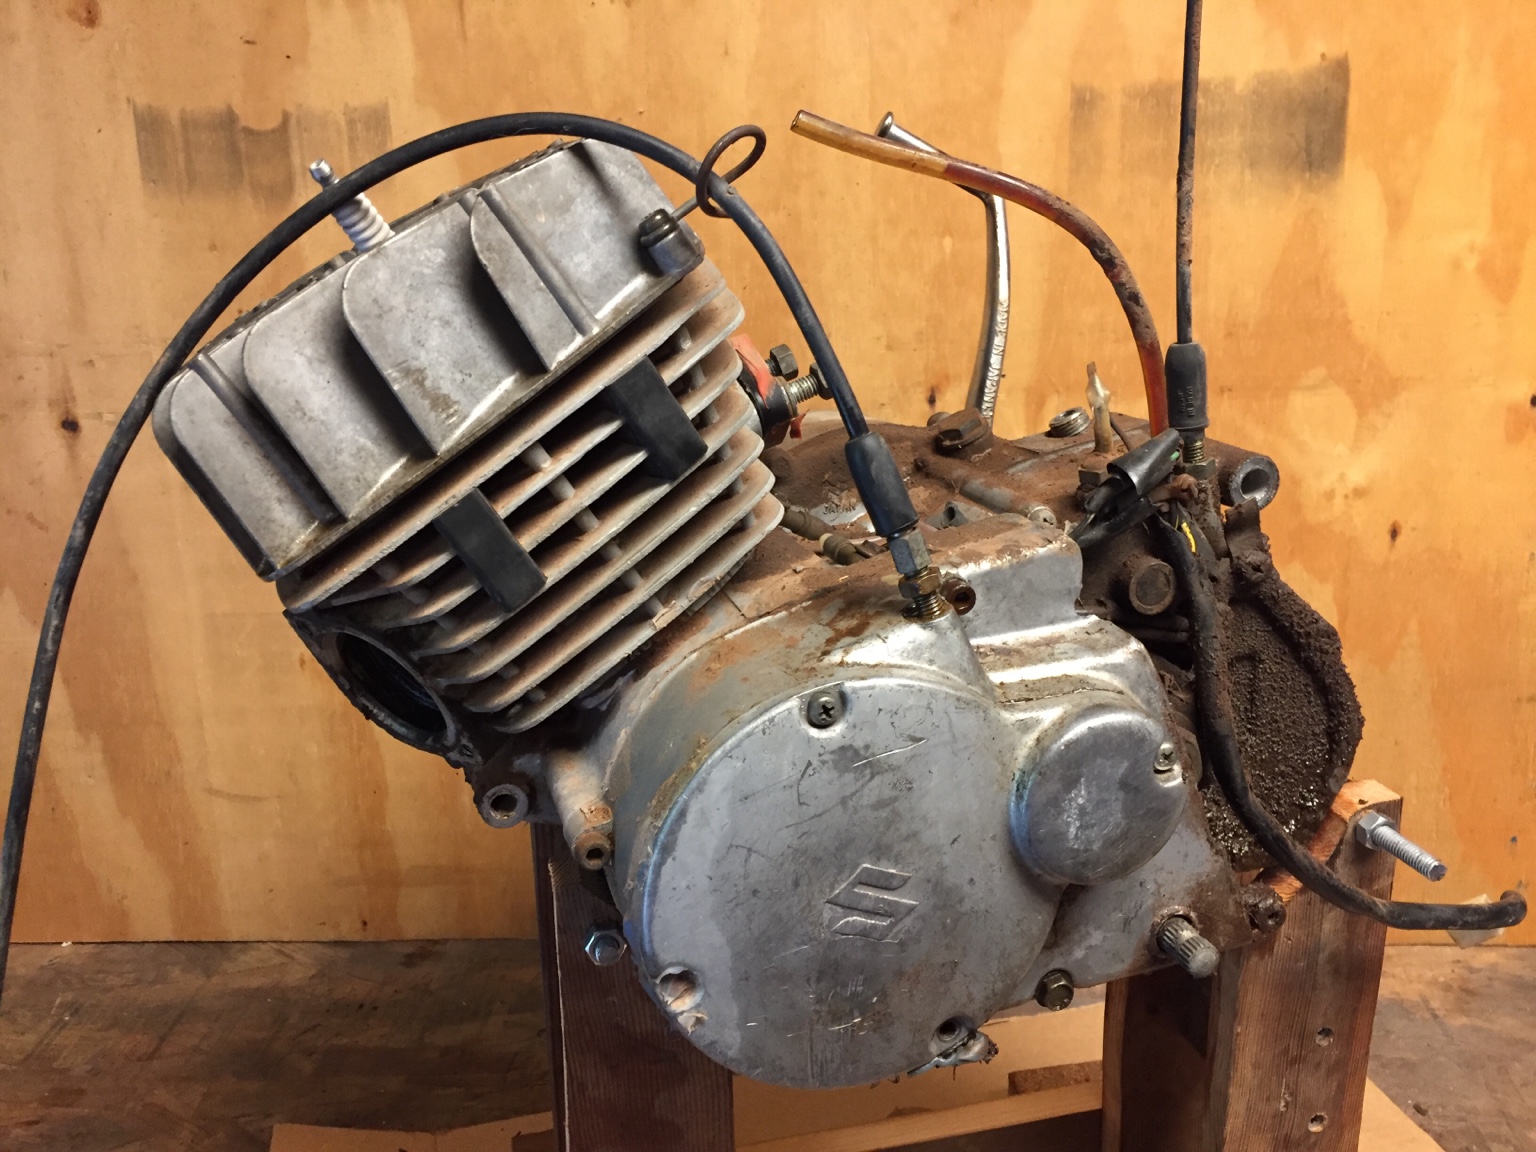
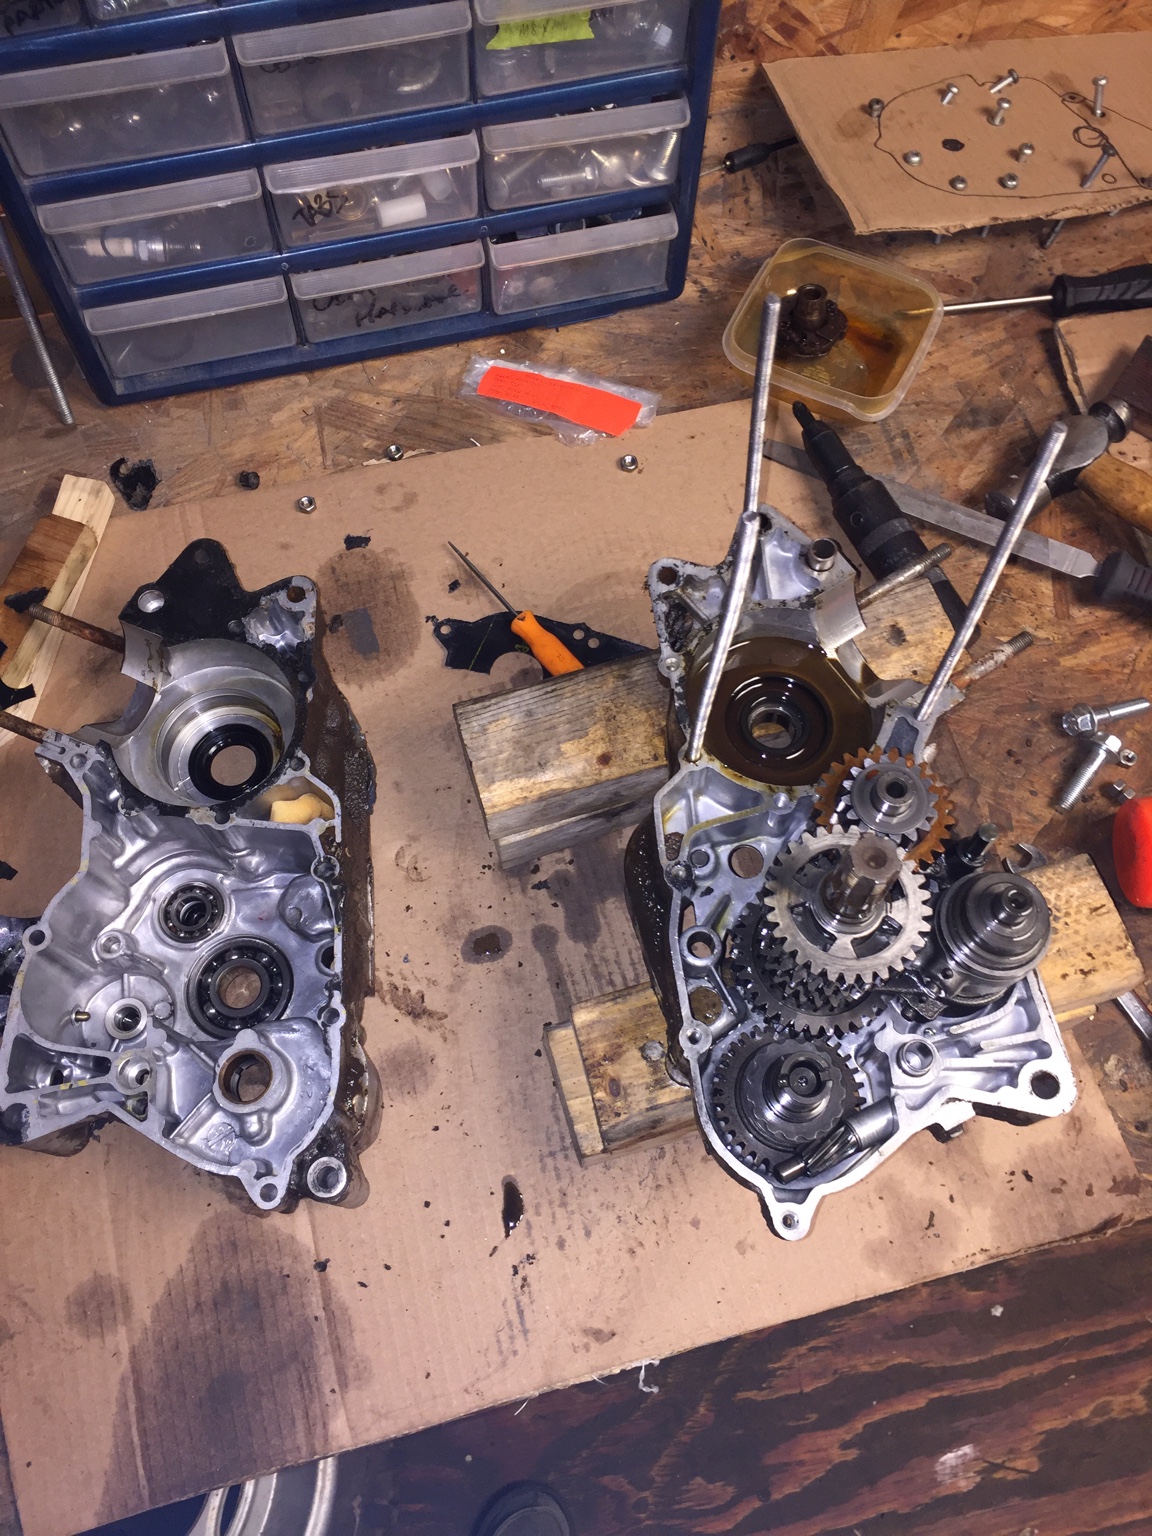
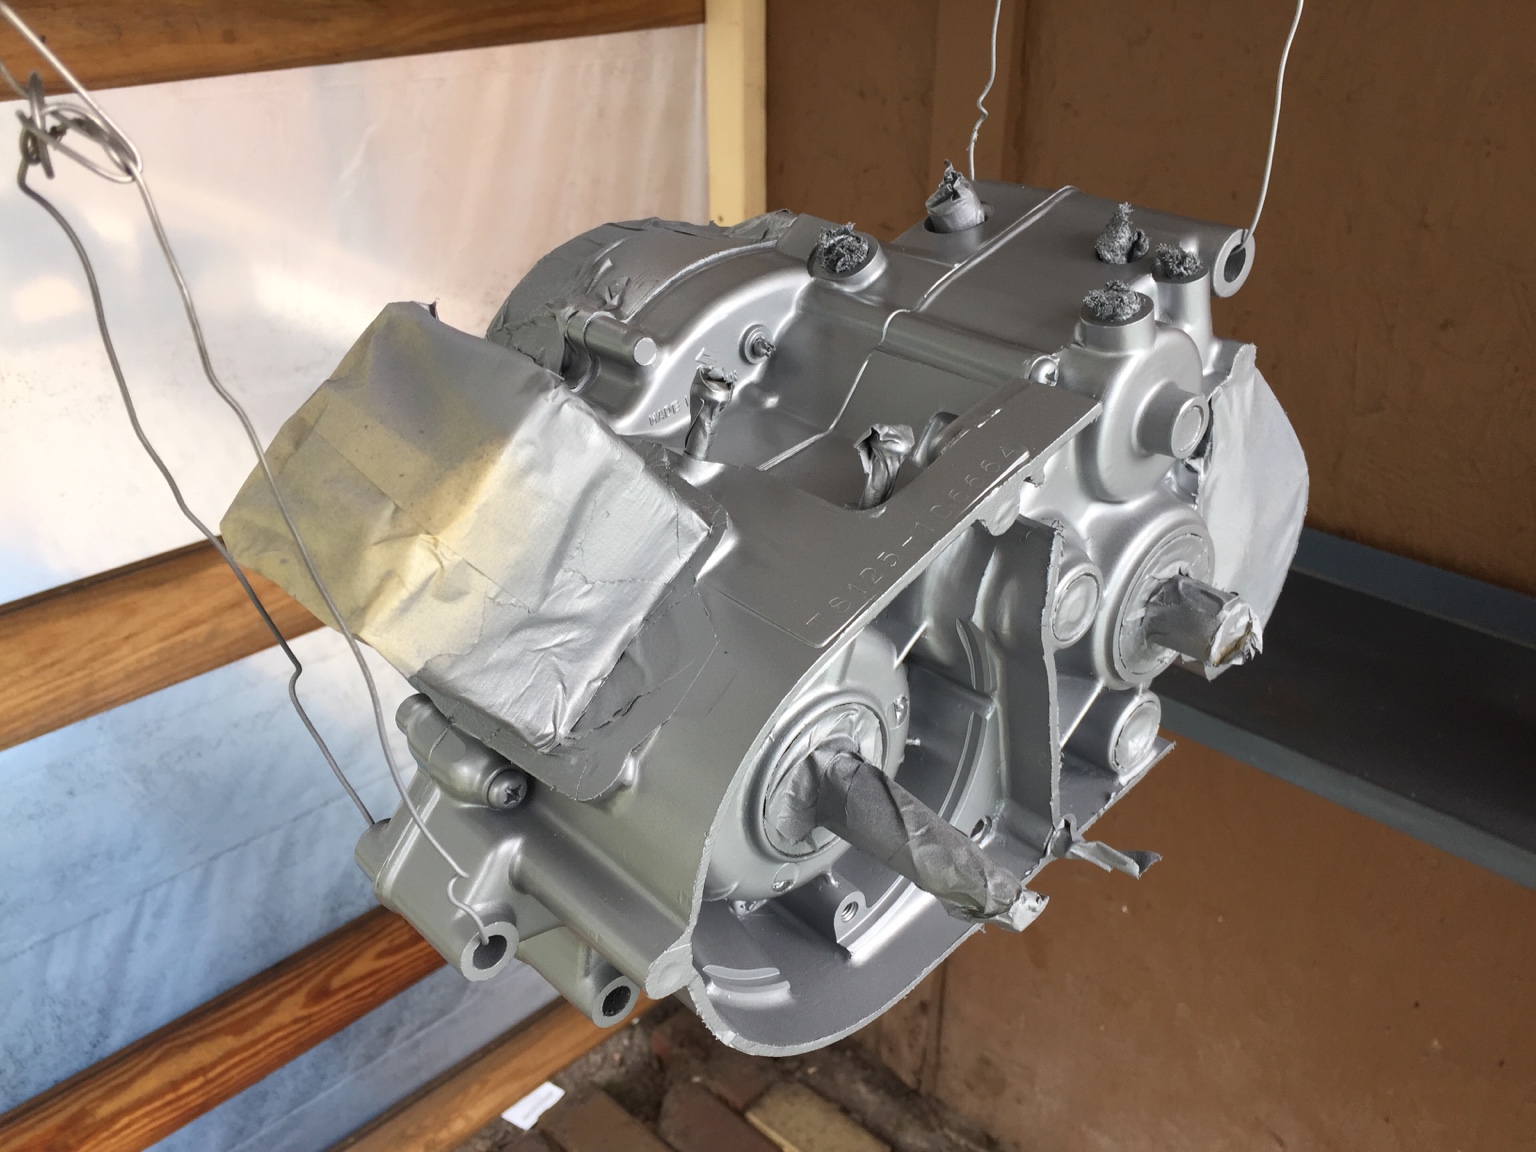
And that brings us just about up to date with where I'm at. The new cases have been cleaned up and I'm beginning to swap transmission and other internals over.
Re: The Van Van - '73 Suzuki RV125 "tracker"
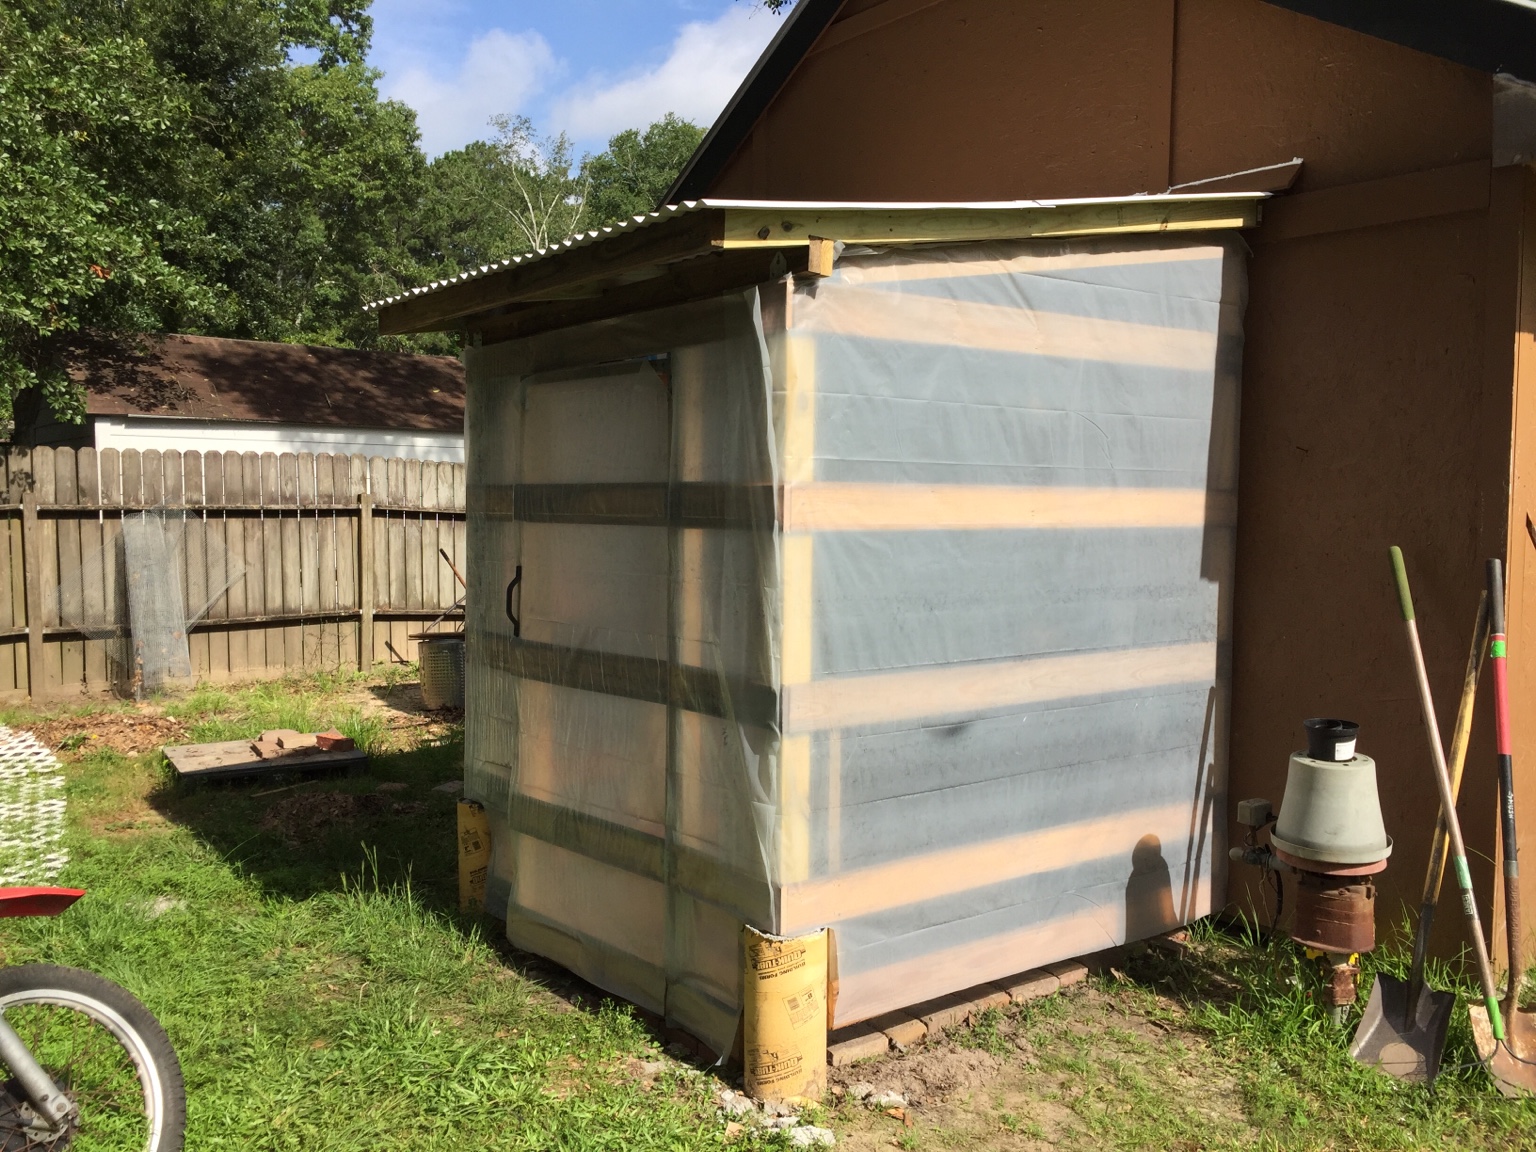
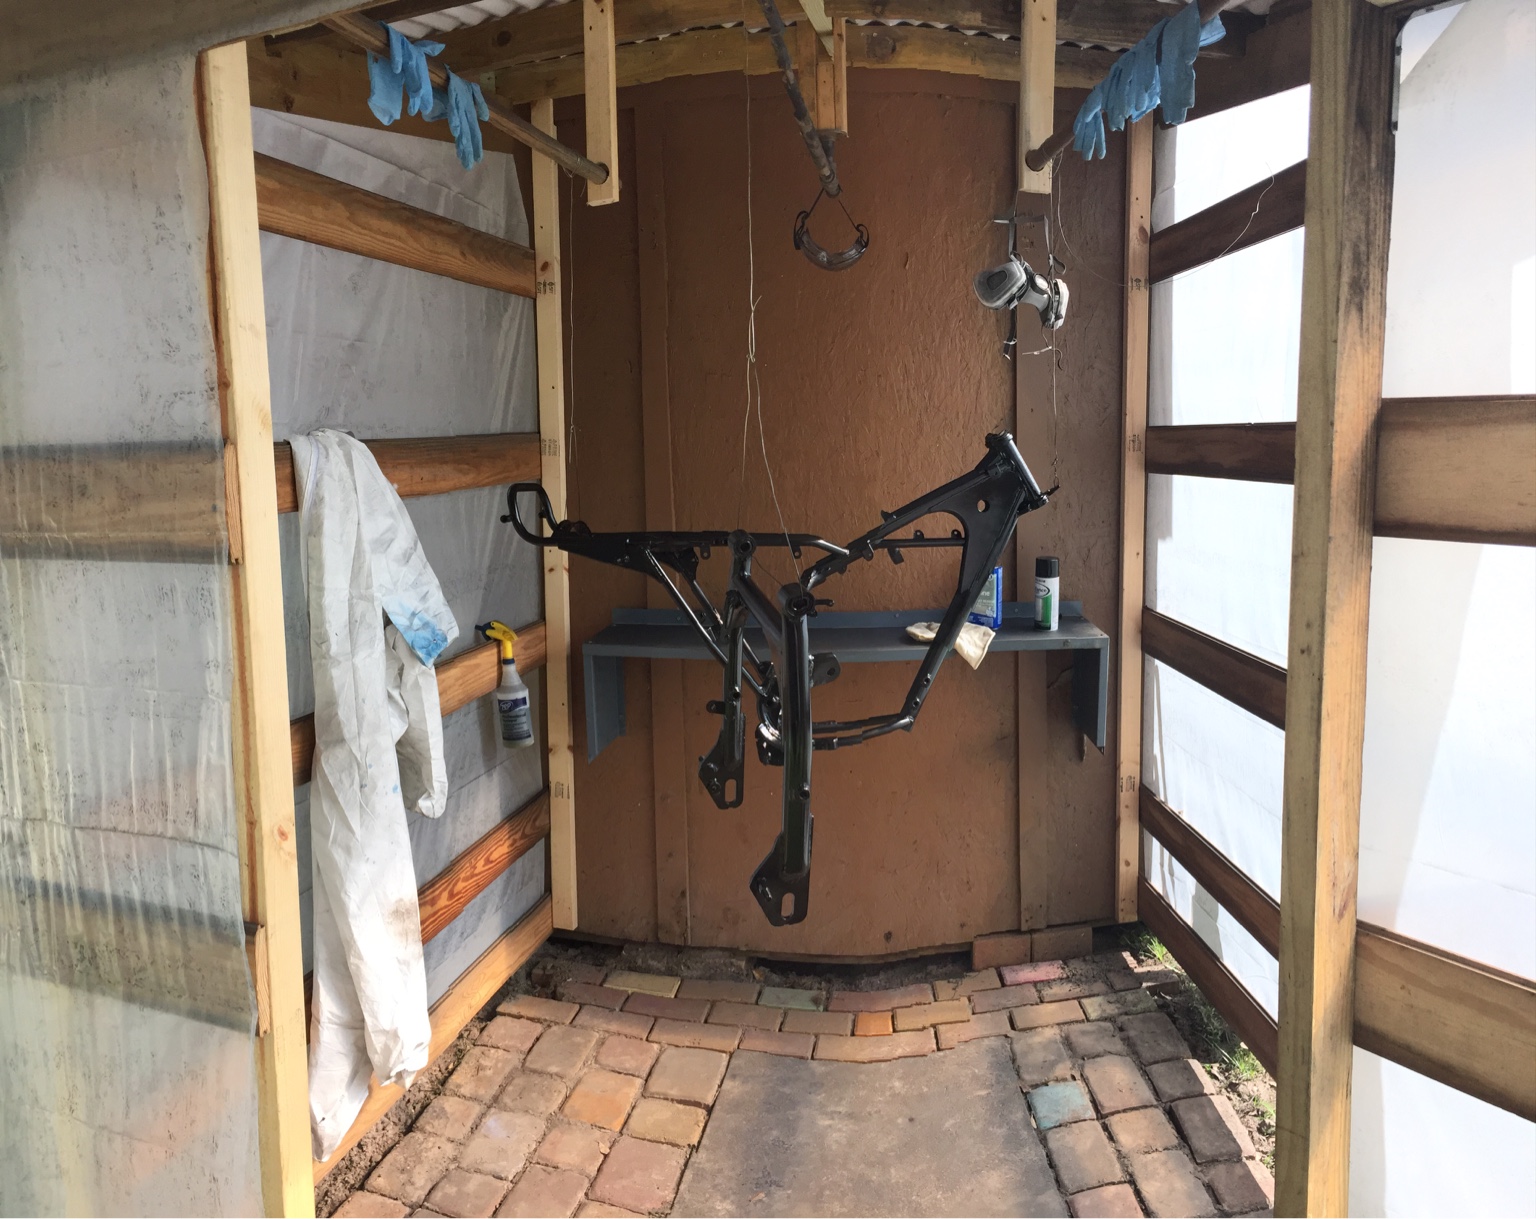
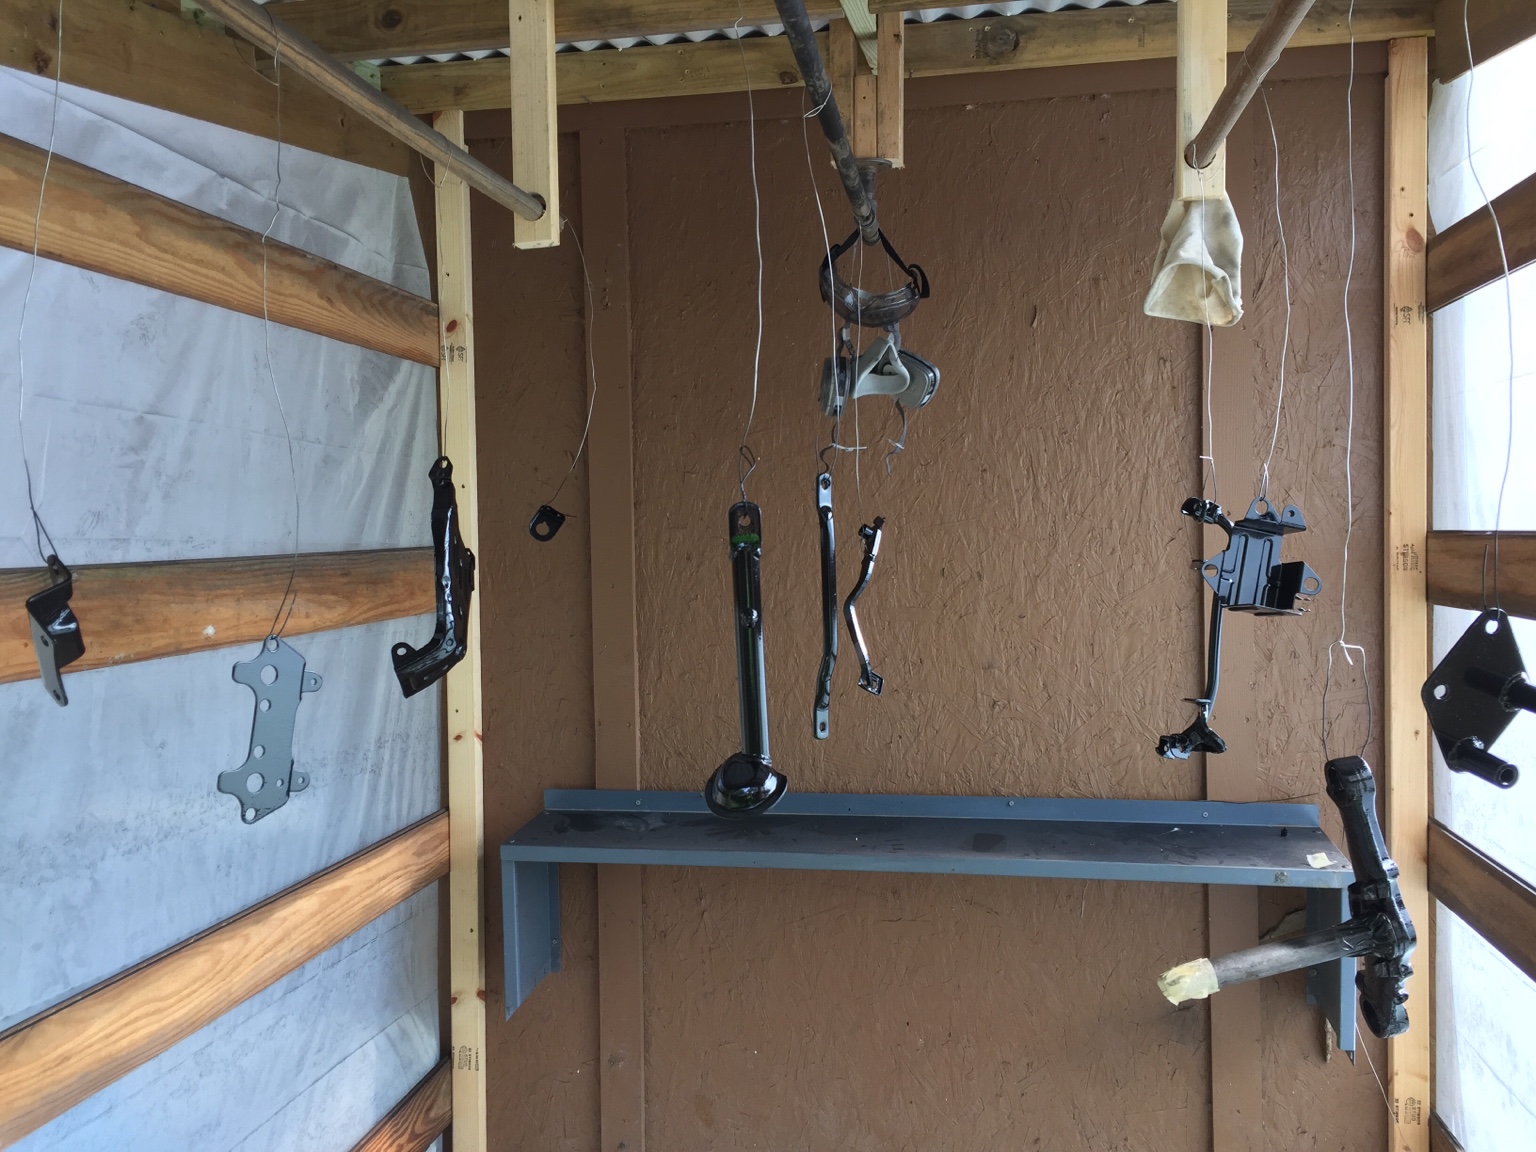
While the motor is in progress, I have been sourcing parts and prepping for refinishing. Built a little spray booth out of recycled materials back behind the shop so I don't coat everything with overspray. It will get sheathing and probably get expanded later, but I needed this up quick to get moving so it's nothing special.
Prepped the frame and swinger to test out the booth. Works killer.
Wow. nice. there was one of these for sale local and I thought it was ct70 size, that's a full size ride. now I wished I had bought it with the $$ I don't have.
Re: The Van Van - '73 Suzuki RV125 "tracker"
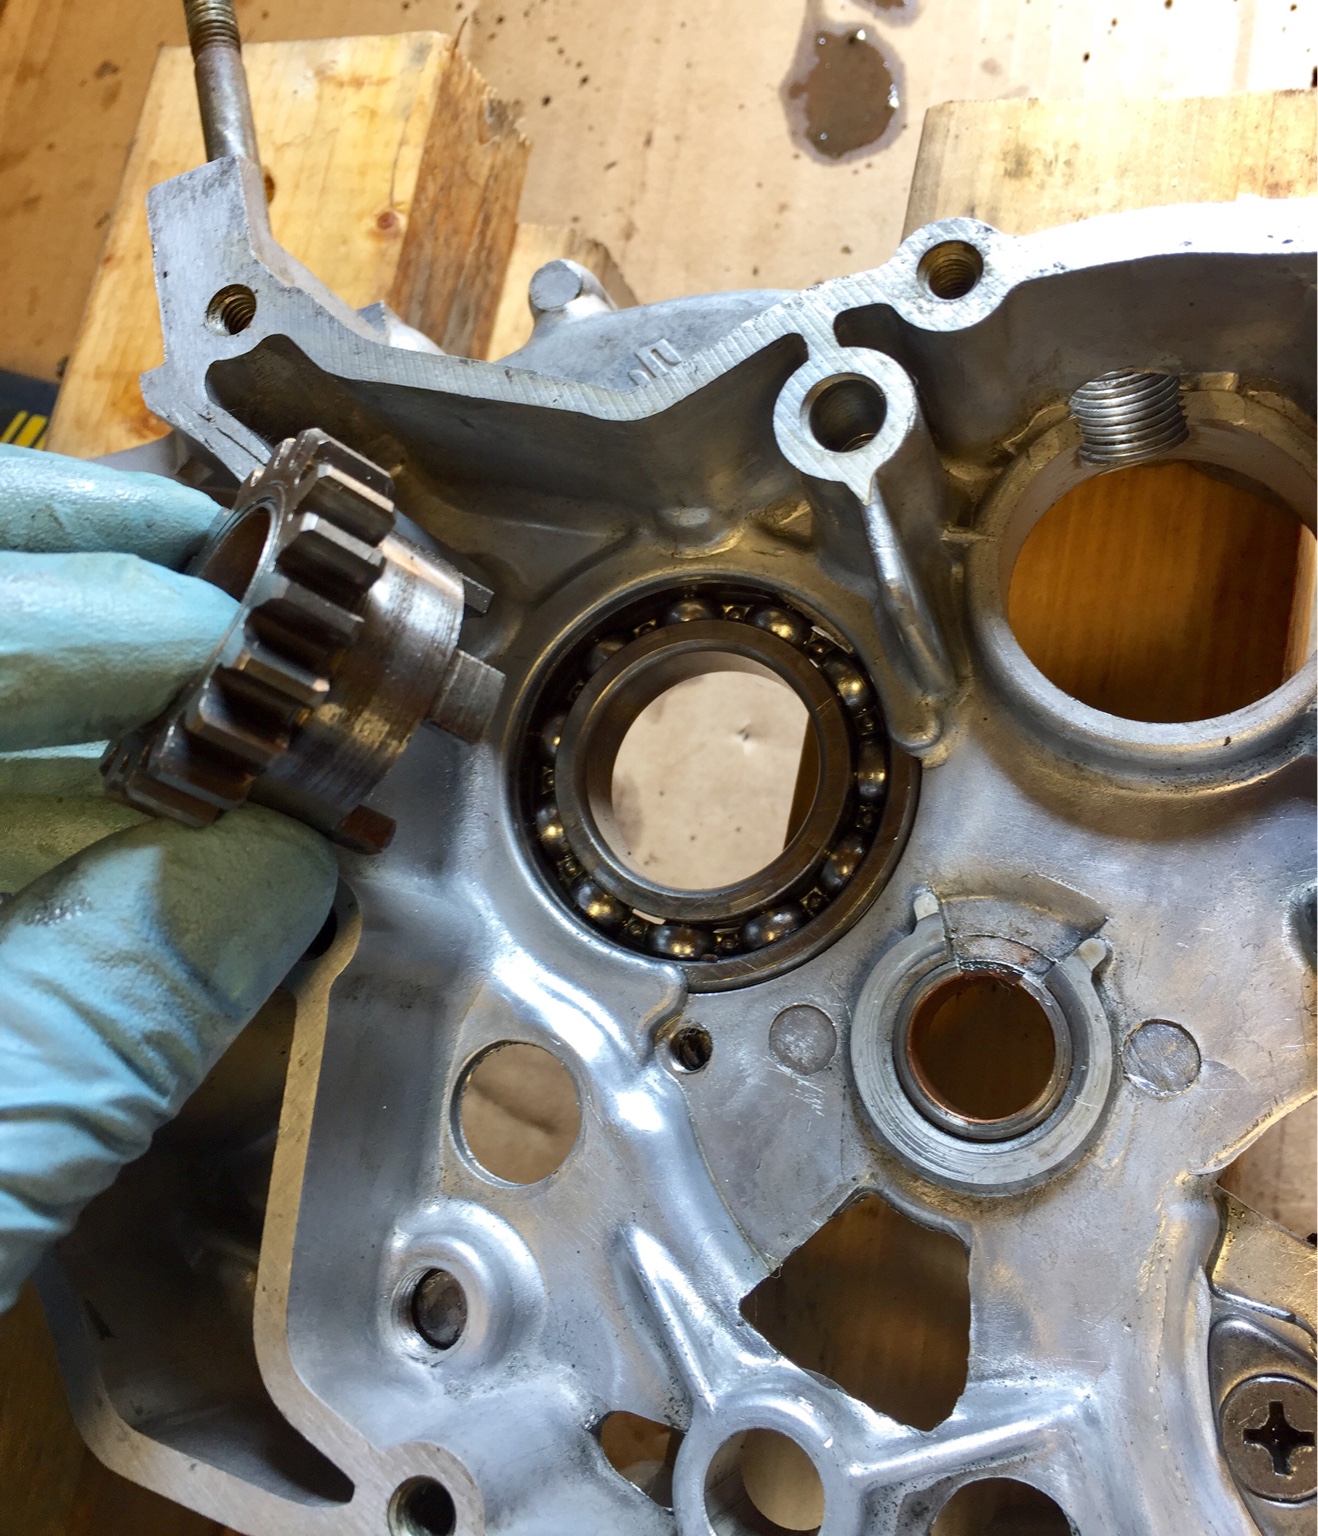
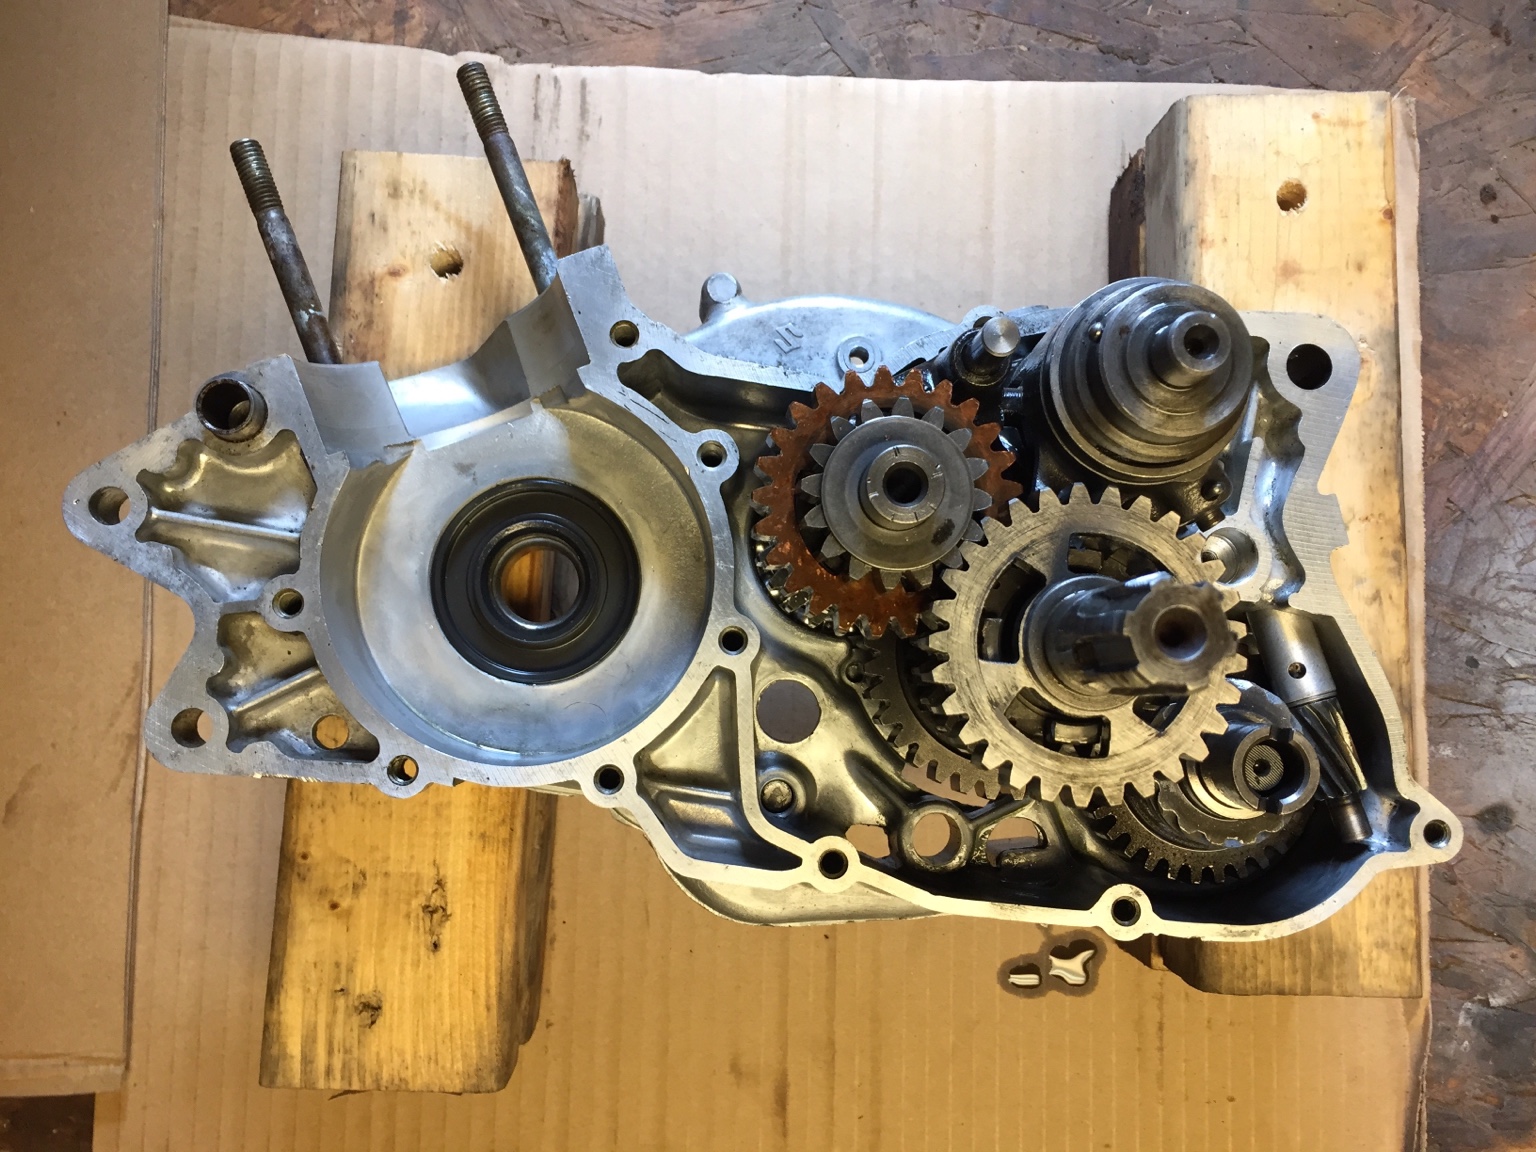
More progress on the motor. This gear slip fit into the bearing. I gently tapped it out of the old case, stuck it in the freezer for a couple hours, then heated the bearing and it slid right in.
New crank seal for this half, transmission and gearshift assemblies back in place and lubed up.
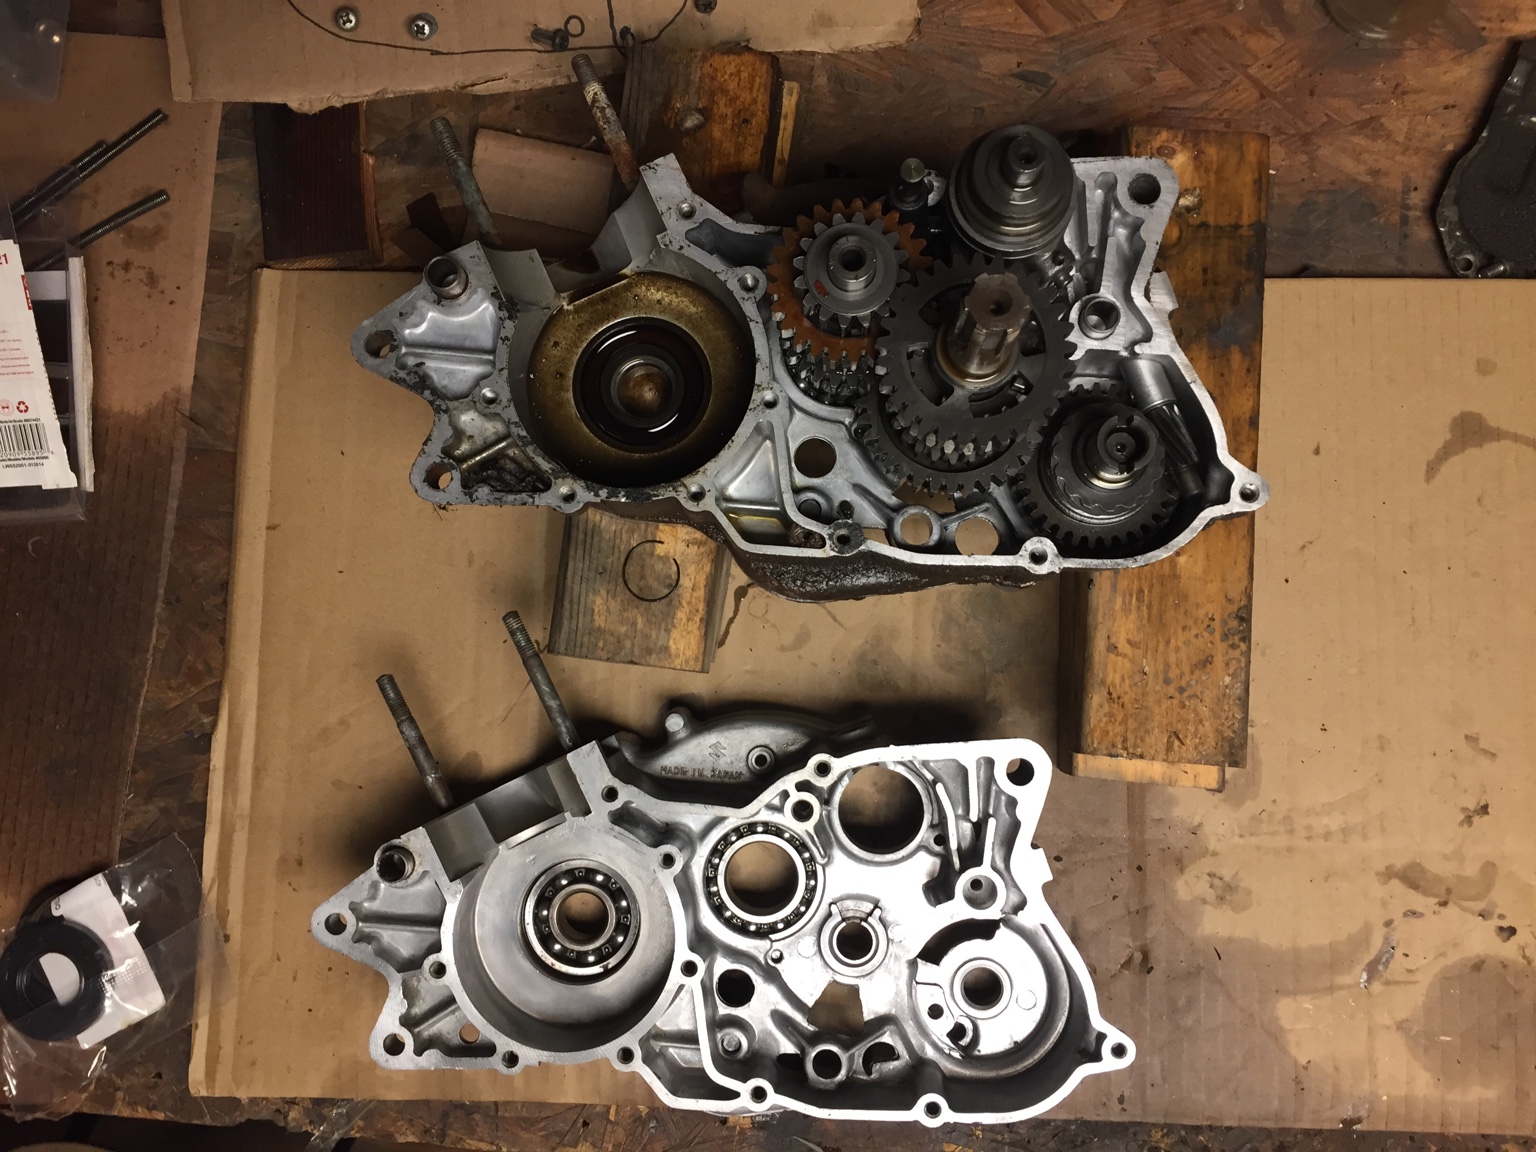
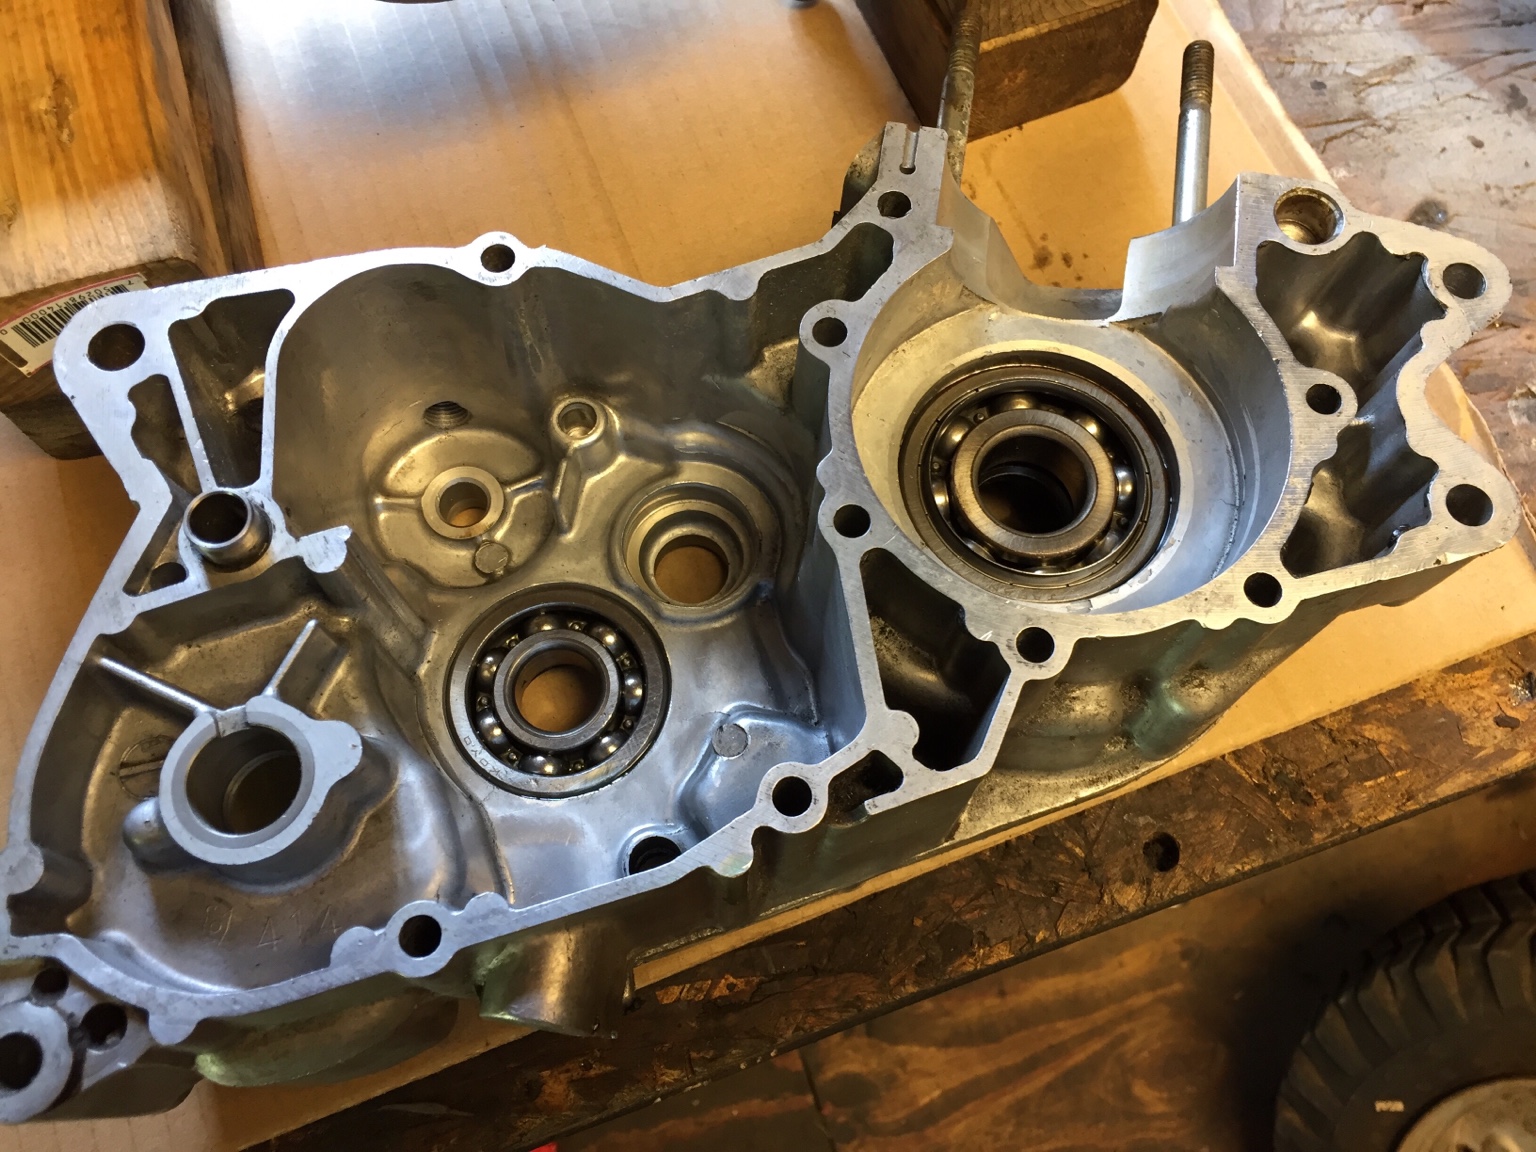
Now I cleaned up the other half of the eBay case. The gasket surface is pretty nicked up from whoever was in here before. This motor uses a fiber gasket between the case halves... but would it be a good idea to use a super thin coating of yamabond to make sure they seal up nice and tight?
If the one side is good just oil the gasket on that side. The side with the nicks put just enough yamamabond to fill the nicks but not much else almost like bondo filling pin holes, you can apply it then use a razor blade on its edge to smooth away all but enough to fill your imperfections and then let it dry and oil the gasket and put it together. apply it first with a paint brush so there is almost no excess to ooze over the sides into the cases to not have to clean them.
Re: The Van Van - '73 Suzuki RV125 "tracker"
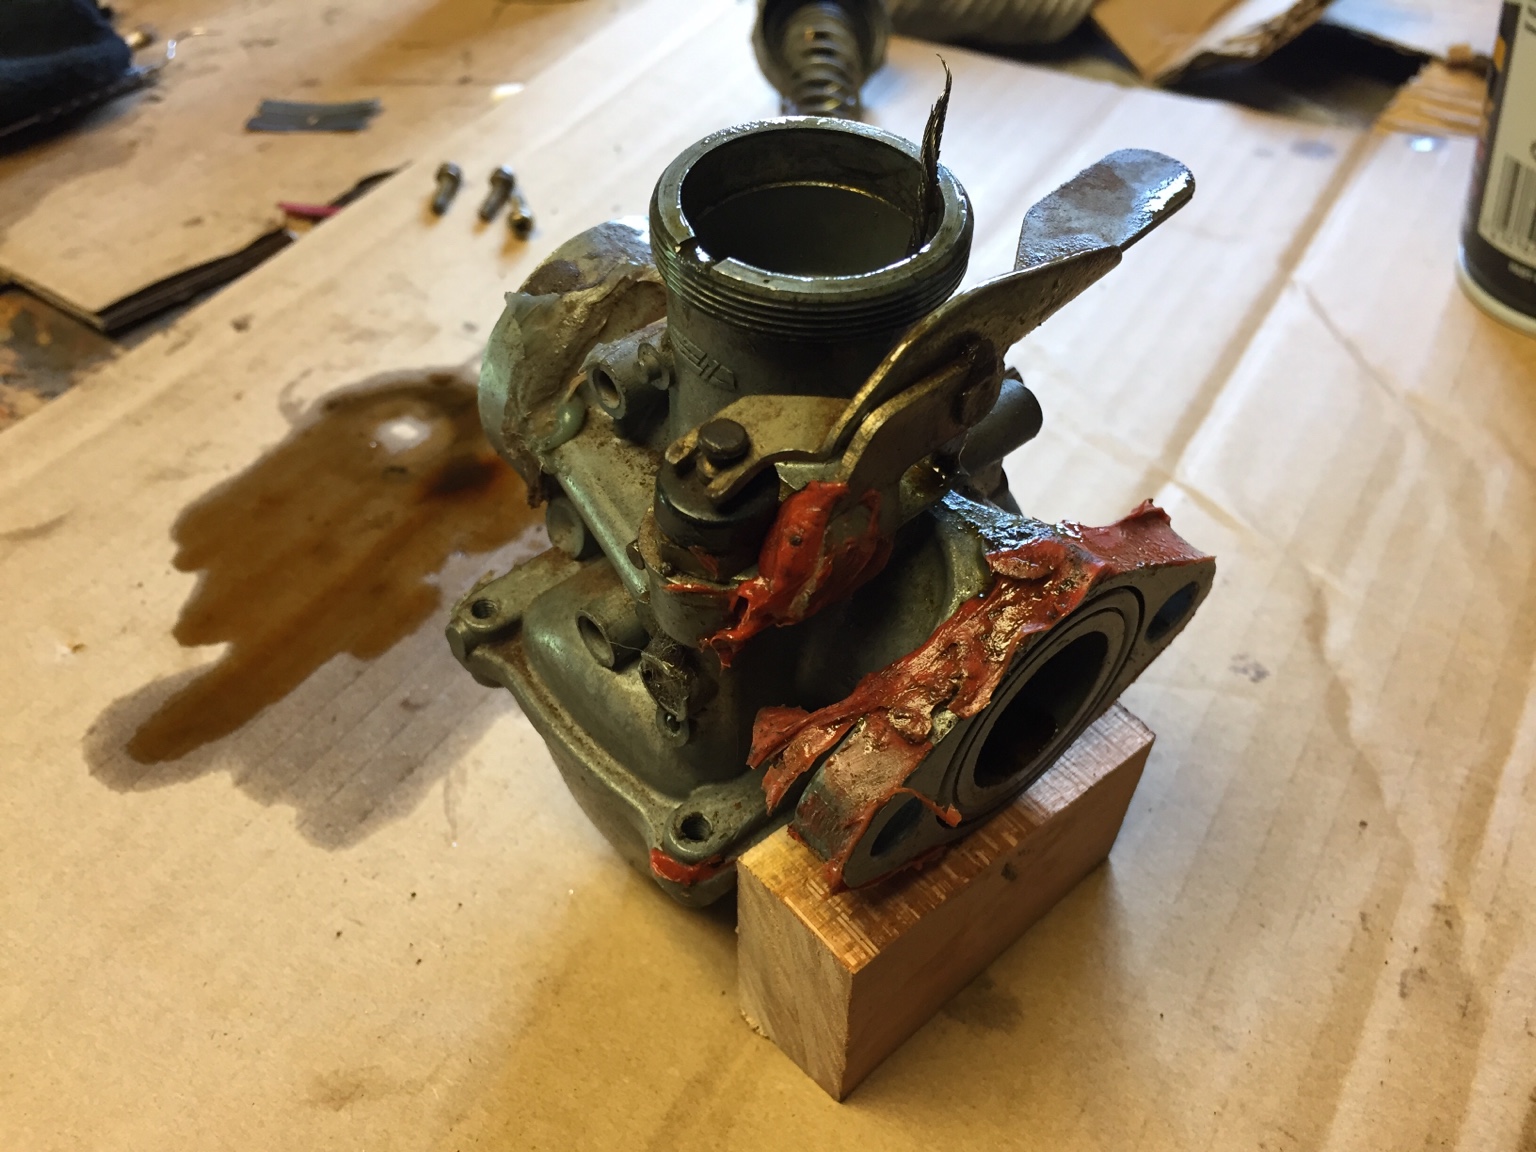
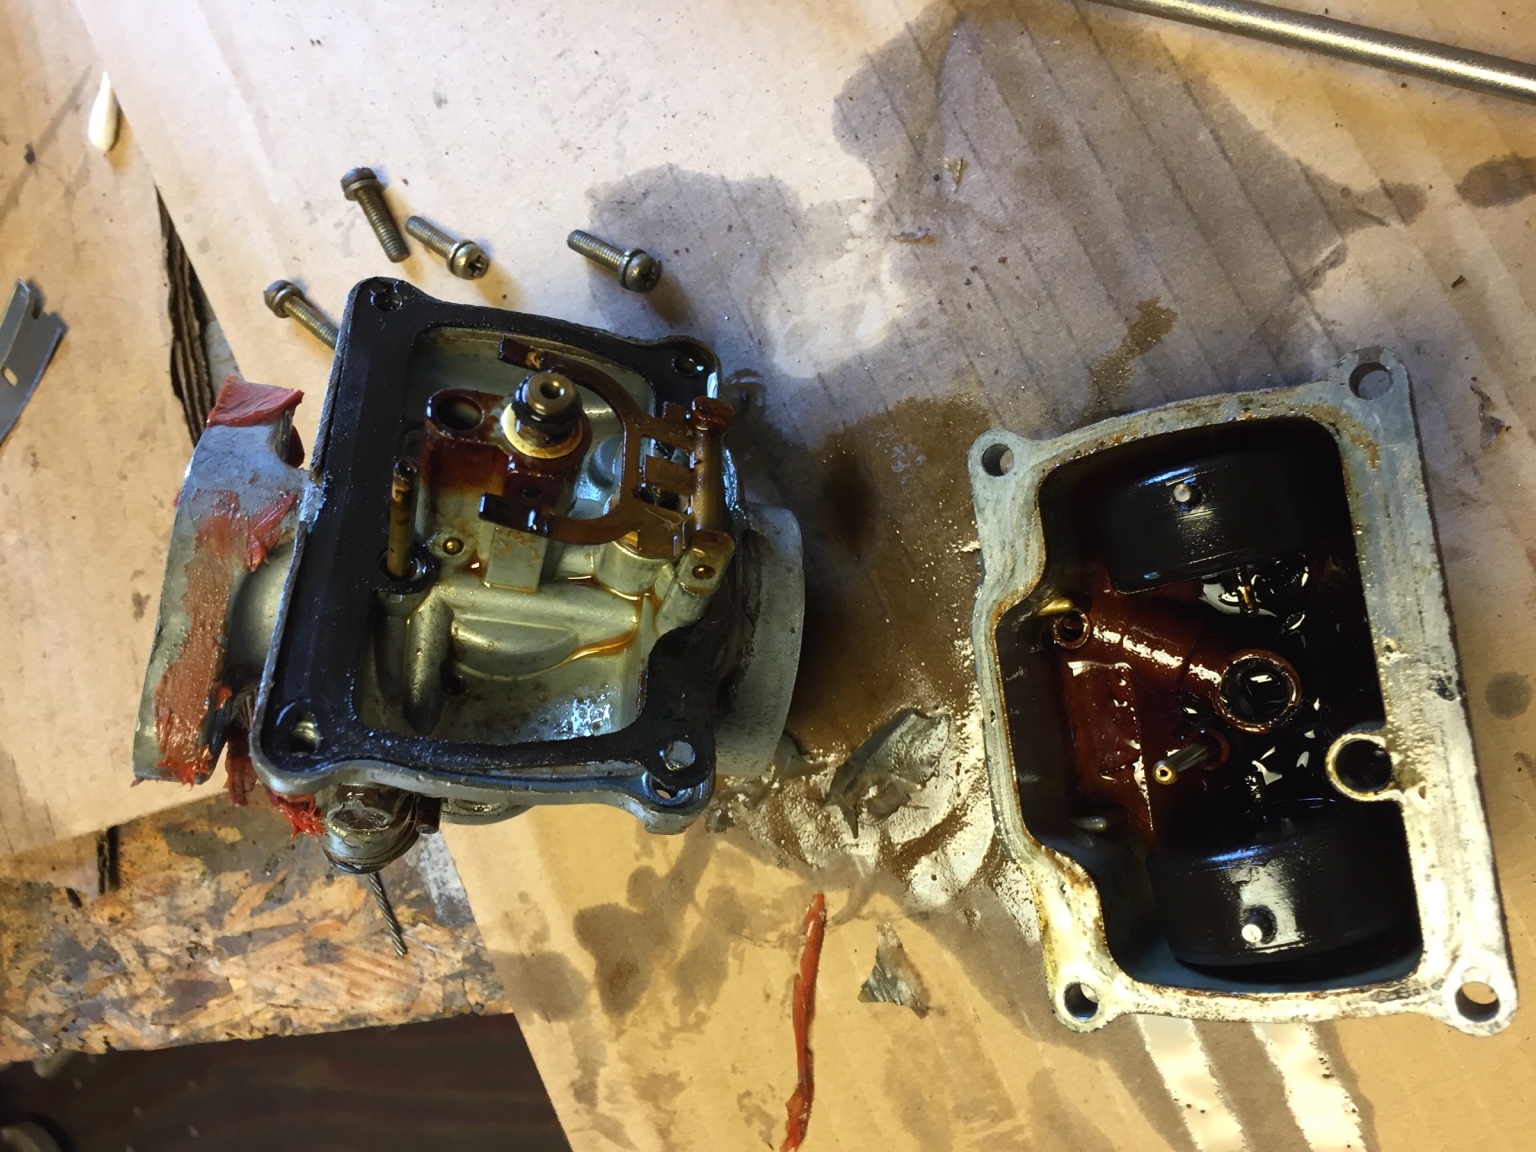
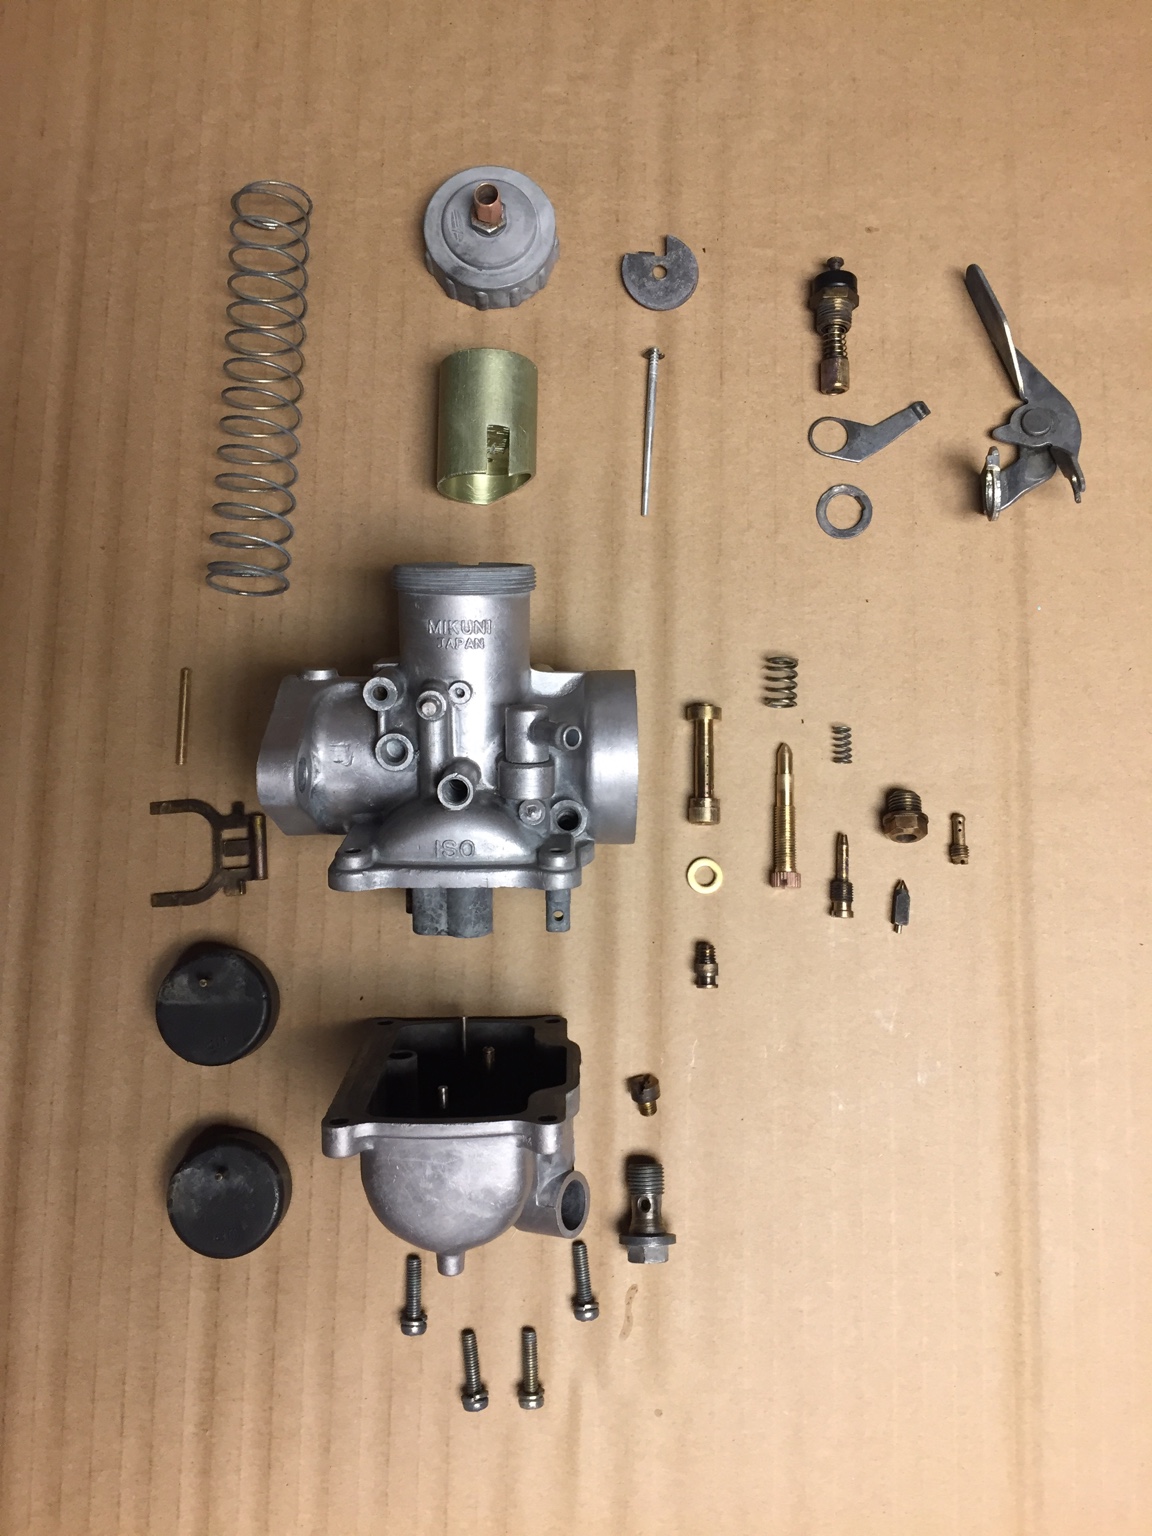
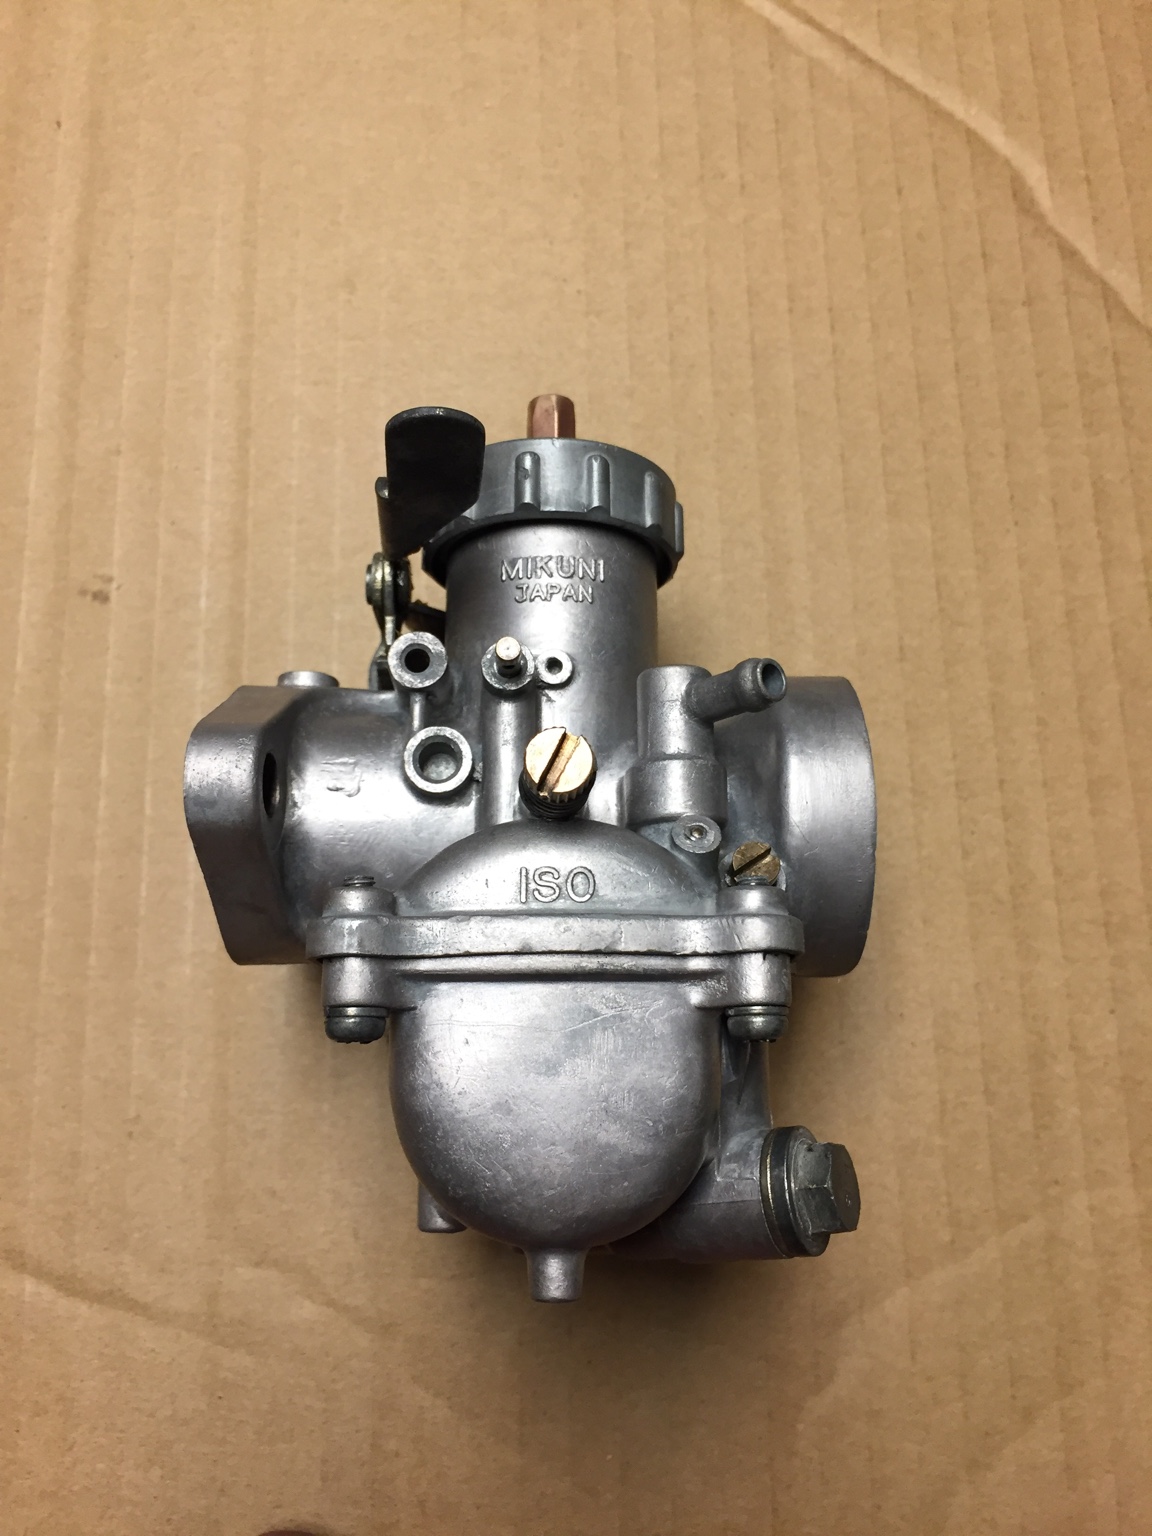
Freshening up the Mikuni VM22 that a tube of RTV exploded on at some point..
After a trip into the new ultrasonic cleaner.
This carb is set up funky. The floats are two separate pieces that move independently on brass posts, and the drain plug is a banjo bolt into the end of which threads the main jet. Weird. Grabbed a crush washer from the hardware drawer to replace the old junk gasket that was there.
Looking damn good.
That picture of you on the bike threw me for a loop! I thought maybe you were really really tiny for a second.
Definitely expected that bike to be smaller.
This site uses cookies to help personalise content, tailor your experience and to keep you logged in if you register.
By continuing to use this site, you are consenting to our use of cookies.