bikeboy
Over 1,000 Posts
I've been deliberating for a while now whether to post here or not. Mainly because this isn't the project bike that prompted me to join this site. I have a cb400F I'm hoping to cafe once this one is complete. Secondly, I'm not sure I'm comfortable with the 'streetfighter' tag :-\
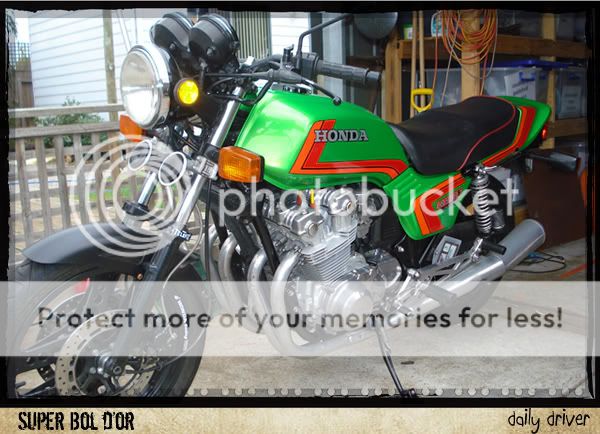
Anyway, it turns out my desire to have this 'out there' has overwhelmed any misgivings I may have regarding labels. So, without further ado, and apologies to the Netrider guys that may have seen this before, for your enjoyment, I present my current, nearly complete 1980, CB900FA, that I'll probably find a groovy name for later")
(oh, you may also notice the timelines have condensed considerably, because this has been dragging on for a while. Fortunately, I've spared you the long intervals where not a lot was happening.)
so here we go. Hang on tight
The background to this is that I have a second FA I can modify without interupting the riding season-which is pretty much all year round.
Stage 1 was to fit an 1100 swingarm I picked up, and fit an F2 rear wheel in there. I had a few alignment issues to start with, but ended up sorting it out with the help of some of the guys.
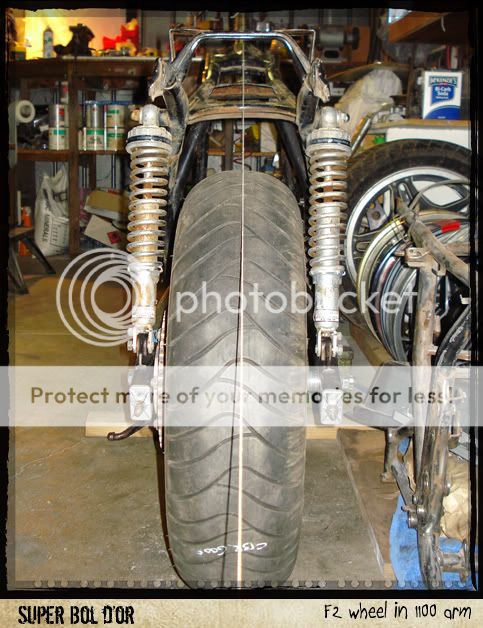
I had to work out a system to capture the caliper anchor, but I kept putting that off :-(
Stage 2 was to find a set of F2 forks to do the front end swap. Turns out, after a few bad ebay decisions, that the first set of forks I bought weren't F2, but F1, and the F2 triples I had my stem pressed into was distorted:
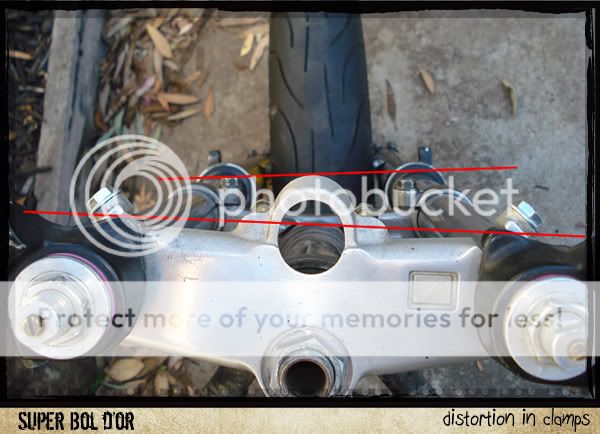
Well, I got another set of clamps, and it was all good.
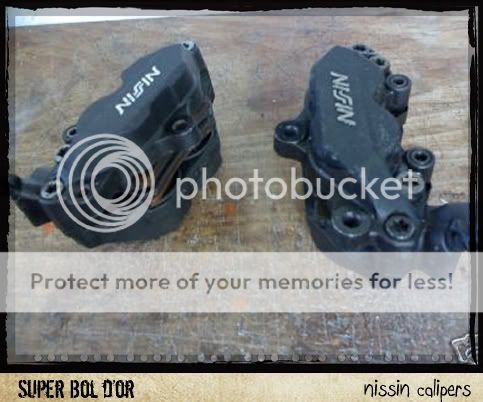
Well, time passed, as it does, and I picked up a pair of 4-pot nissin calipers from a cbr900rr.
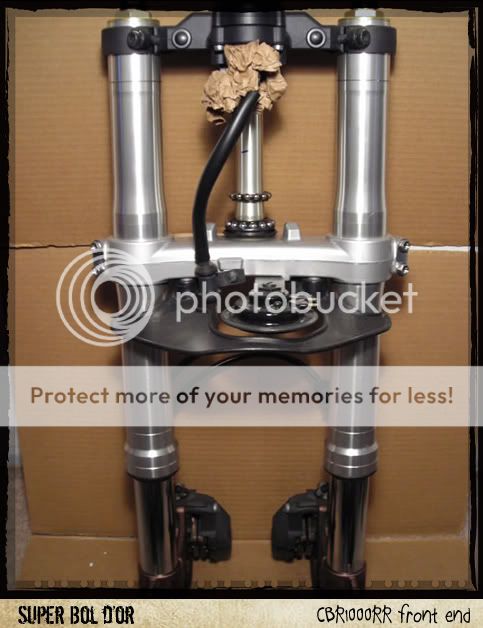
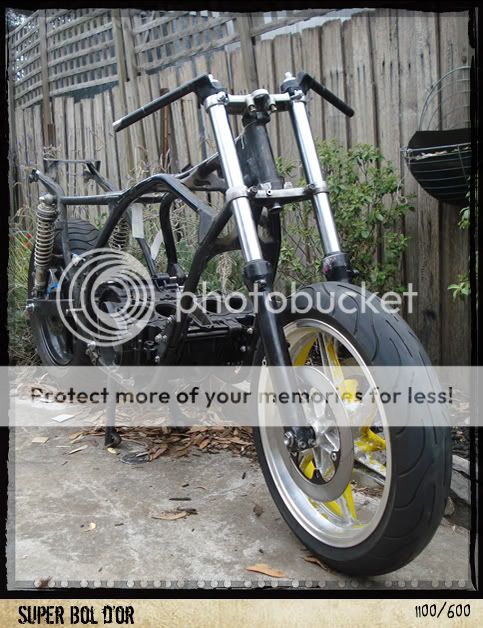
I started trying to fabricate an adapter to fit them to the F2 forks as I'd seen done by a couple of guys, and I had a pretty good unit mocked up out of MDF that I was just aboutready to get machined. Then I spotted a complete 900rr front-end that no-one seemed to be biddin on, and well, I found myself at Stage 3. The problem with the 900RR front end of course, is the 16" front wheel. Seeing as I had the F2 front end all sorted, I was able to determine that the F2 wheel *may* fit between the RR forks with a couple of spacers. The rotors were the same size, and looked like they may align with the calipers. There was nothing else to do but give it a try, so I did. I figured 2 6mm spacers either side would keep the wheel centred, and the rotors did indeed sit right where they were supposed to in relation to the 4-pot calipers.

Had these spacers knocked up:
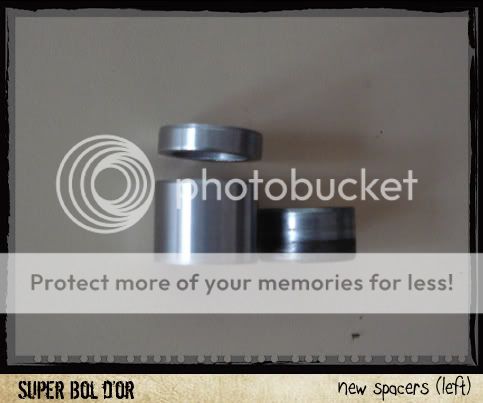
The longer one replaces the right-side original, with the extra 6mm added.
Next thing to do was re-think the handlebars set-up. I needed to drop the forks as low as I could to compensate for their shorter length, and this meant I wouldn't be able to use the RR clipons. I needed a pair of risers I could bolt to the top triple, and found a pair of a "400ex quad" that looked ok, and weren't too high. That meant I also had to find a pair of bars, and I found a set of Renthall motocross units that suited the look I was shooting for:
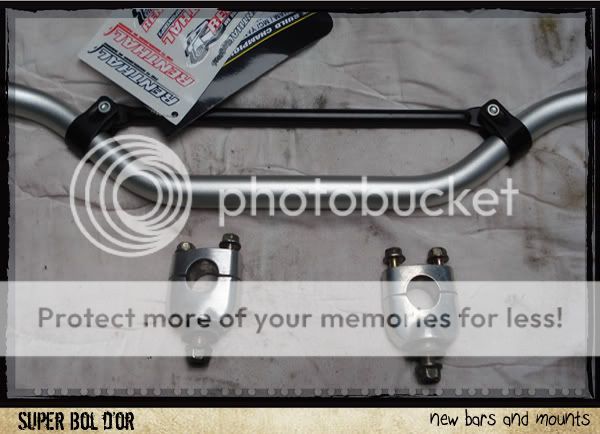
With a little work, the risers fitted OK, and the bars don't interfer with the adjusters on top of the forks. What ever they are!
Concurrent to this, I'd decided that I wanted to go monoshock on the rear and had been collecting parts for that conversion, and they had been turning up in the post. I had a set of pre-fab brackets and F2 swingarm and shock to play with. I had to decide how to attach the swingarm, and had 2 options. The early favourite was the bracemaker method of replacing the F2 pivot with the CB unit, and I had a spare prepared and ready to go:
Not being a welder myself, I was going to rely on my boat-building brother to put it together for me, but he had a few work commitments and was unable to come around for a while. When I have time on my hands, I get to thinking.
Could be worse I suppose ;-). So I had another look at the F2 arm and it's mechanisms. It looked like all I needed to do was change out the 2 pair of 15mm ID bearings with some 16mm units, then have the 2 spacers and roller bearing bush turned out to 16mm, and I could use the CB swing arm pivot bolt, and not have to shim or alter the frame openings. So that's what I did.
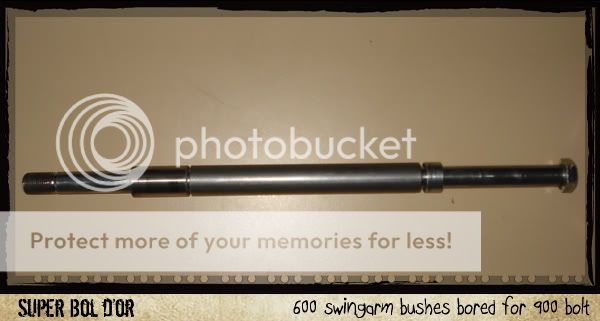
Turns out the roller bushing is hardened, and it took the engineering firm 3 times as long to bore it out, with an approriate 'adjustment to the quote. Oh well.
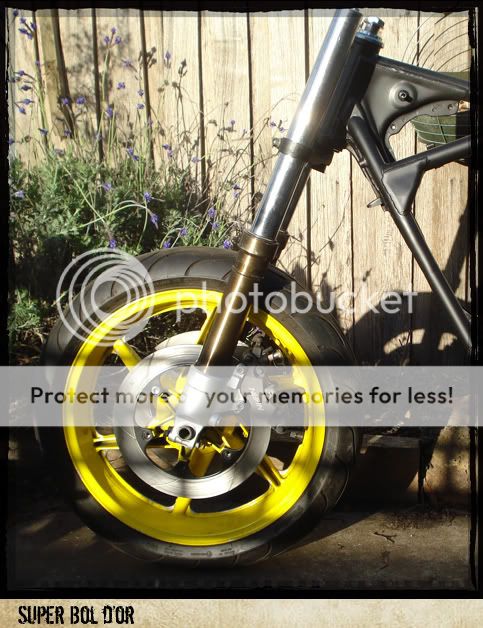
So, as it stands at the moment, I have the F2 front wheel sitting in the RR forks, giving me a 17" wheel, mechanical spedo drive, and 4-pot calipers. That's a win I reckon.
At the back, I have the F2 swinger all fitted and linkages ready to be welded in place, and enough tubing left over to brace the frame in all the common spots.
Well, I may have been a bit premature in measuring the F2 wheel/disc combo in the RR forks. They fit just fine with the new spacers, but since I've temporarily got the brakes fitted and bled, it seems the rotor is 20mm to short in diameter to take full advantage of the brake pad surface area. A quick double-check of my measurements reveals I have measured the *rear* rotor of a VF1000 that was fitted to an F1 rim, instead of the F2 rotors. The VF is 295mm, the same as the RRs, but the F2s are 275mm.
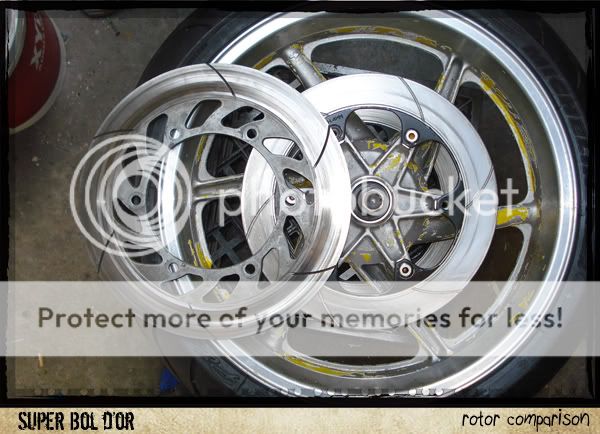
I have to hunt around for a second VF rotor now, but for the time being I'll press on. One issue will be the pattern on the rotor won't reverse.
In the meantime, I've worked out the steering damper mounting. My problem was (as we all know) the brackets for attaching the device at either end can't be had for love nor money, so I've had to improvise.
Step 1: drill and tap some rod to accept the 8mm thread.
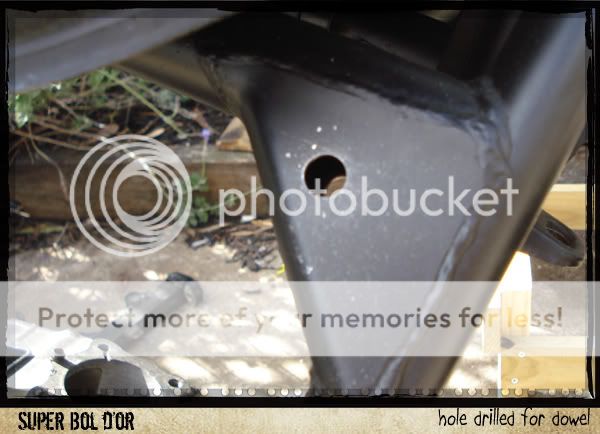
Step 2: test and measure for the frame mounting point, then drill a hole through both sides of one of the gussets to accept the rod.
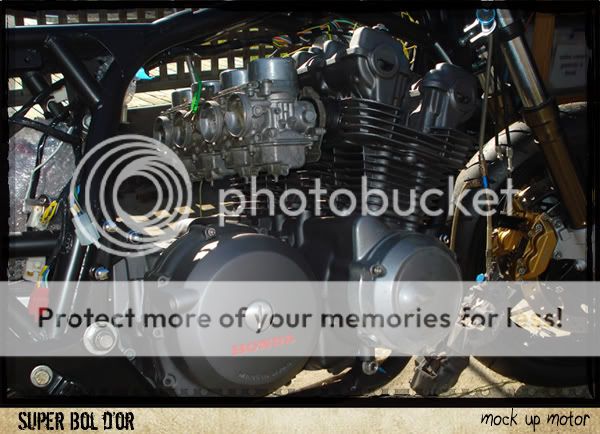
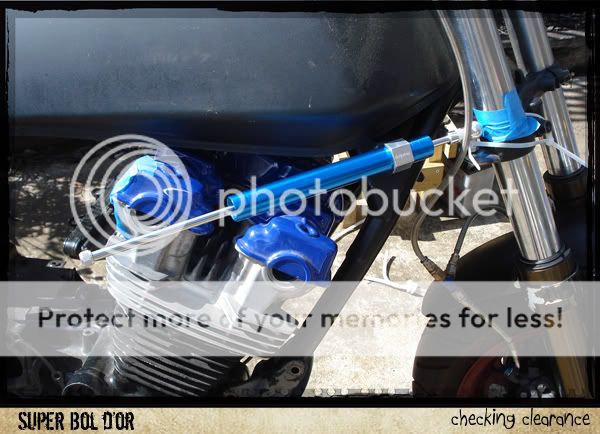
Step 3: put you mock-up motor/tank on to gauge final clearances, then tack the 'inside' end of the rod.
Step 4: zip-tie the fork end in place while you wait for your 'real' welder to attach that end later, at the same time he finish-welds the 'outside' face of the rod :wink:

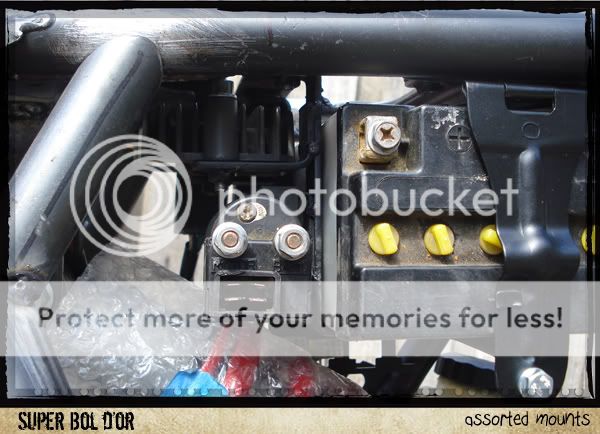
Spent the last couple of days tackling the battery box/electrics issue, and come up with this:
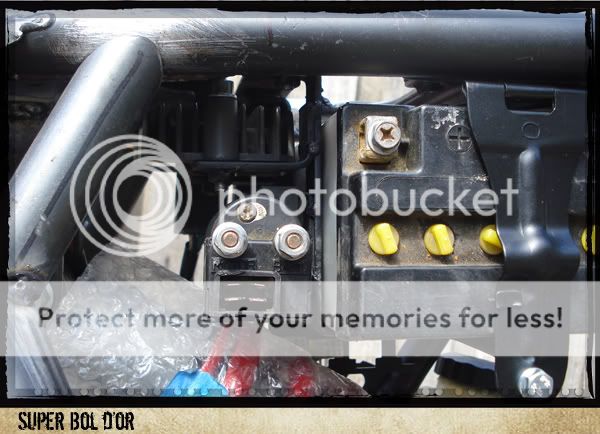
Got the solenoid and rectifier mounted on the left. I'll be using a gel battery obviously so that I can lay it on it's side, but for a mock up- this old thing is dimensionally the same.
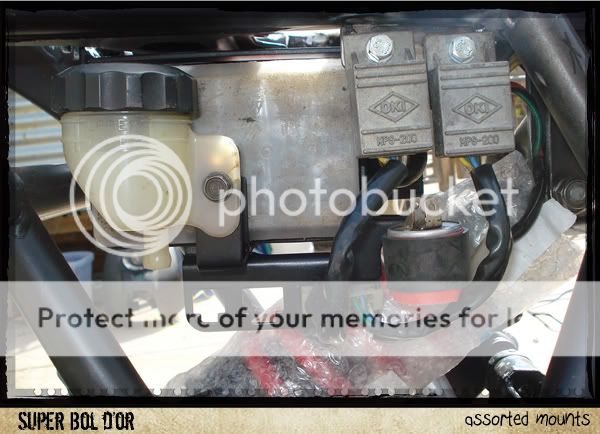
Spark units, rear master, and flasher relay on the right, along with the bracket to keep the connectors organised.and from the top:
I've used the rubber-mounting system similar to the original on the front pair of bolts, but I may also fit it to the rear.
I will also need to relocate the fuse panel from the triple clamp, but I want to get one of the modern 'blade' type. I've seen a couple on ebay off a CBR1000 that look like they'll do the job. That will be the last thing to fit here.
I'll need to re-arrange the loom to accommodate the moved units, but that's no big deal.
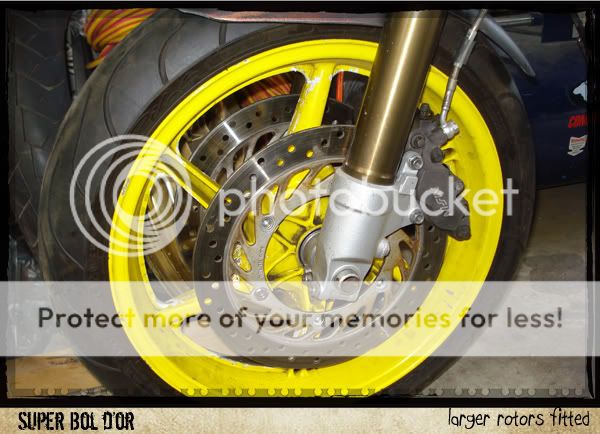
Got the brake rotors sorted:
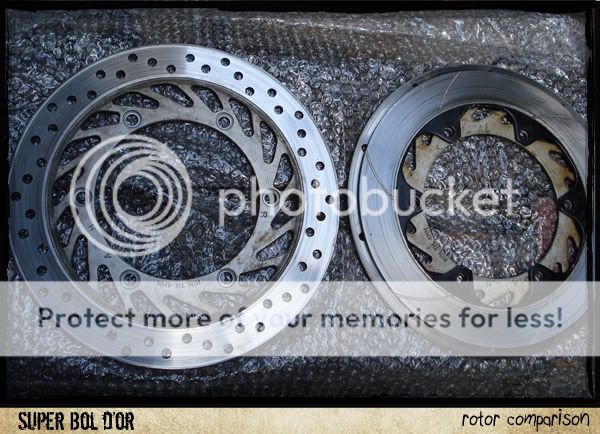
off a CBR1000. Correct diameter (295mm), and correct stud pattern. That's the 600 disk on top of the one on the right.
I love it when a plan comes together:
Also got a blade fuse-holder from the same bike:
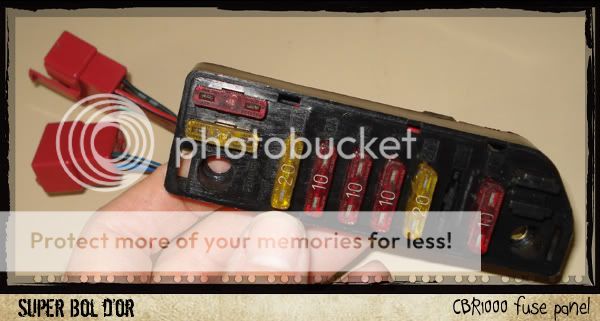
which will be a lot neater solution. eventually. I'm thinking now I should try to keep it under one of the sidecovers, purely for accessibility? Would be a pain to have to pull the tank to check a fuse I reckon. Might manage to stuff something else up there tho' :wink:
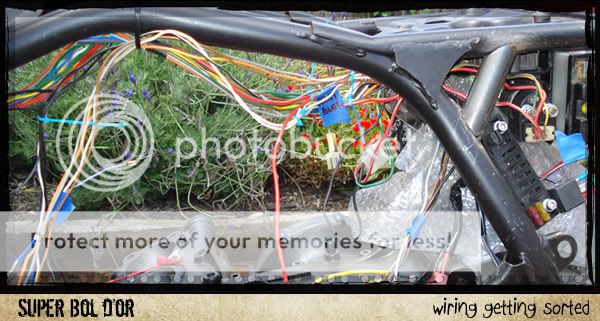
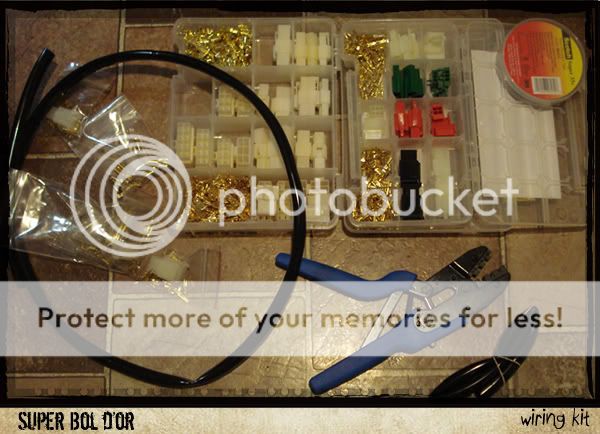
I thought I would make a start on the new loom I'll need because of the re-configured layout. I've ordered new terminals and connectors from these guys because they seem to be a really good match for OEM. While I wait for them to arrive, I'll sort out some spaghetti.
What could possibly go wrong :roll: :roll:
Got the kit(s) delivered today! I've had domestic post take twice as long as that!
This should keep me busy for awhile:
Well, it's been a while ;-)
The frame mods have all been tacked in place, and I've dismantled everything so my welder-brother can do the finish welds over the break.
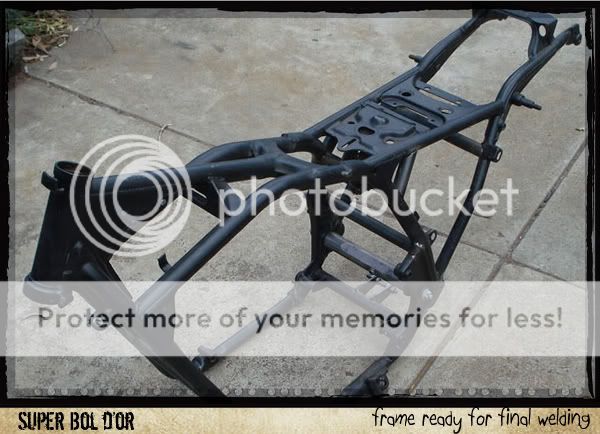
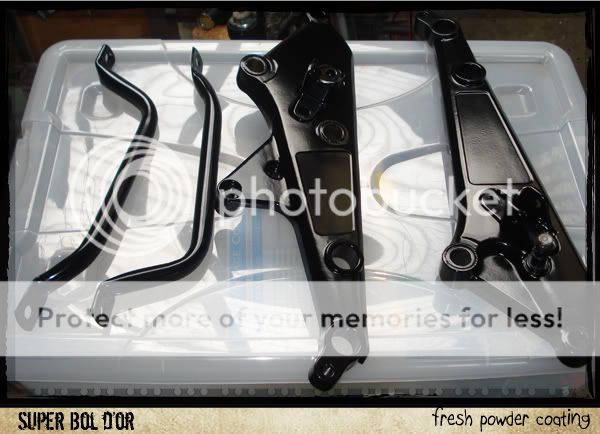
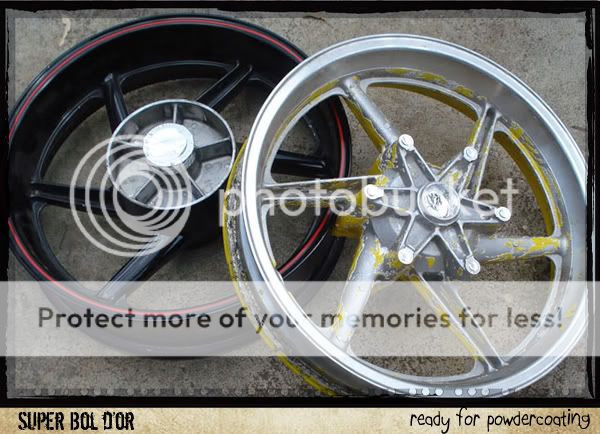
Also taken the tyres off the rims and taped them in preparation for powdercoating
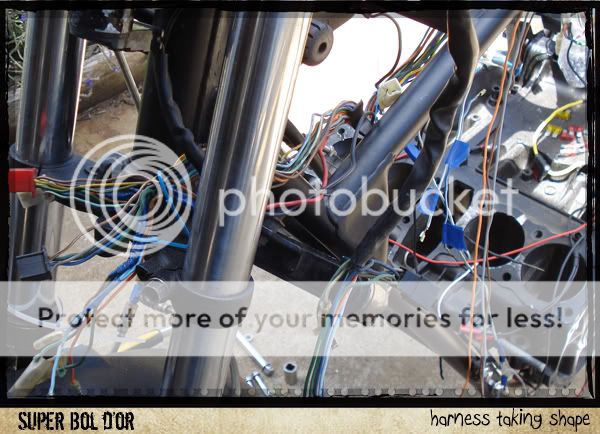
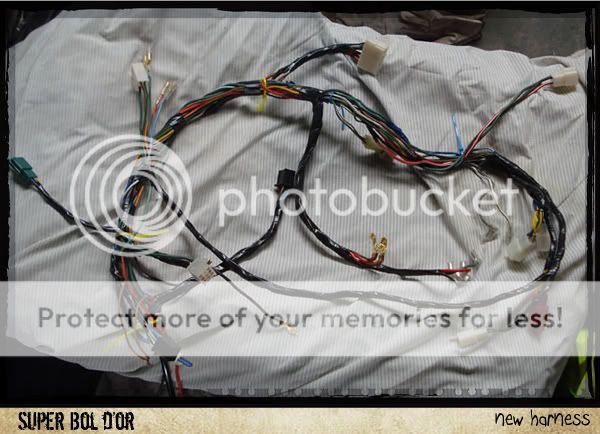
The wire harness is mostly complete. I've routed everything, and just need to wrap the main trunk after making a couple of alts for the new headlights.
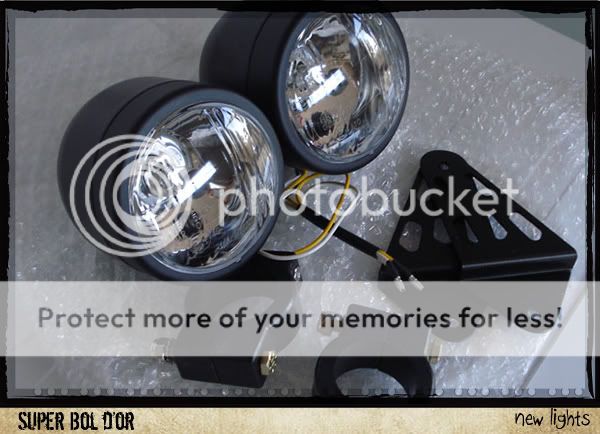
Got a few goodies this week:
headlights and mounts
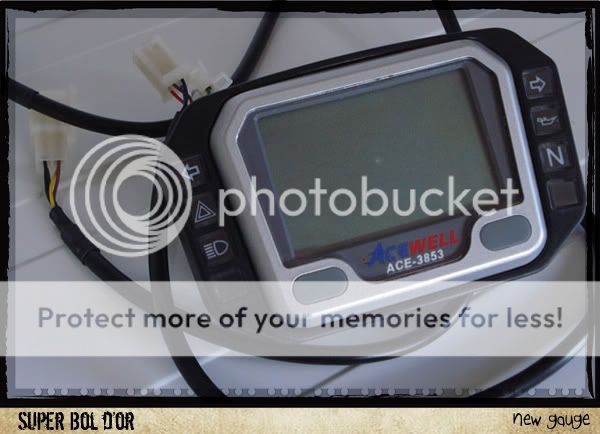
Acewell digital dash (will also need to alter the harness for this now!)
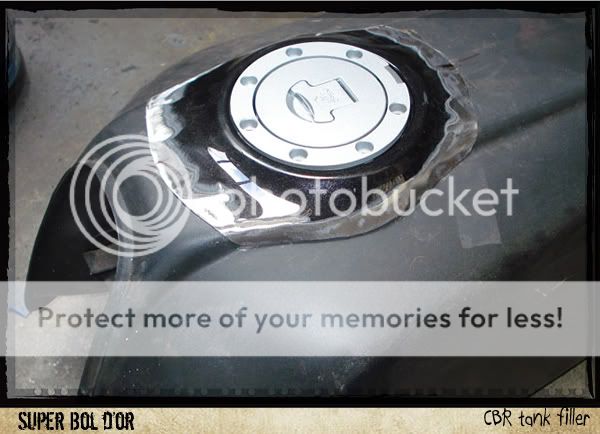
Also got a tank-filler section from a CBR to complete the tank filler mod on a spare tank
I'm thinking I'll take it to a panel beater and get them to weld it all together. Don't want to blow my brother's head off ;-)
Finger's crossed, but I should be able to start final assembly (soon).
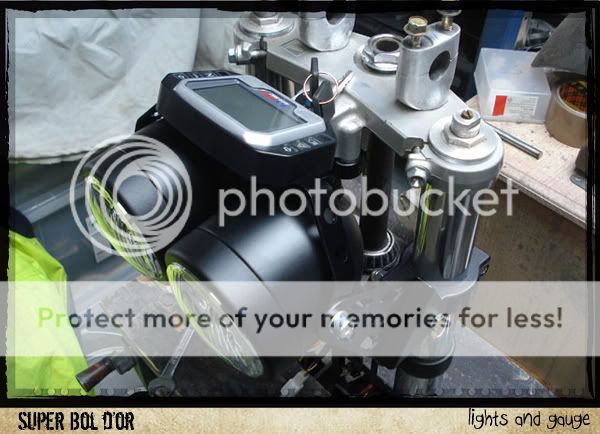
test fitted the lights and made a bracket for the gauge. Bit of a mis-match between 'satin' blacks, but I'll sort that out later. Also need to tidy the headlight wiring up, to conceal it a bit better than it is.
Got the frame back today from my welding-buddy. I got most of the ideas from various builds. I'm hoping they work well together :wink:
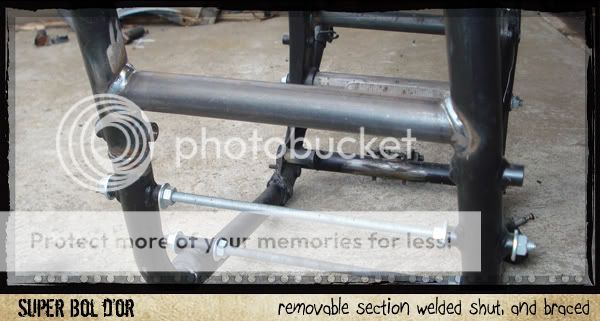
I welded shut the removable frame section, and put a brace across the front.
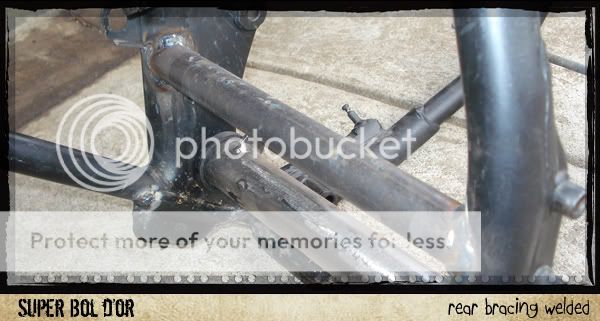
put another one across behind the engine:
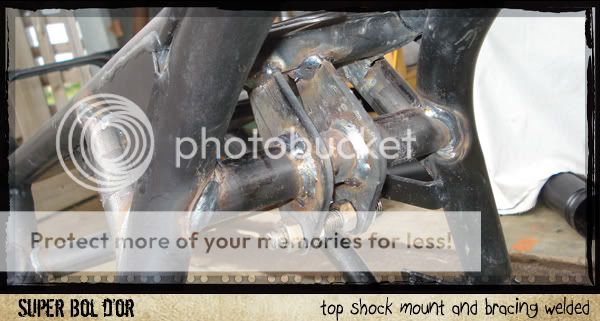
top shock mount (bought as a set from powerroy on the custom site):
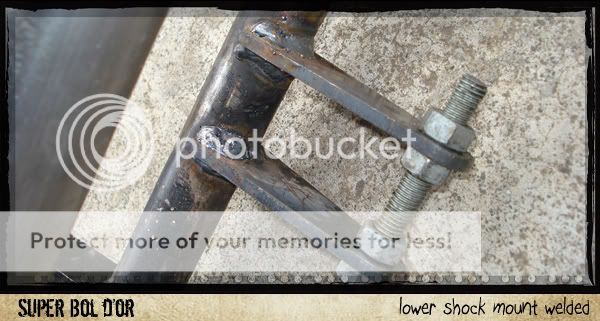
bottom shock mount:
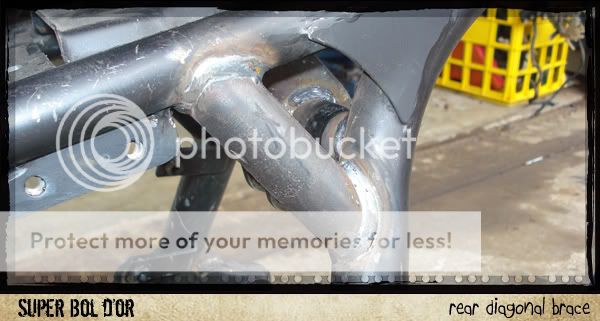
a couple of short diagonals at the end of the top shock cross bar:
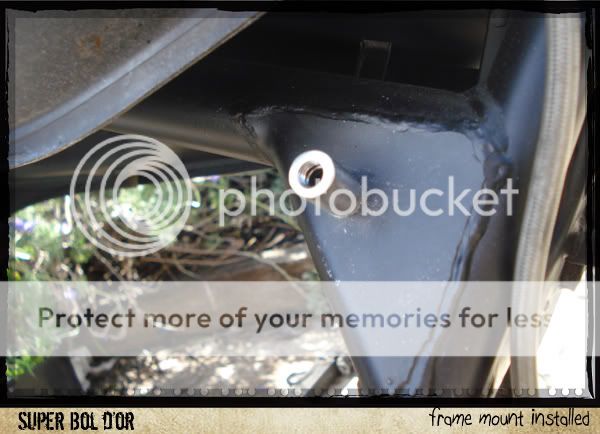
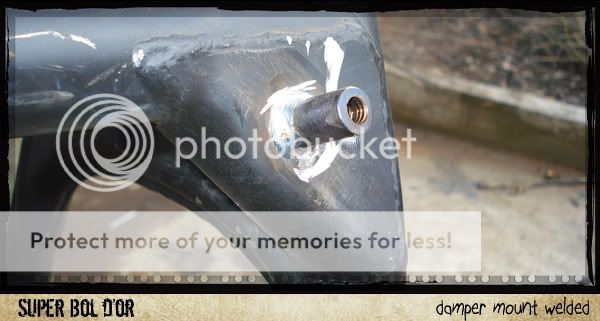
and the steering damper frame mount:
I used the threaded rod and swingarm pivot in an attempt to minimise any distortion from the welding. We'll see how well the worked when I start putting it back together ;-)
so there you go. If you've read all this to here, well done. The current state of play is the frame is now a nice satin black, the swing arm is silver and fitted. Wheels are satin black too, and waiting for new rubber, then I start putting it back together in earnest.
Hope you enjoy.
cheers
ian
Anyway, it turns out my desire to have this 'out there' has overwhelmed any misgivings I may have regarding labels. So, without further ado, and apologies to the Netrider guys that may have seen this before, for your enjoyment, I present my current, nearly complete 1980, CB900FA, that I'll probably find a groovy name for later
(oh, you may also notice the timelines have condensed considerably, because this has been dragging on for a while. Fortunately, I've spared you the long intervals where not a lot was happening.)
so here we go. Hang on tight
The background to this is that I have a second FA I can modify without interupting the riding season-which is pretty much all year round.
Stage 1 was to fit an 1100 swingarm I picked up, and fit an F2 rear wheel in there. I had a few alignment issues to start with, but ended up sorting it out with the help of some of the guys.
I had to work out a system to capture the caliper anchor, but I kept putting that off :-(
Stage 2 was to find a set of F2 forks to do the front end swap. Turns out, after a few bad ebay decisions, that the first set of forks I bought weren't F2, but F1, and the F2 triples I had my stem pressed into was distorted:
Well, I got another set of clamps, and it was all good.
Well, time passed, as it does, and I picked up a pair of 4-pot nissin calipers from a cbr900rr.
I started trying to fabricate an adapter to fit them to the F2 forks as I'd seen done by a couple of guys, and I had a pretty good unit mocked up out of MDF that I was just aboutready to get machined. Then I spotted a complete 900rr front-end that no-one seemed to be biddin on, and well, I found myself at Stage 3. The problem with the 900RR front end of course, is the 16" front wheel. Seeing as I had the F2 front end all sorted, I was able to determine that the F2 wheel *may* fit between the RR forks with a couple of spacers. The rotors were the same size, and looked like they may align with the calipers. There was nothing else to do but give it a try, so I did. I figured 2 6mm spacers either side would keep the wheel centred, and the rotors did indeed sit right where they were supposed to in relation to the 4-pot calipers.
Had these spacers knocked up:
The longer one replaces the right-side original, with the extra 6mm added.
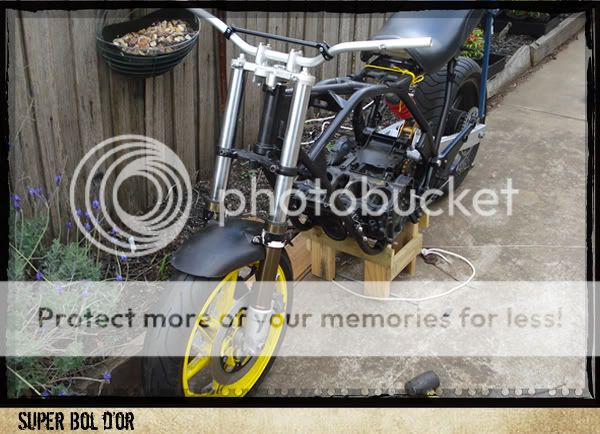
Next thing to do was re-think the handlebars set-up. I needed to drop the forks as low as I could to compensate for their shorter length, and this meant I wouldn't be able to use the RR clipons. I needed a pair of risers I could bolt to the top triple, and found a pair of a "400ex quad" that looked ok, and weren't too high. That meant I also had to find a pair of bars, and I found a set of Renthall motocross units that suited the look I was shooting for:
With a little work, the risers fitted OK, and the bars don't interfer with the adjusters on top of the forks. What ever they are!
Concurrent to this, I'd decided that I wanted to go monoshock on the rear and had been collecting parts for that conversion, and they had been turning up in the post. I had a set of pre-fab brackets and F2 swingarm and shock to play with. I had to decide how to attach the swingarm, and had 2 options. The early favourite was the bracemaker method of replacing the F2 pivot with the CB unit, and I had a spare prepared and ready to go:
Not being a welder myself, I was going to rely on my boat-building brother to put it together for me, but he had a few work commitments and was unable to come around for a while. When I have time on my hands, I get to thinking.
Could be worse I suppose ;-). So I had another look at the F2 arm and it's mechanisms. It looked like all I needed to do was change out the 2 pair of 15mm ID bearings with some 16mm units, then have the 2 spacers and roller bearing bush turned out to 16mm, and I could use the CB swing arm pivot bolt, and not have to shim or alter the frame openings. So that's what I did.
Turns out the roller bushing is hardened, and it took the engineering firm 3 times as long to bore it out, with an approriate 'adjustment to the quote. Oh well.
So, as it stands at the moment, I have the F2 front wheel sitting in the RR forks, giving me a 17" wheel, mechanical spedo drive, and 4-pot calipers. That's a win I reckon.
At the back, I have the F2 swinger all fitted and linkages ready to be welded in place, and enough tubing left over to brace the frame in all the common spots.
Well, I may have been a bit premature in measuring the F2 wheel/disc combo in the RR forks. They fit just fine with the new spacers, but since I've temporarily got the brakes fitted and bled, it seems the rotor is 20mm to short in diameter to take full advantage of the brake pad surface area. A quick double-check of my measurements reveals I have measured the *rear* rotor of a VF1000 that was fitted to an F1 rim, instead of the F2 rotors. The VF is 295mm, the same as the RRs, but the F2s are 275mm.
I have to hunt around for a second VF rotor now, but for the time being I'll press on. One issue will be the pattern on the rotor won't reverse.
In the meantime, I've worked out the steering damper mounting. My problem was (as we all know) the brackets for attaching the device at either end can't be had for love nor money, so I've had to improvise.
Step 1: drill and tap some rod to accept the 8mm thread.
Step 2: test and measure for the frame mounting point, then drill a hole through both sides of one of the gussets to accept the rod.
Step 3: put you mock-up motor/tank on to gauge final clearances, then tack the 'inside' end of the rod.
Step 4: zip-tie the fork end in place while you wait for your 'real' welder to attach that end later, at the same time he finish-welds the 'outside' face of the rod :wink:
Spent the last couple of days tackling the battery box/electrics issue, and come up with this:
Got the solenoid and rectifier mounted on the left. I'll be using a gel battery obviously so that I can lay it on it's side, but for a mock up- this old thing is dimensionally the same.
Spark units, rear master, and flasher relay on the right, along with the bracket to keep the connectors organised.and from the top:
I've used the rubber-mounting system similar to the original on the front pair of bolts, but I may also fit it to the rear.
I will also need to relocate the fuse panel from the triple clamp, but I want to get one of the modern 'blade' type. I've seen a couple on ebay off a CBR1000 that look like they'll do the job. That will be the last thing to fit here.
I'll need to re-arrange the loom to accommodate the moved units, but that's no big deal.
Got the brake rotors sorted:
off a CBR1000. Correct diameter (295mm), and correct stud pattern. That's the 600 disk on top of the one on the right.
I love it when a plan comes together:
Also got a blade fuse-holder from the same bike:
which will be a lot neater solution. eventually. I'm thinking now I should try to keep it under one of the sidecovers, purely for accessibility? Would be a pain to have to pull the tank to check a fuse I reckon. Might manage to stuff something else up there tho' :wink:
I thought I would make a start on the new loom I'll need because of the re-configured layout. I've ordered new terminals and connectors from these guys because they seem to be a really good match for OEM. While I wait for them to arrive, I'll sort out some spaghetti.
What could possibly go wrong :roll: :roll:
Got the kit(s) delivered today! I've had domestic post take twice as long as that!
This should keep me busy for awhile:
Well, it's been a while ;-)
The frame mods have all been tacked in place, and I've dismantled everything so my welder-brother can do the finish welds over the break.
Also taken the tyres off the rims and taped them in preparation for powdercoating
The wire harness is mostly complete. I've routed everything, and just need to wrap the main trunk after making a couple of alts for the new headlights.
Got a few goodies this week:
headlights and mounts
Acewell digital dash (will also need to alter the harness for this now!)
Also got a tank-filler section from a CBR to complete the tank filler mod on a spare tank
I'm thinking I'll take it to a panel beater and get them to weld it all together. Don't want to blow my brother's head off ;-)
Finger's crossed, but I should be able to start final assembly (soon).
test fitted the lights and made a bracket for the gauge. Bit of a mis-match between 'satin' blacks, but I'll sort that out later. Also need to tidy the headlight wiring up, to conceal it a bit better than it is.
Got the frame back today from my welding-buddy. I got most of the ideas from various builds. I'm hoping they work well together :wink:
I welded shut the removable frame section, and put a brace across the front.
put another one across behind the engine:
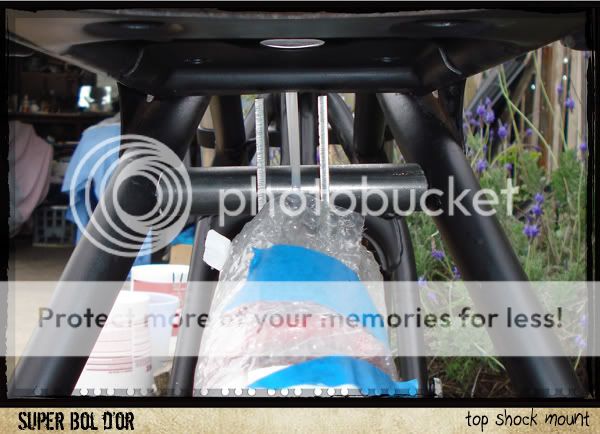
top shock mount (bought as a set from powerroy on the custom site):
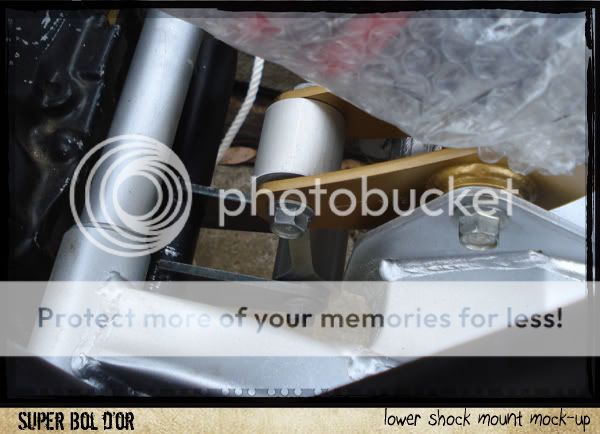
bottom shock mount:
a couple of short diagonals at the end of the top shock cross bar:
and the steering damper frame mount:
I used the threaded rod and swingarm pivot in an attempt to minimise any distortion from the welding. We'll see how well the worked when I start putting it back together ;-)
so there you go. If you've read all this to here, well done. The current state of play is the frame is now a nice satin black, the swing arm is silver and fitted. Wheels are satin black too, and waiting for new rubber, then I start putting it back together in earnest.
Hope you enjoy.
cheers
ian