CB 450 twin. I said I needed a project

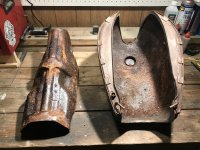
I got the hub apart! It wasn't too bad. The bearings feel pretty good and I'm thinking that I might just paint the hubs myself and leave the bearings in. I don't think the hubs really need powdercoating. Was wondering if anyone here has experience painting spokes? I want to have a completely black wheelset, and am thinking that I'll wire brush the spokes & nipples and just rattle can them, then get the rims powdercoated since they are chrome plated and cheap paint is going to want to chip on that. ALSO! it's the last day to get in on a t-shirt if you are feeling it. After the order closes, there won't be another chance to get one. I think it ends around 8 CST tonight!
 
I painted the rims and hubs on my 360 and have had minimal road chipping. Most was from re-lacing the wheels anyways.

If you have the hubs apart you might as just well do bearings. You aren't saving anything by not doing them. They are cheap and pretty easy to do, and added security knowing they are new sealed bearings.


Sent from my iPhone using DO THE TON
 
advCo said:
If you have the hubs apart you might as just well do bearings. You aren't saving anything by not doing them. They are cheap and pretty easy to do, and added security knowing they are new sealed bearings.

Was wondering about that. Will probably just go ahead and do it. Thanks for the nudge
 
If you're going to paint the spokes I would recommend scuffing them up with some 220 grit after you get them clean with a wire wheel. The wire will leave them too smooth for the paint to really grab on to. I haven't used it on bikes, but I've heard that people have really good luck with appliance epoxy on wheels. You can get it at any hardware store. I know that it coats nice and sets up very strong.
 
ncologerojr said:
If you're going to paint the spokes I would recommend scuffing them up with some 220 grit after you get them clean with a wire wheel. The wire will leave them too smooth for the paint to really grab on to. I haven't used it on bikes, but I've heard that people have really good luck with appliance epoxy on wheels. You can get it at any hardware store. I know that it coats nice and sets up very strong.

Thanks for the tip
 
Whelp, that was a bit of a break from normal posting. After getting my cylinders last year I kind of hit a wall. Realized I needed to, at a minimum hone them, but thought I should probably get them machined. Life and work and all that jazz and a week turned into a month... yadda, yadda, yadda. We've all read this story before. Well after a walkthrough of the amazing Revival shop in East Austin, I got a name to call for machine help. I dropped my parts off and am getting a full refresh with some help. We are doing a slight bore with new pistons, I needed a couple valve guides replaced and vapor blasting everything. So stoked! While all that's going on I sold my house and have about a month to try to get as much done as I can, so I have a fire lit. I need new rubber and was thinking about going with something a little wider, I also like the look of matched size front and rear tires. I've read a bit here about tire sizes, but I can't quite figure out what to do. I was thinking that the cheap way to go is to find another steel 18" rim to lace up to the front hub and put the widest thing I can safely fun on them. Anyone here have recommendations? I measured my stock rims at about 2.75" width front and rear. Alternately, I may be able to swing some aluminum rims from Buchanan, but am totally unsure what width to go for to keep clearances ok, but to give me the look I want. Thoughts?
 
So the gas tank on this thing is pretty bad. I tried soaking it in vinegar and it didn't make any difference. I was thinking about just finding another tank, but the 350 four tanks that I like are pretty pricey. So I figured, why not slice this thing open and give it a complete scrub from the inside, bang the dents out and braze it back together? I figure all it's going to cost me is some sweat and time. So that's what I did. Started off by trying out a hacksaw blade, but that was painfully slow. So a I pushed my Dremel to the limit and used about 4 reenforced cut wheels. I was a little nervous about abrasive cutting into a tank, but I gave it a good flush with water and went to town.

Here's the inside:
 

Attachments

  • IMG_4318.JPG
    IMG_4318.JPG
    3.2 MB · Views: 368
  • IMG_4319.JPG
    IMG_4319.JPG
    4.2 MB · Views: 377
  • IMG_4320.JPG
    IMG_4320.JPG
    4.3 MB · Views: 382
It looked like there might have been a weak attempt to seal this thing, there was some kind of layer of gunk in it that accumulated along the bottom 1/3 of the tank. As I wire wheeled through it, it smelled kind of plastic-y.
 

Attachments

  • IMG_4321.JPG
    IMG_4321.JPG
    2.7 MB · Views: 392
And a couple hours later I have a clean tunnel and shell. I couldn't really get into the seam as well as I'd like, so I might need to spend a bit more time on some problem areas, but this is a good start.
 

Attachments

  • IMG_4333.JPG
    IMG_4333.JPG
    1.8 MB · Views: 387
  • IMG_4335.JPG
    IMG_4335.JPG
    1.2 MB · Views: 385
  • IMG_4337.JPG
    IMG_4337.JPG
    1.3 MB · Views: 380
Someone probably used KREEM on it at some point. Stuff should be outlawed.

Lots of good protective coatings on the market like POR-15 or RED KOTE. KREEM IS KRAP.
 
And the epic tale of one man's motorcycle continues...

When I left off I was riding high, I'd found help and had dropped off my motor at the guy's place that was recommended. His shop looked great, out in the edges of Austin. He had a lot of motorcycles out there that looked like customer bikes and he seemed pretty legit. Well it's been almost a year and I still don't have my motor. I paid him $500 up front to help cover costs and the only time I hear from him is when I pester. I told him a couple weeks ago that I just want to get my motor and I don't care if it's done and he sent a picture and said he would wrap it up asap. And then two weeks go by and I hear nothing. I'm getting worried that I'll never see the thing again. I'm also worried that this job is going to cost more than expected. I've been asking for a price since day one and have only gotten a price for vapor blasting, honing the jugs and fixing a valve guide. On the plus side, the picture that I got a couple weeks ago looks pretty great. So there is always that. I haven't really done much to the bike in the meantime, because I wanted to make sure I had a motor. I knew this was going to take time to do, but this is pretty ridiculous.
 

Attachments

  • motor.jpg
    motor.jpg
    2.7 MB · Views: 306
After another month and a few more nags I finally got most of my motor back!! It's missing the chain cover (I dropped it off with the engine, but it's gone missing :'( ) but everything looks pretty good. There was no need to add bore size, so it remains stock displacement.
 

Attachments

  • 58147055-E369-4E03-B61C-D622674C8C34.JPG
    58147055-E369-4E03-B61C-D622674C8C34.JPG
    1.6 MB · Views: 298
That motor looks great. Did he fix the valve guide, and how did the pricing work out?
 
Yeah the motor got at least one new valve guide. not much else other than a full rebuild and cleaning and a new timing chain. As far as pricing goes, what would you expect to pay for a job like this? I'll say it was more than I expected, but I also had to wait almost a year for it.

Now that the motor has become bench jewelry, I've got motivation to spend more time in the garage. I got new cheap duro tires and rebuilt the wheels with new bearings. I was on the fence about replacing the rims with some equal size guys (either 18 or 19 front and rear, but decided that I need to just focus on getting this one on the road. My wife quit her job, so the goal switched from making THE bike to making a bike that I can ride. I need to keep the budget down on this, but will try to add sweat equity where I can. Case in point, I called the local shop to see what a tire install cost, it was $38 per wheel! Is that normal? I decided to do it myself (and only ruined one tube in the process ;D ). So now I have a rolling frame! It's great to see wheels on there after this poor thing has been sitting so long. Next up is to figure out my tank and seat situation and start re-wiring the beast.

Here's how it sits as of today:
 

Attachments

  • cb450.jpg
    cb450.jpg
    361.1 KB · Views: 279
In the top pic on the work bench.

Your mechanic blasted it without removing the old copper crush gaskets in the exhaust ports? AND he lost one of your engine covers?

Wow.
 
trek97 said:
In the top pic on the work bench.

Your mechanic blasted it without removing the old copper crush gaskets in the exhaust ports? AND he lost one of your engine covers?

Wow.
The motor didn't have any copper gaskets in it when I picked it up, Not sure why they are in that pic above (he sent that to me) Yeah, he said he found the cover and is getting it vapor blasted, so I should be able to get it back soon. Hopefully.
 
I started brazing my tank back together last night. I haven't picked up the torch in a couple of years, but I feel pretty good with how things turned out. I tacked the tunnel to the tank and then attached the sides. I need to make a piece to cover up a 1/4 inch gap in the bottom of the tank, and I expect I'll have that all buttoned up by this weekend. Then I should be able to test for leaks. I'm thinking that I'll probably still coat this thing once I get it together.
 

Attachments

  • IMG_6095.jpg
    IMG_6095.jpg
    2.8 MB · Views: 265
  • IMG_6097.jpg
    IMG_6097.jpg
    3.7 MB · Views: 266
If you are needing any engine parts, start looking now. I was talking to Bill Silver (Mr. Honda) a couple of days ago and he said good 450 engine parts are getting hard to find. The 450 is one of my favorite bikes and I have owned at least 15. When I was in high school I worked part time at the local Honda shop. The first bike I assembled from the crate was a 1968 CL450 Scrambler and I was hooked!
 
A few more brazing shots
 

Attachments

  • 87DC683B-5F0F-4838-9AAC-96B342885CA1.jpeg
    87DC683B-5F0F-4838-9AAC-96B342885CA1.jpeg
    2.1 MB · Views: 256
  • 690BF34C-DCB1-4C72-A797-1AB3BABCE69E.jpeg
    690BF34C-DCB1-4C72-A797-1AB3BABCE69E.jpeg
    1.4 MB · Views: 247
  • 5247D91F-0A3B-469F-B792-33B384A3D343.jpeg
    5247D91F-0A3B-469F-B792-33B384A3D343.jpeg
    1.9 MB · Views: 260
  • C41841C0-8EA2-47B3-8267-75321A7B0D6A.jpeg
    C41841C0-8EA2-47B3-8267-75321A7B0D6A.jpeg
    1.2 MB · Views: 258
  • E0FB7D87-BB2B-499A-AE21-31DD7102793F.jpeg
    E0FB7D87-BB2B-499A-AE21-31DD7102793F.jpeg
    1.7 MB · Views: 250
I had a gap to make up in the bottom that wasn’t going to be able to fill with just brass, so I spliced in a little material. Turned out fine. Testing for leaks tomorrow.
 
Back
Top Bottom