Follow along with the video below to see how to install our site as a web app on your home screen.
Note: This feature currently requires accessing the site using the built-in Safari browser.
We noticed you are blocking ads. DO THE TON only works with community supporters. Most are active members of the site with small businesses. Please consider disabling your ad blocking tool and checking out the businesses that help keep our site up and free.
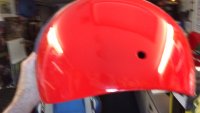
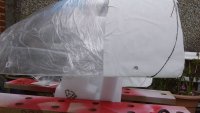
Cheers yoz mate still got a few coats of silver to go on the fairing using spray cans don't realise how much paint ya use by the end probably 18 x 300ml silver & clear maybe a bit OTT but hope the finish will be worth it still cheaper than getting a paint job plus its my own work hows ya doin with yours is ya rollin yet mate 8)
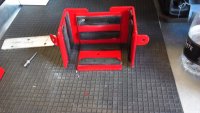
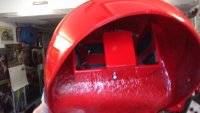
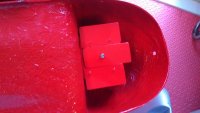
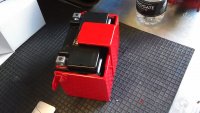
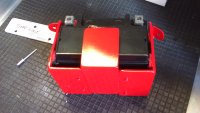
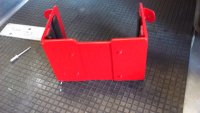
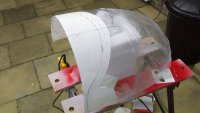
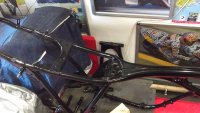
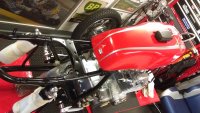
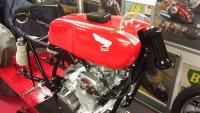
A update from me shed when I should be in the ISLE of MAN :'( still working on the old girl to finish her hopefully for the classic TT ??? shame it wasn't ready for the main TT still :-[ sat in the comfort of me shed listening to it on the radio and ITV4 on a night still makes the hairs stand up on the back of me neck so got a few bits done decided to locate battery to under seat hump was gonna use the old air box to hold it now gonna use airbox to house all the electrics wot there will be (no front light or indicators) ??? pics to follow of airbox but hers the pics of the seat /batt set up
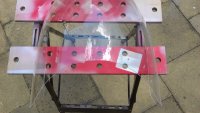
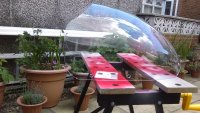
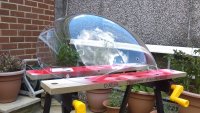
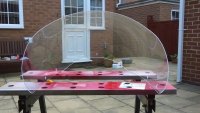
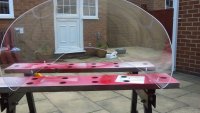
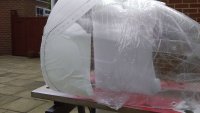
Another job ticked off the list sun shining so decide to cut the plexi-glass screen 8) took a bit of working out for the right shape :-\ drew it out twice solid line would be my first cut, the dotted line would be a back up cut if the first went wrong :-[ it went great first time so stayed with it I used a dremel with disk cutter on to slice through took it steady but the finish was worth it just finished off the cut edge with 400 & 1000 grade emery paper then polish up hehe starting to feel the race rep feel now ;D
What date is classic tt ? Did you have your tickets booked for tt then .hutcy doing well he's surprised me I thought he was done .still like to see guy win one .what's left to do on bike then
ey up mate looked like I was gonna miss out on taking bike over for TT so hang fired on the tickets, phew : classic TT is last week in August so got time to sort out . frame and swing arm + heep of brackets are all at powdercoaters once its all back I can start putting together may have a bit of messing about fitting fairing & wiring :-\ sometimes seems I got loads to do other times it like Ile easy get it done ??? yup hutchy been on fire this week he deserves it too after all he went through would love to have seen guy martin win one, bet he will pack in before it happens :'( haven't seen or heard what went on in senior TT gonna watch now sure it will be awesome 8)
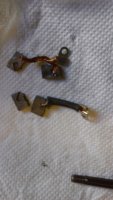
hiya gang heres a little update on me slow progress :-[ had a couple NOS parts give out on me couldn't get starter to work, all be it on bench test, looked inside to find my new carbon brushes in bits replacements on there way thanks to David silver spares UK
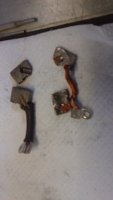
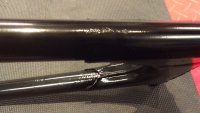
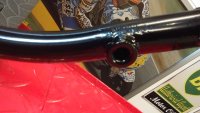
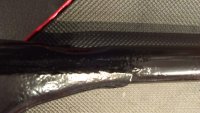
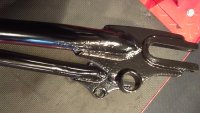
Also had my frame / swing arm and engine mounts etc away at powdercoaters so heres a heads up for any Yorkshire UK DTTers don't use MSS ltd of Morley they charged me £180 for blast n gloss black powder coat the result is SHITE they bust off two hangers bent another three the finish is pants bits / rough ,coated grease nipples and bearing areas even tho they were going to cap off so glad I did the stearing head and swing arm pivot : they just said read the small print we allow amount of damage and contamination of finish WOTF here are a few pics see wot ya think
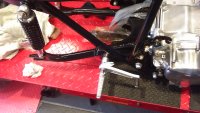
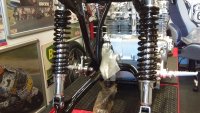
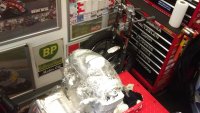
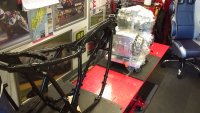
Ok ranting over got a smile on me face cos its re-build time buttoned motor back up readied the frame got the motor on its side and lowered it over motor slid mounting bolts in and hey presto motor back in frame and fastened up yeah ;D next swing arm with me home made bushings 8) its such a good feeling at last parts going back together grinning like a pissed cat while ime working ;D got a fair bit done heres a few pics to remind ya wot Ime workin on haha updates gonna come quicker now ( wiv loads o pics ) finally got me buzz back yeah
Whats wrong with these companies .No pride in there work .I've had it a few times with bits I've had to ask them to do it again . I really like how you have mounted the rear sets .look forward to progress shots .
I would of gladly kept my mouth shut, paid the bill with my AMEX and canceled payment after I left. The fine print would need to say they can fuck it up entirely to win against those AMEX girls... they live to get results for good customers and awesome reviews ;D
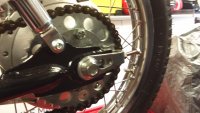
cheers guys yup sure got me pissed off guess I should have got it re-coated else where again so true 1fasgsxr the only bit to get done by someone else is the crap finish when ya think I painted all my bikes outside in the yard with cans and get a better finish but by the time exhausts & fairing etc are on ya won't see much framework but ile know its there :-\ anyways heres a couple more pics of progress got the coils on breather pipe / horn ??? rear wheel & drive chain a few little bits that seem to take ages to get just right but still smilin
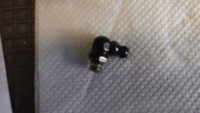
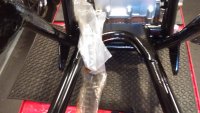
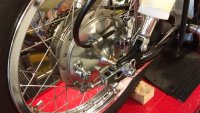
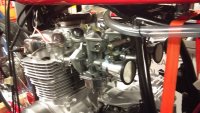
Really enjoying your excellent build! I was wondering if you had attempted installing that rear brake cable from the other direction - I know it was designed to be the way you have it. I realize the cable housing mount is asymmetric, but it looks like you might be able to make up a cable (and maybe some fussy bits to come in from the other side) that might work if you swap out the lever arms. Might look simpler than it is due the the angle of the pic though. It would go a long way to looking more authentic - If I recall rightly, the race bikes had the cable housing attached to the front side and also rotated a pretty good bit counter clockwise from where you have yours now. I realize you are not using the factory race parts, so you will be limited by the difference - but maybe worth a shot checking it out if you have not already done so. Beautiful work - looking forward to future posts!
cheers mate funny you shoud mention it I spent all day looking at it cos its not quite right and trying to rotate drum a bit or get hold of a longer cable I would like it to show more of the working detail of the drum may have to mod the arm so it pulls from other side I would love to get more original / race parts but my pockets aint that deep ??? but still think its gonna look good 8) I cant wit to fire her up bet its gonna sound awesome
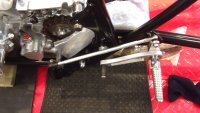
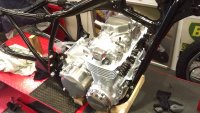
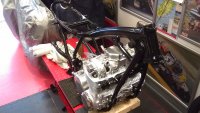
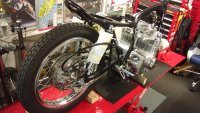
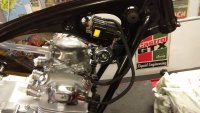
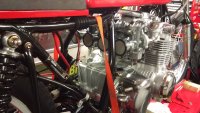
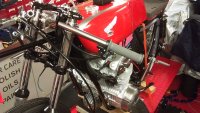
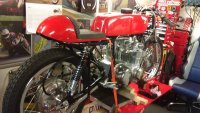
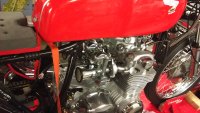
8) 8) 8) well its hotter than its ever been here in UK 36.7c sure slows ya down when ya trying to rebuild ya project how you guys do it out there when this weather is the norm I don't know anyways heres an update been trying to rearrange me rear brake cable waiting for a longer one to arrive :-\ been dry fit fairing to find fixing points now motor is back in new starter motor fitted sump new filter and magnetic sump plug oil in also checked over clutch plates everything was sound so that's back together and in, fitted exhausts and all carbs run the throttle cables etc so all I need to start next is the electrics then I can fire this monster up haha lots of other little bits been put together and put on but blah blah blah let the pics tell the story here are a few update snaps from me phone nearer end than start wot ya think :
This site uses cookies to help personalise content, tailor your experience and to keep you logged in if you register.
By continuing to use this site, you are consenting to our use of cookies.

") still got a few coats of silver to go on the fairing using spray cans don't realise how much paint ya use by the end probably 18 x 300ml silver & clear
still got a few coats of silver to go on the fairing using spray cans don't realise how much paint ya use by the end probably 18 x 300ml silver & clear