We noticed you are blocking ads. DO THE TON only works with community supporters. Most are active members of the site with small businesses. Please consider disabling your ad blocking tool and checking out the businesses that help keep our site up and free.
You are using an out of date browser. It may not display this or other websites correctly.
You should upgrade or use an alternative browser.
You should upgrade or use an alternative browser.
FRANKENHONDA II the 1982 DOHC CB 750F2 Build
- Thread starter cb250nproject
- Start date
cb250nproject
If you can make it better do so
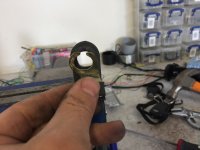
I needed to make a mount for the speed sensor to go, so last Friday I headed down to the old mans workshop and he helped me make one up out of some aluminium he had in the shed
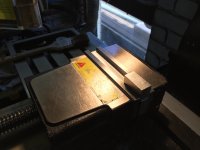
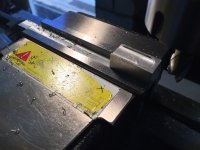
First we had to make the block square, then we made a 1mm slot up the top so the bracket would slide over one of the original mud guard mounting positions.
Then we drilled out the hole for the M6 bolt, and on the underside we made another slot for the speed sensor to sit. We counter sunk the hole so the bolt would sit nice and flush
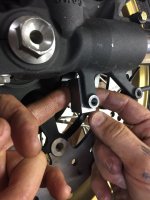
Next was the fun part polishing it up then mounting it, I like it because it blends in and stands out at the same time.
I think when it comes to the final assembly I’ll polish all the parts the Oldman has made up as they’re parts that I want to show off the craftsmanship especially the foot peg adapter brackets and soon to be custom top triple “watch this spot”
I’m not sure if the wiring will get completed this break as I’ve been told by the minister of war and finance that the backyard needs to be partially excavated and I’ve got two days to make that happen. Hopefully tomorrow I have a really good run, either that or it rains and works cancelled I can dream
Sent from my iPhone using DO THE TON
First we had to make the block square, then we made a 1mm slot up the top so the bracket would slide over one of the original mud guard mounting positions.
Then we drilled out the hole for the M6 bolt, and on the underside we made another slot for the speed sensor to sit. We counter sunk the hole so the bolt would sit nice and flush
Next was the fun part polishing it up then mounting it, I like it because it blends in and stands out at the same time.
I think when it comes to the final assembly I’ll polish all the parts the Oldman has made up as they’re parts that I want to show off the craftsmanship especially the foot peg adapter brackets and soon to be custom top triple “watch this spot”
I’m not sure if the wiring will get completed this break as I’ve been told by the minister of war and finance that the backyard needs to be partially excavated and I’ve got two days to make that happen. Hopefully tomorrow I have a really good run, either that or it rains and works cancelled
 I can dream
 Sent from my iPhone using DO THE TON
Attachments
-
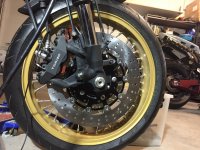 Image1536477057.866241.jpg1.8 MB · Views: 245
 -
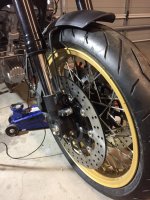 Image1536477042.599982.jpg1.8 MB · Views: 248
 -
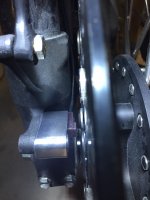 Image1536477022.649893.jpg1.6 MB · Views: 258
 -
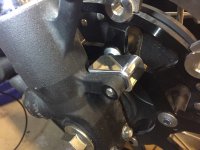 Image1536476981.147329.jpg1.7 MB · Views: 246
 -
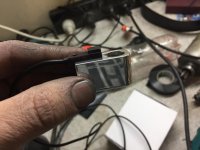 Image1536476880.129019.jpg141.6 KB · Views: 279
 -
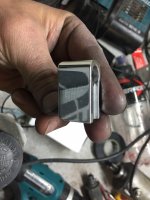 Image1536476845.635677.jpg1.5 MB · Views: 281
 -
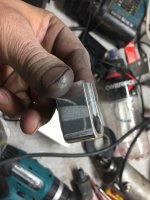 Image1536476827.441576.jpg1.5 MB · Views: 242
 -
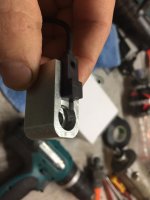 Image1536476746.001959.jpg1.5 MB · Views: 281
 -
 IMG_3604.JPG1.4 MB · Views: 241
 -
 IMG_3605.JPG1.6 MB · Views: 254
 -
 IMG_3606.JPG1.8 MB · Views: 247
 -
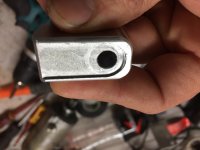 Image1536476453.645945.jpg1.5 MB · Views: 236
 -
 Image1536476517.053670.jpg1.5 MB · Views: 278
cb250nproject
If you can make it better do so
I’ll wrap it up with the brake line probably with some of that coil wrap stuffThe Jimbonaut said:Looking sharp man, great work. How will you be routing the wire from the sensor to the speedo unit? A friend has the same set up on his CB900 and he has his kinda exposed.
Sent from my iPad using DO THE TON
Kunphushun
Big Dreams. Small Funds!
Ive just read through 53 pages of amazing dedication and perseverance. This is an awesome build! I cant wait for an update! You're a mad man, and very skilled at it.
cb250nproject
If you can make it better do so
Kunphushun said:Ive just read through 53 pages of amazing dedication and perseverance. This is an awesome build! I cant wait for an update! You're a mad man, and very skilled at it.
Cheers, she’s been a journey, hopefully this break I can get my ass into gear and make some serious ground.
Lol I’ve always prided my self on being a skilled madman, I’m still working on the whole skilled mechanic side of things but.
Sent from my iPhone using DO THE TON
cb250nproject
If you can make it better do so
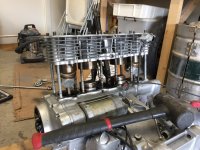
So in preparation of getting work done to the head and cylinders I pulled the motor out.
Luckily for me one of my mates came over for lunch and while we were in the garage talking bikes offered to help me drop the motor out. I must say after doing it by myself last time, I highly recommend doing it with someone to assist. Engine out in 25 mins and that’s while we were having a conversation about best options for his next bike.
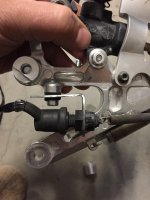
In addition to this I realised that the OEM R6 rear break switch and bracket didn’t fit into the housing because of the adapter bracket we had made previously to mount the rear sets. So I went about making one up.
I ended up just using a rubber Gromit in the hole that the fastening bolt goes through just so it wouldn’t rattle loose.
Now back to the garage to separate the cylinders and head so I can take it to the shop tomorrow.
Sent from my iPhone using DO THE TON
Luckily for me one of my mates came over for lunch and while we were in the garage talking bikes offered to help me drop the motor out. I must say after doing it by myself last time, I highly recommend doing it with someone to assist. Engine out in 25 mins and that’s while we were having a conversation about best options for his next bike.
In addition to this I realised that the OEM R6 rear break switch and bracket didn’t fit into the housing because of the adapter bracket we had made previously to mount the rear sets. So I went about making one up.
I ended up just using a rubber Gromit in the hole that the fastening bolt goes through just so it wouldn’t rattle loose.
Now back to the garage to separate the cylinders and head so I can take it to the shop tomorrow.
Sent from my iPhone using DO THE TON
Attachments
-
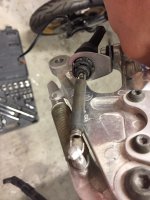 Image1540962527.669570.jpg1.5 MB · Views: 214
 -
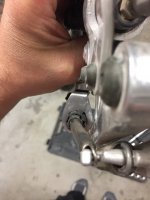 Image1540962513.780607.jpg1.4 MB · Views: 231
 -
 IMG_4176.JPG1.6 MB · Views: 209
 -
 IMG_4172.JPG1.5 MB · Views: 214
 -
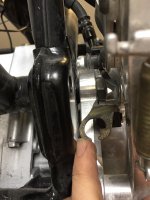 Image1540961066.945018.jpg1.5 MB · Views: 216
 -
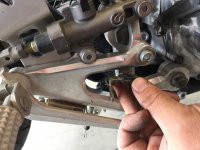 Image1540961039.977027.jpg1.6 MB · Views: 207
 -
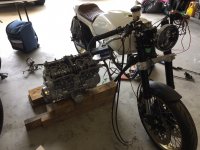 Image1540960634.287829.jpg1.6 MB · Views: 244
 -
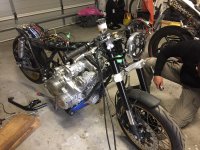 Image1540960597.465644.jpg2 MB · Views: 235
cb250nproject
If you can make it better do so
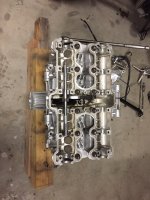
Well the cams are out and all the required nuts and bolts have been removed, but I’m struggling to remove the cylinders from the bottom end. I’ve come to a roadblock so I’m off to google and YouTube removing stubborn cylinders
Sent from my iPhone using DO THE TON
Sent from my iPhone using DO THE TON
Attachments
cb250nproject
If you can make it better do so
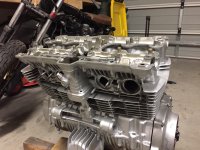
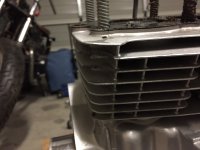
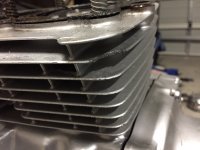
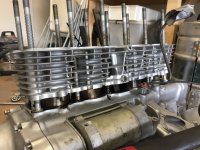
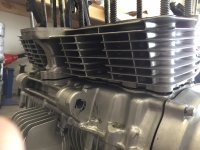
Well after a lot of tapping with a rubber mallet the head finally came off.
Unfortunately due to my poor accuracy I managed to damage 3 fins. A little upset but they’re much harder to re attach than they are to knock off so I think I’ll just have to get use to it.
Still unable to budge the barrels so I’ll have to have another crack at it in the morning.
Sent from my iPhone using DO THE TON
Attachments
")
cb250nproject
If you can make it better do so
I didn’t even think of that, may be an option later on, at the moment I need to focus on getting the barrels off so I can get the head and barrels to the machine shop.LMCol said:Nice build mate, very thorough. I'd be tempted to get a tig wizard on those fins and hand shape them back.
Want them to tidy up the head, redo the valve stem seals and bore it out to 823cc then I’ll put it back together.
Hopefully whilst that’s being done I’ll weld the final tabs to the frame before having it and the electrical tray sandblasted and powder coated black.. big aspirations, at this point I’d be happy if the barrels decide to separate
Sent from my iPhone using DO THE TON
Not sure why you're trying to free the cylinders by tapping the corners..You need to shock it, hard, and on a solid surface IE the big solid casting in between 2 & 3.
trek just went through this on his 400F. See below
https://youtu.be/S0_rerU_Ymw
http://www.dotheton.com/forum/index.php?topic=75640.360
trek just went through this on his 400F. See below
https://youtu.be/S0_rerU_Ymw
http://www.dotheton.com/forum/index.php?topic=75640.360
cb250nproject
If you can make it better do so
It was a swing and a missadvCo said:Not sure why you're trying to free the cylinders by tapping the corners..You need to shock it, hard, and on a solid surface IE the big solid casting in between 2 & 3.
trek just went through this on his 400F. See below
https://youtu.be/S0_rerU_Ymw
http://www.dotheton.com/forum/index.php?topic=75640.360
Sent from my iPhone using DO THE TON
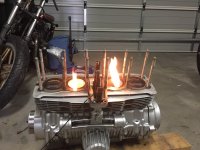
It works super. For stubborn cylinder removal.
Run the two center cylinders to bdc.
Pour an inch of alcohol into them and light.
Let it burn down and out, it takes a few minutes.
I used a block of walnut and deadblow plastic mallet to strike up and under the “400cc” tag.
2 sharp hits and it popped free. Easy peasy.
Run the two center cylinders to bdc.
Pour an inch of alcohol into them and light.
Let it burn down and out, it takes a few minutes.
I used a block of walnut and deadblow plastic mallet to strike up and under the “400cc” tag.
2 sharp hits and it popped free. Easy peasy.
cb250nproject
If you can make it better do so
Looks like I’m off to the hardware to get some alcohol
Sent from my iPhone using DO THE TON
Sent from my iPhone using DO THE TON
cb250nproject
If you can make it better do so
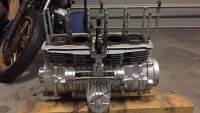
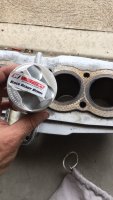
So I ended up using some Aerostart and sprayed it into the barrels.
It’s still took a whole lot of tapping with a rubber mallet
But slowly slowly she started to come. Now she’s ready for the machine shop to work their magic. Apparently this guy can repair the fins also. So I’ll have a discussion about that when we discuss all the other things.
At the moment I’m thinking bore & hone barrels, Lao the valves change the stem seals and maybe just clean up the dags in the head but other than that no major head work. Otherwise I think I will haemorrhage more $$$$ than I want to.
Once I get back home I’ll drop the bike right down so I can head over to the old mans to weld the last of the tabs on and look at how we are going to mount this steering damper ( this will be tricky)
Sent from my iPhone using DO THE TON
Attachments


cb250nproject
If you can make it better do so
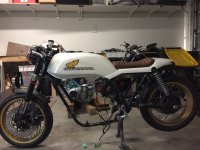
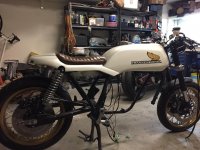
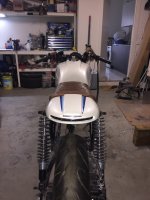
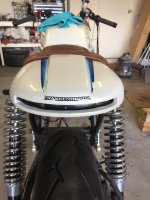
Mucked around with some of the decals yesterday. Unfortunately we realised the tank stripes had been scaled incorrectly, so we will need to remake them.
Luckily we aren’t in too much of a rush given the current state of everything.
Sent from my iPhone using DO THE TON
Luckily we aren’t in too much of a rush given the current state of everything.
Sent from my iPhone using DO THE TON