FRANKENHONDA II the 1982 DOHC CB 750F2 Build

So today I decided to strip the the tank back in preparation of a few minor patch up jobs then I’ll put it in undercoat


Sent from my iPhone using DO THE TON
 
Hopefully once she has had a lick of paint and the decals are back on she really pops looks a little drab and grey at the moment.


Sent from my iPhone using DO THE TON
 

Attachments

  • Image1524723825.848774.jpg
    Image1524723825.848774.jpg
    1.7 MB · Views: 239
  • Image1524723846.098546.jpg
    Image1524723846.098546.jpg
    1.9 MB · Views: 238
  • Image1524723879.338686.jpg
    Image1524723879.338686.jpg
    1.6 MB · Views: 235
  • Image1524723902.550144.jpg
    Image1524723902.550144.jpg
    1.7 MB · Views: 206
  • Image1524723924.071406.jpg
    Image1524723924.071406.jpg
    1.8 MB · Views: 213
Ok so I managed to spend the afternoon with my most excellent brother who had some test decals ready

He had to cut them out by hand as this time he didn’t have them pre cut luckily his hands are far steadier than mine

Next we placed the tank and seat cowl on a bench and started to apply the decals

We stretched the media a little during the application (mental note for next time ) but overall it came out pretty sweet

Because he was unsure for size the rear stripes were a little too fat, so he reprinted just in paper so we could get the sizing correct for later

The side stickers were originally too big so we resized them with paper, came out sweet

Then I went home to mock it all up, can’t wait to get her painted up now really pumped, bro produced the absolute goods
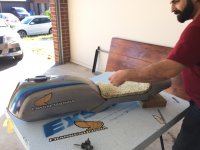
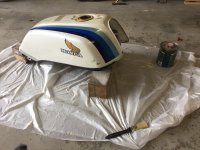
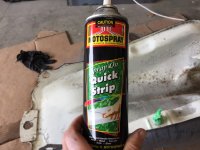


Sent from my iPhone using DO THE TON
 

Attachments

  • IMG_1258.JPG
    IMG_1258.JPG
    1.6 MB · Views: 217
  • Image1524903921.514418.jpg
    Image1524903921.514418.jpg
    1.7 MB · Views: 211
  • Image1524903939.712655.jpg
    Image1524903939.712655.jpg
    1.7 MB · Views: 236
  • Image1524903960.361001.jpg
    Image1524903960.361001.jpg
    1.8 MB · Views: 216
  • Image1524903983.842703.jpg
    Image1524903983.842703.jpg
    1.6 MB · Views: 236
  • Image1524904005.243905.jpg
    Image1524904005.243905.jpg
    1.7 MB · Views: 238
  • IMG_1246.JPG
    IMG_1246.JPG
    1.7 MB · Views: 205
  • IMG_1238.JPG
    IMG_1238.JPG
    1.5 MB · Views: 204
  • IMG_1184.JPG
    IMG_1184.JPG
    1.5 MB · Views: 210
  • IMG_1198.JPG
    IMG_1198.JPG
    1.4 MB · Views: 200
  • IMG_1192.JPG
    IMG_1192.JPG
    1.8 MB · Views: 210
  • IMG_1206.JPG
    IMG_1206.JPG
    1.6 MB · Views: 203
  • IMG_1214.JPG
    IMG_1214.JPG
    1.6 MB · Views: 206
  • IMG_1250.JPG
    IMG_1250.JPG
    1.3 MB · Views: 206
Question - did u mock up two different size wing and Frankenhonda emblems for the tank sides? Which one are u going for? I know which one I like!

And I really like the seat cowl shot without the frankenhonda badge too. Looks really clean like that. You guys are smashing it.


Sent from my iPhone using DO THE TON
 
Yea there were two different sizes, because the brief I gave to my brother was while I was overseas and he didn’t have access to the tank. We went with the smaller Frankenhonda emblem, as the other one was just way way too big but we put it on for shits and giggles.

Still undecided with the logo on the back of the cowl we were going to actually put a slight curve to it so it tied into the curve of the cowl more but we will see how it looks once all the decals are made up.

Luckily my bro will make a heap of extras just encase anything doesn’t work first time.

The other thing I need to decide is these decals are actually designed so the can be put on top of the paint work with no need for a clear coat over the top.

I know from factory they put clear over the decals. So I need to research the medium and perhaps do a test run with some clear on it to see if it impacts on the quality of the decal.

It would be a lot easier if we spray the whole lot then decals last otherwise it’s a day to lay down the white wait a few hour lay down the pearl wait a few hrs decals then final coat clear maybe two coats


Sent from my iPhone using DO THE TON
 
Hell yeah, that’s gonna look awesome! Really like the re-interpretation of the colored lines and the frankenhonda is a really nice touch :) I haven’t painted over decals myself, but I do believe you want to cover them in several layers of clear to ensure no edges are showing. Don’t skimp on the finishing now ;)


Sent from my iPhone using DO THE TON
 
LightsOut said:
Hell yeah, that’s gonna look awesome! Really like the re-interpretation of the colored lines and the frankenhonda is a really nice touch :) I haven’t painted over decals myself, but I do believe you want to cover them in several layers of clear to ensure no edges are showing. Don’t skimp on the finishing now ;)


Sent from my iPhone using DO THE TON

It’s really funny because the original plan was to have the bike all black with gold rims (very similar to the cognito moto build)

But then after I chucked the rims on to do a mock up, I loved the white with blue tri colour stripes as it all just tied in.

The decals are on a medium that is ultra thin and made to be placed directly onto vehicles. After we did the mock up there was no more edge than with the original decals which were actually under a coat of clear, unfortunately there is always a slight edge when you use the decals :/


Sent from my iPhone using DO THE TON
 
The combination of stripes and that long long side badge, makes the tank look longer than stock. It also draws the eye to the decals and away from the seat-tank connection and that's also good. Nice touch.
 
Yea I actually think we could mount the side badge a little lower on the tank to be honest


Sent from my iPhone using DO THE TON
 
So did a little more work in the garage.

First thing I did was grind back a few welds on the bracket for the front mud guard, hit it with a wire brush then I sprayed it up.

Next thing I did was strip the paint from the underside of the fuel tank, I used some spray on paint remover, in hindsight I should have used that for the top of the tank. It’s a lot easier to use and did a much better job.

Once the paint had been stripped I gave it a quick blast with the gernie. Once it was cleaned up I could see the rust in the underside of the tank.

I hit the rust with a wire brush on the drill and after a little bit it came up pretty good.

After that I treated the whole tank again with rust converter for about 20 mins then wiped it down with a damp rag followed by some wax and grease remover.

It actually came up pretty good there are only really two small dents I will need fill in later.

Next I hung the tank so I could spray it with etch primer.

The etch primer came out of the can poorly so it was a bit of a shit job once it dries I’ll give it a light sand with some 800 grit before using some filler on it


Sent from my iPhone using DO THE TON
 

Attachments

  • Image1525244635.609257.jpg
    Image1525244635.609257.jpg
    1.6 MB · Views: 208
  • Image1525244655.569755.jpg
    Image1525244655.569755.jpg
    1.6 MB · Views: 205
  • Image1525244737.745036.jpg
    Image1525244737.745036.jpg
    1.9 MB · Views: 194
  • Image1525244758.271100.jpg
    Image1525244758.271100.jpg
    1.6 MB · Views: 232
  • Image1525244773.495669.jpg
    Image1525244773.495669.jpg
    1.4 MB · Views: 197
  • Image1525244787.188469.jpg
    Image1525244787.188469.jpg
    1.7 MB · Views: 198
  • Image1525244615.861861.jpg
    Image1525244615.861861.jpg
    1.6 MB · Views: 185
  • Image1525244548.745518.jpg
    Image1525244548.745518.jpg
    1.5 MB · Views: 229
  • Image1525244258.825028.jpg
    Image1525244258.825028.jpg
    1.7 MB · Views: 195
  • Image1525244277.594581.jpg
    Image1525244277.594581.jpg
    1.6 MB · Views: 199
  • Image1525244296.919556.jpg
    Image1525244296.919556.jpg
    1.5 MB · Views: 201
  • Image1525244385.965132.jpg
    Image1525244385.965132.jpg
    1.9 MB · Views: 228
  • Image1525244404.963918.jpg
    Image1525244404.963918.jpg
    1.7 MB · Views: 196
  • Image1525244427.284062.jpg
    Image1525244427.284062.jpg
    1.5 MB · Views: 220
Awesome job on the bike, it looks great, particularly the seat/tank combination.
I think that there is an issue with putting filler on top of the etch primer though, you might want to check on that before you go any further.
 
Copy that, so it looks like ill have to sand those two sections back tomorrow and bog it up before i go any further.

Tomorrow ill bog it up, sand it back, then prime it up again. I'll also mount the mud guard to the bracket I painted today then install it to see how it looks. Originally I had intended to paint the mudguard a satin black but now I'm not so sure see how it looks on the bike guess if i paint it and don't like it I can always strip it back, I'm getting pretty good at stripping paint these days.
 
Runs were slow today sanded it back and bogged it up.

Put some primer back over to see how my job was 
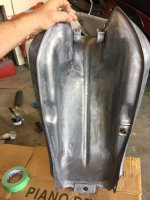
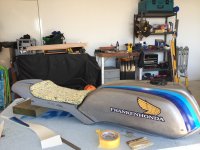
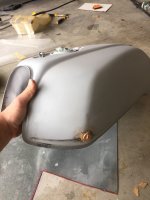
looks like I’ll have to try and build it up some more again tomorrow

I sanded the tail section back and primed it up also

I fitted the front mud guard mount after painting it black came up alright. I still need to drill out the remainder of the rivet holes and the hole that holds the brake line bracket in place

I’ll get stuck back into it again tomorrow.


Sent from my iPhone using DO THE TON
 

Attachments

  • Image1525332225.593098.jpg
    Image1525332225.593098.jpg
    1.7 MB · Views: 188
  • Image1525332208.880878.jpg
    Image1525332208.880878.jpg
    1.8 MB · Views: 182
  • Image1525332196.245026.jpg
    Image1525332196.245026.jpg
    182.4 KB · Views: 191
  • Image1525332178.957656.jpg
    Image1525332178.957656.jpg
    1.7 MB · Views: 212
  • Image1525332022.491311.jpg
    Image1525332022.491311.jpg
    1.6 MB · Views: 177
  • Image1525332007.592085.jpg
    Image1525332007.592085.jpg
    1.5 MB · Views: 183
  • Image1525331988.040027.jpg
    Image1525331988.040027.jpg
    1.5 MB · Views: 195
  • Image1525331975.916676.jpg
    Image1525331975.916676.jpg
    1.3 MB · Views: 192
  • Image1525331960.544196.jpg
    Image1525331960.544196.jpg
    1.5 MB · Views: 201
  • Image1525331946.413094.jpg
    Image1525331946.413094.jpg
    1.3 MB · Views: 188
Front mudguard mounts look great - no easy way on USD forks but you've accomplished it.
 
Pete12 said:
Front mudguard mounts look great - no easy way on USD forks but you've accomplished it.
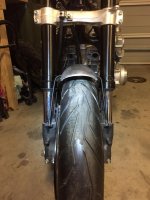
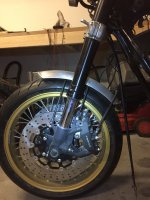
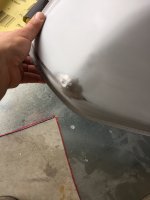
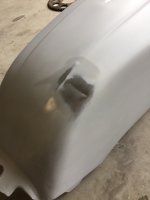
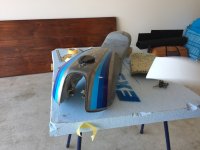
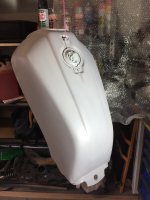
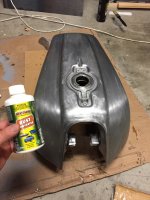
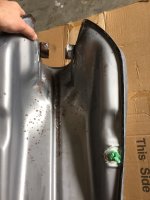
Cheers Pete and thanks for the advice about the filler too, tomorrow I’ll drill it out and rivet the guard to the bracket it thinking mat black


Sent from my iPhone using DO THE TON
 
cb250nproject said:
[/IMG]
Sent from my iPhone using DO THE TON
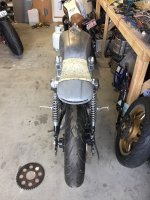
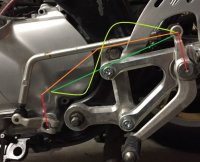
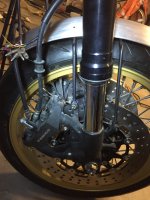
Very nice project! I'm afraid you will need to do a bit more work on your shift linkage though. The driving and driven links need to be much closer to being parallel to each other. (Red lines in pic) They do not have to be exactly parallel, but much closer than you have them. You can't adjust the driving link without cutting and welding or changing the pedal location, so you have to work around that. Ideally, the angle between the driving and driven crank arms and the connecting link would be 90o, but there is also a bit of leeway here and this likely will be ok. I realize that you have a very nice 90o angle between your crank arms and connecting link, but the 90o needs to be between the crank arms and a straight line between them. This is the theoretical or imaginary dark green line in my pic. Often as you know, this straight link is not possible to fit, but for design purposes, you must think about the link as if it were straight. No matter what the shape of the link (light green line), the function (discounting strength/flexibility issues born from the shape) is as if the link were straight. If you draw a straight line for the link on your existing setup (I didn't make a line for this), you will see that when you push down on the pedal, you won't be rotating the driven link very much. Easy fix though. Just rotate the driven crank to match the driving, and create a new connecting link. Making the bend in it as small as you can (orange line) will make it flex less. And once you are driving the bike, you will find making very small changes to the angles of the components can make a big difference in the shifting quality.
 

Attachments

  • shift link 1.jpg
    shift link 1.jpg
    201.2 KB · Views: 170
Back
Top Bottom