
We noticed you are blocking ads. DO THE TON only works with community supporters. Most are active members of the site with small businesses. Please consider disabling your ad blocking tool and checking out the businesses that help keep our site up and free.
You are using an out of date browser. It may not display this or other websites correctly.
You should upgrade or use an alternative browser.
You should upgrade or use an alternative browser.
Honda XR650L Thumpster
- Thread starter compoundcycles
- Start date
compoundcycles
Been Around the Block
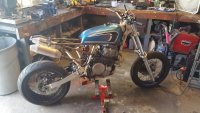
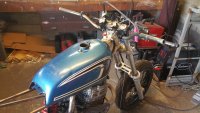
I took Brodies idea and cut the old bars off and moved the frame brace farther back. It's much stronger now and helps the lines with the exhaust and mufflers better as dualero suggested. Also, me for rider proportions.Brodie said:I would just replace the lower bar further back so that it is under where you sit. Then add some gusset plates in and you should be right. Replace the bar with 1" for peace of mind haha.
Here is a terrible photoshop I did on ny phone.
I think the tank needs to move forward. ..
Attachments
Man that thing looks like it will be a blast to ride!.
osteoderm
Been Around the Block
compoundcycles said:I think the tank needs to move forward. ..
Same frame, same tank... I moved the tank as far forward as the oil filler would allow, which looks good to my eye, but watch the fork clearance! I'm barely missing with the stock steering stops.


compoundcycles
Been Around the Block
compoundcycles
Been Around the Block
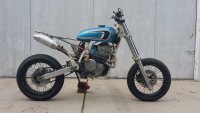
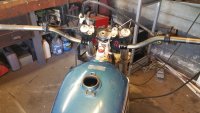
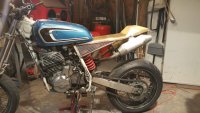
I finally got the gas tank mounted in a position I'm happy with. I patched the holes in the bottom where I needed clearance for the frame. The front tank mounts which ride on the rubber dampeners are solid in place, just need to fine a clever way to mount the back.
I'm considering grinding off the stock handlebar mounts in favor of a pair of super moto bars that I've split down the middle and mounted in some clip-ons. I really like that it lowers the top of the bars almost flush with the top triple clamp but doesn't completely change the riding position like real clipons or clubmans would. They clear the tank by about 1/4 inch.
I'm considering grinding off the stock handlebar mounts in favor of a pair of super moto bars that I've split down the middle and mounted in some clip-ons. I really like that it lowers the top of the bars almost flush with the top triple clamp but doesn't completely change the riding position like real clipons or clubmans would. They clear the tank by about 1/4 inch.
Attachments
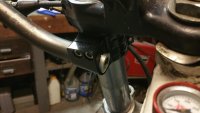
the bars don't look quite right
maybe if you swap the mounts side to side so the mounts are in front of the tubes, with bars on the same side as they are, then roll the bars back to a similar location
the grip ends look a little flat as they are now and the swap may drop the outside a little for a little more wrist comfort
maybe if you swap the mounts side to side so the mounts are in front of the tubes, with bars on the same side as they are, then roll the bars back to a similar location
the grip ends look a little flat as they are now and the swap may drop the outside a little for a little more wrist comfort
compoundcycles
Been Around the Block
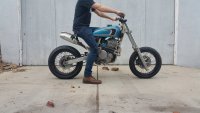
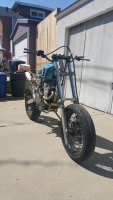
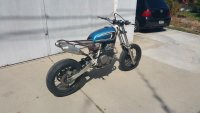
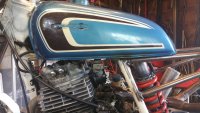
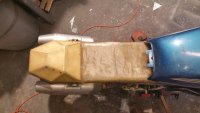
Today I welded in the petcock spigot and hammered out some mesh side covers. In the second photo you can see where I had to clearance the tank to get it to sit over the frame. Rolled her out into the sunlight for a few photos.
Attachments

danejurrous
Been Around the Block
Yeah, I'm really digging this bike 8)
compoundcycles
Been Around the Block
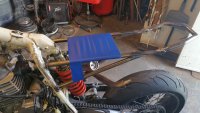
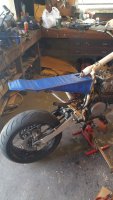
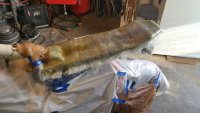
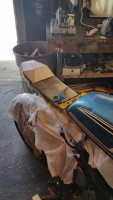
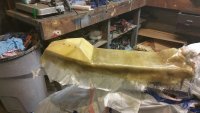
I decided to try making a seat pan and cowl out of fiberglass. I started by wrapping the frame with painters tape, then saran wrap so the fiberglass and resin wouldn't stick to the frame. I started with fiberglass mat, 2-3 layers for the base seat pan.
Attachments
compoundcycles
Been Around the Block
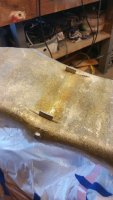
I realized I needed a way to secure the seat to the frame. After the first layer of resin cured overnight I cut some slots to embed some tabs in the seat. I backed the tabs with some metal plates to help distribute any stress the mounts would come under. Added a couple of patches of fiberglass and resin right over the tabs to help secure them. This cured overnight.
Attachments

compoundcycles
Been Around the Block
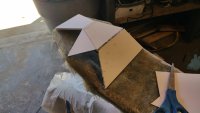
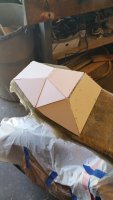
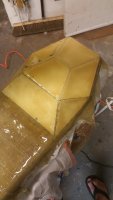
I used some thick foam core poster board to make the seat cowl puzzle pieces. It had to be strong enough to support several layers of wet glass and resin. I layed the pieces out somewhat according to the concept image i mocked up on photoshop earlier on in the build. I hot glued all the pieces together and filled in any extra gaps with more glue.
Attachments
compoundcycles
Been Around the Block
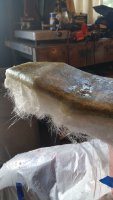
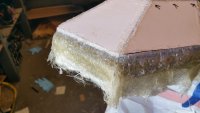
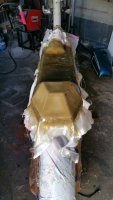
I added 3-4 passes with fiberglass cloth, not to be confused with fiberglass mat. Fiberglass cloth is much more finely woven and a pleasure to worth with compare to fiberglass mat. Fiberglass mat is more like trying to use spider webs and horsehair to build something. Going heavier on the resin at this point trying to seal up any air bubbles or fibergalss weave that hasn't been saturated.
Attachments
compoundcycles
Been Around the Block
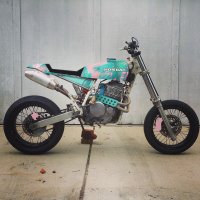
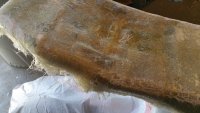
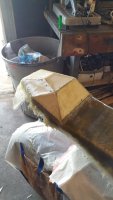
I used an angle grinder with a thin cutoff wheel to trim the excess fiberglass off. I tried to measure 1" of overhang wherever made sense. It popped off with a little bit of pressure. It's a TIGHT fit. Needs some cleanup, sanding, bondo, and paint.
Attachments


Maritime
Over 10,000 Posts
Brodie said:Now that looks alright! I wonder if you could integrate some strip LED lights into the seat.
+ 1 that may be pretty cool with a strip along the cowel just above the frame.


