New 1980 Gs550 project

track06

New Member
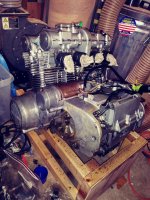
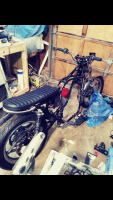
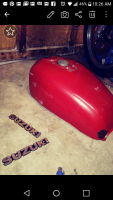
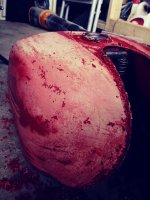
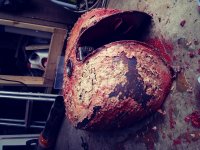
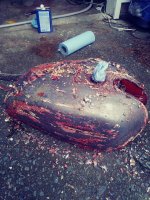
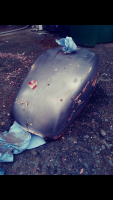
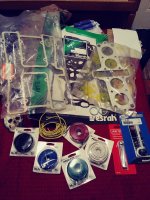
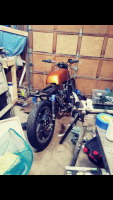
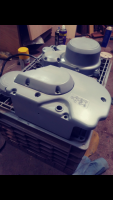
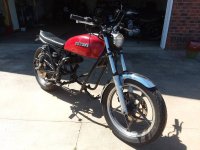
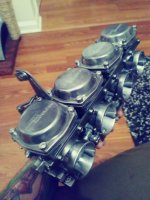
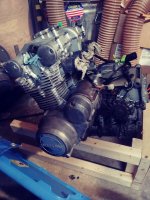
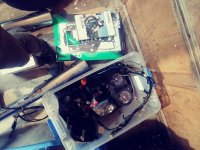
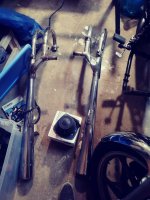
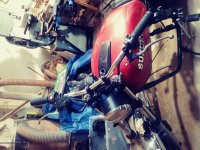
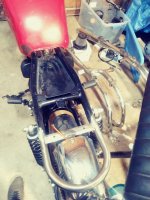
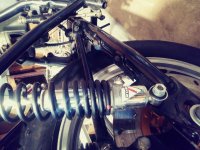
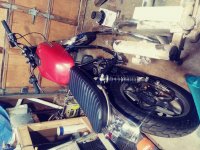
Hello, I'm quite excited to start on this new project i picked up today. It's a 1980 gs550 that tbh has already been started and was nearing completion before i got it. This however is perfect for me to get my hands wet and finish the build. This is not my first bike, but it is my first bike that I'll be putting together. So a bit about what i got. It is currently a roller, a clean one too. The carbs have already been cleaned, rebuilt and synced, the frame has been chopped, rear triangle cleared. Battery and electrical box has been welded in under the custom brat style seat, and hoop has been welded in. Forks have been rebuilt, brakes are done, nice vintage koni war shocks, new tracker/ dirty bike bars with new grips, switches and a new master cylinder. Came with a nice clean set of pipes, everything. Else is in a tote and is bagged and tagged. Two sets of gaskets, two wiring harnesses, the manual, and a tote of pretty much everything that was taken off the bike.
I'm going to just replace some gaskets and get the motor in the frame. I still need to buy a chain, and a battery, but I'll also be picking up a smaller speedo to keep the front clean. I've been doing a lot of reading about which battery to get since i have to get a smaller one to hide under the seat, but I'm very confused as to which one will actually work with my bike. I was looking at the ballistic evo2 8 cell since it's small and I've seen a few people using these but will have to convert everything? If so what would i need to get to make this work? Thanks check it out, and thanks for the future advice! I'll be taking pics of my progress, I'm really excited to get this thing up and going!
 

Attachments

  • 00q0q_4eCyZUN0Pht_1200x900.jpg
    00q0q_4eCyZUN0Pht_1200x900.jpg
    119.6 KB · Views: 225
  • 20190411_033017_Film1.jpg
    20190411_033017_Film1.jpg
    2 MB · Views: 218
  • 20190411_032912_Film1.jpg
    20190411_032912_Film1.jpg
    2.6 MB · Views: 221
  • 20190411_032900_Film1.jpg
    20190411_032900_Film1.jpg
    1.9 MB · Views: 221
  • 20190411_032824_Film1.jpg
    20190411_032824_Film1.jpg
    2.3 MB · Views: 217
  • 20190411_032814_Film1.jpg
    20190411_032814_Film1.jpg
    1.4 MB · Views: 221
  • 20190411_032754_Film1.jpg
    20190411_032754_Film1.jpg
    1.8 MB · Views: 218
  • 20190411_032744_Film1.jpg
    20190411_032744_Film1.jpg
    1.3 MB · Views: 221
  • 20190411_032731_Film1.jpg
    20190411_032731_Film1.jpg
    2 MB · Views: 225
Hey Kevin! Good to see this bike moving forward.
I saw your post about the battery. I didn't make that tray; the frame came to me like that. The small ballistic batteries should work, and I've seen them mounted on the swing arm, etc.


This is a CB550 I did and mounted one on the swing arm.


I think that'll be a cool bike. I already upgraded the forks with Sonic springs and Gold Valve Emulators, plus fresh oil and seals. It ought to handle nice, along with those old school Koni shocks.
Get the engine sealed up and pretty and in the frame and you'll be on the home stretch!
 
Looks good so far. I love the GS series. Once you get it running be sure to test the charging system, pretty much the only weak point of these engines as far as I know.
 
Hey Scott! Thanks again for the bike, and all your help! I was going to go with the anti gravity nattery but after updating the reg/rec and battery i would have in at around $260 since outs not kick star i wanted to go with the 8cell. That's something I'm interested in doing just not right now. So i picked up an agm battery for now, and i can still mount that on its side, and will go either on/under the swing arm, or just under the seat box... For now. I ordered a new headlight, and tail light, both which have indicators on them, new chain and sproket kit, and that battery. Been looking for a black mini speedo with warning lights but i have not find one that i like not can i find much info on the ratio i need. I started cleaning and scrubbing the motor, took the tank off, got the badges off and today I'm going to start stripping the paint. Moving along!!! :)
 
The tank had some chips and scratches on the paint, also a few dents so today I'll be stripping the paintand working on that. I started working on scrubbing that motor yesterday but ran out of posts cleaner, so back to the store i go! While I'm there I'm going to pick up some engine paint, i think this motor is going to be black.
 

Attachments

  • 20190412_102143_Film1.jpg
    20190412_102143_Film1.jpg
    2.6 MB · Views: 226
  • Screenshot_2019-04-12-10-26-41.png
    Screenshot_2019-04-12-10-26-41.png
    1.2 MB · Views: 205
  • Screenshot_2019-04-12-10-26-46.png
    Screenshot_2019-04-12-10-26-46.png
    987.7 KB · Views: 198
track06 said:
So i picked up an agm battery for now, and i can still mount that on its side, and will go either on/under the swing arm, or just under the seat box... For now.

Should be easy to fab up some straps out of flat steel that could bolt between the rear frame and the electronics tray. Look at Lowe's for some various sizes of flat stock.

I've used Danmoto gauges before. Lotta bang for the buck. That Nano is the bomb and super tiny. Uses a magnet sensor on the front wheel and a signal wire from the coils. Has tach, speedo and all your warning lights, too.

http://www.dan-moto.com/index.php?main_page=index&cPath=5&zenid=1b35bd79d40d391491cd3582d5107143
 
scott s said:
Should be easy to fab up some straps out of flat steel that could bolt between the rear frame and the electronics tray. Look at Lowe's for some various sizes of flat stock.

I've used Danmoto gauges before. Lotta bang for the buck. That Nano is the bomb and super tiny. Uses a magnet sensor on the front wheel and a signal wire from the coils. Has tach, speedo and all your warning lights, too.

http://www.dan-moto.com/index.php?main_page=index&cPath=5&zenid=1b35bd79d40d391491cd3582d5107143

My thoughts exactly!!! Thanks, I'm actually just looking for a simpler. More retro speedometer, but with the dummy lights...
 
I'm ready to get back to the engine, and ready to get to that tank! Just a heads up Aircraft paint remover has been pulled from the shelves everywhere due to a certain chemical they see no longer allowed to use. I lucked out and was able to purchase this can today, the manager almost wouldn't sell it to me!!!
 

Attachments

  • Screenshot_2019-04-12-17-44-58.png
    Screenshot_2019-04-12-17-44-58.png
    1,002.9 KB · Views: 213
So, i coated the tank with the aircraft remover, 2 times now, the first time i didn't let it sit long enough i gutted i just got excited once i saw the paintjust bubbling off. I scraped the tank with a plastic card, wiped out down with mineral spirits, and started again. This time while it was sitting on the i went over to the engine and started scrubbing. Let me tell you, this stuff is no joke. I started in my garage with the door open and wearing a 3m mask, but the second go, i moved outside. I tried not to get any of this stuff on my hands even though i was wearing gloves... But as luck would have it my hands are currently tingling... This stuff ate through the gloves with out putting a hole in them and managed to get contact with my skin. I can't even imagine how this would feel without gloves!
 

Attachments

  • 20190412_181128_Film1.jpg
    20190412_181128_Film1.jpg
    1.7 MB · Views: 212
  • 20190412_184222_Film1.jpg
    20190412_184222_Film1.jpg
    1.7 MB · Views: 210
  • 20190412_190309_Film1.jpg
    20190412_190309_Film1.jpg
    3.5 MB · Views: 219
Almost there!!! Unfortunately, it's date night tonight... So since i bought this project i need to be good to the lady and take her out... Tomorrow i plan on finishing this strip job then get to filling the dents, scratches and emblem holes.
 

Attachments

  • Screenshot_2019-04-12-19-29-50.png
    Screenshot_2019-04-12-19-29-50.png
    1.2 MB · Views: 212
track06 said:
My thoughts exactly!!! Thanks, I'm actually just looking for a simpler. More retro speedometer, but with the dummy lights...

Like this?

http://www.dan-moto.com/index.php?main_page=product_info&cPath=5&products_id=133
 
Alright, kids are gone, the lady isn't home... Time to get back into this bike. So I've picked up some wire, I've been reading so much about the wiring and rewiring on these bikes i think I'll just take a stab at rewiring... But that's for later, tonight I'll be getting into the motor and checking the valves, cleaning more and replacing gaskets!!!
 

Attachments

  • 20190414_201213_Film1.jpg
    20190414_201213_Film1.jpg
    2.4 MB · Views: 226
Alright, moving right along! I've made some really great progress in the past couple nights and mornings, basically whenever i can squeeze some time in... Also lots of parts are starting to arrive! So I've started getting into the motor, and cleaning off all the old gaskets, man that's been quite an adventure! I've cleaned, degreased and primed most of the covers. Oh yeah I also started painting the tank, i wentback and forth between a bunch of oranges, and finally found one i really like! Unfortunately once a nice and shiny coat of paint was sprayed i noticed two more tiny dents... Doh!!! So time to sand back down and fill those areas! I really love the color of the tank, I'm thinking about a black pin strip on it somewhere, somehow, i haven't decided that yet. Well It's almost 1am and I'm about to call it a night, tomorrow however I'm off work so I'm really hoping to get a lot accomplished!!! Pay no attention to my messy garage, i barely have a corner to work with here...
 

Attachments

  • Screenshot_2019-04-17-00-38-03.png
    Screenshot_2019-04-17-00-38-03.png
    1.1 MB · Views: 204
  • Screenshot_2019-04-17-00-38-24.png
    Screenshot_2019-04-17-00-38-24.png
    882.6 KB · Views: 202
So, sincemy last post I've done A LOT. Motor is rebuilt and painted, and put back in the frame finished the tank, chopped and painted the fenders( the rear still needs a bit more work. New head light, tail light, both with indicators. Chopped the exhaust( still need to weld that up) welded a new battery box. New speedo, still need to get a tach but ran out of money... Fresh carb boots, K&N pods, and dynojet stage 3 kit. New reg/rec, and new battery... Hmmm i feel like I'm forgetting something... Anyway here she is, waiting on some valve shims before i torque everything down, then on to wiring!!! I really wanted an Munit, but again... Ran out of money so that will just have to wait. The whole build is on the GSR forum under my same name if you want to see the progress.
MdPN57q.jpg
 
Looks good mate I had a nightmare getting mine running right with those filters on .even with stage 3 kit
 
Thanks! Don't tell me that lol! I'm having a nightmare trying to get pods that fit!!!! The ones in the picture were too long and hit the frame, i tried grinding them down and they still wanted to pull the carbs off the motor! So i ordered APE, those were too long as well. Then i saw someone said the K&N rc 0884 was the way to go, so i ordered them without hesitation, they came in yesterday and they dont fit my carbs!!! So now I'm looking at the RC 2344, and UNI( though i don't much like the look of them) , those should both theoretically fit... Just have to wait, till they get here, i wish i could start tuning already!!! Where are you located? What did you end up jet and needle wise? I have the DJ 155 main, 3rd clip down from the top, air correctors in, drilled out the needle slide hole, and I'm sitting at 2.5 turns out. She starts up and idles fine with no filters i rubber banded a paper towle over the carbs and took her down the street and rode fine through the gears, i didn't get on it, i just wanted to see if she would run, and she did!
 
In the end I was 3 and a half turns out on air screw 3rd clip down on needles. 170 on main jets. Sorry for late reply good look with it .and my filters touched the frame too but did fit on carbs ok
 
Back
Top Bottom