Juggernaut XS750 "Antichrome"

Kind of a major update. The shorai battery arrived and is 1/10th the weight of the stock recommended battery. It is very close in size with the CDI black box.

Comparison to stock size
BatterySize1.jpg


Placed where it will be going
BatterySize2.jpg


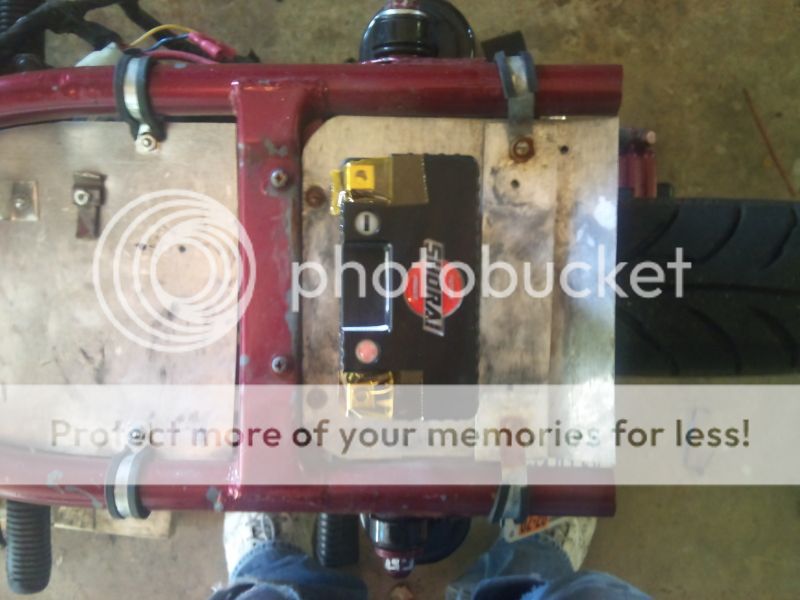
Placed where it will be going 2
BatterySize3.jpg


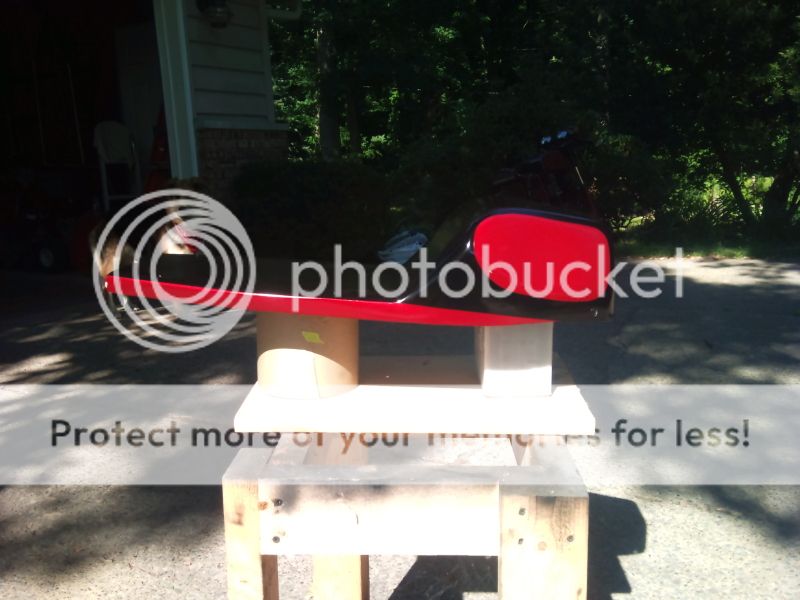
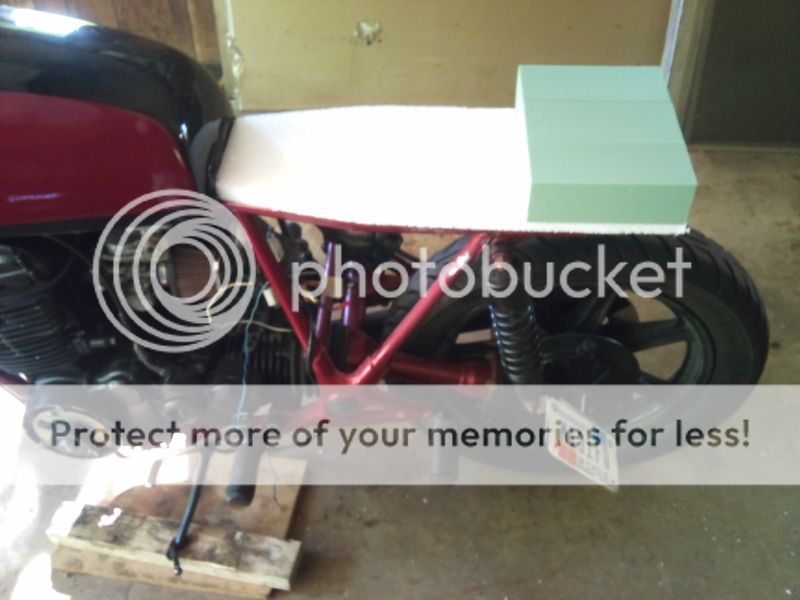
The major update is the build of my cafe racer seat. Fiberglass seemed like a scary endeavor but has been coming long nicely. I seem to be mixing more resin then I need but having extra in case is better than coming up short. The break down is follows:

1. 3 hours to glue the floral foam blocks together and let them dry
2. 6 hours to carve the seat, admire, carve some more and get to a point where it looks great and symmetrical
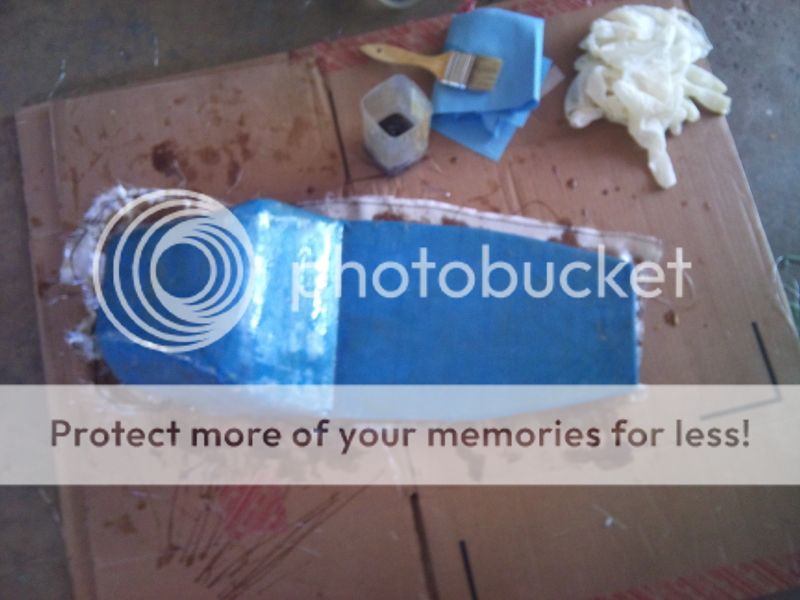
3. 20 mins taping the seat and applying wax as a mould release agent.
4. 20 mins cutting the fiberglass sheets to fit the mould
5. 10 minutes for each resin application (4 applications total when finished)

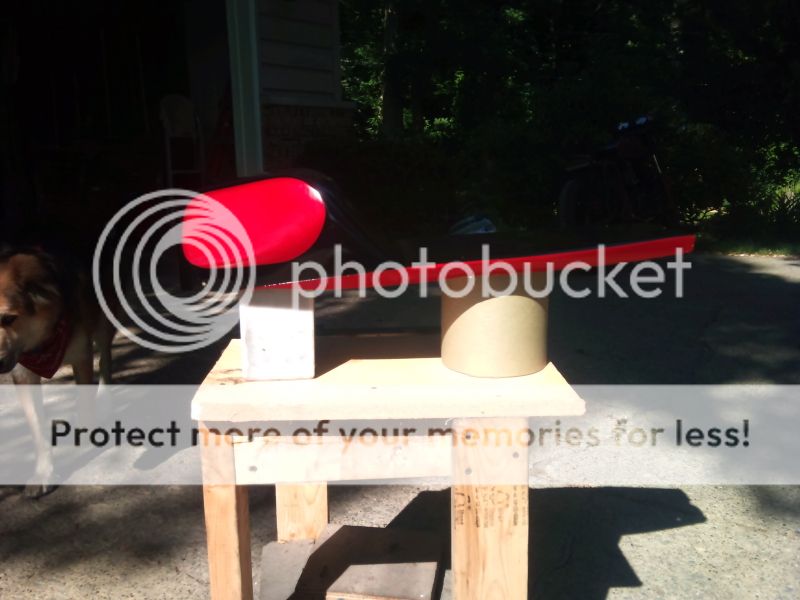
Starting the assembly
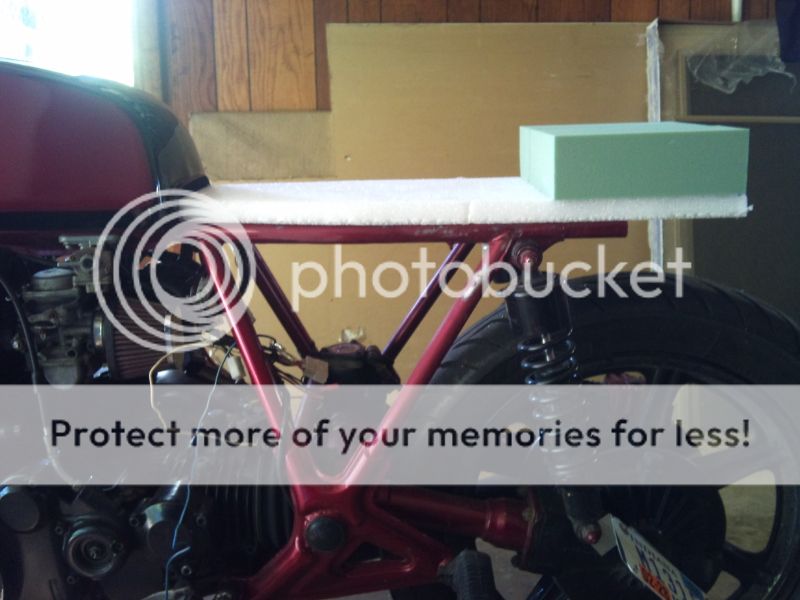
Cafeseatbuild1.jpg


Another View
Cafeseatbuild2.jpg


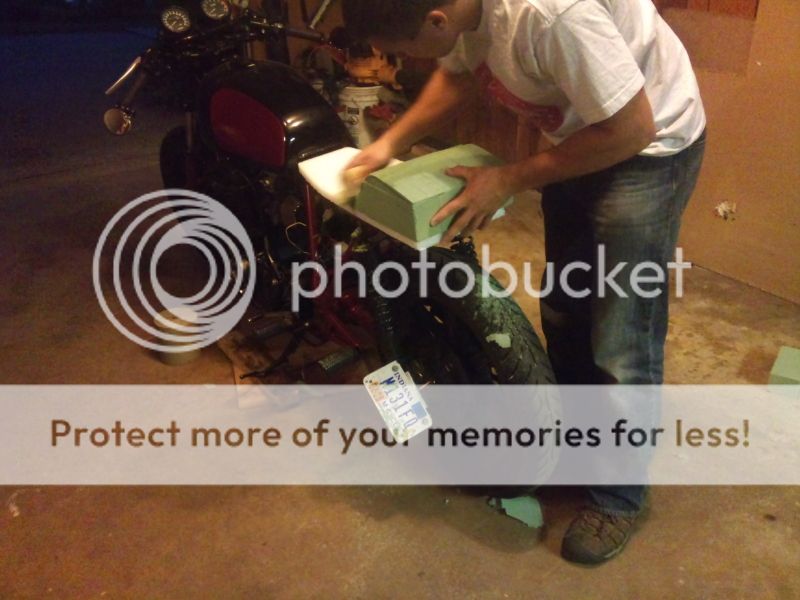
Cousin Mule carving the seat. (It nice to have another perspective and other ideas when doing something like this.)
Cafeseatbuild3.jpg


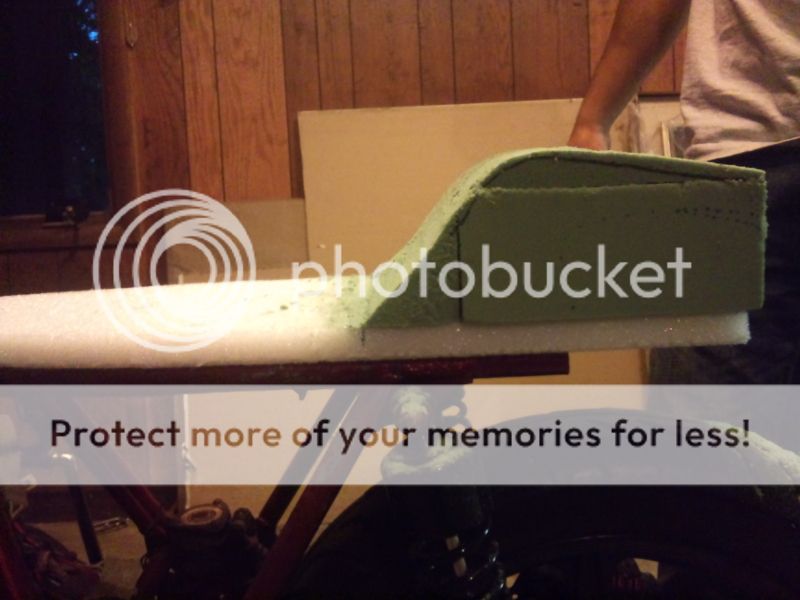
Side View of the rough cut.
Cafeseatbuild4.jpg


Fiberglass cut to be laid on in one piece
Cafeseatbuild6.jpg


Glass on the foam before resin is applied
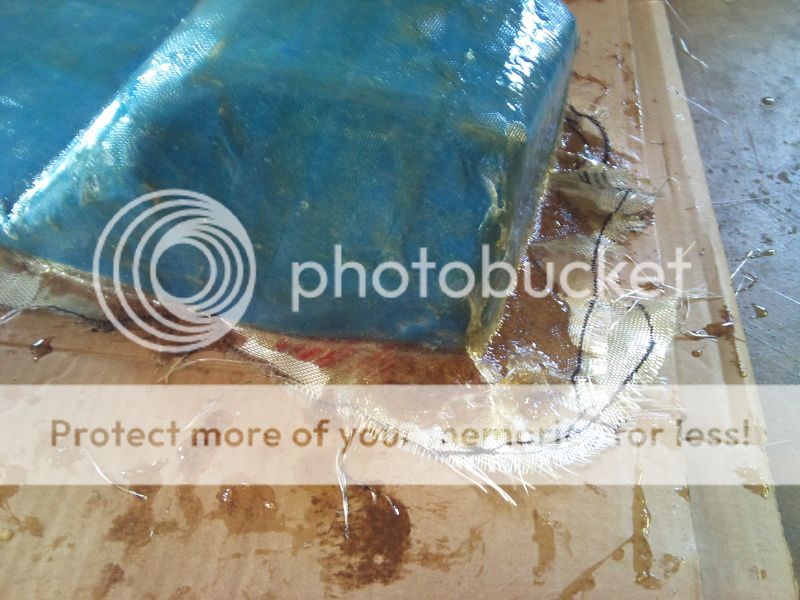
Cafeseatbuild7.jpg


Resin applied
FirstLayerofGlass1.jpg


Better idea of the design
FirstLayerofGlass2.jpg


Overhead shot of the first layer done
FirstLayerofGlass4.jpg


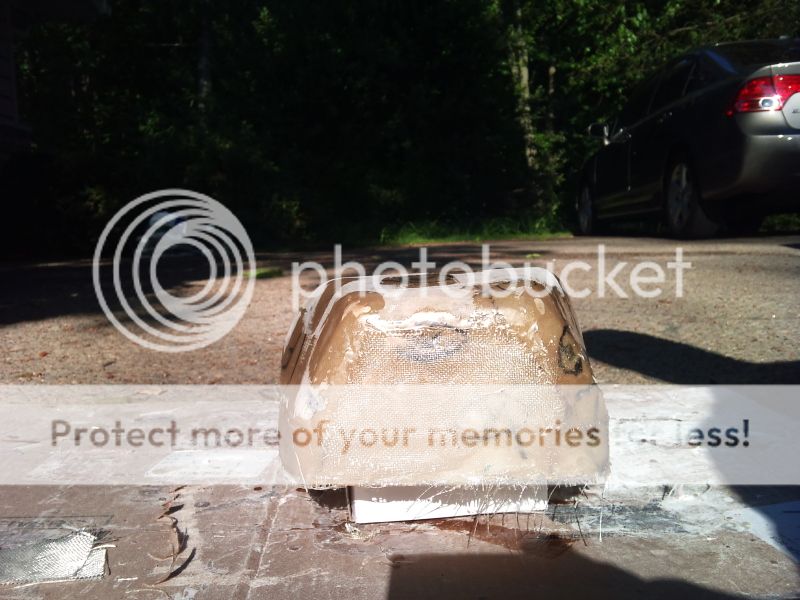
There will be two more layers applied to the underneath side for greater reinforcement. Then comes a lot of sanding, body filler, sanding, priming and painting. Glass will be finished tonight and will start sanding it tomorrow.

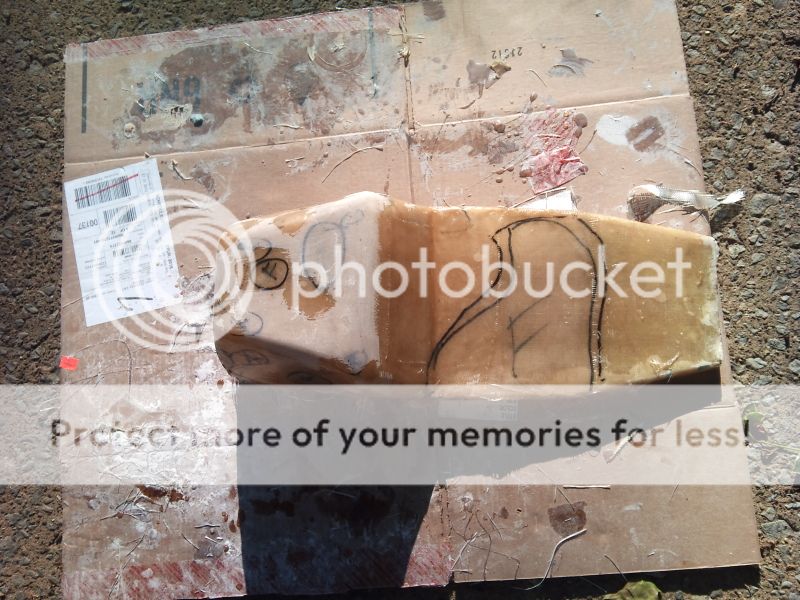
I'm looking for any pointers on finishing this seat. I've read that people use excess resin as a body filler after sanding to fill in any low spots. Are there any issues with doing this is should I just skim it with actual body filler?
 
Don't know how I've missed this build, but great job!!! I love seeing people that can take somthing that looks like the cat draged in and turning it in to bars of gold. Good luck on the seat bump. I'm on my 2nd try, lots of work but worth it in the end.
 
Thanks guys. Just a quick update. I have been doing fiberglass work and sanding for 4 days after I get off work. The first layers came out terrible and I needed to do a lot of chopping and resin applications to get it smoothed out for the most part.

Some things I learned along the way:

1. Make paper templates and make them fit the mold perfectly before laying any resin. "Fraying" (1/4" spaced cuts along outside edge of each piece) the edges seems to be the hot ticket on you tube tutorials. I don't recommend doing the first layer in one big sheet unless you cut it perfectly. Use the templates to cut the fiberglass, label them and put them in the appropriate locations.

2. Lay two layers of glass on the mold before taking the plug out. My seat pan became deformed when I put down the second layer. After having pulled out the plug.

3. A rough estimate on hardener is fine unless you enjoy watching your stuff set up while you count out 30 drops. That's extra time that could be spent making sure there are no bubbles in your layers.

4. Extra resin is a must if you are a n00b like me and use too much in one go. I probably wasted 1/2 a can before I figured out it doesn't take a lot of resin to coat the glass.

5. You will really love loathe sanding after a while. The dust will get everywhere so wear a mask, long sleeves, pants, goggles...ect safety crap unless you enjoy cold/hot, cold/hot showers to ease the fibers out of your skin. It wasn't bad for me but still itch a little in the night.

6. Overhang the fiberglass 1+ inches over the sides of the plug as you will possibly be cutting it off the base. You don't want to end up short, or repairs are in your future.

First two layers of glass done. Notice the warping on the seat pan.
2LayersDone.jpg


Top view of what I hope is the last application of fiberglass.
My symbology: F=Fuck up and R=Retard.... just kidding :p
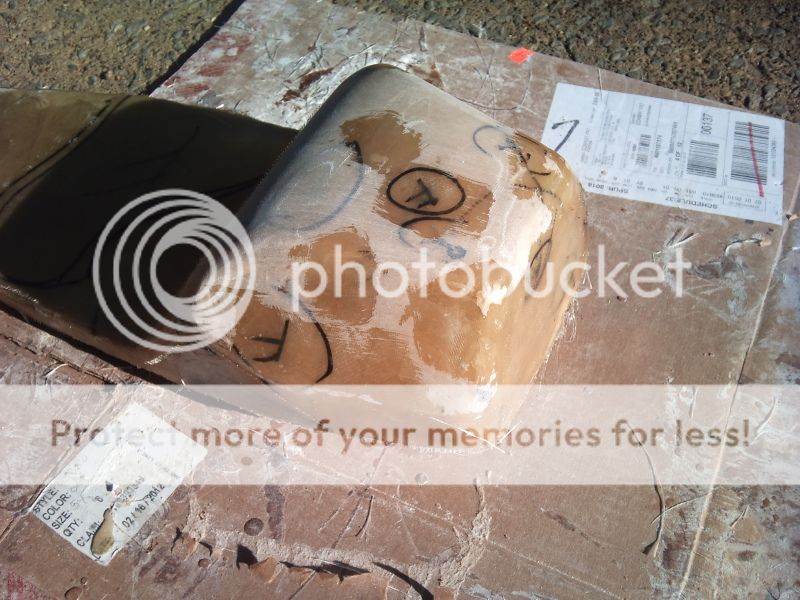
... F=fiberglass because it was really low in that spot and R=resin because it was shallow and just needed a quick skimming. It helps when you need to be quick.
FinalLayersApplied5.jpg


Left Side
FinalLayersApplied4.jpg


Back
FinalLayersApplied3.jpg


Top overall
FinalLayersApplied1.jpg
 
Nice! Looks better than my first seat that I just finished up. I learned many of the same lessons.
 
Seat looks great my man, and thanks for all the helpful tips along the way. I wanna follow all your builds for the "2 minute tips with Jugg" Seriously. Big help! Keep it up
 
A few days ago I primed the seat. Let it dry for a couple and sprayed the red yesterday. Today I finished it with the black and pulled the tape off while the black was still drying. I highly recommend this so you don't chance the paint coming off with the tape a couple of days down the road. If you do want to wait keep a very sharp blade in one hand in case it sticks to the tape. Then just cut it off and be done.
I finish the last color coat about 2 hours ago and will wait a while before I spray the clear. I want to make sure the garage is at a decent temperature and the paint has had some time to gas off.

Here is where I stand with the seat build.

Just after removing the tape
JustPaintedBlack1.jpg


The sun hitting the seat
JustPaintedBlack5.jpg


The other side
JustPaintedBlack4.jpg


Placed on the bike
DSC_1324.jpg


The seat and the bike is completely done. I put clear coat on it last night at 9pm since it was cool and the dehumidifier had been running for a while. It's perfect where it needs to be and rough on the spots that are being covered with the seat pad. No more changes will be done, now it's just basic maintenance and general repairs. Thanks to everyone on this board who helped me out and gave me the motivation to trudge through this 2 year project. I have learned a lot and will pass on any information I possible can.

FINISHED!!!

Finished1.jpg


Finished3.jpg


Finished2.jpg
 
looks really really clean!

love the tail!

if it were mine id maybe do the gauges as well.....a custom ally plate with led dummy lights and mini speedo/tach....blah blah blah yarda ya ya
sorry i was daydreaming again......
i dont mean to start telling you what "I" would do......i dont wanna come across as "that guy"
but..... eeeeeekkkk.....ive done it....

in all seriousness though.....really nice bike....if i saw it in the street ide take a photo
 
love the red/black combo! looks super slick. So I guess there is one thing left to do.....Ride the hell out of that thing!
 
I neglected my carburetors a couple of months ago and killed the engine. It ingested a screw and caused cylinder 1 to start knocking badly. I have since ripped the engine apart and put everything in body bags. The engine just got measured at the machinists and is getting glass bead blasted and cleaned.

My rod and crank bearings just came in today and that means I can start putting the bottom end back together. Because I'm a glutton for punishment I have decided to overbore the engine to 900cc, add fuel injection and for the icing on the cake, will give it a turbo.

This will not happen overnight but i hope to wrap it up before summer. Worst case scenario I will at least get the engine built and add fuel injection. The turbo may have to wait until the fall.

I'm using this site to get me started on the fuel injection:
http://users.hal-pc.org/~dhutch/

The turbo will probably end up being a Garrett GT15 or the turbo from the Yamaha SECA 750. I just have to find the better of the two options which requires more learning.

Everything for the rebuild has been sourced and is just a matter of buying the stuff and installing it. The head work makes me the most nervous. I may just port and polish it a little bit with new valves and valve springs.
 
Nice! Look forward to seeing how you go with the 900cc conversion.

The PO was halfway through a 900cc conversion when I bought it off him, so I have the rings, pistons, and cylinders all ready to rock, just need some watermarks in the jugs taking care of and then try to find a head gasket to suit. Are you going for the Wiseco pistons for the XS1100? I've got a Henry Abe kit in mine which is a bitch to find replacement rings for! :)
 
Yes, I am going with the Wiseco pistons. I found two sites that sell them.

http://lukesracing.com/Merchant2/merchant.mvc?Screen=PROD&Store_Code=LR&Product_Code=4069M07450&Category_Code=WPYS

and

http://mxpartsonline.com/Merchant5/merchant.mvc?Screen=PROD&Store_Code=mxparts&Product_Code=4069M07450&Category_Code=WPYS
 
I'd love to covert to fuel injection, but a turbo sounds pretty hardcore. You'll already be raising compression, so you won't be able to run crazy boost. Check out what I found on Ebay:

http://www.ebay.com/itm/Yamaha-XS750-Turbocharger-Turbo-Kit-Cylinders-Pistons-Exhaust-Full-Set-SU-Carb-/160723969712?forcev4exp=true&item=160723969712&vxp=mtr#ht_6109wt_830

That looks like a pretty shoddy kit, but it might give you some ideas.
 
Thanks Beldrueger for the link. It will give me some ideas. I can't believe they were running that intake manifold and carburetor on top of points. Looks like a scary combination.
 
Putting a turbo on an air-cooled, bored engine is not a good idea.
Kawasaki did this on the Z1R, but only sold the bike with voided warranties, and that was only 10psi of boost.
Suzuki did it again in the 80s on a 650, but only attempted 85 hp. Yamaha's attempt also had to keep the boost down to avoid blowing up.
Honda got the most bang, but the setup relied heavily on electronics.
 
teazer said:
Do NOT do a spreadsheet and do Not ever add up the costs after you finished - unless you have shares in a make of anti depressant drugs.

I like to think of cheap bikes as a sort6 of installment plan. Of course each installment is basically whatever is in your account at the time.. :)

I learned that the hard way. $$$


Sent from my iPhone using Tapatalk
 
Back
Top Bottom