Follow along with the video below to see how to install our site as a web app on your home screen.
Note: This feature currently requires accessing the site using the built-in Safari browser.
We noticed you are blocking ads. DO THE TON only works with community supporters. Most are active members of the site with small businesses. Please consider disabling your ad blocking tool and checking out the businesses that help keep our site up and free.
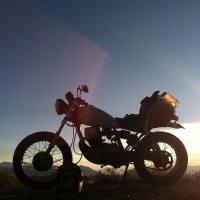
Clocked a couple hundred miles last weekend on a short trip to a friend's cabin up in the mountains- and Pete ran great the whole time. The last 8 miles (and back) up the final canyon was all dirt, and the last mile was frozen mud... not the best for my slick city tires, but sliding the back and spraying icy mud chunks for a mile was a total blast.
Pic 1 - Echo, UT
Pic 2 - saddle at the top of East Canyon
Pic 3 - Weber Canyon
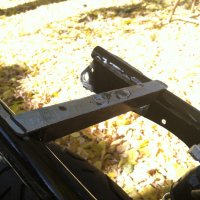
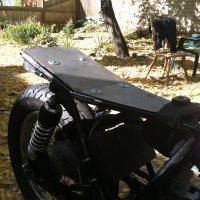
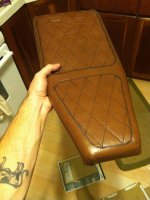
The curve on the stock seat has been driving me crazy, it slides you forward into the tank and seats you a little higher than necessary... So I decided to start on a flatter brat/tracker style seat.
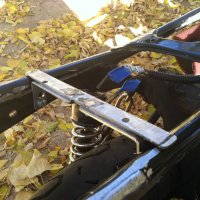
I don't have easy access to any welding equipment- and really just wanted to get something on there this weekend- so I fabbed up a support bracket with two pieces of bar bent to 90 deg. and a length of angle bar. I drilled out the two and then bolted and JB Welded then together, and then ground down the bolt heads flush and excess JB. The JB has no structural purpose here, just keeps it together a little cleaner. It's not pretty, but hidden and strong. I'll probably get something welded in there eventually, but at least this way I can keep it flexible in case I want to go for a different style seat later.
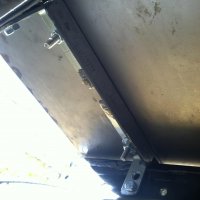
Made a seat pan out of sheet and got some foam on there. It doesn't look like much padding right now, but there's another layer that will wrap it once I get the leather upholstered on.
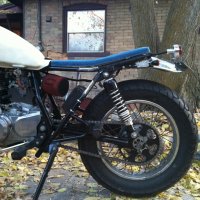
Also modified the front fender a good bit. The stock fender didn't fit the fatter tire I put on front, so i had to widened in a good bit. Fortunately, it was still pretty high off the tire, so I had plenty of metal to work with for bending/widening.
I also wanted it to be low profile, but still do it's job... so I followed suit with SteveG's build and kept the back a little longer. I think I kept my overall length a few inches longer than his though.
To Do Next:
-Starter motor is still out... good thing I like to use the kicker.
-Fab up custom brat seat
-Keep cleaning up wiring (slowly over time)
-New speedo is in the mail
-Shorten clutch and brake cables
To Do Later:
-Relocate key ignition to battery box?
-Figure out mirrors that aren't ugly and ineffective (is there such a thing?)
-Paint wheels black?
-Engine rebuild
-New shocks
-Re-repaint tank
-Fix/improve/customize whatever else keeps breaking
Thanks teazer- It's definitely a nice looking place to ride. Long straight desert roads, mountain twisties, salt flats... there's a little bit of everything out here. Except for water, that is.
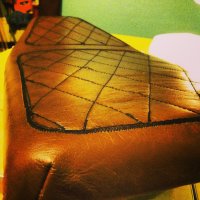
Made the seat last night. It's... okay. I don't know the first thing about sewing beside's how to set up a machine and run straight lines, so it was kind of baptism by fire. I didn't have any quilt batting to go underneath and used material from an old torn up sweatshirt instead, so the diamonds didn't really 'puff' up or anything.
The end result is definitely not as nice looking as I was hoping for... but considering that it's function is to be sat on, I guess it'll do it's job nicely.
For the leather, I spotted an old couch with a broken frame at a thrift store and asked the manager if I could salvage the leather for a few bucks. He said if no one had purchased the couch by the end of the week, the leather was all mine. So by Friday I had a couple bags of nice leather for $2 total. Not a bad trick.
It's not letting me post pictures right now, so I'll try later.
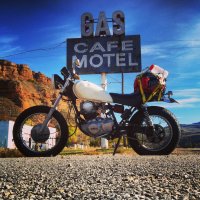
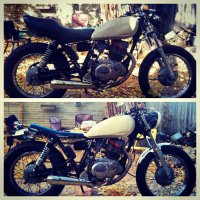
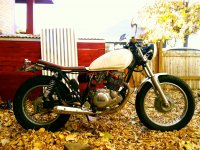
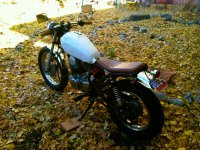
As he sits today. It's been fun to see such a transformation over the course of summer and fall... and be able to ride for most of it too. One of these days I'll have to completely tear him down and do it all over proper-like, but until then...
Got a new speedo and cable in the mail and threw them on the bike this afternoon. Still need to wire up the indicator/neutral/high beam lights, but at least I can see my speed now. Hoping to wire up the lights and paint the front fender tomorrow.
I'm thinking matte black for the fender, with some glossy black rubber edge stripping for the edges. Hopefully that'll make it easy to overlook... both for esthetics and to keep the local law from looking at it and seeing it shortened up. I've heard that SLC cops have been ticketing people for non-stock front fender length? Hopefully just a rumor.
Hoping to wire up the lights and paint the front fender tomorrow.
I'm thinking matte black for the fender, with some glossy black rubber edge stripping for the edges. Hopefully that'll make it easy to overlook... both for esthetics and to keep the local law from looking at it and seeing it shortened up.
You might also think about using PlastiKote black http://www.plastikote.com/. More durable than paint, easier to apply (more forgiving), and still gives the matte black finish.
Oh that's a good idea- I do have a good amount of black spray at my house already, but I might have to pick up some plastikote for it anyways.
Anyone have any tips for painting/plastikoting the inside of a fender? I'm assuming it'll be just like painting any other surface. I've been stripping down rust slowly over the last few weeks, and am hoping to give it a good protective layer.
I used automotive asphalt wheel well spray. Thick tar like coating that resists rocks and stuff. holding up well so far. I soaked the fender in vinigar to remove rust, then neutralized with baking soda, rinsed with water, dried and sprayed away the underside with the chrome side masked off. If you are painting the chrome black you need to either remove it with acid or use a flapper wheel and a grinder to give lots of tooth to the chrome surface, then an etch primer would be a good idea.
Great input Maritime- thanks. I'll have to pick up some wheel well spray after work today. I was planning on getting through the chrome with a flap disc on a grinder... but just have normal primer. I'm not familiar with etch primer... what's the purpose of it?
It acid etches the surface to make it stick better than standard primer. Duplicolor make it as well as Rustoleum I think. I use it on shiny surfaces after sanding etc. then if you need to you can use a sandable primer over that to smooth things out etc and it will stick better.
Bud, I'm loving the pictures. I have a 1980 SR250 that I'm working on. I'm still in the process of figuring out what I want to do. I take things apart and find spiders and bug bits everywhere I look.
Thanks Westy- yeah they're fun little bikes, and you can go so many routes with them. And they must attract spiders, cause I have a tendency to find them around the bars while I'm riding. Probably shouldn't keep my bike in a shed...
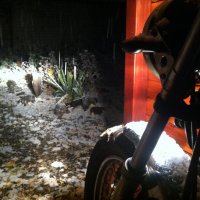
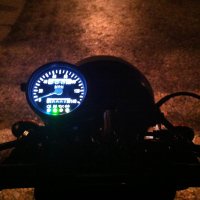
More photos-
Hooked up a new speedo- looks lovely at night. I've been riding around nearly daily without one for the last month or so... so I'm a bit relieved to have one on there now
Snow already? This one caught me off guard...
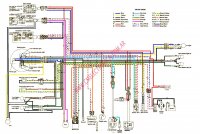
And finally, if anyone's looking for a better sr250 wiring diagram, here you go. The only other ones I found online are shitty old b&w photocopies and quite difficult to read, so finding this has made life soo much easier. Color coordination also helps a lot.
This site uses cookies to help personalise content, tailor your experience and to keep you logged in if you register.
By continuing to use this site, you are consenting to our use of cookies.


")