Follow along with the video below to see how to install our site as a web app on your home screen.
Note: This feature currently requires accessing the site using the built-in Safari browser.
We noticed you are blocking ads. DO THE TON only works with community supporters. Most are active members of the site with small businesses. Please consider disabling your ad blocking tool and checking out the businesses that help keep our site up and free.
Be a shame.... could you do something like the coil mounts on the down tubes?
stance looks good but if mine Id lift the rear of the tank a tad...but thats me and everyone around here says I have bad taste
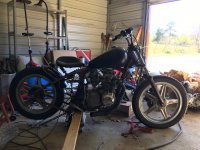
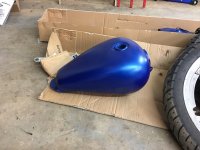
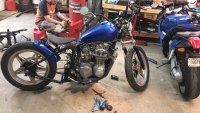
Been putting in a little work. Mounted the new tank. The stock mounts on the new tank were too long so I cut them and drilled a 1/4 hole in each one. I drilled a hole through the frame, ran a tube through it. A piece of 1/4-28 threaded rod then slides through the tank mount and the frame. An acorn nut on either side keeps it secure. I cut down the rear mount tab on the tank and drilled a hole that fits over what was the forward seat mount stud. I’ll have to drill another hole and relocate the seat hinge just a little aft.
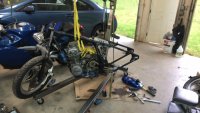
I cut down my headlight ears. They aren’t perfect but they’ll work for now. I stuck the gauge on the tree opposite of the choke cable. I don’t really like it being off center, there was just a convenient mount hole for the moment.
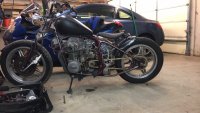
I still need a front brake hose and then I think I can give it a test ride. It’s 10 days until the Meltdown in Hendersonville. Between now and then I need to finish up odds and ends, strip it, clean it and throw some paint on it. Sprint to the finish!
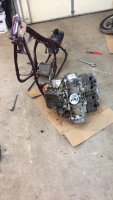
Burned some midnight oil last night. Took her apart to paint. It’s just gonna be a quickie paint job for now because I want to ride. Found a blue with a little metal flake in it for the tank, the frame will be black. It’s always a wrestling match getting the engine out of the frame on my own but I got that out. Smoothed our the bondo on the frame. Tomorrow I prep that for paint.
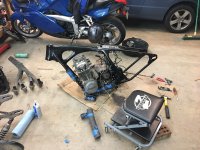
Got the engine back in the frame last night. That always seems to take a lot more wrestling than I’m prepared for. Sprayed a some clear on the tank and fender. I’m actually pretty happy with how they came out.
I painted the fork legs last night and left them to dry. This evening I should be able to put it all back together. Fingers crossed.
This site uses cookies to help personalise content, tailor your experience and to keep you logged in if you register.
By continuing to use this site, you are consenting to our use of cookies.

") then it will look like a train is coming down the road
then it will look like a train is coming down the road