Honda 125 Brat style By a Newbeeeeeeeeeee

jeff4uk

Been Around the Block
Hi Guys yes its Jeff but this build is being posted for some one else who cant use a computer
The you lads name is Hadley ,He's 22 years old and has'nt got a licence to ride yet!!!
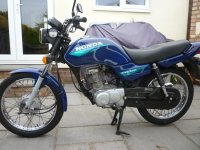
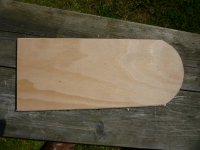
It all started with him sending me a photo of a Brat style bike (just in passing really) I replyed "we can build that"
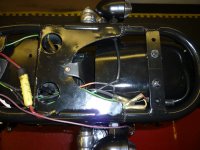
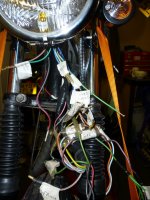
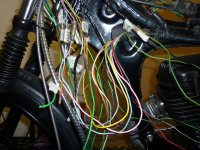
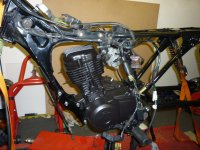
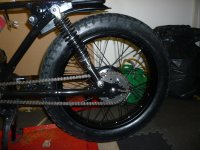
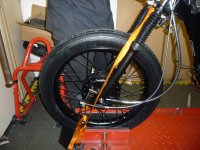
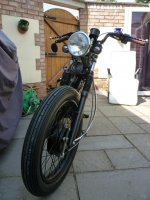
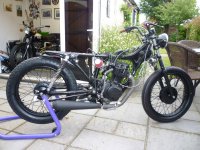
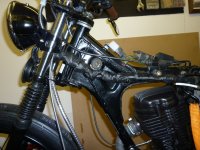
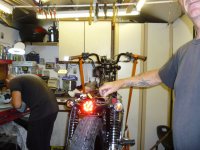
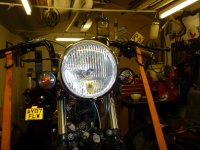
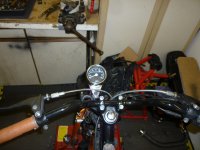
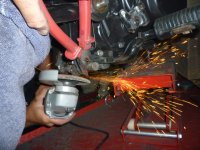
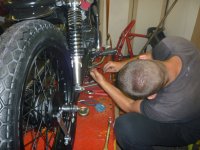
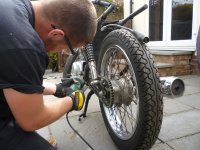
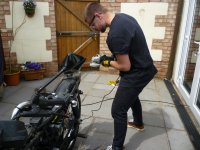
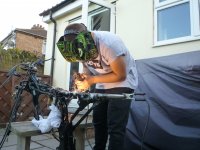
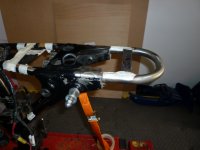
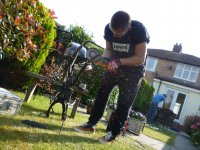
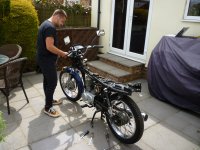
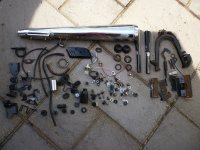
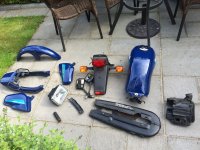
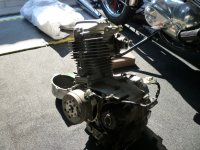
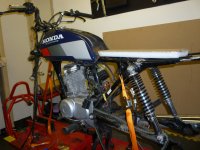
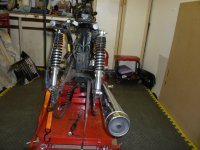
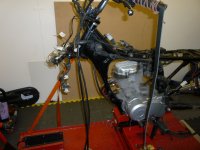
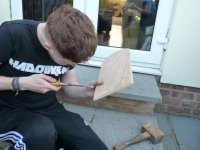
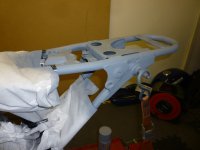
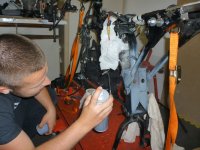
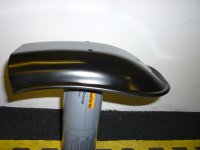
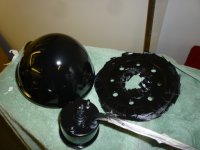
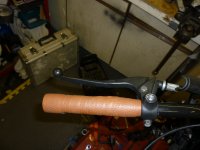
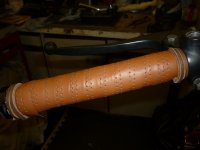
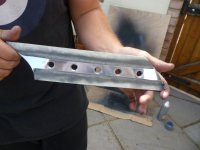
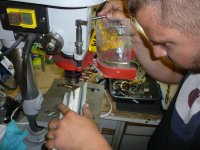
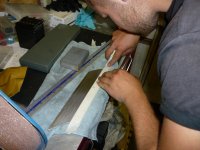
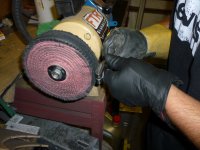
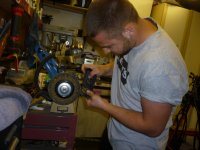
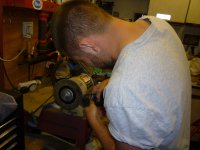
and that was it ! The hunt was on for a bike ,After a few weeks He found a 2000 CG 125 in very good condition and running well.Hadley has no tools and has NEVER built a bike or anything so this is his first attempt ,he has some great ideas for what he wants the finnished bike to look like , He started with removing every thing that was'nt going to be used,He had never used an angel grinder or a welder ,so i gave him a few lessons just to get stared
 

Attachments

  • P1020881.JPG
    P1020881.JPG
    1.5 MB · Views: 344
  • P1020872.JPG
    P1020872.JPG
    1.5 MB · Views: 335
  • P1020878.JPG
    P1020878.JPG
    1.5 MB · Views: 332
So there seems to be a fair bit that he dos;nt need!!!!
Hadley wants to turn this modern bike into some thing old school (as a brat bike is any way)
He;s gona loop the seat section, hide the electrics, big boots,pro seat and then make what ever he needs then .
He;s told me of some of his ideas ,if he pulls them off they will be awesome
Strip down is the easy bit !!! bringing it back to life after that is the hard bit!
 

Attachments

  • P1030065.JPG
    P1030065.JPG
    2.3 MB · Views: 298
  • P1030077.JPG
    P1030077.JPG
    2.3 MB · Views: 306
  • P1030068.JPG
    P1030068.JPG
    2.1 MB · Views: 319
  • P1030064.JPG
    P1030064.JPG
    2.2 MB · Views: 312
  • P1030060.JPG
    P1030060.JPG
    749.1 KB · Views: 319
  • P1020875.JPG
    P1020875.JPG
    1.5 MB · Views: 317
  • P1030138.JPG
    P1030138.JPG
    1.5 MB · Views: 319
  • IMG_0658.JPG
    IMG_0658.JPG
    2.9 MB · Views: 325
Wheels are off to paint shop, seats off to the upholster and the tank will soon go off to paint too
 

Attachments

  • P1030040.JPG
    P1030040.JPG
    2.3 MB · Views: 303
  • P1030035.JPG
    P1030035.JPG
    472.5 KB · Views: 323
  • P1030033.JPG
    P1030033.JPG
    2.4 MB · Views: 317
  • P1020914.JPG
    P1020914.JPG
    2.4 MB · Views: 320
  • P1020908.JPG
    P1020908.JPG
    2.2 MB · Views: 304
  • P1020909.JPG
    P1020909.JPG
    2.3 MB · Views: 307
He made the seat pan out of 4 ply and will cut the foam to 80 mm high.
got his mate Jake to chiseling out the resese for the bolts.
the engine works fine so just going to it spray black
tidying up some of the frame work.
 

Attachments

  • P1030066.JPG
    P1030066.JPG
    2 MB · Views: 308
  • P1030079.JPG
    P1030079.JPG
    2.2 MB · Views: 303
  • P1030069.JPG
    P1030069.JPG
    2.4 MB · Views: 311
Thanks Tim
There,s a few bits that need to be made or painted
Handle bar grips are made from bicycle wraps finished either end with leather strips.
head light,speedo, rear mug guard,key holder will be black
Chain guard is being made from 1/4 X 3" Aluminium bar holes drilled and counter sunk ,polished in the middle then painted
top and bottom he,ll do the same for the carb guard
For Hadley,s first ever build he,s doing so well,
 

Attachments

  • P1030097.JPG
    P1030097.JPG
    1.9 MB · Views: 286
  • P1030092.JPG
    P1030092.JPG
    1.9 MB · Views: 297
  • P1030092.JPG
    P1030092.JPG
    1.9 MB · Views: 301
  • P1030090.JPG
    P1030090.JPG
    2.3 MB · Views: 298
  • P1030083.JPG
    P1030083.JPG
    2.2 MB · Views: 285
  • P1030085.JPG
    P1030085.JPG
    2 MB · Views: 304
Remember he,s never used tools like these before .
 

Attachments

  • P1030101.JPG
    P1030101.JPG
    2.1 MB · Views: 296
  • P1030100.JPG
    P1030100.JPG
    2.3 MB · Views: 298
  • P1030099.JPG
    P1030099.JPG
    2.3 MB · Views: 307
  • P1030070.JPG
    P1030070.JPG
    2.4 MB · Views: 310
  • P1020920.JPG
    P1020920.JPG
    2.3 MB · Views: 294
  • P1020919.JPG
    P1020919.JPG
    2.3 MB · Views: 297
Good Heavens above! How do expect to build a decent machine if you yourself are fuelled by Diet Coke? I sincerely hope there's a splash of Jack's in there ;)
 
Please tell him to use eye protection when using the wire wheel on the bench grinder - when they let wires go they can blind you.
 
Wheels are back and new tyres fitted 350 x 18 rear and 300 x 18 ribbed front Hads is well pleased with the look.
engine is back and in the bike ,just got to sort out the wiring, that,s my job.then start building this thing back up
lights ,indicators, ignition
 

Attachments

  • P1030117.JPG
    P1030117.JPG
    317.5 KB · Views: 304
  • P1030118.JPG
    P1030118.JPG
    542.5 KB · Views: 280
  • P1030119.JPG
    P1030119.JPG
    1.6 MB · Views: 293
  • P1030080.JPG
    P1030080.JPG
    549.3 KB · Views: 276
  • P1030103.JPG
    P1030103.JPG
    2.4 MB · Views: 290
  • P1030105.JPG
    P1030105.JPG
    2.4 MB · Views: 283
The battery is hidden in the Y section on the frame where the rear shocks go and the wiring is hidden on a tray under the seat
 

Attachments

  • P1030098.JPG
    P1030098.JPG
    2.3 MB · Views: 261
There,s a few of theses going down too,The Diet coke was for Jake ;D ;D
 

Attachments

  • P1030078.JPG
    P1030078.JPG
    2.2 MB · Views: 265
The lads working hard ,its starting to look like a bike again
I like hadleys idea of drilling out the leavers looks cool
The rear LED light is a nice touch as is the red air filter
 

Attachments

  • P1030131.JPG
    P1030131.JPG
    1.5 MB · Views: 268
  • P1030110.JPG
    P1030110.JPG
    1.5 MB · Views: 277
  • P1030130.JPG
    P1030130.JPG
    1.5 MB · Views: 262
  • P1030124.JPG
    P1030124.JPG
    1.5 MB · Views: 260
  • P1030111.JPG
    P1030111.JPG
    1.5 MB · Views: 249
  • P1030113.JPG
    P1030113.JPG
    1.5 MB · Views: 247
  • P1030093.JPG
    P1030093.JPG
    1.7 MB · Views: 241
  • P1030089.JPG
    P1030089.JPG
    2.3 MB · Views: 254
  • P1030086.JPG
    P1030086.JPG
    2.3 MB · Views: 244
it only had a full stand so he cut that off and fabed up one from an other bike
 

Attachments

  • P1030106.JPG
    P1030106.JPG
    1.4 MB · Views: 231
  • P1030108.JPG
    P1030108.JPG
    1.5 MB · Views: 251
  • P1030116.JPG
    P1030116.JPG
    1.6 MB · Views: 253
Nice project and good progress, well done.


I used cloth loom tape for that old skool look, especially on the part that shows around the headstock.

I might steal the drilled lever idea for my CBX ;)
 
Don't want to appear like the Fun Police, but drilling holes in your levers (especially a cable brake lever) is a really bad idea. I weakens the crap out of them....and the last thing you want in a panic brake situation is a snapped lever :eek:
 
Back
Top Bottom