Well for all the 2 strokers out there I thought I might add my homemade leakdown tester to the list. Basically, the tester allows you to pump a small amount of pressure into your motor and check for any air leaks in your engine. Air leaks=lean mixture, lean mixture=death. Common areas of concern would be the crank seals, intake manifolds and cylinder/heads gaskets. Cases could leak too, but probably less likely (if you torque your case bolts and use quality 3 bond like good boys and girls).
What you will need:
1) Low pressure gauge 1-20 psi max, with 1/4" pipe thread adaptor. I ordered mine from McMasterCarr (0-15 psi).
part #: 4000K681 cost: $9.05
2) Low pressure 'T' pipe fitting w/ 1/4" female threads.
McMasterCarr part # 4429K251. Cost $6.05 ...can be found at any hardware store.
3) Schraeder air fitting(bicycle tire fitting) with 1/4" male threads.
McMasterCarr part # 8063K37. Cost $3.82.
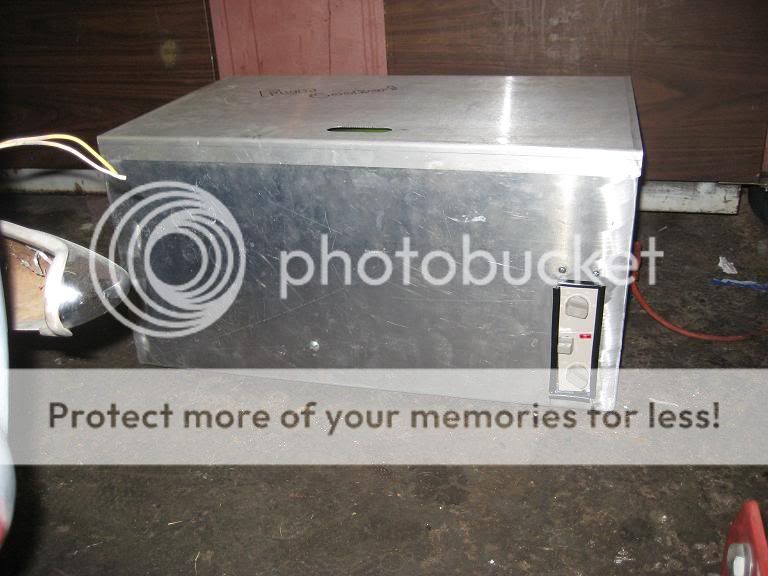
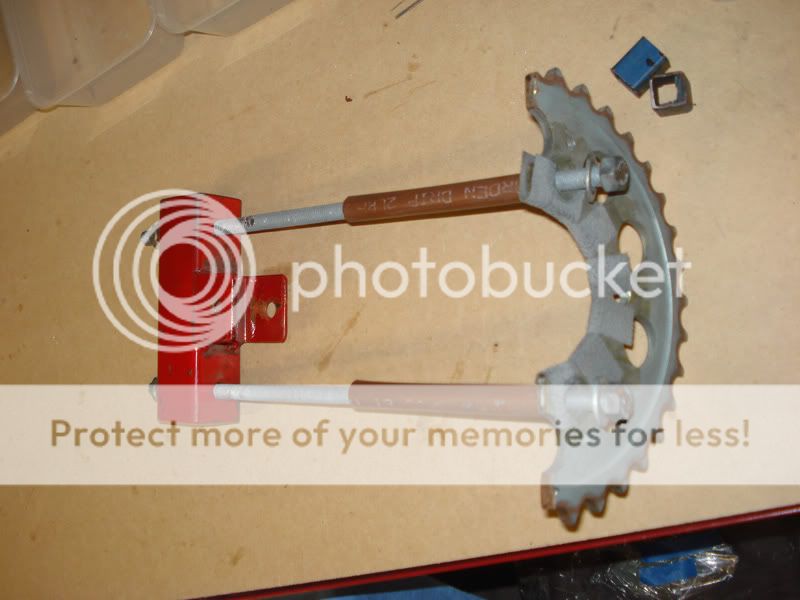
4) 2 rubber expansion plugs (the 2 circular metal things in the pic, the metal piece is just a big washer and under it is a 1.5 inch thick piece of rubber
with a smaller washer on the other side and a bolt that goes through. When you tighten the nut the 2 washers squish the rubber part and makes it
expand 1/8"). Measure your exhaust outlets port size and then find the correct diameter expansion plug that will expand to provide an airtight seal at the
exhaust port. Look in the plumbing dept. I found mine at Ace Hardware. About $4 a piece.
5) 1 PVC elbow per carb...so if you have a twin buy 2. Take your intake manifold to the hardware store and look in the plumbing section for one that is a
real tight fit in your manifold where the carb would mount. Make sure to BUY ones that don't have any raised letters or markings on them.
Also make sure to get ones with female threads on the end that sticks OUT of the manifold. Around $2 a piece.
6) Find a threaded brass plug that will thread into the female threads on the PVC elbow, this is just to block off one of the elbows. Cheap dollarish.
7) Find a reducer coupling to connect the other PVC elbow to your 'T' fitting. (I needed 2, 1/2" to 3/8" & 3/8" to 1/4" threads on the 'T'). Also dollarish.
8. Hand operated bicycle pump. You probably have one, if not your neighbor does.
9) Teflon tape and silicone. You probably already have some.
10) bottle of windex
* For the above, materials are not set in stone. You will have to find the correct size plugs to fit you bike. The one I made is for an RD350. However, once you have it made you can simply buy different sized plugs and pvc elbows and adapt it to any bike.
** MY design as far all the reducers and plugs is just what I happened to find that worked on the dimesions of my bike. You may be able to make it less convoluted by avoiding the reducer couplers and whatnot. Also, you could probably use a 3rd rubber expansion plug to plug up the second carb on a twin, but I thought that a solid piece of PVC was better, b/c then I could use the carb hose clamp to get a nice tight fit. Other things could work with some creativity. But as for my materials I sourced them all from McMasterr Carr and Ace...you could get it all from MMC but its better to physically find nice tight fitting PVC elbows.
So the way it works is: First off it's way easier with the motor out of the frame, but not necessary. Remove the exhaust and carbs. torque all your case bolts to spec (alot less than you may think), torque the head bolts, and spark plugs. If you have reeds: use a little of wood like a cut down chop stick or something to prop open the reeds ( I used a couple bolts with electrical tape wrapped around the end so as to not harm the delicate reed valves. I place my pistons so that all the ports were partially open. RD350's have a labyrinth seal in the middle of the crank that will allow air to pass through and fill the other cylinder/crankcase/cage/manifold, so you only have to do the test on one side. Also, I would advise removing the motor covers so you can SEE the crank seals, it may not be necessary on the clutch side, but definitely on the rotor side. I know its a pain in the ass b/c you'll have to retime, but you likely need to anyway

. If the clutch side seal is leaking then your bike would be sucking or burning transmission oil, unless you have some fancy fucking 2 stroke with a dry clutch like a TZ or something...and if you do...then you already know how to do all of this!
Now plug up the exhaust port(s) with the rubber expansion plugs. I applied a little bit of oil to the sides, stuck em in my exhaust ports and cranked those suckers down as far as they would go. Now assemble the inlet schraeder valve, pressure gauge, and PVC elbow to the 'T' fitting like pictured. Use teflon air fitting tape or dope on all the threads. (I later applied silicone to the outside of all the threads to ensure the tester itself would not leak...especially where brass threads into PVC). Same with the other carb plug PVC elbow. I also filled the inside of it solid with silicone to make damn sure it wouldnt leak. Install those into your intake manifolds and tighten them with the hose clamps that hold your carbs on. Now you motor is plugged up, sealed (theoretically
)
Now, grab your bike pump. Attach the bike pump to the inlet valve and slowly pump it up to 6.5 psi. Try and pull the pump the valve off as quickly as possible after reaching 6.5 psi, do this until you can pull it off without losing any more than .5 psi. So what you want is 6 psi. (if you leave the pump on the valve it will likely leak, mine did) Now watch the gauge, it should hold that 6 psi for at least 6 minutes. Chances are it won't!
So take you windex and spray around the intake manifolds, anywhere one surface touches another, including where the tester seals. Look for any bubbles or foaming. My brand new ones leaked like a damn cive. Also check where the reed blocks, if you have them, mount to the cylinder, check the head, check the base of the cylinders, check around the crankcases, and check the crank seals. If you find obvious leaks such as bubbles or foam, then address that problem and move on. For instance I had take my manifold/cages off and use new gaskets and yamabond then play with the torque specs to get a good seal. i totally rebuilt my motor so I wasn't expecting any other leaks, and didnt find any. Even if you don't find any bubbles with the windex, but the gauge still shows a lose of pressure, just keep at it until you achieve a proper seal. Your mating surfaces may need flattened or maybe you didn't torque something to spec.
But most of these old strokers need new seals at the very least.
A well sealed 2 stroke engine will be much safer, more reliable, and wayyyy easier to tune. Otherwise you'll be trying to jet around your leak problems instead of fixing them.
*Equally important is doing a vaccum test, I have not done mine yet. But basically you use the same exact setup but take the core out of the schraeder valve, hook up a tube that fits over it that is hooked to some sort of vaccuum pump,.....a mitey vac brake bleeder should work perfect and it has a vaccuum gauge on it as well. i don't remember how much vaccum the engine should hold. But google it!
So, by all means if you have money to burn...buy the $200+ motion pro tool. Otherwise this will work fine. Have fun!