Tl125 street tracker

wfo speedracer

Been Around the Block
I would like to say I just started this project , I would like to say that but I hate to lie. This thing was started maybe 20 years ago, a lot happened during that time, I changed jobs about five times , moved , opened my own small business repairing Jet skis and this thing got stuck in a corner in the back of the shop.

I had started on a trials build when I fitting the engine I found out it would not work because of the forward kicking kickstarter, thats when I remembered this TL125 frame and hey I wouldn't want a good motor to go to waste.

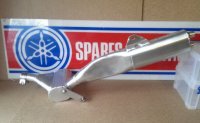
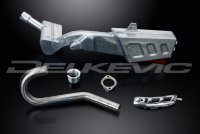
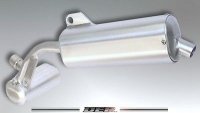
I have collected a lot of parts over the years, a White Brothers cam from my old XR200 hare scramble bike, a Honda reflex exhaust system , a disc brake system off a Yamaha XS750 mated to the stock TL rear hub, handlebars off a VT500 Ascot , a ATC200X fuel tank and a cafe seat off who knows what .

A lot of work has already been done so I guess we are starting somewhere in the middle, so if you are following this hang on its going to be a bumpy ride !

I will try to post some pics tomorrow.
 
A little background on the engine, many years back I built a XR200 twin shocker for scrambles. XR200 frame XL185 engine, ported head White Brothers cam, White Brothers head pipe welded to a White Brothers Supertrapp rear section, 28 Mikuni flat slide carb.

The thing was a beast. it handled like crap and beat your back to death off jumps but it would outrun anything in its class or in the 250 class, thats right YZ's , CR's , KX's , RM's , I passed them like they were sitting still, wheelies in any gear with ease.

I sold the XR200 but since I was working at the Honda dealer and we had spare parts, I put the engine back to stock, kept the ported head , cam and the carb. I later sold the carb to a guy with a ATC200X but it is replaced easily enough.

So the new engine is an ATC200X engine with a forward kicker, I used the cylinder and head off the 200x engine for a trials bike and had a small fin cylinder bored to match the cylinder head, it is bigger bore than the scramble engine by a few CC's.

In this lightweight ,stripped down frame it should be a blast !
 
So I am working on the seat-tail section today, I started off with a really ratty rusted cafe shell, I am just using it as a plug so it matters not. I cut it apart and did some rebending, then I added some styrofoam because working with foam is much easier than working with metal to me.

Follow that up with bondo and more foam, the bondo works quite well to stick the foam pieces together.Next up will be covering the whole thing with fiberglass so I will maintain the shape I want, then when I have it just like I want I will pop a mold off of it to make the new tail section.


And finally a pic of the bike, I know you were wondering when lol.


Like I said a lot of small stuff has already been done , XL125 headlight and instruments , XL100 leading axle forks to take some of the trials steering feel out , TLR 200 exhaust system , rear disc setup , 18" front rim laced up to a XL125 front hub, wiring harness is ready to go and has been rewrapped.
 
Still working on the seat base-tail section, the way I see it the tank -seat combo makes or breaks the bike so I will be spending a lot of time getting this just right.

I laid some fiberglass today and am making the transition from the tank to the tail section, the 200X tank has a section on the back where the fenders go around it, so I decided to make the tail section go around the tank there. I also added some epoxy fairing compound ( expensive fuckin bondo lol) Oi had left over from a Seadoo I am repairing for a customer.

This will keep the front of the tail section stable from side to side , an aluminum tab attached to the seat pan will position the front and the stock shock bolt holes will be used to attach the seat base to the frame. The old seat bolt holes will become the new shock mount holes so the shocks will lay down forward and match the profile of the pipe.

::)
 
So from doing some reading on here my brake setup won't work the way I have it, it has to be reversed with the caliper and stay bar up top, dammit , it's only been this way for 15-20 years and nobody said a damn thing ! :eek:

So the stay has to be cut off the swingarm and rewelded on the top , this is one of those things I will probably have professionally welded, I know how to weld but I don't have the equipment and I would rather not skimp where a safety item is concerned.

It also looks like the intake pipe to the muffler needs to be cut out and moved over, I could box the frame but again there's that safety thing that keeps rearing its ugly head. As long as this build has been in the making I want it the way I want it and I will have it no other way !
 
Still working on the seat but its coming right along , the white material is expanded PVC foam , its thermoformable at 150 degrees and easily makes compound shapes which is necessary , so I heated it up and started bending .

The piece I used had a hole cut in it, I decided to go with it and covered the hole with a piece of nylon so it be used as a vent.
 

Attachments

  • 0213141646.jpg
    0213141646.jpg
    295.5 KB · Views: 355
  • 0225141649.jpg
    0225141649.jpg
    256.8 KB · Views: 376
  • 0225141650.jpg
    0225141650.jpg
    179.9 KB · Views: 344
  • 0225141659.jpg
    0225141659.jpg
    227.3 KB · Views: 356
foamed the seat as well, I will cover over this with a layer of thin foam then make a cover for it, the seat base will attach to the tail section with industrial velcro.
 

Attachments

  • 0225141709.jpg
    0225141709.jpg
    221.9 KB · Views: 366
Made a bit of progress today, the exhaust really didn't clear the frame so I c-notched the frame. Don't worry I have a piece fabbed to weld back in the hole.


battery box zip tied in place


i cut the shock retainers off and moved them to the seat mounting holes, then the old shock holes will be used to mount the seat.


removed the old front tank mounts and ground them down


ground down the weld on the frame, it will have to be rewelded but lower


exhaust mounts zip tied in place


trying to get it read to head to the welder, I can weld ok but there are some thing on here I would rather someone else weld than me such as the brake arm stay.
 
BTW in case you are wondering why notch the frame, I really want to use the TLR exhaust system, but they also make these in aluminum and later down the road if this bike works like I am thinking it will I will upgrade to a new exhaust.

While I could have cut and rewelded the exhaust to make it fit, I would have had to do it again on a $350.00 exhaust system, not going to happen, here is a pic of the available exhaust systems for the TLR.
 

Attachments

  • WES.jpg
    WES.jpg
    77.4 KB · Views: 377
and this one, I really like the second one best, this one would be my second choice.
 

Attachments

  • DEP.JPG
    DEP.JPG
    10.7 KB · Views: 1,513
I got the tank mounts done today , so now everything is ready to be welded, I will probably be doing most of the welding with my friends Miller mig, except for that brake stay bracket , that is getting tigged on.

I also got the dummy engine all bolted in, I had to do some work on the front engine mount, this was necessary to get the exhaust brackets welded in the correct location .

The forks clear the tank at full lock, which is a feat in itself considering how much steering throw a TL frame has.
 
Finished up the seat plug and welded up the frame, pics of the frame later , I still have to unload it off the truck. I started the long process of waxing the plug with mold release, wax on , wax off, for days !

 
A few pics in no particular order, welded up some ho;es, welded in the frame c-notch piece, welded the muffler stays, welded the frame backbone, welded in the battery box, painted and installed the muffler, made a top mount for the head. I may get them to pretty up some of the welds with the tig when I get the brake stay welded.


A couple more pics I missed somehow. I will get another flap disc and clean up that weld on the frame tomorrow. Yeah I know the shocks are too short, I will take care of that st a later date, the other ones are bent.


Of course once I installed the top brace the tank would not go back on, so then I had to mod the tank tunnel for clearance, who would have thought it, at any rate the tank is now mounted up.

I also disassembled the speedo and cleaned up the face, reassembled the plastic case with epoxy, once it goes back in the stainless bezel its all good and hey it even works !
 
Did a few things today, disassembled the left control switch ,cleaned and lubed it. Got out the Honda wiring code book and figured out the wiring. I was looking at the electrics and it looked to me like I could tuck everything under the tank, turns out yes, yes you can !


Swapped out a bunch of crusty , rusty bolts for nice , shiny stainless ones.
 
Back
Top Bottom