1974 CB360 "Pickled"

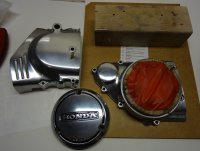
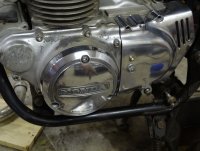
I just talked with a friend who has been clearing polished aluminum pieces. He has seen no issues with the parts he has sprayed with automotive grade urethane. Im planning on clearing all of my side panels once polished up. I already have everything I need so its an easy step for myself. If I had to go buy everything, I probably would end up doing the polishing every couple of months. I like the scotch pad idea.
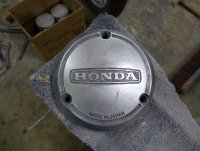
I have always liked that cover you have. Maybe I can come up with something if I get some spare time.
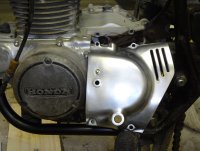
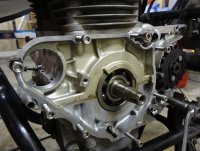
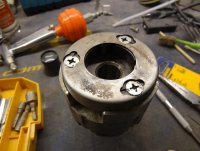
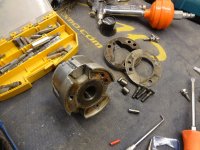
 
It was done with a 1/4" drill, files and Dremel.
I drilled through the 'corners' from back of cover so as not to disturb the inner webs.
I've done a second one with a mill and rotary table, (marked webs by drilling from back)
Not sure it's as nice but it was a lot quicker and easier ;D
 
Any pics of the new one? I was thinking of using the same pattern but drilling the holes out of the aluminum instead of backing it with a mesh. Maybe if I can find an extra one I can do some playing around. By the way, what type of grease should be inside the clutch adjuster and whats the little nib sticking out of the cover? Is that some sort of a grease zirk? Do people install a new seal when taking it apart or leave it if it looks to be in good condition? Thank you
 
Only pic is on Brendon's bike with the mesh fitted
Your correct about the grease fitting (zerk)
I use ordinary high melting point wheel bearing grease


I'll get a close up next time he brings bike round
 
More wasted time. I said the hell with It and started cleaning out the inside of the epoxy, Kreem, whatever it is lined with tank. Lots of acetone and a scotch pad. What A Mess!! I was planning on cutting up the tank up anyway so I decided to take the opportunity to use the openings to help with cleaning. I got 85% of it and I may try bead blasting the rest out tomorrow. We will see how it goes. Just a quick pic for anyone thinking about it.
 

Attachments

  • Tank.jpg
    Tank.jpg
    288.4 KB · Views: 252
  • Tank2.jpg
    Tank2.jpg
    278 KB · Views: 232
Ive been doing a bit of work on the bike the last few days and thought I would show how things are coming along. I chopped my stock bars down and took the rise out of the bars. I had a professional weld them back up so I can feel fairly confident things wont come apart while going down the road. I cleaned them up and sprayed them black quick just to get an idea of what I had before I give them a quality paint job. I know these styles of bars can be had pretty cheap but it only cost me a 12 pack of pop to have them welded so I cant complain. I also included a pic of my starter removal. Nothing fancy here, just trying to locate a plug for it so I can get the side back together. The rest of the photos are just showing how the polishing is coming along. Im trying not to take everything apart all at once even though it would be the easiest. I have to maintain some sort of order in my messy garage. lol
 

Attachments

  • bars.jpg
    bars.jpg
    274.6 KB · Views: 262
  • frontsprocketcover2.jpg
    frontsprocketcover2.jpg
    224.2 KB · Views: 242
  • covebefore.jpg
    covebefore.jpg
    268.2 KB · Views: 243
  • sideplates2.jpg
    sideplates2.jpg
    224.3 KB · Views: 250
Im hoping to have them all polished and clear coated by this weekend.
 

Attachments

  • sideplates.jpg
    sideplates.jpg
    241.7 KB · Views: 244
CrazyPJ makes a nice plug specifically for the 360. Very affordable from what I hear. He also makes the vacuum gauge adapters for synchronizing carbs. May as well get em all from him and save some $ on shipping.
 
Yep, Im getting the plug from him. I have a friend that's a certified Honda Mechanic who will set the carbs for me. He did them once just by sight so the bike would run until we drive it to the shop. Are these adapters a Honda Mechanic should have?
 
It's possible but unlikely.
Honda discontinued them years ago and very few techs bought their own as they are specific to 360 and can't be used on any other bike (AFAIK?)
I never had them when I was at dealers, don't remember a CB250 or 360 ever coming in for service in 2 yrs I was there (1978~80)
I started making them as a service for 360 owners, it probably isn't worth a manufacturer making a few pairs a year
CNC would probably be cost prohibitive, no way could they sell 100,000+ pairs, (to make CNC worthwhile)
There are probably less than 100,000 360's still around?
If you want a pair, same price as tach plug, add to starter plug order, saves shipping
 
I cleared my covers last night and Im pretty happy with the way they came out. A few dust specks here or there but nothing that cant be wet sanded out. Couple of days of drying and I will get things spic and span ;). I also removed the starter sprocket along with the setting plate. Does everyone leave starter plate hole open or replace the bolt? Does the starter clutch and clutch plate also get removed? Any tips before reassembly? Thank you.
 

Attachments

  • Clearedcovers.jpg
    Clearedcovers.jpg
    206.6 KB · Views: 239
  • Left case.jpg
    Left case.jpg
    258.4 KB · Views: 264
  • Rotor.jpg
    Rotor.jpg
    218.6 KB · Views: 238
Oh yea, should grease be added to rollers inside the rotor? What do they do?
 
You undo the three screws and remove the starter clutch, it isn't needed when starter motor is removed
There are springs and plungers inside as well as the rollers, when you remove it you can see the ramps then figure out how it works ;)
Make sure you have the Woodruff key installed on crank and lined up with the slot in rotor
 
The rollers make up the starter clutch.

http://www.hondabrat.com/2012/08/rotor-starter-replacement.html
 
I googled it and even went to that site but I never seen the information I needed on there. I appreciate it. I found when removing the starter clutch that I had no springs in my clutch and some of the rollers were kind of beat up. Maybe They are stuck in there further, I better double check. lol
 
Nope no springs. I guess it doesn't really matter anyways. Just to make double sure, all the pieces on the right are not used when reassembled correct? I can see that they are useless but I don't know if removing everything throws the balance off or anything. thanks, G
 

Attachments

  • rotor&parts.jpg
    rotor&parts.jpg
    460.7 KB · Views: 242
If you're feeling really tricky, you can shave even more weight off by turning it down on a lathe or even cutting the whole backside off with a band saw (though the saw may affect the keying of the rotor... check before you cut).
 

Attachments

  • 553011_10151446852575159_2128965601_n.jpg
    553011_10151446852575159_2128965601_n.jpg
    74.9 KB · Views: 245
Luck said:
I googled it and even went to that site but I never seen the information I needed on there.

WTF? What kind of info were you needing that wasn't on there? Take the pics you would need to see on there and a short write up. I will be delighted to add anything you have to share thats not already on there.
I am serious! This is the kind of feedback I need.
People email me often about that post and tell me how helpful it was.
AND since we are on the subject. Once you get PJs plug installed take a nice clear pic of the inside mounting and post it so I can get that crappy pic replaced.
 
Back
Top Bottom