
We noticed you are blocking ads. DO THE TON only works with community supporters. Most are active members of the site with small businesses. Please consider disabling your ad blocking tool and checking out the businesses that help keep our site up and free.
You are using an out of date browser. It may not display this or other websites correctly.
You should upgrade or use an alternative browser.
You should upgrade or use an alternative browser.
MT250 Knobby Vintage Streetfighting Cafe Scrambling Rat Tracker
- Thread starter Floyd650
- Start date
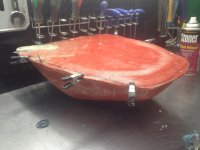
So there were really two different parts of this process that I wanted to learn how to do. The first was making a mold from a plug, and that was crazy tedious but turned out well. The second was vacuum-bagging. Previously for my BMW adventure bike, I've made a couple carbon windscreens, a carbon seat-compartment, and a kevlar/carbon skid plate. But each time I had used a previous part as my mold and just layed the CF and resin over it. That worked fine and was cosemetically OK. But vacuum-bagging seemed like the way to go if you really wanted to press the fiber into the mold. I didn't want to spend a ton of $ on a vacuum pump, but found this on instrucables.com (http://www.instructables.com/id/make-a-manual-vacuum-pump-for-under-%2420-by-convert/?ALLSTEPS). Essentially you disassemble a cheap bike pump so it sucks air instead of pressurizing it. You need a few other things for the pump and then a bunch of materials, all of which I ordered from fiberglast.com
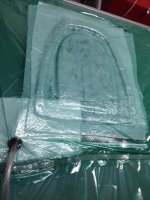
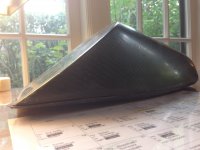
Then you make a vacuum bag, wax your mold, coat it with resin, lay your fiber, followed by peel-ply and a layer of breath material. You stick it all in the bag and suck the air out of it and let it cure.
Then you make a vacuum bag, wax your mold, coat it with resin, lay your fiber, followed by peel-ply and a layer of breath material. You stick it all in the bag and suck the air out of it and let it cure.
Attachments
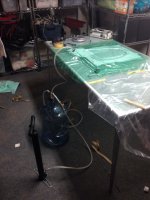
I had added the big water carboy into the vacuum system, because if you have a leak then, in theory, the big vacuum reservoir will maintain the negative pressure. Two things happened. First, I did have a leak that I could never find. And second, when I really vacuumed the system hard, carboy imploded. I was worried about all of this and had a a back-up plan. I had heard of people using aquarium pumps as continous vacuum pumps for making model airplane wings. It seemed super weak, and unlikely to work that well, but I had scouted around on Amazon and found a cheap, semi-industrial aquarium pump for around $30. I hooked it up and voila! Continous vacuum! At this point it didn't matter that I had a little leak somewhere, because the pump created a continuous vacuum. It worked awesome, although it made a ton of noise that you could hear from any point in my house, even though it was in the basement.
Attachments

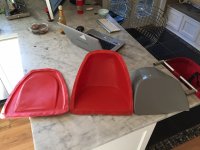
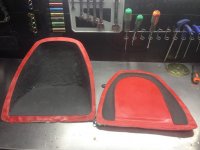
I hadn't thought out how I was going to attach the two halves of the cowl, but hoped that I'd just figure it out when the time came. Lining everything up seemed like a big opportunity to mess it up, and that would've been a big bummer after all the previous work. Finally I decided the best way to do it would be to wax up my two molds, put the pieces back into their respective molds, epoxy the seam, and clamp the two mold halves back together. There was high potential for messing everything up, including the molds if the epoxy stuck to the surface. But, it still seamed like the best plan.
Attachments
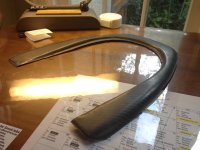
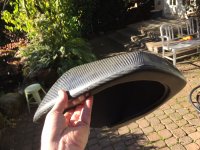
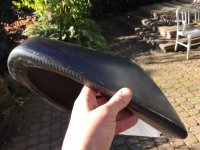
It worked! In this light, you can see the imperfections. I'll go back and make all of this again to get it just right with no voids in my resin. But as a first attempt, proof-of-concept, I'm pretty stoked! Not that it really matters to me either, but it is incredibly light: 265 grams. Again, that's not really important to me, but it's still pretty cool.
Attachments
Looking awesome.
catsy said:This is too cool.
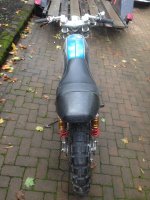
have you had a though about maybe reducing the thickness of the seat?
and lowering the ducktail to match?
i reckon it would look sick lines and just make the lines flow!
your taste your bike though man, looks great either way!
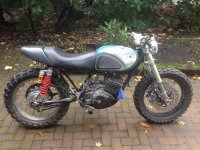
I had thought of that, and in retrospect, the seat might be a bit fluffy, especially up where it meets the tank. I think I am going to keep it all the way it is currently, but I have been trolling for another seat pan so I can build an alternative seat with a little less foam. With regard to the cowl being a little pointed upwards, It just sort of followed the lines of the rear frame hoop. It would be easy enough to drop it down, especially after I get everything tucked under the cowl, and I can see how much space I have left.
EL Sammo said:Looks great! The pipe is glorious. Good work.
Thanks! I'm currently sorting out the wiring, after which I can fire it up again. I haven't had it running in over a year and not at all with the new pipe. I'll post up some video so you can hear it once I get it going again!


