
We noticed you are blocking ads. DO THE TON only works with community supporters. Most are active members of the site with small businesses. Please consider disabling your ad blocking tool and checking out the businesses that help keep our site up and free.
You are using an out of date browser. It may not display this or other websites correctly.
You should upgrade or use an alternative browser.
You should upgrade or use an alternative browser.
Down under, an idiot and a 400F
- Thread starter neevo
- Start date
neevo
Over 1,000 Posts
GoingsMoto said:hey Neevo, if you are going to run a rectifier I would allow for some air to get to it. Since you are going to run that pan just something to think about before hand. The build is looking good.
Good point. I will cut some discrete vents so some air flushes under the seat to the electrics under the rear seat bump.
neevo
Over 1,000 Posts
hillsy said:If you solid mount the reg/rec to the plate you have under the seat it will act as a heat sink and draw the heat away from it.
Good idea! I planned on some cross bracing in the seat bump anyway. I could attach it to that.
jeff4uk
Been Around the Block
Nice job so far man your going down the same road i did two years ago when i did my 400/4 F1
The brake master cylinder i got from david silvers is a really good repo and was the same price as the referb kit!!!!
carbs are a real lotory when buying say on ebay but are easy to bring up to scrach D.S do a good carb kit and well worth the money
for pic ref my one is called
from rat to cafe CB400/4
keep up the good work mate
neevo
Over 1,000 Posts
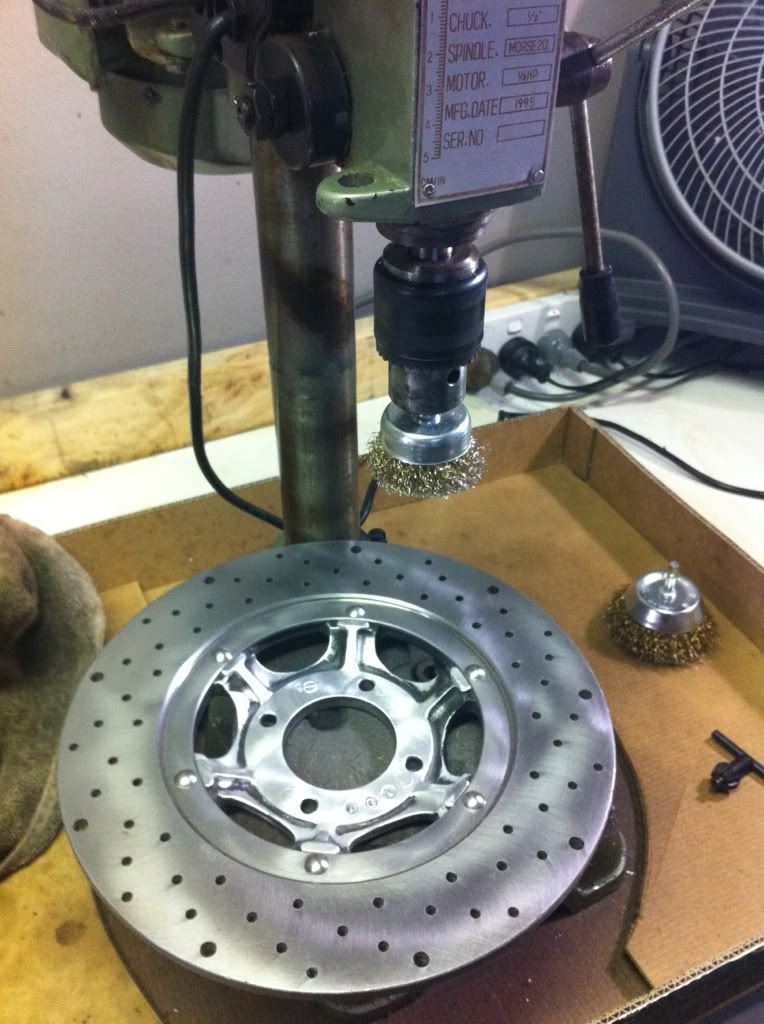
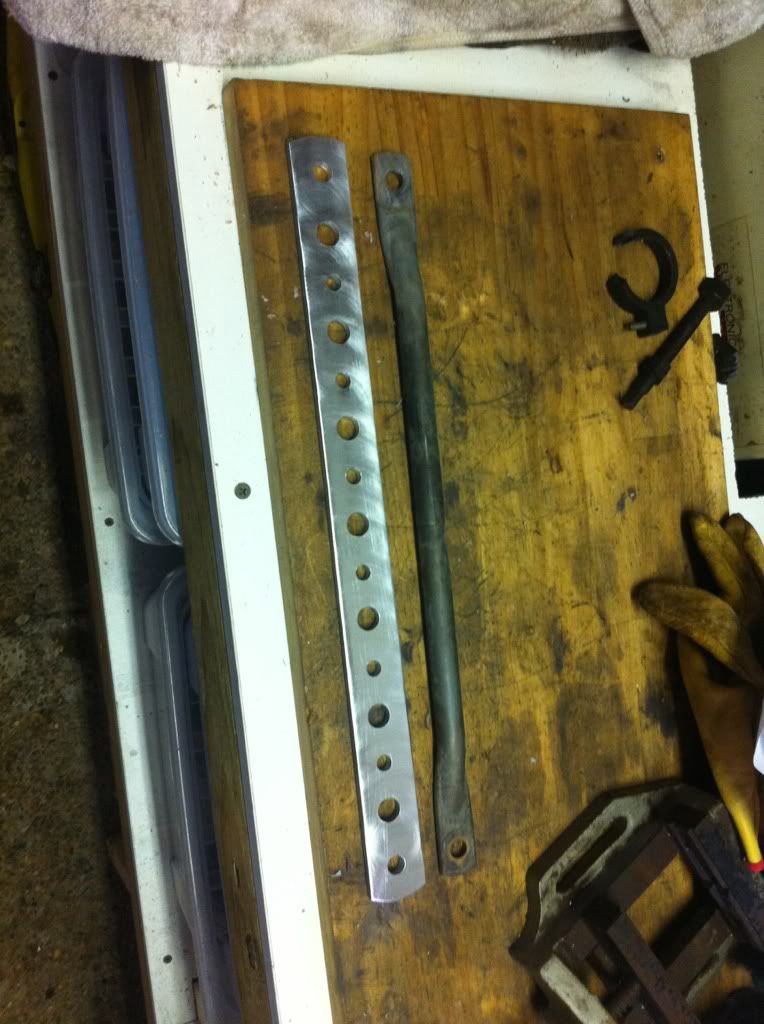
Picked up my latest eBay purchase today:
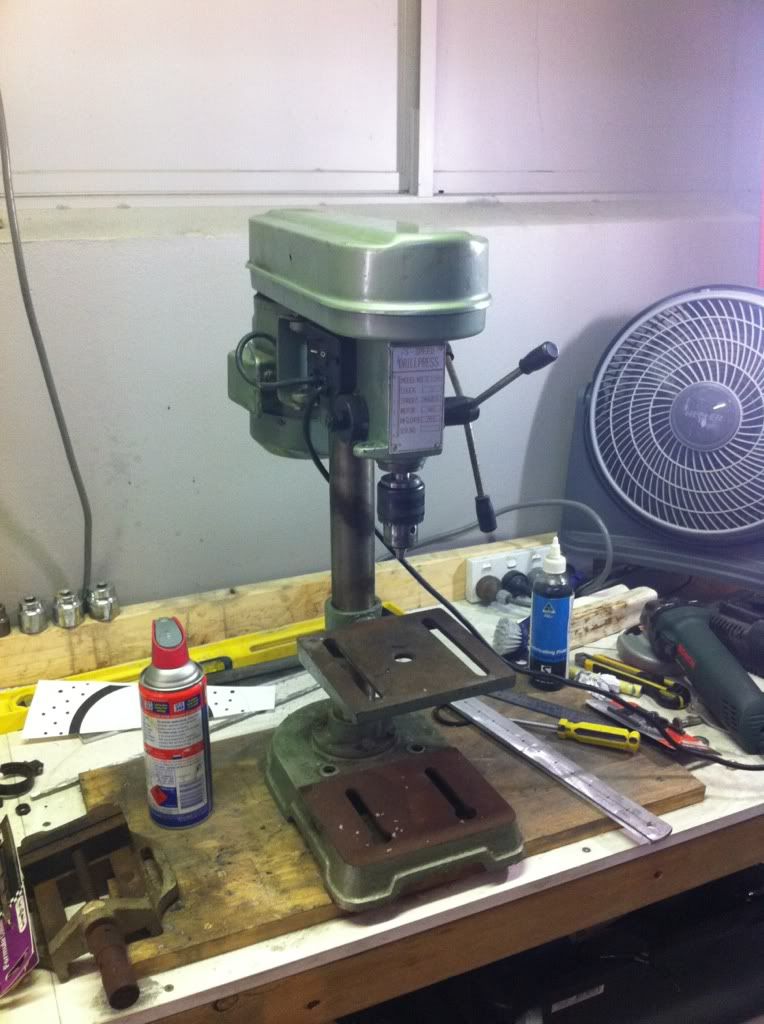
Needed some fettling to get it running sweet but for only $50 I was chuffed to bits.
Plan was to use it to drill out my rotor and rear brake arm so I headed down to Bunnings and blew $90 on drill bits and lube.
Just starting:
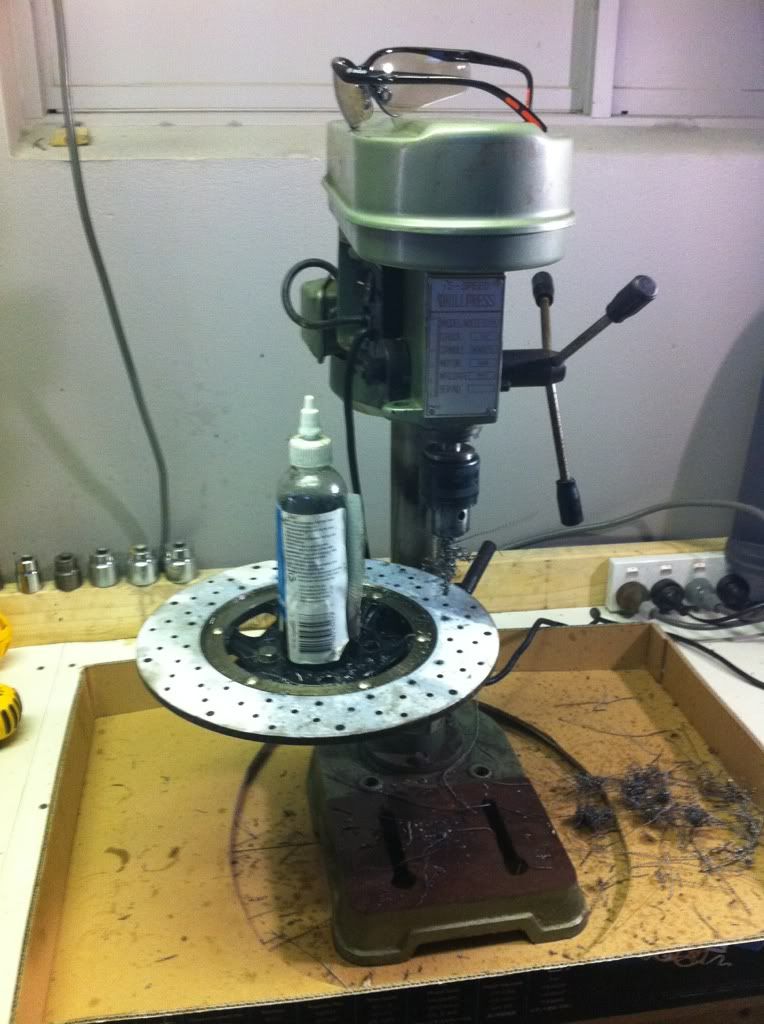
All done:
Nearly got all the way through with the one bit, the curls were coming off at an amazing rate.
All done:
What's the best way to finish the disc off?
Needed some fettling to get it running sweet but for only $50 I was chuffed to bits.
Plan was to use it to drill out my rotor and rear brake arm so I headed down to Bunnings and blew $90 on drill bits and lube.
Just starting:
All done:
Nearly got all the way through with the one bit, the curls were coming off at an amazing rate.
All done:
What's the best way to finish the disc off?
neevo
Over 1,000 Posts
Ryanh said:Emery paper
Quick scuff?
Hoosier Daddy
Earache my eye...
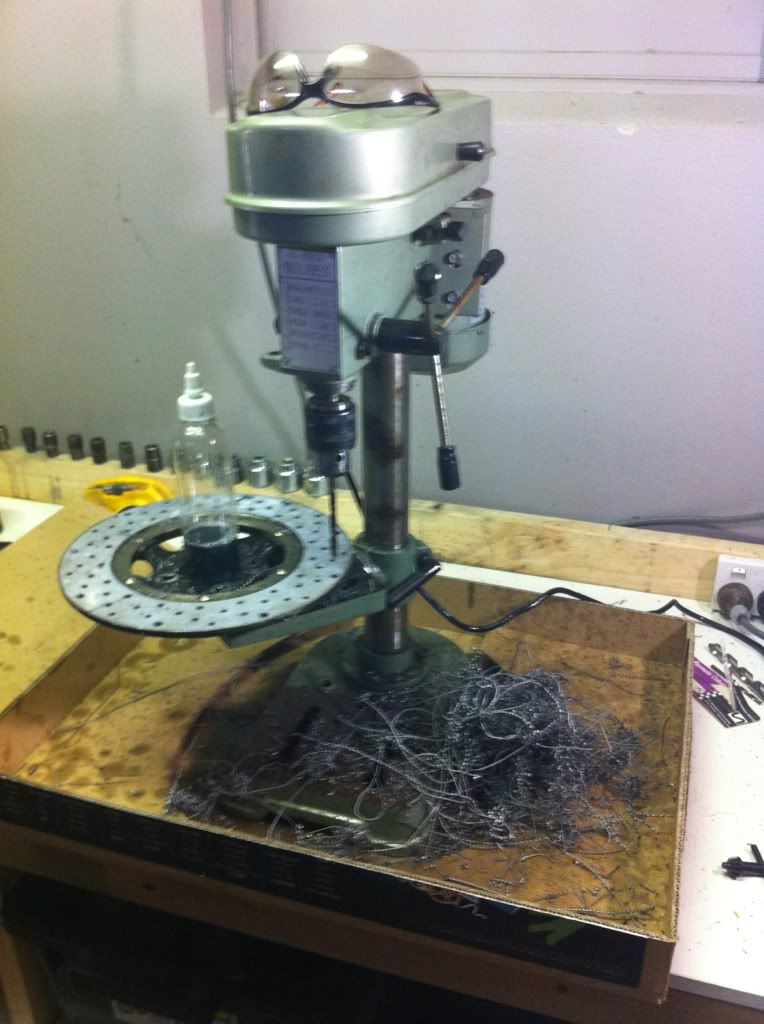
Use your new toy!
I chucked up a large (4") sanding disc into my Drill press and with the plywood on the work surface to protect it. The clamps not only held the plywood on but locted the rotor by coming right up to its edge. When I cranked down of the drill press handle the rotor spins slowly and it sanded it very evenly.

I chucked up a large (4") sanding disc into my Drill press and with the plywood on the work surface to protect it. The clamps not only held the plywood on but locted the rotor by coming right up to its edge. When I cranked down of the drill press handle the rotor spins slowly and it sanded it very evenly.
neevo
Over 1,000 Posts
Hoosier Daddy said:Use your new toy!
I chucked up a large (4") sanding disc into my Drill press and with the plywood on the work surface to protect it. The clamps not only held the plywood on but locted the rotor by coming right up to its edge. When I cranked down of the drill press handle the rotor spins slowly and it sanded it very evenly.
Genius!
bikeboy
Over 1,000 Posts
Hoosier Daddy said:Use your new toy!
I chucked up a large (4") sanding disc into my Drill press and with the plywood on the work surface to protect it. The clamps not only held the plywood on but locted the rotor by coming right up to its edge. When I cranked down of the drill press handle the rotor spins slowly and it sanded it very evenly.[/img]
Yes indeed. I used an ocky strap around the handles to pull down an even but gentle pressure on the pad. Works a treat.
These drill presses are very versatile things.
cheers
ian
MotorbikeBruno
Over 1,000 Posts
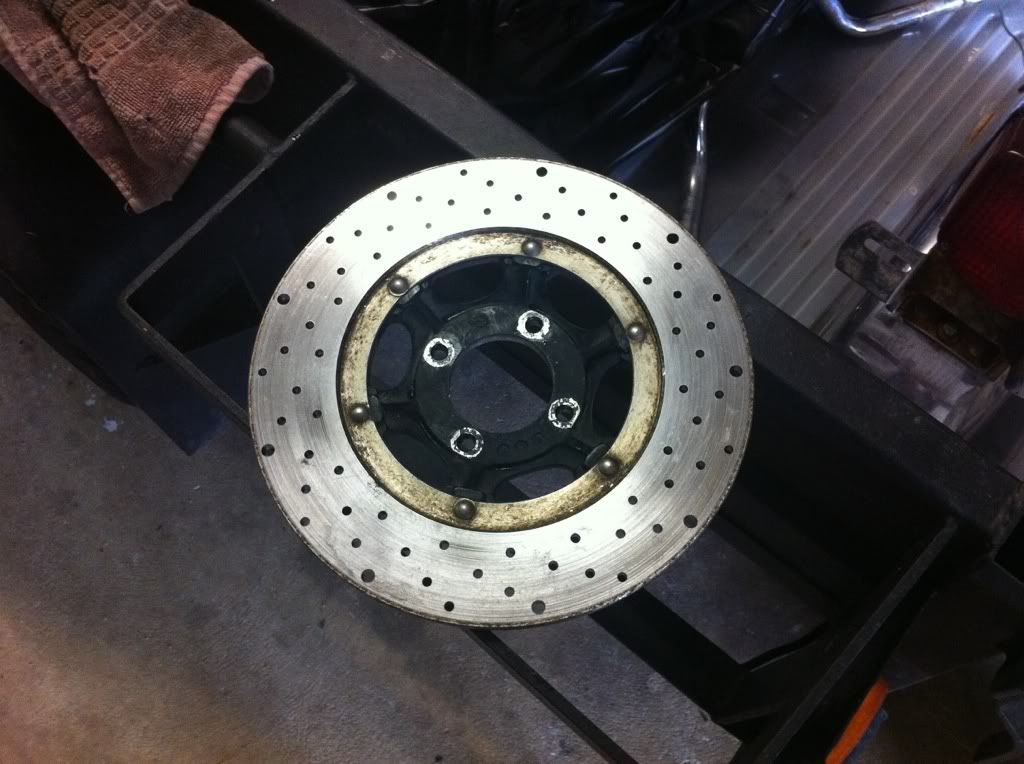
Holy hell, that seemed to have done the trick! What drill bit did you use that you only needed 1 of them....(I've never drilled rotors before) Looks great man.
neevo
Over 1,000 Posts
MotorbikeBruno said:Holy hell, that seemed to have done the trick! What drill bit did you use that you only needed 1 of them....(I've never drilled rotors before) Looks great man.
4.5mm cobalt bit from my local hardware store. Went really slow (let the bit pull itself through with gentle pressure) and lots of lubricating oil (used 3/4 of a small bottle).
I thought these things were supposed to be hard but it went waaaaay to easy.
MotorbikeBruno
Over 1,000 Posts
You sure they weren't chinese rotors?  Just kidding. If I decide to go that route with another bike I'll keep that in mind. My Kz550 had them drilled from the factory !
Just kidding. If I decide to go that route with another bike I'll keep that in mind. My Kz550 had them drilled from the factory !neevo
Over 1,000 Posts
Christmas came early today
Went to a local tube bender and got my custom rear hoop, rear frame upright, replacement lower section, spare pipe and custom turned sleeves:
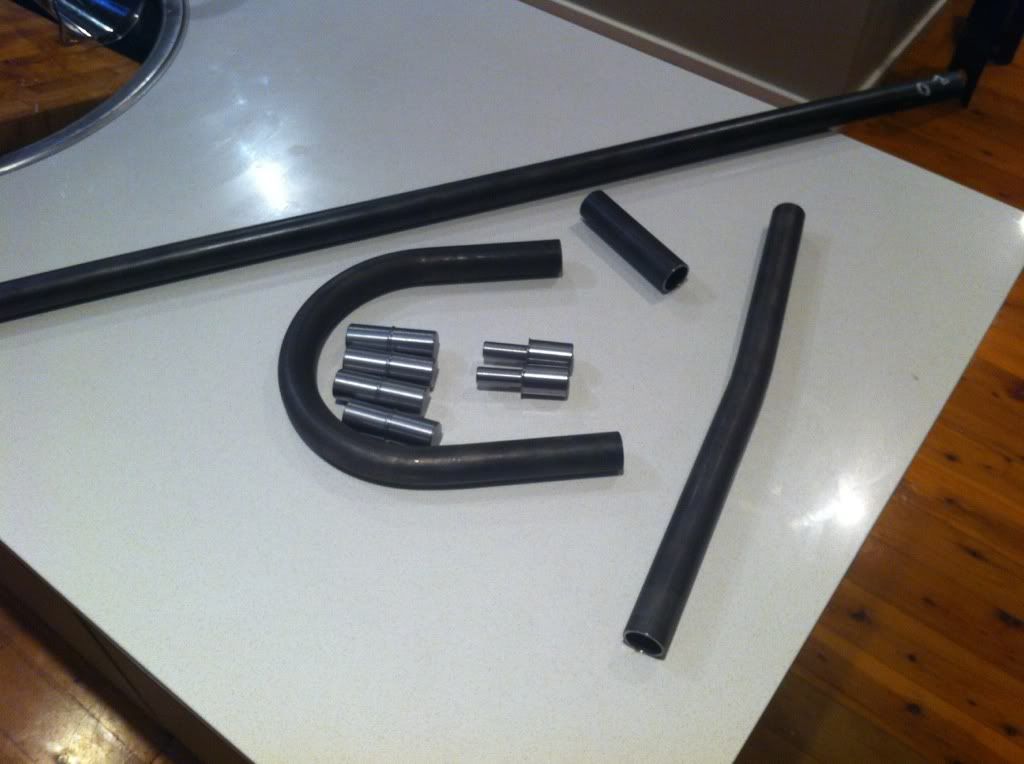
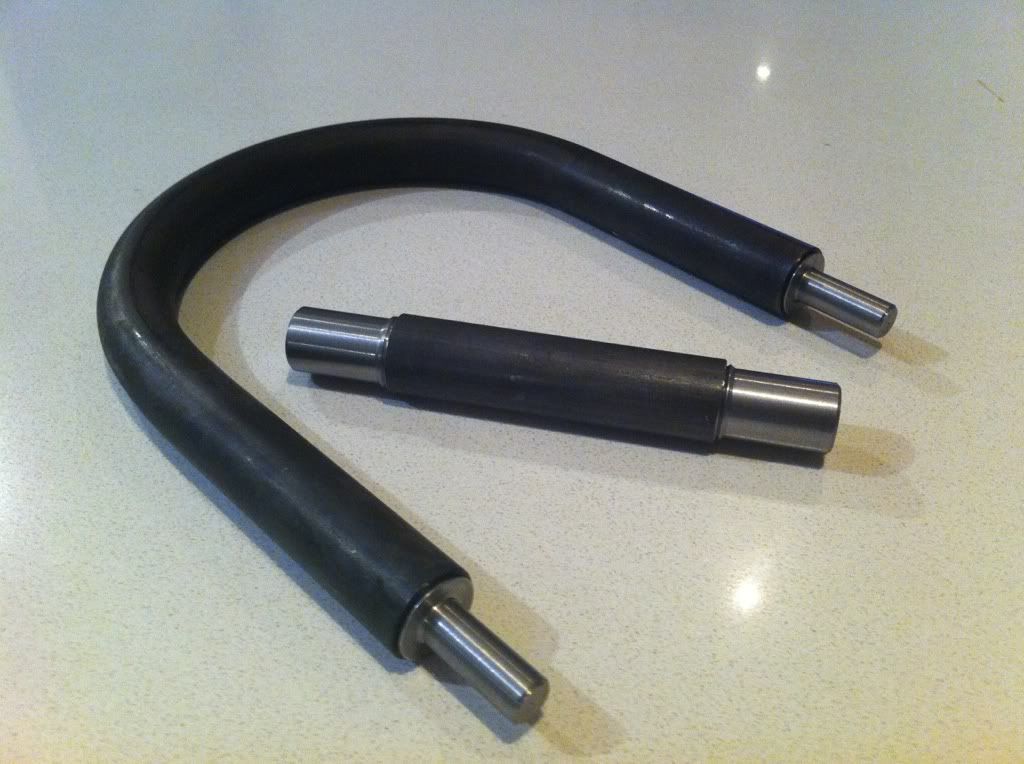
Buggered up the hoop inserts (the stepped down section is too small) but some grinder work will fix that.
Cannot recommend the supplier enough, fast turn around, great communication and the whole lot was only $140
Edit: pleased to say its all a perfect match/fit.
Went to a local tube bender and got my custom rear hoop, rear frame upright, replacement lower section, spare pipe and custom turned sleeves:
Buggered up the hoop inserts (the stepped down section is too small) but some grinder work will fix that.
Cannot recommend the supplier enough, fast turn around, great communication and the whole lot was only $140
Edit: pleased to say its all a perfect match/fit.
bikeboy
Over 1,000 Posts
neevo said:Also been looking at replacement shocks and like the look of CB900F ones. Anyone know if they will fit?
mounts will fit. 900 shocks are 365mm long. Any help?
cheers
ian


