CB200 '73 tracker project - DONE :D

Ako, i have no idea what you're talking about? The bolts are m14 8.8 bolts.
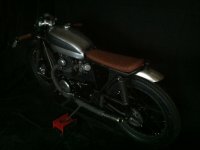
We customized the whole frame and the original shockmounts are long gone. The bolts go thru the frame and the pieces of tubing where they are going thru are 3.5cm long and have a wall thickness of 5mm.

In the picture Jene posted above your comment you can see (if you look closely) the head of the bolt under the fender. Please see the build thread for further info about how the frame is modified.

Please tell me if i completely misunderstood your concern. 2 know more than 1 ;)
 
Bert Jan said:
Please tell me if i completely misunderstood your concern. 2 know more than 1 ;)

Uh oh, guys, Bert's been kidnapped
 
Don't mean to upset you Bert Jan, but pic #6 on post 108 looks like a grade 4.6 bolt with full thread has been used.

I could be wrong, not trying to shoot you down at all.
 
No offense taken. English is not my first language so i can not always say exactly what i mean.. Sorry for that. The bolts are 8.8, but do you mean it would be better to use bolts with less threads? So a smooth piece of the bolt sits inside the frame and shock? Cause then you're right and i know. Could not find the right bolts, and on the to do list already. Thanks!
 
Yes. A bolt with less threads and more shank. Exactly what I was on about. 8)

No worries, take it easy mate ;)
 
Haha its cool man. I dont know what shank means but its the nonthreaded piece of a bolt then i guess?
 
Go ahead :) theyre not hard to make, if you have enough time. If you ever need more pics or something feel free to ask!
 
iedereen kan bouwen aan een mooie fiets met onbeperkte middelen, maar je fiets inspirerend voor mijn negen jaar oude. He said, "wood fenders that is cool!"
Patrick de Zeeuw
 
hey bons love the bike!
i just registered to DTT because of your awesome build and i just bought a '75 CB200T myself!
really love what you did with the bike, i think the entire build looks amazing, and nothing seems to be out of place, something that's incredibly hard to do. the colours of the tank, the wood, the frame, the seat- if only bike makers could have your vision and talent.
as pretty as you are, i'd choose your bike lol
and bert, i have to say, gold star for your engineering man. you took this bike to a whole different level
my hat's off to both of you!
 
HI Bons! Really nice job. As you know I'm following your bike with very attention because I have one cb200 that I'm working 2. And it is very very nice to see the 2 possibilities for the same model. :) Each one full of personality I think.

Out of toppic here is mine right now!

http://www.caferacer351.com/forum/index.php?topic=1396.msg52114#msg52114
lots of work to done. but the major:
New wheels,front suspension and brake from honda nsr125 2000. new shocks, new exhausts, modified frame, engine rebuilt, new fender, new stop light(cat eye led type), motogadget tiny clock, m-unit and bottons from motogadget2, rizoma brake fluid case...and so on! :D

At the end we need to put the two bikes side by side :p
 
Re: CB200 '73 tracker project

Bons said:
Back to the engine. Since the mechanical disc brake is not known for its tremendous stopping power i decided to install a new hydraulic caliper. Because i want my bars symmetrical, hydraulic clutch is a must ;)
Lots of work for the BF ;)
Right engine cover milled flat to accomodate clutchslave-adapterplate. (still prototype made of wood for now) We're gonna use the original push rod.

Schermafbeelding2012-01-24om151610.png


These engines are known for cam housing issues so we decided to reroute the oilpassage externally. We also decided to install a needle bearing on the points side for this being the side with the least oil and the biggest chance to die.
Bert used the lathe to undo the conic shape on the camhousing so it would fit in the lathe jaws. After that used the lathe again to make the camhole 26 mm in diameter and 14 mm deep. That way the original bearing in the camhousing wasn't completely taken out so the camshaft stays aligned and the bearing has a boss. Needle bearing was then pressed in. Man he is so smart ;)

23012012657.jpg

23012012660.jpg

Schermafbeelding2012-01-24om151509.png

Schermafbeelding2012-01-24om151409.png

Schermafbeelding2012-01-24om151420.png

Schermafbeelding2012-01-24om151641.png

Schermafbeelding2012-01-24om151435.png


We also made a template for the CNC mill to cover up the cam housing. Maybe we're not the sharpest tools in the shed, but with a lot of patience and luck i managed to make a scan to finish in Illustrator. I guess we missed a simple solution, cause first we tried to make a mold with marzipan :p After that stupid plan oldfashioned paper and scissors seemed the best option.

Schermafbeelding2012-01-24om151551.png

Schermafbeelding2012-01-24om151528.png


Thats all for now!
Bye!


Hi!
I've seen you did some mods to reroute oil passage externally.
Did you kept the sludge trap?
I started and almost done the works on a 1969 cb175 and due to a slight fiscal issue (after a motorcycle crash 15 years ago) I cannot operate the clutch lever so we installed an EFM auto clutch.
That works great but being the new clutch larger we have no room for the sludge trap.
Can you please help me understand if your mod may help me and how you did it?

I'm so close to get the bike running and I'd hate to have to restart with a different bike. So any help is really welcome!

Thanks!!!

Here is my bike
 

Attachments

  • IMG_2363.JPG
    IMG_2363.JPG
    85.9 KB · Views: 1,369
Back
Top Bottom