Follow along with the video below to see how to install our site as a web app on your home screen.
Note: This feature currently requires accessing the site using the built-in Safari browser.
We noticed you are blocking ads. DO THE TON only works with community supporters. Most are active members of the site with small businesses. Please consider disabling your ad blocking tool and checking out the businesses that help keep our site up and free.
To my understanding they are electroplated with zinc first, then are passivized. Which could also be called black chromated zinc I guess... It seems like a pretty hard surface anyway
To my understanding they are electroplated with zinc first, then are passivized. Which could also be called black chromated zinc I guess... It seems like a pretty hard surface anyway
Good question... I walked into the workshop and they had some pretty massive looking vats but I am not sure about the scale of things. If you look at their website they have some photos of some larger items and have a diagram showing their maximum footprint to be 3000mm x 1100 x 600. Would a mag wheel be smaller than 1.1m?
ThomPa said:
How much did it cost you? And what was the process called? pretty interested..
I got that stuff done for cash of course, so was a bit different but it wasn't expensive. The process in Swedish is called 'Svartpassivering' which translates to black passivization. But I think it is black chrome to be honest. Anyone feel free to correct me if I'm wrong - I'm certainly no expert.
From the website if you can be arsed translating: 'Efter elförzinkningen kromateras/passiveras detaljerna blå, gula eller svarta för att ytterligare förbättra korrosionsskyddet.'
These guys: http://www.galvanoverken.se/verksamhet.aspx
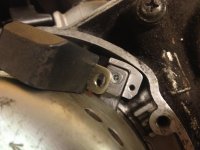
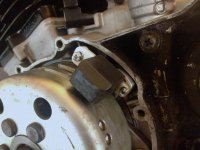
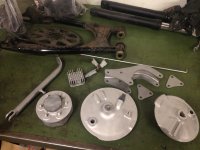
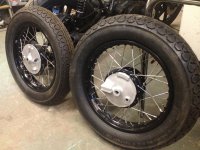
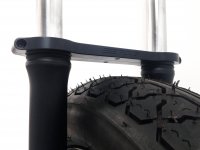
Yay for the weekend. I got to test fit the machined ignition brackets and blast some more parts. The brackets fit a treat and are pretty simple to install. Some of the blasted parts will be powder coated and some will remain as they look - the aluminium parts. I really like the contrast of raw aluminium wheel/brake plates against the black powder coated hubs 8)
if you are gonna leave the hub bare you might want to do a "brushed" look. bare sandblasted surfaces attract dirt like crazy and are very difficult to clean because of the "tooth" the media leaves. Everything is looking good though. The black Zinc looks great.
if you are gonna leave the hub bare you might want to do a "brushed" look. bare sandblasted surfaces attract dirt like crazy and are very difficult to clean because of the "tooth" the media leaves. Everything is looking good though. The black Zinc looks great.
Indeed. Lots of raw surface area from blasting oxidizes quite rapidly and looks aged in a short time. Aluminum alloys are quite difficult to maintain a nice finish on. Anodizing is the best (colors can be very prone to fading in the sun but clear has good life)but most alloys used for casting turn dark in the process. Vapor blasting or glass beading with new large beads leaves a smooth shiny long lasting finish on castings but is not locally available in most places in the US. A brushed finish will oxidize fairly rapidly, but often is easy to maintain so can be a good option. The smoother the surface the less area and the longer it maintains its appearance. That is why polishing is good as long as you can get at it to maintain it. Clear coats work well but it is troublesome to prepare for. Aluminum starts to oxidize instantly when a new surface - say from scotchbrite - is exposed to the oxygen in the air. You may not see it, but simply clearcoating that flawlessly finished fork leg will not preserve it. Eventually you will see the corrosion under the clear. You can solve this problem by passivating the surface which will stop the oxidation process, but doing so requires a bath in chromic acid and cyanide, something you don't want to try at home even if you can somehow acquire the materials. I have read where people claim clear powdercoating is good, but I have not seen it to be any different than 2k clear against corrosion creep under it in my own experience.
So for me, these are the options for aluminum alloy parts that will stay bare: 2000 and 6000 alloys wrought components can be anodized. Castings get polished, painted silver (they will get corrosion under the paint eventually but it won't show for a very long time), polished, or glass beaded depending on the application. I usually paint engine cases silver so they look like aluminum. Hubs are a good candidate for paint as well because they are hard to maintain (spoke wheels) and paint cleans easily. Brake backing plates and fork legs usually get polished because they are easy to maintain by touching up the polish on the bike, though I have done the brush finish then passivated and clear coated when it absolutely positively had to be museum original perfect. Parts like carburetors I glass bead with brand new large glass beads. Very nice shiny smooth long lasting finish like vapor blasting, but fairly expensive as the beads have a super short lifespan before they break and start cutting into the surface.
Thanks for the suggestions and tips. I think I'll polish them - just because I dont like the idea of painting them and dealing with the flaking down the track. I do have a soda blaster on the other side of the bead blaster I have been using, so perhaps I'll use that in the future to avoid as much media 'bite' into the surface.
Yeah I was gonna say something about the sweet shots and sound quality too. Really nice. Did you do anything special to avoid wind noise? Or do GoPro's do that on their own? (never used one )
A bit slow with progress this and last week. I have had to take on more design work to help pay for the production orders I am placing. Which is awesome, but means there's not as much time left at the end of the day/end of the week for the bike.
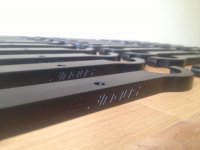
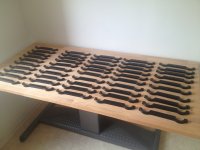
Speaking of orders... I got the first order of fork braces last week and they look feckn awesome. I ended up ordering some custom cut shims as well to make every installation a snug fit. I will send these out with each set.
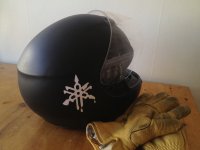
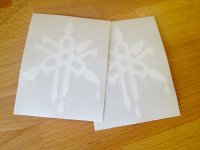
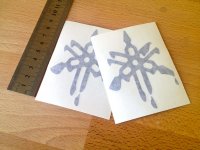
I also decided to order the vinyl stickers I designed - the dripping Yamaha tuning forks logo. Hoping other people dig them too
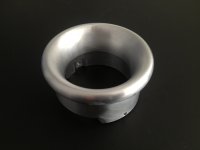
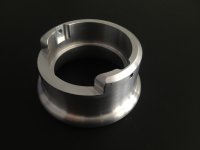
The idea is that the bellmouth bolts right up to the SR carb (which is does - fits a treat, thanks to my 3D printer and many prototypes) with just a couple of set screws. Then clamp the filter on over the top - yeah, you've seen this earlier in the thread. But I actually think these would bolt right up to the stock BS34 XS650 carbs too... If they work, thats pretty sweet!
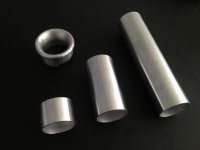
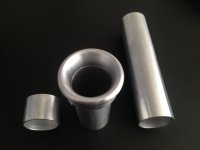
The three different length tubes are for the 4th, 3rd and 2nd harmonic. I bought some rubber intercooler hose to be able to clamp the different lengths to the carb and then the actual bellmouth just bolts on the the end of the tube - nice and flush on the inside surface. Then I can test to see if there is any noticeable different between them all. My guess is that it will be unmeasurable, but hopefully the difference between the airbox and this bellmouth (with filter) IS noticeable. We'll see huh!
This site uses cookies to help personalise content, tailor your experience and to keep you logged in if you register.
By continuing to use this site, you are consenting to our use of cookies.