
hey man what diameter is the sr fr drum ?JadusMotorcycleParts said:New separate testing thread up! ;D
http://www.dotheton.com/forum/index.php?topic=70174.0
We noticed you are blocking ads. DO THE TON only works with community supporters. Most are active members of the site with small businesses. Please consider disabling your ad blocking tool and checking out the businesses that help keep our site up and free.
You are using an out of date browser. It may not display this or other websites correctly.
You should upgrade or use an alternative browser.
You should upgrade or use an alternative browser.
Yamaha SR250 - A clean standard build
- Thread starter JadusMotorcycleParts
- Start date
xb33bsa said:hey man what diameter is the sr fr drum ?
Don't have it in my head. I'll measure it up for ya when I'm in the workshop next.
Finally some time for this project on the weekend ;D
I tried out the powder coating oven for the first time. It went well! I have never owned/used an oven that comes up to temperature so fast - 8-10 mins to get to 200C. And next to no heat leakage either - you can put your hand anywhere on the outside of the cabinet and its just warm.
I need to sort out a decent place to actually lay on the powder though - I ended up with quite a lot of dust and stuff that also gets stuck on/attracted to the parts when they are charged. Maybe some kind of other cabinet is needed.
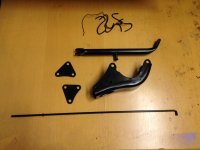
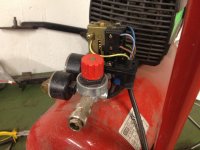
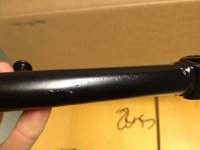
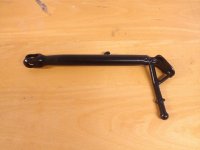
I got on a roll and did some of the engine mounts, the side stand and the brake rod. I didn't mask the threaded part - I thought I'd just run a die over it later. Then the little air compressor I use with the PC gun shat itself and I had to fix it - so I didn't quite get to the frame. Perhaps a blessing in disguise as I want the result on the frame to be a bit better and set things up a bit better before I do it.
I tried out the powder coating oven for the first time. It went well! I have never owned/used an oven that comes up to temperature so fast - 8-10 mins to get to 200C. And next to no heat leakage either - you can put your hand anywhere on the outside of the cabinet and its just warm.
I need to sort out a decent place to actually lay on the powder though - I ended up with quite a lot of dust and stuff that also gets stuck on/attracted to the parts when they are charged. Maybe some kind of other cabinet is needed.
I got on a roll and did some of the engine mounts, the side stand and the brake rod. I didn't mask the threaded part - I thought I'd just run a die over it later. Then the little air compressor I use with the PC gun shat itself and I had to fix it - so I didn't quite get to the frame. Perhaps a blessing in disguise as I want the result on the frame to be a bit better and set things up a bit better before I do it.
Attachments
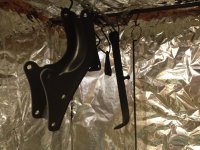
Here you can see some of the dust now baked onto the parts. Plus, not the best finish - a little orange peel. But I'll get better at laying it on hopefully. The idea is to practice on parts like this - the sort of forgotten details in the background that you dont look to closely at - so that I can do the more important parts better. Hopefully.
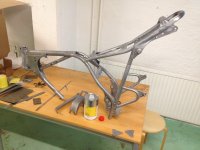
I tried something else too - metal filler. I tried it on a non-critical part first - another kickstand. The key is to sand it back down to 400 grit so that the edge of the filler to the metal is super thin, then the powder wont cling to that edge as much and should create a smooth layer over it. The powder obviously doesn't cling to the filler as well as metal, but if you are careful with the gun and are generous with the application, it covers up fine. Then I baked it and was pleasantly surprised with the result. This led me to fill some of the ugly welds on the SR frame with it - what a sin! Filler on a frame! I actually tried cleaning up some of the shit ugly factory welds with my welder but it put so much extra, unnecessary heat into the joints of the frame, I decided to just fill the areas with this stuff instead.
I tried something else too - metal filler. I tried it on a non-critical part first - another kickstand. The key is to sand it back down to 400 grit so that the edge of the filler to the metal is super thin, then the powder wont cling to that edge as much and should create a smooth layer over it. The powder obviously doesn't cling to the filler as well as metal, but if you are careful with the gun and are generous with the application, it covers up fine. Then I baked it and was pleasantly surprised with the result. This led me to fill some of the ugly welds on the SR frame with it - what a sin! Filler on a frame! I actually tried cleaning up some of the shit ugly factory welds with my welder but it put so much extra, unnecessary heat into the joints of the frame, I decided to just fill the areas with this stuff instead.
Attachments

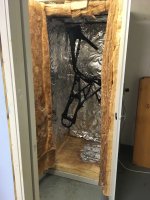
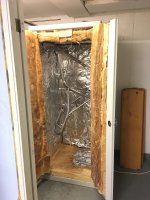
Finally got the frame powder coated! After repairing the small compressor and cleaning the frame with acetone, it was time for a test fit in the oven. It was tight! Didn't go in sideways or forwards, had to be on a slight angle. And as anyone who has powder coated before knows, once the powder is on dry, you sure as hell dont want to touch it. So I had to be damn careful getting it in there!
This feels like a big step. Hopefully the remaining smaller parts for blasting and powder coating will go a bit quicker/easier. The next step will be building up a rolling chassis. Cant wait for that!
This feels like a big step. Hopefully the remaining smaller parts for blasting and powder coating will go a bit quicker/easier. The next step will be building up a rolling chassis. Cant wait for that!
Attachments
You do know elements heat by resistance, right? That means they can shock you when touched. That heat box is scary beyond all hell. It's turning black because you're getting it hot enough to burn all the binders in the glass, which means you're starting to breath that stuff.
deviant said:You do know elements heat by resistance, right? That means they can shock you when touched. That heat box is scary beyond all hell. It's turning black because you're getting it hot enough to burn all the binders in the glass, which means you're starting to breath that stuff.
Thanks for your concern for my personal health. I'll endeavor to wear a mask next time I operate it. The area is well ventilated - forced through a ventilation system so that would help.
I can explain the blacking though - its not burning the insulation in normal operation. One time, right in the beginning I foolishly did a quick test with it and the elements accidentally dropped and touched the insulation - hence burning and blackening it on the bottom there. Also another stupid mistake I made was to do another quick 'test' and try to powder coat something in the oven before turning it on (with the elements covered) and some over spray gathered on the walls. I am a complete rookie here man, and just like the Swedish saying goes... 'Man måste prova sig fram'... You've gotta try stuff right? And I am not afraid to try
")
Excuse my ignorance but you can get shocked? Its wired up just like is was in the oven it came from... You mean to tell me that anyone can accidentally shock themselves in their home oven by accidentally touching one of the coils? Anyway, thanks for your concern again. And I dont think it is very fun to touch red hot elements anyway, so that will be avoided for now haha
In there current state, the elements shouldn't shock you, because the heating wire is embedded in magnesium oxide which is an insulator. If they crack, then that's another story. I admit I tend to lean way far on the side of safety, but as you may remember, I build stuff like this so i can be somewhat of a curmudgeon about doing things a certain way. If things aren't breaking down, then don't mind me. But, in the event that a hanger fails or something like that and it cracks or breaks the element then be aware you can get a shock. Knowing myself, I might be apt to keep it running while loading and unloading, so it's just something to be aware of.
deviant said:In there current state, the elements shouldn't shock you, because the heating wire is embedded in magnesium oxide which is an insulator. If they crack, then that's another story. I admit I tend to lean way far on the side of safety, but as you may remember, I build stuff like this so i can be somewhat of a curmudgeon about doing things a certain way. If things aren't breaking down, then don't mind me. But, in the event that a hanger fails or something like that and it cracks or breaks the element then be aware you can get a shock. Knowing myself, I might be apt to keep it running while loading and unloading, so it's just something to be aware of.
Oh yea! You make these things for a living right?! Then I understand your concern. This set up is very amateur to say the least haha. But thats good advice, I'll keep an eye on the elements. I too have heard if they get damaged in any way they loose their insulation and send the current through your body instead of the earth wire! I unplug it from the wall each time I am done with it as well to avoid any mishaps when not in use
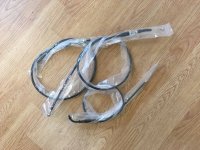
Couple things came in the mail today - some carb diaphragms from JBM and the short cable kit samples - rev.2 ;D
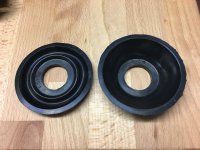
Quite often the diaphragms in these carbs look worn but still have no holes and still work fine. Not the one on this bike. Hole right through. Never tried these solid rubber replacements before so it'll be interesting to see how the install goes. I bought two just in case - or for the next bike.
Quite often the diaphragms in these carbs look worn but still have no holes and still work fine. Not the one on this bike. Hole right through. Never tried these solid rubber replacements before so it'll be interesting to see how the install goes. I bought two just in case - or for the next bike.
Attachments
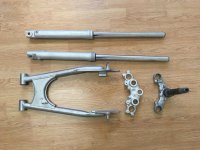
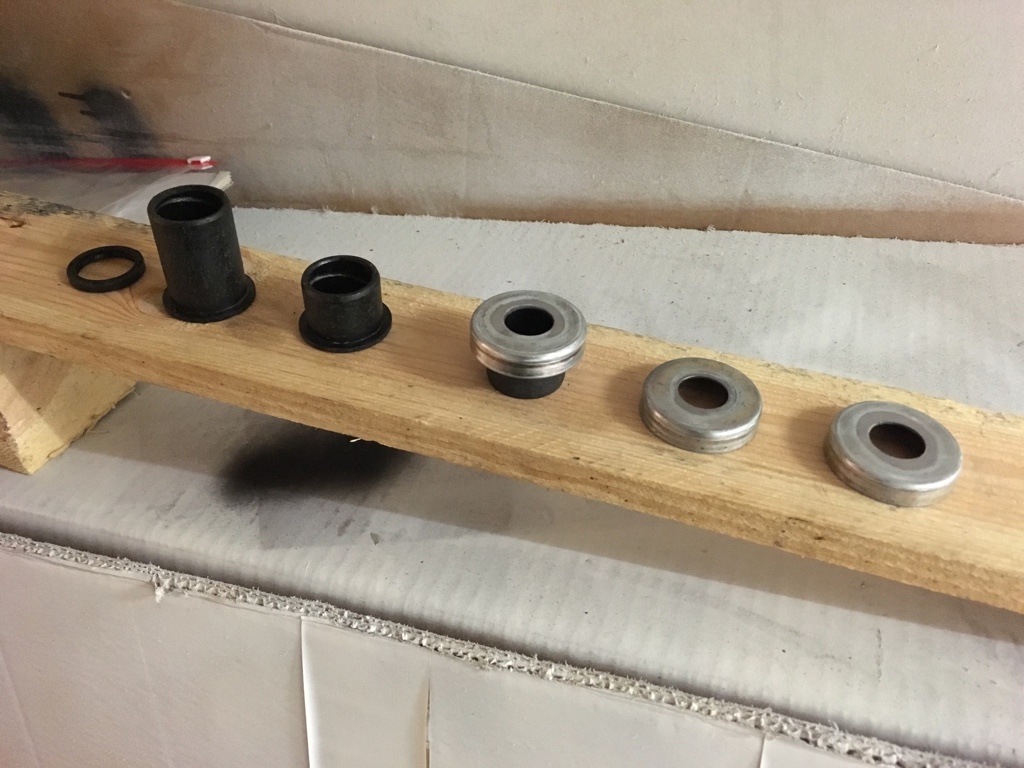
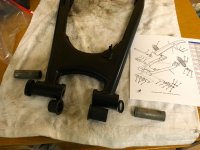
Yesterday I heated the swingarm and removed the plastic bushings for powdercoating and prepped the metal bushing caps for a coat of paint.
And then did the painting today 

Some good things and some bad things this weekend.
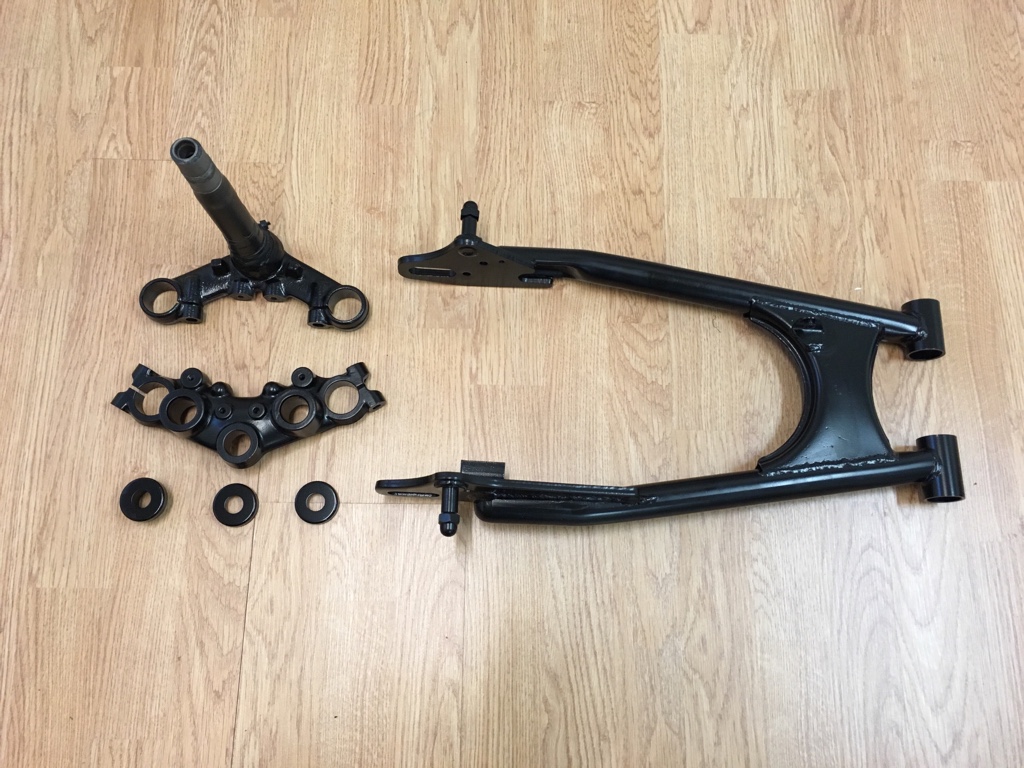
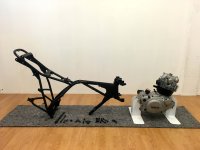
It was good to start assembling things again - feeling like I'm on the other side of the process now. I put the triple tree in place then cleaned a space to be able to slot the engine back into the frame with the swingarm.
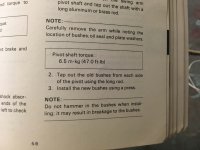
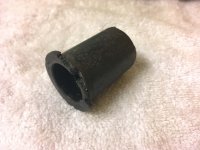
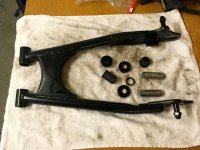
It was bad to reassemble the swingarm with bushings etc and break them while re-installing them. I was trying to be careful - hitting them back in with a block of wood and rubber mallet. I must have hit them slightly off centre and smashed one of the flanges off. Then I checked the manual and it says to press them back into place (I dont have a damn press!) rather than hitting them into place as you may break them. Duh! Crappy plastic ones. I have ordered new ones already and have ordered double - so I can measure them up and investigate getting some bronze ones made up down the track - a very common mod to XS650s and SR500s etc. Next time I reinstall these plastic ones I'll use some ply wood and a ratchet clamp or something - some kind of makeshift press.
I did take a lot of photos at various stages of disassembling the bike so I have a lot of reference material for putting it back together. But its still really nice to have a print out of exploded drawings of the entire bike with part numbers etc when doing so. I put a pdf together a while back just for this purpose: http://media.wix.com/ugd/e2462d_af1674218cca49e1abb72ad99c96d5b6.pdf Now you can all print a copy ;D Don't know how that works with copyright but I have included the link where the pics etc were taken. Plus, I highly recommend buying stuff there - always got stock, easy to find stuff and real good shipping!
It was good to start assembling things again - feeling like I'm on the other side of the process now. I put the triple tree in place then cleaned a space to be able to slot the engine back into the frame with the swingarm.
It was bad to reassemble the swingarm with bushings etc and break them while re-installing them. I was trying to be careful - hitting them back in with a block of wood and rubber mallet. I must have hit them slightly off centre and smashed one of the flanges off. Then I checked the manual and it says to press them back into place (I dont have a damn press!) rather than hitting them into place as you may break them. Duh! Crappy plastic ones. I have ordered new ones already and have ordered double - so I can measure them up and investigate getting some bronze ones made up down the track - a very common mod to XS650s and SR500s etc. Next time I reinstall these plastic ones I'll use some ply wood and a ratchet clamp or something - some kind of makeshift press.
I did take a lot of photos at various stages of disassembling the bike so I have a lot of reference material for putting it back together. But its still really nice to have a print out of exploded drawings of the entire bike with part numbers etc when doing so. I put a pdf together a while back just for this purpose: http://media.wix.com/ugd/e2462d_af1674218cca49e1abb72ad99c96d5b6.pdf Now you can all print a copy ;D Don't know how that works with copyright but I have included the link where the pics etc were taken. Plus, I highly recommend buying stuff there - always got stock, easy to find stuff and real good shipping!
Attachments
While we're on the topic of blunders, I thought I would share another one I had a few weeks ago...
When I had the riser bars made up I told the fab shop that I would have no problem tapping the M6 bosses myself - to save them the time/labour and me the money. I managed to do 3 of them without too much hassle, although it was quite time consuming. I royally muffed the 4th one though as Murphy's Law would have it.
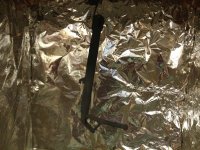
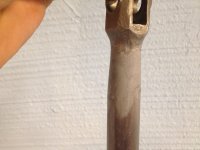
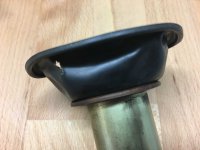
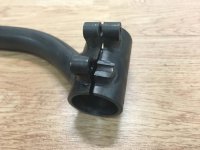
I must have been tapping the hole slightly off centre or at a slight angle - probably more likely. Anyway, the tap got stuck and broke off in the hole. Then when trying to remove it - with all sorts of stupid ideas (including the oxy torch), this happened - see attached. Now I'm embarrassed to go back to the guy who made them and show him what I've done to his nice hand work! Hahaha ;D I rekon he'll be able to fix them though - just grind back the wrecked boss and weld on another. Perhaps I'll ask him to tap the hole even too
When I had the riser bars made up I told the fab shop that I would have no problem tapping the M6 bosses myself - to save them the time/labour and me the money. I managed to do 3 of them without too much hassle, although it was quite time consuming. I royally muffed the 4th one though as Murphy's Law would have it.
I must have been tapping the hole slightly off centre or at a slight angle - probably more likely. Anyway, the tap got stuck and broke off in the hole. Then when trying to remove it - with all sorts of stupid ideas (including the oxy torch), this happened - see attached. Now I'm embarrassed to go back to the guy who made them and show him what I've done to his nice hand work! Hahaha ;D I rekon he'll be able to fix them though - just grind back the wrecked boss and weld on another. Perhaps I'll ask him to tap the hole even too
Attachments
Are you trying to tap in one swing, or are you turning the tap a few turns, then backing out a few turns plus using drill and tap oil while you do it?
Yeah, ideally, these would have been tapped in a lathe like you say! Although in my experience, threads seem to get a lot weaker and even distorted through the welding process from the exposure to heat - sometimes even the peaks of the threads can melt away a little. Does that happen to others or is it just me?
Yep, used thread cutting paste and backed out every time the load on the tap got too much. It was just because I tapped in crooked I think - so one side of the hole loaded up waay too much (possibly even deeper than the cutter could cut!).
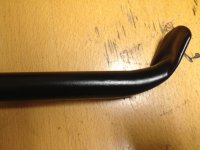
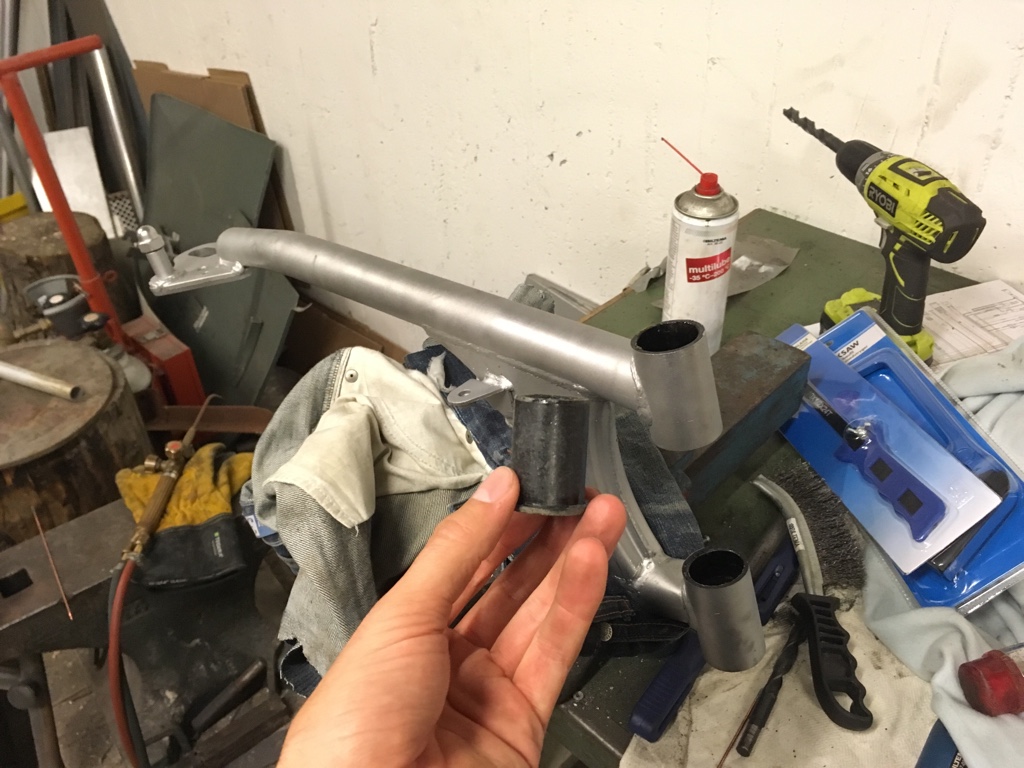
On another note, I have re-designed these bars so that they can be more universal - using adapters they will be able to fit bars from 32mm - 36mm in diameter. I have also 'raised the rise' so that when attached below the top yoke, they come up to just above level with the top of the tree - like a cool alternative to a flat bar in terms of ergonomics/riding position whilst having the clip-on 'look'. I have been pricing them up from a tooling/jig set up perspective and piece price. Really hoping to get something competitive and get them into production
Yep, used thread cutting paste and backed out every time the load on the tap got too much. It was just because I tapped in crooked I think - so one side of the hole loaded up waay too much (possibly even deeper than the cutter could cut!).
On another note, I have re-designed these bars so that they can be more universal - using adapters they will be able to fit bars from 32mm - 36mm in diameter. I have also 'raised the rise' so that when attached below the top yoke, they come up to just above level with the top of the tree - like a cool alternative to a flat bar in terms of ergonomics/riding position whilst having the clip-on 'look'. I have been pricing them up from a tooling/jig set up perspective and piece price. Really hoping to get something competitive and get them into production
that should have never just flat fractured in half like that i measn there is something wrong with the metal there
it should have broken any tap longer before it even distorted the hole
but steel does not snap like that from a tap being crooked you got issues with the metal
if it snaps like that it should be too hard to even scratch with a file ,see
it would need to be in a highly hardened heat treated state without any after heat treatment normalizing to be that brittle
what im saying is
it was already fractured from the weld, pal ,you just helped it out and good thing to, those need to go to scrap
do not use them
what did they use for stock ? what was the source of material ?
there is a very common grade of steel that is popular for machined parts called stressproof us machinists love it cause it has a bit of lead innit and turns the most beautifol blue hot curlies and it is not sticky machines up smooth
but the lead contentr makes it a no no for any welding, i would bet dollars they used a lead containing free machining steel, but they should have known
Tune-A-Fish
BOTM LOSER Proudly Deplorable
Got a little impatient and welded the nugget on then quenched it may bee?? that el make it had as a morning boner


