Yamaha SR250 - A clean standard build

You're right xb, I would be being naive if I thought that handling characteristics were defined by rake and trail alone. I guess I'll just have to test the set up. This was mainly a check to make sure I wasn't doing anything radical/crazy. Who knows, it still might be, but it still gave me a little comfort to see that my trail was not less than 100mm and rake was not too tight either. Measurements were made with suspension topped out. Was that stupid? How do the manufacturer's do it? Btw, do you have a baseline suggestion?

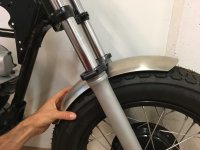
If you go back several pages in the build you'll see that the special 'above yoke' clipons I designed clamp to the stanchions above the the top clamp. This is the look I want. If things are a bit hairy, I'll got up in wheel size again rather than changing the handle bar design. That should get some trail back.

I strongly disagree with you about the ride height and the level/'the line' of the bike. But that's down to personal taste ;)

xb33bsa said:
all the bikes you have listed use a factory installed steering damper there is a reason for that

Source? Not because I dont believe you, I would just like to know how you find specific information about each bike for my own reference/research in the future. Or do you have this kind of stuff dedicated to memory? Savant? Jokes Haha
 
On another note, a delivery came today, yay!

Spread across a few boxes were the rear frame loop kits I designed for these SR's - see attached. They look mint, really happy with them. I designed them so that anyone can install them - no welding required. Although welding would still be an option if so desired. The metal rods fit right into the rear of the stock frame and the with two holes you can bolt it in place. And of course, it matches the seat I designed :D The welded metal tab in the middle is in case anyone wants to bolt up a different fender or tail light bracket if they were going to eliminate the fender all together.

I'll chuck these up on the webshop in a while. I already sold the first two sample prototypes I got back in February and the two blokes I sold them too were really stoked with the quality and the look it gave their bike - really cleans up the back end.
 

Attachments

  • SR250_FrameLoop.jpg
    SR250_FrameLoop.jpg
    898 KB · Views: 243
  • SR250_RearFrameLoop.jpg
    SR250_RearFrameLoop.jpg
    514.7 KB · Views: 246
  • SR250_FrameLoopSeat.jpg
    SR250_FrameLoopSeat.jpg
    629.2 KB · Views: 234
Also, in one of the boxes was the first off tool sample of the aluminium front fender I designed. It is designed for the SR 250 first, but I also designed it to be as universal as possible. The curvature and the width of it means it can fit many different wheel sizes. Now I have the challenge of designing some universal brackets for it. On the SR it can bolt right up to the fork brace I designed. In the photo you can see the development stages it went through - from 3D printed plastic prototype, to hand made sample, to final tooling sample (yes, I paid for special tooling to be made to make it!).

It is made is a two stage process - shape stamped out them formed in a two piece press form. I really wanted a super clean guard without any flanges or beads (usually added for strength and rigidity to thin sheet guards), so I specified 3mm thick sheet to gain back the strength. Now its plenty strong and perhaps a tad on the heavy side. I'm going to get a sample made in 2mm thick and compare the two. If it is strong enough in 2mm and lighter I'll go with that, if not, 3mm it is.
 

Attachments

  • IMG_0205.JPG
    IMG_0205.JPG
    437.8 KB · Views: 231
  • IMG_0204.JPG
    IMG_0204.JPG
    445.8 KB · Views: 247
  • IMG_0203.JPG
    IMG_0203.JPG
    524.3 KB · Views: 247
  • IMG_0202.JPG
    IMG_0202.JPG
    573.5 KB · Views: 241
  • AluminumFrontGuardUnder.jpg
    AluminumFrontGuardUnder.jpg
    757.9 KB · Views: 268
  • AluminiumFrontGuard.jpg
    AluminiumFrontGuard.jpg
    822 KB · Views: 250
  • SR250_AluminiumFrontGuardDev.jpg
    SR250_AluminiumFrontGuardDev.jpg
    814.2 KB · Views: 256
JadusMotorcycleParts said:
Thanks man! Lots of distractions and waves of motivation/lack of motivation along the way!

That's part of the deal man.. All of my builds seem to be like that. I am hoping to get some good wrench time in this weekend. Cheers.
 
I just flipped through the entire build thread.... Crazy cool stuff. Love it. Keep going I need regular updates. Subscribed.
 
Thanks dudes.

I had time yesterday to install the new carb slide diaphragm from JBM Industries. What an awesome idea/solution they came up with. Installation was a piece of piss and saved over $100usd! (can buy original from online parts stores for around $140, bought the JBM one for $20!). Mostly because the original NOS ones are an assembly, not a separate diaphragm.

The existing diaphragm just needs to be carefully clipped away, then the thick boot of the JBM one takes its place and fills the gap perfectly and holds there really nicely. I have seen quite a few solutions for people replacing these with other ones from other companies and checked the videos on youtube - they all seemed very complicated. Not this one. If I wanted to be more careful I would have removed the jet needle as well but I managed to avoid bumping it.

The hole in the slide should be in line with the carb throat and be on the engine side, then you pain a dot so you dont forget to install it that way every time. As recommended, I sanded down the diaphragm sealing lip on the carb as well to remove any possible burrs that could damage the new one.
 

Attachments

  • JBMDiaphragmInstall.jpg
    JBMDiaphragmInstall.jpg
    331.8 KB · Views: 254
  • SandLip.jpg
    SandLip.jpg
    470.4 KB · Views: 256
  • NewJBMCarbDiaphragm.jpg
    NewJBMCarbDiaphragm.jpg
    375.2 KB · Views: 253
  • CarbSlideLip.jpg
    CarbSlideLip.jpg
    331.8 KB · Views: 263
  • CarbDiaphragmInstall.jpg
    CarbDiaphragmInstall.jpg
    500.9 KB · Views: 260
  • StuffedCarbDiaphragm.jpg
    StuffedCarbDiaphragm.jpg
    308.1 KB · Views: 239
  • CardDiaphragmReplacement.jpg
    CardDiaphragmReplacement.jpg
    503.4 KB · Views: 252
Damn shoddy wiring in the tail light gave out so I had to re solder one of the wires back to the board...
 

Attachments

  • TailLightRepair.jpg
    TailLightRepair.jpg
    630.1 KB · Views: 230
I took Zap's advice and installed a grommet in the tail guard for the tail light wires to go through - to avoid any chaffing and possible shorts! Got a sweet set for cheap from Biltema ;D
 

Attachments

  • GrommetInstall.jpg
    GrommetInstall.jpg
    283.7 KB · Views: 237
  • Grommets.jpg
    Grommets.jpg
    420.3 KB · Views: 243
Also decided the position of the guard and drilled the mounting holes using a paper template to find center!

I have seen thin aluminium guards crack and split under vibration if they are not isolated. I am hoping that because this guard is substantially thicker than most, it wont be a problem. But I'll test spacing it from the fork brace with some o-rings and see how that goes - if it helps damp any vibes.
 

Attachments

  • SR250AluminumFrontGuard.jpg
    SR250AluminumFrontGuard.jpg
    391.8 KB · Views: 241
  • AluminiumFrontGuard.jpg
    AluminiumFrontGuard.jpg
    629.3 KB · Views: 261
  • VibeDamping.jpg
    VibeDamping.jpg
    325.1 KB · Views: 229
Likely that will help only very little. Aluminum is rather dreadful for fatigue cracking- no endurance limit which means if you keep shaking it, eventually it will fail so you design around some threshold that you never expect to see. You can get some very substantial benefit though if you actually rubber mount it - as in rubber isolate it. This would mean drilling large enough holes in the fender to install some grommets. then you will need some sleeves just a little shorter than the grommet. Put a washer on each side and bolt it on. This will totally isolate the fender from any contact with its mount except through the shock absorbing rubber grommet. It is not an absolute cure, but the accelerations will be drastically reduced due to vibration and the aluminum part should last a very great deal longer. Here is an example of a mounting plate I built a while back. You can see the various parts that make up the rubber isolation mount.
 

Attachments

  • 07212013 033.jpg
    07212013 033.jpg
    2.3 MB · Views: 231
Vibration will be the least of your issues on that fender. Bigger issues will be mounting with two holes in the center of the fender parallel with tire. You'd be better with 4 holes, or even 3. Mounting to a sub frame would be a better solution if you're concerned about fatigue-either above the fender or below it. It could be a plastic mount like for a plastic dirt bike fender or metal like a fiberglass or plastic fender is often mounted.
 
deviant said:
Vibration will be the least of your issues on that fender. Bigger issues will be mounting with two holes in the center of the fender parallel with tire. You'd be better with 4 holes, or even 3. Mounting to a sub frame would be a better solution if you're concerned about fatigue-either above the fender or below it. It could be a plastic mount like for a plastic dirt bike fender or metal like a fiberglass or plastic fender is often mounted.
Indeed. Even though it is fairly small (really like how well it looks to be fitting - even a slight miss match seems to jump out to my eye on so many otherwise nice bikes)it would be good to try to spread the mounting points out farther from each other and in two planes as well (so at least three mounting points). Really like Deviant's suggestion of a plastic sub-mount which would greatly absorb energy transferred to the fender, but it looks like you will be hard pressed to fit anything else in there. Maybe try 3 or 4 mounts spaced as wide as you can and see if it lasts acceptably long. Front fenders seem to not get too much abuse from vibration (higher frequency like from engine rpm is a lot worse than road vibration in the main) but do get a lot more shock and impact loads that try to bend the fender around the mounting points which is why thin light fenders usually have struts unless made of something that can take the bending forces and spring back like plastic. Aluminum is pretty poor for this except for it being light, and your fender is short which will help a lot.
 
Thanks for the tips guys. I like jp's idea of completely isolating it with rubber grommets and spacers. After all, I did just buy a whole set of grommets ;)

Would it help if I fastened a brace/bracket underneath the fender to spread the load a little further than the two mounting holes? As mounting from any other point is not possible/not wanted.
 
It could be made to help a lot, but no telling if it is actually needed. If I thought something like that was necessary, I would likely construct it like having another much shorter fender form-fitted inside the one that shows. Something like half its total length serving as a doubler and stiffener for the center half where it bots on. You could hold the edges back to where the doubler didn't show and glue the two together with some flexible adhesive. Then just mount it up with grommets and sleeves to rubber isolate it. If the mounting holes alone are the main concern, you could do the same thing with a much smaller doubler only a little larger than the fork brace you are mounting to. You might even get away with just the two fasteners you have now though as previously noted the stability rocking side to side could be an issue. If the mounts are robust enough this may not be a problem. In any case, any doubler inside the fender needs the edges relieved with a radius so as not to place an edge load from the doubler against the underside of the fender and create a stress riser there. I suggest the glue so dirt and moisture do not get in between the two parts and cause corrosion failure.
 
Something also to consider, in addition to vibration or rocking, is road debris. I fabricated my cb750 fender to have minimum clearance over the tire. I'm running a brace/sub-frame under the fender with four mounting points for the forks (2 on each side) and four riveted mounting points for the fender to the brace. I have an Avon Roadhandler tire up front that doesn't have very aggressive tread. I rarely, if ever, go for a ride where at some point a rock or some type of debris isn't clanging through the fender between it and the tire. It will take something significant to move my fender because the brace is pillaged from a stock unit and has to be at least 2 to 3mm thick.
 
jpmobius said:
It could be made to help a lot, but no telling if it is actually needed. If I thought something like that was necessary, I would likely construct it like having another much shorter fender form-fitted inside the one that shows. Something like half its total length serving as a doubler and stiffener for the center half where it bots on. You could hold the edges back to where the doubler didn't show and glue the two together with some flexible adhesive. Then just mount it up with grommets and sleeves to rubber isolate it. If the mounting holes alone are the main concern, you could do the same thing with a much smaller doubler only a little larger than the fork brace you are mounting to. You might even get away with just the two fasteners you have now though as previously noted the stability rocking side to side could be an issue. If the mounts are robust enough this may not be a problem. In any case, any doubler inside the fender needs the edges relieved with a radius so as not to place an edge load from the doubler against the underside of the fender and create a stress riser there. I suggest the glue so dirt and moisture do not get in between the two parts and cause corrosion failure.

mmmmm glue sniff sniff
yep and sikaflex polyurethane adheasive is the shit
i used it when i reskinned a 40ft eagle motor coach after i got done making it 9 inches taller and 10 wider that is
and the sikaflex is all they use in that industry as well as boat building
i think you gotta go to sweden to get it though too bad
 
xb33bsa said:
yep and sikaflex polyurethane adheasive is the shit

They make a zillion products so a bit of research may be needed to get the right thing. should not be too bad to find it - I think it is a USA product. Absolutely great stuff! Most polyurethanes are damn good - too good in fact as usually you can NEVER separate the parts again without destroying them. Locktite PL premium construction adhesive is a pretty good polyurethane and is readily available at home centers. It will say "3X the strength" on the tube. Very poor shelf like once opened (like all polyurethanes) so plan to throw away what you don't use but it is cheap.
 
Back
Top Bottom