1976 GMC Motorhome

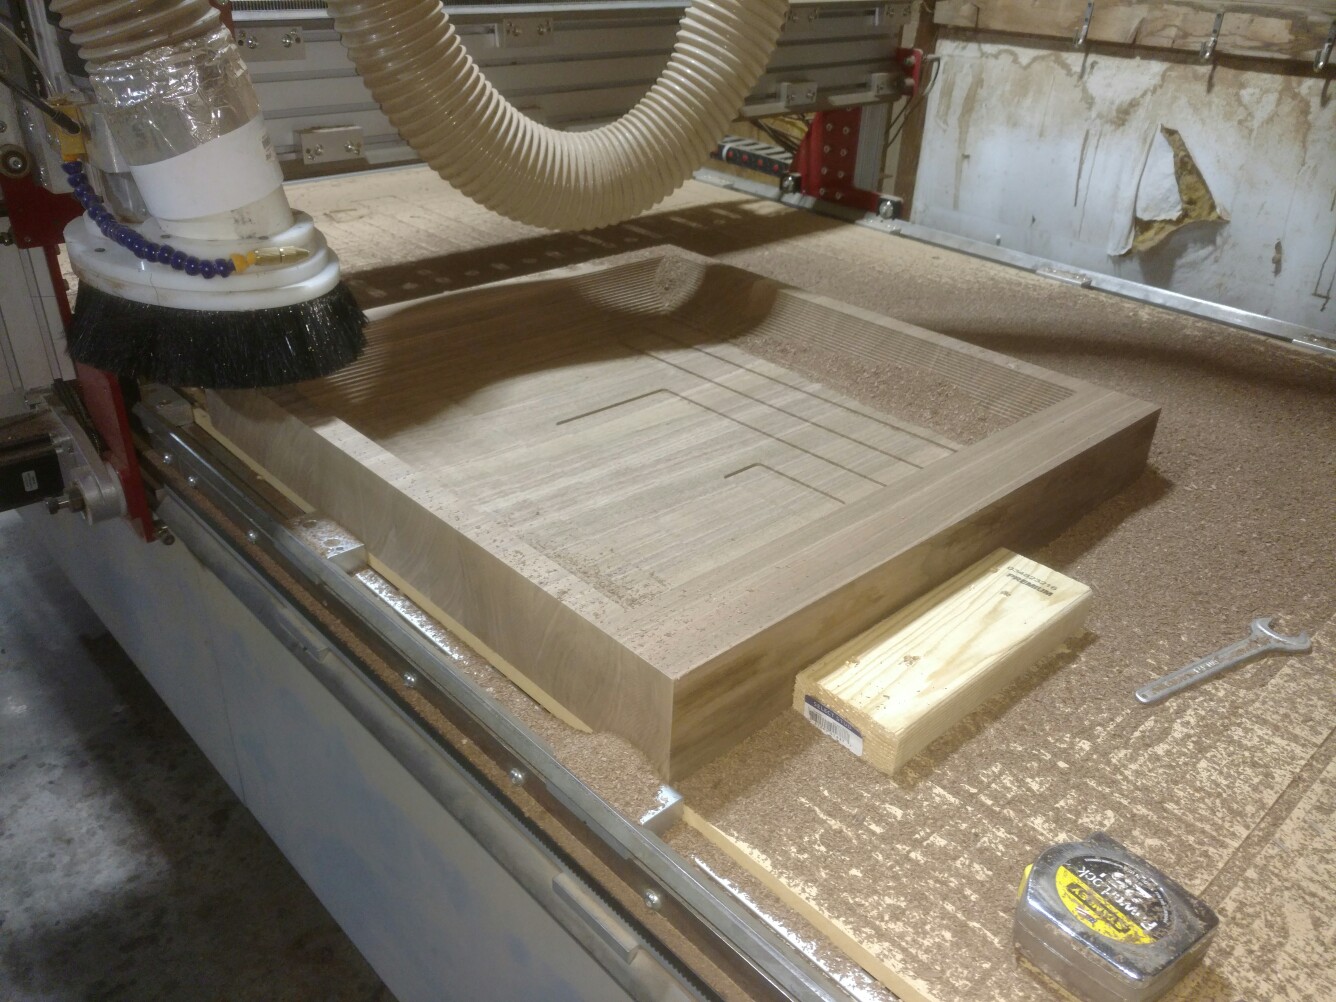
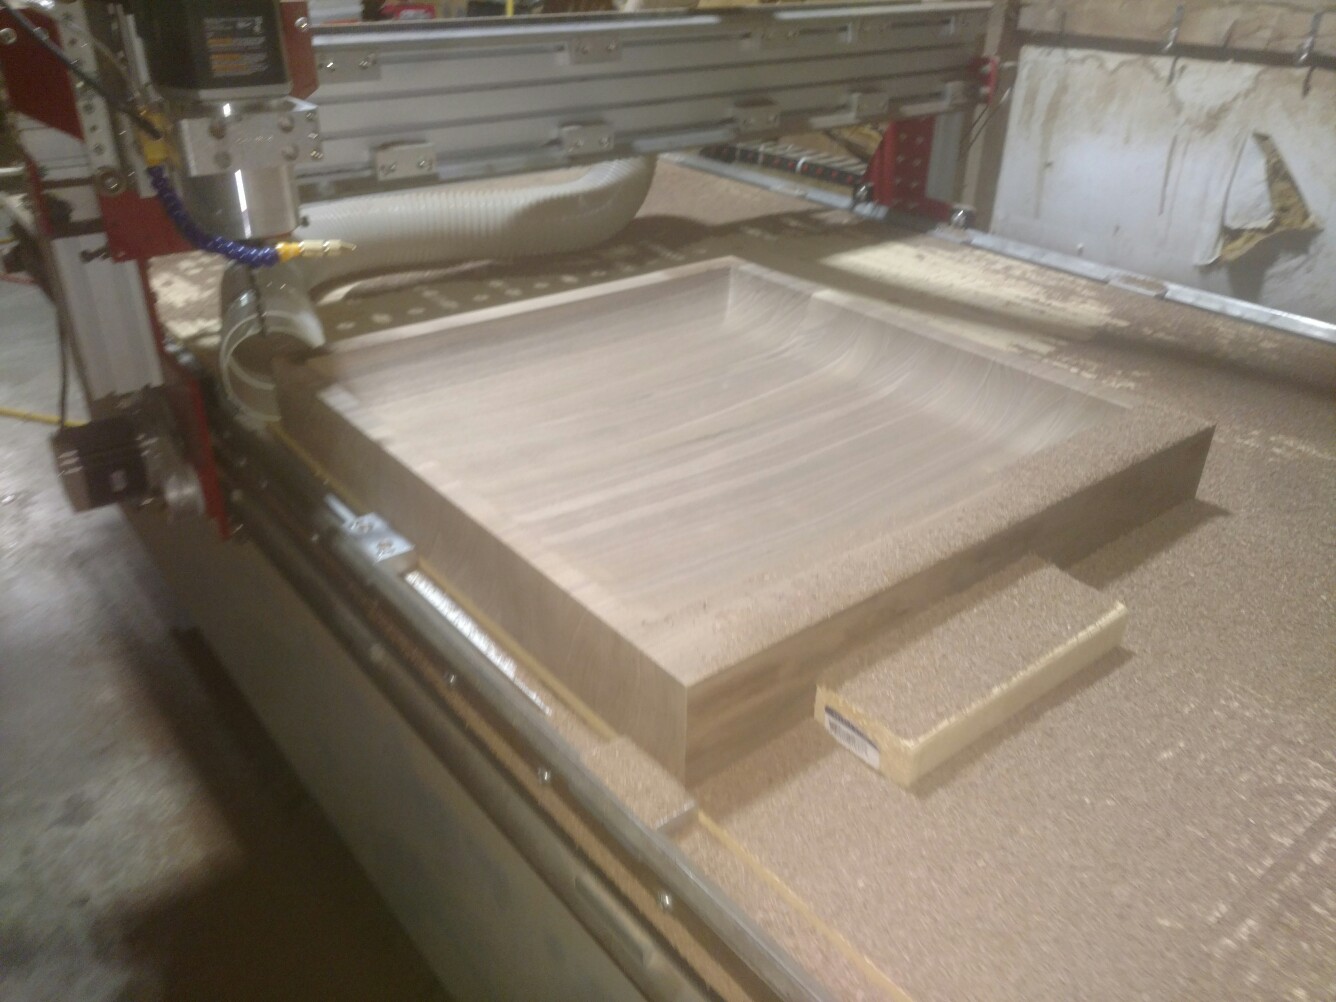
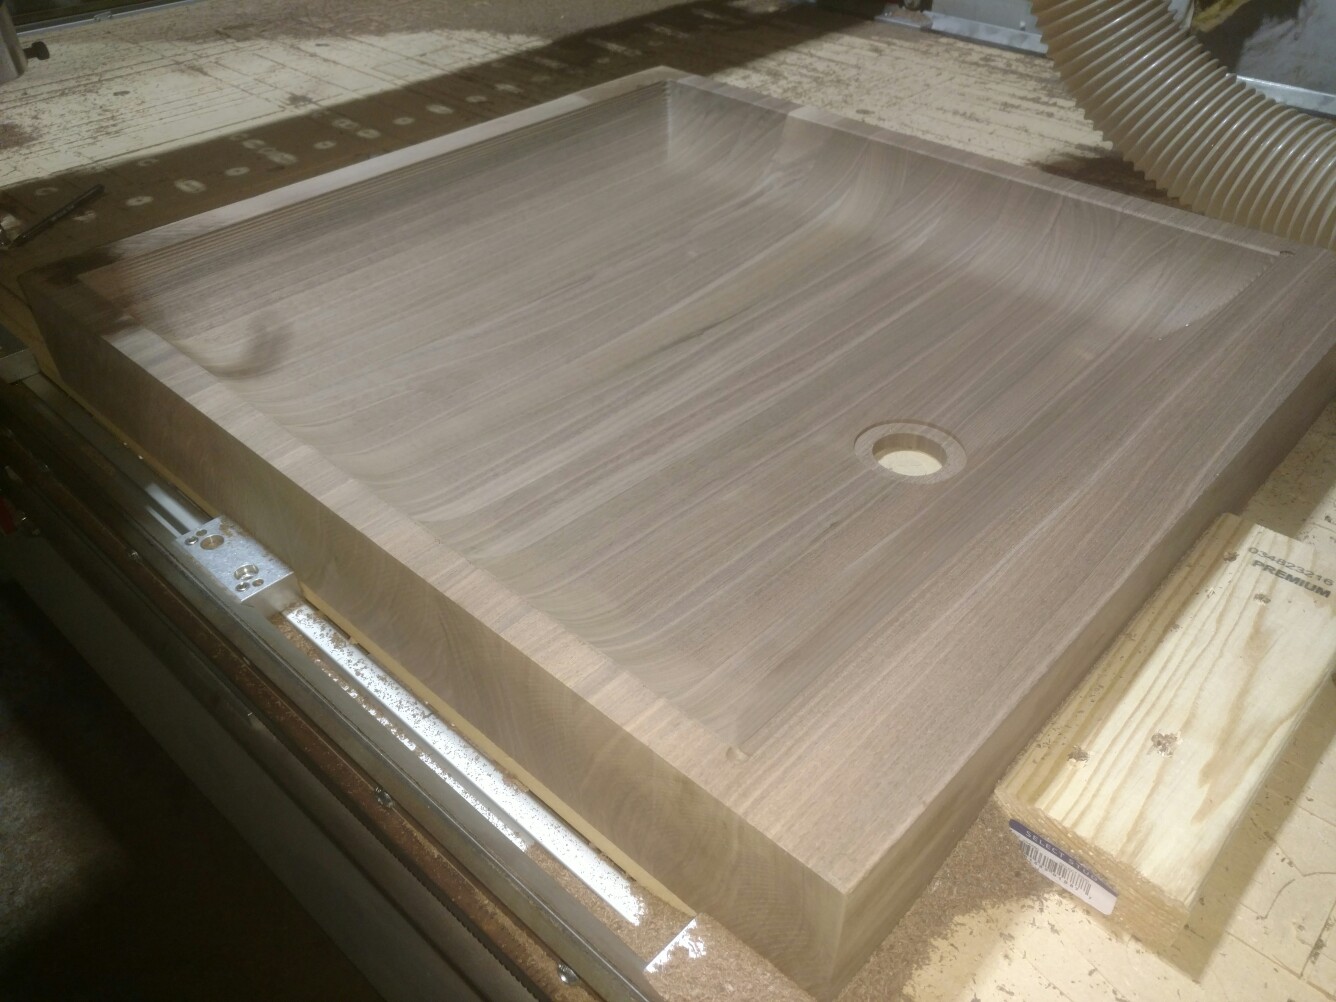
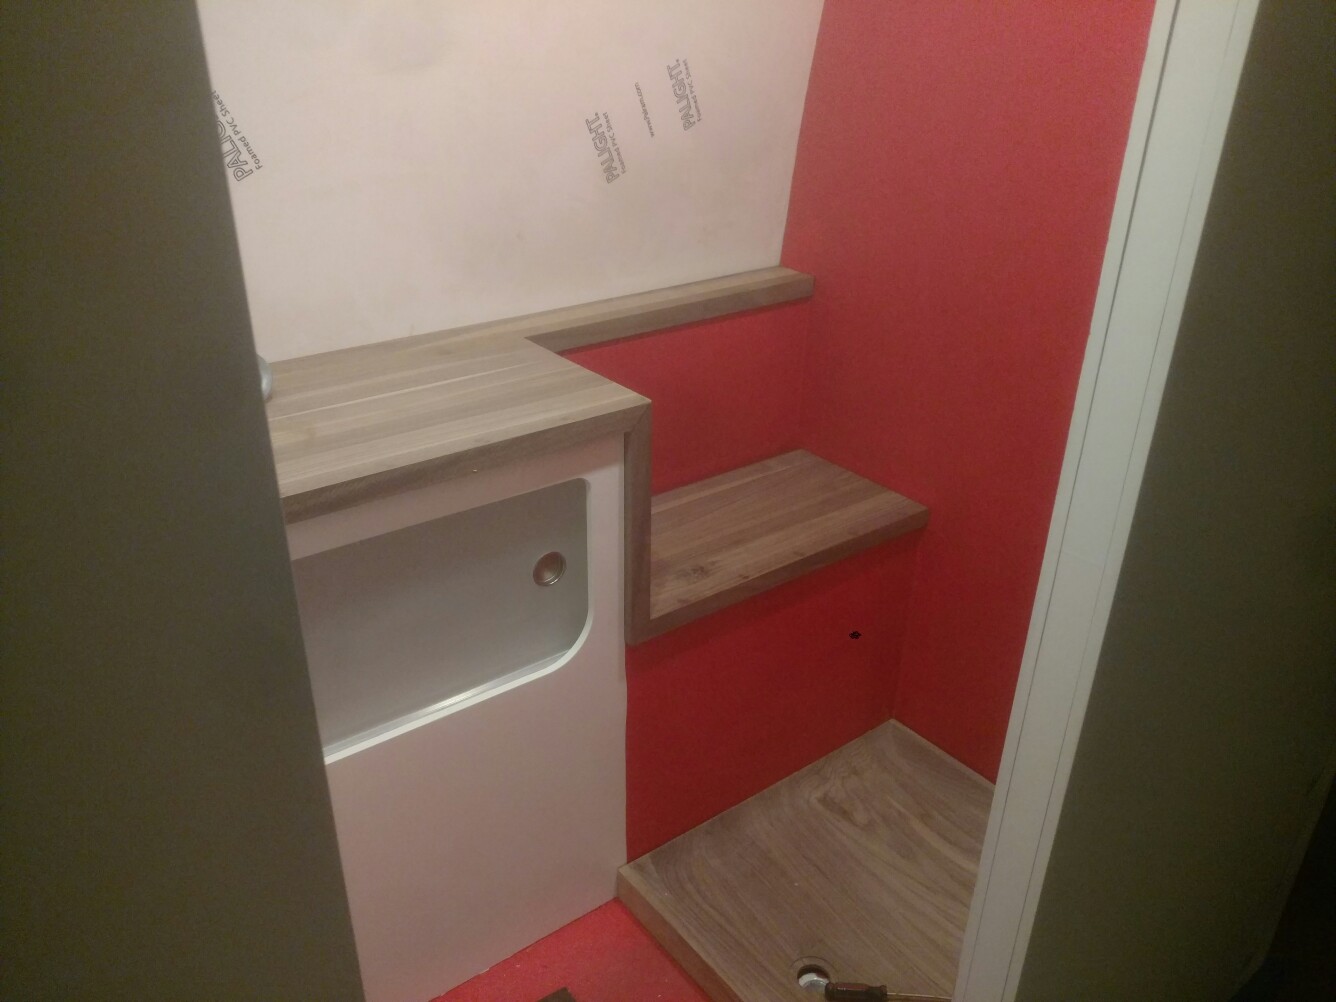
Tim it's a multi step solution to the moving cracking problem.

Step 1 is the redcoat, if the grout cracks the water should not rot out the wood beneath, it hopefully will eventually find it's way to the drains.
Step 2 is an epoxy thinset that's flexible.
Step 3 is using Sonite (epoxy tiles) in a very small size (1/2" mosaic tiles, 1/16" thick) , so the tile themselves won't crack.
Step 4 As Eric said, urethane grout with extra flex additive to make the grout flexible enough to withstand the constant earthquake that is being mobile.

Step 5...hope for the best 8)
 
Oh and you can see it in the pictures, but all the corners got a fiberglass mesh membrane between layers of waterproofing to keep the corners solid with the flexing.
 
Late to the party, this thing is awesome. My hunting trailer is about to rot into the ground, this would make things so much more comfortable :)
 
SONIC. said:
I think taking a moving shower would be quite an interesting experience
Aw DUDE!
Crank up Red October on the media system and pretend you're in a sinking submarine!
 
This will end up being the shower pan, and a very expensive pile of sawdust hahaha
 

Attachments

  • IMG_20170221_173703756-1336x1002.jpg
    IMG_20170221_173703756-1336x1002.jpg
    214.7 KB · Views: 232
Cool. so you are shaping that with the cnc router to get the slope for water then tiling over it? or treating it for water and tiling just the walls etc?
 
Tiling just the walls Mike.
The pan will get several coats of conversion varnish to waterproof it. That's what we use to make wooden sinks and it holds up really well.
 
jag767 said:
This had got to be my favorite project on here by far!

Thanks Man, it's definitely different.
I'm about ready to be done and back to building bikes
 
It's been too damn cold to do much lately. Kills my motivation when its 18 degrees outside.

I did get the shower pan built.
I had to do it twice because the first one I forgot to offset the drain hole by 1/2". Whoops. Good thing I've got plenty of walnut sitting around haha.

Design in cad so the water all drains:
Capture.jpg


Cut and glue:
IMG_20170221_173703756-1336x1002.jpg


Send through the widebelt to flatten it out, then a skim pass on the CNC to get it perfectly flat on the bottom. Flip it over and:

IMG_20170311_142915720-1336x1002.jpg


And 4 hours later

IMG_20170311_170550159-1336x1002.jpg


Switch to the ballnose bit and wait another 5 hours:
IMG_20170311_183538301-1336x1002.jpg


Back to the 1/2" endmill and we're done
IMG_20170311_183857197-1336x1002.jpg


And this is where it goes, tile is up next to cover all the red shit
IMG_20170302_183417614-1336x1002.jpg


All the walnut needs to be sanded and finished as well
 
That is just nuts! Amazing work.

You should Airbnb / VRBO that thing when you're not using it.
 
i nominate it for build of the month !

or is there some rule i didnt see that says it has to be a bike??
 
Loving it! Are you going to do anything to the finish so it isn't slippery (when wet) or are you just going to use some kind of removable mat in the shower?
 
awesome beautiful work

make sure you seal it

west system or the like thixotropic epoxy so it cant grow any mold or dryrot
 
Thanks Guys!

The shower pan will be getting an epoxy finish on the sides and bottom and then a Conversion Varnish finish for the top inside surface.
As for slip resistance I haven't given it much thought, but I've never been a shower mat person so I'm not too worried about it
 
advCo said:
That shower pan is amazing. I really like that clamping setup you've got, is that something you made?


Sent from my iPhone using DO THE TON

The clamps are by a company called JLT, worth every penny if you do a lot of gluing.
I made a few clamps using their design before I bought theirs, they aren't complicated, but I have 80 of them so I decided to just buy them instead of spend weeks making them. The clamps themselves run about $100-150 each depending on the length.
 
Back
Top Bottom