Follow along with the video below to see how to install our site as a web app on your home screen.
Note: This feature currently requires accessing the site using the built-in Safari browser.
We noticed you are blocking ads. DO THE TON only works with community supporters. Most are active members of the site with small businesses. Please consider disabling your ad blocking tool and checking out the businesses that help keep our site up and free.
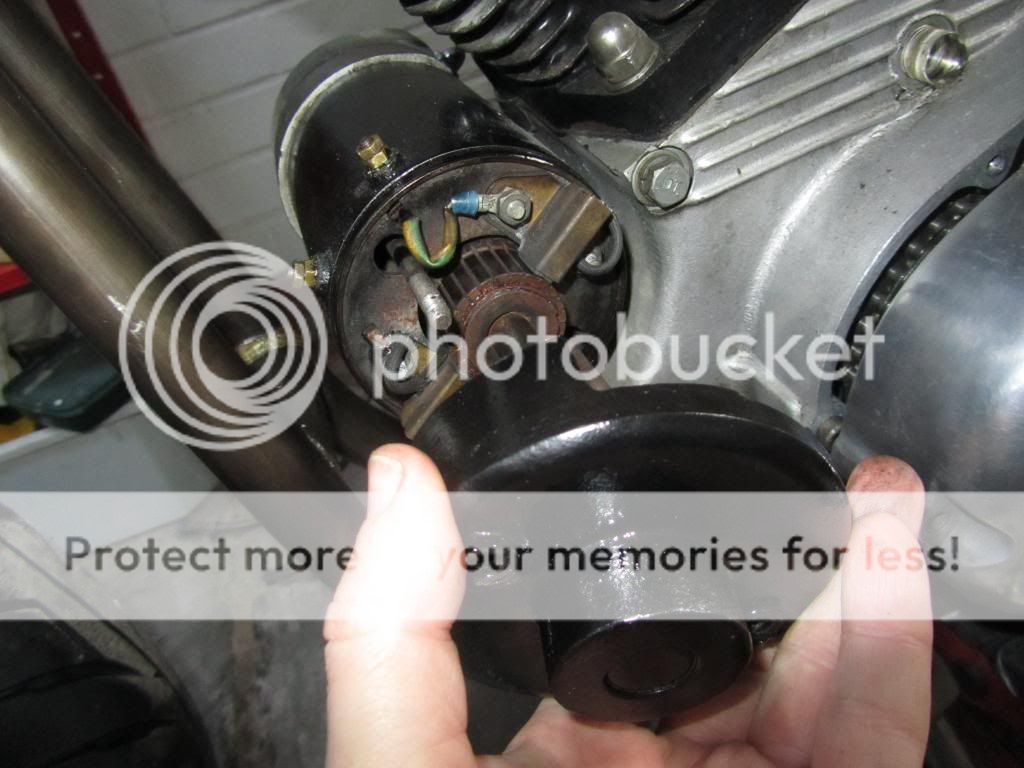
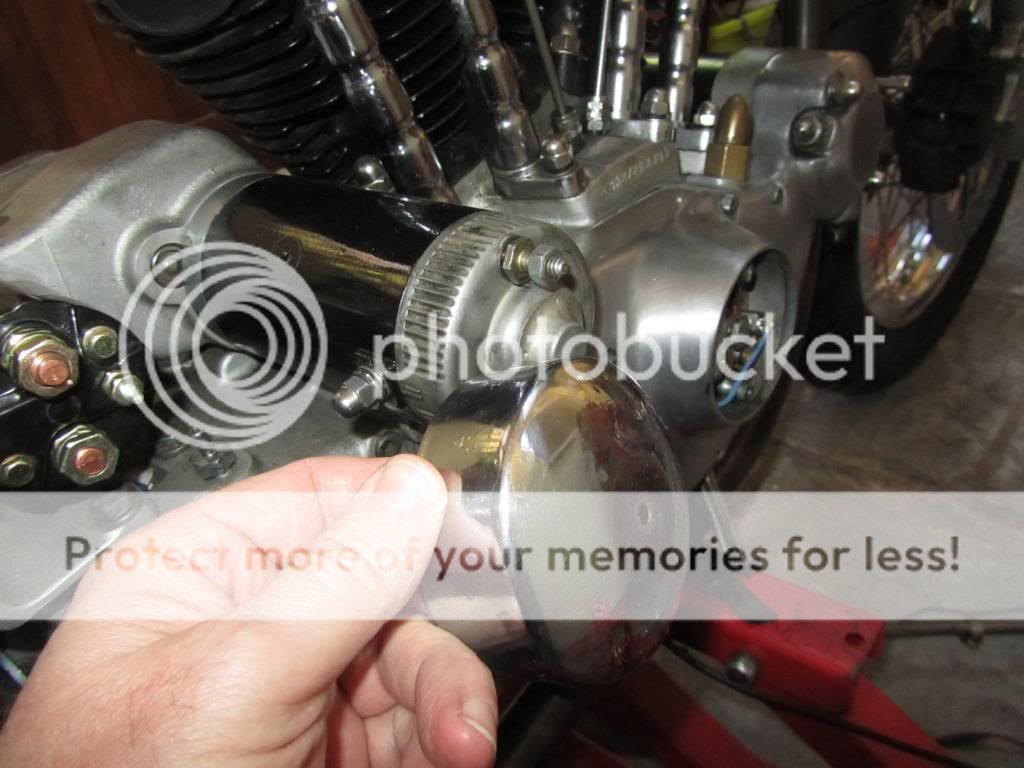
A couple more tasks ticked off the to-do list, first I replaced the generator end cover with an aftermarket one which is also a rectifier. This cleans up the wiring and looks a bit better I think..
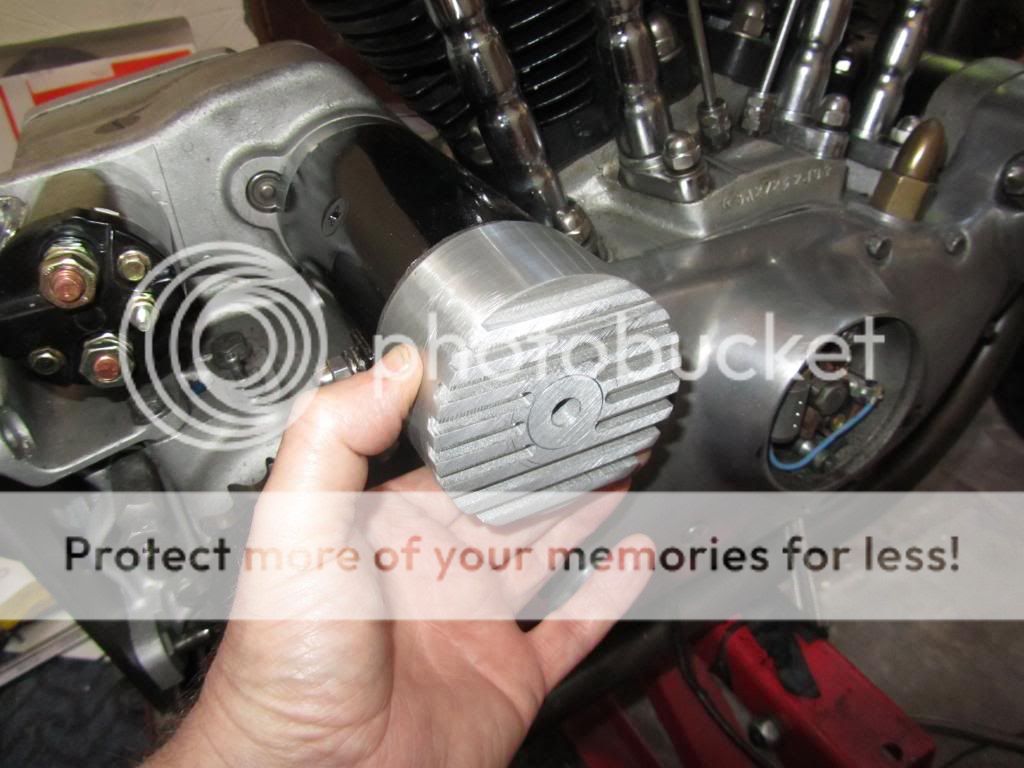
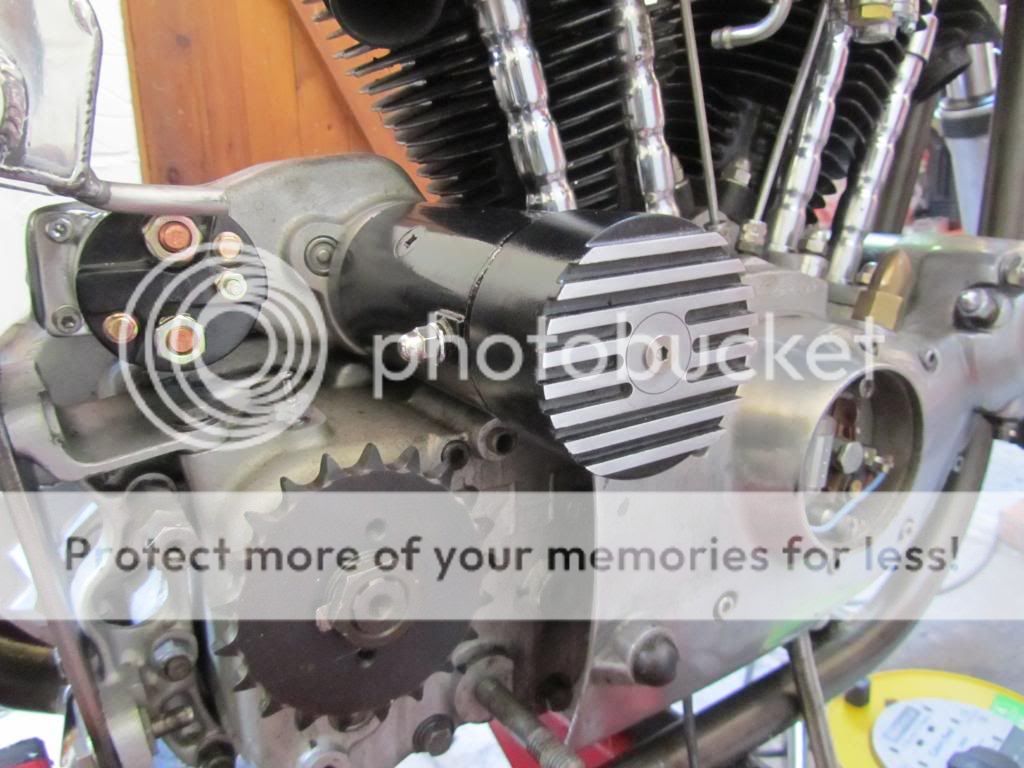
I didn't like the chrome covers that normally get fitted to the end of the generator and starter motor, so with the generator sorted, we made a billet cover for the starter which mimics to style of the new generator cover. Not sure if I'll paint it black with the fins highlighted, or just leave it as is.. (I painted it black and left the fins highlighted in the end)
Just need to make a new mount to sit it a little further over the starter..
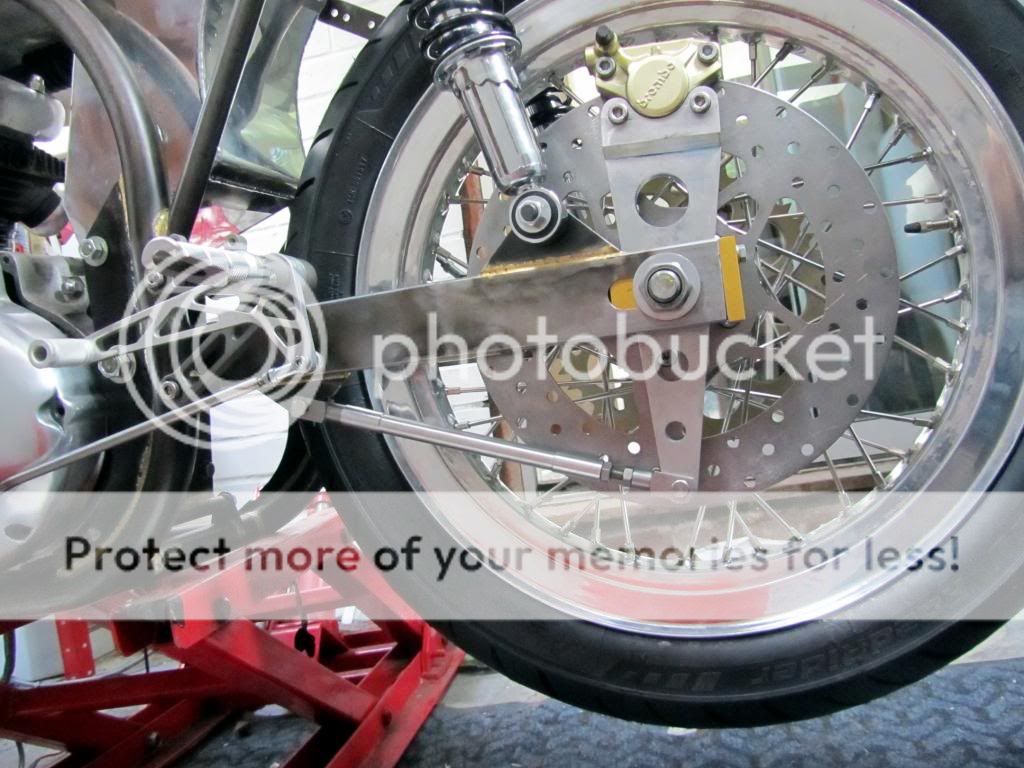
God is in the details.. the wheel spacers are stainless,a bit heavy so we drilled them to lose a few grams. I did try to 'liberate' some of Jeffs precious Titanium to make them, but he wasn't having that ;D
Rear caliper bracket done, we needed to machine it down from 20mm plate as it needed to be stepped to give the correct clearance. Well, when I say 'we', I mean that Jeff does the hard work while I drink tea and eat his favourite biscuits and ask lots of questions lol..
More detail work.. using a hard anodised alloy rear sprocket from Renthal, which was special order for my bike, only took a week to arrive. The sprocket bolts are high grade stainless, which I try to use wherever possible. They looked a bit boring, so we dished the heads on the lathe and saved a few more grams too..
You can see in this photo where I'm up to. The oil tank mount is just temporary, I wont finalise its exact location in the frame until the exhaust is made. Also the rear sprocket is a few mm misaligned with the front sprocket, so the front one will need spacing out a little. The bike looks almost finished, but its probably only about half way completed in terms of man hours so far..
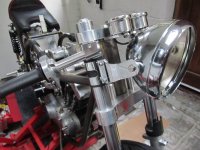
Headlight and mounts loosely bolted up. Because the yokes are a little wider than standard, had to make a pair of 8mm spacers to mount the shell to the brackets. Its these little jobs that take so long to do (for me at least), mainly because the bike is at home, and any machining is done three miles away at Jeff's place.. at times my measuring isn't as accurate as it needs to be.. though I am slowly getting better.
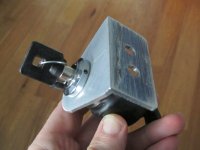
Another job that took a huge amount of time was the top motor mount, I wanted a billet one to match the head steady that it had to bolt too.. this is the MK3 version.. I also incorporated the ignition key, and left space for a couple more switches.. horn and starter button.. that'll be all the switches the bike is having.. Still needs to be polished yet..
Good eye, they are the ones that came on it when he bought the bike but if you had read the post it would have been more obvious to you as he shows the new ones and mentions them in a list of items bought.
I guess like most homemade projects, mine progresses as time and money allow. The target is to get it on the road by next spring. I haven't gone into some of the endless details of the build, such as all the options I considered for a seat, or the ratio needed for the master cylinder to work the clutch slave, or which performance cams I'm going to fit and so. Because most folks wouldn't be that interested and I don't have the time to write pages and pages. This thread is more of a summary with lots of photos to show progress, with more details of some of the problems I had to deal with along the way. 18 months isn't that long lol.. my last drag bike took three years, then again are they ever really finished? Once they are on the road, there are always things I want to improve and change.
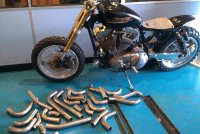
Actually today I've been to an exhaust specialist and brought back a few metres of 1 3/4 inch stainless tubing and enough bends to make two systems, one for me and one for my mate Tim's XL scrambler..
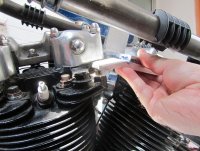
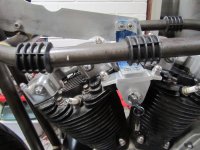
The pushrod covers are still the same as when I got the bike, I don't like them and so have bought some new std ones, but haven't fitted them yet. Talking of the motor, it ran fine and had a recent rebuild, but I'll take the heads and barrels off once the dry built is complete and get them powder coated or maybe ceramically coated, not sure yet. It'll also get electronic ignition to replace the points and a set of performance cams, maybe not straight away, but that's the plan. Long term I'd like to make a pair of billet barrels too, but got other projects waiting to do before that..
I haven't gone into some of the endless details of the build, such as all the options I considered for a seat, or the ratio needed for the master cylinder to work the clutch slave, or which performance cams I'm going to fit and so. Because most folks wouldn't be that interested
ok, its getting late here in England, so I'll just just leave you with these that I mentioned before..
My old sprint bike.. Merch 120 motor, with NOS.. 424 lbs and 180 bhp... it was fun.. a road bike now..
racing at Santa Pod
The current (long term) drag bike project I'm building with my mate Jeff ..
And my Guzzi Cali 3 café .. on hold till I finish the Ironhead.. I want to change a lot of the work I've already done on this... just need the time and money
I have a couple of old Ducatis I've restored too, but they are std.
Those that would be interested in the details have already read your tech intensive build thread. Powder coating your heads and cylinders has been discussed as to whether it retains heat. While it does retain some heat it is negligible, while ceramic coatings main intention is to retain heat, my cylinders and heads would be the last place I would use ceramic.
Those that would be interested in the details have already read your tech intensive build thread. Powder coating your heads and cylinders has been discussed as to whether it retains heat. While it does retain some heat it is negligible, while ceramic coatings main intention is to retain heat, my cylinders and heads would be the last place I would use ceramic.
That's a good point, I mentioned ceramic coating as I've been thinking about having that treatment on another projects exhaust, and I could get it done for free.. powder coating it is then !
I read an article in The Horse where one of their columnists does a test regarding the heat retention properties of powder coating. He powder coated one head and painted the other. then he put them in front of a fan and ran a heat gun through their ports, taking heat measurements as he went. Then end result was the powder coating held in significantly more heat then the paint did, i do mean significantly. I would never powder any engine parts after reading his article and seeing his numbers. I used a decent quality spraybomb hi temp heat for my 59 xlh and its held up fine and looks great.
Well im not saying your gonna kill the engine by doing it, but its still a bad idea. These cast iron heads and jugs have a hard enough time trying to dissapate heat as it is, no reason IMO to make it harder.
This site uses cookies to help personalise content, tailor your experience and to keep you logged in if you register.
By continuing to use this site, you are consenting to our use of cookies.