
I’ve been looking for an electronic ignition system for my 1976 KZ400D for some time and I’d found 4 potential options. I’ve put a lot of work trying to make more power out of my KZ and a high output coil with a nice ignition system was the last step. Here’s what I found: 1- Boyer Bransden out of the UK has a “Micro Digital” Kit that they confirmed would work with my bike, 2- from an old thread on DTT I heard of a company called 7th Gear Designs that was making a kit, 3- I know that you can retrofit an electronic ignition from the later KZ440. 4- I heard rumors that Charlie’s Place had a kit.
I could not get a hold of 7th gear designs, not sure they are still in business. The Boyer Bransden system was difficult to source in the US. I found a distributor that had one, Kit Number: KIT00087. But they did not have the kit that came with the coils. More on that later… The Charlie’s place set up seemed pretty straight forward so I called Charlie’s place last week and spoke with Charlie who explained that they didn’t have a kit specifically designed for the KZ400, but if I was willing to put in a bit of modification then we could make it work using one of their systems for the Honda parallel twins that used a similar ignition setup. I.e. single pickup, ‘wasted spark’, dual output single coil. I believe the Hondas that use this are: CA72/77, CB/CL160, CB/CL/SL175 and CB200 (but I’m not a Honda expert).
This thread covers modifying that system to fit my KZ400 and some issues that I had with my timing advancer that were unrelated to Charlie’s system. Charlie sent me the electronic ignition and a Dyna coil and asked that I report back to him what it took to fit, so that he might be able to create a bolt-on system in the future.
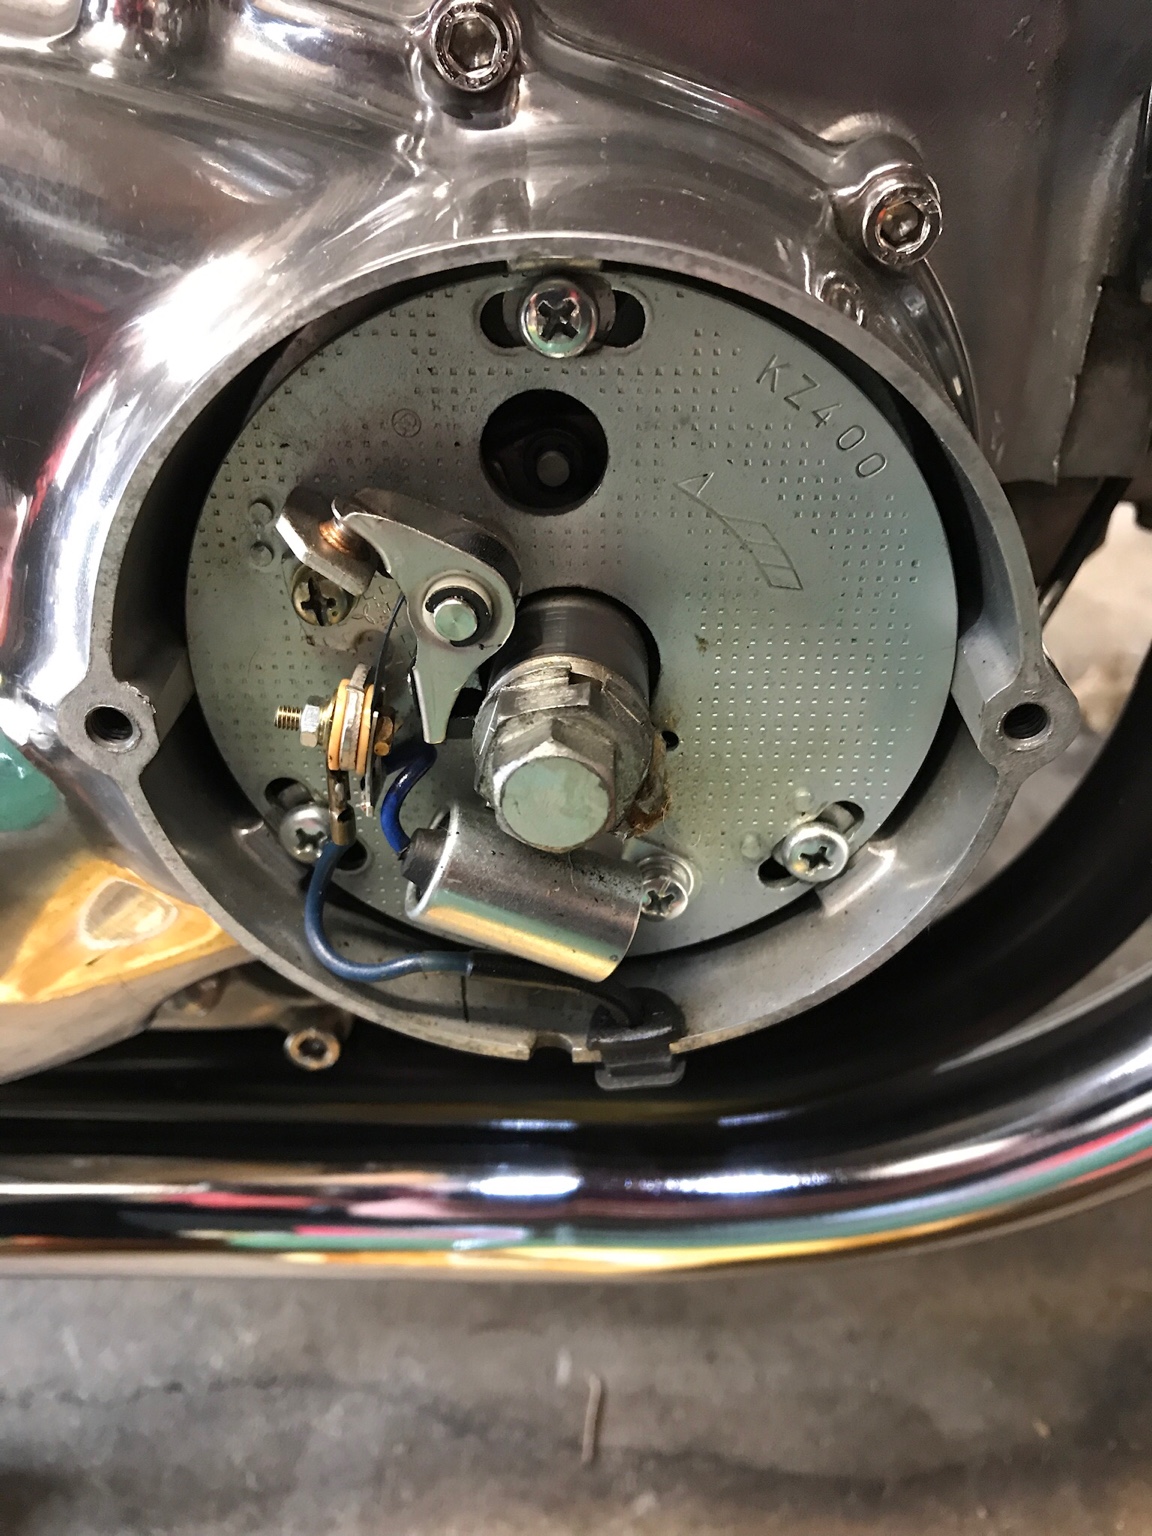
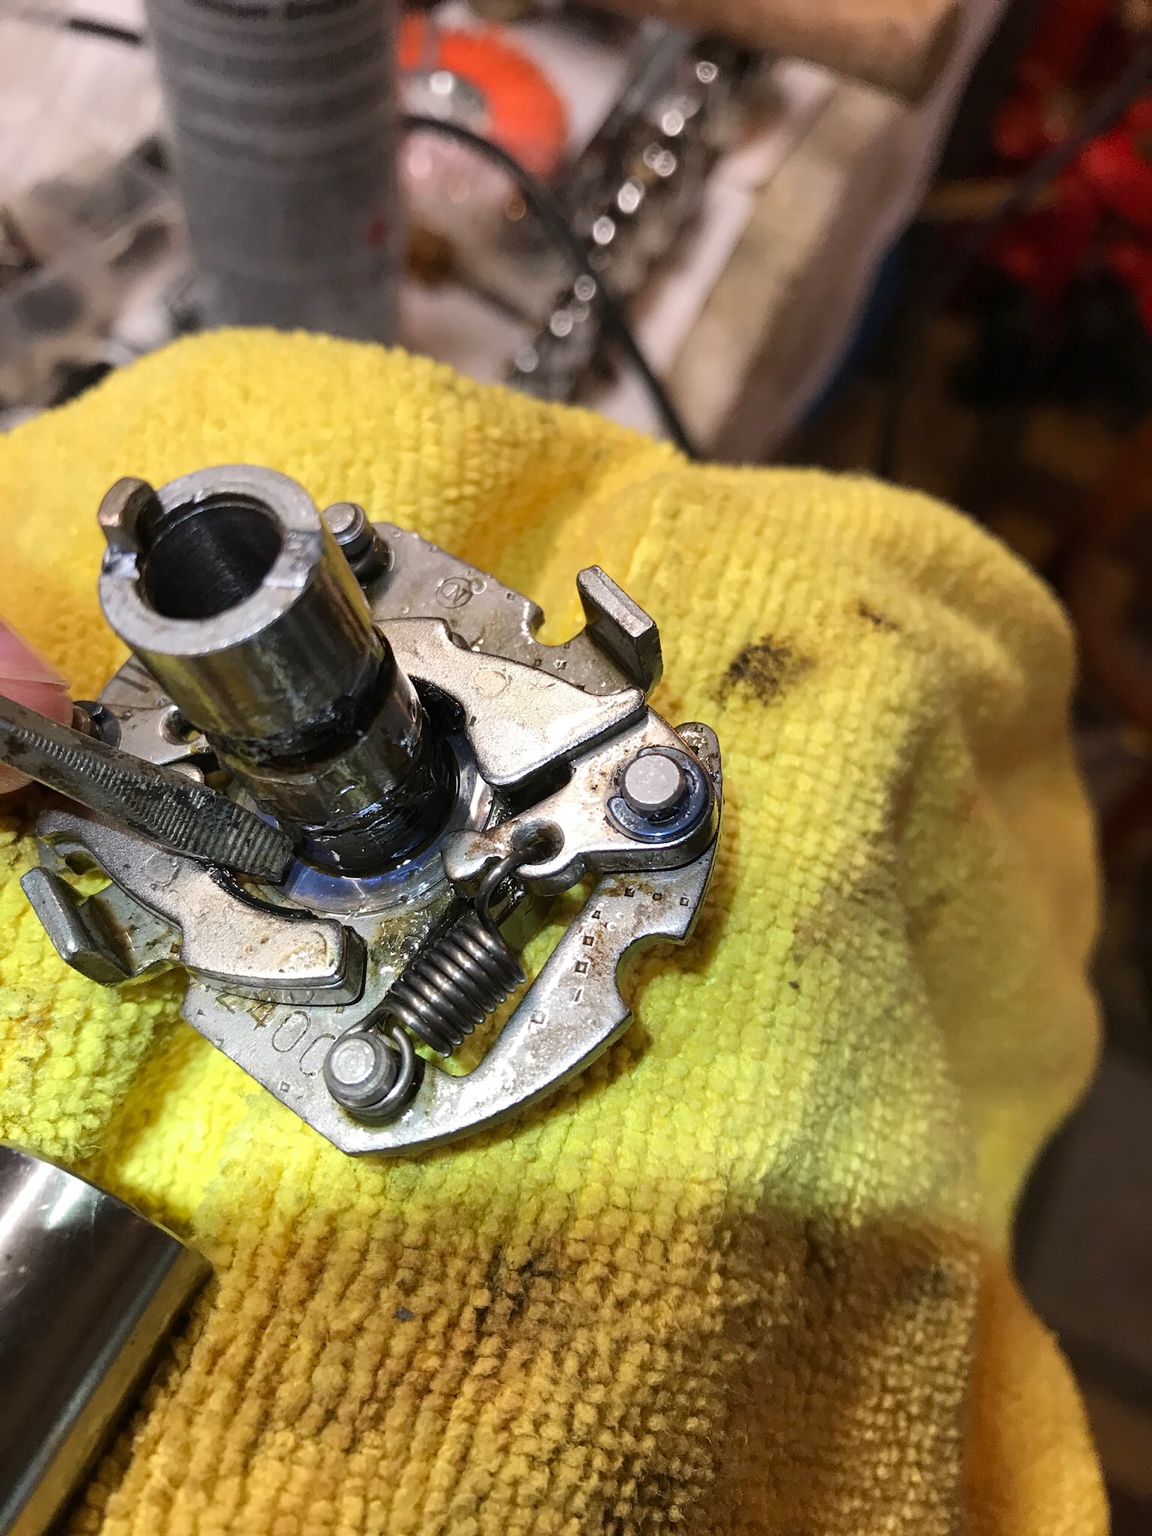
Number 1- here is a picture of the KZ400 points and condenser ignition system, it is located under the right side engine cover. Note the location of the timing mark window at about 12 O’clock.
Number 2- disconnect the wire from the condenser and remove the 3 screws holding the timing plate. Remove the plate and you’ll see the timing advancer mechanism and the cam being held onto the crankshaft with a bolt (outer 14mm?) and a notched locating nut (inner 17mm). Use a wrench to hold the 17mm nut in place while loosening the outer bolt.
Number 3- remove the cam from the timing advancer shaft. For me this was difficult because my timing advancer was damaged. More on that later. But you may be able to just pull the cam off.
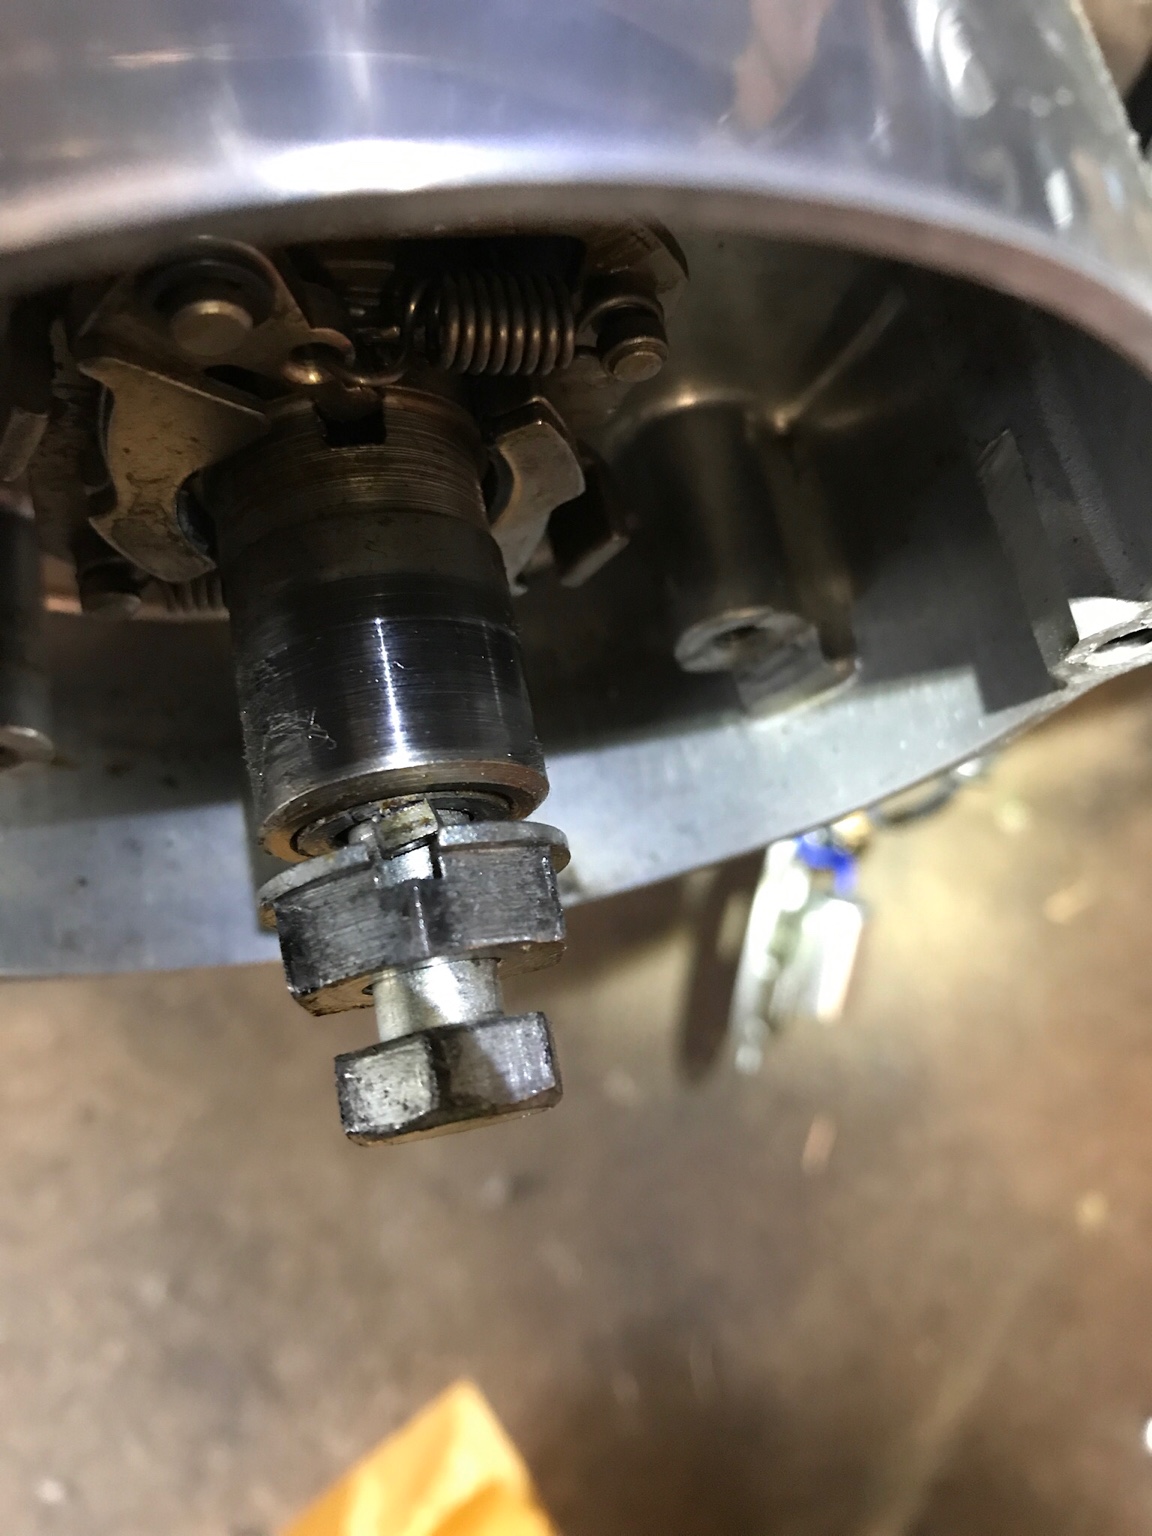
Number 4- check the operation of your timing advancer! You should be able to move the 2 weighted levers with your fingers and they should snap back. Here is a pic of the timing advancer with the cam removed. Notice there is a metal washer at the base of the advancer shaft. I left this in place.
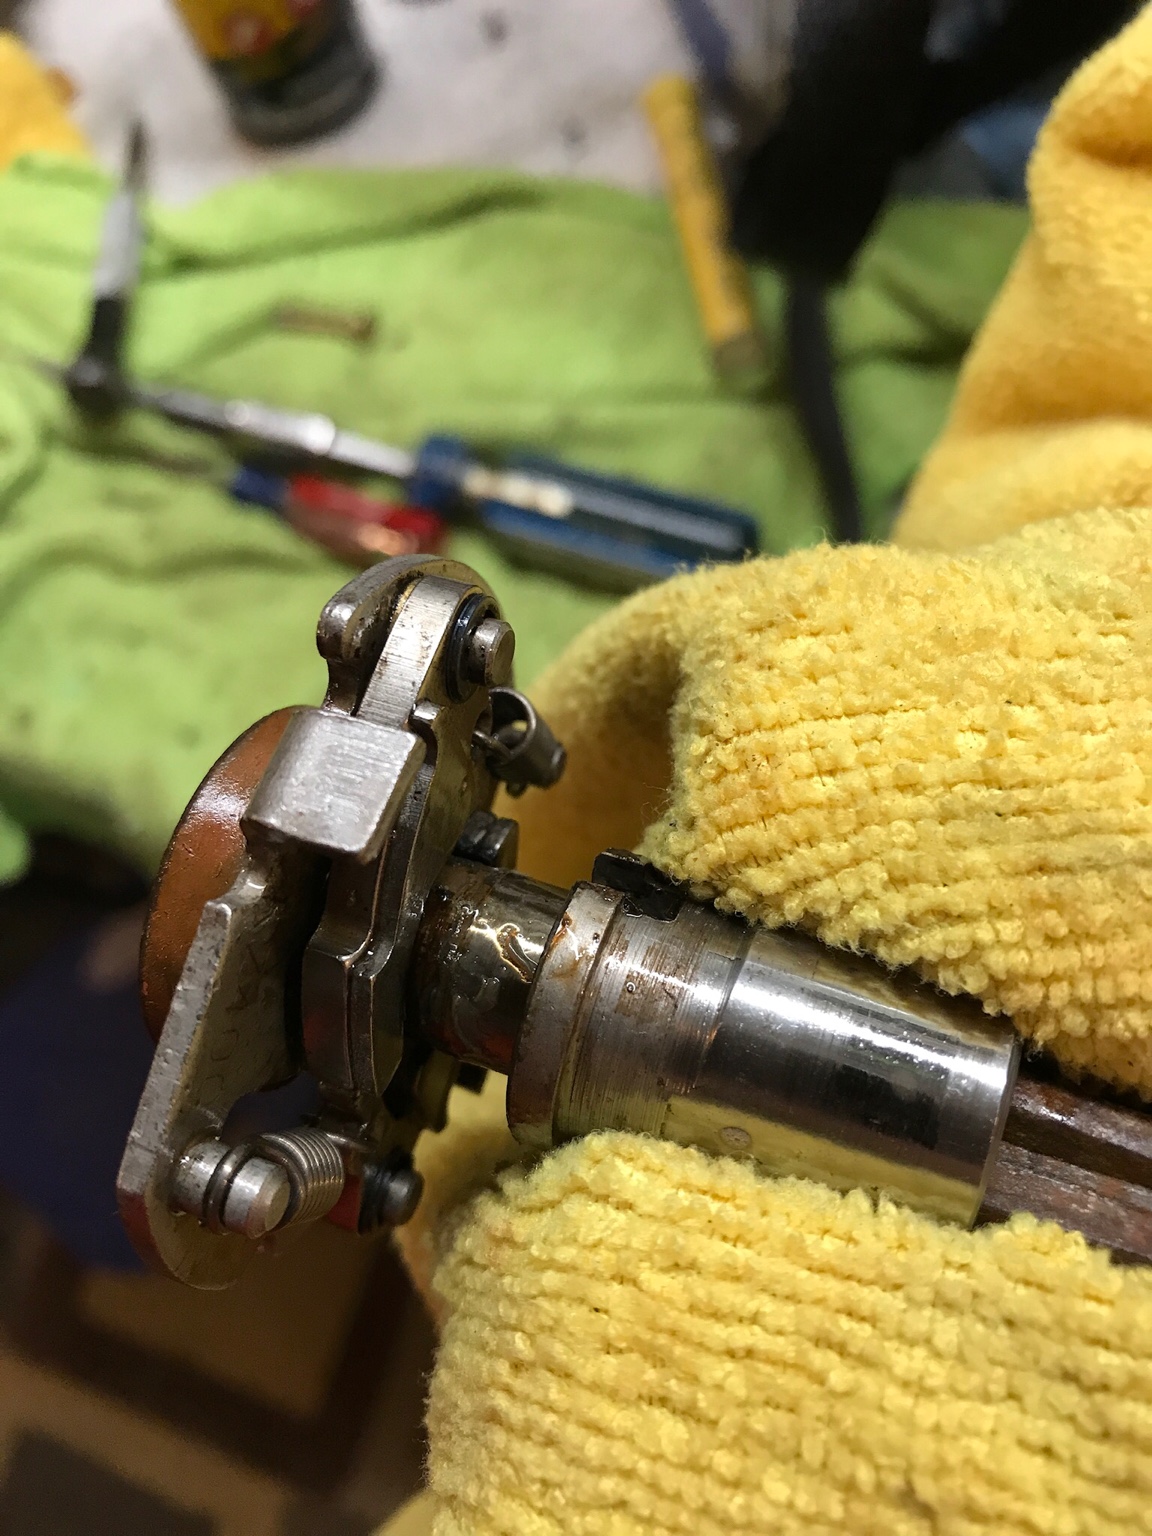
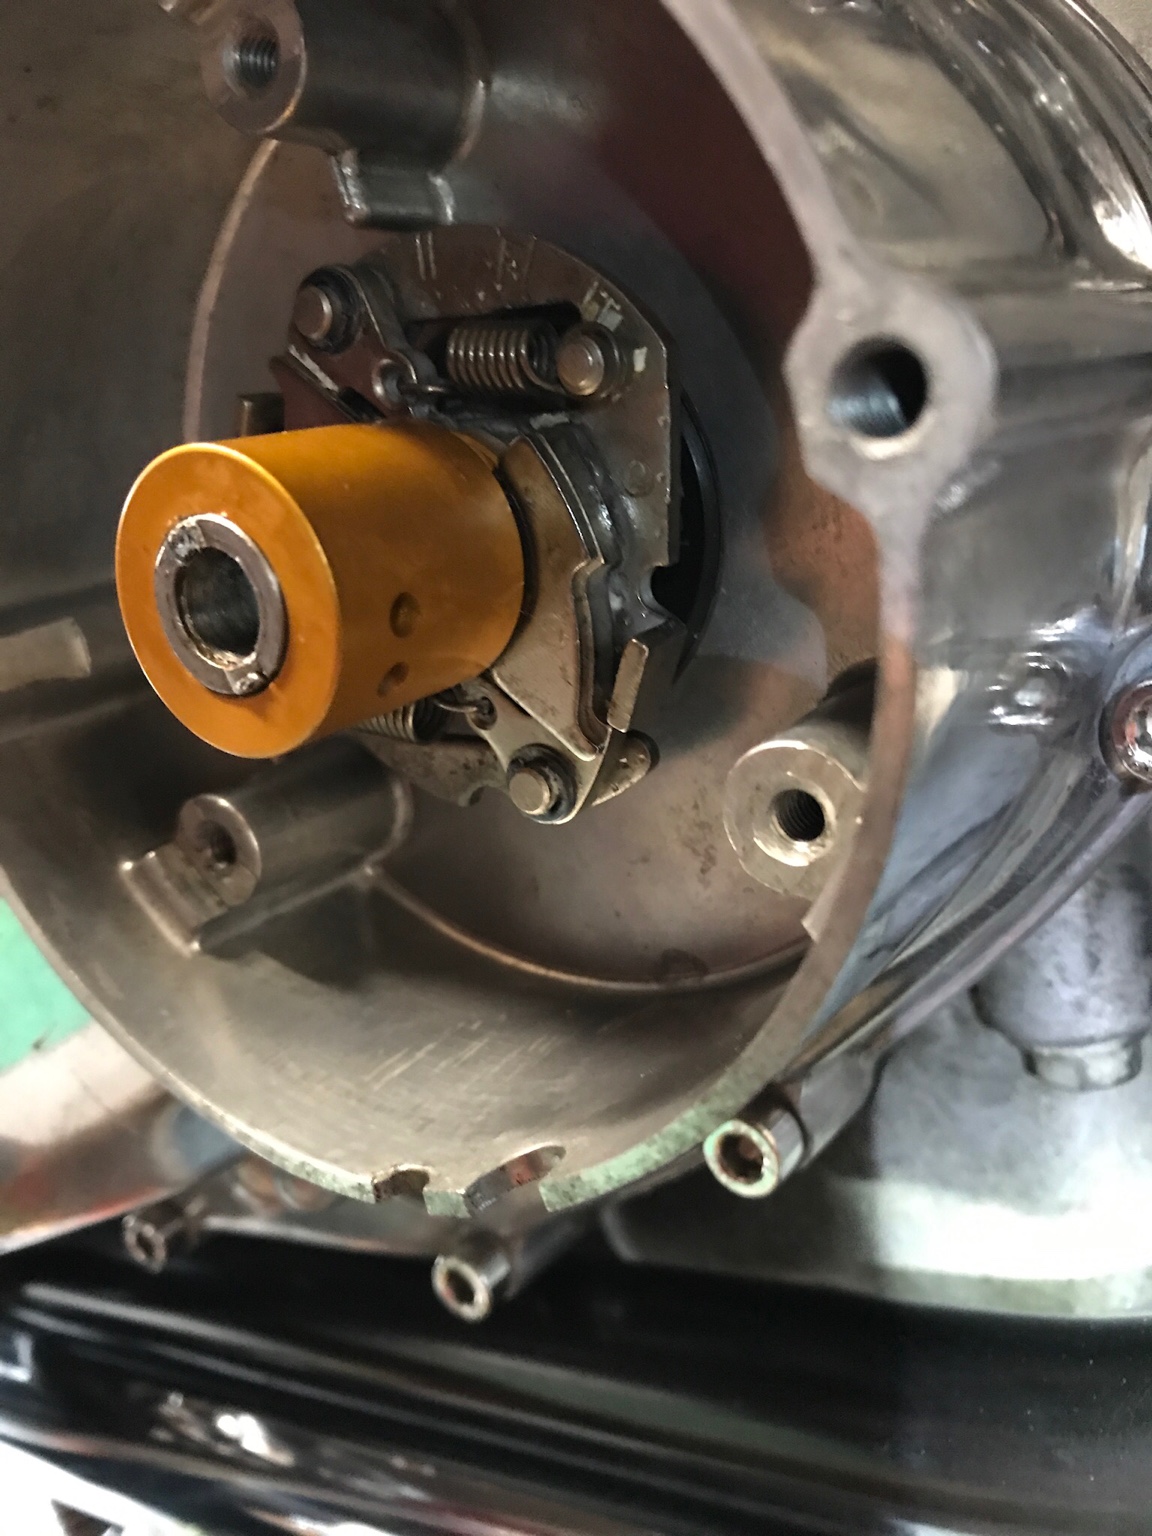
Number 5- Now the fun part. The Charlie’s place kit comes with a new “cam.” It’s actually a rotor and I believe it uses magnets instead. My new rotor came with some aluminum shavings left over from the machining process, I would recommend cleaning this up before installing it, so that it easily rotates on the shaft (in order to advance timing above 3000rpm). Here’s a pic of the new rotor installed on the advancer shaft. The shop manual recommends lubricating the shaft with grease, so I cleaned it up and greased the shaft before putting the new rotor on. Second pic shows the advancer installed back on the crankshaft. Notice the location of the 2 holes in the rotor. With the timing marks (F,T,//) at the 12 o’clock position, I placed the 2 holes at about 3 o’clock. It’s possible to install the rotor in 2 positions that are 180 degrees from each other. In the end I don’t think this matters because we’ll be modifying the plate anyway to account for the new location of the firing position.

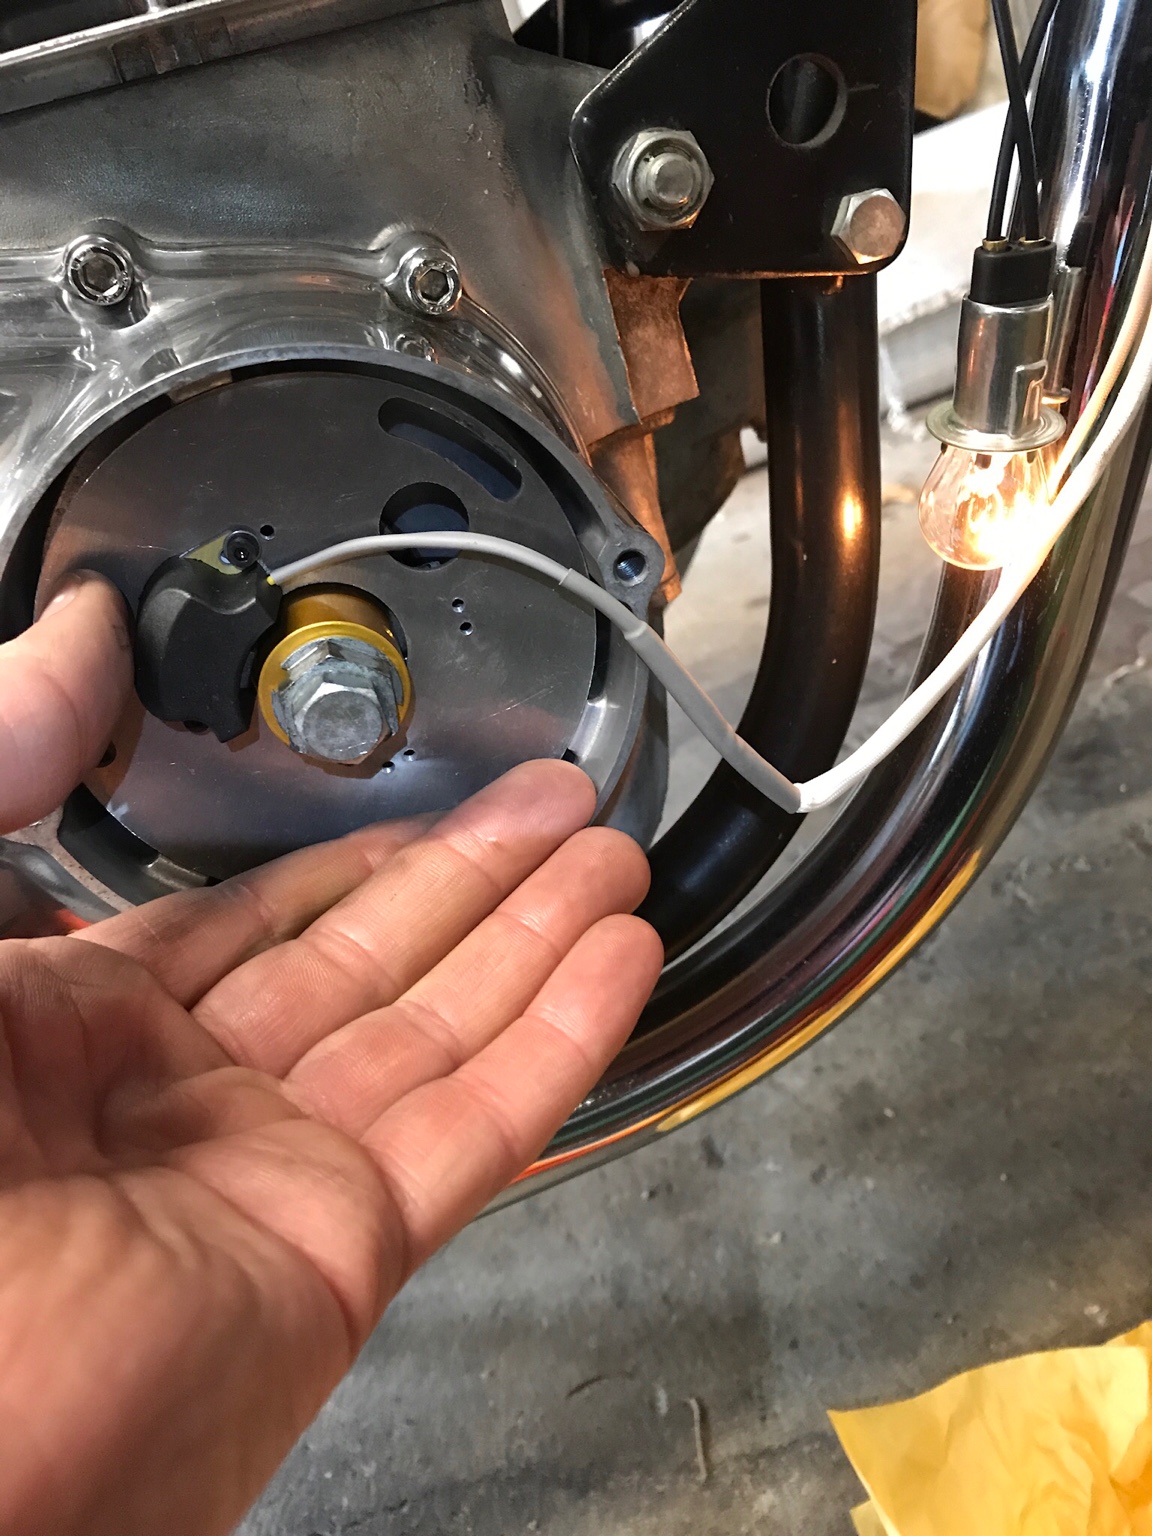
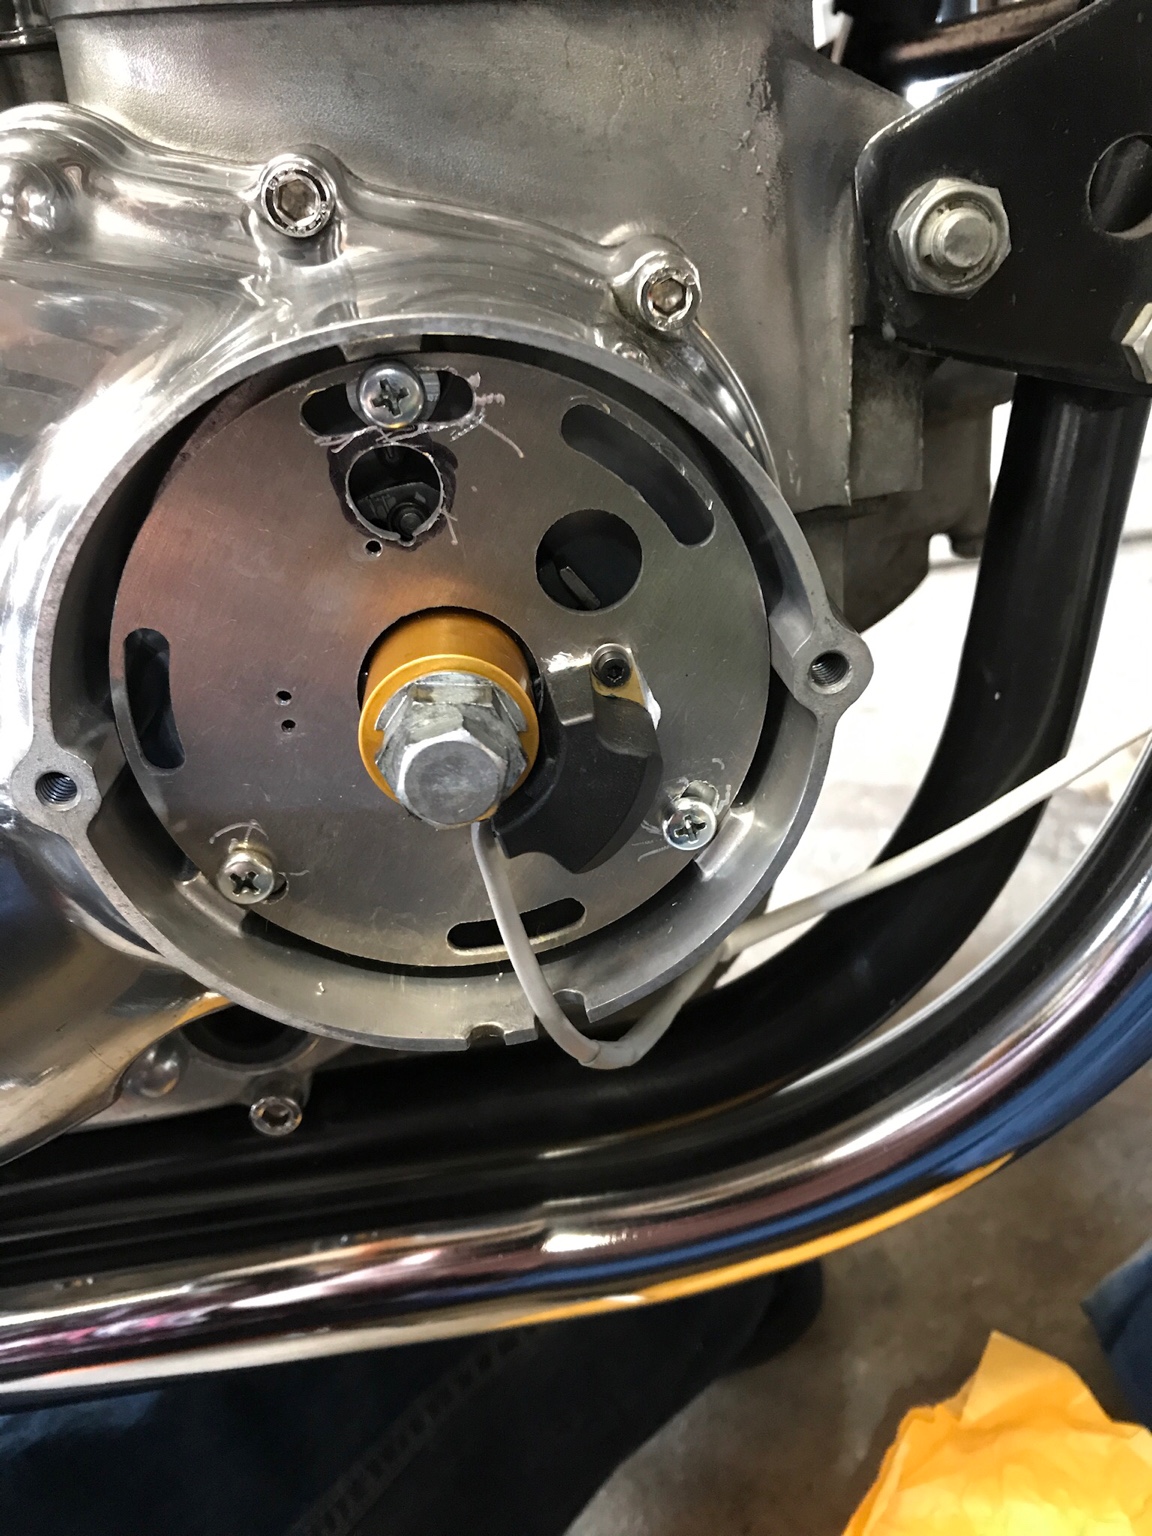
Number 6- You can now re-install the 17mm locating nut and 14mm? bolt on the end of the timing advancer to hold the rotor in place. Here’s where the modifications come into place. If you re-install the new timing plate with the viewing window showing the timing mark you’ll notice first that the electronic pickup is on the left side and output wire runs over the top of the rotor. That needs to change because the cam is spinning and it will eat the wire, so first step is to move the pickup to the right side. The second problem comes into play when you go to set the timing. According to instructions from Charlie’s place, you set the timing by hooking up a 12v test light in series with the output wire from the pickup (check the Charlie’s place website for instructions). Rotate the crankshaft until the “F” mark on the timing advancer lines up with the timing mark. Then rotate the timing plate until the test light goes off and then comes back on. Right when it comes back on is when you want the F mark aligned with the timing mark. If you look at the picture below, you’ll see the problem. The viewing window in the plate is no longer at 12 o’clock and you won’t be able to see the timing mark and the screw holes are also not aligned.
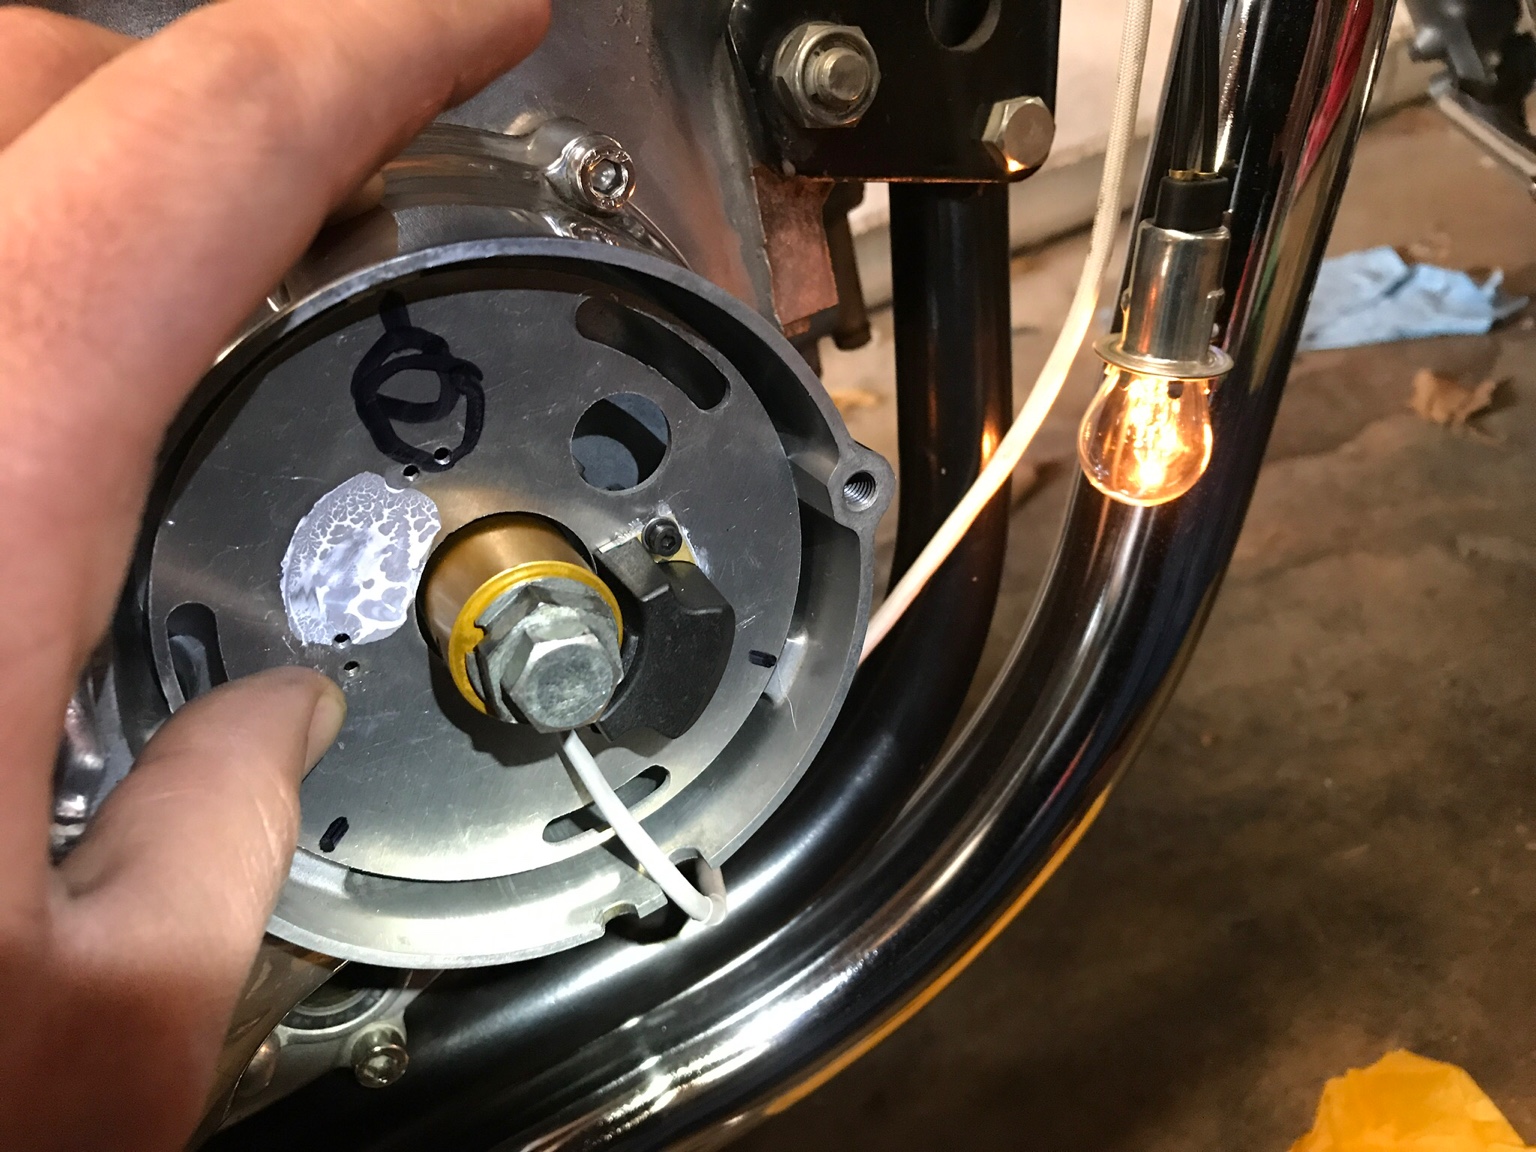
Number 7- once you get the location of the plate correct, you’ll need to drill a new viewing window and bolt holes for the plate screws, so mark the locations with a sharpie for your cuts. See pic.
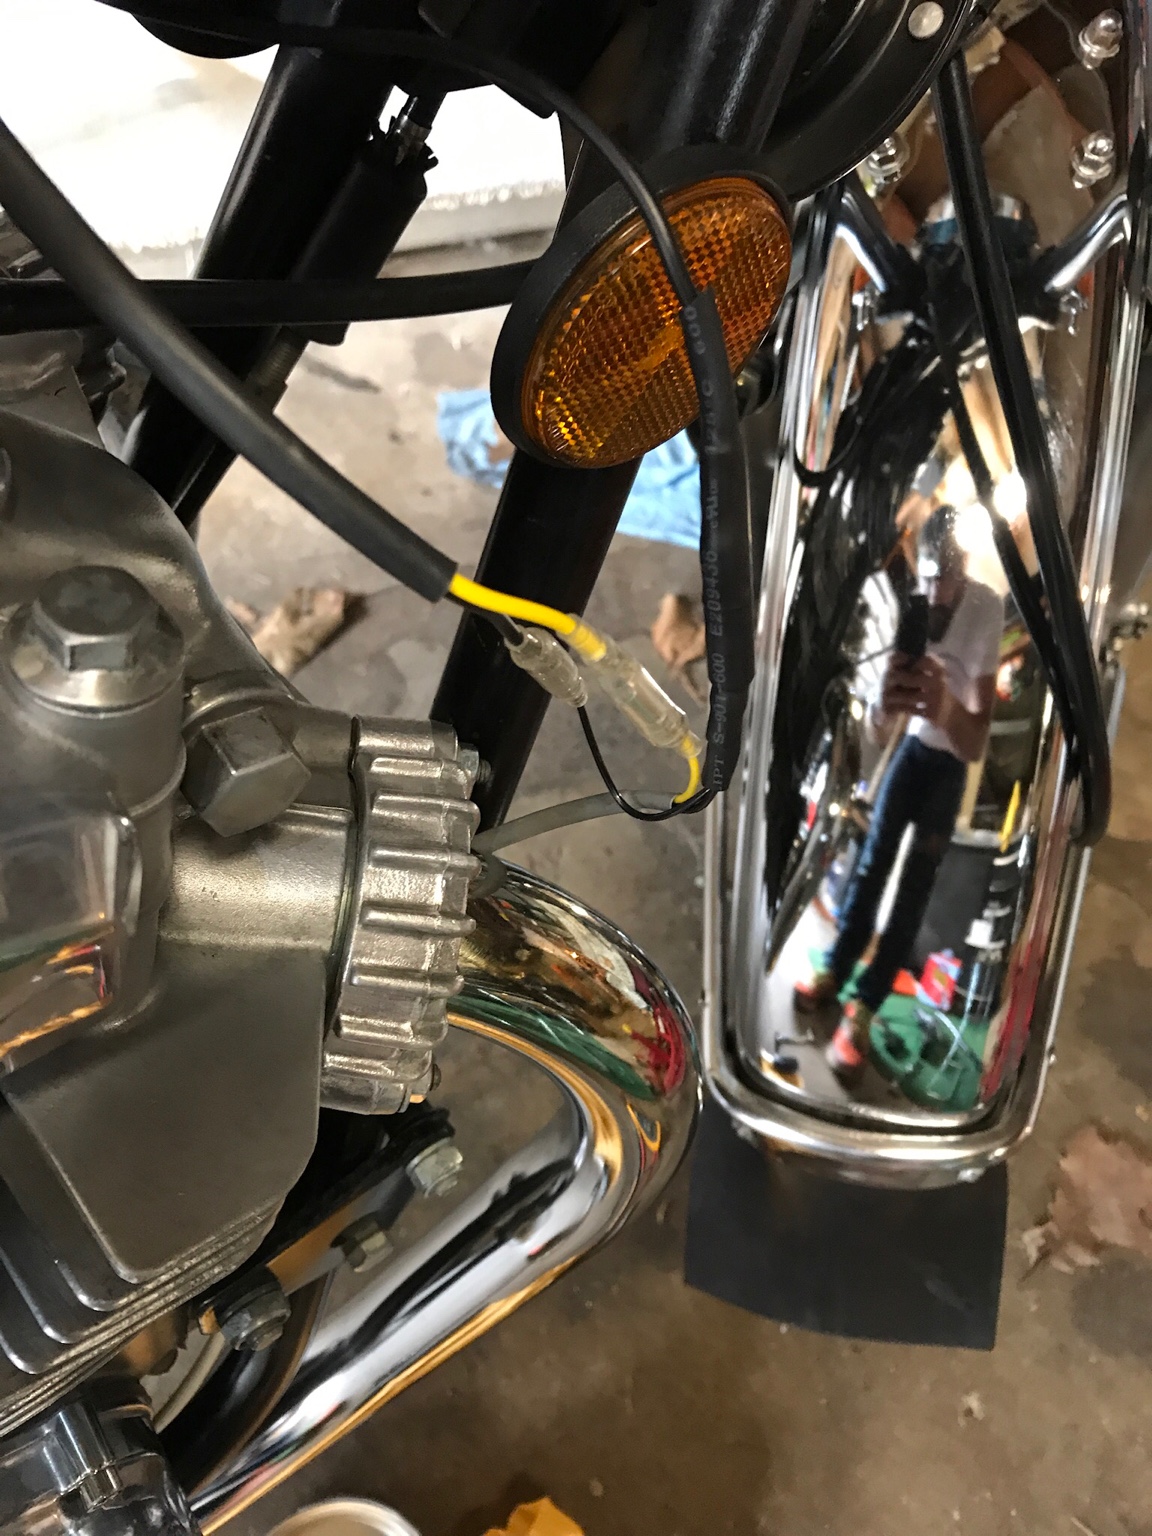
Number 8- make your holes and reinstall the plate and check your timing per the Charlie’s place instructions. Tighten everything up and re-check. Check the function of the advancer by rotating the rotor with your hands, it should turn freely about 70degs and then snap back. I re-used the rubber grommet that runs the output wire from the timing cover, by putting a slit in it for the wire because I could not get it to slide over the new output wire. Run the wires up your frame and hold in place with some zip ties or something.
Number 9- Now you can mount up your coil. I had Charlie send me a new Dyna high output coil in order to get the most of my engine modifications. If you are using the stock coil you can figure it out. The great news is the new coil bolts into place without any modifications. Remove your old coil and put the new coil in its place on its side using the old spacers between the coil mount and the frame mount. You’ll notice that the spark plug wires now come out the side, but this does not create a problem. I had Charlie send me the aluminum adapter mount, but I did not end up needing it.
Number 10- wiring up the coil to the ignition is not difficult. There’s 3 wires from the ignition, yellow, black (male) and black (female). And 2 wires from the coil: Black and Yellow. It goes like this:
• Yellow ignition to Yellow coil.
• Black female ignition to Black coil.
• Black male ignition to wiring harness (yellow w/red stripe) This is the one your old coil was plugged into.
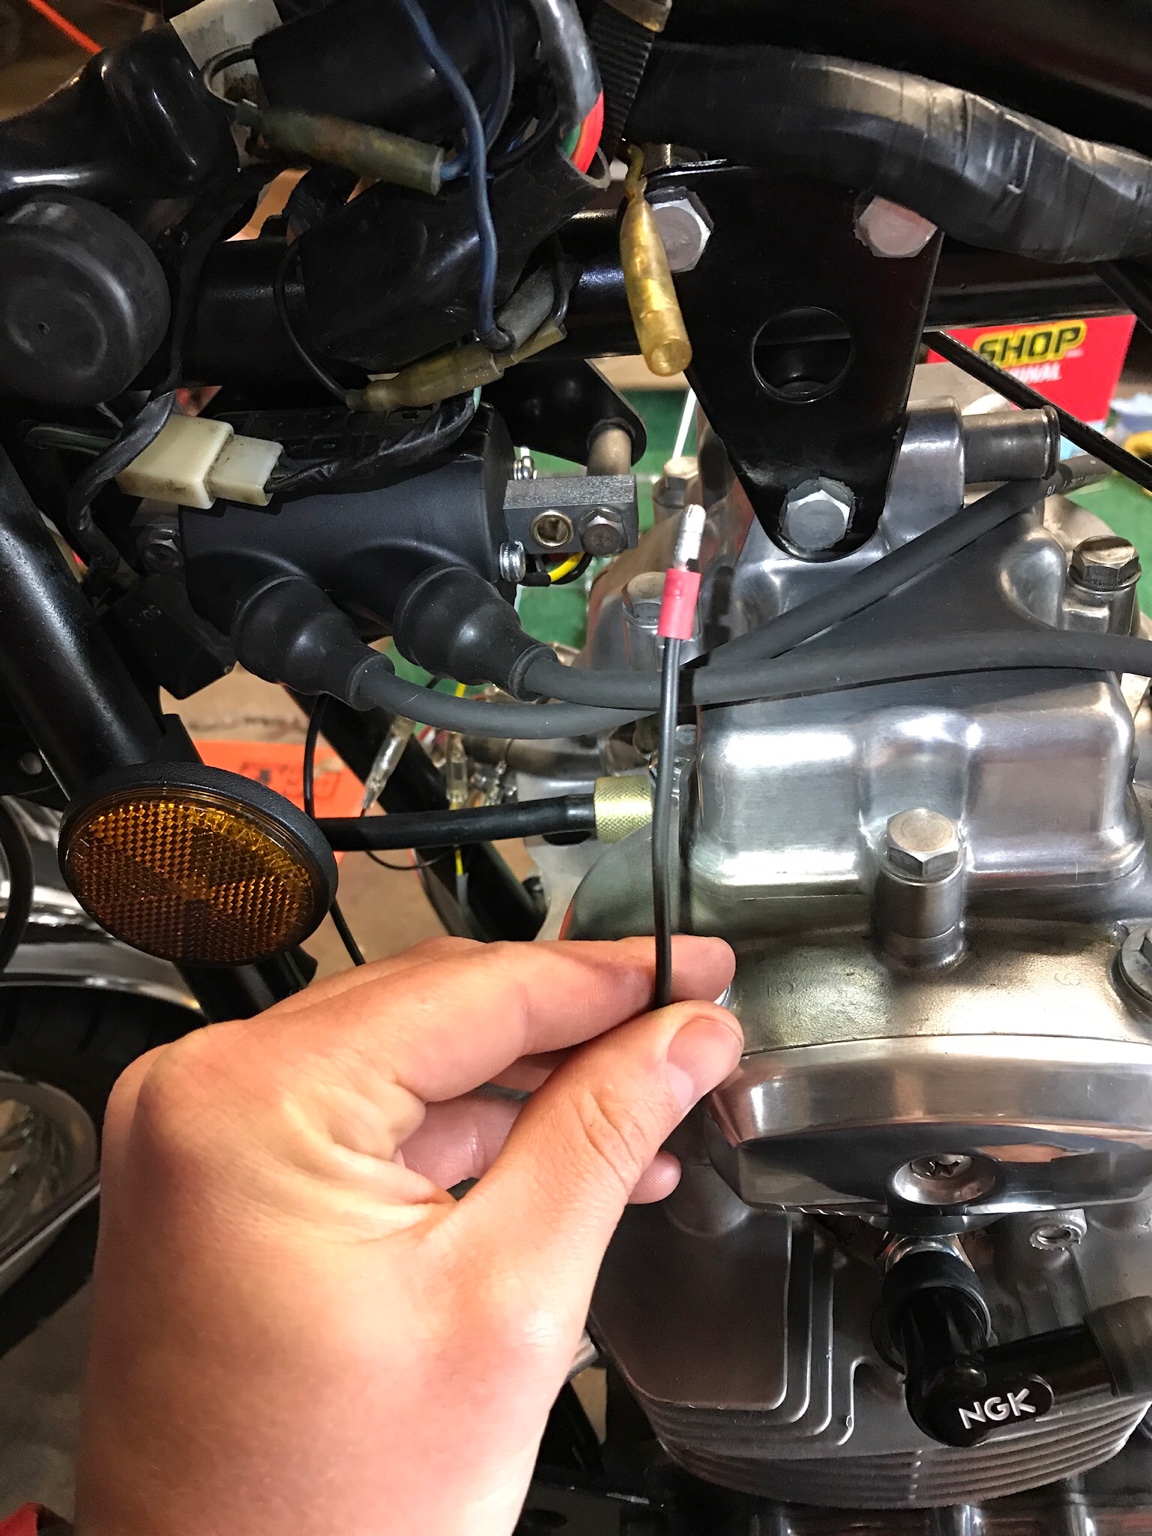
The only modification you’ll have to make with the wiring is to extend the black male ignition about 8-10” to reach the yellow wiring harness wire. I assume if you’ve gotten this far you can figure that out.
Number 11- Don’t forget to hook up your plug wires. One was longer than the other on my coil and I had no problem routing them over the top of the engine to each plug. Double check everything, zip tie it all in place and hook up a timing light. Start your engine and you should be seeing the “F” mark at idle. Check the operation of your timing advancer by revving to 3000rpm +, at that point the timing should advance to the “//” mark. At least that’s how it is on my ’76 KZ400-D3, but check your shop manual to verify.
Boyer Bransden System Micro Digital System:
I mentioned earlier that there was another system available for electronic ignition the KZ400. I don’t recall the exact cost, but I remember it being comparable to the Charlie’s place set up. Unfortunately, it was difficult to source in the states, but it was very intriguing to me because it actually has more functionality than the Charlie’s place ignition. From Boyer’s website:
"These units constantly monitor engine speed and time the spark precisely to suit. In addition, the programming of the 'mini computer' offers control over ignition coil energy, starting speed, tickover stabilisation and rev limits if required……..ignition timing is controlled - in bands of 50 r.p.m. over the entire speed range, this gives the ability to programme any firing angle required. To help engine power at idle, the timing can be advanced, on and below the idle speed, this stabilises and reduces the chance of stalling."
So the big advantage that system would have is the ability to electronically advance ignition timing across the entire rpm range while the Charlie’s place system still relies on the mechanical advancer. Pretty cool! Maybe someday I’ll switch over to the Boyer system, but it’s absolutely overkill for a KZ400 street bike, even a modified one like mine. For now the Charlie’s place one is working great!
Timing advancer issues
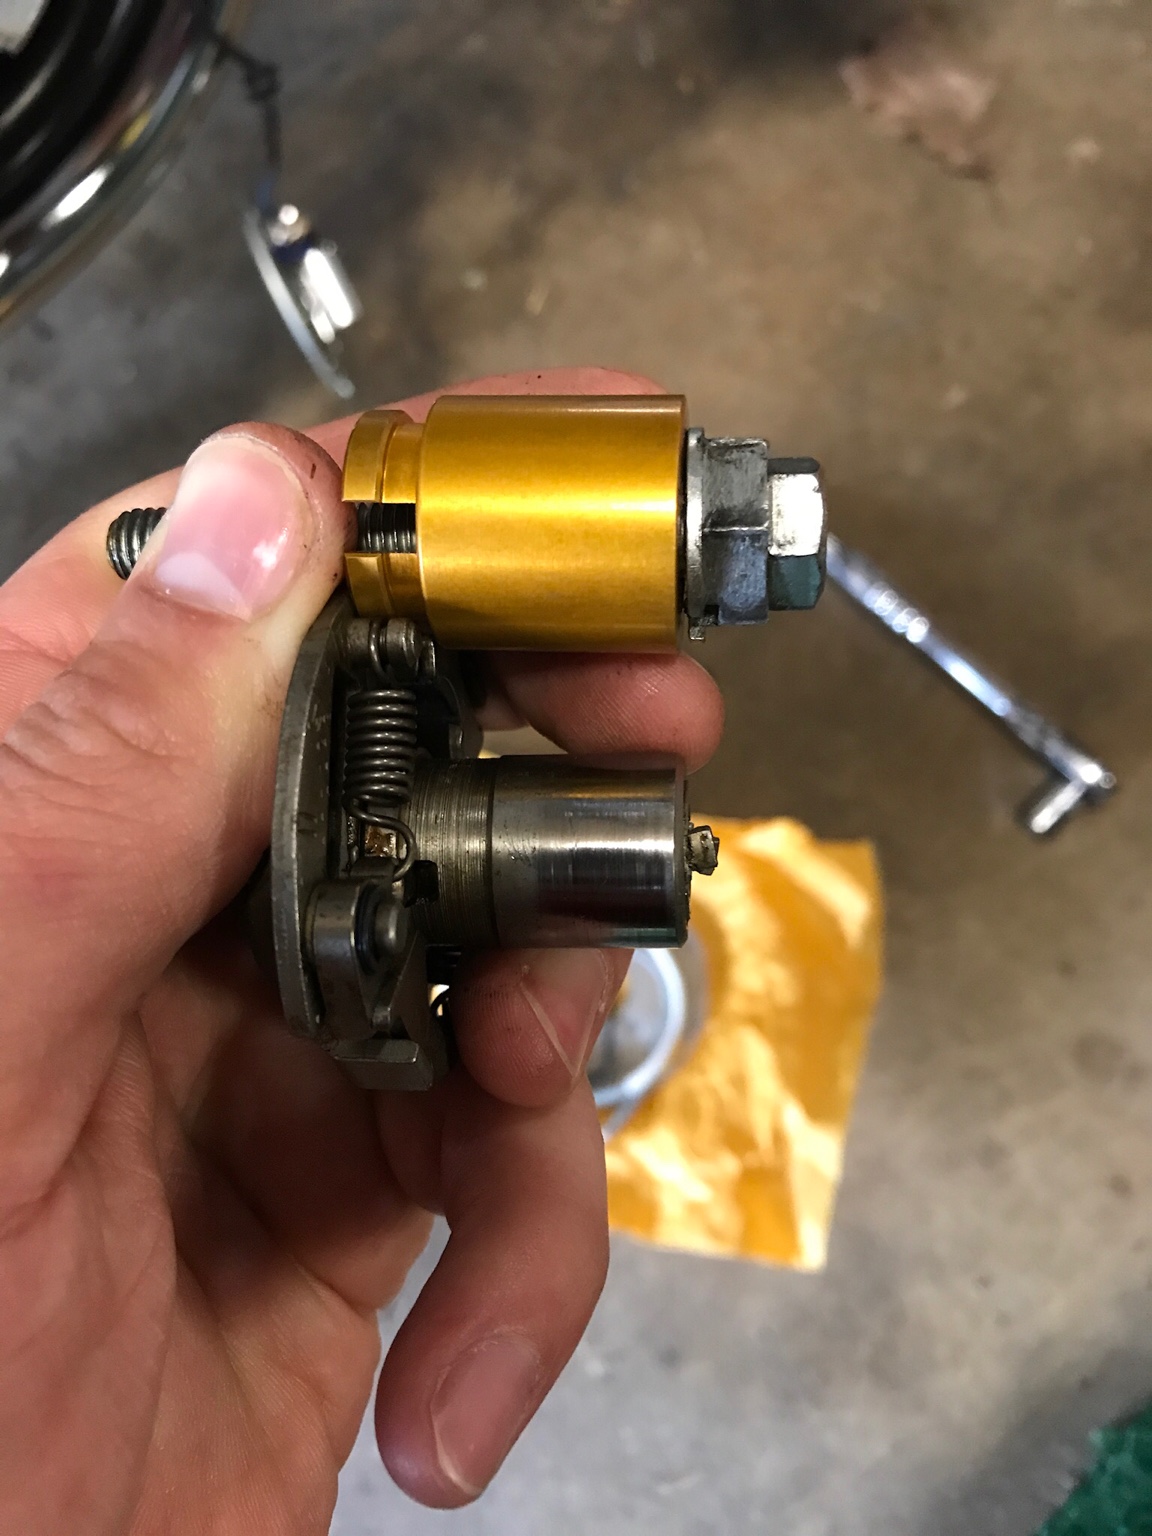
You may have noticed in earlier pictures that there are “teeth” on the end of the timing advancer shaft and that those teeth are damaged in my earlier pictures. These teeth sit in the gaps of the 17mm locating nut. As best as I can figure the purpose of this is so that you can rotate the crankshaft counter-clockwise (in the direction of operation) without it slipping or unthreading the end bolt.
Whatever I did during rebuilding my engine I damaged those teeth and the timing advancer and it was preventing the advancer from working properly. Basically, the cam would not rotate and it was stuck in the “advanced” position. My levers would not snap back.
I spoke with Charlie today and he said he if I send him the pics of my mods he'll be able to produce a new timing plate and longer wires and create a system that's bolt on for KZ400s!! KZ400 owners rejoice!! I'll try to update my thread when I hear more from him.
Good luck and Godspeed.
Wiley
Sent from my iPad using DO THE TON
I could not get a hold of 7th gear designs, not sure they are still in business. The Boyer Bransden system was difficult to source in the US. I found a distributor that had one, Kit Number: KIT00087. But they did not have the kit that came with the coils. More on that later… The Charlie’s place set up seemed pretty straight forward so I called Charlie’s place last week and spoke with Charlie who explained that they didn’t have a kit specifically designed for the KZ400, but if I was willing to put in a bit of modification then we could make it work using one of their systems for the Honda parallel twins that used a similar ignition setup. I.e. single pickup, ‘wasted spark’, dual output single coil. I believe the Hondas that use this are: CA72/77, CB/CL160, CB/CL/SL175 and CB200 (but I’m not a Honda expert).
This thread covers modifying that system to fit my KZ400 and some issues that I had with my timing advancer that were unrelated to Charlie’s system. Charlie sent me the electronic ignition and a Dyna coil and asked that I report back to him what it took to fit, so that he might be able to create a bolt-on system in the future.
Number 1- here is a picture of the KZ400 points and condenser ignition system, it is located under the right side engine cover. Note the location of the timing mark window at about 12 O’clock.
Number 2- disconnect the wire from the condenser and remove the 3 screws holding the timing plate. Remove the plate and you’ll see the timing advancer mechanism and the cam being held onto the crankshaft with a bolt (outer 14mm?) and a notched locating nut (inner 17mm). Use a wrench to hold the 17mm nut in place while loosening the outer bolt.
Number 3- remove the cam from the timing advancer shaft. For me this was difficult because my timing advancer was damaged. More on that later. But you may be able to just pull the cam off.
Number 4- check the operation of your timing advancer! You should be able to move the 2 weighted levers with your fingers and they should snap back. Here is a pic of the timing advancer with the cam removed. Notice there is a metal washer at the base of the advancer shaft. I left this in place.
Number 5- Now the fun part. The Charlie’s place kit comes with a new “cam.” It’s actually a rotor and I believe it uses magnets instead. My new rotor came with some aluminum shavings left over from the machining process, I would recommend cleaning this up before installing it, so that it easily rotates on the shaft (in order to advance timing above 3000rpm). Here’s a pic of the new rotor installed on the advancer shaft. The shop manual recommends lubricating the shaft with grease, so I cleaned it up and greased the shaft before putting the new rotor on. Second pic shows the advancer installed back on the crankshaft. Notice the location of the 2 holes in the rotor. With the timing marks (F,T,//) at the 12 o’clock position, I placed the 2 holes at about 3 o’clock. It’s possible to install the rotor in 2 positions that are 180 degrees from each other. In the end I don’t think this matters because we’ll be modifying the plate anyway to account for the new location of the firing position.
Number 6- You can now re-install the 17mm locating nut and 14mm? bolt on the end of the timing advancer to hold the rotor in place. Here’s where the modifications come into place. If you re-install the new timing plate with the viewing window showing the timing mark you’ll notice first that the electronic pickup is on the left side and output wire runs over the top of the rotor. That needs to change because the cam is spinning and it will eat the wire, so first step is to move the pickup to the right side. The second problem comes into play when you go to set the timing. According to instructions from Charlie’s place, you set the timing by hooking up a 12v test light in series with the output wire from the pickup (check the Charlie’s place website for instructions). Rotate the crankshaft until the “F” mark on the timing advancer lines up with the timing mark. Then rotate the timing plate until the test light goes off and then comes back on. Right when it comes back on is when you want the F mark aligned with the timing mark. If you look at the picture below, you’ll see the problem. The viewing window in the plate is no longer at 12 o’clock and you won’t be able to see the timing mark and the screw holes are also not aligned.
Number 7- once you get the location of the plate correct, you’ll need to drill a new viewing window and bolt holes for the plate screws, so mark the locations with a sharpie for your cuts. See pic.
Number 8- make your holes and reinstall the plate and check your timing per the Charlie’s place instructions. Tighten everything up and re-check. Check the function of the advancer by rotating the rotor with your hands, it should turn freely about 70degs and then snap back. I re-used the rubber grommet that runs the output wire from the timing cover, by putting a slit in it for the wire because I could not get it to slide over the new output wire. Run the wires up your frame and hold in place with some zip ties or something.
Number 9- Now you can mount up your coil. I had Charlie send me a new Dyna high output coil in order to get the most of my engine modifications. If you are using the stock coil you can figure it out. The great news is the new coil bolts into place without any modifications. Remove your old coil and put the new coil in its place on its side using the old spacers between the coil mount and the frame mount. You’ll notice that the spark plug wires now come out the side, but this does not create a problem. I had Charlie send me the aluminum adapter mount, but I did not end up needing it.
Number 10- wiring up the coil to the ignition is not difficult. There’s 3 wires from the ignition, yellow, black (male) and black (female). And 2 wires from the coil: Black and Yellow. It goes like this:
• Yellow ignition to Yellow coil.
• Black female ignition to Black coil.
• Black male ignition to wiring harness (yellow w/red stripe) This is the one your old coil was plugged into.
The only modification you’ll have to make with the wiring is to extend the black male ignition about 8-10” to reach the yellow wiring harness wire. I assume if you’ve gotten this far you can figure that out.
Number 11- Don’t forget to hook up your plug wires. One was longer than the other on my coil and I had no problem routing them over the top of the engine to each plug. Double check everything, zip tie it all in place and hook up a timing light. Start your engine and you should be seeing the “F” mark at idle. Check the operation of your timing advancer by revving to 3000rpm +, at that point the timing should advance to the “//” mark. At least that’s how it is on my ’76 KZ400-D3, but check your shop manual to verify.
Boyer Bransden System Micro Digital System:
I mentioned earlier that there was another system available for electronic ignition the KZ400. I don’t recall the exact cost, but I remember it being comparable to the Charlie’s place set up. Unfortunately, it was difficult to source in the states, but it was very intriguing to me because it actually has more functionality than the Charlie’s place ignition. From Boyer’s website:
"These units constantly monitor engine speed and time the spark precisely to suit. In addition, the programming of the 'mini computer' offers control over ignition coil energy, starting speed, tickover stabilisation and rev limits if required……..ignition timing is controlled - in bands of 50 r.p.m. over the entire speed range, this gives the ability to programme any firing angle required. To help engine power at idle, the timing can be advanced, on and below the idle speed, this stabilises and reduces the chance of stalling."
So the big advantage that system would have is the ability to electronically advance ignition timing across the entire rpm range while the Charlie’s place system still relies on the mechanical advancer. Pretty cool! Maybe someday I’ll switch over to the Boyer system, but it’s absolutely overkill for a KZ400 street bike, even a modified one like mine. For now the Charlie’s place one is working great!
Timing advancer issues
You may have noticed in earlier pictures that there are “teeth” on the end of the timing advancer shaft and that those teeth are damaged in my earlier pictures. These teeth sit in the gaps of the 17mm locating nut. As best as I can figure the purpose of this is so that you can rotate the crankshaft counter-clockwise (in the direction of operation) without it slipping or unthreading the end bolt.
Whatever I did during rebuilding my engine I damaged those teeth and the timing advancer and it was preventing the advancer from working properly. Basically, the cam would not rotate and it was stuck in the “advanced” position. My levers would not snap back.
I spoke with Charlie today and he said he if I send him the pics of my mods he'll be able to produce a new timing plate and longer wires and create a system that's bolt on for KZ400s!! KZ400 owners rejoice!! I'll try to update my thread when I hear more from him.
Good luck and Godspeed.
Wiley
Sent from my iPad using DO THE TON


