Follow along with the video below to see how to install our site as a web app on your home screen.
Note: This feature currently requires accessing the site using the built-in Safari browser.
We noticed you are blocking ads. DO THE TON only works with community supporters. Most are active members of the site with small businesses. Please consider disabling your ad blocking tool and checking out the businesses that help keep our site up and free.
Not a bike this time. It is time for a boat upgrade, something I can have confidence to out to sea rather than staying in Port Phillip Bay which is relatively sheltered. My old boat did a good job in the bay and we caught some great fish.
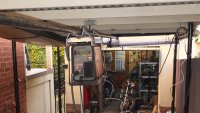
The new boat is 5.5m (18') long with a self draining deck and cabin, it does get cold down south in Australia. It is going to be a squeeze building it at my house, but I would rather do that then have to travel to a build site.
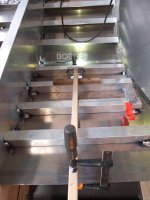
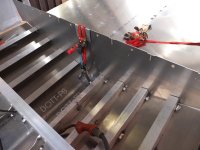
The Cebora Synchronous Double Pulse welder is being suspended on a 60mm tube rail 5m long. I made up a carriage with 4 ball bearings as rollers. By using the rail system I can easily weld anywhere on the hull with the standard 4m mig gun. The other option is $1000 push/pull gun.
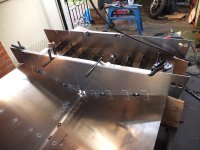
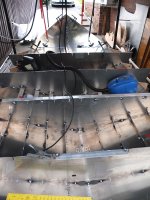
The kit arrives next week, all the plates are partially cut out of 6m sheets of 5083 aluminium using a NC router.
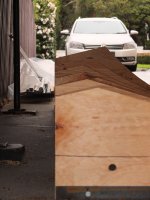
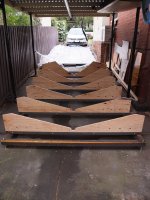
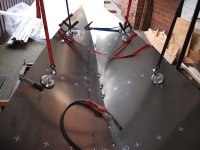
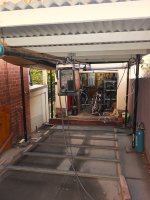
The weather was not kind to me this weekend, Saturday afternoon was a right off, wild, wet and windy. Managed to setup the plywood forms onto their stations. Made sure that they went on square by measuring the diagonals. They have lined up well, edge to edge and through the dowel holes. The photo through the dowel holes shows them all lined up through all six stations.
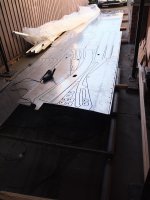
Sunday was spent cutting the pieces out of the 6,100mm X 2440mm alloy sheets. Each piece has its profile cut by a NC router, but there are small tabs every 400mm holding the piece in the sheet for delivery. Took all day to cut out all the parts and then clean up the edges.
Hope to start tacking it together next weekend, weather permitting. :
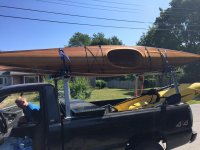
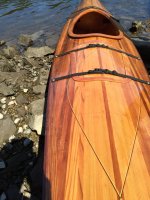
Awesome. Building another boat is on my list in the next 10 years or so. I've got an 18' cedar strip kayak that a couple friends and I built in high school. I don't get it out much as I like since it lives halfway across the country right now.
Does that come as a kit from a vendor with all the parts in a CAD file? Very cool, looks like one big puzzle just like I like it!
Love the kayak. My first boat build was a tango skiff http://www.tangoskiff.com/ which was a simple first go. Loved working with wood but built up a dislike for sanding fibre glass.
This boat is focused on fishing not beauty. Alloy is more durable and no sanding. It will be interesting.
Yes it is a kit, their website is http://www.platealloy.com/
If you go back to the original post there is a pdf with all the details on the finished boat.
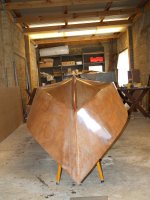
Not the prettiest, but a good safe, strong offshore boat.
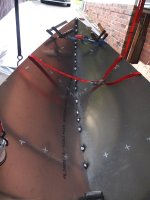
Pretty happy with the progress from the weekend. I have learnt to appreciate ratchet straps, basically pulled it into shape with ratchet straps before stitching it with the MIG. Amazing how accurate the NC cut panels go together.
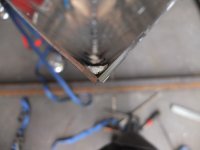
I am glad I spent the extra cash to get a very good quality Sychronous Pulse MIG welder. It enables a novice to do this. I do check the penetration of the weld set up, by welding off cuts and cutting sections.
Weather was not helpful today, cold for Melbourne at a maximum temp of 10C. Weather is coming up from the Antartic!
Progress was frustrating. I though I would do the right thing and blow out the torch liner to make sure the feed was smooth. All I did was block it up solid. Guess that is one of the risks of buying second hand and not knowing how it had previously been maintained. In the end I just went and got a new liner, there was no way I could remove the blockage.
It took me a while to feed the new liner into the torch. I tried from both ends, and was successful by feeding in from the torch end.
I ended up tacking in 2 bays of stringers and frame #5. What I did get done, went together very well. The scribe marks are all lining up. Weather is not forecast to be any better tomorrow, see how we go.
This site uses cookies to help personalise content, tailor your experience and to keep you logged in if you register.
By continuing to use this site, you are consenting to our use of cookies.

")