Follow along with the video below to see how to install our site as a web app on your home screen.
Note: This feature currently requires accessing the site using the built-in Safari browser.
We noticed you are blocking ads. DO THE TON only works with community supporters. Most are active members of the site with small businesses. Please consider disabling your ad blocking tool and checking out the businesses that help keep our site up and free.
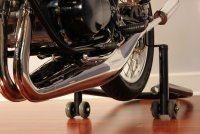
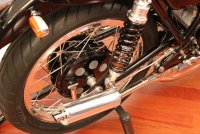
One of the more personally satisfying parts on this bike. Seems sort of trivial once done, but before the mount is welded on and the shape bent up, it is very fussy figuring how to get it in a really good spot retracted while still working well as a prop without it being an eyesore or looking like an afterthought.
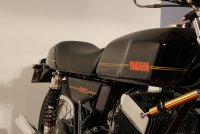
Wanted to include this shot because it shows why the seat pan looks like it does. The RD400 tank has a very out-board and visible seam on the bottom and my solution to getting the seat to look like it matched was, well, to match it. Without the matching “pinch weld” the bottom of the seat and cowl either looks too high if it matches the shape of the tank, or too low if it aligns with the bottom of the flange. Mimicking the flange eliminated having to make a choice.
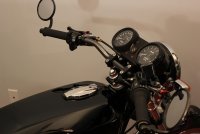
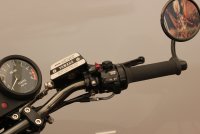
Rebuilt the instruments and hand switches. All completely stock RD350. The owner asked for closer hand levers, so I fitted some aftermarket adjustable levers that are a lot closer to the bars. I re-machined them to fit to the stock perches. This was a crazy amount of work and I won’t do it again. No reason not to simply get modern bolt up perches. I thought the MC was from an XS11, but now I can’t place it. Used it because it has a smaller piston diameter which makes the front brake feel much more powerful and an integral brake light switch. Pretty sure it is from the 70’s though!
Really nice to see projects done to this level.
Im looking forward to your next one.
BUT PLEASE! NEXT TIME: Post more work in progress pics! :-D
Thanks for sharing. Inspiring.
The owner has only had it a few months and has put 4000 miles on the clock, so there has been a bit of wringing. He has 3 other bikes that are "daily" drivers, so I presume he doesn't find it particularly disagreeable!
You don't know how good that sounds... I was thingking... "man I hope that gets to go play and not collect dust" Sooo good to hear the owner is putting miles on it. ;D
I'm a little late in the game to view this and reply but I am blown away! Thank you so much for posting the progress and tidbits on all the custom work. You are a true craftsman. Fit and finish on this thing is nothing short of immaculate and loving all the proper 2T goodies. Great to hear 4000 miles have been logged already because as beautiful as this thing is, it looks like a proper and very tasteful RD. Good on ya! Ring a ding ding waaAAAAAAAAAAAAAAAAA!!!! ;D
A little die grinder action.
And a trip through the glass beader.
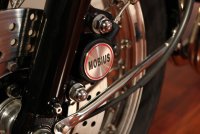
And done. I will make some dies to form up some stone screens later. The screens will get epoxied in on the inside of the backing plate after it gets painted.
This site uses cookies to help personalise content, tailor your experience and to keep you logged in if you register.
By continuing to use this site, you are consenting to our use of cookies.