
We noticed you are blocking ads. DO THE TON only works with community supporters. Most are active members of the site with small businesses. Please consider disabling your ad blocking tool and checking out the businesses that help keep our site up and free.
You are using an out of date browser. It may not display this or other websites correctly.
You should upgrade or use an alternative browser.
You should upgrade or use an alternative browser.
'75 CB550K1 Gulf - Round...3, the fun stuff
- Thread starter Ringo
- Start date
Re: '75 CB550 unnamed - subframe
Those rings look like they will probably be OK. Clean them up and examine them for pitting. Have you che4cked the size of the pistons to be sure what size they are?
Most pistons are not machined on the crown. They are cast that way and machined only where necessary.
Those rings look like they will probably be OK. Clean them up and examine them for pitting. Have you che4cked the size of the pistons to be sure what size they are?
Most pistons are not machined on the crown. They are cast that way and machined only where necessary.
t71ford
Over 1,000 Posts
Re: '75 CB550 unnamed - subframe
Looks clean, man! I don't know if you really need any gusseting there, though since all that part is doing is holding up yer butt!
Actually, though, since the shocks connect there I would look at maybe some lateral gussets rather than vertical ones. It looks strong enough vertically, but you might have some sideways flex under load. I might have to get out to take a look soon. is your shop close to your house?
Re: '75 CB550 - subframe
I'm just about done with the frame, and don't really have anything else to do since I'm waiting on parts. So I decided to draw a little. I can't keep a straight line in photoshop to save my life, so I did it the old fashioned way: pen and pencil. This is my plan for the tank/seat and general stance of the bike. I might go a little shorter on the tank, and I'm still not sure how I want to shape the muffler. Hate it, like it? Opinions welcome.
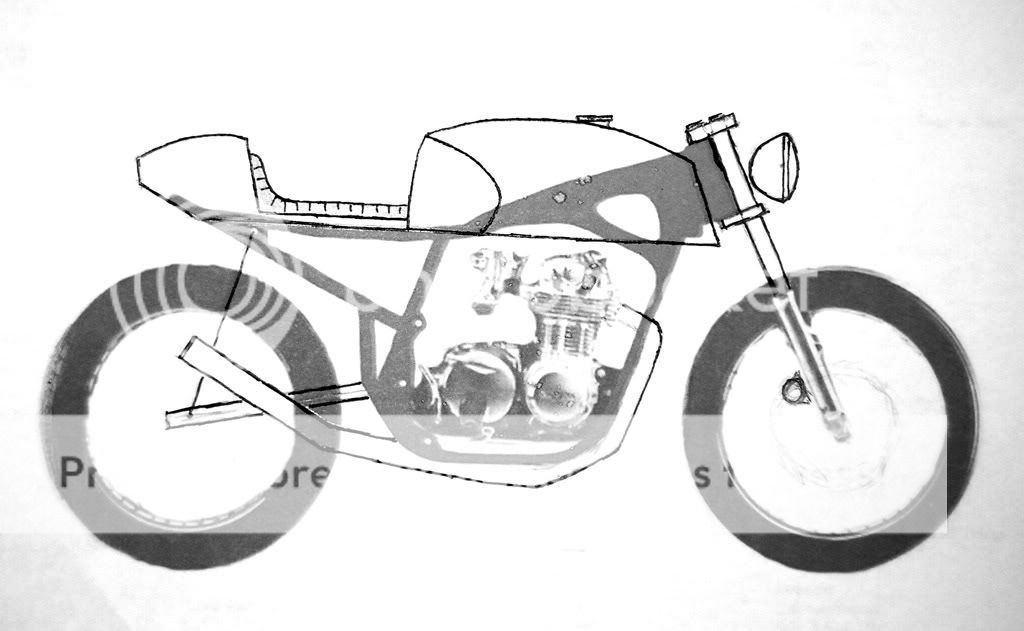
I'm just about done with the frame, and don't really have anything else to do since I'm waiting on parts. So I decided to draw a little. I can't keep a straight line in photoshop to save my life, so I did it the old fashioned way: pen and pencil. This is my plan for the tank/seat and general stance of the bike. I might go a little shorter on the tank, and I'm still not sure how I want to shape the muffler. Hate it, like it? Opinions welcome.
Re: '75 CB550 - tank/seat ideas
Aha! So I was thinking about ways to make the tank (wire frame versus foam) and I was having a hard time justifying the headache of incorporating the petcock and front tank mounts into a fiberglass tank, not to mention shaping the tank to fit properly over the frame. It dawned on me that I could cut off the bottom/inner ridge of the tank and simply shape the new tank onto it! Think of it as using the seatpan to make a new seat, but with the tank. That way the petcock and tank mounts remain in the same place, and it fits the frame like stock. And as a bonus, the bottom of the tank follows the line exactly that I drew up in the bodywork plan. The only changes I need to make to the uh, tankpan, we'll call it, are extending it back a couple inches and forward about an inch. Man this will save me so much time.
Aha! So I was thinking about ways to make the tank (wire frame versus foam) and I was having a hard time justifying the headache of incorporating the petcock and front tank mounts into a fiberglass tank, not to mention shaping the tank to fit properly over the frame. It dawned on me that I could cut off the bottom/inner ridge of the tank and simply shape the new tank onto it! Think of it as using the seatpan to make a new seat, but with the tank. That way the petcock and tank mounts remain in the same place, and it fits the frame like stock. And as a bonus, the bottom of the tank follows the line exactly that I drew up in the bodywork plan. The only changes I need to make to the uh, tankpan, we'll call it, are extending it back a couple inches and forward about an inch. Man this will save me so much time.
IndieSol
"This one goes to eleven." -Nigel Tufnel
Re: '75 CB550 - tank/seat ideas
I really like the frame work. Looks badass.
I wish I had more to contribute, but it appears you've got everything handled, and anything you don't is going to be over my head anyways. I'm good for encouragement, though. Keep it up!
I really like the frame work. Looks badass.
I wish I had more to contribute, but it appears you've got everything handled, and anything you don't is going to be over my head anyways. I'm good for encouragement, though. Keep it up!
Erskine
Over 1,000 Posts
Re: '75 CB550 - tank/seat ideas
Thanks IndieSol. I'm probably in over my head myself. But I guess that's the good thing about working with metal and glass; if ya screw up, just cut it off and redo!
Erskine - thanks for the link. I don't like the general shape of my tank so I'm just using the bottom for the mounting points and making the top/sides out of glass. Guess I'll be able to say I have a composite tank! hah. ;D
Re: '75 CB550 - tank/seat ideas
Yeah man, you're always welcome here. I don't have much more than a frame and a bunch of ideas right now, and my shop's ghetto as hell, but I love it! I will be in town for a few more days, through the weekend at least. Give me a ring.
Yeah man, you're always welcome here. I don't have much more than a frame and a bunch of ideas right now, and my shop's ghetto as hell, but I love it! I will be in town for a few more days, through the weekend at least. Give me a ring.
Re: '75 CB550 - tank/seat ideas
Thanks BadKaw!
Ah, so this Friday night will be spent in the shop instead of a bar. Priorities I guess...
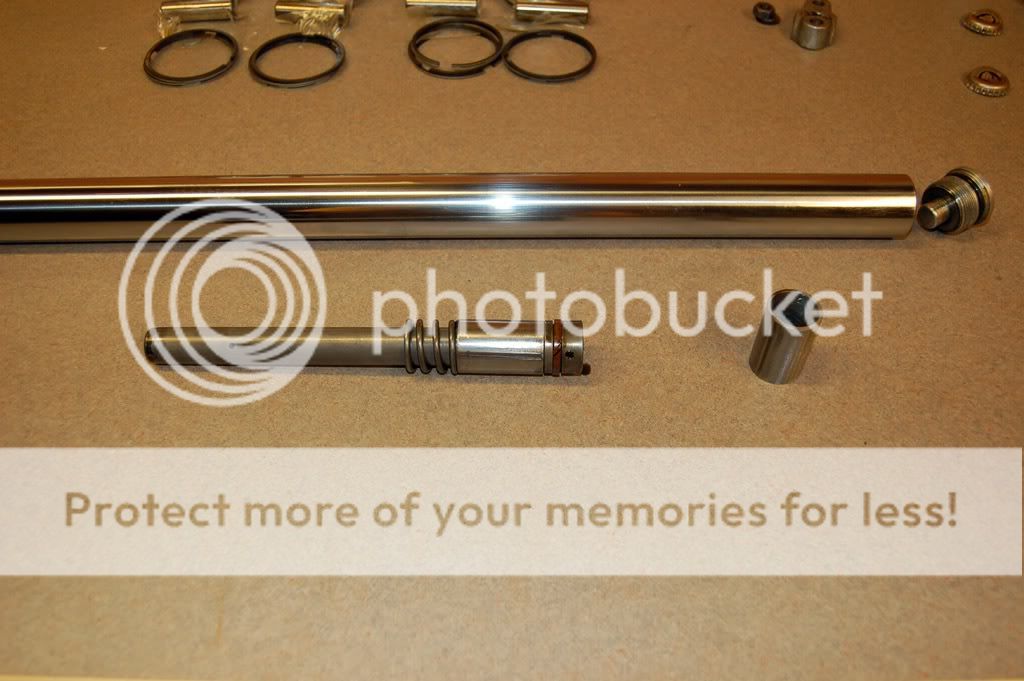
I didn't post any pictures of them, but the stock fork tubes were too rusted under the fork ears to be able to make pretty again, so I trashed them. I couldn't find a reasonably priced, unrusted set of cb550 tubes on ebay, so I got a set of cb650 forks. I'm using the 650 tubes in the 550 lowers, but they're a little less than an inch longer than the 550 tubes.
So, I'm shortening the forks tonight. The plan is to put a spacer under the damper rod spring (right name for it?). Anyways, it will suck the fork tube down about 1.5 inches, without having to cut the spring. I've considered cutting it, but then the tube can still extend all the way, with no pressure from the spring. I don't like the sound of that. It also provides a way to shorten the forks without sliding them through the trees, cause that's just plain ugly, no? May help provide an alternative for those considering doing that, and it's pretty damn easy. Plus, a guy could remove or shorten the spacer if need be and not affect any stock parts. The only thing you have to be aware of is not using up too much of the available compressible length. I'll post up some pics in a bit.
Don't know if I'm explaining it clearly, but you follow me?
Thanks BadKaw!
Ah, so this Friday night will be spent in the shop instead of a bar. Priorities I guess...
I didn't post any pictures of them, but the stock fork tubes were too rusted under the fork ears to be able to make pretty again, so I trashed them. I couldn't find a reasonably priced, unrusted set of cb550 tubes on ebay, so I got a set of cb650 forks. I'm using the 650 tubes in the 550 lowers, but they're a little less than an inch longer than the 550 tubes.
So, I'm shortening the forks tonight. The plan is to put a spacer under the damper rod spring (right name for it?). Anyways, it will suck the fork tube down about 1.5 inches, without having to cut the spring. I've considered cutting it, but then the tube can still extend all the way, with no pressure from the spring. I don't like the sound of that. It also provides a way to shorten the forks without sliding them through the trees, cause that's just plain ugly, no? May help provide an alternative for those considering doing that, and it's pretty damn easy. Plus, a guy could remove or shorten the spacer if need be and not affect any stock parts. The only thing you have to be aware of is not using up too much of the available compressible length. I'll post up some pics in a bit.
Don't know if I'm explaining it clearly, but you follow me?

Re: '75 CB550 - shortening forks...no, not through the trees
Haha, thanks man, but i should post up a full pic of the shop...not organized at all... I just move around piles of parts to keep clutter out of the pics.
Yeah, sawdust is a bitch. I take my chopsaw outside if I need to cut wood...
Haha, thanks man, but i should post up a full pic of the shop...not organized at all... I just move around piles of parts to keep clutter out of the pics.
Yeah, sawdust is a bitch. I take my chopsaw outside if I need to cut wood...


