
We noticed you are blocking ads. DO THE TON only works with community supporters. Most are active members of the site with small businesses. Please consider disabling your ad blocking tool and checking out the businesses that help keep our site up and free.
You are using an out of date browser. It may not display this or other websites correctly.
You should upgrade or use an alternative browser.
You should upgrade or use an alternative browser.
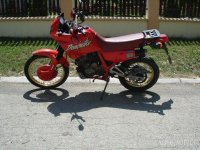
Honda NX650 Dominator tracker
- Thread starter tort
- Start date
I try to do exactly what you described in your thread with the frame. So thanks again for sharing ")
I'am happy with the kickstarter. So you always have a 'plan B' when the battery dies on you...
Still a lot of work to do. But it already starts to look as a scrambler.
Yesterday I ordered the alu fenders, head- and tail lights.
Also a speedometer. Hope the original cable fits. I bought a meter with K 1.4 gear.
Is that the right one?
How are you securing the front of the tank? I cant seam to get my tank (CG) low enough yet, and still pondering how to secure it. I did notice a lot of the photos of finished NX frames ready to be reassembled had the original brackets removed with no obvious replacement bracket fitted.
sincerelyadam
Active Member
Saw the pics on page 1 and was skeptical curious so skipped to the last page to see where the bike was at now and wow! what a difference. Gonna go back and browse the rest of the thread. Nice work.
sincerelyadam
Active Member
Finally got a chance to finish reading the thread. Really impressive stuff tort, and inspiring.
So in the beginning of the summer during first ride, after 80 km i lost charging. No power from stator. Afterwards at home had trouble with finding neutral. Had to open the engine and turned out there was a washer loose, from a shaft in the left side. When all conditions were right, it finally got stuck to the magnet and sliced the wires when rotating. That´s a 30 eur easy fix. Found a crack in the skirt of the piston and since the cylinder was very slightly oval (can only be determined when using the right cylinder measuring tool), ordered 100.25 piston and had the cylinder rebored. Also installed a new gear lever shaft, while i was at it and the engine was in half. Got my neutral back aswell. Ordered a complete seal set.
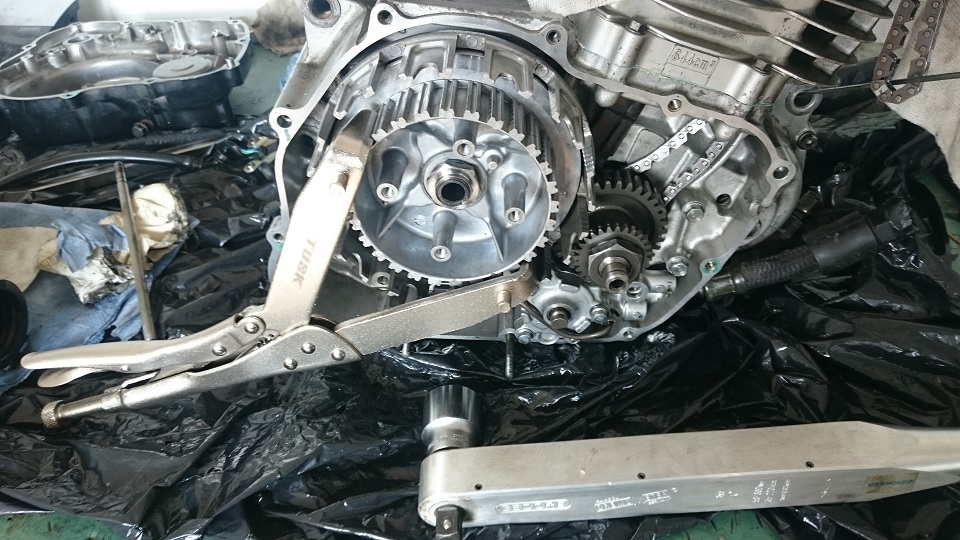
Had no trouble opening the engine, bolts were ok. Still, broke 2 of the the rotating clutch centre´s bolt sockets. New used one from Gremany cost 40 eur. Note to other people - if you don´t have the right tool, don´t try to open it with a regular wrench, only air gun. There are some tricks you can use, but either way it´s reasonable to use air gun since you also have to open the crankshaft bolt and nut, 125 nm and 110 nm. Much safer with air gun. Engine in half:
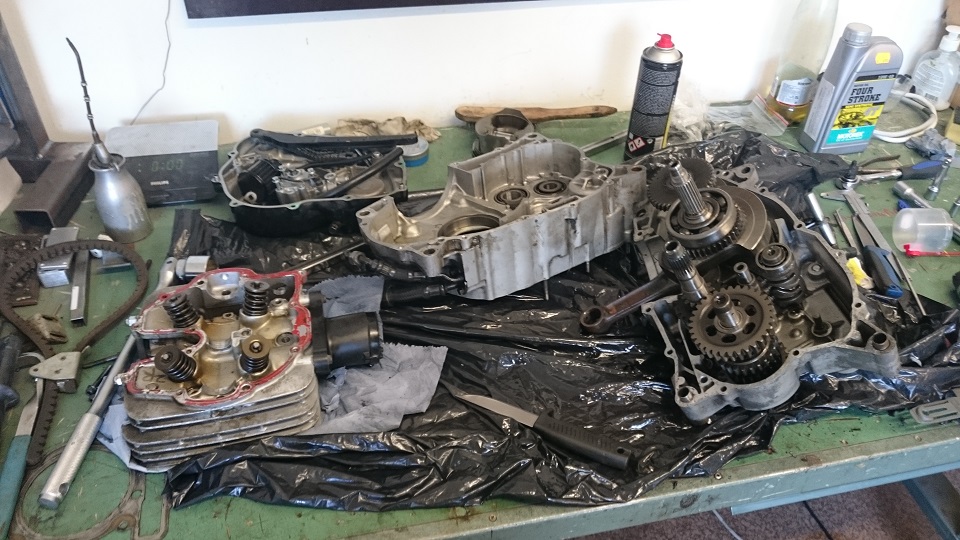
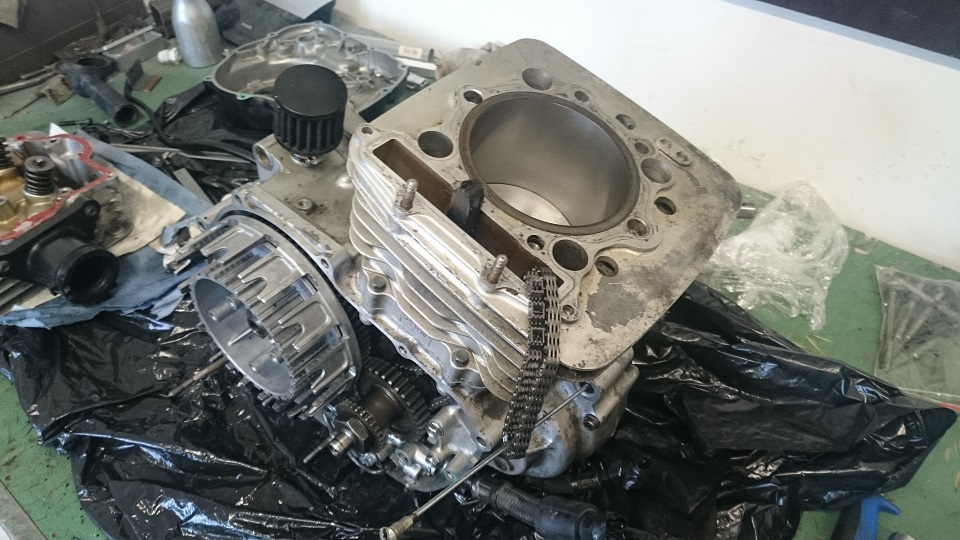
Rebored:
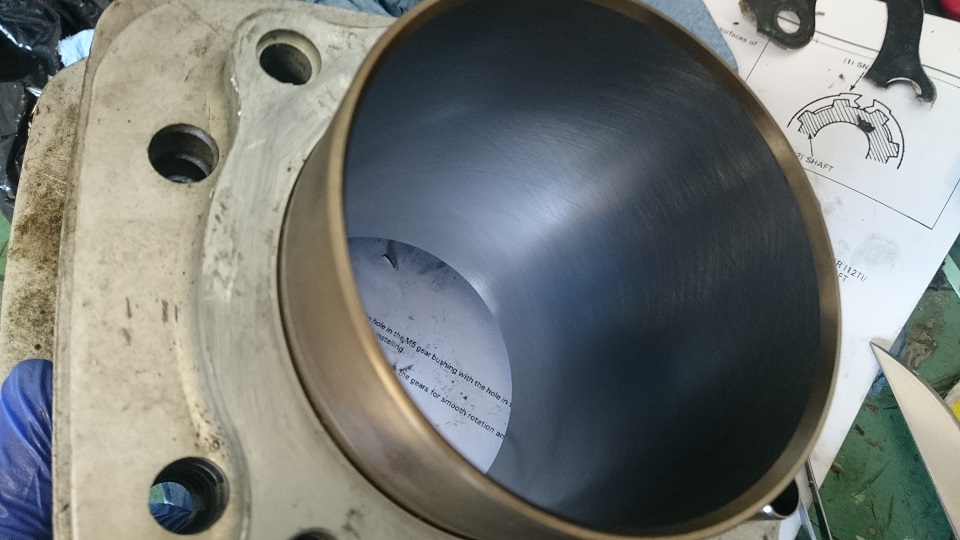
Self made tool for valve stem seals. Works fine but it´s easier when a friend can hold the head, i did it alone:

Changing the valve stem seals:
This is the clutch centre holder. Can be done without it but it´s much safer and easier if you have one to use:
So next, attach the head, time the cam, wait for stator to arrive from shop and close it up:
All in all, be careful what you wish for. During winter/spring i was thinking i should get a thumper engine from somewhere to rebuild it, just for fun and experience. Had to rebuild mine instead. Still, can surely recommend the job for anyone interested. It´s a fairly simple engine and once you quit bitching about it, it´s a fun thing to do. If you lack time, it´s better to take it to a shop instead. Also, if you just want to rebore it and install a new piston, this can be done while the engine is attached.
Had no trouble opening the engine, bolts were ok. Still, broke 2 of the the rotating clutch centre´s bolt sockets. New used one from Gremany cost 40 eur. Note to other people - if you don´t have the right tool, don´t try to open it with a regular wrench, only air gun. There are some tricks you can use, but either way it´s reasonable to use air gun since you also have to open the crankshaft bolt and nut, 125 nm and 110 nm. Much safer with air gun. Engine in half:
Rebored:
Self made tool for valve stem seals. Works fine but it´s easier when a friend can hold the head, i did it alone:
Changing the valve stem seals:
This is the clutch centre holder. Can be done without it but it´s much safer and easier if you have one to use:
So next, attach the head, time the cam, wait for stator to arrive from shop and close it up:
All in all, be careful what you wish for. During winter/spring i was thinking i should get a thumper engine from somewhere to rebuild it, just for fun and experience. Had to rebuild mine instead. Still, can surely recommend the job for anyone interested. It´s a fairly simple engine and once you quit bitching about it, it´s a fun thing to do. If you lack time, it´s better to take it to a shop instead. Also, if you just want to rebore it and install a new piston, this can be done while the engine is attached.
Put it together last week but had no oil pressure. I filled the pump during assembly but i guess some oil got spilled during the process. Opened the right case, moved oil pipe a bit away and started pouring oil into the pump while turning it backwards. After some time filled it up and turned the right way and voila, i've got oil. Put it all together and it sings like a bird. Checked oil pressure with the engine running aswell.
I chose the hard break in, instead of the 500-1000 km low rev break in. Idle on the spot until engine was hot, checked for leaks and oil level. Then a short ride with gear testing, followed by all gears with 1/3 throttle, 2/3 of throttle and full throttle. Did 35 km city tour today, no problems. Only the annual tech inspection guy (we have annual compulsory tech inspection where i live) had me remove the yellow tint from the headlight. Otherwise the bike passed, since all tuning parts have E-stamps on them. Even the loud Leo Vince. I'll put the tint back i guess, i have leftovers.
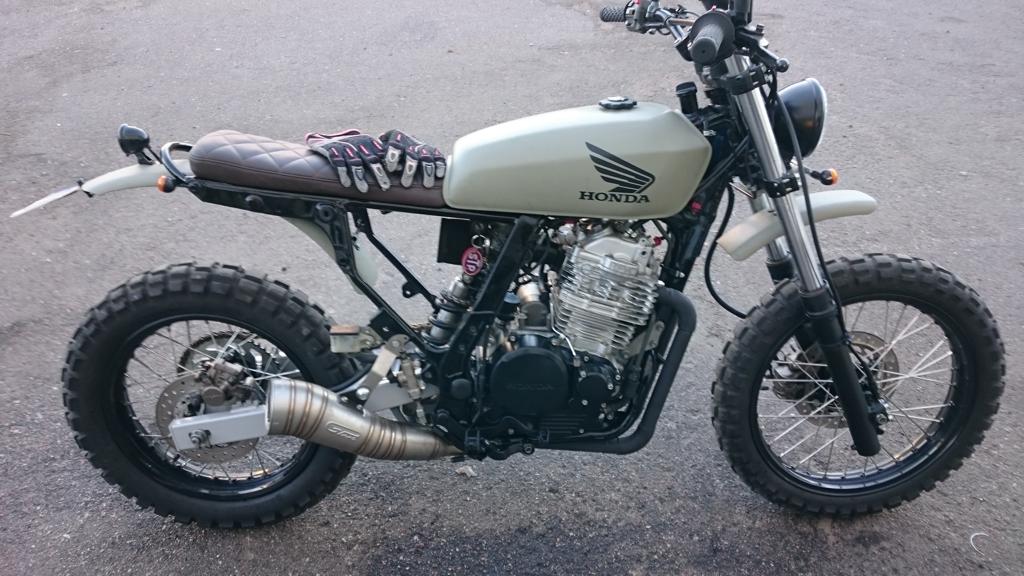
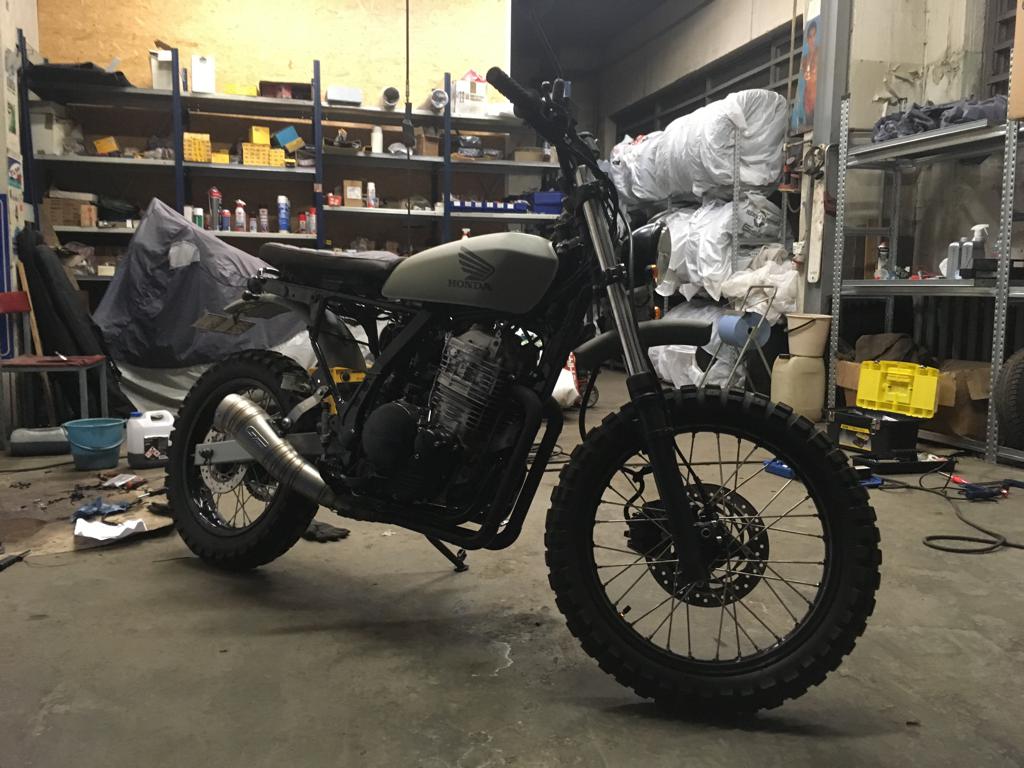
No posing pics, just a regular "in front of the garage":
I chose the hard break in, instead of the 500-1000 km low rev break in. Idle on the spot until engine was hot, checked for leaks and oil level. Then a short ride with gear testing, followed by all gears with 1/3 throttle, 2/3 of throttle and full throttle. Did 35 km city tour today, no problems. Only the annual tech inspection guy (we have annual compulsory tech inspection where i live) had me remove the yellow tint from the headlight. Otherwise the bike passed, since all tuning parts have E-stamps on them. Even the loud Leo Vince. I'll put the tint back i guess, i have leftovers.
No posing pics, just a regular "in front of the garage":
You can see the thin shiny oil line going from the right side engine cover (near the oil filter) up to the head on the right side of the engine. You just open the upper or lower banjo bolt by approximately 0,5 turns and if there´s oil pressure, it will start pushing out. Takes about 15 seconds maybe until it does.
Some day i´ll make a WOT drive by video, sure. Without the silencer it sounds like war. Currently the fixed stator is showing continuity where it shouldn´t. Probably the extended wires are done near the stator due to bad angle, didn´t have much wire left coming out of the stator to reattach. Or the inner isolation around the soldered extentions outside the engine are done.
NoRiders
Over 1,000 Posts
tort said:Without the silencer it sounds like war.
Ha. My son's 400/4 has a similar chopped zorst and it does sound very loud, he worked a baffle into the end pipe somehow which quietened it a decibel or three.
Meanwhile, since it lost charging in the end of last season, i replaced the stator with a "new" used one. Although the one i had showed correct resistance when cold, if i measured it correctly last year, it was shorted out when warm. Also i didn't like that the wires were reconnected really close to the coil. I had to use 2 zip ties to give the wires the correct bend and avoid connection with the flywheel etc. Not good. So i figured i want to exchange it anyway. Did some soldering aswell. Anyway, now i've got charging again. New oil filter + oil aswell.
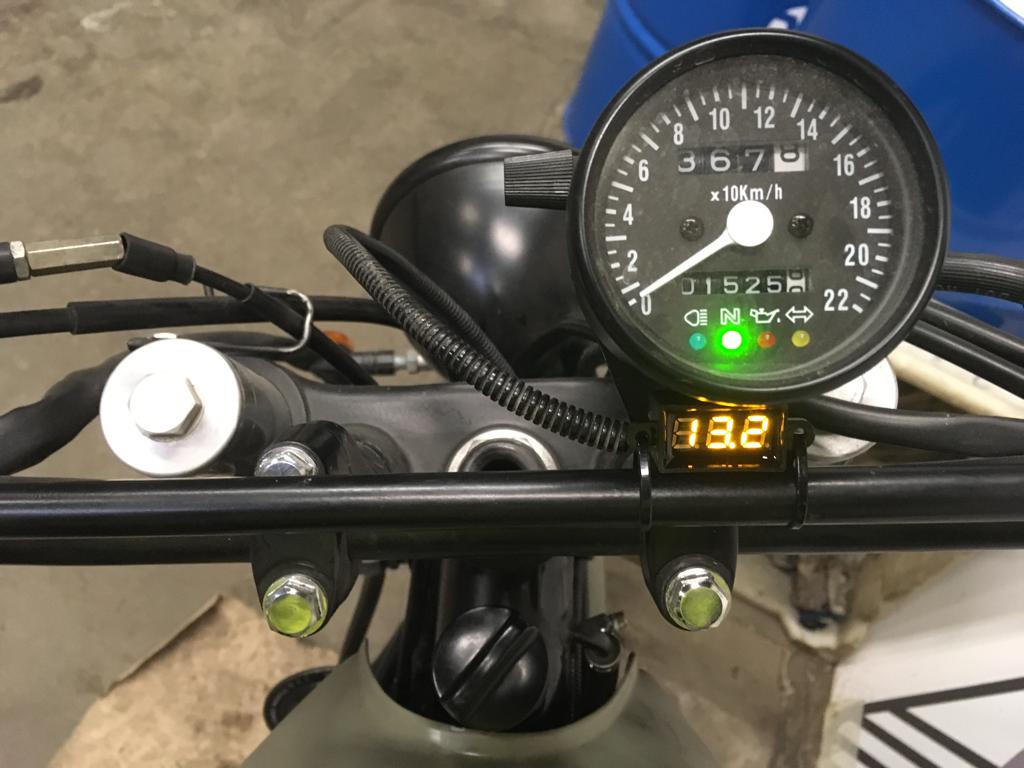
Also, since it was not the first charging issue, i added a comfy extra (didn't have time or a decent table to do the bracket though, although i have the alu sheet, maybe later):
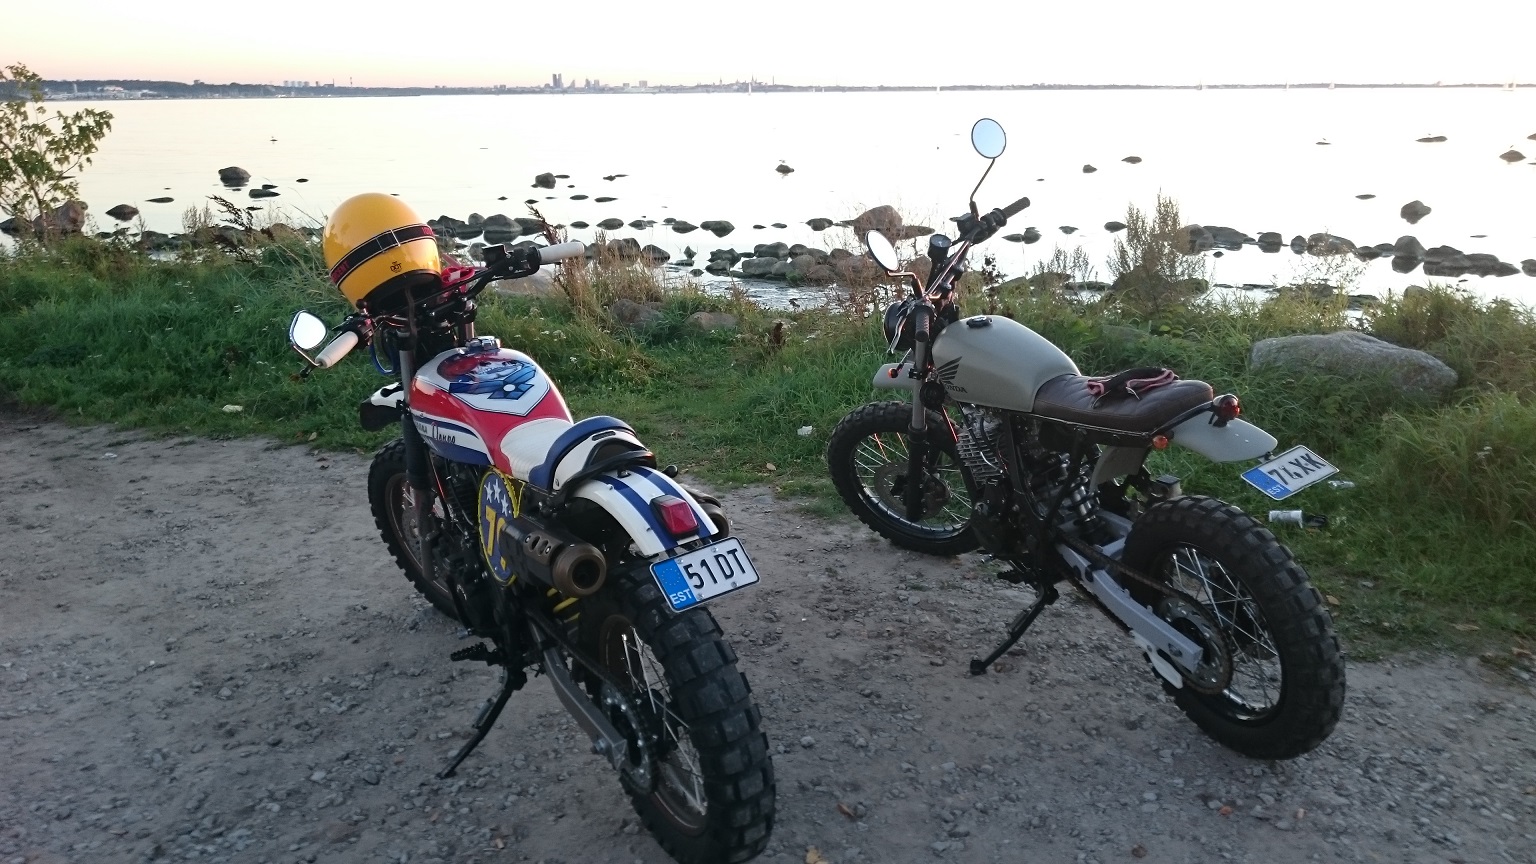
Evening well spent, work in progress:
Also, since it was not the first charging issue, i added a comfy extra (didn't have time or a decent table to do the bracket though, although i have the alu sheet, maybe later):
Evening well spent, work in progress:


