
We noticed you are blocking ads. DO THE TON only works with community supporters. Most are active members of the site with small businesses. Please consider disabling your ad blocking tool and checking out the businesses that help keep our site up and free.
You are using an out of date browser. It may not display this or other websites correctly.
You should upgrade or use an alternative browser.
You should upgrade or use an alternative browser.
"La Pastinaca" CB450 498cc Big Bore Engine Built By DWMS Racing!
- Thread starter joeyputt
- Start date
bluesmoke69
Been Around the Block
Re: "La Pastinaca" CB450 Parts List And Photos Added!
Looks great can't wait to see motor finished.
Looks great can't wait to see motor finished.
Re: "La Pastinaca" CB450 Parts List And Photos Added!
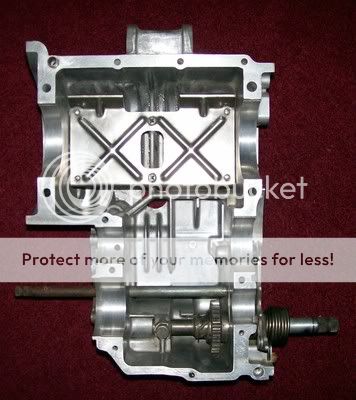
I budget one complete day for cleaning crankcases. Sometimes you get lucky, but it takes time toi get them clean and then clean out all the threads and countersunk them all, helicoil any that need it, check all the faces to get them dead flat and then clean them again to remove oil from fingers.
It takes time to get motors right, and that investment pays off.
Habanero52
The Race......is only with yourself!
Re: "La Pastinaca" CB450 Parts List And Photos Added!
Mr. Swagger, thanks for your comments, much appreciated.
Joey, this is looking better every day!!! I am very grateful for your dedication!
Mr. Teazer, you are right on sir! The only way to do an engine is to do it the right way, taking whatever time is needed and paying attention to every detail like Joey is doing and I am sure you also do. As you can see, the new components are the best available and affordable to me, and the only way to make them all "hum" in harmony, is to have top notch craftsmen like Joey and yourself bringing them all together with American pride!!!
Thanks you all of you gentlemen for all of your comments!!!!!") ;D
;D
Speed cost.......how fast do you want to spend?
Mr. Swagger, thanks for your comments, much appreciated.
Joey, this is looking better every day!!! I am very grateful for your dedication!
Mr. Teazer, you are right on sir! The only way to do an engine is to do it the right way, taking whatever time is needed and paying attention to every detail like Joey is doing and I am sure you also do. As you can see, the new components are the best available and affordable to me, and the only way to make them all "hum" in harmony, is to have top notch craftsmen like Joey and yourself bringing them all together with American pride!!!
Thanks you all of you gentlemen for all of your comments!!!!!
;D Speed cost.......how fast do you want to spend?
joeyputt
The green flag sets me free
Re: "La Pastinaca" CB450 Parts List And Photos Added!
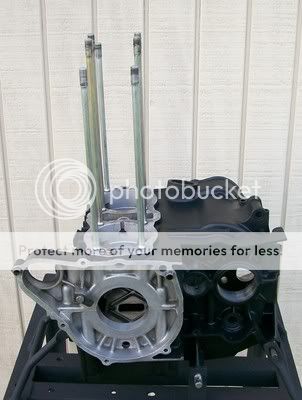
I agree that prepation is key and never base what needs to be done on how long it will take and love to give each part the necessary time that it deserves. It is easy for me to spend anywhere from a couple of days to over a week just on the cases depending on what I am doing with them. I have spent close to forty hours working on a single part to prepare it for show quality polishing! Building quality equipment does takes a lot of time, patience, and dedication but in the end the rewarding feeling of seeing what you have created with your own hands is always worth it for me.
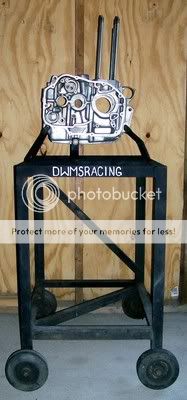
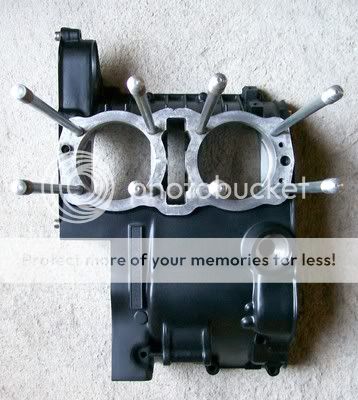
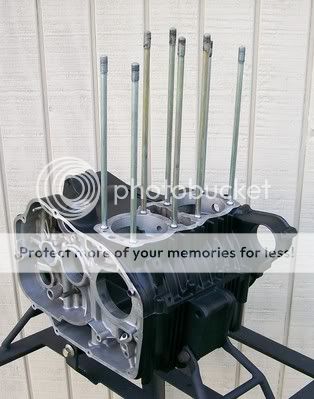
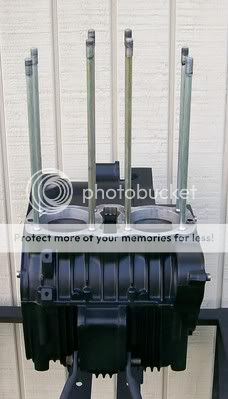
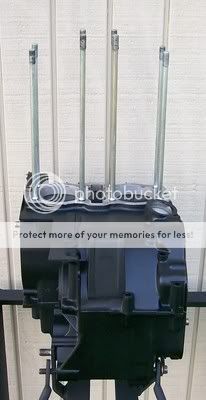
I also clean the cases by hand without chemicals so it takes me a little extra time but I enjoy it. Here are a couple photos of the two case halves sitting on my engine building stand.
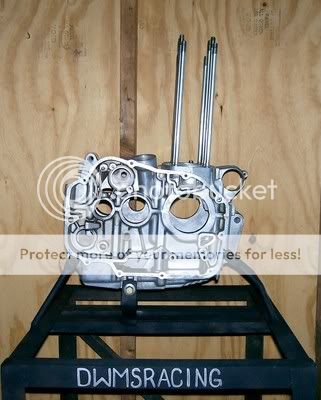
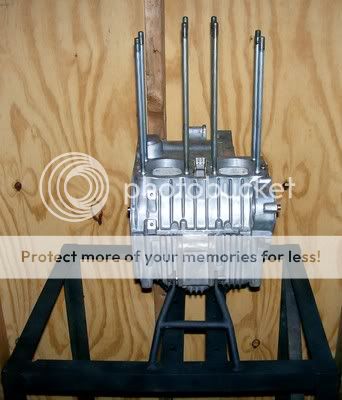
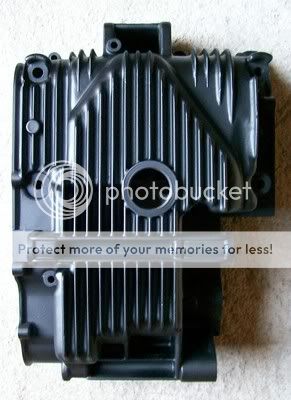
The satin black engine coating came in today and I still have a couple hours of sanding, smoothing, and cleaning left to do before they are ready to coat but here is a photo that shows how the front of the cases look so far.
Thank you all for taking the time to read and support this thread!
Brother Habanero52 it truly is an honor to work with you, thank you again for putting your trust in me!
I agree that prepation is key and never base what needs to be done on how long it will take and love to give each part the necessary time that it deserves. It is easy for me to spend anywhere from a couple of days to over a week just on the cases depending on what I am doing with them. I have spent close to forty hours working on a single part to prepare it for show quality polishing! Building quality equipment does takes a lot of time, patience, and dedication but in the end the rewarding feeling of seeing what you have created with your own hands is always worth it for me.
I also clean the cases by hand without chemicals so it takes me a little extra time but I enjoy it. Here are a couple photos of the two case halves sitting on my engine building stand.
The satin black engine coating came in today and I still have a couple hours of sanding, smoothing, and cleaning left to do before they are ready to coat but here is a photo that shows how the front of the cases look so far.
Thank you all for taking the time to read and support this thread!
Brother Habanero52 it truly is an honor to work with you, thank you again for putting your trust in me!
Habanero52
The Race......is only with yourself!
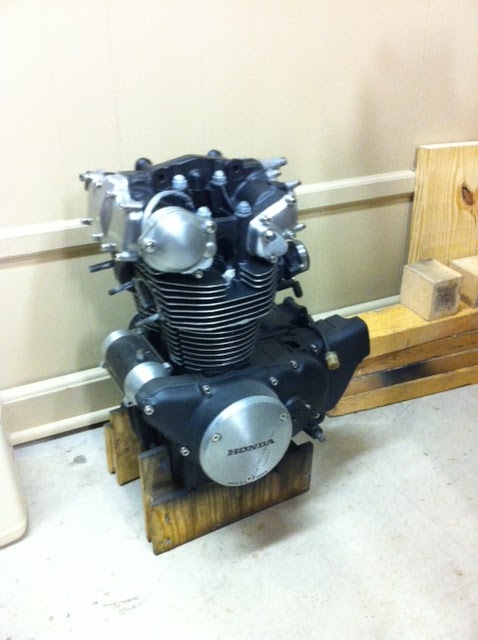
Re: "La Pastinaca" CB450 New photos! Painted the cases!
Sweet!!!!! ;D
"Speed cost......How fast do you want to go?"
Sweet!!!!! ;D
"Speed cost......How fast do you want to go?"
Flugtechnik
My bike is not transportation, it is a respite
"La Pastinaca" CB450 New photos! Painted the cases!
This is going to look nice. I have a very similar scheme on mine. The silver bit are actually brushed with a clear on them.
This is going to look nice. I have a very similar scheme on mine. The silver bit are actually brushed with a clear on them.
joeyputt
The green flag sets me free
Re: "La Pastinaca" CB450 New photos! Painted the cases!
No fair, my CB450's engine is gold! I want to ride with the cool kids too! Hahahaha! I know...we are not kids, but we are young at heart and that counts right? Hahahaha! Seriously though there are a lot of beautiful black engines around here lately!
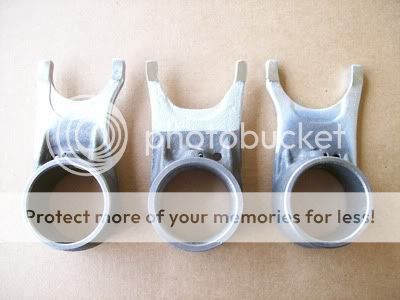
Oh well, back to work! Brother Habanero52 ordered new shift forks for the transmission and it will be a few days before they arrive and I can assemble the bottom end so I am working on sanding the engine covers to prepare them for polishing and the cylinder head.
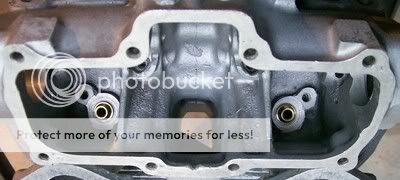
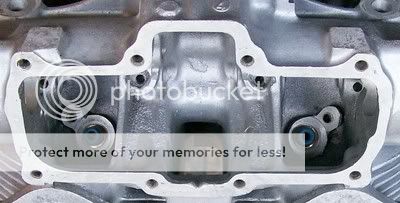
We are converting the valvetrain from the stock factory valves to lightweight racing valves with 5mm stems. Naturally with the stem size change we had to convert the valve guides as well. We got all four valve guides installed in the cylinder head and reamed so here are some photos!
This photo shows the new 5mm valve guides installed in the cylinder head on the intake side.
Here is a photo of the new valve seals installed.
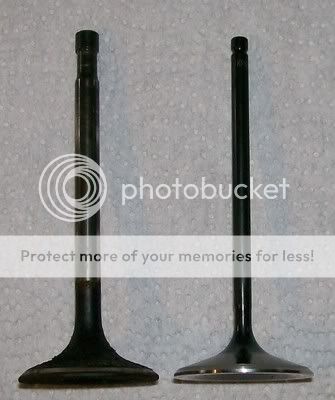
In this photo you can see the difference between the stock intake valve on the left and the new 5mm lightweight racing intake valve on the right! The new valve stems themselves are shorter as well for use with lash caps.
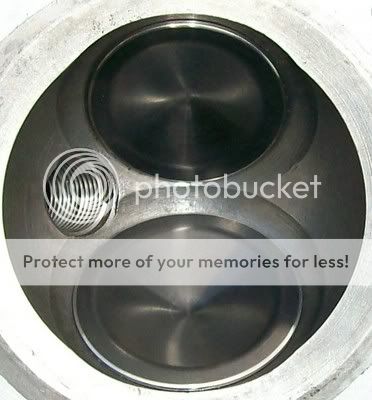
I still need to cut the valve seats and am waiting for a pilot in the new guides size before I can do it. I also want to smooth the combustion chambers a little more but here is a photo of what the valves look like in the chamber.
Swagger said:Say Flugtechnik...that's pretty....but all you black engine guys....knock it off! hehe
Aw well, we'll be the black engine posse.....(perhaps with a less dumb name)
No fair, my CB450's engine is gold! I want to ride with the cool kids too! Hahahaha! I know...we are not kids, but we are young at heart and that counts right? Hahahaha! Seriously though there are a lot of beautiful black engines around here lately!
Oh well, back to work! Brother Habanero52 ordered new shift forks for the transmission and it will be a few days before they arrive and I can assemble the bottom end so I am working on sanding the engine covers to prepare them for polishing and the cylinder head.
We are converting the valvetrain from the stock factory valves to lightweight racing valves with 5mm stems. Naturally with the stem size change we had to convert the valve guides as well. We got all four valve guides installed in the cylinder head and reamed so here are some photos!
This photo shows the new 5mm valve guides installed in the cylinder head on the intake side.
Here is a photo of the new valve seals installed.
In this photo you can see the difference between the stock intake valve on the left and the new 5mm lightweight racing intake valve on the right! The new valve stems themselves are shorter as well for use with lash caps.
I still need to cut the valve seats and am waiting for a pilot in the new guides size before I can do it. I also want to smooth the combustion chambers a little more but here is a photo of what the valves look like in the chamber.
Swagger
Putting boot to ass since 1967!
Re: "La Pastinaca" CB450 New photos! 5mm racing valves conversion!
Apparently there's some *measurable* power to be had in cutting and blending the ridge between the valves down, especially near the plug. I've seen two dyno sheets that showed around a pony from doing so. Now....I've not seen them in real life nor did I know the guys that built the engine. Just thought I'd toss it out there since you're turning this one up to 11......
Apparently there's some *measurable* power to be had in cutting and blending the ridge between the valves down, especially near the plug. I've seen two dyno sheets that showed around a pony from doing so. Now....I've not seen them in real life nor did I know the guys that built the engine. Just thought I'd toss it out there since you're turning this one up to 11......
Rip-It-Up
New Member
Re: "La Pastinaca" CB450 New photos! 5mm racing valves conversion!
Nice, I haven't looked alot into internal mod's for these motors. Do you have any links or resources you would mind sharing for parts and stuff?
BTW looks like there's a ton of room for unshrouding to be had there. My hand is twitching for a die grinder just looking at those pics! lol! I reaaalllyyy want to play with one of these bikes.
Out of curiosity do you have any more pic's of the port's? Did honda leave alot of flashing in there? Haha, sorry for so many questions. I haven't seen any posts with anyone doing much more than a rebuild on one of these. I'm very interested to see what one of these old twins could pick up with some of todays cylinder head knowledge. Correct me if I'm wrong but I think I've heard that they where pretty under rated at 43hp back in the day.
joeyputt
The green flag sets me free
Re: "La Pastinaca" CB450 New photos! 5mm racing valves conversion!
Brother Swagger combustion chamber and port shapes would be a long discussion and would deserve their own threads I am sure as I know there are a lot of different opinions on the subjects here on dotheton as we have attempted to try and discuss them a couple of times! Hahahaha!
Brother Rip-It-Up I sent you a PM. We have to help you find a CB450 to play with, you would love it! This is an older article that you may enjoy, it is a short read and has some good information- http://www.motorcycle.com/how-to/modifications-to-the-henning-honda-cb500-14679.html
Brother Habanero52 ordered new shift forks for the transmission and they got here today so I can start assembling the bottom end!
Re: "La Pastinaca" CB450 New photos! 5mm racing valves conversion!
You might be surprised how much shrouding those heads need to improve trapping efficiency. I'd just round off the sharp edges and leave it at that. You don't want too much overlap flow into the exhaust port.
Most older Hondas suffer from constipation. They have enough intake flow but can't get rid of exhaust gasses effectively. Squish (quench) was typically too deep to be effective too. Lots of ways to improve them.
joeyputt
The green flag sets me free
Re: "La Pastinaca" CB450 New photos! 5mm racing valves conversion!
It is not like that Brother! You know I always value your information and enjoy talking with you, I just do not want to get into a large debate (not with you, I know we agree a lot!) over combustion chamber designs and port shapes here as it is Brother Habanero52's build thread. We can start a new thread if everyone would like to try and discuss these issues though and I will join in.
Brother Teazer that is the plan, as this engine is not going to be on the track I just want to smooth the chambers and ports real nice and I may cc match the chambers after I cut the seats.
Swagger said:true enough, I'll look forward to you pics.....
It is not like that Brother! You know I always value your information and enjoy talking with you, I just do not want to get into a large debate (not with you, I know we agree a lot!) over combustion chamber designs and port shapes here as it is Brother Habanero52's build thread. We can start a new thread if everyone would like to try and discuss these issues though and I will join in.
teazer said:You might be surprised how much shrouding those heads need to improve trapping efficiency. I'd just round off the sharp edges and leave it at that. You don't want too much overlap flow into the exhaust port.
Brother Teazer that is the plan, as this engine is not going to be on the track I just want to smooth the chambers and ports real nice and I may cc match the chambers after I cut the seats.
lingo
social pariah
Re: "La Pastinaca" CB450 New photos! 5mm racing valves conversion!
I would really enjoy a discussion of the modifications that can be done to the 450 head to make it breath better. I come from the hot rod world but head work is something that I have never learned. I wouldn't necessarily do it myself but I would like to learn about it.
I would really enjoy a discussion of the modifications that can be done to the 450 head to make it breath better. I come from the hot rod world but head work is something that I have never learned. I wouldn't necessarily do it myself but I would like to learn about it.
Rip-It-Up
New Member
Re: "La Pastinaca" CB450 New photos! 5mm racing valves conversion!
Teazer I get what your saying about leaving the valve shrouded to help prevent cross flow during the overlap. However if you where to do serious work to a 450, and I understand he's not taking this one that far, You would want to fix the poor scavenging correctly. It does appear to be, although hard to tell from the pic's, alot of unshrouding around the cylinder sides of the valve that could easily be cut back.
I seems to me that the "linear" torsion bar springs are the problem here. I would imagine there would be a bit to be gained by both the 5mm valves and by retrofiting the motor with progressive springs "beehives" would be ideal allowing a custom grind cam with better ramp geometry.
Thanks for the article Joey, It does help shed some light to the weak points in the design.
Lingo, there's alot of good articles floating around on the web about head porting that would give you some good insight. Without a flow bench and ton's of experience I wouldn't do much more than deflashing and smoothing the ports, smoothing the chamber to eliminate hot spots, and a good valve job. The biggest mistake most people make is taking out too much metal destroying the flow velocity.
I think a good discussion on cam geometry and port work would be beneficial to all if someone wants to start a new thread. I think we have jacked Joey's enough. lol


