1982 Suzuki GS850 Bobber

ticrazy05

New Member
Hi Everyone,

It all started 3 years ago with a coworker telling me about a motorcycle he had when he was young. Apparently they only drove it in the backyard of his dad's house only a few times and after a few months, they put it in the shed where it’s been seating for about 25-30years. He didn’t know anything about the bike.

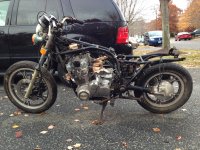
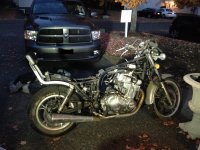
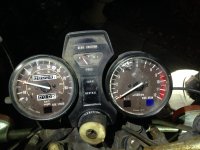
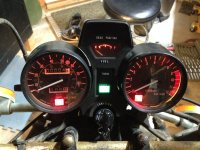
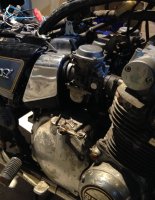
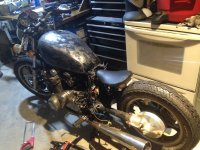
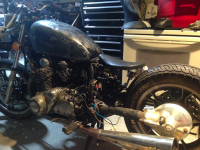
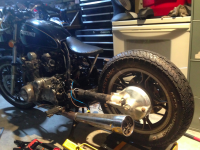
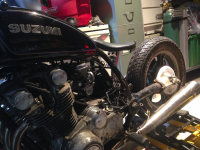
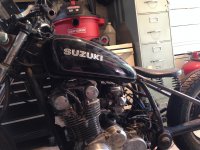
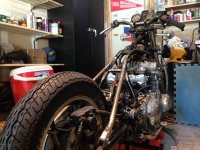
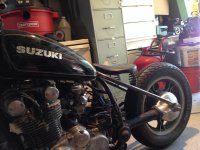
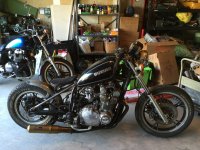
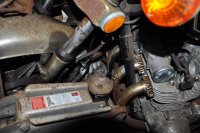
I have always wanted to build a bobber or café racer but didn’t want to spend too much money. I begged him for 2 years to give it to me until he finally decided to let me see it last year. They bike was buried in the shed behind a tractor. There it was a 1982 Suzuki GS850. The tachometer was reading 4miles on it. After a few months on negotiation, I ended up picking up the bike for $200.

I have been working on this on and off for less than 1 year. Now I think it’s about time that I share it with you all and get some advice.

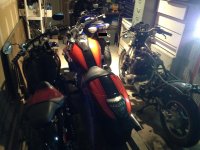
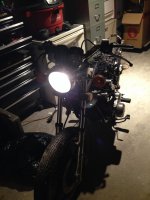
I have been taking pictures of my progress since I started. I post a few to give you an idea.

I can't wait to get moving on this, and look forward to any help you folks may be able to offer

So hopefully I finish this project up in a timely manner.

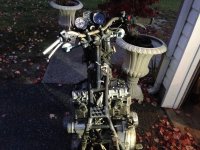
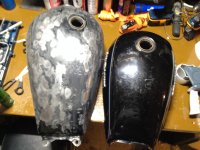
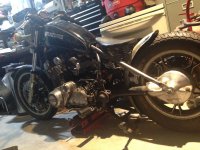
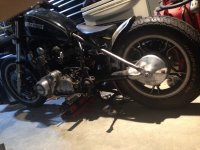
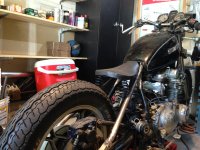
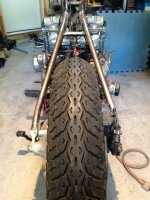
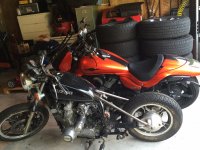
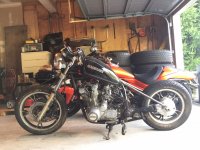
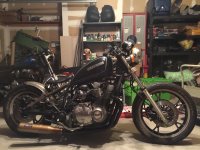
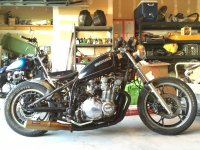
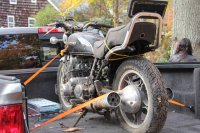
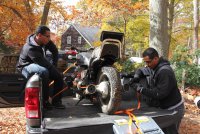
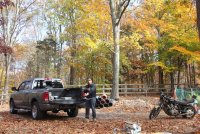
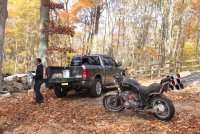
Here are a few pictures of the day I picked it up.
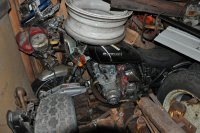
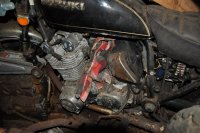
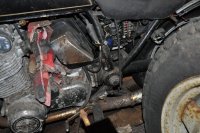
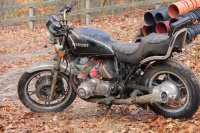
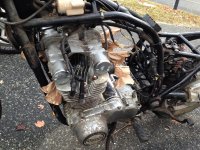
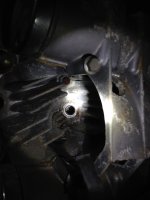
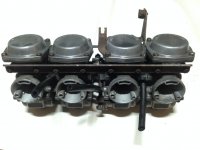
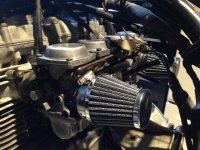
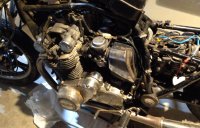
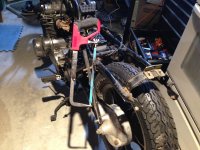
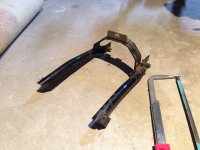
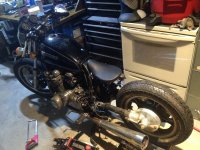
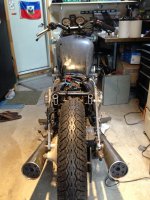
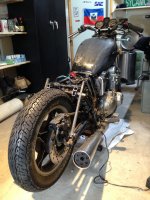
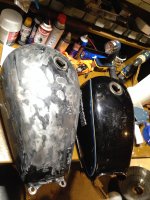
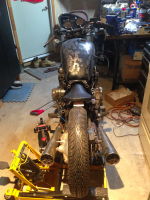
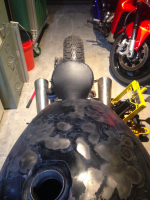
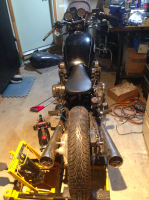
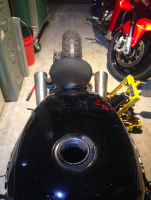
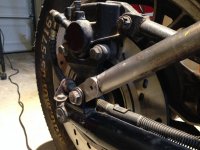
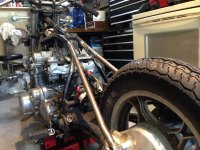
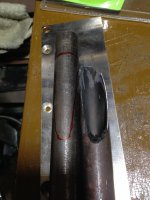
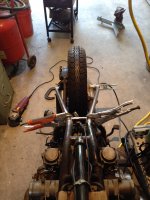
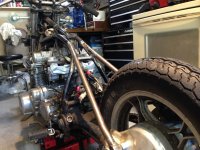
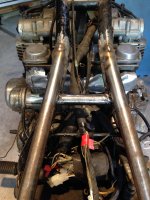
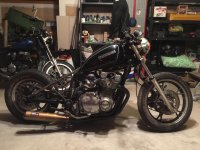
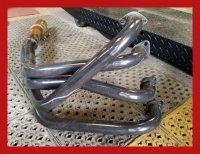
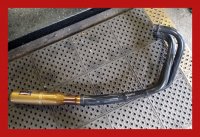
 

Attachments

  • DSC_4854.JPG
    DSC_4854.JPG
    3.5 MB · Views: 699
  • DSC_4855.JPG
    DSC_4855.JPG
    3.4 MB · Views: 664
  • DSC_4861.JPG
    DSC_4861.JPG
    3.3 MB · Views: 659
  • DSC_4863.JPG
    DSC_4863.JPG
    3.2 MB · Views: 653
Here are some shots of when I picked up the bike !
 

Attachments

  • IMG_0165.JPG
    IMG_0165.JPG
    454.2 KB · Views: 607
  • IMG_0151.JPG
    IMG_0151.JPG
    671.1 KB · Views: 562
  • IMG_0141.JPG
    IMG_0141.JPG
    580.7 KB · Views: 588
  • IMG_0145.JPG
    IMG_0145.JPG
    520.8 KB · Views: 562
  • IMG_0161.JPG
    IMG_0161.JPG
    622.3 KB · Views: 780
So when I finally got home with the bike, the first thing I did was removing all the spider web and washing the bike. I left it outside the garage covered until I felt that it was clean enough to bring it in :). At that time, I only had a 1 car garage and space was very important. While the bike was outside, I started removing all the covers, fenders and exhaust. I wanted to try and get the bike started as soon as possible but at the same time, I didn't want to put too much work into it because I didn't know how I was gonna get it yet.

Here are a few pictures. Note the gauge with 4 miles on it.
 

Attachments

  • IMG_0316.JPG
    IMG_0316.JPG
    1.2 MB · Views: 600
  • IMG_0315.JPG
    IMG_0315.JPG
    1.2 MB · Views: 537
  • IMG_0125.JPG
    IMG_0125.JPG
    538.5 KB · Views: 561
  • IMG_0123.JPG
    IMG_0123.JPG
    862.6 KB · Views: 593
  • IMG_0122.JPG
    IMG_0122.JPG
    983 KB · Views: 559
  • IMG_0124.JPG
    IMG_0124.JPG
    811.9 KB · Views: 570
Here is what my garage looked like back than. My brother's bike (Suzuki GSXR), Kawazaki Vulcan (SOLD), Suzuki M109r and 1982 Suzuki GS850.

That's why space was very important for me :)
 

Attachments

  • IMG_0128.JPG
    IMG_0128.JPG
    762 KB · Views: 529
I got a set of keys for the bike and headlight and started putting everything together when I realized that the carbs that he gave me with the bike was not for it.

I installed everything else and waited till I got a good deal on a set of carbs.

I purchased some Mystery Oil that I used to free up the engine in the mid time while I was waiting for the carbs.

With a battery that I had laying around, I connected everything and Abra Cada Bra ! I was excited to see that everything was working as far as headlight, gauge and signals :)
 

Attachments

  • IMG_0037.JPG
    IMG_0037.JPG
    719.2 KB · Views: 556
  • IMG_0039.JPG
    IMG_0039.JPG
    878.4 KB · Views: 536
I found a set of carbs on craigslist and also purchased a set of pods filters on eBay. I used a temporary tank and tried to start the bike.
 

Attachments

  • IMG_0320.JPG
    IMG_0320.JPG
    661.8 KB · Views: 523
  • 2.jpg
    2.jpg
    359.4 KB · Views: 541
  • 1.jpg
    1.jpg
    685.6 KB · Views: 529
I tried started starting the bike and it wouldn't start. I talked to a mechanic who told me to try to stock airbox. Guess what ! after I installed the stock airbox with an home mad filter. I was surprised to see that the bike started on the first try.

Lesson learned : DO NOT USE Cheap POD FILTERS on eBay :)
 

Attachments

  • IMG_0223.JPG
    IMG_0223.JPG
    215.5 KB · Views: 505
  • IMG_0178.JPG
    IMG_0178.JPG
    483.3 KB · Views: 540
Now that I knew I had a running bike. It was time to start cutting metal and think about what I wanted to do.

Here are pictures of the progress:
 

Attachments

  • IMG_0041.JPG
    IMG_0041.JPG
    921.2 KB · Views: 541
  • IMG_0045.JPG
    IMG_0045.JPG
    1,006.3 KB · Views: 534
  • IMG_0044.JPG
    IMG_0044.JPG
    869.7 KB · Views: 550
I ordered a smaller tank from a GS550 and also ordered a seat.
 

Attachments

  • IMG_0202.JPG
    IMG_0202.JPG
    958.8 KB · Views: 731
  • IMG_0199.JPG
    IMG_0199.JPG
    1,018.5 KB · Views: 651
  • gs850 a.JPG
    gs850 a.JPG
    2.5 MB · Views: 680
  • gs850 b.JPG
    gs850 b.JPG
    2.4 MB · Views: 593
  • IMG_0242.JPG
    IMG_0242.JPG
    1,002.5 KB · Views: 568
  • IMG_0241.JPG
    IMG_0241.JPG
    907.7 KB · Views: 526
I cut more metal and decisions decisions decisions !

I had a hard time decided what to go with but I ended up going with the small tank.
 

Attachments

  • Screen Shot 2014-02-20 at 8.31.27 PM.png
    Screen Shot 2014-02-20 at 8.31.27 PM.png
    1.1 MB · Views: 534
  • Screen Shot 2014-02-20 at 8.31.19 PM.png
    Screen Shot 2014-02-20 at 8.31.19 PM.png
    694.2 KB · Views: 1,958
  • Screen Shot 2014-02-20 at 8.31.12 PM.png
    Screen Shot 2014-02-20 at 8.31.12 PM.png
    618.2 KB · Views: 2,035
  • Screen Shot 2014-02-20 at 8.31.05 PM.png
    Screen Shot 2014-02-20 at 8.31.05 PM.png
    1.1 MB · Views: 514
  • Screen Shot 2014-02-20 at 8.30.56 PM.png
    Screen Shot 2014-02-20 at 8.30.56 PM.png
    675.3 KB · Views: 1,944
  • Screen Shot 2014-02-20 at 8.30.46 PM.png
    Screen Shot 2014-02-20 at 8.30.46 PM.png
    600.1 KB · Views: 1,949
  • Screen Shot 2014-02-20 at 8.22.39 PM.png
    Screen Shot 2014-02-20 at 8.22.39 PM.png
    1.1 MB · Views: 512
Here is how I mounted the hard tail.

Before spending time in the shop making parts, I modeled a few parts on the computer and used the 3D printer to try a few things.
 

Attachments

  • IMG_0258.JPG
    IMG_0258.JPG
    1.2 MB · Views: 491
  • IMG_0257.JPG
    IMG_0257.JPG
    1.2 MB · Views: 483
  • IMG_0256.JPG
    IMG_0256.JPG
    1.2 MB · Views: 500
  • IMG_0102.JPG
    IMG_0102.JPG
    1.8 MB · Views: 493
  • IMG_0238.JPG
    IMG_0238.JPG
    628.7 KB · Views: 484
  • model 2.JPG
    model 2.JPG
    138.2 KB · Views: 473
  • model 1.JPG
    model 1.JPG
    127.5 KB · Views: 479
Now it was time to spend some times in the shop :)
 

Attachments

  • IMG_0096.JPG
    IMG_0096.JPG
    686.4 KB · Views: 430
  • IMG_0093.JPG
    IMG_0093.JPG
    604.2 KB · Views: 442
  • IMG_0091.JPG
    IMG_0091.JPG
    574.5 KB · Views: 432
  • IMG_0090.JPG
    IMG_0090.JPG
    713.4 KB · Views: 449
  • IMG_0087.JPG
    IMG_0087.JPG
    559.6 KB · Views: 445
  • IMG_0080.JPG
    IMG_0080.JPG
    500.1 KB · Views: 456
  • IMG_0085.JPG
    IMG_0085.JPG
    874.7 KB · Views: 467
  • IMG_0077.JPG
    IMG_0077.JPG
    370.3 KB · Views: 452
Final hard tail mount :
 

Attachments

  • IMG_0294.JPG
    IMG_0294.JPG
    643.1 KB · Views: 450
  • IMG_0298.JPG
    IMG_0298.JPG
    1.1 MB · Views: 447
  • IMG_0262.JPG
    IMG_0262.JPG
    806.6 KB · Views: 441
  • IMG_0057.JPG
    IMG_0057.JPG
    646.6 KB · Views: 448
Time to weld :
 

Attachments

  • IMG_4254.JPG
    IMG_4254.JPG
    916.8 KB · Views: 473
  • IMG_4295.JPG
    IMG_4295.JPG
    926.7 KB · Views: 452
  • IMG_4256.JPG
    IMG_4256.JPG
    802.1 KB · Views: 507
  • IMG_4295.JPG
    IMG_4295.JPG
    926.7 KB · Views: 457
  • IMG_4294.JPG
    IMG_4294.JPG
    807.5 KB · Views: 456
  • IMG_4300.JPG
    IMG_4300.JPG
    931.2 KB · Views: 461
  • IMG_4298.JPG
    IMG_4298.JPG
    880.2 KB · Views: 530
  • IMG_4297.JPG
    IMG_4297.JPG
    883.4 KB · Views: 473
  • IMG_0264.JPG
    IMG_0264.JPG
    862.5 KB · Views: 470
  • IMG_0268.JPG
    IMG_0268.JPG
    831.1 KB · Views: 484
  • IMG_0272.JPG
    IMG_0272.JPG
    931.5 KB · Views: 469
  • IMG_0278.JPG
    IMG_0278.JPG
    951.3 KB · Views: 467
  • IMG_0274.JPG
    IMG_0274.JPG
    977.5 KB · Views: 472
  • IMG_0275.JPG
    IMG_0275.JPG
    747.5 KB · Views: 520
Finally moved and got a 2 car garage. Im still setting up my shop but here is a picture of "The Little Beast" and "The Big Beast" in the garage.
 

Attachments

  • IMG_0325.jpg
    IMG_0325.jpg
    961.4 KB · Views: 498
  • IMG_0327.JPG
    IMG_0327.JPG
    1 MB · Views: 488
Now guys I need some feedback.

I have to mount the seat and the tank. I would like to raise the tank as shown in the picture below.

I need a tachometer and a new handle bar. Feedback and comments will be appreciated.

These pictures were taken yesterday when I got my new exhaust.

The only thing I have sold from the bike so far is the carburetor that I bought the bike with.

NOW I have for sale:

Stock GS850 Exhaust FULL System (with some rust)
Stock Tank (started prepping for painting)
Stock Side covers in great condition
Stock intake box with filter in great condition.
Stock seat and with back rest.

I will post pictures of each item soon.


I would like this thing to look awesome but with not a lot of money invested :)

Help me out ! Send me some examples.


Thanks
 

Attachments

  • IMG_0365.JPG
    IMG_0365.JPG
    2.1 MB · Views: 584
  • IMG_0364.JPG
    IMG_0364.JPG
    830.8 KB · Views: 581
  • IMG_0336.JPG
    IMG_0336.JPG
    289.8 KB · Views: 494
  • IMG_0332.JPG
    IMG_0332.JPG
    172.9 KB · Views: 504
  • IMG_0329.JPG
    IMG_0329.JPG
    181.6 KB · Views: 473
  • IMG_0328.JPG
    IMG_0328.JPG
    179.8 KB · Views: 473
Im still open on changing the seat and getting something different.

Im not sure what I want to do with the handle bar yet but Im leaning torwards a clip on set.

I have no idea what I want to do with the tachometer yet. I want to bike to look clean and the stock tach doesn't help.
 
This is what i have in mind right now !

Please left comments and feedbacks.
 

Attachments

  • IMG_0384.JPG
    IMG_0384.JPG
    2.4 MB · Views: 503
nice fab work
but you need the seat to be level, you will be constantly sliding back off it otherwise
and the muffler needs to be tucked in better and raised up it s gonna drag to easy on turns
 
Thanks. I was tanking about the same thing for the seat. The tabs for it has not been welded yet. I still need to mount the tank as well.

You are right about the exhaust. I didn't think about that. I don't think i can raise it up more than that unless i make a short curved adapter from the manifold to the gold muffler.

Good feedback ! Thanks. Looking to get more advice like that and suggestion for tachometer, re wiring, carb tuning for pod filters (K&N or other recommended filters), paint, .....
 

Attachments

  • IMG_0389.JPG
    IMG_0389.JPG
    2.4 MB · Views: 857
  • IMG_0390.JPG
    IMG_0390.JPG
    2.6 MB · Views: 492
Back
Top Bottom