First Build - Brat Style

oathamm

Active Member
Evening from a cold UK.

Summer is finally over so I’ve started on my ’74 CB360 Brat build. I’ve had the bike a while now but not done a lot with it. I’ve started to strip it down in order to pull the motor and have the frame worked on. As much as I’d love to do it all myself I don’t have the skills or the tools!

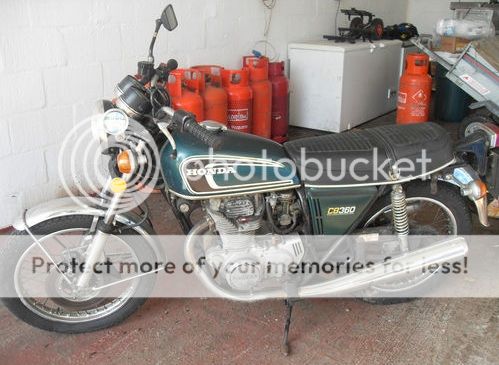
Here’s a pic of how it started


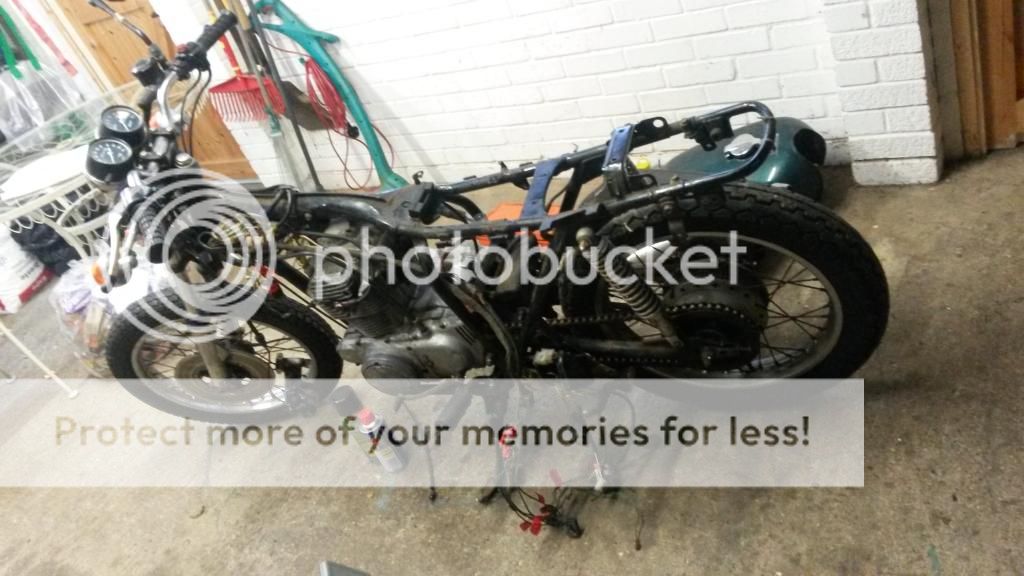
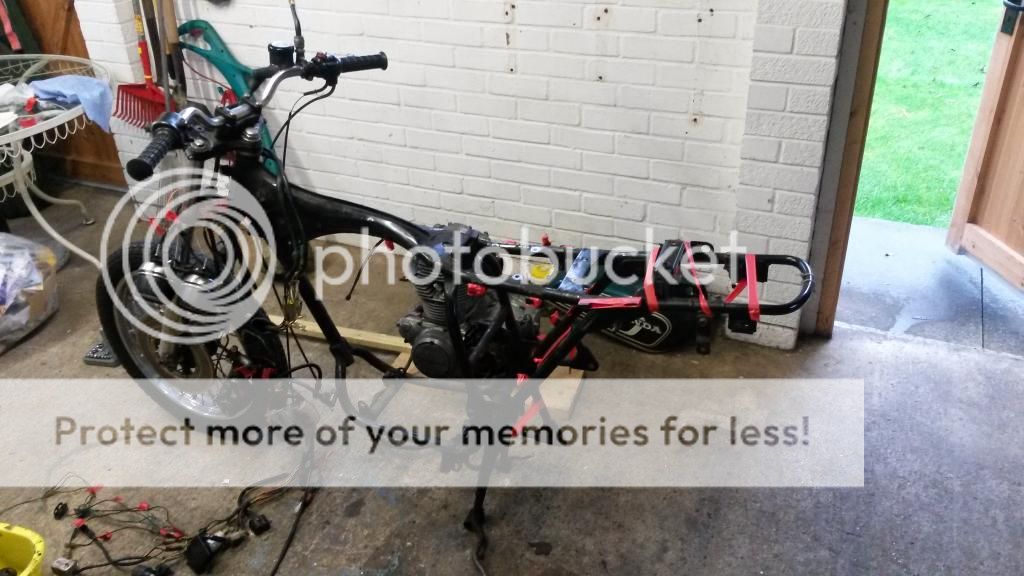
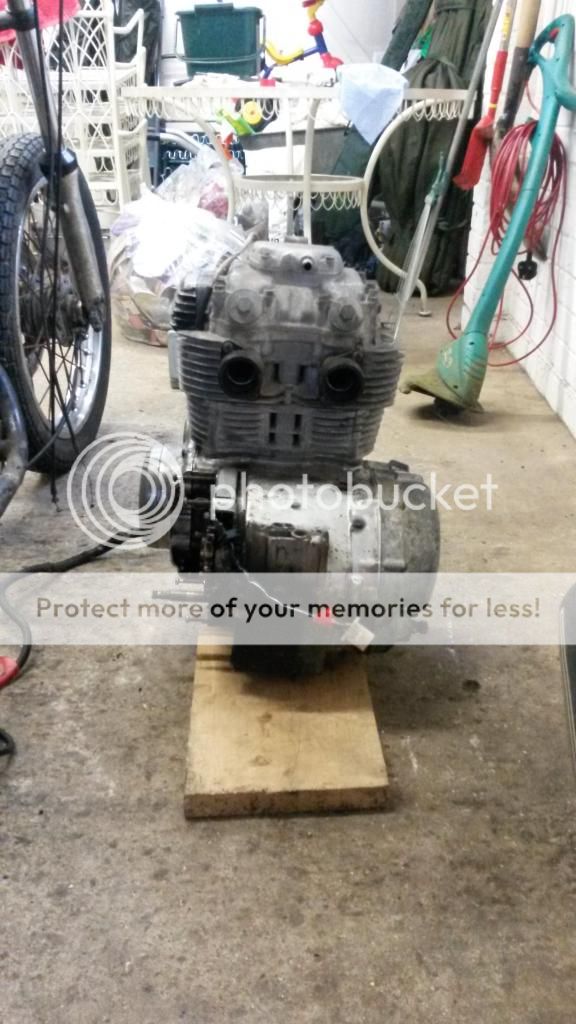
And here’s a pic of where I’m at


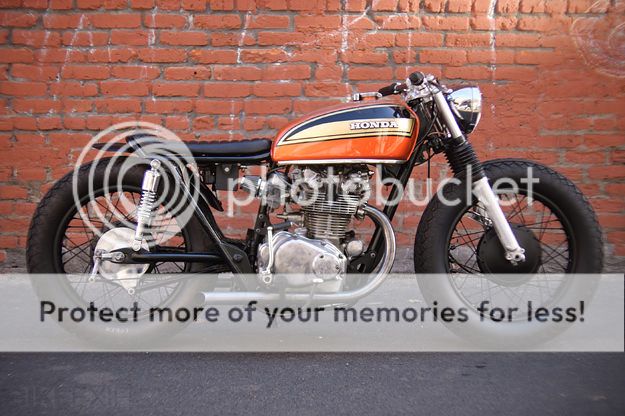
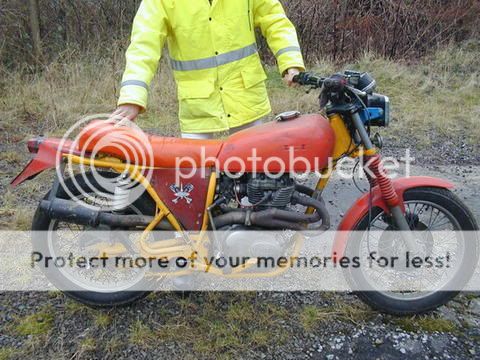
And here’s a pic of where I’m trying to get (does anyone have any history of this bike)


My plan is to have the motor looked at and cleaned up – for the cleaning part I’m tempted to by myself a soda blaster to do the cleaning myself, can sell it after the build if need be. I will be removing the electric start. I’ll lose the stock air filters and run some pod filters.

Once the motor is out I’ll have the frame looked at, I’ve found a local fabricator to help with welding, I’m gonna go with a DCC brat seat and loop. Then it will be blasted and powder coated. I think I will also have to get the exhaust mufflers at the same time stage so I can work with the fabricator to fit them and lose any unwanted tabs from old mufflers. I’ll also need to decide on battery and location – I’m thinking of a small tray under the seat.

Once that’s done I think I will put the engine back in and install new loom with new coils, regulator / rectifier and get it running.

Stage 2 will be building out the electrics and cosmetic styling.

Questions:
Soda blasting engine casing – can I just mask up intake and exhaust when I’m blasting?

Battery – I’m going for minimal loom, kick start only, head and tail light. – any recommendations on battery that will be small enough to go under seat – something half the size as stock battery? Will this take the stock regulator / rectifier?

List of parts on list for first stage:
Start removal plug http://www.ebay.co.uk/itm/Honda-Starter-Block-Off-Plug-CB350-CL350-CB360-CL360-CB450-CL450-CB500T-MCS-013-/380888971034?pt=Motorcycles_Parts_Accessories&hash=item58aec0771a
Exhaust http://www.dimecitycycles.com/satin-black-12-inch-shorty-muffler.html
Exhaust http://www.dimecitycycles.com/vintage-cafe-racer-caferacer-bobber-brat-chopper-custom-motorcycle-exhaust-parts-muffler-exhaust-reducer-kit-80-47310.html
Air filters http://www.common-motor.com/honda-pod-filters
Points + condenser http://www.common-motor.com/honda-ignition-rebuild
Seat http://www.dimecitycycles.com/review/product/list/id/3047/category/1722/
Tail loop http://www.dimecitycycles.com/dcc-originals-diy-custom-rear-tail-hoop-for-small-cc-motorcycles.html

Would love to know your thoughts, can it be done, plan look good, comments on parts? This is my first build and by posting regularly I’m hoping it will help me keep on track over the winter.

Thanks
Matt
 
CB360 is a great bike! that motivation pic you posted is fairly easily achieved... just tackle one thing at a time and youll be done before you know it
 
Sunday afternoon so time for a quick update, making progress on the tear down, grabbing a few hours where I can and carefully labelling parts as they come off and labelling wires. I’m planning on building a custom harness but I figure having the original labelled up and laid out will help me work out how to build a new leaner harness.

20141116_133745.jpg


I’ve labelled the tabs I plan on removing with red tape, although I’m not sure if I should remove the exhaust hanger brackets. I’m looking to run the 12” shorty muffler from DCC – will these need to be anchored to the frame? Anyone have any experience with fitting and running the 12” shorty muffler from DCC?

Pulled the motor today, just waiting on stator removal tool and starter motor removal plate before I send it off to be looked at and soda blasted.

20141116_133754.jpg


Thanks to everyone who has posted on my other threads where I've been asking various questions.
 
the bike wont run nearly as good as it can with just shorty's and you must have a good hanger bracket for them
ideally you keep the overall length long, by adding a midpipe and have some muffs out back
also if you remove the original seat/fender up and over bracket and put the seat pan flat on the frame, the tire will hit it, you will want a way to make your suspension work badly ie shorten the shock travel
sadly for you,this is the bratarded way, make the bike worse than stock

you really should consider leaving those nice stock pipes and airbox on the bike
at least you will be able to ride it and learn to tune it
 
Wow time flies, now Christmas is out of the way and paid off time for a progress update. I've been busy posting for advice on DTT and admiring lots of build threads and getting a ton of inspiration.

On my build I've completely stripped the frame ready for fabrication, although this won’t start until I can afford the DCC brat seat and loop.

I striped the wheels and sent the hubs for painting


The only thing I didn't remove from the hubs was the cush drive bushings, didn't fancy the stress so that meant I had to have the hubs wet sprayed rather than powder coated, should be getting them back on Tuesday. Then I can send them to be rebuilt. I'll have the rims powder coated and new spokes put in - still undecided on black vs chrome spokes. The wheels and hubs will be gloss black and I'm looking to run Dunlop K82 tyres.

Had a delivery from www.cmsnl.com with all the parts I need to finish the wheels such as bearings, dust seals, retainers etc... And a nice key ring for the kids to fight over.


I decided to run kick start only which caused some discussion on another thread I posted, finally got the starter motor out and drive and clutch assembly removed. I plugged the starter motor opening with a seal from www.common-motor.com although I prefer the cap crazypj makes so I have one on order. I then had the engine soda blasted with good results.


I've also been busy with the wet and dry and Autosol, undecided on a mirror finish vs the brushed look, elbow grease alone won't give me a mirror finish so if I do want that look I'll have to invest in a bench polisher.


Taking the engine to a local shop at the weekend to be checked out, I'd come up with a list of things to be checked / replaced such as cam chain, tensioner and guide, pistons and rings, valves and seats plus seals and gaskets. The previous owner said the right cylinder "wasn't right" and it didn't sound great the one time I fired it up so I'm guessing there will be some work required.

https://www.youtube.com/watch?v=GR2kvnc96h0

Had a few other parts in the delivery from www.common-motor.com such as points, condenser, horn, I'm at the collecting stage at the moment, slowly gathering the parts ready for assembly. Got some nice stickers for the kids and a stubby holder for me in the package - thanks Brenden. Thanks for your advice as well.


Finally got the registration of the bike sorted after nearly 2 years since buying it, the previous owner didn't send off the registration docs which meant lots of form filling which I had been putting off. Anyway officially all mine now!


Also printed a copy of the Shop Manual which will make life easier - means I don't have to keep firing up the laptop or iPad, sometimes the old way in the best way!


Next up I'll be rebuilding the front forks and having some chroming done and also making a decision on handlebars, controls, lights and the harness. I'm looking at a nice small Lithium-Ion battery maybe an Antigravity or earthX, something that will fit in a small battery box beneath the seat, I assume I'll need new coils and definitely an upgraded regulator / rectifier - anyone gone the Lithium-Ion route?

Until next time...
M
 
Build Update

Well I was happy with the slow progress I was making, got the rims back from the powder coater and took delivery of new Dunlop K82's 3.50-18 front and read and new spokes ready to re-lace the wheels.


In the meantime the engine was being looked at, having only 12k miles on the clock I didn’t think there would be too much work required but it seems at some point oil hadn't got up to the head and the cam has ground itself into the head and cover. Two of the rockers are also worn and the rings have not only broke but shattered.


I've just done my seat and frame budget on cmsnl and ebay buying 2 new rockers and head cover, and a used head and cam. The cam is from a CB250G5, the research I've done suggests it’s the same but as this was the only part from my shopping list that was in the UK and was £20 / $30 I thought I'd take a chance given all the other parts are coming from overseas meaning the shipping is more than the parts themselves!

Here's the new parts I've ordered I'm hoping they are the parts I need, my model is a European CB360G5, these parts have come from various other CB360's (except the cam) so I'm hoping the engines didn't change between the model iterations and various regions of sale. Anyone have an idea?


I guess if I'd done some more research I wouldn't have been that surprised it seems that cams running dry is a common issue and because there are no removable cam journals on these engines the only option is to swap out the head.

Would love to hear if anyone else has run into this issue and if there is another solution to swapping out the head.

More updates when the replacement parts arrive and I have more money to burn!
 
Looking forward to seeing your progress. The inspriation pic you posted is one of my favorite bikes, and I want to build something similar after I finish my 750.
 
Nice work oathamm,

I'm a complete novice and up to exactly the same stage as you with my cb360 in terms of aesthetics. Just about to start work on the carbs and engine and have new seals and bolts on their way. That inspiration pic is pretty much mine too. Looking fort a slightly neater, cleaner battery solution but a bit stumped.

Keep the info coming, I should put up my rebuild too!

Cheers
 
Re: First Build - Brat Style

Update time, it's been a while....
Engine is still in the shop, I managed to source used (ebay) cam, head, cover, rockers then had to buy 0.5 oversized pistons and rings, the expense and time has set me back a good few months but now I've all the parts the engine can be bored and re-built. Starting to worry now about getting oil to the head and cam in future and wondering if I should look at an oil mod? Any thoughts?

Made some progress in other areas, I had the wheels re-built by James at Essex Wheels http://www.essexwheelsandeng.com


Next job is to mock up the frame and decide what's going and what's staying, I'll order my seat and loop from DCC as soon as I have the funds, unfortunately for me we are in the middle of a house move and that ain't cheap here in the UK, good news is the new house comes with a workshop!

Anyone have any tips on mudguards / fenders, I'm after a small one for the rear like on the Holiday CB450, is that a custom job or a chopped down stock?

Was reading posts on rear shocks and Hagon Shocks seem to be loved, done some research and their HQ is round the corner from me in Essex, they offered me a custom paint job which I'm happy about.

Anyone in the UK heading to the Bike Shed London show end of May? http://thebikeshed.cc/2015/03/31/london-tickets/

Matt
 
While you had wheels apart you should have fitted the rear rim on front then got a rim off rear of XS650 (or similar) for the back
I'm pretty sure you can get a rear loop bent up 'local' much cheaper than getting a DCC one?
If you see this one around, slap the fucker riding it
It was stolen from my shed last year (in South Wales)
1977CJ250.jpg

Are you in Essex? I used to hang out in Lower Shearing and / or Great Bardfield 8)
Make sure you modify oil transfer piece in clutch cover plus open transfer holes next to cylinder stud (do a search, Trek97 has all the info)
 
PJ you need to write a book with all your experience and tips! I'd buy it.

I'm not far from Shearing, Alf Mossell of Harris Yamaha fame is out that way, was tempted to take my frame to him but think I'll stick with Essex Wheels.

I'll keep my eyes peeled for your bike, I feel your pain I had my brand new R6 pinched!

Started the mock up today not sure whether to go for clip-ons or flat bars, any thoughts?


Happy with the profile the, rear wheel could be fatter but you live and learn, I'll remember the XS650 top for next time PJ.

Gonna rinse the credit card and order the parts I need to get the frame complete. I'm thinking I just need seat, seat loop, rear light, battery or at least battery dimensions so I can fabricate electrics tray. Anything else while I'm at it?
 
Remove rear shocks and fit a bar with 12mm holes drilled on 9.5" centres instead.
That way you know you have clearance between tyre and frame/battery tray, etc
 
9.5" is pretty arbitray guesswork wont fly in these situations,unless you know what shock he is usiong and have that figure brained-in ;)

the bar should equal the length of the fully bottomed out shock, that would be a pretty easy thing to measure.
from fully bottom give an inch to the fender/seat pan frame bar MINIMUM this allows for the day when you want better shocks
 
crazypj said:
Remove rear shocks and fit a bar with 12mm holes drilled on 9.5" centres instead.
That way you know you have clearance between tyre and frame/battery tray, etc

Could you explain this in more detail please?
 
If you remove shocks the rear wheel will drop if on centre stand or frame will drop onto tyre if on wheels.
Stock shock fully compressed is 9.5", fitting a bar with holes on 9.5 centre will be same as removing springs and re-fitting damper
You then know exactly how much clearance tyre has to solid bjects
 
Back
Top Bottom