FRANKENHONDA II the 1982 DOHC CB 750F2 Build

CrabsAndCylinders said:
Damn, those brackets look fantastic!
Cheers I'm looking at what needs to be done to convert the mill to a CNC , hopefully we can design and replicate some of his work

When I get home I'll see how it looks maybe I'll just anodise it clear


Sent from my iPad using DO THE TON
 
Cookie said:
I'd see about centering the wing on that logo: it'd look more balanced. Otherwise it just kind of looks like a decal saying "Franken" was tacked on to original. My $0.02.

They're pretty slick otherwise though; I love that your brother was able to match the font so closely to original
Yea when it's in the middle it just doesn't sit right with me so it will have to look tacked on

Next challenge is getting the paint to match and also getting him to replicate the blue stripes , and work out how to / whether or not to strip the front and rear fairing


Sent from my iPad using DO THE TON
 
cb250nproject said:
Yea when it's in the middle it just doesn't sit right with me so it will have to look tacked on

Next challenge is getting the paint to match and also getting him to replicate the blue stripes , and work out how to / whether or not to strip the front and rear fairing


Sent from my iPad using DO THE TON

I wouldn't move it to the middle but rather about 1/3 of the way from the front.
 
Can anyone tell me what the original front and rear sprocket ratios were on the dohc 750s I want to get new ones but I'm not at home to count the teeth also how many links in the chain ?? Cheers in advance


Sent from my iPhone using DO THE TON
 
cb250nproject said:
Can anyone tell me what the original front and rear sprocket ratios were on the dohc 750s I want to get new ones but I'm not at home to count the teeth also how many links in the chain ?? Cheers in advance

Yup!
Taken directly from the Honda Factory Service Manual, 1981 Addendum (there were no driveline changes in 1982):

CB750F and K ran 18 Front/46 Rear (2.555:1 ratio) with a 108 link, #530 chain.

CB750C was 18/43 (2.388:1) with 106 link, #530 chain (loses some acceleration, but better for cruising/touring).

I went to a 17/40 combination with a 106-link chain on my 750C. Almost the same ratio (within 1.5%), but the smaller sprockets were on sale and saved me about/40. Also, it was cheaper to buy a 110 link chain and shorten it, than to buy a 106-link.
 
Cookie said:
Yup!
Taken directly from the Honda Factory Service Manual, 1981 Addendum (there were no driveline changes in 1982):

CB750F and K ran 18 Front/46 Rear (2.555:1 ratio) with a 108 link, #530 chain.

CB750C was 18/43 (2.388:1) with 106 link, #530 chain (loses some acceleration, but better for cruising/touring).

I went to a 17/40 combination with a 106-link chain on my 750C. Almost the same ratio (within 1.5%), but the smaller sprockets were on sale and saved me about/40. Also, it was cheaper to buy a 110 link chain and shorten it, than to buy a 106-link.

Awesome I think my rear hub is a k anyway as it's a spoked rim with a disc brake, the original rim was a cornstar and it actually runs a different sprocket I was a bit devo as I was going to reuse it

If you change to a lighter chain say a 520 does that effect the sprockets you can use ?


Sent from my iPhone using DO THE TON
 
Yea it does. 520/530 are both 5/8" long between the links, I believe 520 is narrower (thinner). Might have concerns fitting on stock-sized sprockets (but I've never tried).
 
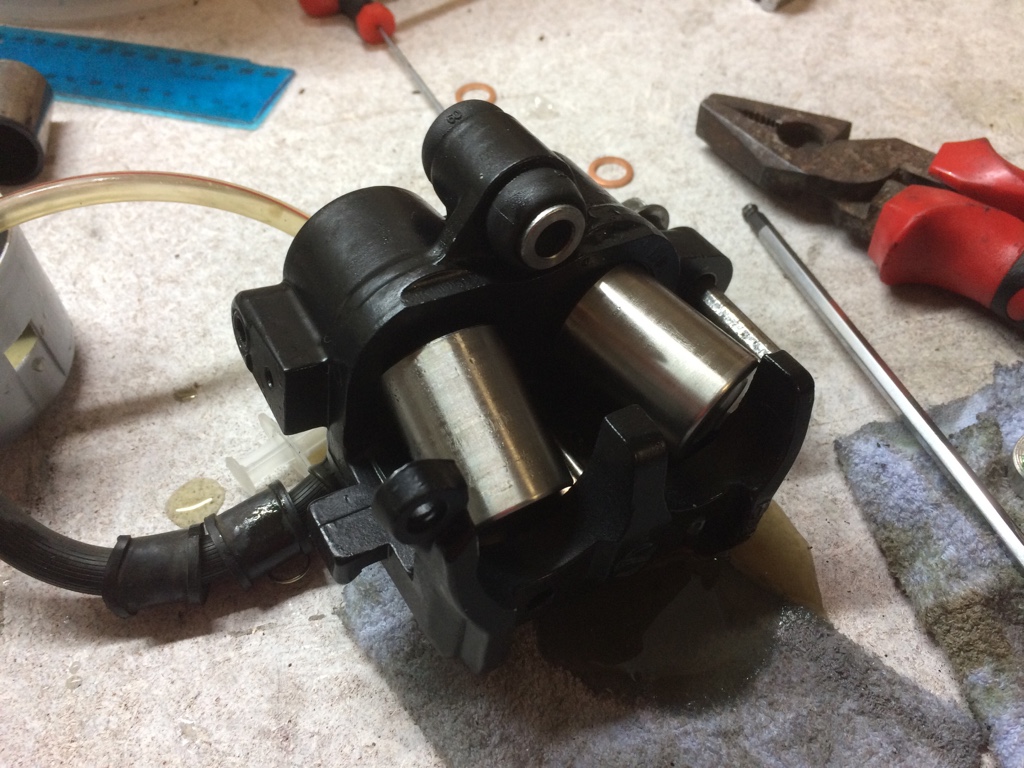
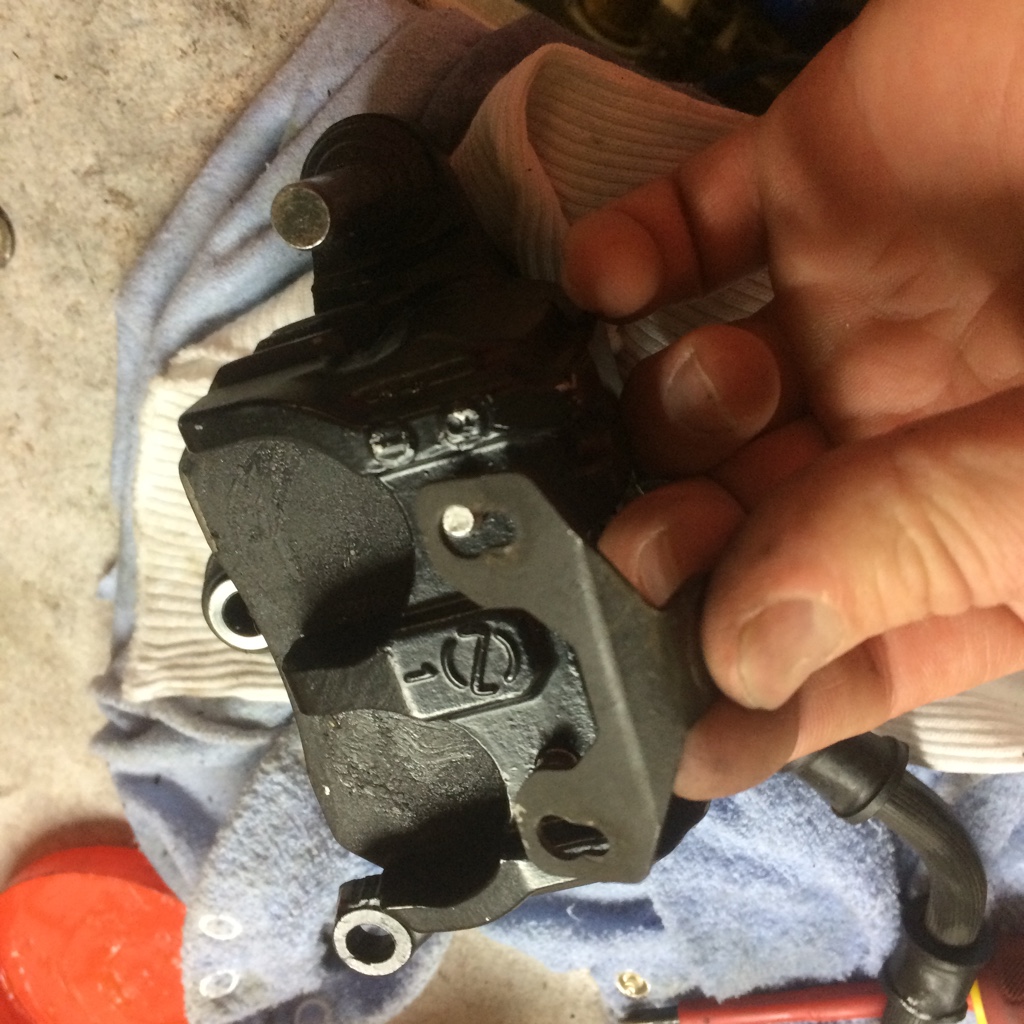
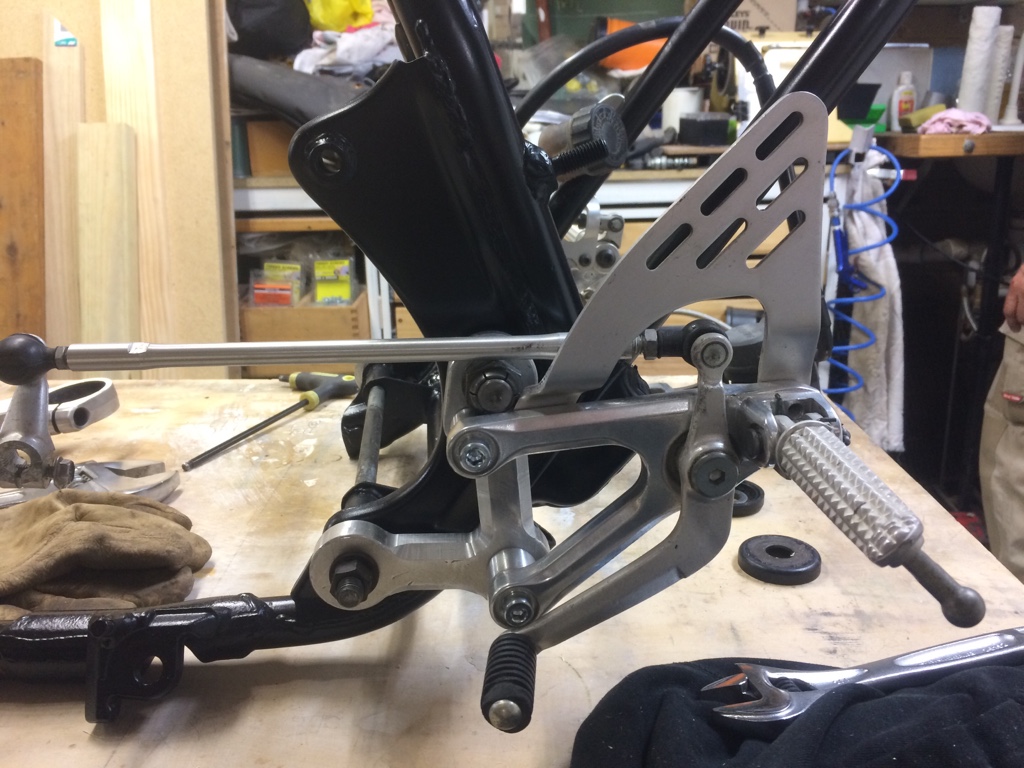
So got back from work and decided after a red eye I would try to work in the bike... apparently this was not such a good idea, thought I would tackle the caliper rebuild

6426be01c585525bd9bfa33361b0f672.jpg


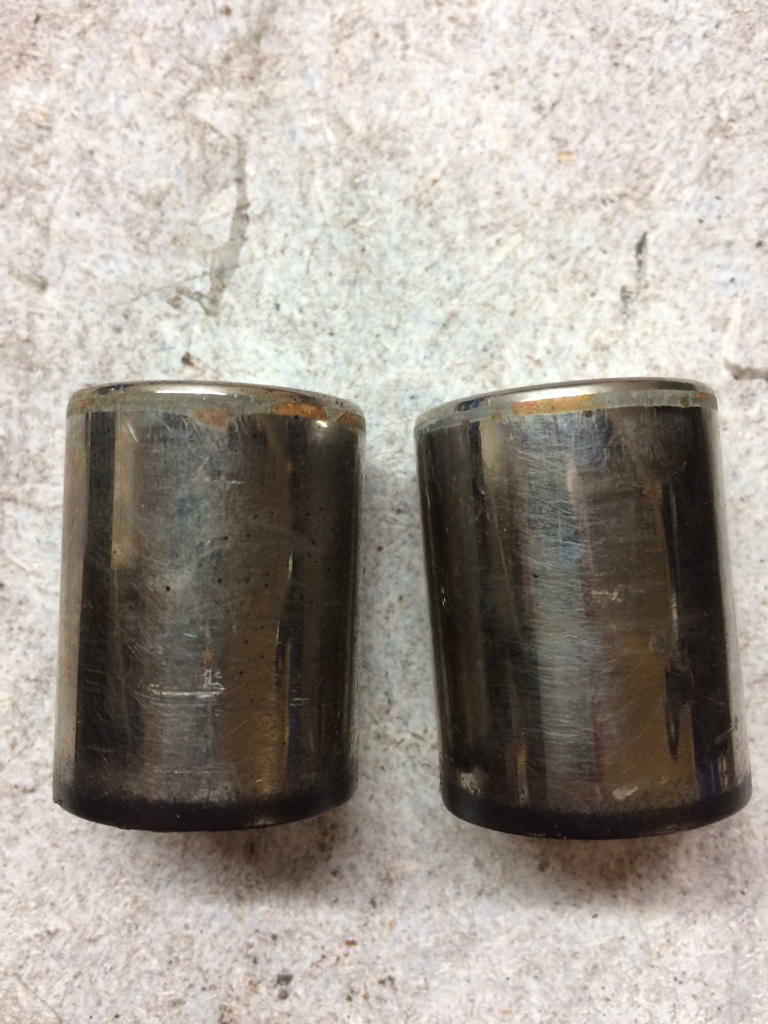
So these were the original pistons pitted, scratched and rusted

6e6ee633cdc43ae25b68d6cfb108b067.jpg


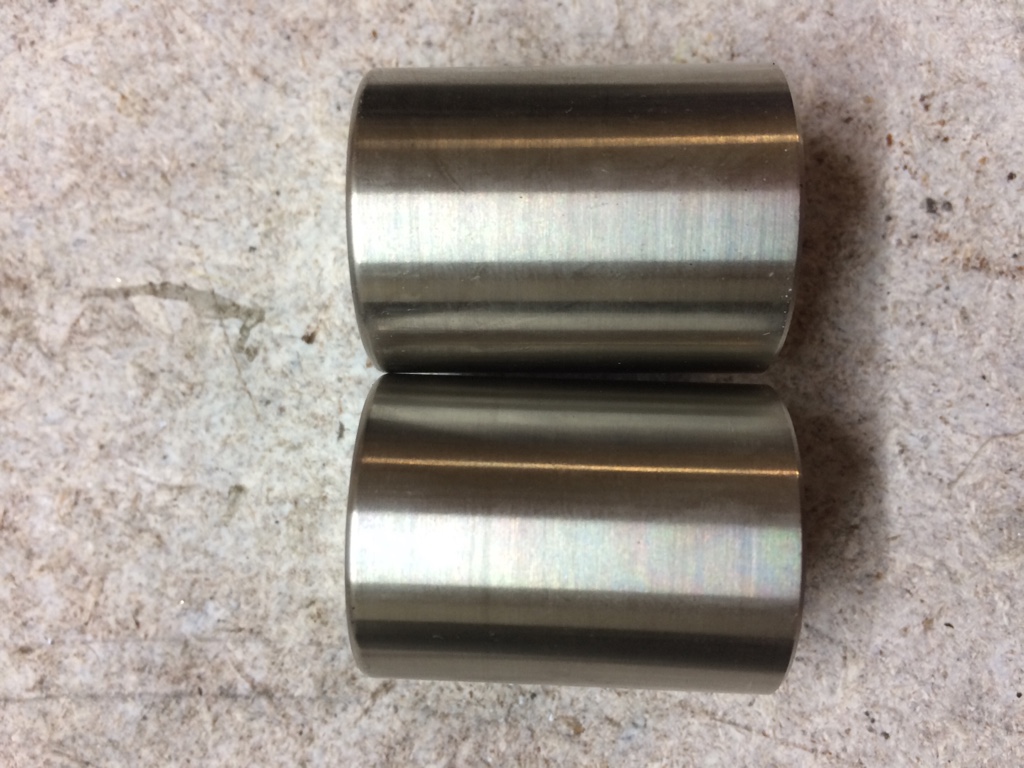
Here are the new ones that arrived

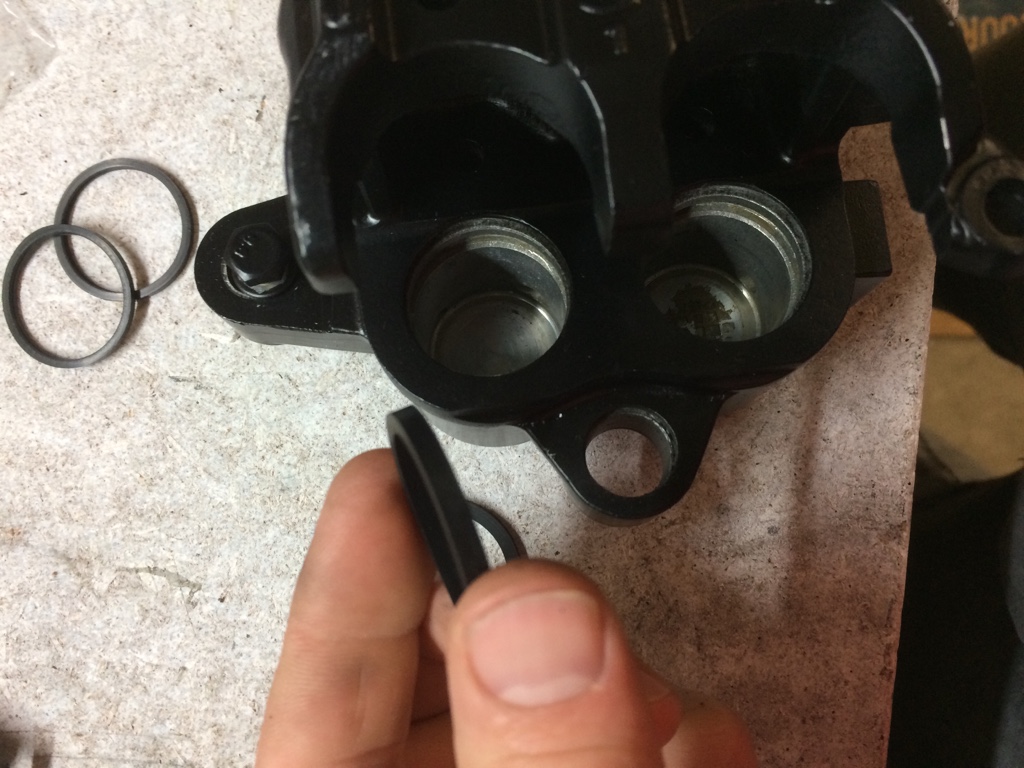
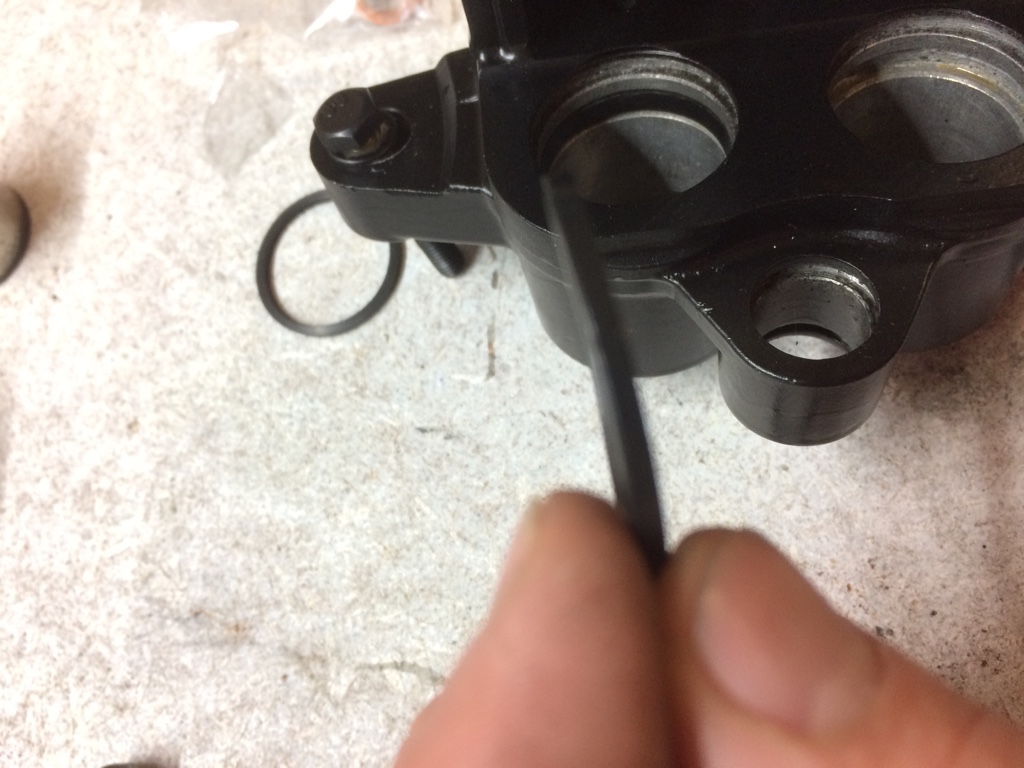
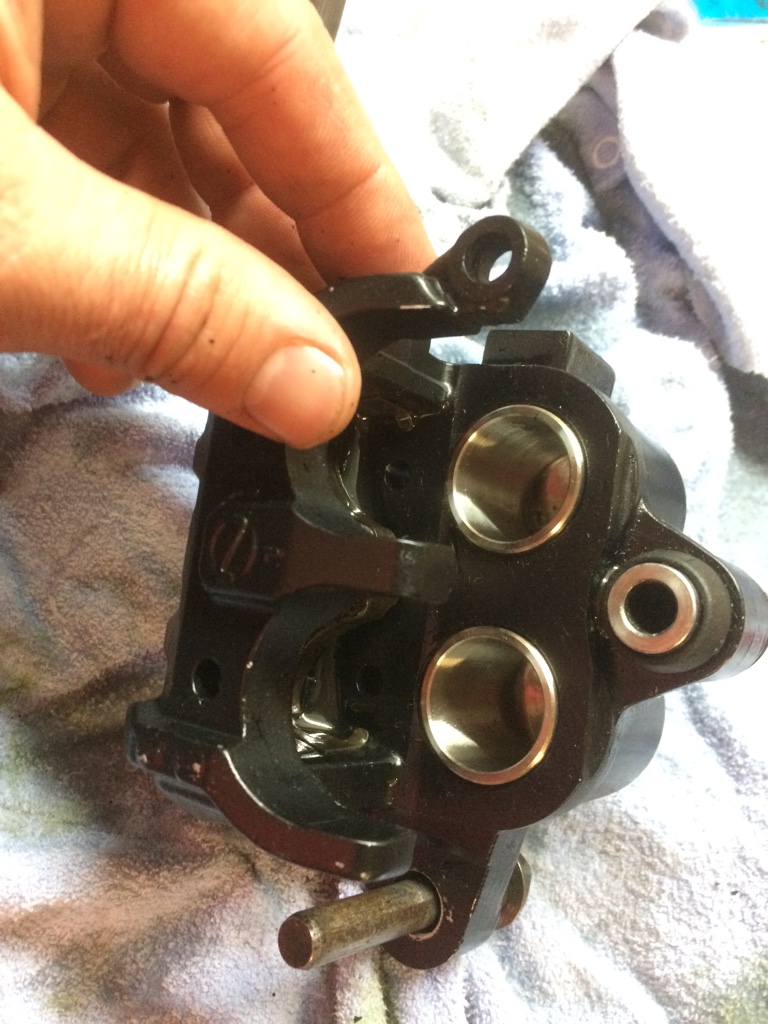
First I installed the rubber seals in, There is a thicker one that is inserted into the lower groove

e444cec0f99fa8cc0fe20ca4de8914c3.jpg
62c7b557240fe25b3c32c238b9e27a3b.jpg


Through great skill and mastery I somehow managed to twist the seal as I installed it, after a little cursing and persistence I untwisted it.

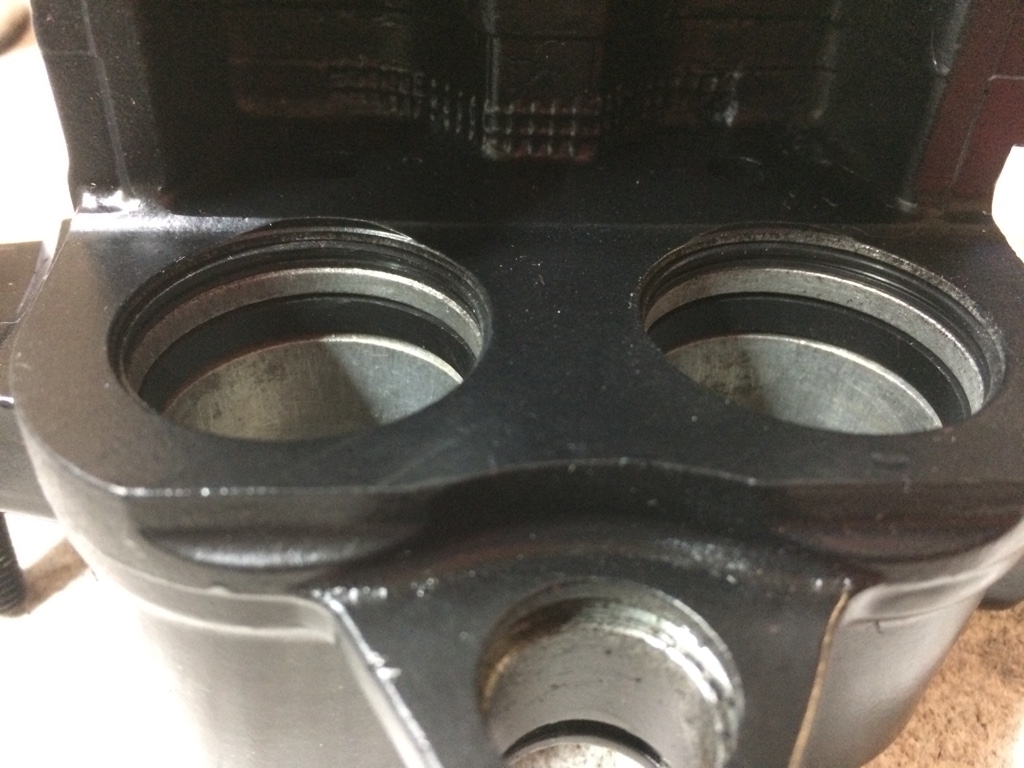
I then installed the smaller seal
b69e55b6f3c8dd4ca4701fb673c33e83.jpg


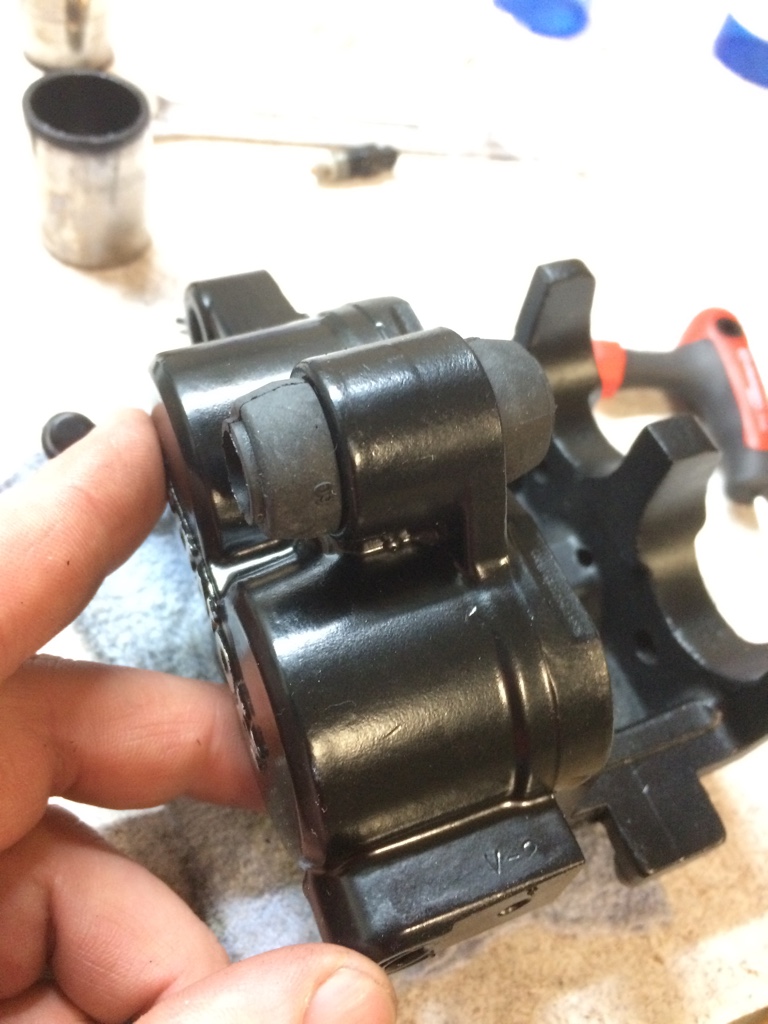
Then repeated for the other side
049e78520060688ddb3c914514180cc3.jpg


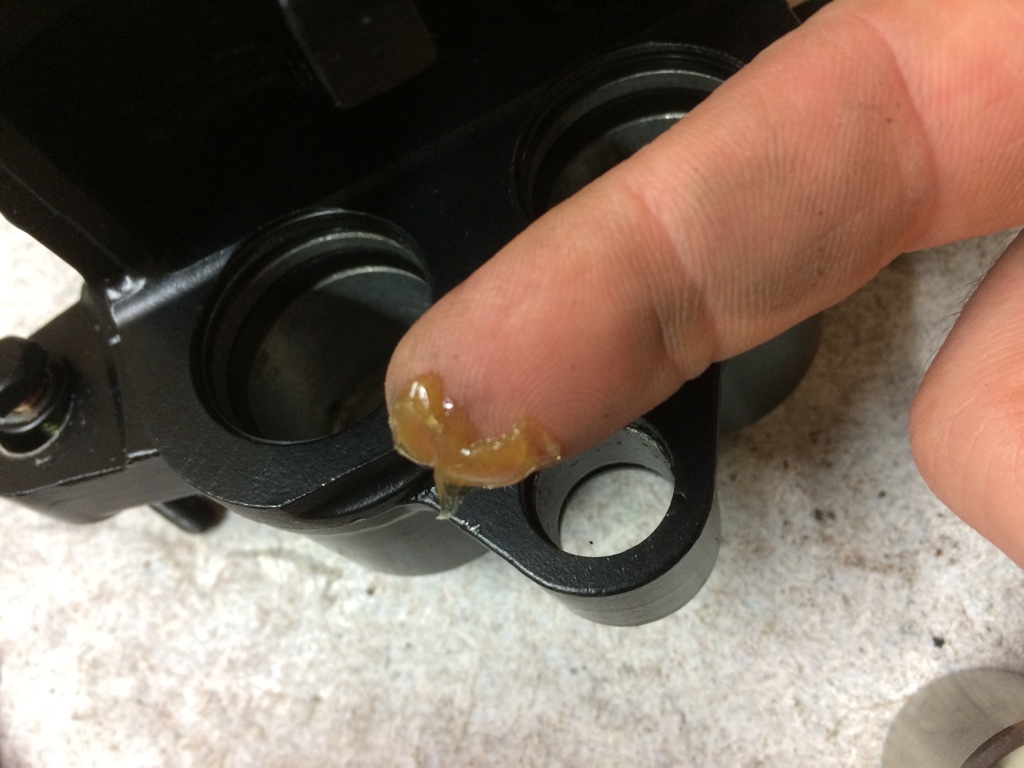
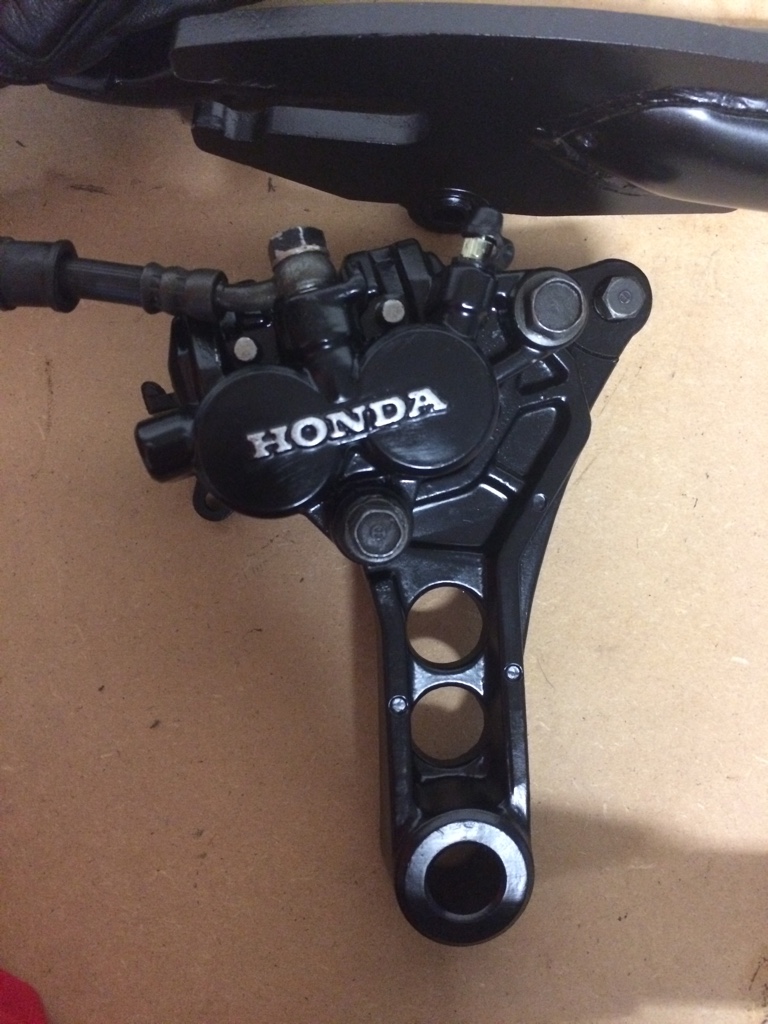
I then put a little grease on them

9cbc9338a364d1401e095973367436e1.jpg


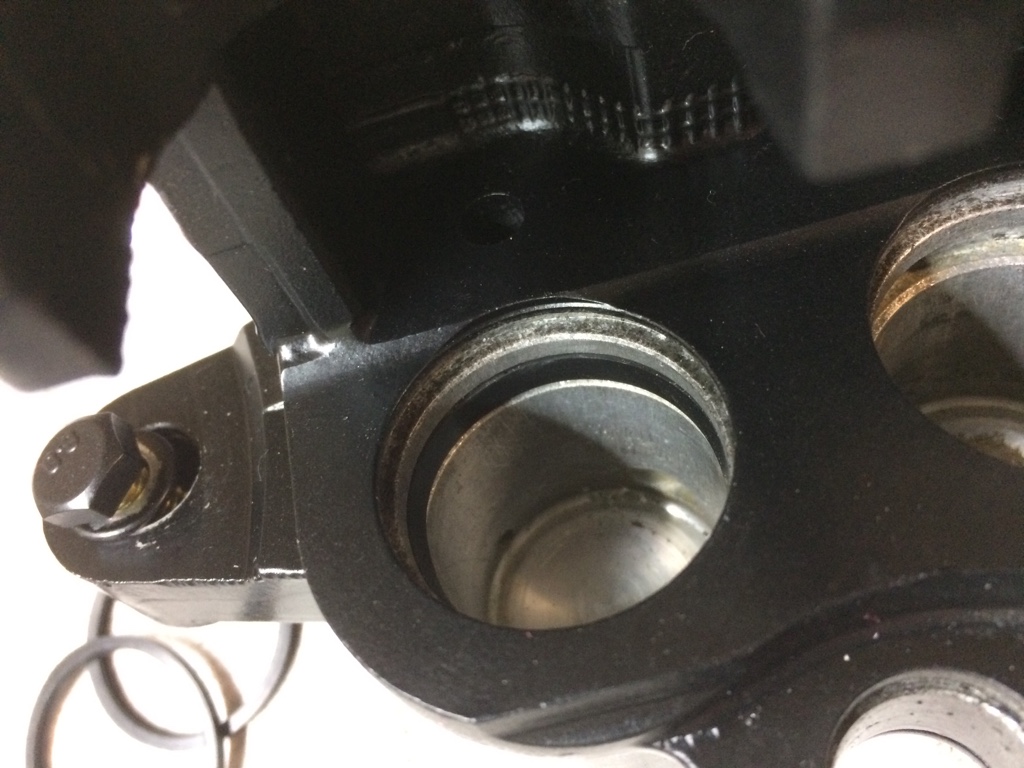
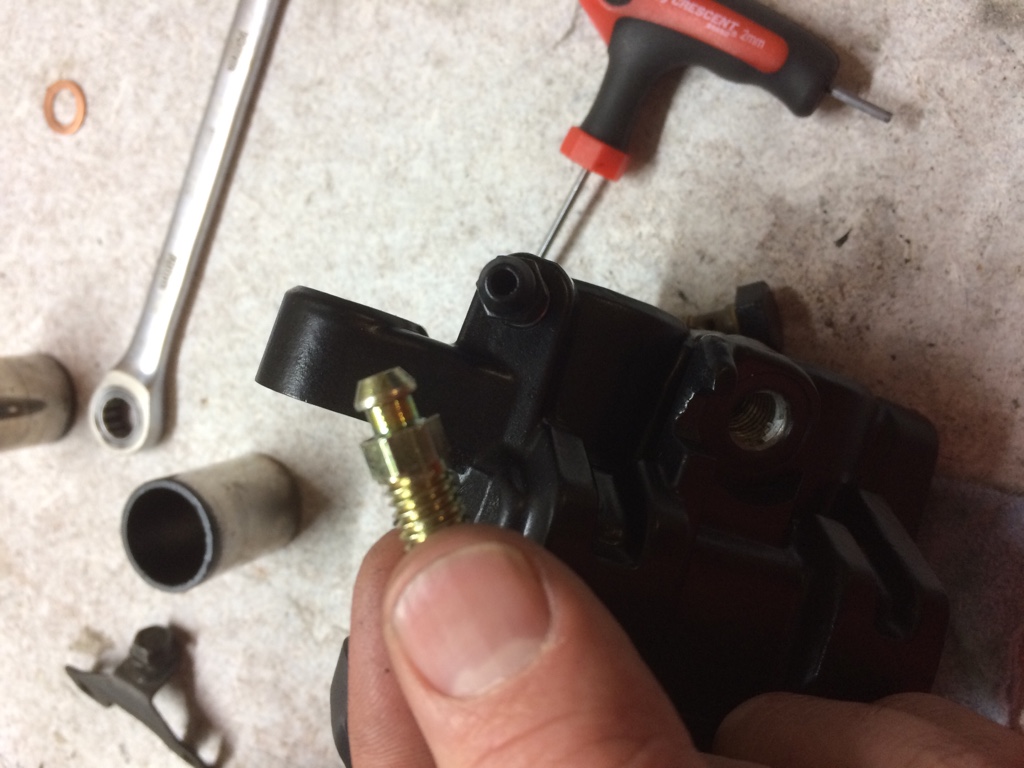
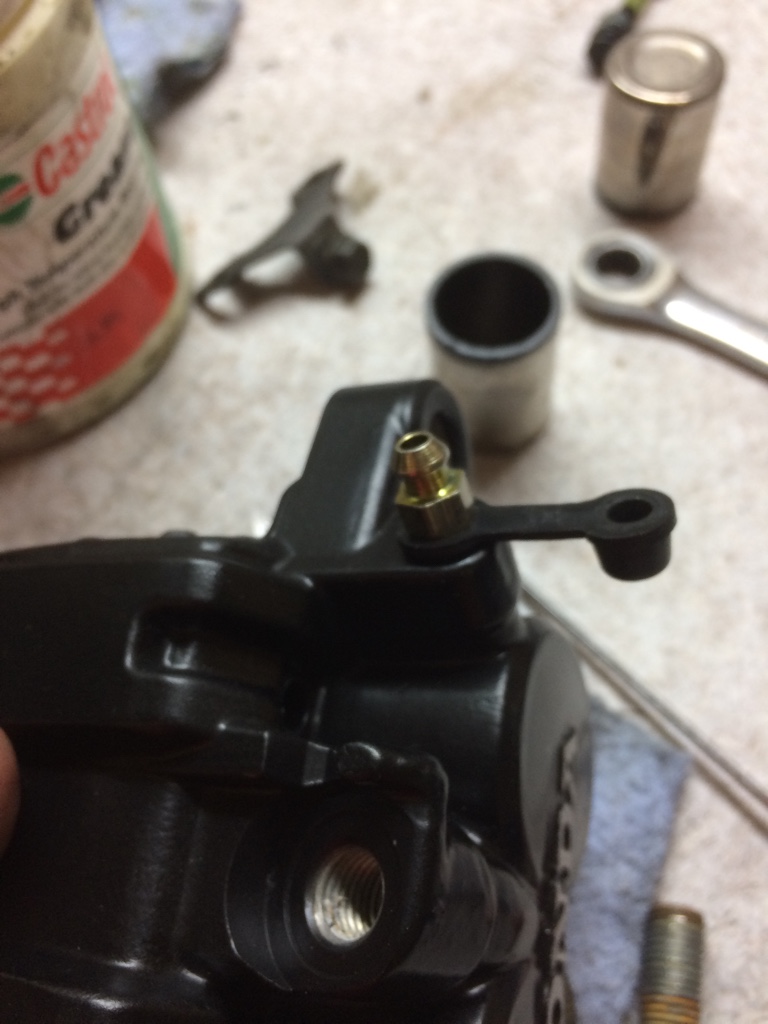
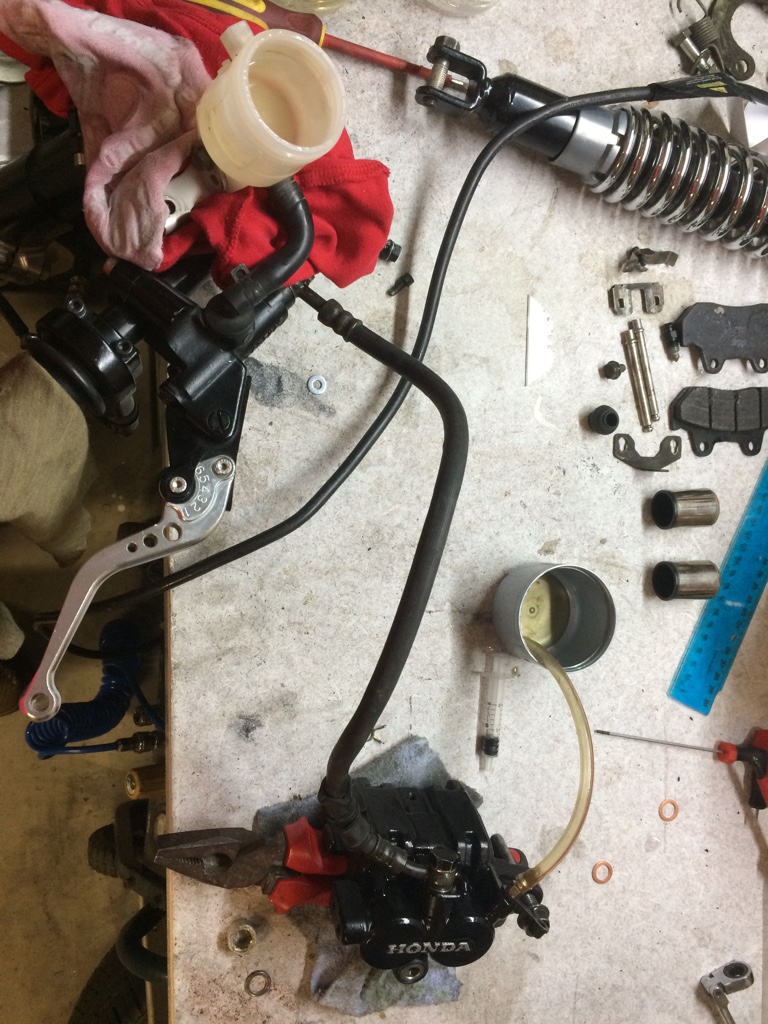
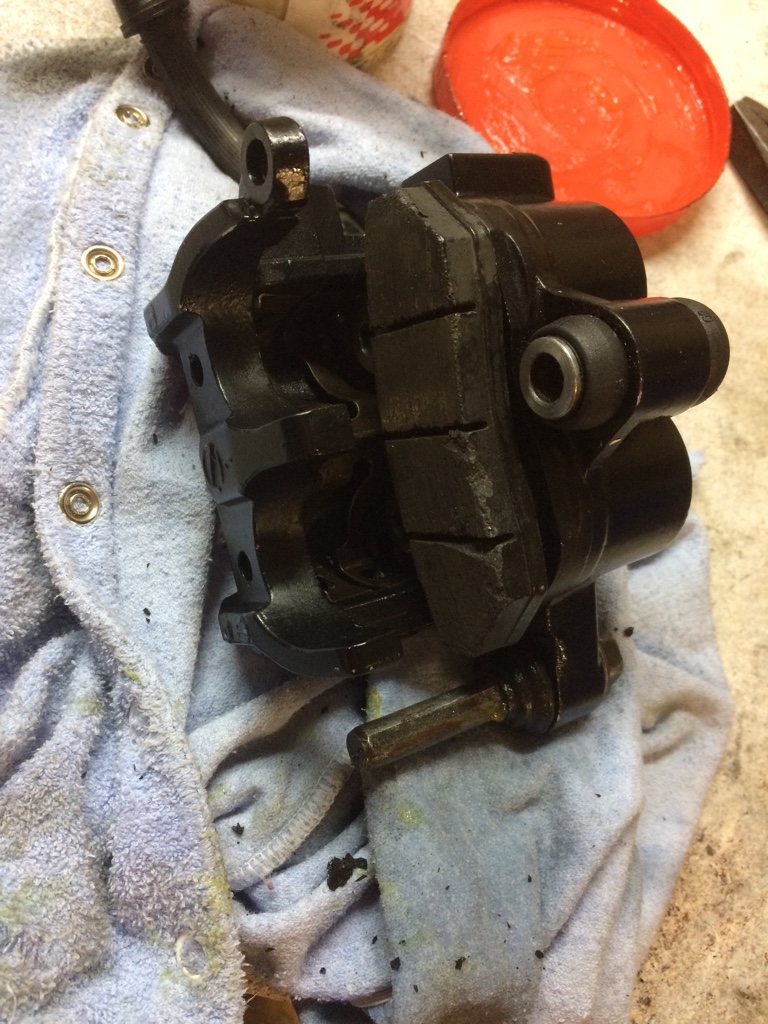
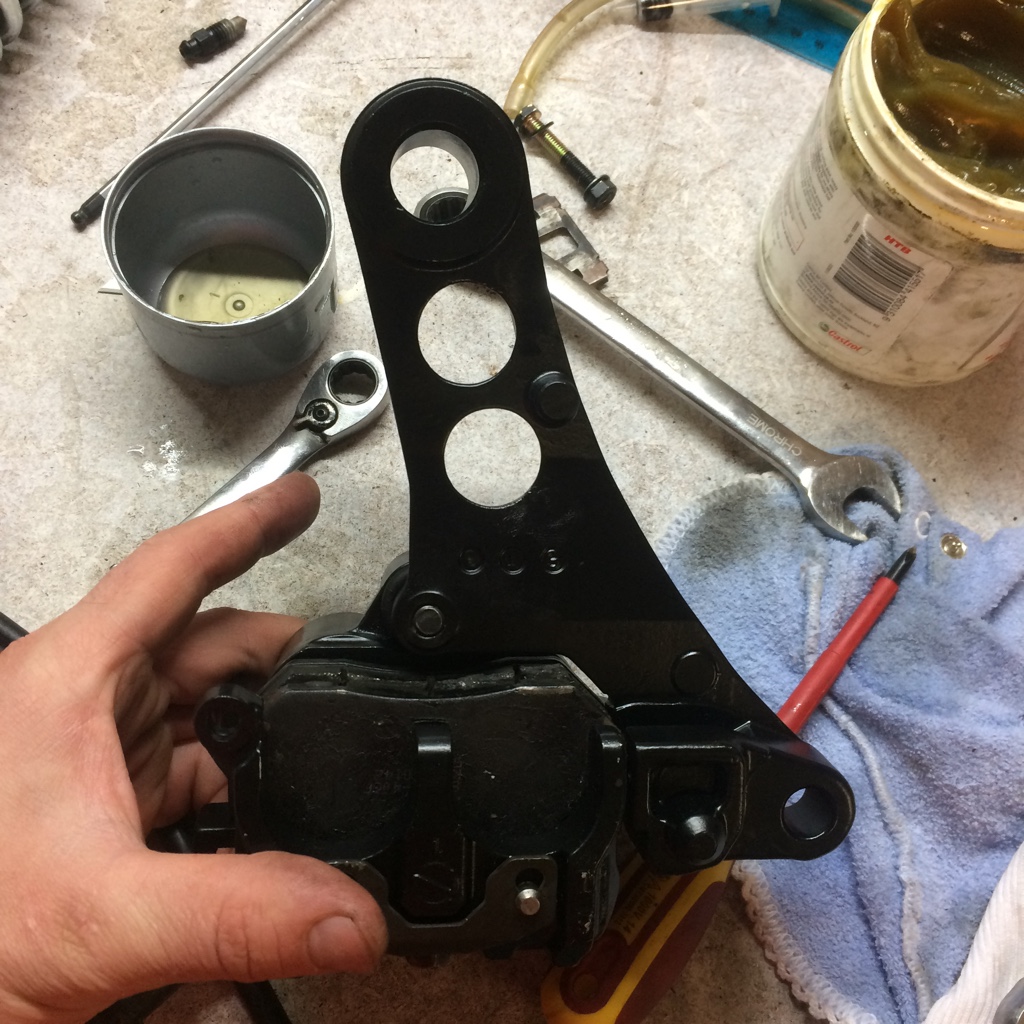
Next I replaced the bleed nipple
74948aa612d52d75c794cfb2030b257d.jpg
e19f10e7550d63cdd823add9eb728b86.jpg


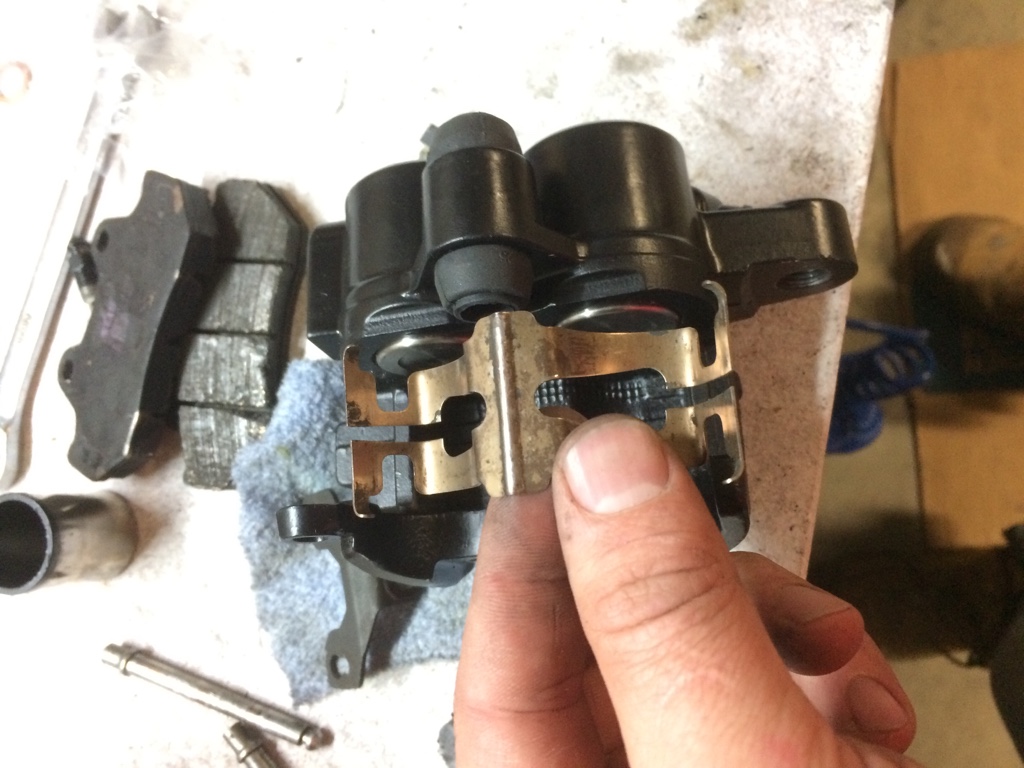
Then I installed the rubbers and hollow pin
805ff67b91d755cd306a4147c6d1e57a.jpg


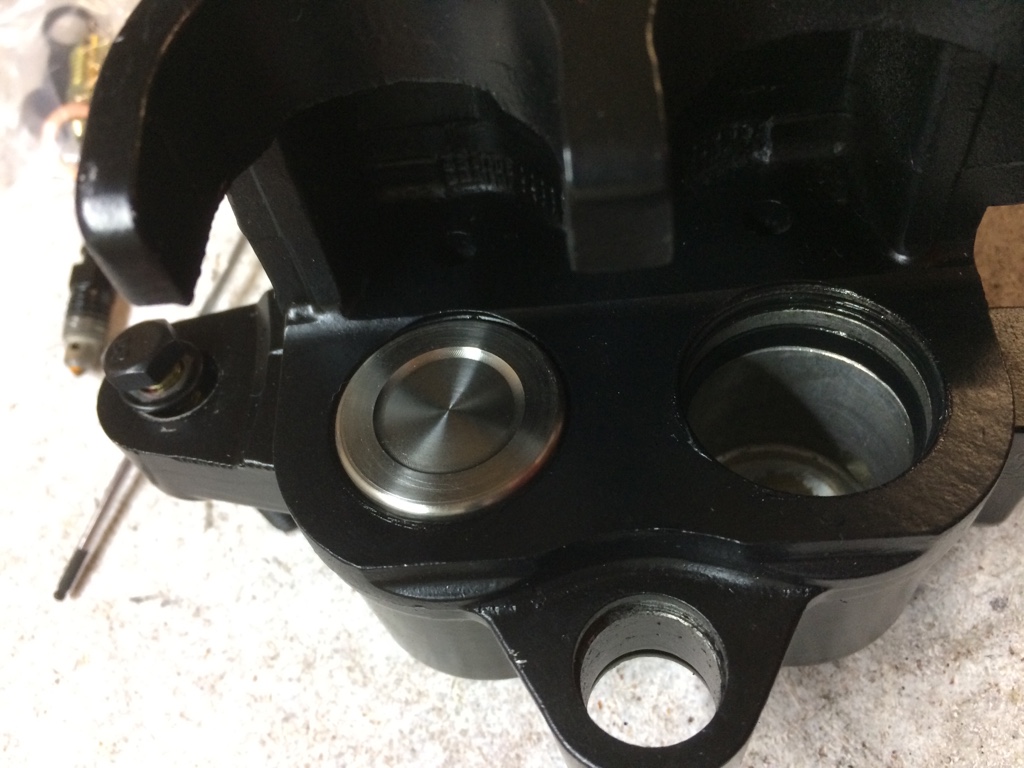
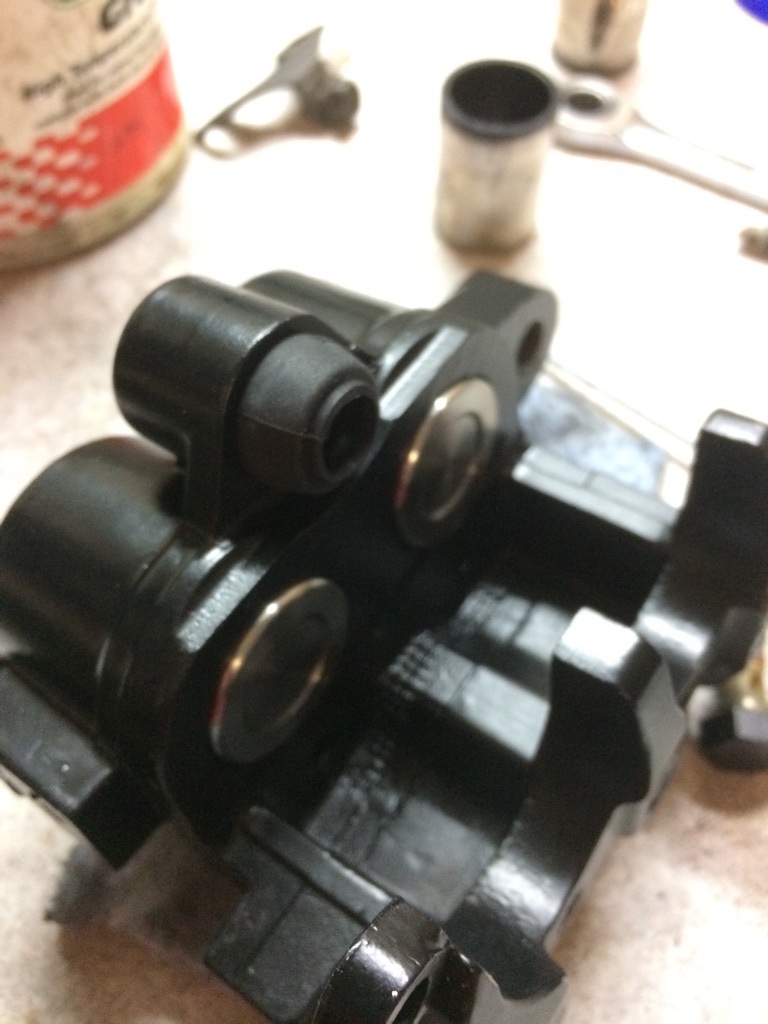
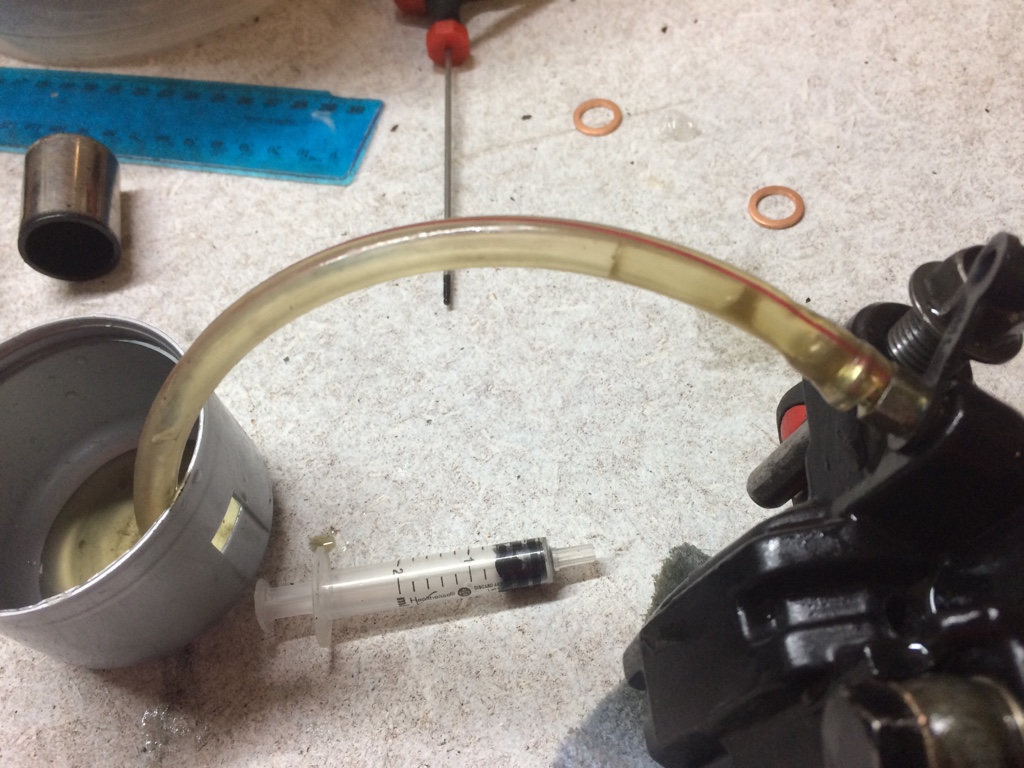
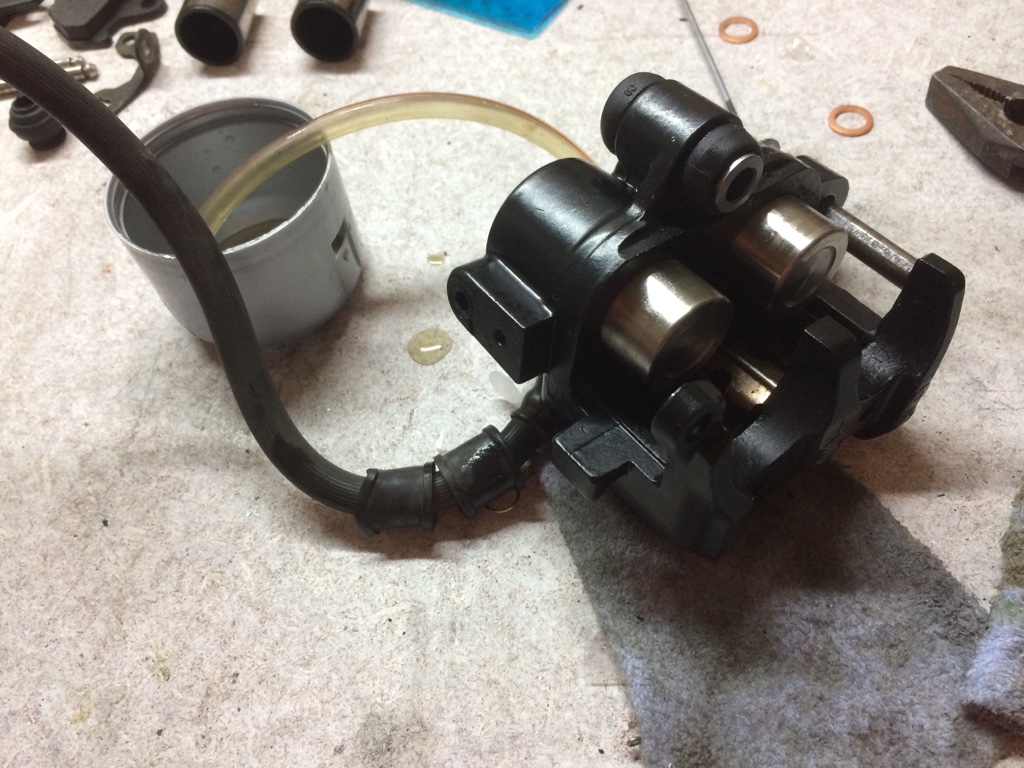
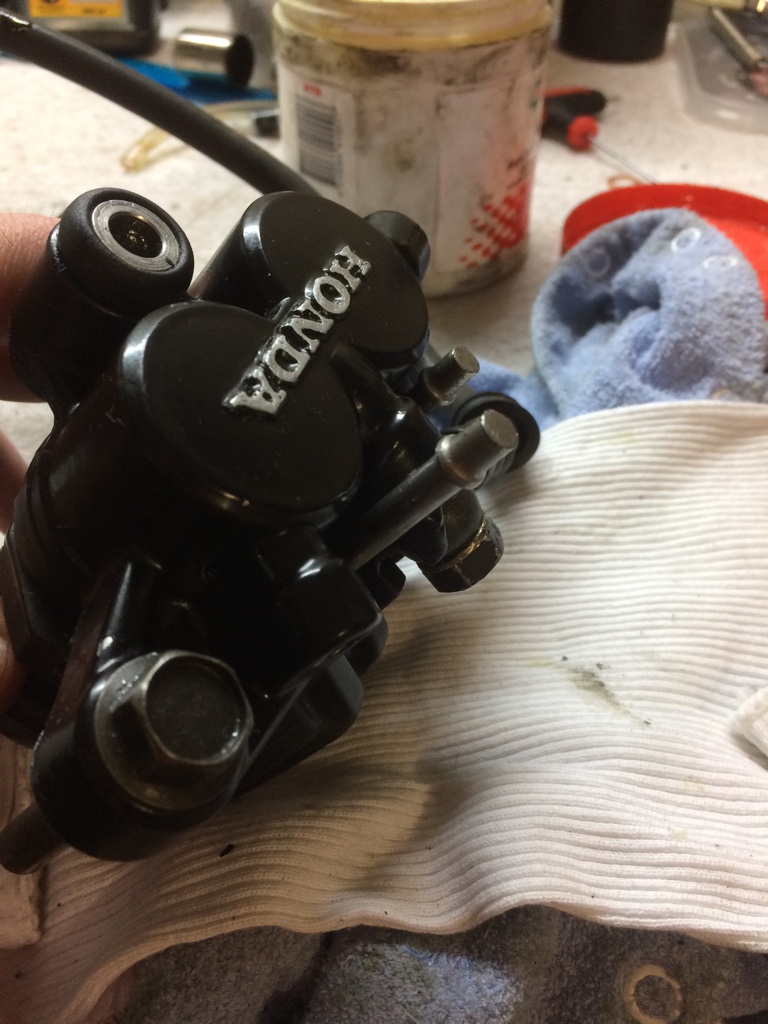
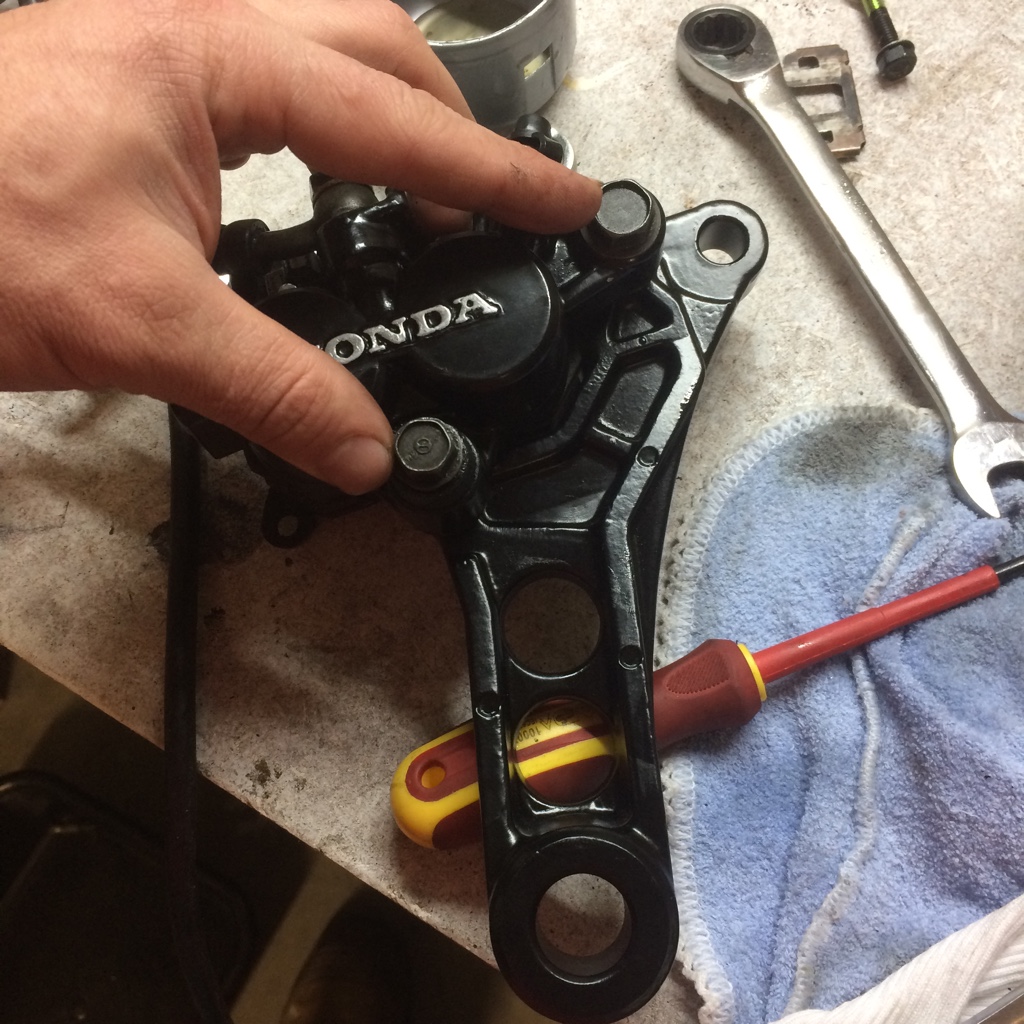
Then this is the moment where I totally fucked up

92b0db7cccdb8c055479c17dae4bd305.jpg
9154a13a5d0a94bb3dffca060c47f2ed.jpg
bbb74a7c1b840cd719e8f1ebbc98fc61.jpg


Yep put the pistons in the wrong way didn't I .... face palm moment... so being a kid raised on magyver I thought to my self what would he do... so I tried connecting the old rear brake master cylinder and for some reason I can't get the pistons to move out ... currently at an in pass.

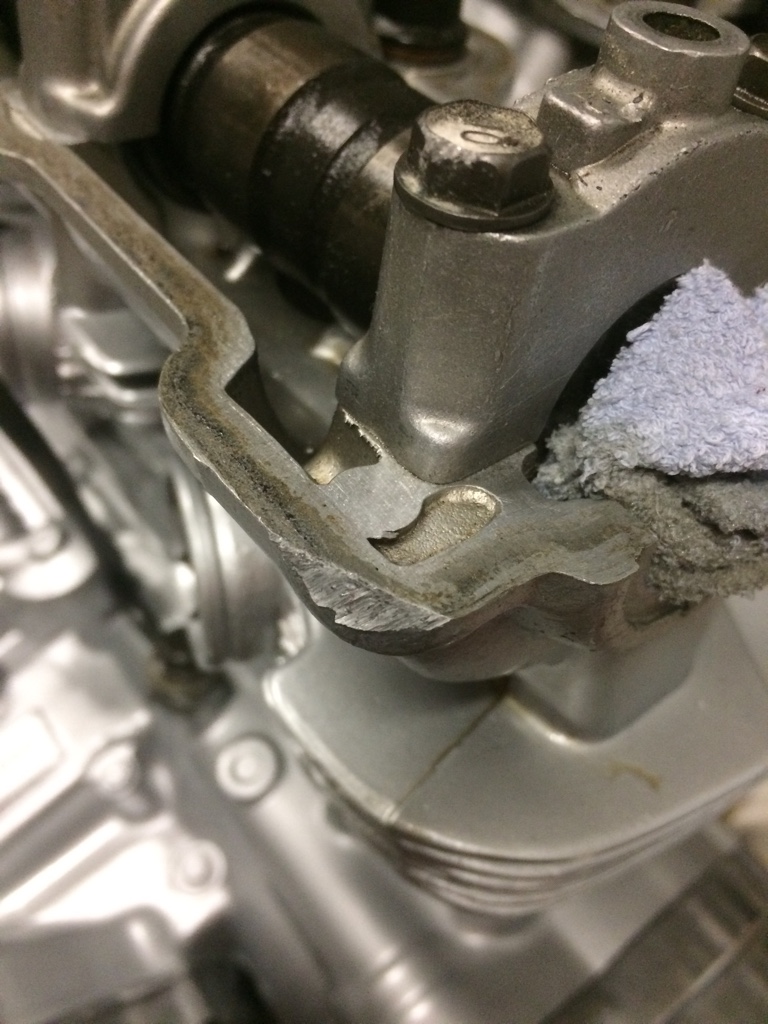
So rather than give you turned my attention to getting the motor back in the frame, as I moved the stand the motor fell off and this happened

f1e37fd17b692681c1d03e0e1c315641.jpg


I'm hoping it still seals otherwise I'll be in need of someone to weld then machine it ... not really what I was hoping for

In addition I scratched the engine paint a little luckily it's on a side cover that can be removed and painted

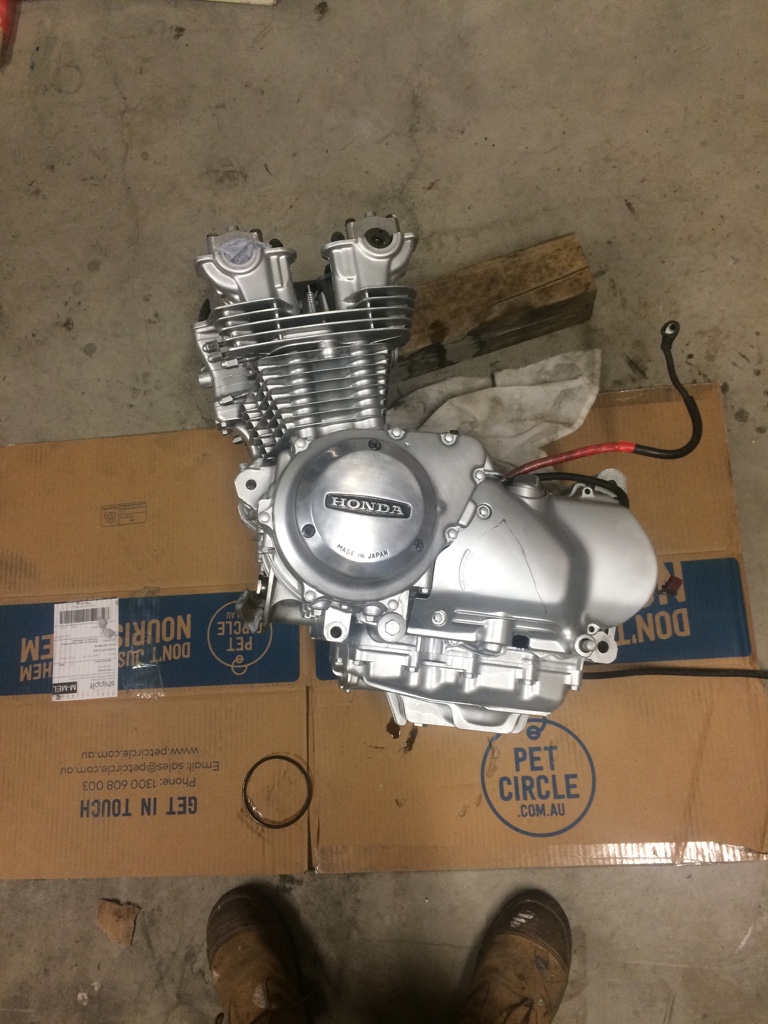
I tried laying the engine over
4de104b4ff3e56abe061ec81f4a51504.jpg


But by myself I'm one arm short of being able to put it back in I think I'll have to wait for some assistance ... unfortunately wifey is about 1 week from due so my number one apprentice is off

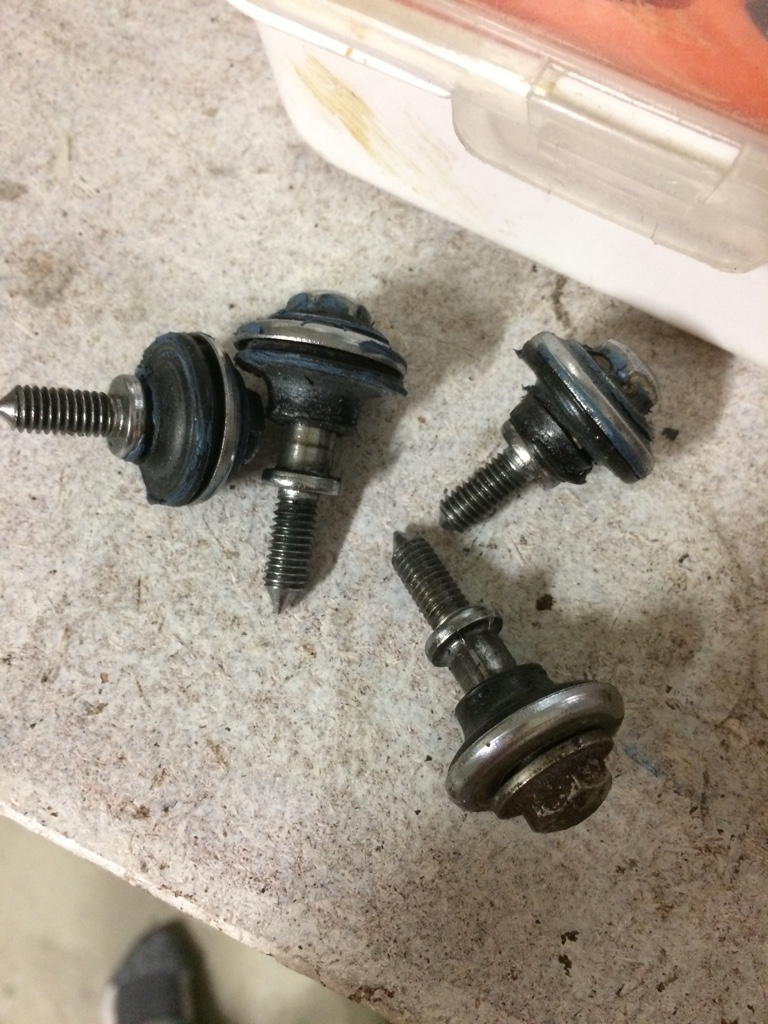
Another thing I noticed I need to replace these bolts that hold the engine cover on
a07b7cbb791a6531b204be298236c42b.jpg


Does anyone have a part number or know the proper name for these ?


Sent from my iPhone using DO THE TON
 
You dont need to replace the entire bolt - you just want new rubber grommets for them. You should always replace these grommets if you are replacing the gasket as they tension the cover down to make it seal.
 
Thanks Hillsy, Do you have a part number for the gromit or know exaclty what its called so i know what to order online ?
 
Number 9 in this schematic - they are called mounting rubbers - Honda part number is 90541-425-000


honda-cb750f2-1982-c-germany-cylinder-head-cover_bigma000096e01_0eb4.gif
 
Ok so I couldn't let it beat me so I concocted a plan on how to get these pistons out

So first I connected the reservoir for gsxr front calipers

78d6edaaad95f6786d5c5d3dd79098b5.jpg


Then I proceeded to purge the line of air first I disconnected the line from the caliper it took a little but the fluid started coming through.

Once I had fluid there I kept the lever down and reconnected the line to the caliper

b1e5b8d4d8367ef4f095660a42eb2ed5.jpg


Next I connected a clear line to the bleed valve and waited for the air to purge
0ea2b564c090565553186ed41cbba713.jpg


Then I kept at it till there was movement on the pistons
ac0458c51f9510afced50f21f02252dc.jpg


I just kept resistance on both the pistons so they came put evenly

126c9ac95fa3449a1c101222099ceba6.jpg


Success and now to undo my bad work and reinsert the pistons the correct way

628d56a9ed4501e8eb1722a7e95d2e3f.jpg


Ok so next I had to put the pads back in each held in place with two pins
ddc493c052286c12dc2041c208c6207c.jpg

c48395eb9585224a167b706ae703d698.jpg


Once the pins are in there is a retaining plate that bolts into place
be1d6840befdda75a15a1296e186860c.jpg


I then connected to the arm that secures it to the rear axle
66f5dddd37a308c5e9f8dfa8d5a2d5e7.jpg
82a439875d28efd8f986a7705944b62b.jpg


661e51fc5001f4e1126775e48c778f3c.jpg


Job done


Sent from my iPhone using DO THE TON
 
Ok so last night I managed to get down to the old mans with the frame so we could make up the final spacers required to fit the rearsets and also to make sure the brackets didn’t interfere with any of the bolts ( which they did a little)
ff0412d3381152c89743bfeb148fdc13.jpg
3fb0ddfdec18aa7cd68f7b833e77fa8c.jpg


So first we made sure the holes were in the right place.. the pressure was on as I was the one who made the template so if she was out it was on me, luckily she fit just like a bought one.

Once the brackets were finished n place we measured to see how big the spacers would need to be
5cfedf7fda34924e346b79315bec8e40.jpg


The right side required a larger spacer for the bracket as the left side sits just about flush

aec8cac6dd6b3d577ae0e84628375c73.jpg


We turned up the spacers for in between the rear set and the brackets first as they would be the same the two tops and then the two bottom spacers

a9adb4f1494be9afd21355e4f1160bbd.jpg


Top spacer done

03a386723db8b4049bc467732ca6187d.jpg


Top and bottom complete

131b9b23262a7e06232b4c59461cb3ba.jpg
a0881a43e00a1a55aee700ca2310fac9.jpg
f734d1059930cb3043a6ef9549d6d42e.jpg


This was the spacer for in between the frame and the bracket

f5cd7cb8d7692e0bdb1791bd7c3f89fb.jpg

ee7dcdcba524f218a3c9ee300a3c5f18.jpg

015ed3135537380b82bddd80155c24f3.jpg


Right side complete next issue was that the swing arm bolt was too long so it needed to be shortened and rethreaded... this is always a tense moment as we’ve found it’s really hard to undo or put back what you mess up :/

0b430ca34a1eca4527ed15f6b889062c.jpg
72eaa1c489afe3867fbdc447d48ec71f.jpg


Fist the old man established the thread size, this then dictates the gearing of the lathe.

5a15c10b587dad7f3c43c5be21c0eab9.jpg


Then he did the scratch pass and we double checked to make sure we were on point... came up all good

c94706e84fc515f6006f44e48cf791f5.jpg


Clearances were tight

158666ae6b6c0e83984e38dda2a00b42.jpg

69f751c7ff121e0f9404d5142ca09a26.jpg

fcdd0562384e784da322414200179a3a.jpg
e33c252ccb810b64569823e5739a0282.jpg
56e9daf55b85e2e6f1cd4f3ec5bd8cd4.jpg


So I’ve decided to leave it silver I think it would be a shame to anodise it black and not have the old mans craftsmanship stand out

...now I’ve got to work out how to get this engine in :/


Sent from my iPhone using DO THE TON
 
Looks slick man. Out of curiousity, why not continue the chamfer around the entire bracket? Noting seems to be mating that far out, and it may look a little cleaner. Just thinking out loud lol.
 
jag767 said:
Looks slick man. Out of curiousity, why not continue the chamfer around the entire bracket? Noting seems to be mating that far out, and it may look a little cleaner. Just thinking out loud lol.
Because that’s the way the rear sets are chamfered, they are not chamfered around where the bolts are


Sent from my iPhone using DO THE TON
 
Back
Top Bottom