Down under, an idiot and a 400F

HUGE milestone today... I actually rode my bike on the street!

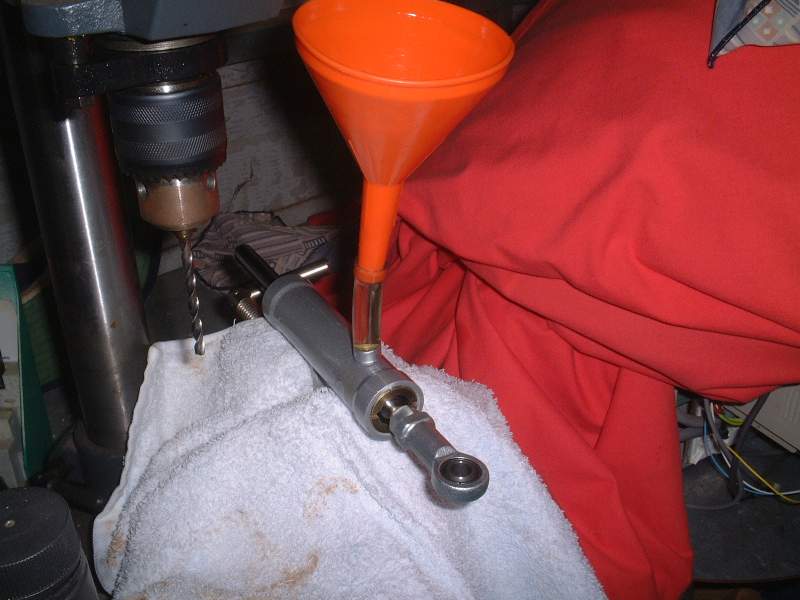
I was really pumped (pardon the pun) to get the brakes bled and see if the custom combination of master cylinder, calipers, discs and lines would actually work... let alone if I was able to bleed them properly.

I decided to bleed the master cylinder and right hand side caliper on the bike and because of the over fender line to the left, would remove this caliper to get the air out of that line. Getting the fluid to start pumping was a challenge but perserverance paid off as i was able to get most of the air bubbles out of the and side caliper within 8 minutes.

Undoing the left hand side paid off as after a few minutes pumping I started to see fluid coming through. I then attached the left caliper back on the bike to get it finally bled. Once I had the left hand side completely bled I went back to the right hand side to clear the remaining bubbles. A final check under full pressure to make sure none of the fittings leaked and it was done.

I am very impressed with the feel in the brakes, I have adjustable levers on the bike and was able to get it very comfortable and a solid feel in the lever with only about 15-20mm of lever movement.

I dropped the bike off the paddock stand and rolled it back and forth in the shed to test the brakes, all seemed good and locking the front was very easy with moderate force. The only thing that seemed not perfect were the pads, which were rubbing on the discs a bit but after a couple of runs near my house this seems to have died back as I assume the pads are bedding into the discs.

Given I now have a bike that can stop it was time to give her a test ride!!!

I grabbed the bike (minus engine) and got her outside for the first time in over 3 years:


And here is an awful video of the bike going down the hill. Excuse the wobbly video, but bear in mind there is one very happy chappy on the back!

http://youtu.be/Gt0jULYz-4A

Riding the bike down the hill also confirmed something which had been a concern for me since the beginning of the build. The USD forks and headlight mounts made the turning circle very small as the forks would hit the tank otherwise. Riding down the hill this was not a concern at all, I was able to flick the bike around with ease and had no issues at all. I will still have problems in car parks as the turning circle is so large at walking pace, but nothing a 14 point turn won't fix.
 
crazypj said:
Whoo hoo, time to practice some stoppie's ;D

Had a little go and that twin setup seems very capable ;)

Also PJ you were right about the steering stops not being an issue on the road, do you think this will work down to low speeds (other than walking pace)?

I have some questions about the 466 kit too, someone mentioned pinging and valve clearance. Are these issues with the kit? I would assume pinging is only going to be a problem if the compression ratio is raised (I would like to have my head decked), however understand this can be managed with higher octane fuel.

With valve clearance it seems like this shouldn't be an issue unless the head has been skimmed. What numbers should we aim for on the valve clearance and I will get some light springs in the valve train and test it out.
 
I ran 0.003" intake and 0.004" exhaust with stock cam on 490? kit (56mm bore) you should be fine doing the same on a 466
You only need radically different clearances when you use a 'race' cam
Steering will be a PITA after a while if you run down to the shops but if your just riding with group or 'playing racers' it won't be an issue. 15 point turns are just another 'day at the races' ;)
 
Another few hours spent in the shed, cutting up PVC pipe and trying to get the exhaust into a shape that I am happy with. I started the session thinking I would get a template for the whole exhaust, however as I started to get into it, I soon discovered its going to be much easier to get the headers bent first, weld up all the merges, then focus on the secondaries later. This will ensure I have a solid initial section of pipe to base the rear templates off.

Despite this change in process, I still decided to have a go at attaching some of the merges, essentially so I could get the dimensions right and check the merges would fit underneath the motor.

First up was attaching the 2 largest merges with a bit of painters tape:


After a test fit under the motor, I realised I had attached the merges wrong as they should be 90 degrees to each other:


Next up I dummied up some secondaries, these aren't the final versions but I wanted to test the concept, strangely enough they were pretty damn close to perfect, however I have the exhausts in storage at the moment so didn't have the chance to mate them up to test fit the final layout:


Next up I cobbled some merges together and checked the general layout underneath the bike... all seems ok and it gave me an idea of where I would need to weld in the first merges:


The secondaries exit point, looking at the exhaust mounting I did ages ago, this exit point seems spot on (by total accident) to mount with a small straight section into the exhausts:


Next up I turned my attention to the headers. I fettled them to a point where all the angels were right, then I used my hot glue gun to pour a load of glue into them to set the angles. I was concerned with the headers and how far off the motor they came, so decided to pop off the fork caps so I could drop the forks and check clearance to the pipes:


There was some serious fouling (as to be expected as I left the headers long where they attach to the head) on the 2-3 cylinders:


Obviously this would need addressing so I decided to cut back the headers and get them to the right length. I did this then retested the clearance to the wheel with the forks totally compressed:


Much better, but still not perfect, however I need to work out if the forks get this compressed or if I am going to the absolute limits. I think I can manage it with some compression damping as a last resort, but would prefer a little more clearance to have zero issues. Ultimately its only a problem on the 2-3 headers as there aren't any issues on the 1-4 now I've trimmed down the headers.

So thats where I finished up for the day. Here is a glory shot of mega long headers (looks a bit drag racing), naturally these will be trimmed right back once the headers are bent and the merges welded on up the front of the motor. All in all I am pretty pleased with how its gone, a few weeks and I will get them made up:


You could trim 2&3 back a bit further and have more than 90 degree bend?
Of course, it will mean less than 90 at the bottom but should give you another 1/2" or more?
 
Good idea PJ. Will do that. Simple to do, just a bit more glue gun action required.

Would prefer the clearance.
 
Bit more exhaust work happening today, the templates are pretty much there and whilst I have built headers for all 4 cylinders, I will only give 1 & 2 to the pipe bender to make sure they are symmetrical as they can simply make up 2 of each.

Job for today was to remove the issue with clearance to the front tyre. I decided to setup the headers for when/if the forks were compressed to the dust scraper on the fork leg, however I would suspect there is a bush inside to stop this from happening, but the plan was to make them for the worst case.

First step was to bring the header on #2 cylinder closer to the head, it turns out the lengths of each of the headers wasn't the same (between the head and the 1st bend), so I thought getting them all the same length would look neater, plus give me the clearance I needed to the front tyre:


It hits about 3mm on the edge of the header (on the 90 degreed bend part), but this bend is larger than the diameter of the final pipe, plus the headers will have more of a gradual bend on this part, so ultimately it will clear:


Job done! Now to get these templates over to the tube bender. Looking good too:


Next up I thought I would have a go at creating the exhaust hangers. I was seriously considering welding these up to the bike today, but instead I think I will get the headers all done first, then the secondaries, so I can make sure it all works together and I have the right lines on the bike.

First up was to get a template, so a bit of painters tape and an old box:


Got the exhaust where I wanted it and drew around it:


Next up I cut this template out and transferred it to some thick Alu:


And done:


I then made a mount for it out of steel. This will be welded to the upright rear frame section:


The concept works, I am just not happy with the mounts when I cut them with an angle grinder, so I think I will get my buddy Darren to run the mounts and hangers on his CNC mill. Will give a far more professional finish.
 
I'm sure everyone has experienced this, but today I started what I thought was going to be a fairly big, complex job... only to discover I had it all done in about 20 mins.

The job was to strip my GSXR steering damper as it had developed an oil leak. The plan was to strip it down, see if I could measure up the seals, then clean it all and prepare it for putting back together.

I searched high and low for a rebuild thread on the web somewhere but didn't come up with anything. I found a thread that referenced the seal size, but the individual listed 2 sizes; 10x20x7 and 10x20x9.

The end caps have a slit in each side, either side of the damper shaft. Originally I put 2 screwdrivers in my vice upside down which worked a treat to undo the end caps, but it turns out I could still undo them by just twisting one side with 1 screwdriver.

Once the caps were off it was easy to undo the end mounting bolt and with a few swift sharp pulls on the damper shaft and the seals came out. On inspection it turns out these things are incredibly simple. Its just a bush on a shaft with a slight clearance to the damper body, this clearance is what the oil flows past and causes the resistance.

The seals are housed in a Alu section with an o-ring, so these will also get refurbed to minimises any chance of oil leakage.

The damper split up:


Luckily enough Kayaba were kind enough to list the seal size (10x20x7):


The o-ring on the seal holder:


Now to find some replacement seals, there are some listed on eBay (double lipped) which will work in a push (they are from China), but I will drop in to see my local seal supplier to see if they have some quality name branded stuff I can use instead.
 
Brilliant way to refill the damper without having to submerge it:

damper_01_800.jpg


Anyone know how to measure up the bushes for the orings? I assume measuring the old oring is not the way as it could be compressed. I would assume I would measure the inside section where the oring sits, the outer edge that the oring needs to protrude, add a bit extra and I should be good. Also what orings are suitable for oil applications?
 
You should be able to measure the 'O' ring groove width and depth then use a standard chart to get the size that fits (I can't find chart but it is available online)
You can also measure 'O' ring it will be a standard size for example, if you get 13.4~13.8mm it's probably a compressed 14mm, etc
Told you they are a simple damper, doesn't need a load of different adjustments :D
You did tilt it around and work it full travel to make sure all the air is out?
 
Sounds good to me.
I would use double lip seals if you can get them, it will be an upgrade ;)
 
And done!

Popped into my local bearing shop on the way back from work and bought 2 large orings for the tops of my forks (pinched one when testing header clearance) plus some seals for the damper. Turns out the old ones were dual lipped anyway (front scraper and rear spring loaded) so those were replaced.

Only cost me $7 for the lot and the seals/orings were done in 5 mins. Just refilling the damper left to do.
 
Quick 5 mins today getting the oil back in the steering stabiliser.

I didn't have any 10w fork oil left so I thought I would try some 10/30w engine oil instead:


Attached some hose to the inlet:


Funnel to help get the oil in without making too much mess:


Pumping slowly and not full travel yielded the best results:


I left it sitting for 10 mins before removing the tube so I could allow the bubbles to rise before a final pump. Worked a treat and it's now back on the bike. Seems to have a nice level of resistance:

 
I'm prefering the 10w/30 full synthetic engine oil, particularly for thing that will heat up during use - front forks
It has bunch of anti-frothing agents and a load of stuff that isn't needed but I haven't had any issues in the last 6 yrs or so.
Not sure if the viscosity is really compatible with fork oil/suspension fluid but it works fine in all conventional forks.
I probably wouldn't use it in USD forks although I haven't tried it. Conventional fork oils feel real gritty in USD
I may try 5w/20 for steering dampers, 360's are pretty stable so don't really need damper
 
neevo said:
Couldn't resist stealing 15 minutes this afternoon to fit up my recently arrived HEL brake lines. Very pleased with the fit and finish (although I would have preferred an extra 10mm on the over fender part). The routing in front of the lower triple clamp and around the fork leg is spot on:


Looking forward to bleeding the things on Sunday and maybe getting it out for a quick trip down the hill in front of my house ;)

I really like your front hose mounting. That would have saved me a lot of trouble with my setup using the factory KZ splitter when I went to braided lines.
 
Big changes at the neevo household as I've moved into a bigger place, with... most importantly a big, clean, double garage :)

Settled in on Tuesday and started building some benches this weekend with a plan to have it all ready to go bike building again after next weekend.

Want the benches to be pretty tidy in the new house so bought fresh pine to do it. You can see the lathe bench already built in this before pic:


Hopefully will share something a lot cleaner in about a week.
 
Back
Top Bottom