We noticed you are blocking ads. DO THE TON only works with community supporters. Most are active members of the site with small businesses. Please consider disabling your ad blocking tool and checking out the businesses that help keep our site up and free.
You are using an out of date browser. It may not display this or other websites correctly.
You should upgrade or use an alternative browser.
You should upgrade or use an alternative browser.
'Hamasaki' formerly known as the '82 KZ305 cafe racer - first build
- Thread starter Rustyhama
- Start date

Re: '82 KZ305 cafe racer - first build
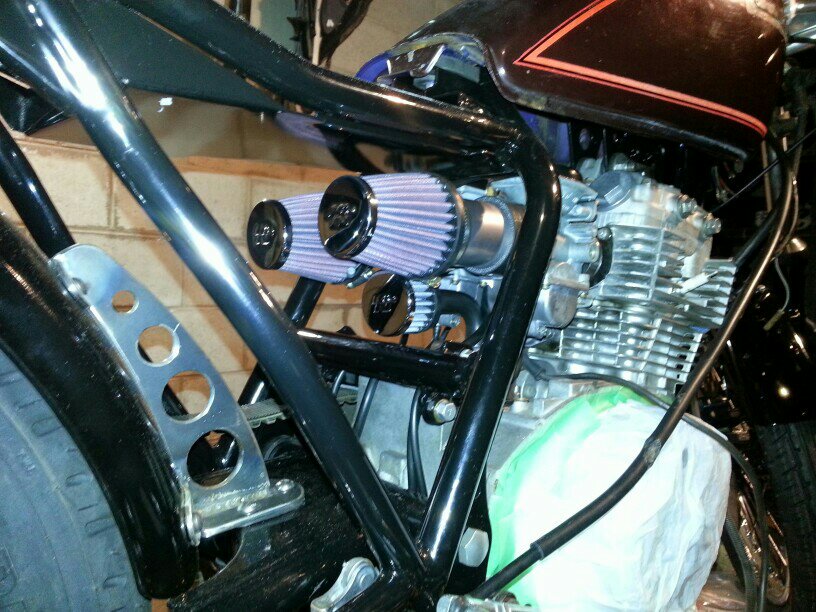
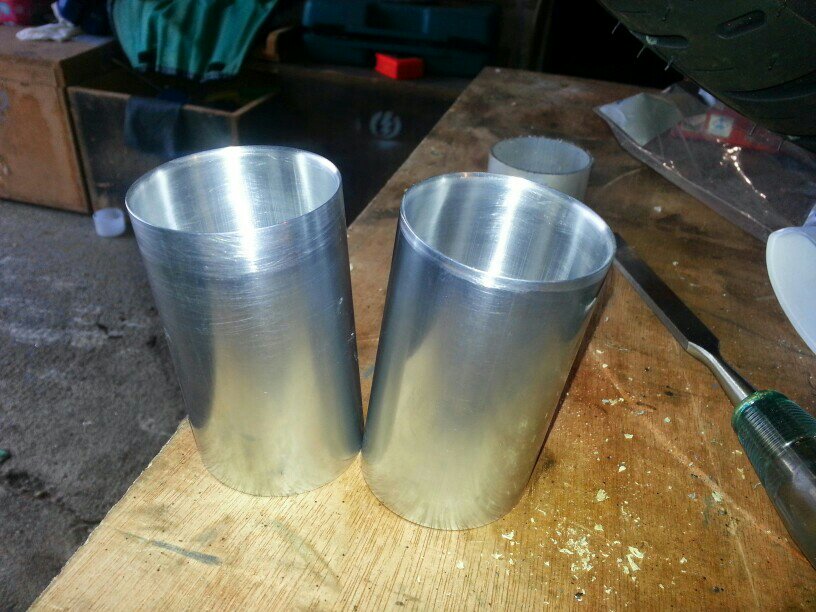
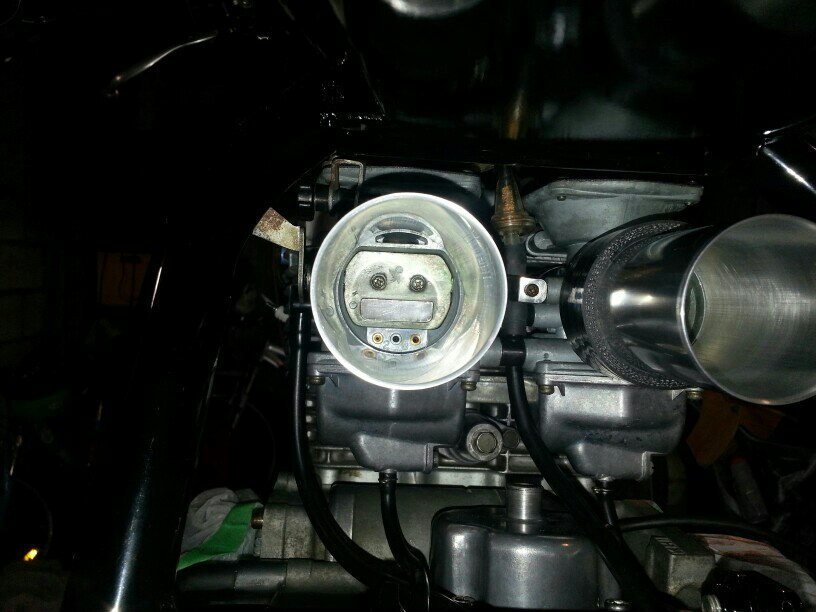
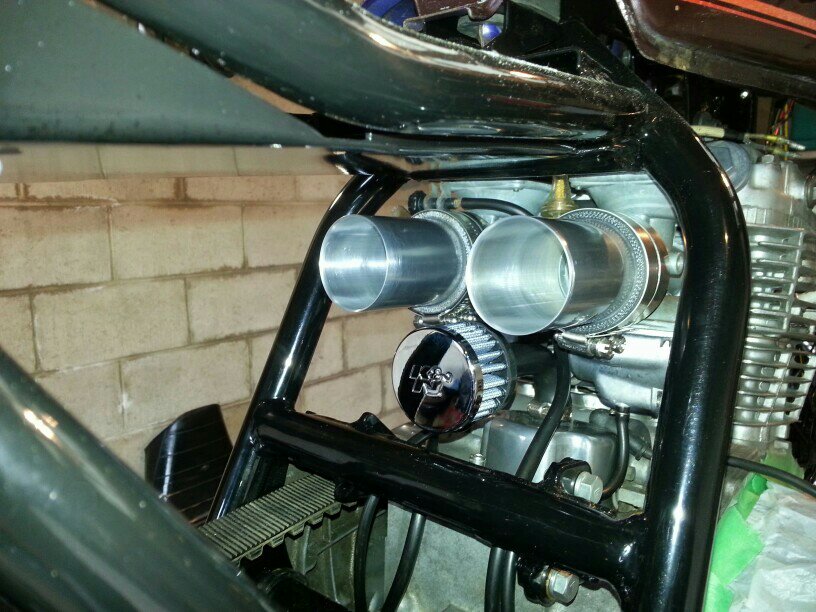
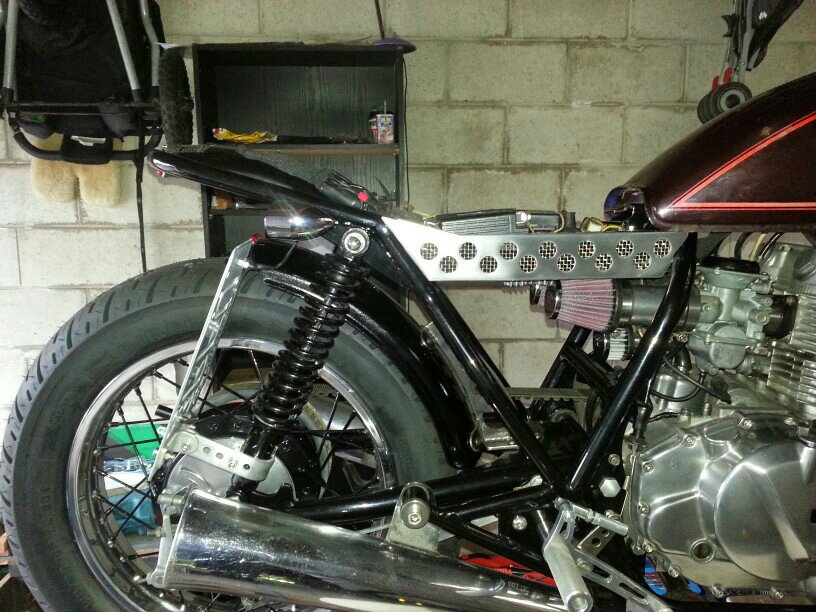
Yes they are custom things. Not sure what I call them but the idea is to settle the air before it gets to the carbs but you know that right? I shaped the intake end like a velocity stack - nice and smooth. I literally carved that shape with a carpenters chisel. Sharp steel chisel vs aluminum, steel wins every time. I cut the other end on an angle to keep them down from the battery tray. As can be seen in the photos the tubes fit well, no obstruction of the openings for the vacuum slides.
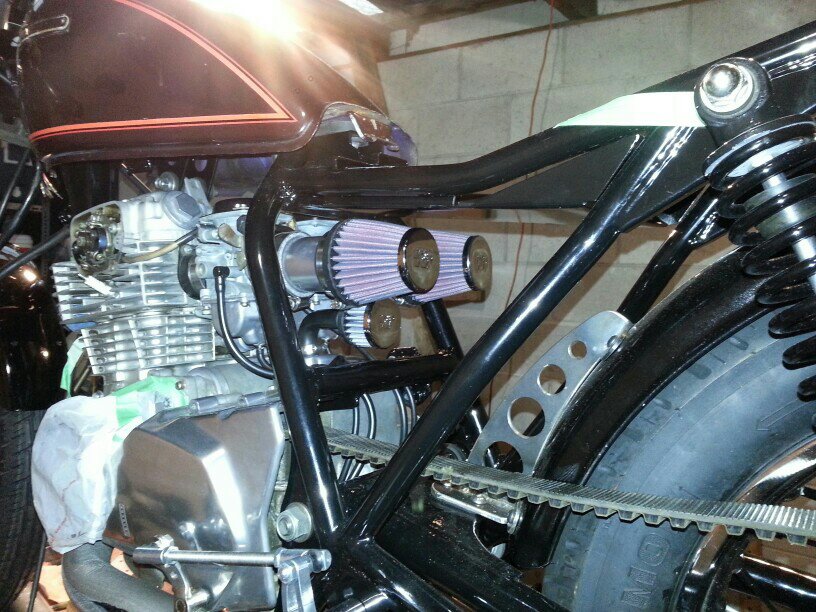
Yes they are custom things. Not sure what I call them but the idea is to settle the air before it gets to the carbs but you know that right? I shaped the intake end like a velocity stack - nice and smooth. I literally carved that shape with a carpenters chisel. Sharp steel chisel vs aluminum, steel wins every time. I cut the other end on an angle to keep them down from the battery tray. As can be seen in the photos the tubes fit well, no obstruction of the openings for the vacuum slides.
Re: '82 KZ305 cafe racer - first build
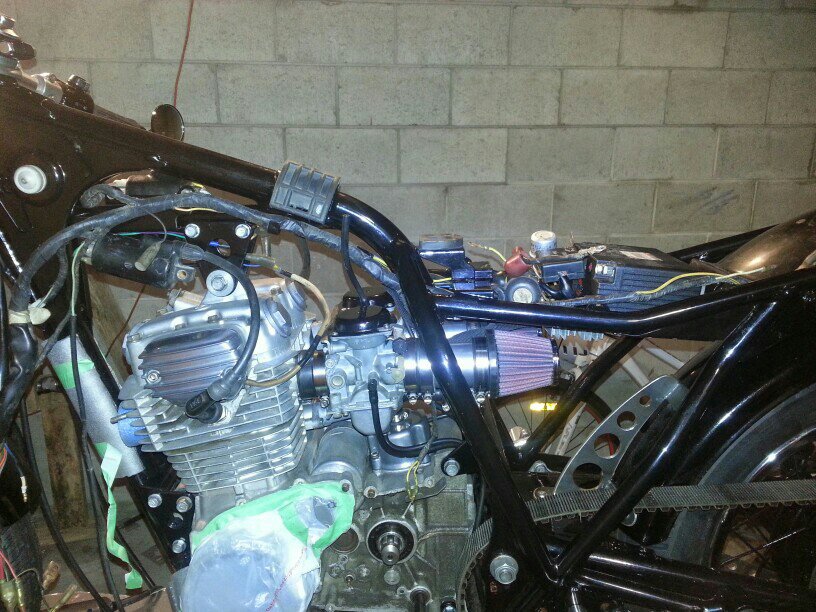
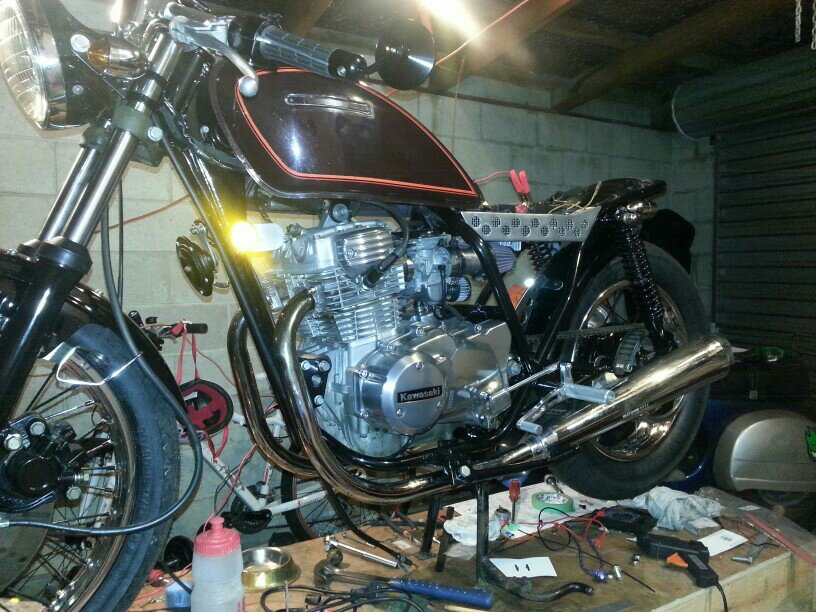
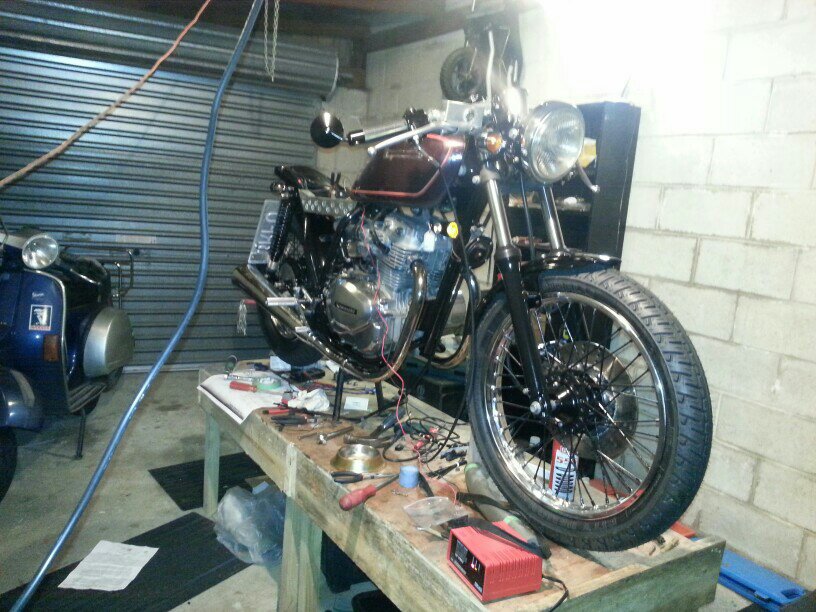
Working on the electrics this week. A bit of a jigsaw puzzle to put it all together but I think I've sorted the tricky stuff. I hope I can get the wiring loom to work as it is and don't have to shorten it or anything too drastic to get it to work.
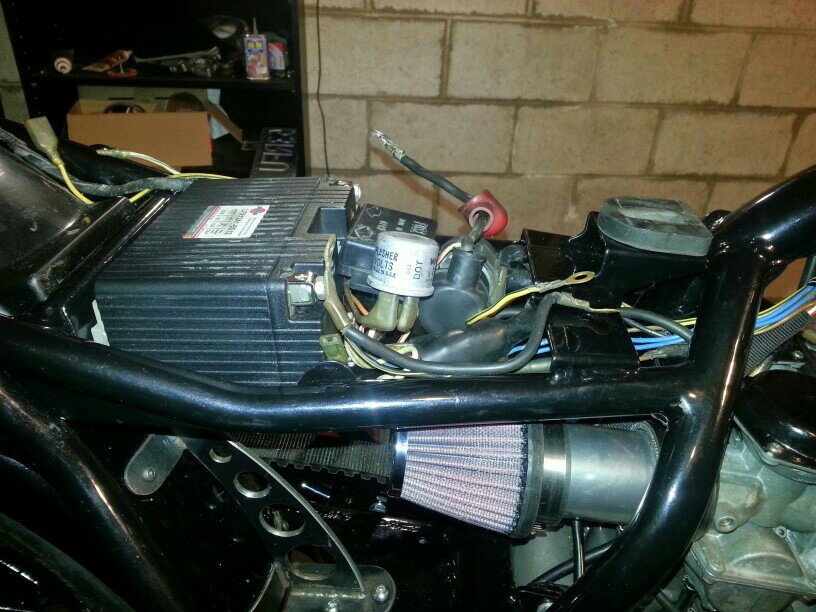
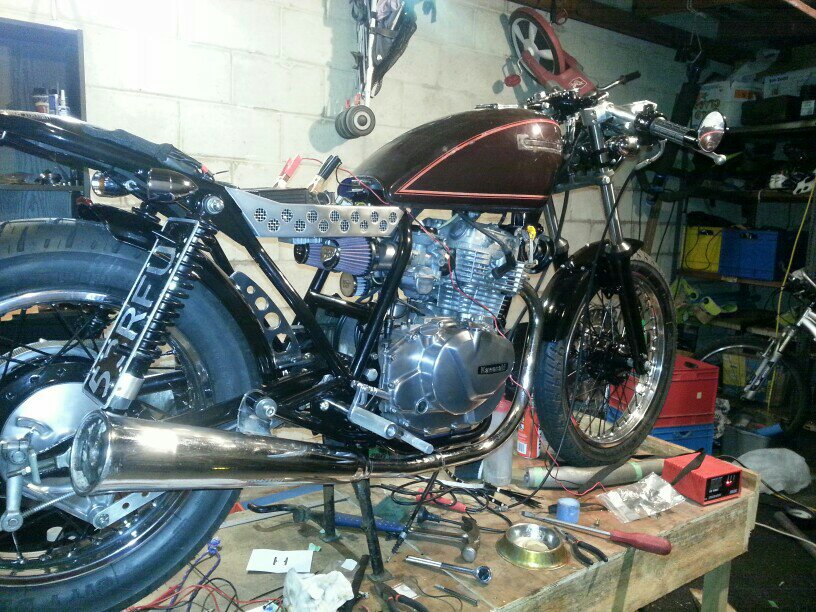
The battery is nice and snug, rectifier is bolted to the underside of the battery tray which I riveted to the frame. I have a bracket made up for the starter solenoid so that will get fixed in place. Every thing else is just tucked in there. Will that be ok?
Working on the electrics this week. A bit of a jigsaw puzzle to put it all together but I think I've sorted the tricky stuff. I hope I can get the wiring loom to work as it is and don't have to shorten it or anything too drastic to get it to work.
The battery is nice and snug, rectifier is bolted to the underside of the battery tray which I riveted to the frame. I have a bracket made up for the starter solenoid so that will get fixed in place. Every thing else is just tucked in there. Will that be ok?
Re: '82 KZ305 cafe racer - first build
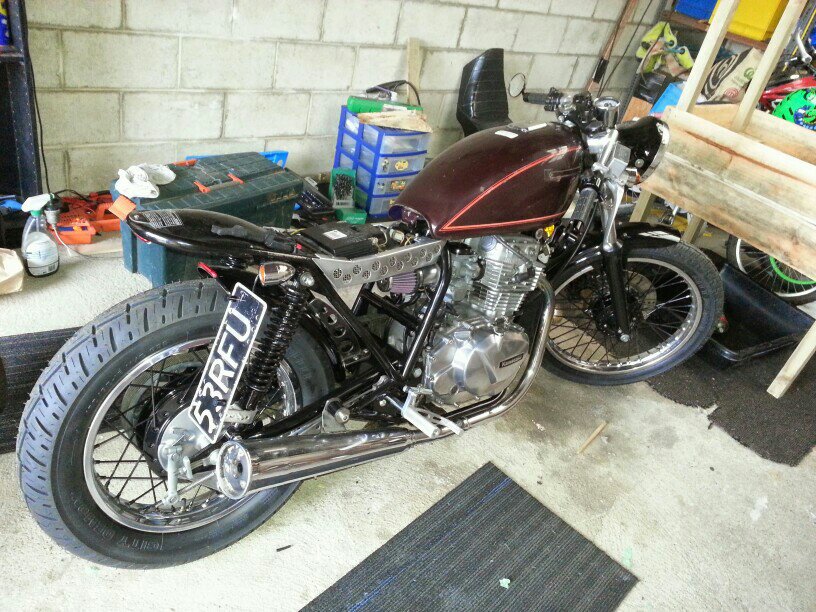
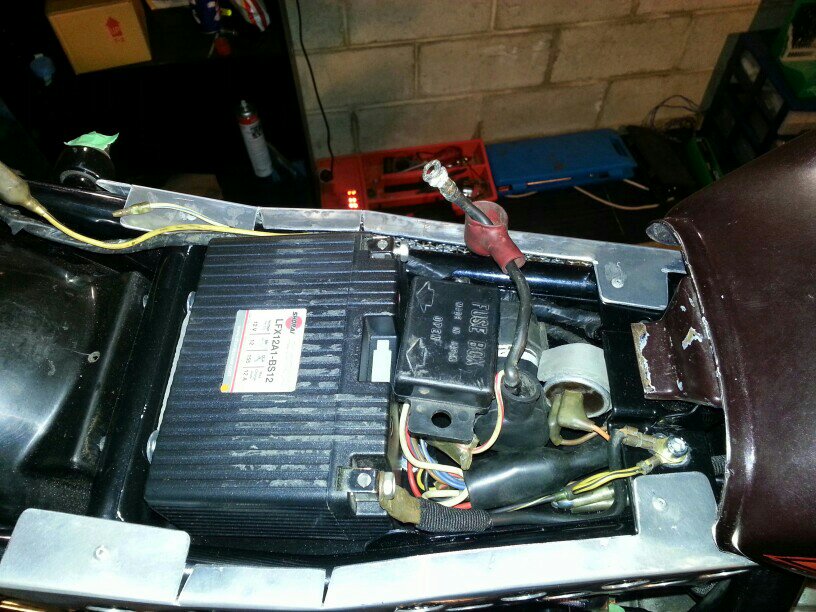
My battery tray turned out better than I expected. Everything fits in with not much room to spare.
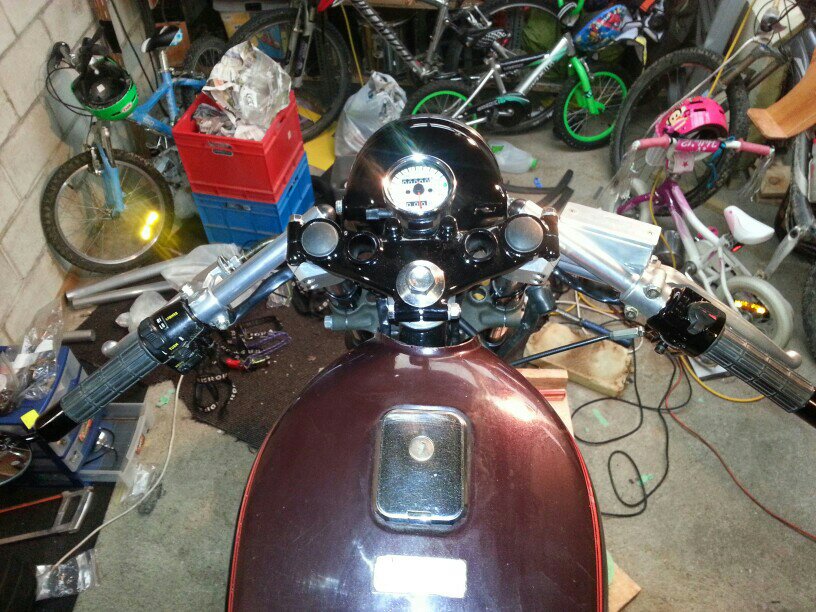
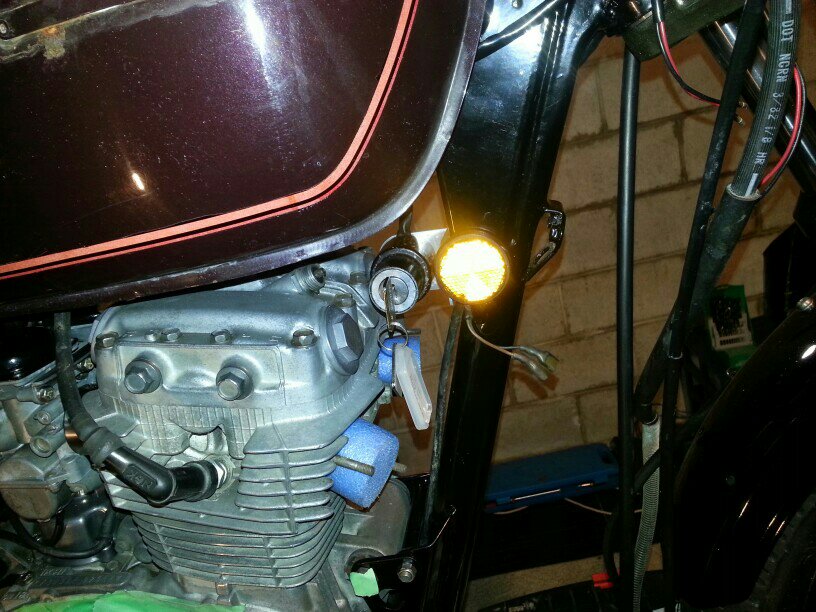
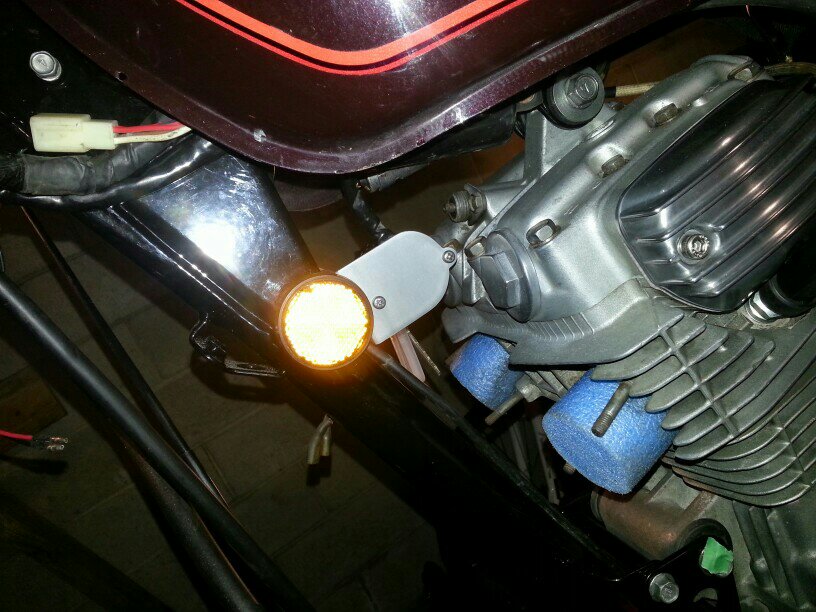
Found a spot for my ignition switch. I nearly ditched it for a toggle but I'd already paid 80 bucks to have it repaired so decided to go with it. It has a really solid feel to it when the key is turned and the key can be removed in any position so it won't be in there when I'm riding. I used the orange side reflectors to mount the ignition. I decided a while ago I liked them, they are so cute and now functional too. I do need to alter the wiring harness to connect the ignition - more fun with the heat shrink stuff!
My battery tray turned out better than I expected. Everything fits in with not much room to spare.
Found a spot for my ignition switch. I nearly ditched it for a toggle but I'd already paid 80 bucks to have it repaired so decided to go with it. It has a really solid feel to it when the key is turned and the key can be removed in any position so it won't be in there when I'm riding. I used the orange side reflectors to mount the ignition. I decided a while ago I liked them, they are so cute and now functional too. I do need to alter the wiring harness to connect the ignition - more fun with the heat shrink stuff!
The number plate bracket turned out to be a lot of hard work and probably the most difficult thing I've fabricated in my garage on the bike.
Over the weekend I shortened the throttle and clutch cables. The hardest part was drilling out the end thingies. I managed to drill through the throttle one and get it soldered up ok but the clutch one I ended up making a 'mould' and casting it in solder! So much effort for something so small!
Over the weekend I shortened the throttle and clutch cables. The hardest part was drilling out the end thingies. I managed to drill through the throttle one and get it soldered up ok but the clutch one I ended up making a 'mould' and casting it in solder! So much effort for something so small!
CALfeRacer
Fat man on a little bike
I'm here, just lurking. What exactly did you do to solder up the brake cable? Just drill the stock end out slightly larger than the cable, slide it on, and flood it with solder? Doing the same with my 125 and ran in to a road block when the cable was too big to fit in the adjustable cable ends I got from the bike shop and used on my clutch.
CALfeRacer said:I'm here, just lurking. What exactly did you do to solder up the brake cable? Just drill the stock end out slightly larger than the cable, slide it on, and flood it with solder? Doing the same with my 125 and ran in to a road block when the cable was too big to fit in the adjustable cable ends I got from the bike shop and used on my clutch.
Yes but they were really tough to drill out. My mechanic said they had brass ones which would be easy to drill, they might already have holes. So you do a hole big enough to pass the cable through then a bigger hole 2 or 3mm deep for the solder. You also need to splay out the end of the cable. This is the video I used as my guide.
https://www.youtube.com/watch?v=axGTa0SvXjE
It just feels like if no body responds what's the point in posting. It's also nice to think people are interested and it's a good ego boost when people compliment or even comment on your work also good motivation to don the greasy puffer & fluffy hat for another night in a cold garage!