Follow along with the video below to see how to install our site as a web app on your home screen.
Note: This feature currently requires accessing the site using the built-in Safari browser.
We noticed you are blocking ads. DO THE TON only works with community supporters. Most are active members of the site with small businesses. Please consider disabling your ad blocking tool and checking out the businesses that help keep our site up and free.
Hello all! Picked up my first street bike last week. A seized 400f missing carbs for $350. Managed to get the pistons freed up and starting cleaning and measuring for new seat. I think I'm gonna go with the fiberglass "Brass" seat from DCC. I think I may only have to trim the tabs to make it fit. Anyone on here with a 400f and that seat or something equivalent? I'm not sure about welding the loop on yet. Also thinking about throwing in the big bore kit to 466cc since it's all apart. Any advice or comments? Ride it like you stole it!
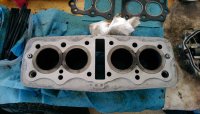
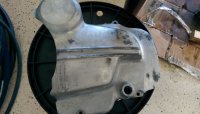
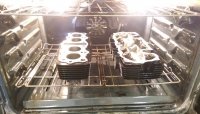
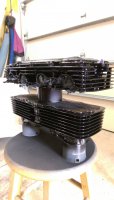
Update on the bike. Soda blasted an engine cover and cylinder head. Thing works pretty good! Dad is taking care of plasty gauging the connecting rods, cleaning the pistons and honing the cylinder head. Tank is off for repair and paint. Now just have to pick a seat and see if any tab trimming is in store for the frame.
Right on! It's looks intimidating at first but the more I work on it the smaller it seems. There's a lot of good OEM parts at http://www.hondarestoration.com/index.htm. This is where I'll be ordering my connecting rod and crankshaft bearings if they aren't to factory specs. Let's see the 400!
Right on! It's looks intimidating at first but the more I work on it the smaller it seems. There's a lot of good OEM parts at http://www.hondarestoration.com/index.htm. This is where I'll be ordering my connecting rod and crankshaft bearings if they aren't to factory specs. Let's see the 400!
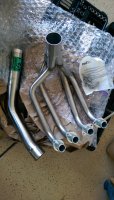
New MotoGP werks exhaust came in today! WOOT! This thing is LIGHT! I think I just dropped 15lbs or more off the bike. Really good craftsmanship as well. Don't know how long I can leave that green tag over the plate. New tires and a points cover coming in on Monday. Have a good fourth!
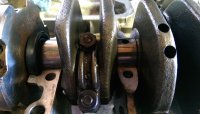
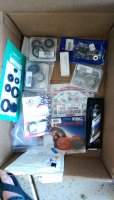
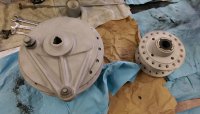
So couple of updates. Plastigaged the bearings and none need to be replaced THANK JEBUS! Got a lot of parts in but still waiting on the seat to come in so I can see what needs to be trimmed on the bike. As soon as that's done then I'll be painting the frame, engine, and rims.
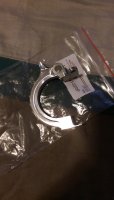
New parts that are in:
Bronze swingarm bushings
New spokes
Tires
cam chain
gasket kit
front brake rebuild with new pads
new engine bolt kit
Motogp werks exhaust
piston rings
fork seals
rear sproket
castle and dome nut kit
new points cover
I bought a set of carbs off ebay but USPS LOST THEM!!! So bummed!Out of all the useless crap I buy online they had to go and lose something I really needed.
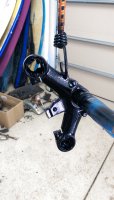
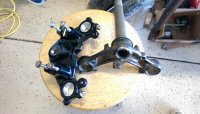
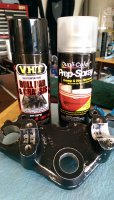
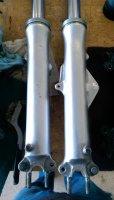
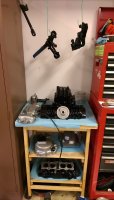
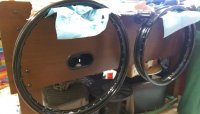
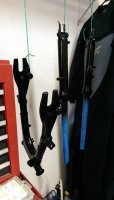
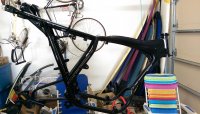
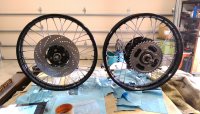
I'm back! I've sent the cases and wheel hubs off for media blasting and painted the swing arm and triple trees with the VHT roll bar paint which came out great! The forks and rims are cleaning up nicely.
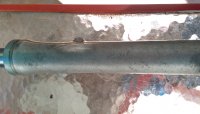
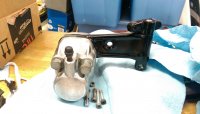
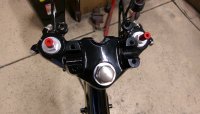
I've hit a couple snags. I'm trying to change the fork seals but every time I spin the allen bolt at the bottom of the forks it feels like the under seat pipe is just spinning inside the fork. The fork pipe isn't moving while I'm turning the allen lefty loosey. Also, I've disassembled the front brake caliper down but can't get the piston out to inspect it. I've read something about using a compressor to pop it out. Any tips? The seat should be coming in this week then I can trim and paint the frame finally. Then I'll have a rolling chassis going!
If you stick a broomstick or similar down inside the fork, then you can usually apply enough pressure to be able to undo the hex bolt at the bottom.
Also, do you have a grease gun? I've worked out very stubborn brake pistons using one. The thread on my gun is similar to the bleeder srew thread. A couple of pumps and it will come out. Clean thoroughly afterwards!
Kwality, your idea for the forks worked! I used a taped up piece of all thread and pushed the fork down on it as I spun the bolt. However the grease gun idea did not. I blocked the front brake pipe whole and pumped threw the bleeder valve but nothing happened except a little grease came out of the side of the nozzle. I don't think my gun is making a good seal. I'll have the try something else. What about heating it up?
I had a similar problem with my brake caliper, the back pressure just caused the grease to come back out the nozzle. I heated it in boiling water, the aluminium will absorb heaps of heat. Then I ended up taking off the zerk fitting on the grease gun, and was able to screw it directly into the brake line hole. Then there was no where else for the pressure to go, and the piston popped out. Hope it helps.
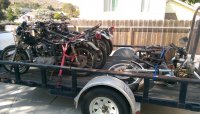
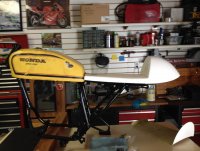
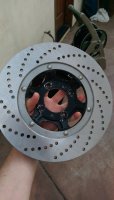
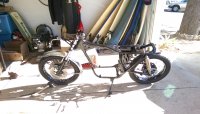
So many updates my friend! Well I have been sanding, cleaning, and painting my ass off for the past few weekends. The bike is about 80% painted now and I'm just about ready to start putting it all back together. It's gonna be like putting together a brand new bike! Things to mention. I sent the rotor off to Truedisk.net and they did an awesome job on the drilling. My seat finally came in after being a month late so now dad and I are mocking it up to see what needs to trimmed/added to the frame to fit it. That should be done this week as well as my order for Hagon shocks. Then I just need to find a set of carbs and that will complete the bike! On a side note, I found a local man with 4 Honda's for sale. 3 Honda cl360's and a 1970 Honda cb450. I inquired about the Honda's and he said if I buy them he'd throw in a Yamaha xs650 front end, frame, and complete motor. So now I have 6 bikes! He only charged me $300, which is %50 less then I paid for my 400f. I didn't know anyone was following this so I'll keep it more up to date now. Cheers!
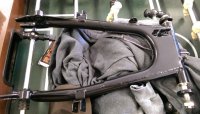
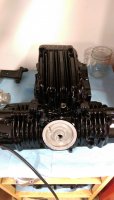
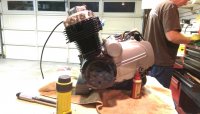
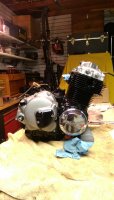
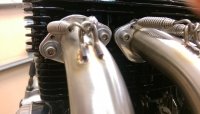
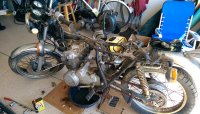
More updates. Dad and I finished rebuilding the engine and I put it back in the frame. Now just waiting for my carbs and hagon rear shocks next week. Man rebuilding from the crank up is a time consuming task. The seat is fit and the pan is being upholstered. I chose brown leather to go with the matte blue tank. I also fit on the motogp werks exhaust which proved a little tough. I removed the exhaust studs and replaced them with allen bolts and I have to cut the loop that the old muffler used to connect to for the new exhaust. Getting close!
This site uses cookies to help personalise content, tailor your experience and to keep you logged in if you register.
By continuing to use this site, you are consenting to our use of cookies.

 IMAG0332.jpg2.9 MB · Views: 319
 IMAG0367.jpg593.9 KB · Views: 289
 IMAG0366.jpg2.6 MB · Views: 275
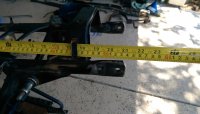 IMAG0365.jpg2 MB · Views: 289
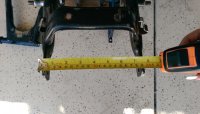 IMAG0363.jpg1.1 MB · Views: 288
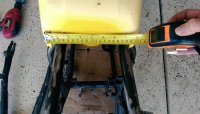 IMAG0362.jpg487.3 KB · Views: 267
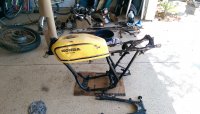 IMAG0361.jpg2.5 MB · Views: 284
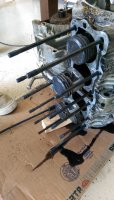 IMAG0346.jpg2.6 MB · Views: 289
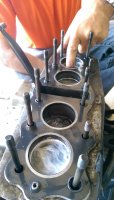 IMAG0343.jpg2.5 MB · Views: 285
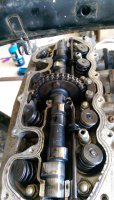 IMAG0337.jpg2.7 MB · Views: 297