vintage race CB350 - last 10% is the hardest

Re: vintage race CB350 - exhaust

ohiocaferacer said:
Are you running a belly pan??

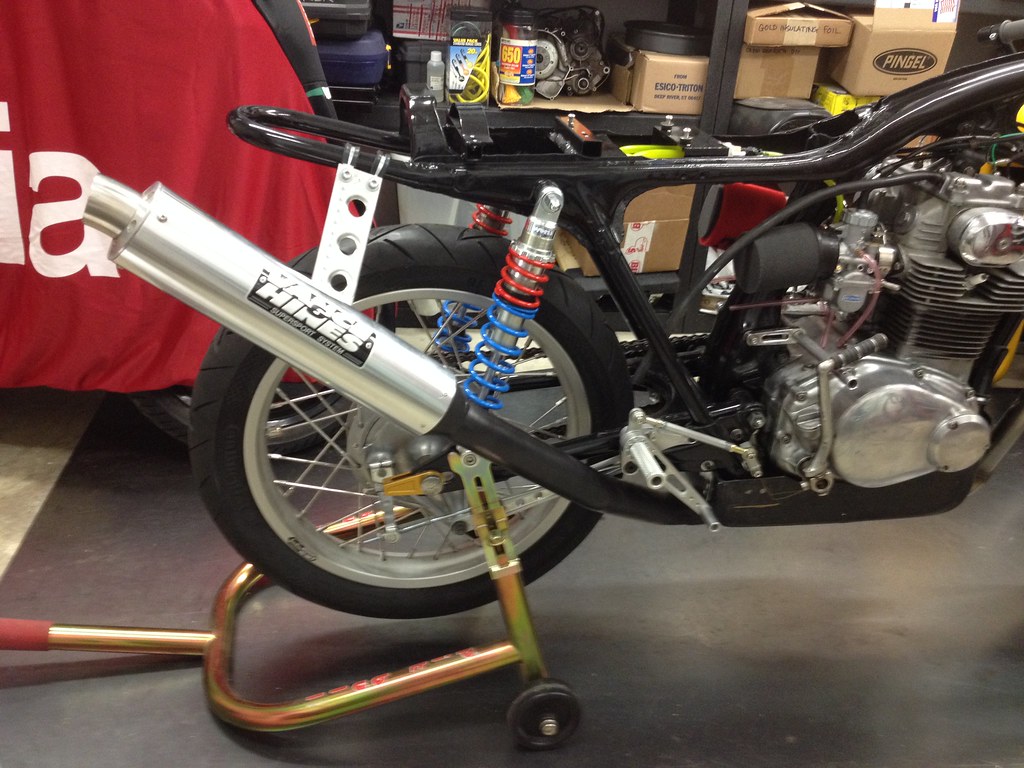
Yes. See 1 page back for pics of my fiberglass belly pan. The belly pan (and muffler) requirement are what prompted me to re-evaluate my exhaust system in the first place and is how I ended up where I am today.

My belly pan hugs the engine cradle real tight and my exhaust passes underneath the belly pan. Yours is the other way around. Tomato, tomato. I've been told my belly pan will be fine resting directly on top of the exhaust pipe but I'm going to install some cool gold insulating foil on the belly pan anyways so that it doesn't melt through.

I've got a lifetime supply of PIG MAT487 polypropylene poly-back UV-resistant oil-only absorbent mat pads (20" Length x 16" Width). If you need one, let me know. I had to buy them in bulk to get the ones I wanted so in essence they cost me $2 each. I need to figure out how many I can fit inside a USPS Priority Flat Rate box :D
 
Re: vintage race CB350 - exhaust

WOW.....that is really close.
Sounds like you have a good plan. Bike is looking amazing......NICE WORK!
 
Re: vintage race CB350 - exhaust

Really like those headers. That is something I'd like to do on mine but not sure if I can pull it off. Bike is really shaping up.

Also, I checked out the first few posts and happy to see this build started back in 2009, now I don't feel so bad about mine :)
 
Re: vintage race CB350 - exhaust

Ha ha ha. Yep, it's been a long build for sure. After I started this project I met my wife, got engaged, moved, got a new job, got married, moved workshops (twice), taken 6 international vacations, recorded 3 albums with my band, mentored several FIRST robotics teams, bought new toys like my Aprilia and now I'm in the middle of a motor build/ swap on my Miata including ITBs and standalone engine management system. So lots on my plate all the time! Like most people I'm in short supply of time and money. But build will be completed this year for sure. Keep the comments and build advice coming!
 
Re: vintage race CB350 - exhaust

Now I feel bad again, I never did anything like that, I have no excuses :) Keep at it now, I'm anxious to see it finished.
 
Re: vintage race CB350 - another gas tank mod

No worries! These projects often have a life (and timeline) of their own. Yours will get done in due time. Hopefully mine will get done sooner rather than later!

So when I first got my gas tank from Roc City Cafe Racers it was setup for a stock Honda CB350 petcock and it had a historically faithful looking vent tube on top. Well, I didn't like the way the stock petcock fit on my bike. I can't recall all the details now but I think I had some sort of interference condition between the petcock and my frame or my carbs or something like that. I think there was some detail differences between the frame Sean was using for mock up and my bike. Anyhow, I had a friend remove the stock petcock fitting and weld a 1/4" NPT bung on the bottom of the gas tank to accept my Pingel Power-Flo race valve.

Like I mentioned earlier, my project has dragged on for several years now and I've moved workshops a couple of times. Despite being very careful I managed to crush the thin wall aluminum 90° vent pipe on the top of the tank. I needed to rectify the situation because not only could it effect fuel flow but I imagined it would only get worse each time I took the tank on and off the bike. I used up all my favors with my friend who welded the petcock bung for me years ago and I'm not yet skilled enough with a torch to do the job myself. So I called upon a friend of a friend to help me out with this vent pipe situation.

Isaac did an awesome job welding the 1/8 NPT bung to the gas tank vent. Instead of the fragile aluminum 90° pipe that used to be here, this bung will allow me to install a more robust 1/8 NPT to -4 AN adapter and -4 AN 90° fitting with a -4 AN hose barb that I can clock to any position I want and can easily replace in the event of damage. Also gives me the option to run a straight hose barb or a 45° if I want. The brass plug pictured below is only there temporarily. It helps keep the threads from getting distorted during welding and keeps foreign debris out of the tank until I install the Aeroquip fittings. Isaac's welds are pretty bad ass if I do say so myself! His day job is making crazy parts for Nissan GT-Rs.


Welded bung to gas tank vent
 
Re: vintage race CB350 - another gas tank mod

This fitting looks good IMO. Rubber cap for steering stem nut can be removed to facilitate vent hose down the center of the steering stem. Still undecided on whether to fit a universal motox style gas tank check valve as most all of them are 1-way. Those are great for preventing fuel spillage on a motox bike that crashes often and has a plastic tank. But it would seem they're not so great for managing fuel vapors on an aluminum tank, which I would imagine is much more susceptible to thermal expansion and contraction and the subsequent fatigue effects. Ideally, you want the vent to allow vapors to escape to the atmosphere when the tank (and fuel) get hot and allow air to enter the tank to displace the fuel that is consumed and block liquid gas from spilling out in the event of a crash.


Re: vintage race CB350 - another gas tank mod

I dearly hope this thread never dies..
 
Re: vintage race CB350 - another gas tank mod

freedomgli;293177 said:
Long time no update. Finally got my 2-into-1 exhaust system mostly sorted out.
Merge collector

Not so fast. Turns out when the head pipes are fully seated in the collector the mid-pipe becomes too short. The slip fit of the new collector is different than my original one, so this changes all the distance calculations. I should have asked Burns to weld an extra foot on the end so I could trim it to length on the bike. Lesson learned. Mid-pipe is off to the welders to get a few more inches added so that all slip fits are fully seated and the rear pipe clears the footrests properly.

In the meantime, I washed out my gas tank to remove any funky residue from drilling and welding. While the tank sits in the sun to dry, I began working on the fuel system plumbing. I'm using a Pingel Power-Flo On-Off "Race" fuel valve with a 5/16" outlet. My Mikuni carbs are designed for a 5.5mm ID fuel supply hose. Given the size mismatch I needed to find a way to step down the hose size from fuel tank outlet to carb inlet. To do this I route the fuel as follows:

[list type=decimal]
[*]From petcock through 5/16 Tygon F-4040-A hose to Jiffy-tite dry break fuel system quick disconnect (-5 AN inlet, -5 AN outlet).
[*]From quick disconnect to Pingel 1-in 2-out fuel filter. Conveniently, the fuel filter is 1" in diameter so I use a stainless steel 1" EMT conduit clamp to secure it to the bike.
[*]From fuel filter to a pair of quick disconnects (-5 AN inlet, -3 AN outlet).
[*]From quick disconnects through 3/16 Tygon F-4040-A hose to Mikuni carbs.
[*]All hoses are secured using spring clamps.[/list]

This setup allows me to remove the tank and the carburetors quickly and easily without spilling any fuel or dealing with hose clamps.


Re: vintage race CB350 - fuel system plumbing

You might have Issac "chase" the larger diameter weld on the tank vent. It look's cold to me. I'm guessing two different weldors did this, Issac and someone else? Super nice bike.
Cheers, 50gary
 
Re: vintage race CB350 - fuel system plumbing

No fuel pump. Gravity fed. You can see the rear tank mount is located directly above the filter. So long as the lowest part of the tank is above the carb inlets you are fine.
 
Re: vintage race CB350 - fuel system plumbing

Not strictly true. If any part of the fuel line exceeds the fuel level in tank, then the lines will need to be primed in order for flow to continue. If you get any air into the lines, it could cause you some issues. Not sure if this is an issue with your setup... just something to think about.
 
Re: vintage race CB350 - fuel system plumbing

Yes you are right. In my case, all fuel supply hoses are below the tank, so no worries. ;)
 
Re: vintage race CB350 - fuel system plumbing

Fabricated an aluminum exhaust hanger. 1/16" aluminum sheet folded over on itself to create a soft edge to protect the rider. Dimpled holes reduce weight and restore strength. Rivets also help strengthen the piece. Rubber lined p-clamps secure the bracket to the frame yet allow some slight movement and dampen vibration. I have no idea how this will work in practice but fingers crossed! Just need to safety wire the bracket hardware, add spring hooks for joint from mid-pipe to rear slip-on muffler section and then shorten the muffler canister and baffle about 6".


Rolled edge for safety.
 
Re: vintage race CB350 - fuel system plumbing

Visually this aluminum exhaust hanger looks a little too bulky to my eyes. I'm thinking about making a version 2.0 that's more like an inverted triangle with the hole size stepping down from 1.00 to .75 to .50 inch. Given I have limited metal shaping equipment in my workshop, this will require a trip to another shop to borrow their sheet metal shear. I will lose the rolled edge and will rivet both leading and trailing edges so I can double up on the material thickness.
 
Re: vintage race CB350 - exhaust bracketry

V2.0 exhaust bracket is better but still a little too wobbly. May need a gusset.


Re: vintage race CB350 - exhaust bracketry

Are you really gonna race it? If so, I don't know if those clamps would pass tech....They may...but I would not run them mounted that way. I know your frame is already "finished", but I would weld a bracket to it so I could have it bolted at both ends then safety wire it.
 
Re: vintage race CB350 - exhaust bracketry

I'm leaning that way. Frame is spray bombed black so it's easy to make any needed changes. No worries.
 
Back
Top Bottom