Follow along with the video below to see how to install our site as a web app on your home screen.
Note: This feature currently requires accessing the site using the built-in Safari browser.
We noticed you are blocking ads. DO THE TON only works with community supporters. Most are active members of the site with small businesses. Please consider disabling your ad blocking tool and checking out the businesses that help keep our site up and free.
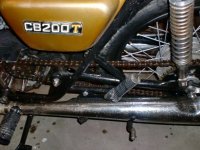
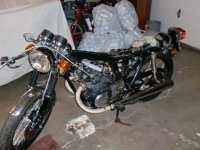
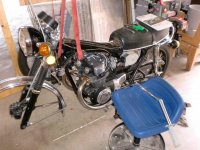
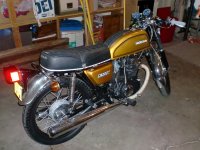
Hi everyone My name is Kevin and I will be starting this build here as a learning experience. My plan has been and will continue to be to learn as much as I can about everything I do in relation to this build. My motorcycle is a Honda CB200 stamped as 8/1974 but it is registered as a 1975 for some reason. Formerly it lived life in California but now lives with me in Oregon. It had 5311.6 or so original miles. And mileage as of project start is 5652.4.
I have been working on making this bike run for a longtime and this project will continue to run here long term but I will do my best to keep updates coming often. Colonel Mustard as I have come to call him, is my first motorcycle and it will be the first vehicle I bring back to life hopefully. My plans are to restore it and improve upon it and maybe make some changes along the way. It has also been the project I have decided to use to prove that I can function. I have fibromyalgia and this health problem has beaten me into the ground. But I am coming back slowly and with this build I will do it for real.
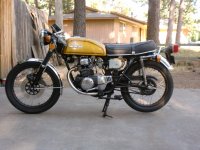
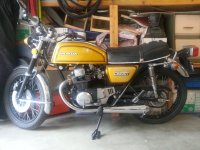
More updates are coming soon. Here are some pictures to get you started.
Hi Kevin, and welcome to DTT!! Looks like you have a beautiful bike with which to start your journey of learning, and recovering. I hope this bike breathes life into you, as you do to it. I look forward to seeing your post along the way!!
You've got a pretty stiff competitor here as is. Full race fairing on a 200? Yep :
That is really beautiful. I've worked on only a few of these but they're nuts, eh!? That cable disc-brake is the only I've ever seen and the rubber on the back of the tank?? She will turn heads. Normally because when this thing goes screaming by, startled pedestrians expect to see a rocket blast by ;D
I really hope you enjoy the hell out of this resto.
I guess on a somewhat related note; I'm physically and mentally impaired and I make my whole living repairing these things. It gets hard when your hands and knees start to lock up and especially when you can't even straighten your spine, but a long ride takes a lot of worries away, even when I'm going all Evel Knievel
It nice to hear that someone else who is in bad condition can do the same work that I am planning to do. Thanks for the support ;D. I can't wait to see what your SL100 build is going to look like Redliner.
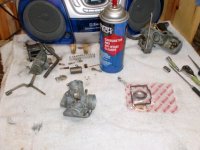
I am going to go over some of the past work I have done to begin here. First I had to do a lot of cleaning. There was rust and oil caked up everywhere and it still really dirty and rusty but now after what I have done is a huge improvement.
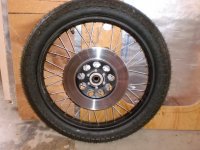
The rear tire was replaced to match the front which I believe was the original rear tire. They are cheapo irc grand high speeds. In taking apart the tires I discovered that the rims are just one the line of being to rusty and the spokes are almost gone as well. So at some point I will have to replace those. But for some reason I didn't take any pictures. I guess I'll have to take the tires off again at some point and show you. I also dabbled in wheel truing and balancing but that art apparently eluded me because when I took it into the shop to get electrical checks and the rims as well they said it was not done properly. I worked on the brakes next but you will learn about that soon.
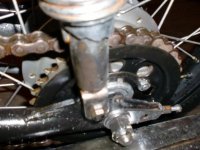
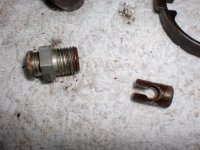
I cleaned up the the front and rear brakes the front was a mess but the rear was fine. I think I am going to need to change out to either a front drum or hydraulic caliper at some point. Also the self-adjusting part of this mechanical caliper no longer works I have to open it up and manual adjust it to get it working properly. The springs are also pretty rusty so I have no idea how long they will last. And on the actual device one of the flange that hold the plastic part in place is broken I feel like that might be why it's not self-adjusting. But I don't know unfortunately I don't have a close up pic of that.
I took care of the rust inside the tank with an acid wash. Stripped the bike down a bit to see how bad the rust really was and fixed the levels in the battery I plan change out to a more modern sealed battery at some point. The seal on the gas cap is completely cracked through does anybody have an idea on how to replace it?
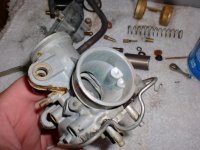
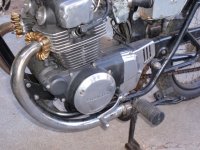
I had to cut off the mufflers to try and get it tuned they turned out to have huge holes in them so they weren't helping anything. Unfortunately, doing this made the bike so loud that it made a child I rode past cry so I can't go with straight pipes. Got to keep it reasonable for the street.
This is a beautiful bike. More-so than it was at the start! Very fine work.
As for the cap seal that is broken, do you mean the rubber (or probably cork, HAH) gasket? If so, you can likely find something about the same size in your hardware store's plumbing section.
Find where the breather hole in the cap is and be certain you're not going to block it.
Well thanks I think the pictures might be inflating it's quality some I still have tons of work to do on it. The rubber gas cap seal is what I was asking about. It seem to be a flat o-ring with a u-shape opening to the inner radius. I have not seen anything quite like it.
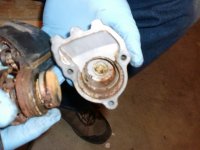
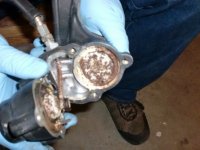
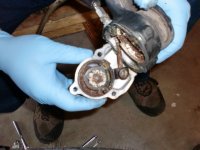
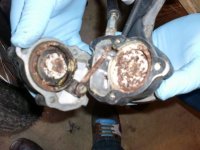
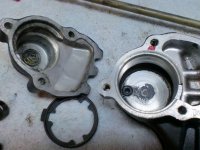
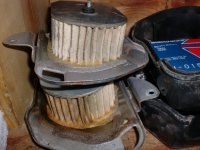
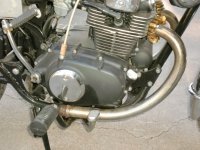
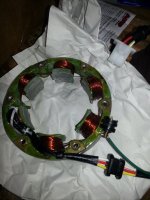
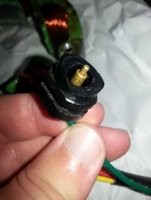
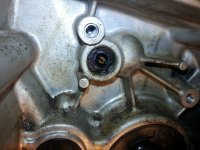
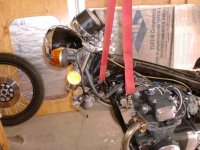
Stator was broken so I had it rewound. But in the process of removing from the engine I broke the stupid plastic neutral light indicator switch. Which just happen to mount to the engine case so I can't fix it without taking the case apart. Looks like I will be riding with no neutral light for a while. Oh well. :-\
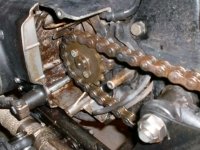
So I have pulled the engine and taken the top end apart to rebuild. Looks like my cam chain wore into the engine a little. I will have picks of that up soon. This is also about as far as I can go without some real reading and understanding of the manual.
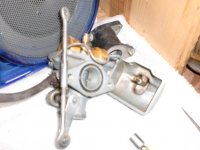
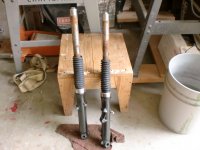
Engine is in the shop to get rebuilt that will take a few weeks. I wish I could do it myself but I don't have the tools and it would probably take me longer to do it on my own. Here is some work from last summer when I cleaned the rust of the forks and rebuilt them as well as repacked the bearing in the in the steering head. The forks were rusty as well as the inside of the headlight mount and even a little inside the steering head but all the bearings were good no rust or anything and the bearing surface was great. I couldn't do anything about most of the rust but I removed as much of it as I could and covered most everything in grease to hopefully keep more from coming.
This site uses cookies to help personalise content, tailor your experience and to keep you logged in if you register.
By continuing to use this site, you are consenting to our use of cookies.

")