1962 BSA DBD34 Gold Star restoration (1000 miles and more)

Re: 1962 BSA DBD34 Gold Star restoration (motor build)

"Work, the curse of the wrenching class..." I ended up working both my days off this week but found time last night to wrench. Here is the lower motor with lots of photos:

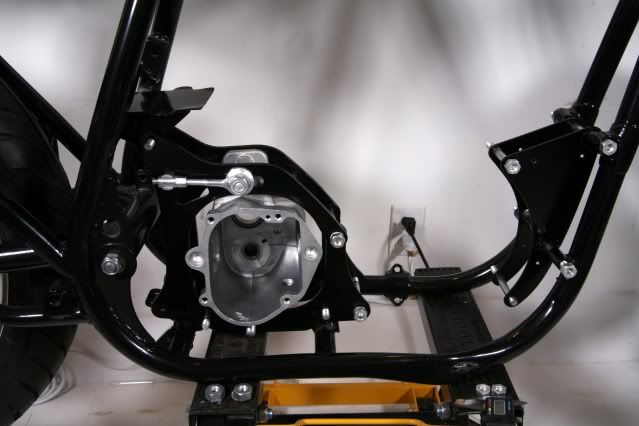
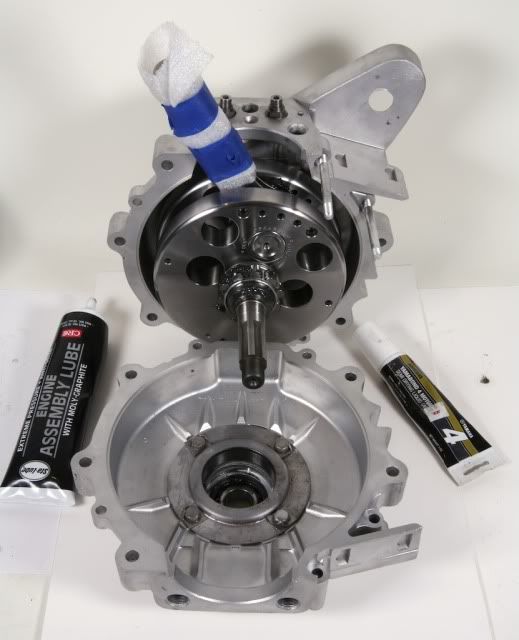
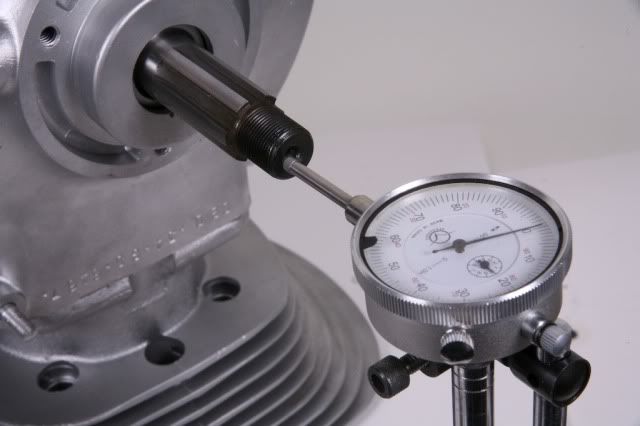
Time to button up the bottom end. I dry fitted the crankcase ends together, measured for endfloat and there was no need to shim. Next I opened the cases again (hopefully the last time for a long, long time) and smeared a thin layer of semi-drying Yamabond sealer, bolted each half together and checked the endfloat of the crank again. All good.
IMG_9336-Version2.jpg

IMG_9337-Version2.jpg

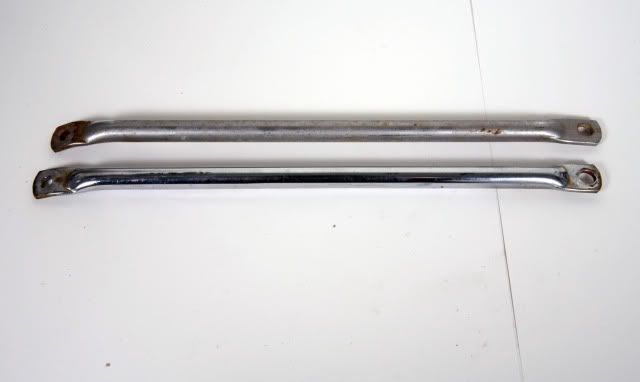
Say goodbye to my little friend..
IMG_9338-Version2.jpg

IMG_9344-Version2.jpg


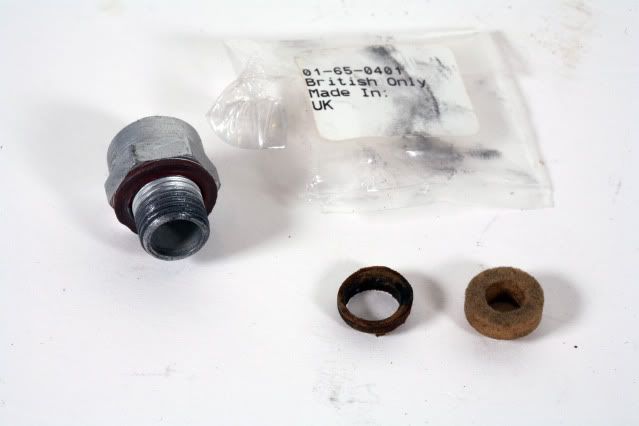
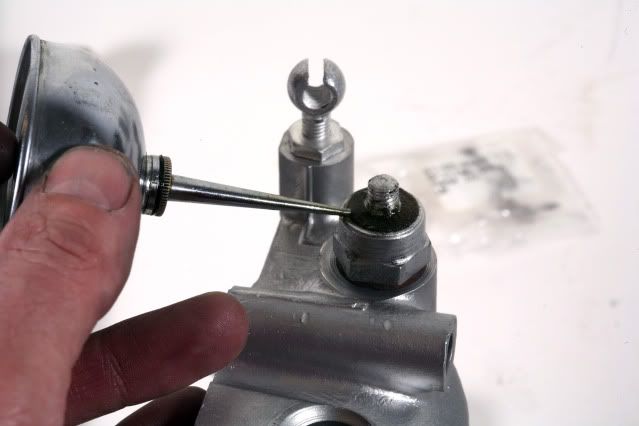
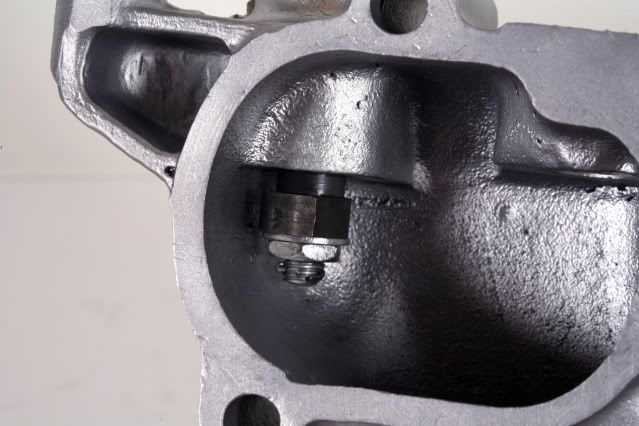
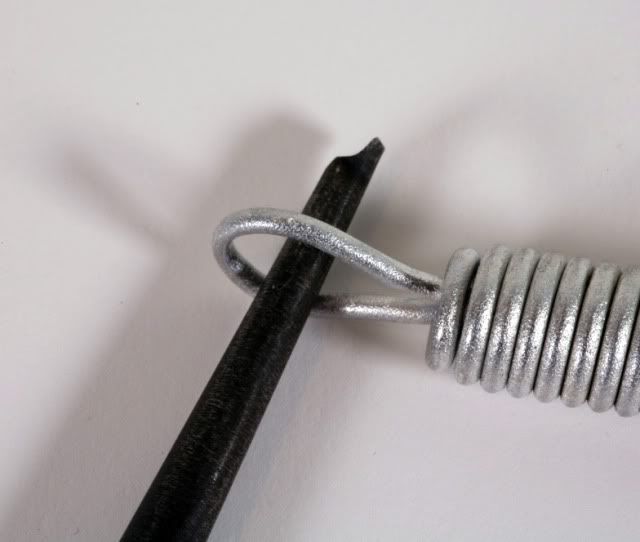
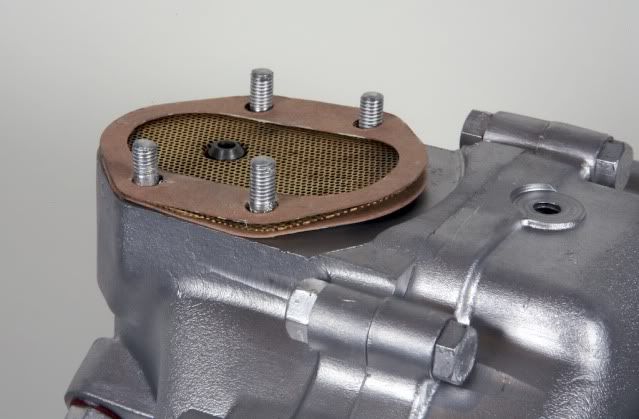
Next, I inverted the motor and installed the oil pump, drive spindle, holder, gaskets, filter etc,
IMG_9333-Version2.jpg

IMG_9348-Version2.jpg

IMG_9342-Version2.jpg

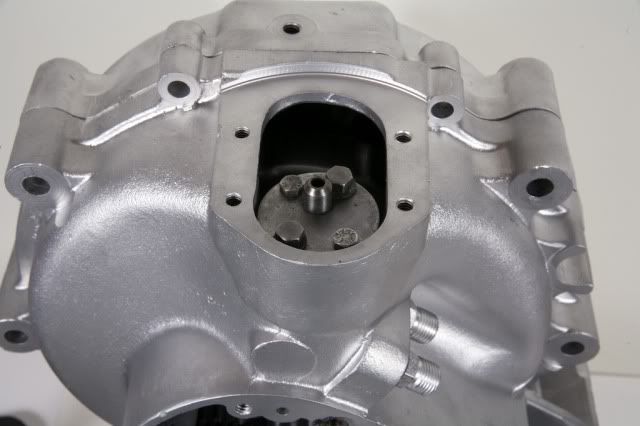
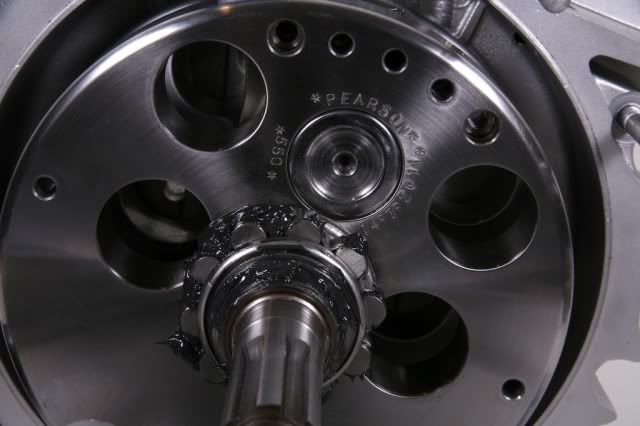
I warmed the crank shaft drive spindle slightly and pressed it over the end of the crankshaft and key. It went together easily and it is so nice to work with precision made parts. I check all the rotation of the crank, spindle and oil pump and all is good.

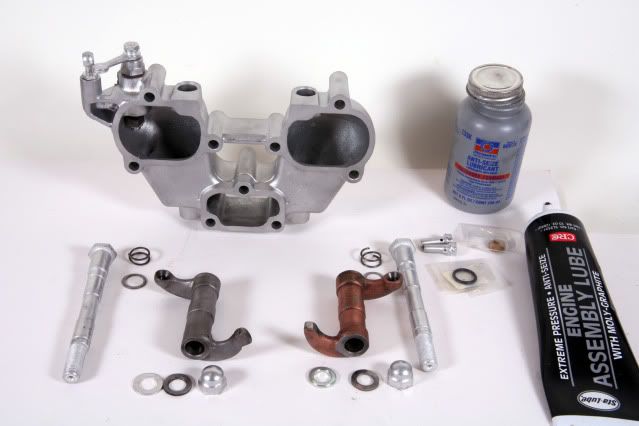
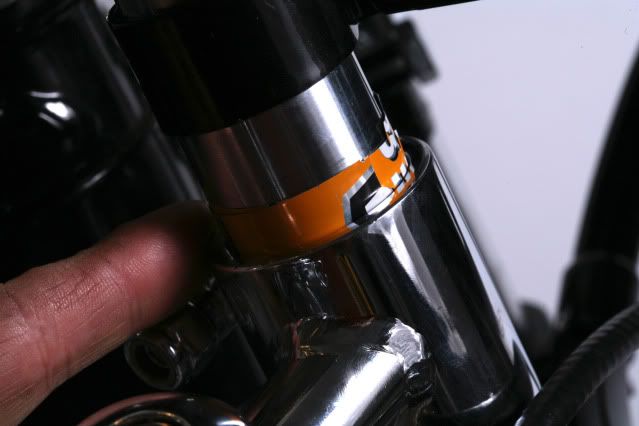
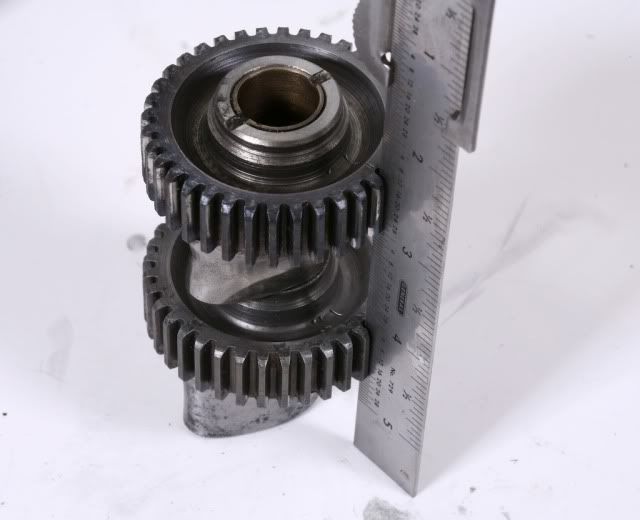
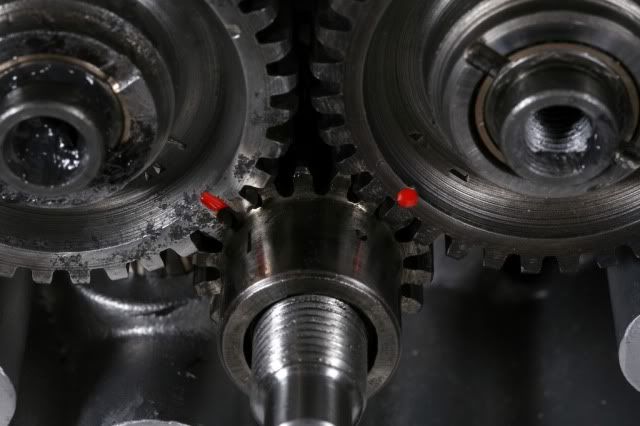
My exhaust camshaft is new from Phil Pearson, but my intake camshaft is used and although the lobe is good, the outer wheel had a bit of corrosion, so it was hard to see the timing mark. I double checked, compared and transfered the mark from my old, worn intake cam. I deepened the timing mark with a dremel wheel and give it a dab of paint to make timing easier in the future.
IMG_9352-Version2.jpg

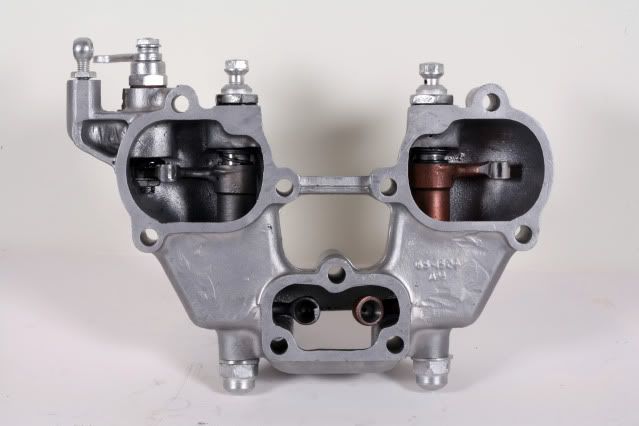
Next I set the crankshaft at Top Dead Center and lined up the camshaft timing marks to the crankshaft.
IMG_9355-Version2.jpg

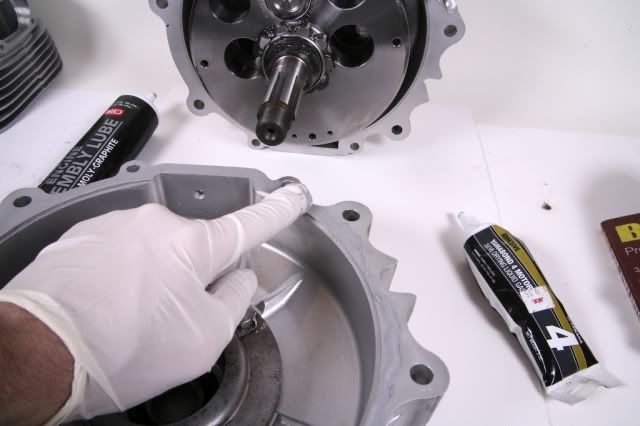
I then finished up the timing side with the outer plate, oil feed and seals.
IMG_9363-Version2.jpg

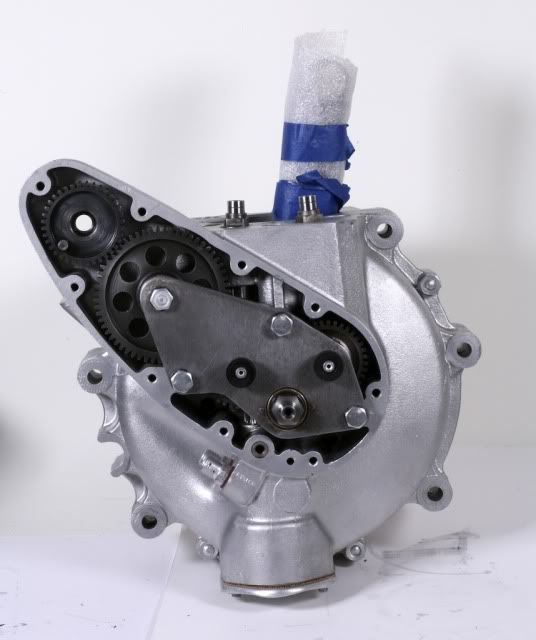
I also installed the magdyno pinion and new seal, but will need to open this back up and install the washer and bolt once my mag is rebuild ($400 later).

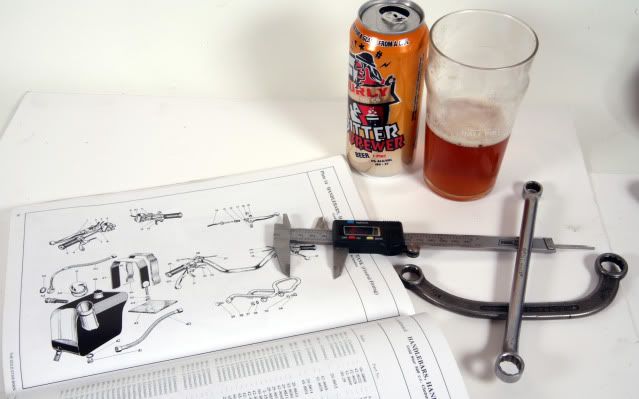
Next, I set the end gap of the piston rings.
IMG_9367-Version2.jpg

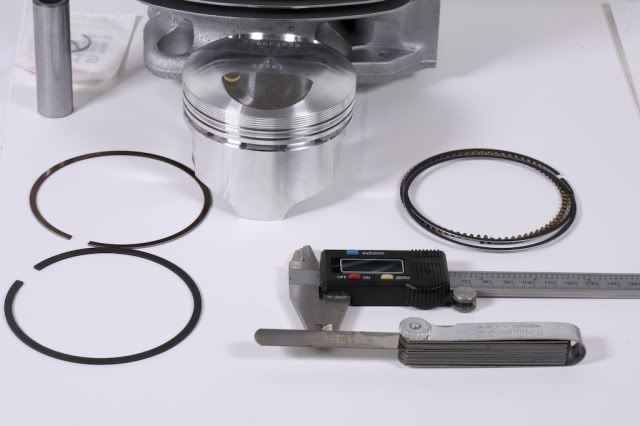
I placed the top and second rings one inch down from the top of the cylinder and measured the gap with a feeler gauge.
IMG_9365-Version2.jpg

The piston came with a formula sheet to calculate the proper top and second ring gap and it worked out to be .015 for the top and .018 for the second rings. I filed the top ring slightly to get the correct gap, but the second was good.
Next, I carefully slipped the rings on to the piston and aligned the gaps to the suggestion orientation.
IMG_9368-Version2.jpg

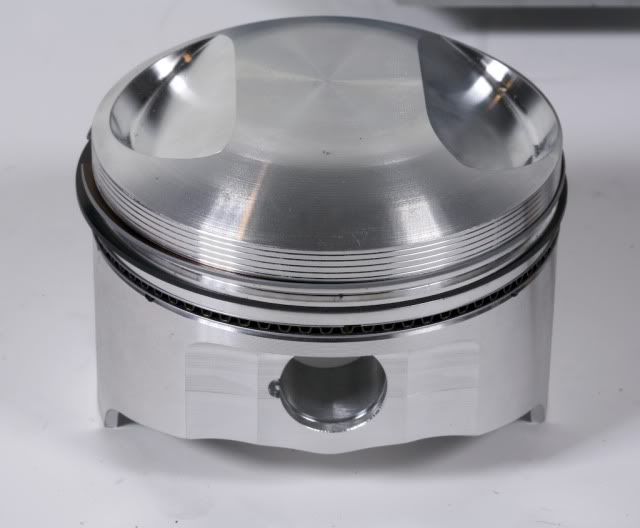
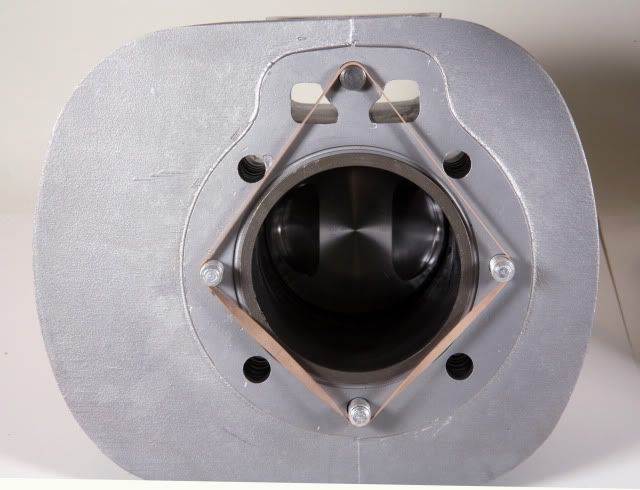
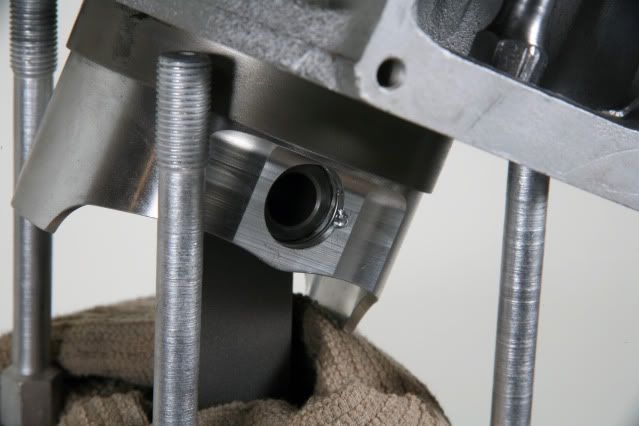
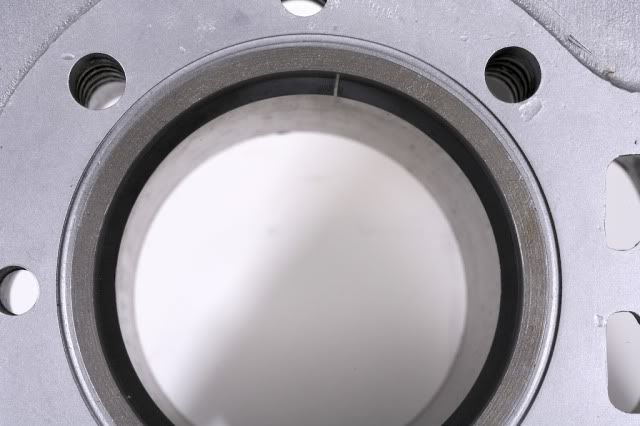
I then compressed my rings with a high-tec specialty service tool (a hose clamp from the hardware store) and oiled and feed the piston and rings into the base of the cylinder. I find it easier to do it this way rather than trying to drop the cylinder on to the piston while attached to the con rod.
IMG_9369-Version2.jpg


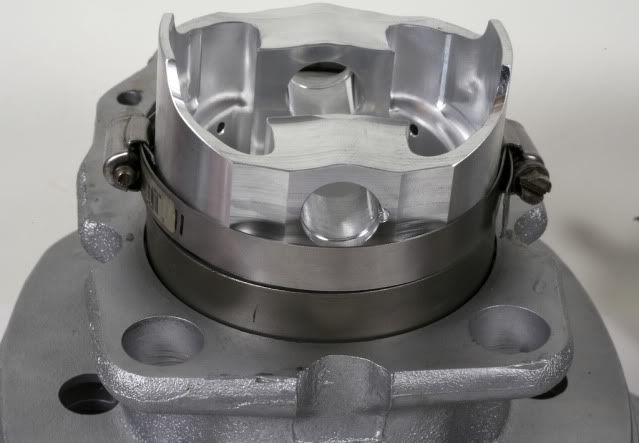
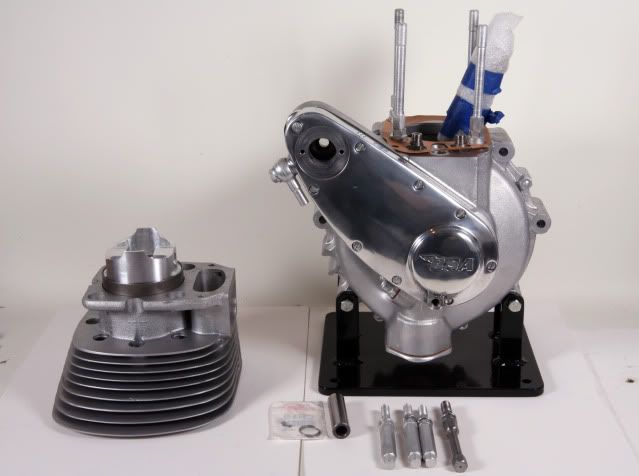
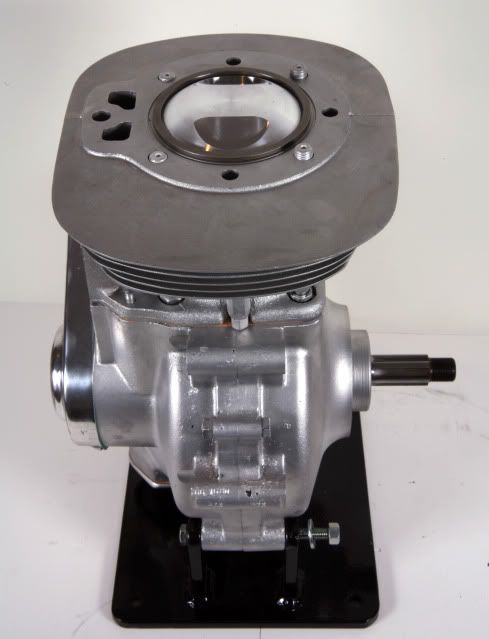
The cylinder bolts were installed next.
IMG_9371-Version2.jpg

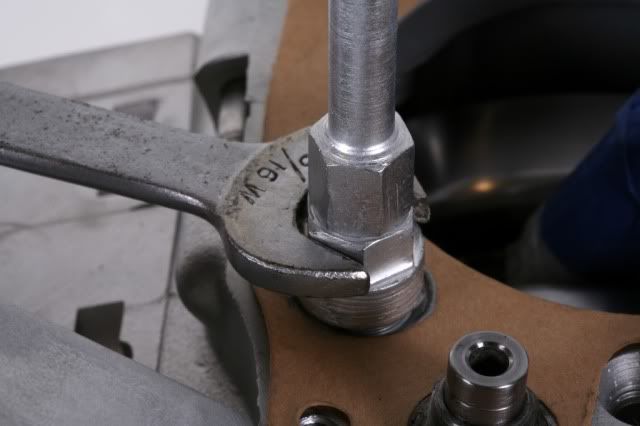
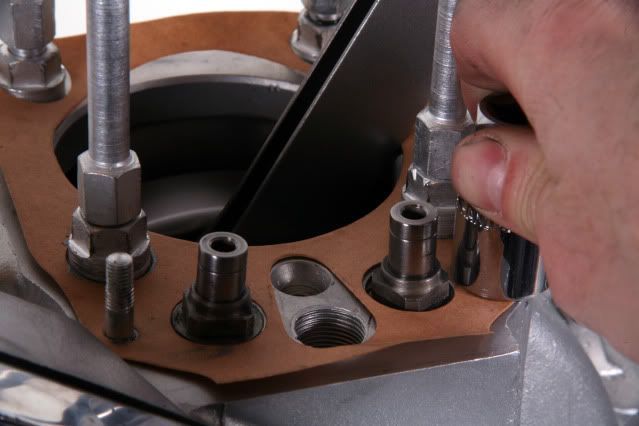
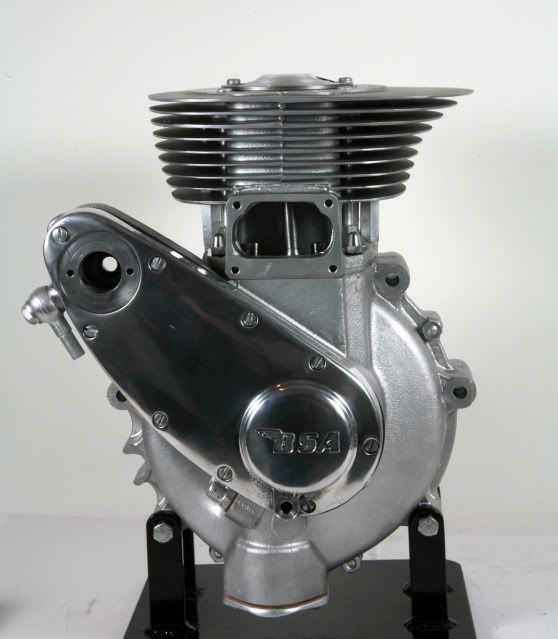
I stopped here because I am waiting for one special sized washer for the cylinder head bolt. The cylinder head bolts slide upwards from the cylinder and need to go in before I match the cylinder barrel to the bottom end.

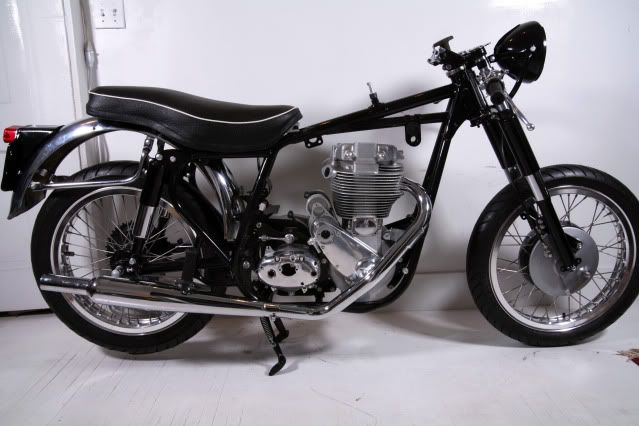
Starting to look like a motor and should make more progress at the end of the week.
IMG_9375-Version2.jpg
 
Re: 1962 BSA DBD34 Gold Star restoration (Rolling chassis!)

I totally want to do high res prints of this assembly and use them for art work in my shop. You are doing a super job on this. everytime I get an email that there is an update, I stop whatever I am doing to read it.

Excellent work.

Regards,

Mike
 
Re: 1962 BSA DBD34 Gold Star restoration (Rolling chassis!)

this has to be the BEST .. and i mean BEST step by step detailed take down of a bike i have seen.

I have a Norton 16H 1941 myself and its in running condition. I got it and had to put 3 years of slow work gathering original parts. Want to help me take apart engine and build it back up? just want to get it cleaned just like yours!
 
Re: 1962 BSA DBD34 Gold Star restoration (Rolling chassis!)

*still drooling*

so nice man. SO Nice.

Definitely take you as an example as to the cleanliness I should have when building my own bikes...
 
Re: 1962 BSA DBD34 Gold Star restoration (Rolling chassis!)

Rocan said:
Definitely take you as an example as to the cleanliness I should have when building my own bikes...

No kidding. I've never had such a clean work space... nor done such precise work. Should I ever need a heart transplant, I want Swan as my doctor. :)
 
Re: 1962 BSA DBD34 Gold Star restoration (Rolling chassis!)

sign me up for one of those books. Pure mechanical porn right here.
 
Re: 1962 BSA DBD34 Gold Star restoration (Rolling chassis!)

Ha, thanks guys. Trust me, my house is not that clean. I have no choice but to do the best possible job I can on my bike because it is a Gold Star, a rare bird indeed.

I cannot tell you how nice it is to work with clean vapor blasted parts, re-plated hardware and to be finally going clockwise. As I was wrenching I was thinking about the mechanics in Birmingham, England doing the same thing to my bike fifty years ago. I love B'ham and have been there many, many times and feel a personal connection to the city and its history.

LuisN, this is my hobby, not my profession, but I talking with the guy who bought my CB400F last year for his daughter and he wants me to repair and rebuild his 1970 Norton Commando project. I may take it on because need to raise more money to get my bike running not to mention $1500 for a new DBD cylinder head. Send your parts to Green Tree Scooters in Iowa (they bought some of Mods and Rockers' VB equipment) and have them vapor blasted, you will be amazed.
 
Re: 1962 BSA DBD34 Gold Star restoration (Rolling chassis!)

I second the using high res prints of these photos as artwork.
 
Re: 1962 BSA DBD34 Gold Star restoration (Rolling chassis!)

I've been a busy boy... Full story and LOTS of images tomorrow...
BSAGoldStarroller.jpg
 
Re: 1962 BSA DBD34 Gold Star restoration (Motor in rolling chassis!)

Thank you for this thread.
 
Re: 1962 BSA DBD34 Gold Star restoration (Motor in rolling chassis!)

Pm me for my shipping address when its finished.
 
Re: 1962 BSA DBD34 Gold Star restoration (Motor in rolling chassis!)

It's all coming together beautifully. I think I have read the whole thread at least half a dozen times!
We are now getting that incredible alchemy that a build of this quality produces. Every single component brings nothing but approval. There's not been a single moment of "oh I don't think he's done that bit right". In some ways, this build is actually rewriting (or at least, redefining) the way a project like this should be planned and executed by anyone hoping to achieve top level restoration results.
I remain in awe of the dedication and single minded determination to see it through.

On a lesser note, my previous comment on this being an M&S restoration alluded to a very famous UK tv advert which in essence stated that their food wasn't, say, just a honey roast chicken, it was an M&S honey roast chicken......all voiced over in as sexual a way as possible by some husky voiced female. Basically it was saying that anything they prepared was a cut above anything anyone else offered. Hence the comparison with this restoration project!
 
Re: 1962 BSA DBD34 Gold Star restoration (Motor in rolling chassis!)

Thanks Bumpthump for the explanation and the compliments. I cannot overstate how nice and rewarding it is to build this bike with clean parts, re-plated hardware and new precision parts.

You guys wanted more images? Here you go:

With the arrival of a few spares parts the cylinder barrel could be installed.
IMG_9399.jpg


Two small crankcase studs were installed with a hand tightened with a stud puller.
IMG_9403.jpg


The cylinder head bolts and correct washers were threaded through the cylinder barrel and held in place with a rubber band (you all know this trick right?)
IMG_9401.jpg


The piston is partially in the barrel and attached to the con rod via wrist pin and held fast with two circlips properly aligned and locked in their respective slots in the piston.
IMG_9404.jpg


Barrel on, oiled piston slid smoothly and looks great.
IMG_9408.jpg

IMG_9409.jpg


Next, on to the rocker box. It looks simple but this quick a bit of time to ensure everything is correct, thrust washer, spring, washer o-rings etc were in correct order and the compression release assembly was tricky.
IMG_9416.jpg


The old felt washer of the compression release was replaced for obvious reasons (left one), but the new washer was difficult to install.
IMG_9422-1.jpg


I oiled it so it would be softer, pressed it in to place with a small washer and an extension socket. With much effort, I could get enough purchase to tighten down the outer nut.
IMG_9424-1.jpg

IMG_9425-1.jpg


IMG_9420.jpg

Exhaust lifter
IMG_9426-1.jpg

Are you a Mod or Rocker? I am a Rocker box.

As for my cylinder head, it is a long story and I am still scratching my head about my head... I have an earlier, smaller style head and not the big, beautiful DBD head that gulps massive amounts of air and fuel and spits fire. I cannot afford a new one and will use this current head with new valves, guides and springs until I pony up the $1500 to work up a new cylinder head plus a bigger carb to match.

Before I could install the lower motor I needed to finish sorting out the engine plate bolts, washers and nuts.The BSA parts manual is very confusing on this illustration, it took me a long while to measure, sort and figure everything out. Goldies use several different engine plate bolts when using rearsets and I am still missing one which is on order.
IMG_9261-Version2.jpg


Also, I finalized the positions for my clip ons, sorted out the steering dampner and installed the center stand and ensure the rolling chassis is solid and ready to hold my lump. More problem solving, if it was easy, it would be a Honda, if it was more difficult it would be a Triton....

Installing the center stand spring can be an absolute nightmare. I normally attach one end of the spring to the frame and slip the open loop on to the center stand with the hollow cylindrical shaft of a multiple bit screwdriver, but this loop was to too small. The solution was to grind a flat spot on a garage sale pin punch, slip the open loop on to the center stand stud. I lightly greased the punch and with three attempts it slipped on the center stand stud. I few tests confirmed the stand works as it should.
IMG_9469.jpg


I chose to use non-stock, non-OEM clip-on handlebars for I did not want a fixed control lever position (one style fits all) normally found on Clubman trim. I can stand the heat from the "correctness police" on this issue... It took many micro-adjustments on my Triton to get the clip-ons exactly where I like them for my riding style and expect the same on my Goldie.

My UK made fork tubes narrow several inches below their tops preventing my clip-ons from tightening fully. Hmmmm, I sat down to sort it out with a pint and I found the answer right in front of my nose. Thin shims made from a beer can! I did this once before on a Honda handle bar pinch assembly and I worked very well. My clip-ons are fully tightened with absolutely no movement now.
IMG_9435.jpg

IMG_9436.jpg

IMG_9437.jpg

IMG_9441.jpg


I had ordered bolts for my handle bar clips last year and put them in storage. Now while installing them I realized they were too long and it is too late to return or exchange them, grrrrr.. I cut them to length and touched up the threads with a die. I cleaned the receiving holes with a tap to remove a bit of powder coat that crept in. The plate to hold the steering dampner knob was installed and works well. It turns out the steering dampner anchor plate I had cadmium plated was for an A10, and not my Goldie. Mine was in a box and I am going to zinc plate (copy cad) and install it.
IMG_9444.jpg

IMG_9458.jpg

IMG_9459.jpg


With everything on the chassis sorted, adjusted and tightened, I place the lower motor in the frame, added the bolts and engine plates. Starting to look like a bike. I added a fews bits to mock it up, test the fitting and alignments and everything is in order.
BSAGoldStarroller.jpg

I also installed the rear fender to ensure my hardware was correct. Both fenders are in rough shape despite polishing the exterior, there are still flaws, scratches, dents, one crack, two extra holes and the front fender has discoloration from PO welds. Both are rusty underneath. As much as I would like to repair them and rechrome, it is not in my budget yet. I may buy new UK made replacements, but most likely will clean the interior of rust and dirt, prime and paint them so they look a bit better, but I am still just polishing a turd.
IMG_9452.jpg

IMG_9467.jpg

IMG_9468.jpg

The fenders stays were pretty bad, but with Mothers and Maas polishes, WD40 and fine steel wool I was able to clean them up and plan to keep them. Of course I will need to buy new stays for the front to match a Clubman fender.
IMG_9319.jpg

IMG_9380.jpg

IMG_9318.jpg


It may looks great, but to my eye I see all the things I need to do and the parts I need to finish or buy. Time and money...

I love my new book holder! (former engine stand).
IMG_9466.jpg


I may start on the gearboxes this evening but the next two weeks are going to be brutal work and travel wise and will have little time to wrench, I'll do what I can and keep you posted. Stay tuned!
 
Re: 1962 BSA DBD34 Gold Star restoration (Motor in rolling chassis!)

stunning swan, simply stunning.

ian
 
Re: 1962 BSA DBD34 Gold Star restoration (Motor in rolling chassis!)

Finally, a criticism. The beer can you used for your clip on shims is clearly not British. Sloppy work. I will of course, mail you a more appropriate (empty) beer can on request.
 
Re: 1962 BSA DBD34 Gold Star restoration (Motor in rolling chassis!)

bumpthump said:
Finally, a criticism. The beer can you used for your clip on shims is clearly not British. Sloppy work. I will of course, mail you a more appropriate (empty) beer can on request.
HA, as close as I can get here stateside and one of Minnesota's best. I request FULL cans of proper bitter if you please...
 
Re: 1962 BSA DBD34 Gold Star restoration (Motor in rolling chassis!)

swan said:
HA, as close as I can get here stateside and one of Minnesota's best. I request FULL cans of proper bitter if you please...

Heck yeah. It is indeed one of our best! haha. You have an insane amount of patience and skill with that engine work man. I'm enjoying this thread for sure.
 
Re: 1962 BSA DBD34 Gold Star restoration (Motor in rolling chassis!)

Keep on going. With everything you have done, I'm sure you know where you will end up. A love affair doesn't have to make sense.
 
Re: 1962 BSA DBD34 Gold Star restoration (Motor in rolling chassis!)

Absolutely fantastic. Any time I check this build and there are no updates I'm pretty dissapointed and sad. What I want to know is if you're drinking that beer ice cold, or just below room temp as is proper. If your drinking it cold your bike will never run properly, just the way the universe works.
 
Re: 1962 BSA DBD34 Gold Star restoration (Motor in rolling chassis!)

Lookin good Swan, se ya next wknd. We should get Hoops to brew us a proper brit bitter for your bike's coming out party.
 
Back
Top Bottom