Follow along with the video below to see how to install our site as a web app on your home screen.
Note: This feature currently requires accessing the site using the built-in Safari browser.
We noticed you are blocking ads. DO THE TON only works with community supporters. Most are active members of the site with small businesses. Please consider disabling your ad blocking tool and checking out the businesses that help keep our site up and free.
Fingers crossed today it doesn’t rain and I’ll take her for another test run to see if the leak has stopped. I have Old Man Murphy coming over for a visit he should be here in about 3 hours was hoping to show him but the sky is looking grey and miserable :/
Thanks Stroker really appreciate the nomination for BOTM,
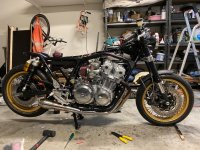
https://youtu.be/v2nSJF01WkI here is a link to her running from today,
Managed to get her out for two quick laps around the block before the rain set in again. we realised the rear indicators are not working (again) this time I dont think its an earth fault as we proved the earth I think the tail light unit is faulty. I jumped onto fleabay to order some more so I may play around with the wiring and see if I can jerryrig something up just so I can venture past the boundaries of the estate.
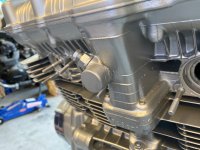
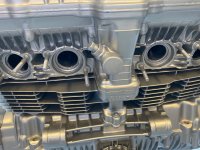
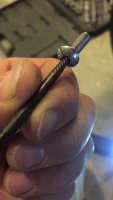
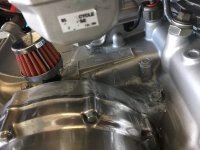
The dam tacho seal still hasn't sealed even with the gallon of honda bond on it, it's only a tiny leak but its going to need to be stopped didnt come this far just to have a tiny leak. tomorrow I might try to drop the forks out and get these steering stops done that I've been procrastinating about.
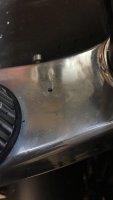
If you aren't going to use the tach drive anyway, why not get OMM to remove it from that cam cap and make up a plug for the valve cover. BTW, I had a similar looking plug every 20 miles on my GL1000 and it turned out to be the needle jet wallowed out.
If you aren't going to use the tach drive anyway, why not get OMM to remove it from that cam cap and make up a plug for the valve cover. BTW, I had a similar looking plug every 20 miles on my GL1000 and it turned out to be the needle jet wallowed out.
So cold start didn’t really like it, I put a heat gun on the carbs for a few mins and boom. Every engine stop and restart after that first time.
I just went for another short ride but took it up to about 80km/h indicators are sorted and it would appear for now no oil leaks, family lunch then steering stops ( after I work out how to get one of the light bracket bolts out that the Allen key hole is flogged out
So sometimes we have to go backwards to go forwards
After a failed attempt to cut a slot across the too of the Allen bolt, I ended up getting the bolt with an easy out.
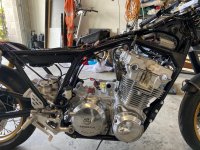
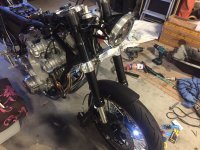
Once that was done I was able to remove the light mounting brackets, triple and handle bars to allow me to slip out the forks and gain access to the lower triple.
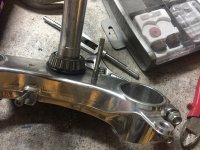
When I slipped it all out and looked back at the bike I felt as if she was all undone, I turned my attention to the lower triple. After using a centre punch I drilled a pilot hole into the triple unfortunately the drill bit broke in the second hole. As luck would have it about 1.5 mm was sitting proud of the hole, after a few swear words I was able to use some pointy nose pliers to persuade the drill bit to come out before drilling with a 6.5 mm bit.
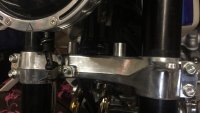
Once that was done I tapped out the two threads and then installed the steering stops before putting everything back in its place.
Did a test run with the tank on and the work as intended. I’ve called it a night tomorrow I will go over the whole front end and re torque everything up before taking her for a proper bust... here’s hoping for more good weather
Well turns out the petcock wasn’t closed properly yesterday and it filled the carbs to the point of it leaking out onto the gearbox and then onto the floor of the garage.
That was inconvenient but the worst part was realising the paint for some reason hasn’t cured and petrol ate straight through it
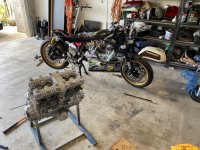
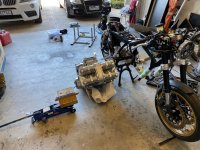
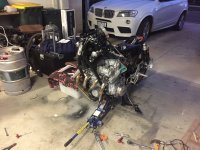
So after a series of F bombs and C bombs and some more F bombs and some pacing and a few more F bombs. I mopped up any residual spill, and have now resided to the fact, that when I come back from work I’ll have to take the motor out; to first strip the paint then repaint it.. also I’ll be ordering a new petcock argh nuts
On the flip side I know that a petrol soaked rag should strip the paint right off, other than brooding over it there is not much else I can do this break as I fly out tomorrow morning.
As long as I don’t Dilly Dally around when I come home I should be able to get it all done in a week. I’ll have to get someone to help me with getting the motor in and out as I don’t want to add to the scratches I put on the frame last time I put it in.
Ow that sucks... those moments where you undo your one work are the absolute worst. I usually try to tell myself the same thing I tell my kids - redoing sucks, but it usually turns out better the second time you do something. F-bombs and lightweight destruction are usually required before emotionally getting to the glass-half-full stage though
Cons to painting your engine with paint that is not fuel resistant; feeling like a twat, having to remove your engine to strip and repaint all again, wasting time,
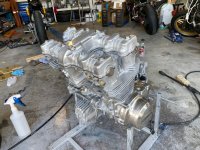
Pros to painting your engine with paint that’s not fuel resistant; being able to use a few brushes and a heap of fuel t strip the pain, mild high from inhaling the fumes whilst stripping the pain from your motor.
Jimbo I ordered the bolt set today, figured why the hell not she’s all out now. Also I’m debating whether to polish the tips of the fins or just respray it once I’ve finished stripping all the paint off.
Well dad duties means we have to break to go to the museum so I’ll think that may be me for the day
Old Man Murphy paid me a visit today and helped me get the motor back in.
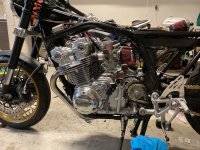
While the motor was out I thought I’d have a try a patching up the leak that was coming out from where the front cam tensioner bolt is. I used some JB weld and tried to make it look reasonable.
I also polished up the side covers again, there is something satisfying about polishing up engine parts.
Next we manoeuvred the engine into place using a wooden stand we jerry rigged to stay in the jack.
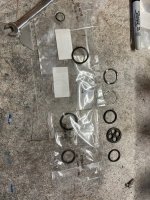
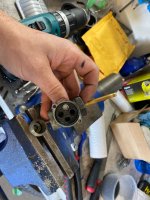
As OMM was leaving I checked the mail and found the all ballz petcock seal kit, so fingers crossed she doesn’t leak, and if it does fingers crossed this paint is actually fuel resistant.
Mid next week OMM can give me a hand with a trailer to get the bike to the mechanics, that should give me time to tidy up all the wiring and give the bike a wash and re torque all the bolts I’ve put back in.
Do you guys use locktite on your engine bolts or just torque and forget ?
Pipes back on, and wiring all wrapped back up. Tomorrow I have to go interstate for the day, so I won’t be able to button her all up until the weekend depending on what the wifey, aka boss dog has planned.
Still waiting on my engine bolts to arrive in the mail, and I’ll have to go and get all the torque settings for the bike written down so I can cross each one off as I tighten them to spec.
This site uses cookies to help personalise content, tailor your experience and to keep you logged in if you register.
By continuing to use this site, you are consenting to our use of cookies.

") So stoked for you!
So stoked for you!

 , then use oil and gas resistant paint before putting her back together again.